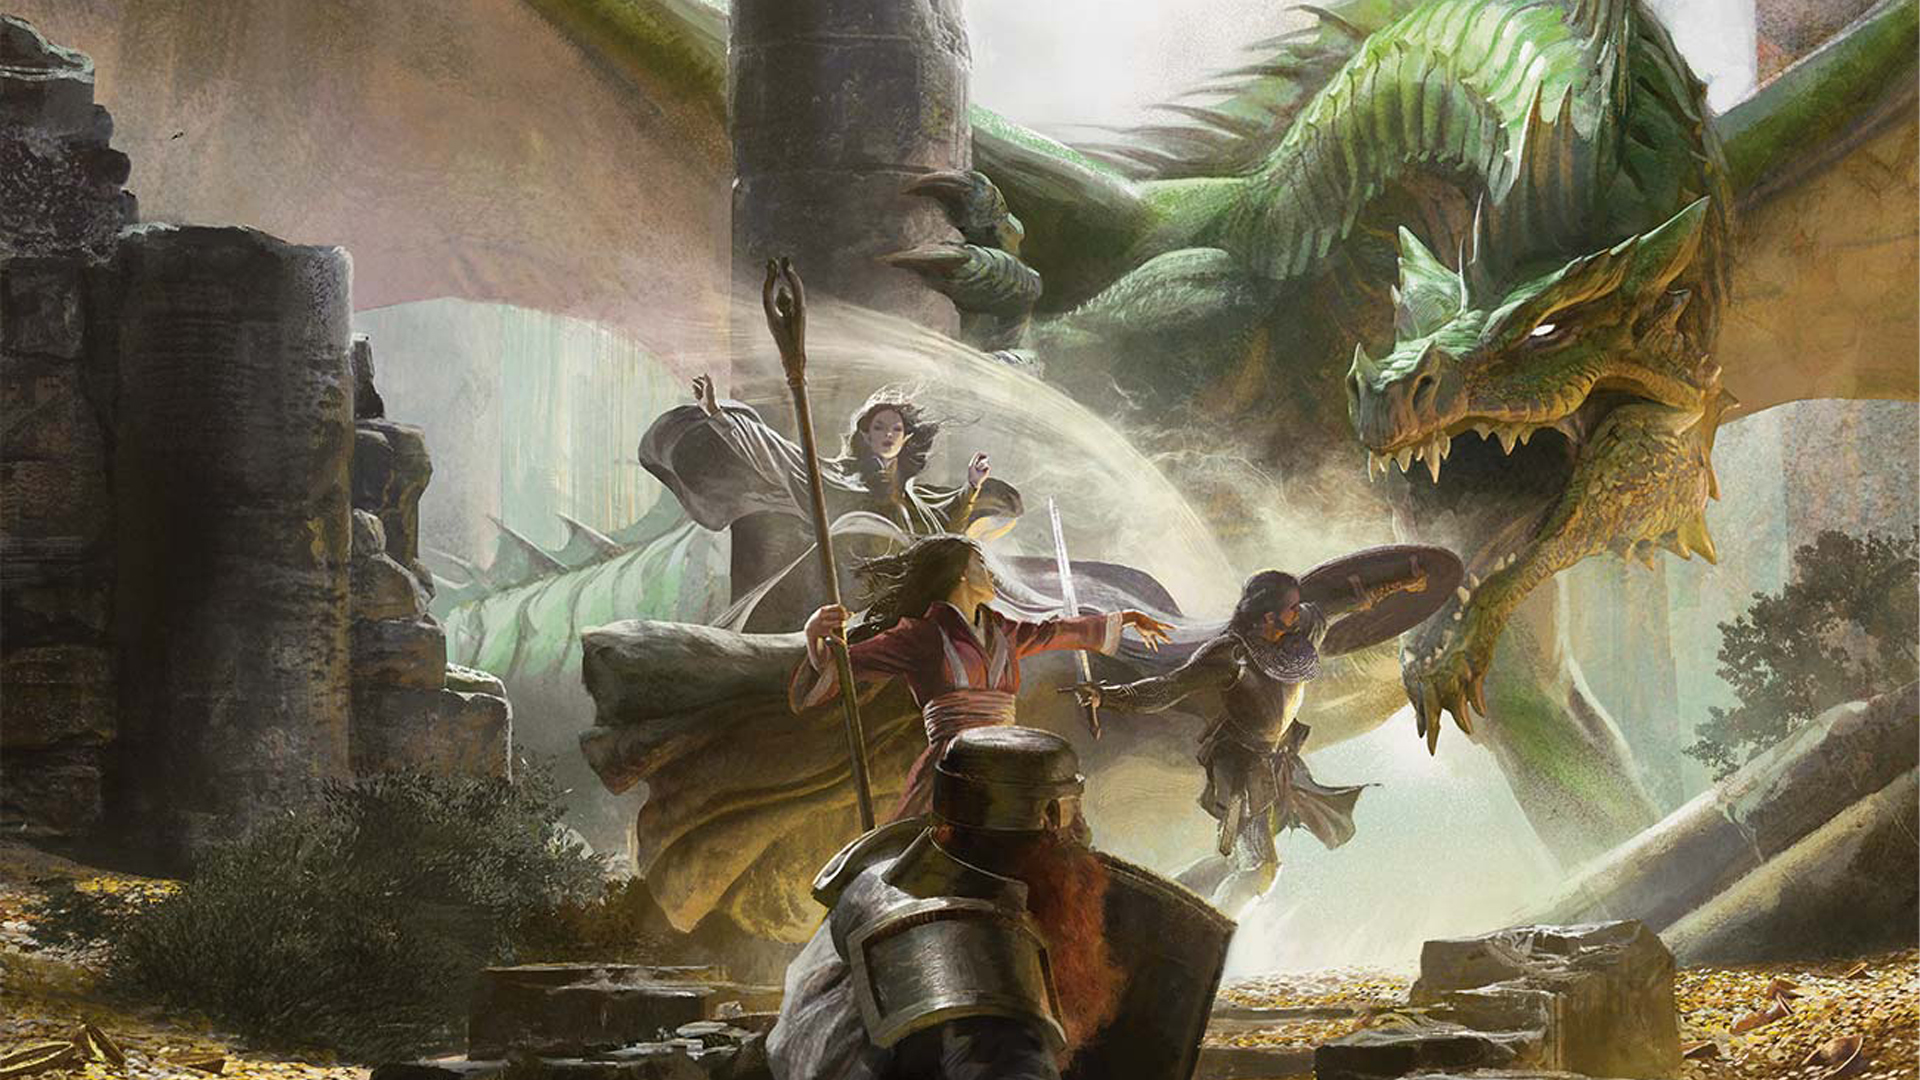
Beyond the Dragon of Icespire Peak - Part 2: Sleeping Dragon's Wake

by phixium

Search GM Binder Visit User Profile

Beyond the Dragon of Icespire Peak
Part 2: Sleeping Dragon's Wake

Content

Introduction 3
Running the Adventure 3
Running for One Player 3
The Adventure Begins 4
Map of the Sword Coast 5
Welcome to Leilon 7
Exploring Leilon 7
Map of Leilon 8
Bronze Shrine 11
Location Overview 11
Travel to the Shrine 11
Arrival 11
Map of the Shrine 13
Claugiyliamatar’s Lair 15
Location Overview 15
Travel to the Lair 15
Arrival 15
Map of the Lair 16
Death Knight-Dreadnaught 22
Location Overview 22
Travel to the Ship 22
Arrival 22
Map of the Ship 23
Iniarv's Tower 27
Location Overview 27
Travel to Iniarv's Tower 27
Arrival 28
Map of the Tower 28
Leilon Point 31
Location Overview 31
Arrival at Leilon Point 31
Map of the Point 31
Arrival at Salt Cave 32
Ending the Adventure 34
Appendix A: Creatures 35
Appendix B: Sidekicks 45
Appendix C: Necromancer's Journal 51
Appendix D: Player Maps 52
Appendix E: Additional Locations 59
Credits 62

Introduction

S leeping Dragon’s Wake is a Dungeons & Dragons adventure designed for characters of 9th through 10th level and takes place in the Forgotten Realms campaign setting. By the end of the adventure the characters should reach 11th level. You can run the adventure for as few as one player or as many as six players.

You can run it as a stand-alone adventure or as the middle adventure in a trilogy called Beyond the Dragon of Icespire Peak (of which Storm Lord’s Wrath is the first adventure and Divine Contention is the last). This adventure trilogy can be played as a sequel to Dragon of Icespire Peak, the adventure that comes with the D&D Essentials Kit.

This is an Unauthorized PDF Version

This adventure and the ones before and after in the series are available from the D&D Beyond website for a small fee. However, they are only available online. If you like and use this unauthorized PDF version of the adventure, please consider paying your dues to D&D Beyond.

Running the Adventure

To run this adventure, you need the D&D fifth edition core rulebooks: Player’s Handbook, Dungeon Master’s Guide, and Monster Manual. The Sword Coast Adventurer’s Guide is helpful but not necessary.

The Monster Manual contains stat blocks for most of the creatures found in this adventure. All the necessary stat blocks are included there or in appendix A. When a creature’s name appears in bold type, that’s a visual cue for you to look up the creature’s stat block in the Monster Manual, unless the adventure’s text instead refers you to the monster appendix in this adventure.

Spells and equipment mentioned in the adventure are described in the Player’s Handbook. Magic items are described in the Dungeon Master’s Guide.

    At various places, the adventure presents descriptive text that’s meant to be read or paraphrased aloud to the players. This read-aloud text is offset in boxes like this one. Boxed text is most commonly used to describe locations or present bits of scripted dialogue.

Running for One Player

If you’re running this adventure for a single player, you can give that player a sidekick as a secondary character. Let the player choose one of the pregenerated sidekicks that come with this adventure in appendix B. If a sidekick is lost or no longer needed, the player character can return to Leilon and acquire a new one.

Using Sidekicks

Make sure the player understands the roles and limitations of sidekicks in this adventure:

  • Sidekicks are stalwart companions who can perform tasks both in and out of combat, including things such as setting up camp and carrying gear.
  • Ideally, a sidekick’s abilities should complement those of the main character. For example, a spellcaster makes a good sidekick for a fighter or rogue.

Adjusting Encounters

This adventure contains advice for adjusting encounters based on the number of characters in the party. You are empowered to modify the number of enemies in an encounter and their hit point totals as you see fit. If you need to adjust the difficulty of an encounter during combat, you can alter hit point totals without the player characters ever knowing and have enemies retreat or reinforcements arrive as needed.

Abbreviations

The following abbreviations appear in this book:

Symbol Description
hp hit point
AC Armor Class
DC Difficulty Class
XP experience points
pp platinum piece(s)
gp gold piece(s)
ep electrum piece(s)
sp silver piece(s)
cp copper piece(s)
NPC nonplayer character
LG lawful good
NG neutral good
CG chaotic good
LN lawful neutral
N neutral
CN chaotic neutral
LE lawful evil
NE neutral evil
CE chaotic evil
DM Dungeon Master
Map of the Sword Coast

The DM’s Sword Coast map shows a region of the Forgotten Realms called the Sword Coast. This map is for the DM’s eyes only, as it indicates the locations of places described later in this adventure or the adventures that follow. A player-friendly version of the map is also included with this adventure (see appendix D). It can be shared freely with the players as their characters explore the region.

Geographical locations marked on both the DM’s map and the players’ map are described below in alphabetical order. This information is not secret and can be shared with players if they request details about a location.

Some locations marked on the map are not detailed in this adventure but are indicated for reference only. See appendix E and the adventures Lost Mine of Phandelver in the D&D Starter Set and Dragon of Icespire Peak in the D&D Essential Kit for more information.

The Sword Coast

Conyberry

The Triboar Trail runs right through this abandoned town, which was sacked by barbarians years ago and now lies in ruins.

Crags

These rocky, windswept hills are dotted with old mines that have become infested with monsters.

High Road

This highway hugs the coast, connecting Neverwinter to the coastal cities of Luskan to the north and Waterdeep to the south. For years, the stretch of road south of Neverwinter fell into disuse because of frequent monster attacks. Recently, efforts have been made to keep the road safe, with light patrols of guards on horseback moving between Neverwinter and Leilon.

Kryptgarden Forest

This ancient forest tucked behind the Sword Mountains contains the ruins of bygone dwarven civilizations. The ancient green dragon Claugiyliamatar, nicknamed the Old Gnawbone, also lairs in the woods. For more information on this location, see “Claugiyliamatar’s Lair.”

Leilon

This small town along the High Road is in the midst of rebuilding itself after being abandoned for years. It serves as the starting location for the adventure. For more information, see “Welcome to Leilon.”.

Mere of Dead Men

Travelers on the High Road, which skirts the mere to the east, must resist being lured into this cold and desolate swamp by will-o’s-wisps. Countless adventurers have perished in the mere, drawn by tales of ruined castles half-sunk in the mire. The Mere of Dead Men contains a ruined keep that once belonged to the lich Iniarv. For more information on this location, see “Iniarv’s Tower.”

Neverwinter

This city was badly damaged when Mount Hotenow erupted some fifty years ago. Now, the City of Skilled Hands works to rebuild under the watchful eye of its Lord Protector, Dagult Neverember, who rules in the absence of an heir to Neverwinter’s crown. At present, no legitimate heirs to the old Alagondar royal line are known to exist, and many believe that the line is ended. Lord Neverember, taking no chances, quietly pays off or disposes of anyone claiming a connection to the rulers of old.

Neverwinter Wood

The forest east of Neverwinter seems to have a magical quality about it, or at least an air of mystical secrecy. Reclusive spellcasters are rumored to dwell deep within.

Phandalin

Nestled in the foothills of the Sword Mountains, Phandalin is a nondescript mining settlement that recently had dealings with a white dragon named Cryovain. The dragon was dispatched by a group of adventurers. For more information, see Lost Mine of Phandelver in the D&D Starter Set and Dragon of Icespire Peak in the D&D Essentials Kit and “Aid from Phandalin” in this adventure.

Starmetal Hills

This range of rocky knolls is so named because the area has been the impact site of a number of meteor showers over millennia. The hills are haunted by ruthless barbarian tribes, giving others little reason to visit the area.

Sword Mountains

These steep, craggy, snow-capped mountains are home to scattered tribes of orcs as well as many monsters. Icespire Peak is the tallest among them. Their foothills are strewn with the ruins of bygone kingdoms, and more than a few half-forgotten dungeons and tombs. A shrine to Bahamut, god of good dragons, is hidden in a network of caverns in the mountains. For more information on this location, see “Bronze Shrine.”

Triboar Trail

This path south of Neverwinter Wood is the safest route between Neverwinter and the town of Triboar, located in the Dessarin Valley to the east. The trail is not patrolled, and monster attacks are commonplace.

The Adventure Begins

The adventure begins in the town of Leilon, which is currently undergoing reconstruction after being abandoned for many years. The characters can receive quests, choose which ones to pursue, and experience encounters in Leilon. While Leilon is described in Storm Lord’s Wrath, the settlers from Neverwinter have continued to rebuild the town, adding new locations the characters can visit.

The “Adventure Background” section describes the events leading up to the adventure and the main threats the characters will face. The “Welcome to Leilon” and “Exploring Leilon” sections describe the town where the adventure begins. Knowing Leilon well will ensure a smooth start to the adventure.

Adventure Background

The town of Leilon was once a fortified settlement on the High Road, midway between the cities of Neverwinter and Waterdeep. The settlement has been destroyed and rebuilt many times in its long history. The Lord Protector of Neverwinter, Dagult Neverember, recently hired a group of his citizens to rebuild the town, a construction project now well underway.

Sleeping Dragon's Wake
as a Stand-Alone

Some sections of this adventure reference Storm Lord’s Wrath, which can be run as a predecessor to Sleeping Dragon’s Wake. If you run Sleeping Dragon’s Wake as a stand-alone adventure, you can ignore the references to Storm Lord’s Wrath, since all the information you need from that adventure to run Sleeping Dragon’s Wake is contained in the “Adventure Background” section.

They hope to create a fortified waypoint for travelers and merchants that can ward off the threats of the surrounding wilderness.

Two forces of evil are on the rise nearby, eager to control the region around Leilon and eventually the Sword Coast. The first is a cult of Talos, god of storms, led by the priestess Fheralai Stormsworm. The cult’s headquarters are inside a death knight-dreadnaught, an undead battleship, beached near a temple of Talos called the Tower of Storms.

Ularan Mortus, a priest of Myrkul, god of death, and his followers are raising an army of undead to lay siege to the city of Neverwinter. The spirit of the dead black dragon Chardansearavitriol, also known as Ebondeath, aids Ularan Mortus in exchange for help finding and seizing the body of a living dragon to inhabit.

The people of Leilon have just begun to uncover the threats both groups pose to the region. They need the help of adventurers if they want their fledgling settlement
to survive the danger.

Welcome to Leilon

Leilon was once a mining town that sold copper, nickel, and silver to Waterdeep. It was also a small port where merchants sometimes offloaded goods on barges (since most proper ships can’t traverse the town’s shallow mud flats) to be transported to cities all over the Sword Coast.

Two hundred years ago, the wizard Thalivar made his home here and raised a tower at the town center to conduct his mystical studies. The House of Thalivar was topped with a planar beacon that lured creatures from other planes into the structure and trapped them there. After Thalivar mysteriously disappeared, the people of Leilon were content to leave his tower and the monsters within alone.

The Spellplague, a divine phenomenon that twisted Faerûn’s magic, corrupted the tower’s defenses. The creatures sealed within were freed to attack Leilon, and the magic of the planar beacon was redirected back into the Material Plane, causing humanoids who looked upon it to become paralyzed. Leilon was quickly overrun and subsequently abandoned and has remained that way for more than a century.

The first action the soldiery of Neverwinter took in Leilon was to destroy the planar beacon inside the House of Thalivar. The mage Gallio Elibro has now rebuilt the beacon and begun his own studies into the Ethereal Plane.

Before its fall, Leilon was defended by a loosely organized group of adventurers called the Swords of Leilon. When the House of Thalivar released its monsters, the Swords fought to cover the escape of the townsfolk. They died and became ghosts bound to Leilon’s ruins. They now watch the rebuilding of the town with caution, hoping that the reconstructed tower does not bring similar disaster.

When you are ready for the adventure to get underway, show the Leilon map to the players and read the following boxed text aloud:

    The half-finished palisade of Leilon will soon make a complete semicircle on the northeast side of the town, defended by an earthen rampart. To the southwest, new settlers attempt to build docks for barges, made to cross the marsh and meet merchant ships in the sea.
    Outside of town, the settlers’ campground becomes ever smaller as new buildings made of wood or stone with thatched roofs are erected in Leilon’s muddy streets. At the center of it all, the New House of Thalivar, a cylindrical wizard tower, rises like a beacon, four times the height of every other building. Some lots still lie in ruins, but the settlers work quickly, clearing and reconstructing.
    Visitors with coin to spend are welcome in Leilon, and adventurers are the settlers’ favorites. While there is much work to be done within the town, there are also missions to accomplish outside the settlement, listed on the job board at the fishery.

When the adventurers are ready to inspect the job board, proceed to the “Fishery” section.

Exploring Leilon

The characters might wish to explore key establishments within Leilon. These locations are marked on the map of Leilon.

Aubrey’s Peculiarities Shoppe

This shop is crammed with curiosities dredged from the ruins of Leilon: old fishing rods, swamp idols, mining helmets, and other oddities. A whimsical Illuskan male named Aubrey Silverspun runs the store. Roll a d20 on Peculiarities table to see what he has on offer when the characters visit.

Peculiarities
d20 Peculiarity Price
1-2 Random Magic Item (DMG's Table C) 500 gp
3-10 Random Trinket (PHB Chapter 5) 10 gp
11-20 Unique tool kit (engraved, adorned, etc.) 50 gp

A painted tryptic above the counter shows three adventurers: a dark-skinned warrior woman, a red-bearded dwarf, and a third whose portrait has faded with age. Aubrey explains that these are the “Swords of Leilon”: an old adventuring company local to the area.

Barge Yard

Six mud-covered barges are chained together and beached at the edge of Leilon where the town meets the marsh. The barge master is a gruff elderly female dwarf named Rorsta Anvilhand. She rents a barge for a tenday for 10 gp.

Fishery

In recent days, the town fishery has become a more permanent structure. During the day, the warehouse hosts several fishers selling their daily catches at stalls, and merchants who sell and repair fishing equipment. At night, Leilon’s town council gathers within the building to discuss the construction of the town and active threats in the region. The current town council has the following members:

  • Merrygold Brightshine (see “Lathander Shrine” for more information).
  • Valdi Estapaar, an elderly female half-elf fisher who keeps the settler camp fed.
  • Grizzelda Copperwraught, a grumpy dwarf architect in charge of rebuilding the town, whom everyone calls “The Growler” behind her back.
  • Jack Torver, the newest council member (see “Torver’s Post” for more information).

A job board outside of the fishery holds notices for adventurers looking for work. If the characters inspect the job board, proceed to the “The Quest Board” section.

House of Thalivar

Gallio Elibro is a brooding middle-aged male Rashemi human mage (with the legend lore spell prepared instead of cone of cold). He came to Neverwinter to find and unlock the secrets of the House of Thalivar and found many coded journals in the ruin, which he has set about decoding with slow progress. The mage hopes to rebuild the tower’s beacon and study creatures of the astral plane.

Gallio does not talk much about his work with adventurers but is willing to cast the legend lore spell in exchange for 400 gp.

Idol Island

Rising from the marsh mere yards from Leilon, Idol Island contains the remains of crumbled statues of forgotten human nobles. The settlers claim to hear voices whispering from the island at night, inviting them to view their destinies. If the characters walk by the island at night, they hear these whispers as well.

A character who spends the night on the island taking a long rest has vague, prophetic dreams of adventures to come. For instance, the character might view the face of an ancient green dragon, a horde of zombies, or a sahuagin attack. At the end of the rest, the character must make a DC 13 Wisdom saving throw. On a success, the character is bolstered by the strange dreams and gains inspiration. On a failure, the character gains a level of exhaustion.

Shrine of Lathander

This shrine to Lathander, god of light, was the first temple to be reconstructed in Leilon. Merrygold Brightshine, an outgoing young female halfling priest, cares for the shrine and offers council to any who pray at the small stone altar to Lathander. She conducts services at the shrine each day at dawn.

Merrygold casts the cure wounds spell for a donation of 10 gp to the shrine and the lesser restoration spell for a donation of 20 gp.

Settler Camp

The camp outside the palisade of Leilon is home to settlers who have not yet erected a home for themselves in the town. The muddy gathering of tents and cook fires becomes smaller by the day, but those who remain are exhausted from their daily labor and the constant guard shifts to keep the camp safe from monsters and wildlife.

The leader of the settler camp is a witty elderly female Chondathan human named Mazira Shae. She knows everything happening in town and can point characters anywhere they need to go, with a side of humor and sass.

Leilon Tales
d6 Tale
1 “The famers at Leilon Point have seen more shark fins in the water lately. Some even claim to see humanoids
swimming alongside the sharks! Can you imagine?” (If the characters visit Leilon Point, see “Leilon Point” for
more information.)
2 “Merchants from Neverwinter claim to have passed something massive out at sea near an old lighthouse on
their way into town. They couldn’t agree if what they saw was a boat or a beached whale, but they agreed it
stank. (If the characters investigate the site, see “Death Knight-Dreadnaught” for more information.)
3 “A few local merchants claim to have been attacked on the road by a band of brigands calling themselves
the Chimera Crew! Bandits sure have gotten more colorful these days.” (If the characters investigate the
attacks, see “Iniarv’s Tower” for more information.)
4 “A few hunters came by saying to avoid Kryptgarden Forest, the dead are walking around there!”
5 “Did you hear about the bronze dragon? Apparently, a few travelers from Neverwinter saw one fly north along
the coast with a dolphin in its claws. They say those metallic dragons are good. I hope they’re right.”
6 “You ever hear of Claugiyliamatar? She’s a great green dragon with a lair somewhere in Kryptgarden Forest.
Folks around here call her Old Gnawbone because she loves devouring people like us. Be careful if you’re
going in that place. You don’t want to run into her.”

Torver’s Post

Jack Torver is an optimistic young male Turami human who just finished building Leilon’s new (and currently only) general store. He is a devout worshipper of Lathander and attends the shrine’s services each morning, then offers advice from the sermons to his customers.

Jack sells standard adventuring gear, with the exception of potions of healing. He directs adventurers looking for potions to the Tymora shrine and those looking for armor, weapons, or other items he can’t supply to the town square.

Town Square

The Leilon town square has become a place where local vendors and those passing through town can set up stalls to sell their wares. One vendor, a female Calishite human blacksmith named Zana Taylish, is a resident of Leilon who sells armor and weapons. More exotic items (such as spell scrolls or other consumable magic items) could be available from a traveling merchant in the square at the DMs discretion. The cost for such items should be high (and perhaps require a favor of the adventurers in addition to an exchange of coin).

Tymora Shrine

A shrine to Tymora, goddess of luck, was recently erected in Leilon. Puck Caribdas, a lithe, rambunctious male elf, runs the temple and sells potions for the prices listed on the Puck’s Potions table. Other than potions of healing, Puck only has 1d4 vials of each potion. Each tenday, Puck’s inventory refreshes, and you can reroll to determine the elf’s new potion supply.

Puck's Potions
Price Potion
50 gp potion of healing
50 gp potion of climbing
150 gp potion of growth
150 gp potion of water breathing
5000 gp potion of heroism

Umber Hulk’s Shell Inn

Alion Malwyn, a kind-hearted, nonbinary Illuskan human, runs this newly constructed two-story inn. A bed for the night costs 5 sp, while a meal costs 1 sp. If the characters stay here, Alion shares a tale from another traveler with them. Roll a d6 and consult the Leilon Tales table to determine which tale Alion knows or pick a tale the characters haven’t heard yet.

The Quest Board

The job board outside the fishery is where the adventurers can learn about quests. Let the players choose the order in which they tackle them. If the players don’t like a quest, they are under no obligation to complete it. However, completing quests helps the characters become more powerful (see “Leveling Up”).

Most of the notices on the job board are written by members of the town council. The council members are unable to provide context beyond what is written on the board. When the characters return to the fishery after completing a quest, the council pays the reward immediately.
Adventure Locations

This adventure encourages characters to explore locations marked on the DM’s map of the Sword Coast. When the characters embark on a journey to a location, use the section of this adventure that describes that location in detail. For instance, if the players choose to undertake the Iniarv’s Tower Quest, go to the “Iniarv’s Tower” section. Each location includes an overview that briefly describes what the characters can expect to find there, followed by information you’ll need to run the encounters at that location.

Starting Quests

When the characters first visit the job board, there are two quests posted. Describe each quest so they can choose which to pursue.

Death Knight-Dreadnaught Quest. “Phandalin had some trouble with a cult of Talos in a lighthouse temple called the Tower of Storms. Now a strange boat or dead creature seems to be beached near the tower. Investigate this strange occurrence, kill or rout any cultists that might be there, then return to the town council to collect a reward of six potions of greater healing.” If the characters undertake this quest, see “Death Knight-Dreadnaught.”

Leilon Point Quest. “Farmers in the small community of Leilon Point report aquatic humanoids making small but frequent raids on the area. They’re killing farmers and burning Leilon’s food supply. Kill or rout the raiders, then return to the town council to collect a reward of 750 gp.” If the characters undertake this quest, see “Leilon Point.”

Follow-Up Quests

After the characters complete either one of the starting quests, the following two quests are added to the job board.

The Bronze Shrine Quest is not actually added to the job board by the town council, but by the ghost of one of the Swords of Leilon, who possessed a citizen of Neverwinter to post the quest. If the characters complete this quest, the town council denies having posted the message but thinks the information is valuable and rewards the characters all the same.

Bronze Shrine Quest. “Go north along the coast and track the bronze dragon Lhammaruntosz, the Claws of the Coast, to her lair. This location looks like a bronze dragon carved into the side of a cliff overlooking the sea. Ask for a chance to worship at the shrine to Bahamut so you may receive visions of the threats facing Leilon. Report the threats you divine to the town council to collect a reward of 1,000 gp.” If the characters undertake this quest, see “Bronze Shrine.”

Iniarv’s Tower Quest. “A band of brigands calling themselves the Chimera Crew has been attacking merchants on the road, stealing supplies we need to rebuild Leilon. The merchants claim that the bandits operate out of Iniarv’s Tower in the Mere of Dead Men. Kill the bandits or drive them from the area, then return to the town council to collect a reward of 1,000 gp.” If the characters undertake this quest, see “Iniarv’s Tower.”

Claugiyliamatar’s Lair Quest. Another quest in this adventure takes place in Claugiyliamatar’s lair. There is no job board notice for this quest, but the Bronze Shrine Quest should lead characters to an encounter with Claugiyliamatar. If the characters undertake this quest, see “Claugiyliamatar’s Lair.”

Leveling Up

Characters advance in level by completing quests. Regardless of the number of characters in the party, the rate of advancement is as follows:

  • Characters gain a level when they complete two quests.
  • Characters gain another level when they complete the remaining three quests in this adventure.

Bronze Shrine

The “Bronze Shrine” quest is balanced for characters of 10th level, though characters of 9th level can survive this quest if they are cautious and rest between encounters. Characters of any level that attempt to fight Lhammaruntosz to the death will likely meet their demise.

Location Overview

Lhammaruntosz, a bronze dragon with the ability to heal quickly, spent decades defending Leilon and the surrounding area as the captain of the Scaly Eye, a fleet that battled pirates and other threats. To honor her deeds, the Swords of Leilon constructed the Bronze Shrine, a massive temple to Bahamut, god of metallic dragons, in a cliff overlooking the sea. The shrine’s face is carved in Lhammaruntosz’s likeness and includes quarters for the rest of the Scaly Eye and a magic statue of Bahamut, which the dragon can use to commune with the deity.

In recent decades Lhammaruntosz has retreated inside the shrine, becoming reclusive due to a attack by a disguised demon which has driven her mad. She leaves on rare occasions to hunt for food, returning as soon as possible. Members of the Scaly Eye still live within the Bronze Shrine, as Lhammaruntosz has ordered them to stay on as her guardians.

Quest Goals

To complete the Bronze Shrine Quest (see “The Quest Board”), adventurers must talk with Lhammaruntosz and receive a vision of the green dragon Claugiyliamatar.

Travel to the Shrine

The Bronze Shrine is forty miles north of Leilon on the shore of the Sword Coast. The characters can access the shrine by boat or by land. The characters can reach the shrine without incident, but if they travel along the coast, they may see the death knight-dreadnaught during their journey (see “Death Knight-Dreadnaught”).

Arrival

When the characters can see the outside of the shrine, read the following boxed text aloud:

    The sea splashes on the bottom of a rocky cliff carved to look like a 60-foot-tall dragon with a ribbed and fluted crest around its head. The dragon’s mouth is open in a triumphant roar, facing the ocean and standing on its hind legs.

There are four entrances into the Bronze Shrine. The first is at the jetty (area B1), but it may be covered by high tide when the characters arrive. While covered, a character can still see the entrance through the waves with a successful DC 15 Wisdom (Perception) check. See area B1 for more information.

A staircase hidden by bushes at the top of the cliff leads to area B5. A character on top of the cliff with a passive Wisdom (Perception) score of 15 or higher notices the tunnel.

A character could attempt to climb through the windows of areas B7 or B8, 60 feet above the surface of the water. The windows are latched from the inside. Unlatching a window requires a successful DC 15 Dexterity check using thieves’ tools. The glass in the windows has AC 13, 5 hit points, and immunity to poison and psychic damage. If Lhammaruntosz notices the characters entering her lair through the windows, she assumes they are thieves and attacks.

The final entrance to the shrine is hidden beneath the waves. A character with a passive Wisdom (Perception) score of 18 or higher looking into the water in front of the shrine, or a character submerged beneath the water’s surface, notices a 30-foot-radius tunnel opening in the cliff 50 feet below the surface of the water. This tunnel is filled with water and leads 50 feet up into area B7.

Climbing the Shrine

Characters can climb the outside of the shrine without equipment with a successful DC 17 Strength (Athletics) check. Characters who fail the check by 5 or more slip on the slick rocks and fall into the ocean.

Bronze Shrine Locations

The following locations are keyed to the map of the Bronze Shrine.

Bronze Shrine Features

The Bronze Shrine is a clean, bright, two-story temple that smells of ocean air.

Ceilings. The ceilings throughout the shrine are 30 feet high.

Light. All areas of the shrine are brightly lit by the continual flame spell cast on torches in sconces.

Open First Level. The lack of doors on the first level of the shrine means that sound carries. If the characters engage in battle, set off a trap, shout, or otherwise make loud noises on this level, the Scaly Eye members in areas B2 and B4 investigate the disturbance.

Rage of Bahamut. If a creature kills Lhammaruntosz or a Scaly Eye member while inside the temple, a spectral dragon appears and attacks the creature. The dragon makes an attack roll with a +10 bonus to hit and deals 22 (4d10) psychic damage on a hit. After attacking once, the dragon disappears.

Walls. Climbing the walls of the shrine without equipment requires a successful DC 15 Strength (Athletics) check.

B1. Jetty

This stone jetty and rocky rise lead to a tunnel with a 10-foot-high entrance carved into the tip of the dragon relief’s tail. During high tide the jetty, the rise, and the tunnel entrance are submerged in ocean water. High tide begins at midnight and noon each day and lasts for six hours.

B2. Guarded Entry

If the characters enter or exit this area from area B1, they might trigger the molten bronze trap (see below).

Members of the Scaly Eye play three-dragon ante at a stone table in the center of the chamber. There is one swashbuckler (see appendix A) plus one additional swashbuckler for each member of the party, not including sidekicks. See the “Scaly Eye Members” sidebar for more information.

A creature with a passive Wisdom (Perception) score of 15 or higher notices the tripwire. A successful DC 15 Dexterity check using thieves’ tools disables the tripwire harmlessly. A character without thieves’ tools can attempt this check with disadvantage using any edged weapon or edged tool. On a failed check, the trap triggers.

Molten Bronze Trap. A tripwire set 3 inches off the ground is extended across the doorway at the top of the stair that leads to area B1. An iron pot full of molten bronze (magically heated) hangs above the door and overturns when a creature triggers the tripwire. The creature must make a DC 14 Dexterity saving throw, taking 33 (6d10) fire damage on a failed save, or half as much damage on a successful one.

A creature that fails this save is covered in molten bronze and takes 5 (1d10) fire damage at the end of each of its turns until it uses an action to scrape off the bronze with a weapon or tool. If the weapon or tool is nonmagical, it is destroyed after removing the bronze.

Scaly Eye Members

Members of the Scaly Eye in the shrine are loyal to and worried for Lhammaruntosz, or Mother Wyrm, as they call her. Most of the dragon’s followers have left the shrine or died of old age, leaving only a few guardians, mostly older humans and a few dwarves and elves. Members of the Scaly Eye wear faded blue tabards displaying a single staring eye weeping a spreading fan of tears, above which arches an eyebrow.

Scaly Eye members are swashbucklers who may attack the characters when they notice them, but a successful DC 15 Charisma (Intimidation or Persuasion) check convinces a Scaly Eye member to stand down. If the characters can then convince a Scaly Eye member they mean no harm, the member shares all of the information in the “Location Overview” section except for the details about the alkilith (because they wouldn’t know about the demon, only that Lhammaruntosz has been acting strange for several years, which is cause enough for concern). That member then offers to escort them through the complex, convincing other members of the Scaly Eye to not attack the characters and pointing out other hazards.

Scaly Eye Names. If you need a name for a member of the Scaly Eye, you can make one up or use any of the following names: Aeris, Bronce, Cobril, Fervo, Gwendal, Headard, Kiltom, Olistan, Surgon, Tazir, Wei, and Zayle.

B3. Scaly Eye Tombs

At both ends of this hall a carving on the south wall reads, “Silence for the fallen heroes, please.” Ninety interment niches line the walls of this hall, each with the name of a deceased Scaly Eye member carved beneath their tomb. Whenever a Scaly Eye member dies, Lhammaruntosz carves a new niche in the wall.

Telna Urkil, the ghost of a female gnome and former Scaly Eye member, watches this area from the Ethereal Plane. If the characters display disrespectful behavior toward the interred dead, such as shouting in the hall, looking through niches for items to steal, or similar actions, Telna appears before them, uses her Horrifying Visage action, then flees.

If the characters make a gesture to honor the interred dead, such as moving through the area with purposeful silence, offering a prayer in front of a niche, leaving a small offering in the hall, or similar actions, Telna appears before them and shares her history with the characters, as well as all the information in the “Location Overview” section, except for the details about the alkilith. She does not know what is causing Lhammaruntosz’s madness, but she does believe there is an outside force affecting the dragon. She begs the characters to find the source and destroy it or use magic to heal the dragon’s mind.

B4. Scaly Eye Chambers

Scaly Eye members eat, train, and rest in this area when they are not on guard duty. Twenty sleeping mats are stacked neatly in the northeast corner of the room.

A roasting spit skewering seven quippers stands over a burning brazier at the center of the room. Scaly Eye members spar with each other around the brazier. There is one swashbuckler plus one additional swashbuckler for each member of the party, not including sidekicks. See the “Scaly Eye Members” sidebar for more information.

B5. Bronze Gate Entrance

A bronze gate locked from the inside with a heavy bar blocks this entrance tunnel. A creature inside the Bronze Shrine that can reach the bar, which is 4 feet off the ground, can unlock it as an action.

Characters hoping to get through the barred gates from the outside must break the gates down, which takes a single character 1 hour. Multiple characters working together can reduce the time proportionately. The noise created by smashing down the doors is loud enough to alert all the Scaly Eye members, who gather behind the gate. There are two swashbucklers plus two additional swashbucklers for each member of the party, not including sidekicks. See the “Scaly Eye Members” sidebar for more information.

B6. Statue Chamber

A 20,000-pound, 25-foot-tall marble statue of Bahamut stands at the center of this chamber, encircled by a hoard of treasure on the floor. The detect magic spell reveals that the statue radiates auras of abjuration and divination magic.

The statue has AC 19, 200 hit points, and immunity to acid, cold, fire, lightning, poison, and psychic damage. Each time a creature damages the statue or touches any of the treasure, the statue shoots a bolt of lightning at the creature. The target must make a DC 19 Dexterity saving throw, taking 66 (12d10) lightning damage on a failed save, or half as much damage on a successful one.

Treasure. The treasure around the statue consists of a scimitar of speed, a cloak of the manta ray, a masterwork painting of a ship at sea set in a gold frame worth 500 gp, five white pearls worth 100 gp each, 623 pp, and 8,329 gp. If Lhammaruntosz or Scaly Eye members notice the characters carrying stolen treasure, they attack.

B7. Ascension Chamber

The walls and pillars of this chamber are carved with hundreds of images of metallic dragons. The ceiling is engraved with Draconic script which reads, “Only those who speak her Scaly Eye name may ascend.” This is of course, referring to the dragon.

A pool at the center of the chamber leads outside the shrine (see “Arrival”).

Stair Trap. A detect magic spell reveals that the stairs radiate an aura of enchantment magic. A creature that is not a metallic dragon that touches the stairs must succeed on a DC 15 Charisma saving throw or be charmed for 1 hour. While charmed in this way, the creature feels an overwhelming urge to drown itself and does everything in its power to do so. A creature that succeeds on the saving throw or speaks aloud the nickname “Mother Wyrm” in Draconic while in this chamber is immune to the effect of the stairs for 24 hours.

B8. Lhammaruntosz’s Chamber

Read the following boxed text aloud to describe this area:

    Two great circular windows in this chamber look out on the ocean, the sea air causing a crust of green barnacles to grow around the glass of the southernmost pane. Before that window sits a great dragon, her scales a deep bronze. Her eyes are wide and wild as she stares at the ocean.

The barnacles on the window are actually a disguised alkilith whose False Appearance feature makes it appear to be barnacles instead of a fungus (see appendix A). Lhammaruntosz has been in the presence of the alkilith for so long that her madness does not wane if she leaves the creature’s presence. When she looks out the alkilith’s window, she experiences hallucinations of her friends dying, her enemies triumphing, and other unspeakable horrors.

Lhammaruntosz is an adult bronze dragon, with the following additional features that increase her challenge rating to 16 (15,000 XP) (see also appendix A):


Innate Spellcasting. Lhammaruntosz’s spellcasting ability is Charisma (spell save DC 17). She can innately cast the following spells, requiring no material components:

1/day each: create food and water, detect thoughts, fog cloud, speak with animals

Regeneration. Lhammaruntosz regains 5 hit points at the start of her turn.

Spellcasting. Lhammaruntosz is an 8th-level spellcaster. Her spellcasting ability is Charisma (spell save DC 17; +9 to hit with spell attacks). She has the following sorcerer spells prepared:

Cantrips (at will): light, mage hand, mending

1st level (4 slots): charm person, detect magic, expeditious retreat, sleep

2nd level (3 slots): darkness, invisibility, suggestion

3rd level (3 slots): dispel magic, protection from energy

4th level (2 slots): dimension door, stoneskin

When the dragon notices the characters, she begins muttering out loud to herself, wondering if the characters are intruders or friends. Each round, a character must speak with Lhammaruntosz as an action, and succeed on a DC 18 Charisma (Persuasion) check to keep her from attacking. If the characters fail a check, attack the dragon or the alkilith, or the initiative count reaches 0 and no character has successfully made the check that round, Lhammaruntosz attacks.

A character who succeeds on a DC 20 Intelligence (Arcana) check knows the barnacles are a madness-inducing demon called an alkilith. The characters can alleviate Lhammaruntosz of her madness temporarily by casting calm emotions, which suppresses it.

However, a greater restoration spell is required to cure her permanently unless the characters manage to destroy the alkilith, which also cures the dragon’s madness. When Lhammaruntosz’s madness is cured, she immediately falls unconscious for 5 minutes while her mind heals.

If the characters cure Lhammaruntosz and the alkilith is still alive, it attacks, fighting to the death.

Lhammaruntosz’s Thanks

If the characters save Lhammaruntosz, she thanks them when she wakes. The dragon is restored to her noble self. She tells the characters that they must receive Bahamut’s blessing as a reward for saving her and escorts them to the statue in area B6. Read the following boxed text aloud when the characters receive Bahamut’s blessing:

    You stand at the foot of the magnificent statue of Bahamut as the Claws of the Coast softly chants a prayer in Draconic. In a flash of light you find yourself in Leilon, but the town is covered in a cloud of putrid green gas. Bloated, asphyxiated corpses lie on broken ground and dying townsfolk crawl through the streets, gasping for breath. At the center of it all stands an enormous green dragon, grinning a bloody smile as the upper half of Merrygold Brightshine’s severed corpse hangs from her mouth.
    In another flash of light, you are back in the statue chamber, and Lhammaruntosz has a grave look on her face. “You must take action swiftly to save Leilon!”

After the vision, Lhammaruntosz explains the following to the characters:

  • The green dragon they saw in the vision was Claugiyliamatar, nicknamed Old Gnawbone because of her appetite for humanoid flesh.
  • Claugiyliamatar lives in a cave at the north end of Kryptgarden Forest, where the woods meet the Sword Mountains.
  • The green dragon is wicked, but she has not attacked a settlement in decades. She does not want to attract ire of the cities of the Sword Coast.
  • Lhammaruntosz believes there is still time to reason with the green dragon and talk her out of her course of action. If the characters can give Claugiliamatar what she wants, they should be able to stop her from destroying Leilon.

Lhammaruntosz then urges the characters to go to Claugiyliamatar’s lair at once (see “Claugiyliamatar’s Lair” for more information). The bronze dragon will not travel with them, for she knows her presence would only anger Claugiyliamatar.

If the characters report their vision to the Leilon town council, the councillors also beg them to go to Claugiyliamatar’s lair and speak to the green dragon.

Treasure. In addition to giving the characters the vision, Lhammaruntosz rewards them with their choice of her scimitar of speed or her cloak of the manta ray. If the characters have already stolen one of these items, she does not offer them a reward.

Claugiyliamatar’s Lair

The “Claugiyliamatar’s Lair” quest is balanced for characters of 10th level, though characters of 9th level can survive this quest if they rest between encounters. Characters of any level that attempt to fight Claugiyliamatar head-on will likely meet their demise.

This quest does not appear on the Leilon quest board, but the party likely comes here after learning that Claugiyliamatar poses a threat at the Bronze Shrine (see “Bronze Shrine”).

Location Overview

Claugiyliamatar, nicknamed Old Gnawbone, has laired in a cave in Kryptgarden Forest for nearly two centuries. The dragon’s long-term presence makes the cave a place of primal magic that causes nature to flourish. Dangerous fauna and flora guard Claugiyliamatar’s treasure hoard, which includes several crystal balls and statues of powerful female humanoids.

A cabal of evil human druids revere Claugiyliamatar, calling themselves the Gnawbones. They live in the lair, caring for the cave’s guardians and doing anything else the dragon demands. The druids have been on edge recently due to increasing undead attacks and the mounting frustration of Claugiyliamatar.

Each day more of Ularan Mortus’s undead minions journey through Kryptgarden Forest and attack Claugiyliamatar’s lair. Though the dragon and her guardians dispatch the undead with ease, Claugiyliamatar has been unable to discover the source of the attacks. Ularan Mortus’s goal is to weaken the dragon’s mental state with anxiety and frustration so Chardansearavitriol the Ebondeath can possess Claugiyliamatar’s body. The necromancer put one of his lieutenants, an undead warlock named Viantha Cruelhex, in charge of organizing these assaults.

Travel to the Lair

Claugiyliamatar’s lair is seventy miles from Leilon. En route to the dragon’s lair, the characters have the following encounter in Kryptgarden Forest.

Myrkul Patrol

Set the scene by reading the following boxed text aloud:

    Through dense vines and foliage ahead, you can see a dancing flame surrounding a floating skull. Shadows move in the greenery nearby, indicating that the fiery being is not traveling alone.

Karanor, a flameskull created by Ularan Mortus, leads ghouls to Claugiyliamatar’s lair. The number of ghouls present equals the number of characters in the party, not including sidekicks. When the undead notice the characters, they attack. Karanor does not reveal details of its mission unless magically compelled to do so.

That said, the flameskull does not know the greater purpose of its mission, only that it has orders from Viantha Cruelhex to attack the lair.

Lair Features

Claugiyliamatar’s Lair is a natural cave system enhanced by the dragon’s magical connection to nature. The cave has an earthy smell and is warm and humid. The following features are common throughout.

Ceilings. The ceilings throughout the cave are 40 feet high.

Light. Phosphorescent moss growing on the walls fills the caves with dim green light, imposing disadvantage on Wisdom (Perception) checks that rely on sight.

Stalagmites. Medium-sized stalagmites are found throughout the cave. When using these stalagmites for protection, a Medium or small creature gains half cover.

Statues. Claugiyliamatar has collected statues of powerful female humanoids from places all over Faerûn and placed them in her lair. Each statue is 10 feet tall and weighs 1,000 pounds. A character knows the figure a statue depicts with a successful DC 15 Intelligence (History) check.

Trees. The trees outside of the lair are 1d6 + 10 feet tall and require no ability checks to climb.

Walls. Wild vines grow on the cave’s walls. Climbing the walls without equipment requires a successful DC 11 Strength (Athletics) check.

Arrival

As the characters approach Claugiyliamatar’s lair, read the following boxed text aloud to set the scene:

    A few scattered pine trees stand before a vine-covered cliff. Two large cave openings, partly obscured by hanging greenery, are readily apparent in the cliff’s face, one twenty feet high and the other forty feet high. Slightly north of these gaping openings, a much smaller cave entrance is level with the ground. A dim green glow radiates from all of the entrances.
    Ten pikes set with skulls and rotting heads stand in a line before the cliff.

Wood woads (see appendix A), plant guardians created from humanoid remains by Claugiyliamatar, hide behind vines and watch the nearby forest from area C1. If the wood woads notice the characters attempting to enter the cave, they climb down and attack. There is one wood woad plus one additional wood woad per two members of the party (rounded down), not including sidekicks.

The cave entrance that leads to area C1 is 40 feet high. The cave entrance that leads to area C4 is 20 feet high. Climbing the walls of the cliff to reach either entrance

requires a successful DC 11 Strength (Athletics) check. Each pike bears the head of a ghoul, skeleton, wight, or zombie. Claugiyliamatar’s servants placed these trophies as a warning, but the grisly display has done nothing to deter the undead attacks.

Lair Locations

The following locations are keyed to the map of Claugiyliamatar’s lair.

C1. Lookout Post

Wood woads (see “Arrival” above) watch for intruders from this point. If the characters battle the wood woads in this area rather than outside the cave, the druids in area C3 free the owlbears in area C2, then arrive as backup at the end of the third round of combat.

Green moss grows over the remains of three headless ghouls stuffed into an alcove in the south.

C2. Owlbear Pens

Two 10-foot-cubic iron cages stand in the north end of this cavern. Unless the druids from area C3 opened the cages to aid with a disturbance in area C1, each cage contains a sleeping owlbear. The cage doors are locked with latches on the outside, which can be undone or relocked as an action.

If the owlbears are freed, they attack the characters. If the owlbears are not in the presence of Claugiyliamatar or a Gnawbones druid, a character who uses an action to make a successful DC 15 Wisdom (Animal Handling) convinces the owlbear to stop attacking. The owlbear resumes its attack if it is damaged, threatened, or commanded to do so by Claugiyliamatar or a Gnawbones druid.

C3. Gnawbones Camp

A small black iron cauldron bubbles over a low campfire. Four woven moss mats sit on the ground nearby. If the druids have not left to investigate a disturbance in area C1, Delis Venomcauldron stirs the cauldron while talking with Argina Therrow, who sits on one of the mats. See the “Gnawbones Druids” sidebar for more information.

Pot of Poison. The cauldron contains an almost finished batch of ten doses of truth serum (see “Poisons” in chapter 8 of the Dungeon Master’s Guide). A character who is proficient with a poisoner’s kit recognizes the recipe and can spend 10 minutes finishing the poison.

Secret Poison Pit. Delis keeps her poison vials hidden in a 1-foot-deep, 1-foot-diameter hole in the ground covered by her sleeping mat. Creatures with a passive Wisdom (Perception) score of 14 or higher notice that the mat dips slightly in the middle. A creature that moves the mat disturbs the swarm of poisonous snakes guarding the poisons. In addition to the snakes, the pit contains three vials of serpent venom, two vials of assassin’s blood, and a vial of malice (see “Poisons” in chapter 8 of the Dungeon Master’s Guide).

C4. Enchanting Spore Cavern

The remains of ghouls, skeletons, zombies, and some other undead lay scattered across this cavern, torn to pieces by Claugiyliamatar. A creature with a passive Wisdom (Perception) score of 17 of higher notices that the surfaces of the chamber are covered with a very fine green dust. This dust is made of tiny, hallucinogenic spores created by moss in the chamber. A detect magic spell reveals that the moss and spores radiate auras of enchantment magic.

Whenever a creature enters this cavern, it must make a DC 15 Constitution saving throw. On a success, the creature is immune to the effect of the spores for 24 hours. On a failed save, the creature is poisoned for 1 minute. While poisoned, the creature is delirious and feels the need to frolic. At the start of its turn, the poisoned creature rolls on the Frolic Direction table and moves its full speed in a direction indicated by the roll. The creature moves in a straight line that direction without regard for its own safety, stumbling into hazards and obstacles or over ledges. If a creature runs into a statue, stalagmite, or wall and still has movement left, the creature takes 1d6 bludgeoning damage per 10 feet of remaining movement (rounded down). The creature can repeat the saving throw at the end of its turns, ending the effect on a success.

Frolic Direction
d8 Direction
1 North
2 Northeast
3 East
4 Southeast
d8 Direction
5 South
6 Southwest
7 West
8 Northwest

Statues. Four statues in this lair depict the following figures (see the “Lair Features” sidebar):

Vajra Safahr is a human depicted with short hair, fine but practical clothing, and a thin, wolf-headed, rune-covered staff, which is taller than her. She is the current Blackstaff and Archmage of Waterdeep.

Lady Aribeth de Tylmarande is a half-elf depicted wearing plate armor emblazoned with the symbol of Tyr (balanced scales resting on a warhammer). She was a heroic paladin who attacked Neverwinter when the city’s leaders unjustly executed her lover.

Danica Bonaduce is a lean-muscled human wearing simple clothing. She has her fists raised in an unarmed fighting stance. She was a heroic monk and the lady of the now-ruined Spirit Soaring cathedral in the Snowflake Mountains.

Laerel Silverhand is a human with long hair in elaborate braids, wearing magnificent flowing robes. She is the Open Lord of Waterdeep, and one of the Seven Sisters chosen by Mystra.

Gnawbones Druids

The Gnawbones are lawful evil female human druids who speak Common, Draconic, and Druidic and have 45 hit points each. The druids worship Claugiyliamatar as a god, and the dragon teaches them to cast spells.

The druids attack intruders on sight. A character can stop the druids’ attacks by claiming to be allies of Claugiyliamatar and succeeding on a DC 15 Charisma (Deception) check made as an action. The druids lead characters they believe to be allies of Claugiyliamatar to the dragon (area C13). If the characters capture a druid and makes a successful DC 15 Charisma (Intimidation) check the druid leads them to the dragon.

Characters could encounter the following four Gnawbones druids in the lair:

Argina Therrow. The leader of the Gnawbones is a tall, thin human in her late sixties who covers herself in green body paint to honor Claugiyliamatar. The dragon devoured bandits attacking Argina when she was a young girl. Argina sees Claugiyliamatar as a savior of those who devote themselves to the dragon and is fanatical in her loyalty.

Delis Venomcauldron. Delis is a middle-aged human with a shaved head and a face scarred with alchemical burns. She joined the Gnawbones after murdering her cruel husband with poison and fleeing civilization. The alchemist has a wicked sense of humor and an obsession with poisons.

Saija Hurwi. Sajia joined the Gnawbones after hearing tales of Claugiyliamatar’s prowess with nature magic. The eighteen-year old human prefers the company of animals to people and often speaks of her desire to help beasts conquer Faerûn.

Zuri Kimyak. Zuri is a short woman in her twenties with wild black hair dyed with a streak of green. She joined the Gnawbones after learning she had a green dragon ancestor and feels a kinship with Claugiyliamatar. Except for dragons and her fellow Gnawbones, Zuri sees all other creatures as inferior and worthy of only distain.

C5. Vine Stairway

Assassin vines hide among the foliage on the walls of this stairway. There is one assassin vine per member of the party, including sidekicks. The vines are controlled by Claugiyliamatar’s magic and attack only intruders.

C6. Phase Spider Den

Webs cover the walls and ceilings of this chamber. Sajia Hurwi and Zuri Kimyak (see the “Gnawbones Druids” sidebar) feed ghoul remains to the phase spiders living in this cavern. There is one phase spider plus one additional phase spider per member of the party, not including sidekicks. The spiders and druids attack when they notice the characters. The druids command the spiders to push the characters into the webs.

If the characters defeat Sajia and Zuri and the phase spiders are not in the presence of Claugiyliamatar or other Gnawbones druids, a character who uses an action to make a successful DC 15 Wisdom (Animal Handling) convinces the spider to stop attacking. The spider resumes its attack if it is damaged, threatened, or commanded to do so by Claugiyliamatar or a Gnawbones druid.

A creature that touches the webs on the walls must succeed on a DC 12 Dexterity saving throw or become restrained. A restrained creature can use its action to try to escape, freeing itself with a successful DC 12 Strength (Athletics) or Dexterity (Acrobatics) check. A creature that can reach the restrained creature can also make this check as an action, freeing the restrained creature on a success.

C7. Slime Pool Overlook

This small ledge overlooks the slime pool with a 10-foot-long, 2-foot-diameter mossy log sitting near the ledge. The log can be used to bridge the slime pool between this area and area C9. Crossing the slippery log requires a successful DC 12 Dexterity (Acrobatics) check. A creature that fails this check slips and falls in the slime below.

C8. Slime Pools

These pools bubble with a dark green slime and are 15 feet deep. Swimming through the viscous slime requires a successful DC 12 Strength (Athletics) check. A creature that fails this check is restrained by the slime and sinks 1d4 + 1 feet into the pool. At the start of the creature’s turns, it sinks another 1d4 feet. As long as the creature isn’t completely submerged in the slime, it can escape by using its action and succeeding on a Strength (Athletics) check. The DC is 12 plus the number of feet the creature has sunk into the slime. A creature fully submerged in slime can’t breathe (see “Suffocating” in chapter 8 of the Player’s Handbook).

A creature can pull another creature within its reach out of a slime pool by using its action and succeeding on a Strength (Athletics) check. The DC is 7 plus the number of feet the target creature has sunk into the slime.

A creature that comes into contact with the slime takes 11 (2d10) acid damage. The creature takes this damage again at the start of each of its turns until the slime is scraped off or destroyed.

Pushing Vines. A detect magic spell reveals that the vines directly above the slime pools radiate an aura of transmutation magic. Claugiyliamatar enchanted the vines to unfurl and attack creatures that fly over the pools, other than the dragon herself. When such a creature flies over a slime pool, it must succeed on a DC 15 Dexterity saving throw or take 11 (2d10) bludgeoning damage and be pushed into the slime pool.

Slime Tunnel. A 5-foot-diameter tunnel connects the slime pools. A creature with a passive Wisdom (Perception) score of 15 or higher notices the very top of the tunnel peeking above the pool.

Statues. There are four stone islands in the largest slime pool that hold statues depicting the following figures (see the “Lair Features” sidebar):

Dynaheir is a human wearing simple robes, with a talisman of a stern-faced man around her neck. She was one of the famed Witches of Rashemen and a hero of Baldur’s Gate.

Alusair Nacacia Obarskyr is a human wearing plate armor and carrying a shield emblazoned with the image of a dragon. She was a brave knight who served as the regent of Cormyr.

Storm Silverhand is a human wearing chain mail and wielding a longsword with a winged hilt. She is one of the Seven Sisters chosen by Mystra.

Dove Falconhand is a human with a longbow strapped across her back. She wears plate armor and wields a longsword. She was one of the Seven Sisters chosen by Mystra.

C9. Zuri’s Hidden Hoard

A 5-foot-square patch of moss in the center of this area hides a spiked pit trap. A creature notices the moss is not actually attached to the ground with a successful DC 15 Wisdom (Perception) check. A Medium or smaller creature that steps on the moss falls 10 feet onto the poisoned spikes at the pit’s bottom, taking 3 (1d6) bludgeoning damage and 11 (2d10) piercing damage, and it must make a DC 13 Constitution saving throw, taking 22 (4d10) poison damage on a failed save, or half as much damage on a successful one.

Treasure. A potion of poison, a silvered warhammer, a diamond worth 500 gp, and 238 gp are scattered on the bottom of the pit. Zuri Kimyak (see the “Gnawbones Druids” sidebar) keeps a hidden stash of treasure for herself in the pit. Zuri knows Claugiyliamatar will kill her if the dragon finds out that the druid keeps her own secret treasure. If Zuri notices the characters poking about her hoard or carrying the potion, warhammer, or diamond from her stash, she attacks with any other allies she can muster, no matter what arrangement the characters have with the dragon or other druids.

C10. Bridge

This bridge hangs 20 feet above the slime pool (see area C8). A wood woad (see appendix A) stands just west of the bridge, next to a large wooden lever that sticks out of the cave floor. When an intruder crosses the bridge, the wood woad pulls the lever.

As an action, a creature that can reach the lever can pull it, causing the bridge to suddenly part in the middle and both its halves to swing downward. Creatures on the bridge must make a DC 15 Dexterity saving throw. On a success, the creature runs off of the bridge and onto the safety the closest cave floor. On a failure, the creature falls 20 feet into the slime pool. As an action, the lever can be pulled again, returning the bridge to its original state.

C11. Statue Overlook

Creatures that stand on this small plateau 10 feet above area C13 might be noticed by Claugiyliamatar.

Statues. Two statues in this area depict the following figures (see the “Lair Features” sidebar):

Catti-brie is a human wearing a flowing dress that exposes symbols on her arms. One is the seven-pointed star of Mystra. The other is the unicorn symbol of Mielikki. She belongs to a famous adventuring party, the Companions of Mithral Hall.

Ammalia Cassalanter is a human dressed in rich finery. She is a powerful enchanter and noble living in the city of Waterdeep.

C12. Map Room

Read the following boxed text aloud to describe this area:

    Vines on the north and south walls of this cavern form almost perfect circles around twenty-foot-diameter patches of moss. The oddly glowing green growth on the north wall depicts a city map, and the south wall displays a map of the Sword Coast. Both maps are dotted with Draconic runes.

Claugiyliamatar’s magical connection to her lair allows her to control the moss in this room to keep track of her various humanoid spies along the Sword Coast. She has a separate map for Waterdeep, where most of her machinations take place. A character who has been to Waterdeep or who succeeds on a DC 12 Intelligence (History) check knows that the north map depicts the city.

A character who understands Draconic knows that each rune is a single letter of the Draconic alphabet. Each depicted rune is different from the others and represents a different agent working for the dragon. There are no runes near Leilon. In addition to Waterdeep, Claugiyliamatar has agents in the cities of Luskan, Baldur’s Gate, Neverwinter, and Elturel.

Hidden Message. A character who examines the Sword Coast map notices a message written in tiny carved Draconic runes at the top of the map with a successful DC 19 Wisdom (Perception) check. The message reads, “When the seven are united, the wall falls and the gold flows.” This is a reminder Claugiyliamatar left for herself about how to access her treasure hoard (area C14), for she believes one day her ancient brain may no longer remember such details.

C13. Claugiyliamatar’s Cavern

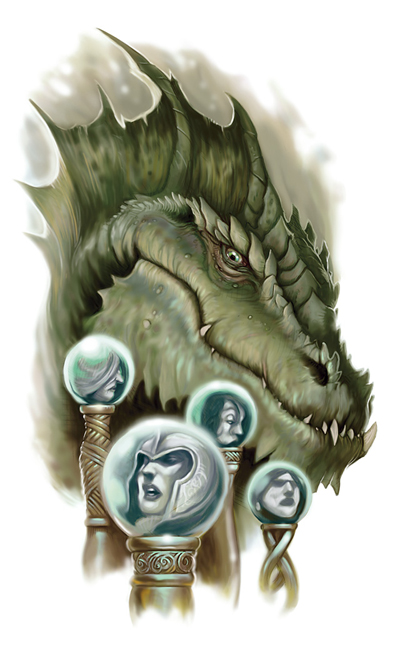
Claugiyliamatar spends most of her time in this cavern, looking into her crystal balls to find the source of the undead that attack her lair. When the characters enter this area and can see the green dragon, read the following boxed text aloud to describe this area:

    Small puffs of foul-smelling green gas emit from the nostrils of a titanic dragon with dull olive scales. The tips of her massive wings and the edges of the frills along her head and spine are black with age beyond mortal reason. She stares into four glowing crystal balls, her serpentine face curled into a wicked scowl around a humanoid femur bone poking out between her teeth. Attacking such a powerful being would almost surely result in your demise.

Claugiyliamatar is an ancient green dragon of immense power. You can find her stats in Appendix A: Creatures.

Roleplaying Claugiyliamatar. Claugiyliamatar does not attack the characters unless they try to harm or steal from her. The shrewd dragon immediately suspects that the characters are not allied with the undead attacking her lair and believes she might be able to put them to work finding answers for her, especially since they bested her lair’s defenses to reach her.

Claigiyliamatar is jealous of powerful female humanoids who get to participate in the backstabbing, intrigue, and machinations of political nobility. Before she asks the characters why they have come to her lair, she demands that they state where they come from, then demands to hear any gossip or rumors the characters might know from the Sword Coast. If the characters can offer a salacious tidbit (such as rumors about the ghosts of the Swords of Leilon or the people rebuilding the town) and a successful DC 15 Charisma (Persuasion) check, or they succeed on a DC 20 Charisma (Deception) check to offer a fake rumor, the dragon asks them why they have come to her lair.

If the characters mention one of the cities with a Draconic rune depicted in her map room (area C12), they gain advantage on the Charisma check made to influence Claugiyliamatar. If the characters cannot mention a rumor Claugiyliamatar believes or likes, she tells them to go away and return when they have some gossip for her.

Once the characters offer the dragon an appropriate rumor, she answers any questions they have honestly with the following information:

  • She explains escalating undead attacks on her lair.
  • Claugiyliamatar cannot find the commander of the undead through her crystal balls. The green dragon believes the closest place to search for a necromancer is Leilon, so she had planned to threaten the people there for information (and make good on those threats if no information is offered).
  • After meeting the characters, she has decided to modify her plan…for now. The dragon knows from questioning previous undead invaders that they are loyal to an undead mage named Viantha Cruelhex. Claugiyliamatar is so far unable to use her crystal balls to spy on the undead, and all the servants she sent to capture Viantha have not returned. She asks the characters to capture or kill Viantha, returning with the prisoner or the deathlock’s remains for questioning (see “Finding Viantha”). In exchange for Viantha, Claugiyliamatar agrees to leave Leilon alone.

Treasure. Claugiyliamatar has a crystal ball, a crystal ball of mind reading, a crystal ball of telepathy, and a crystal ball of true seeing. Each is mounted on a 10-foot-high brass pedestal. The green dragon placed a powerful enchantment on her crystal balls to deter their theft. If a crystal ball is removed from the lair, it ceases to function until it is returned to the lair.

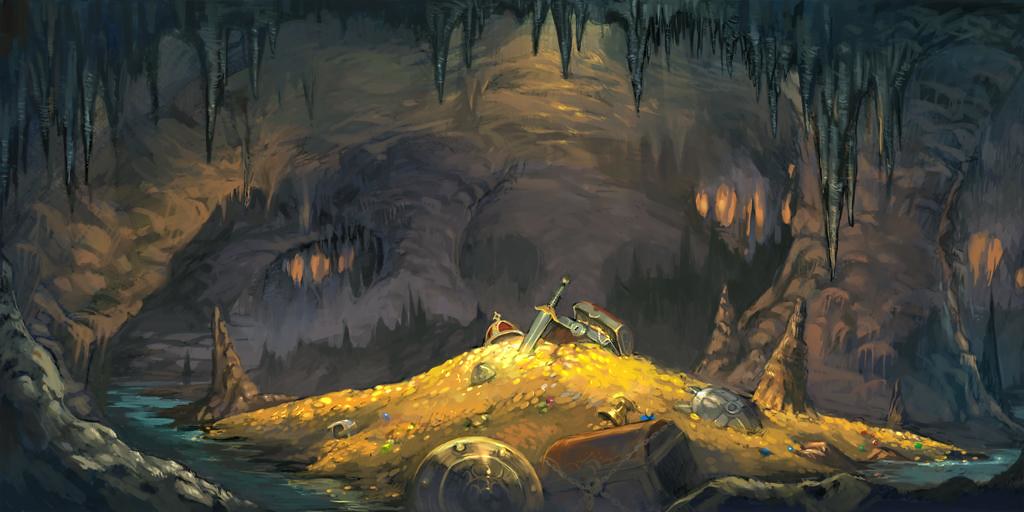
C14. Claugiyliamatar’s Hoard

The raised plateau that holds Claugiyliamatar’s treasure hoard is 20 feet high. The north and south edges of the plateau’s edge each hold two statues (see “Statues” below). A character who makes a successful DC 12 Intelligence (Investigation) check notices three slight divots with a 5-foot diameter in the plateau floor between the two pairs of statues. A detect magic spell reveals that these divots radiate auras of abjuration magic.

A permanent floor-to-ceiling wall of force created by Claugiyliamatar runs from the north wall to the south wall, between the statues and the treasure hoard. The area west of the wall of force is obscured by trapped green gas, but a character who makes a successful DC 17 Wisdom (Perception) check notices a pile of treasure slightly silhouetted in the gas.

Characters can destroy the wall in the following ways:

  • A character who casts the disintegrate spell destroys the wall.
  • If the statues of Dove Falconhand (in area C8), Storm Silverhand (in area C8), and Laeral Silverhand (in area C4) are placed next to their sisters (see “Statues” below) in the divots, the wall is destroyed. The wall reforms if any of the statues on the plateau are removed.
  • If a statue other than those three is placed in a divot, the statue explodes with violent force. Each creature within 10 feet of the statue must make a DC 15 Dexterity saving throw, taking 33 (6d10) bludgeoning damage on a failed save, or half as much damage on a successful one.

If the wall is destroyed, the gas behind it immediately expands, filling all of area C13 and C14. A creature that enters or starts its turn in the gas must make DC 22 Constitution saving throw, taking 77 (22d6) poison damage on a failed save, or half as much damage on a successful one. Creatures and objects in the gas are lightly obscured. The gas remains for 24 hours. A moderate wind (at least 10 miles per hour) disperses the gas after 4 hours. A strong wind (at least 20 miles per hour) disperses it after 1 hour.

Statues. Four statues in this area depict the following figures (see the “Lair Features” sidebar):

Anastra Syluné Silverhand is a human wearing a simple dress and carrying two halves of a broken staff. She died battling three dragons and was one of the Seven Sisters chosen by Mystra.

Lady Alustriel Silverhand is a human wearing long flowing robes and carrying a unicorn-headed staff. She served as the leader of Silverymoon for many years and is one of the Seven Sisters chosen by Mystra.

Alassra Shentrantra Silverhand, also known as Simbul, is a human with long, wild hair and wearing flowing robes. She was the queen of Aglarond and one of the Seven Sisters chosen by Mystra.

Qilué Veladorn is a drow wearing elegant robes, with hair that comes down to her ankles. She was one of the Seven Sisters chosen by Mystra.

Treasure. Claugiyliamatar’s treasure hoard contains a +2 war pick, a wand of magic detection, a spell scroll of speak with dead, seven emeralds worth 1,000 gp each, 1,339 pp, and 14,235 gp. If the characters steal the dragon’s treasure while she still lives, she begins hunting them as soon as she is able to do so.

Finding Viantha

After speaking with Claugiyliamatar in her lair, the characters likely want to find Viantha Cruelhex in Kryptgarden Forest. Each day the characters search the forest, have them choose one character to act as the guide. At the end of each day the guide makes a DC 15 Wisdom (Survival) check. On a successful check, the characters find Viantha (see “Viantha Found”). On a check failed by 4 or less, the characters get close and run into undead (see “Undead Encounter”).
On a check failed by 5 or more,
the characters find nothing.
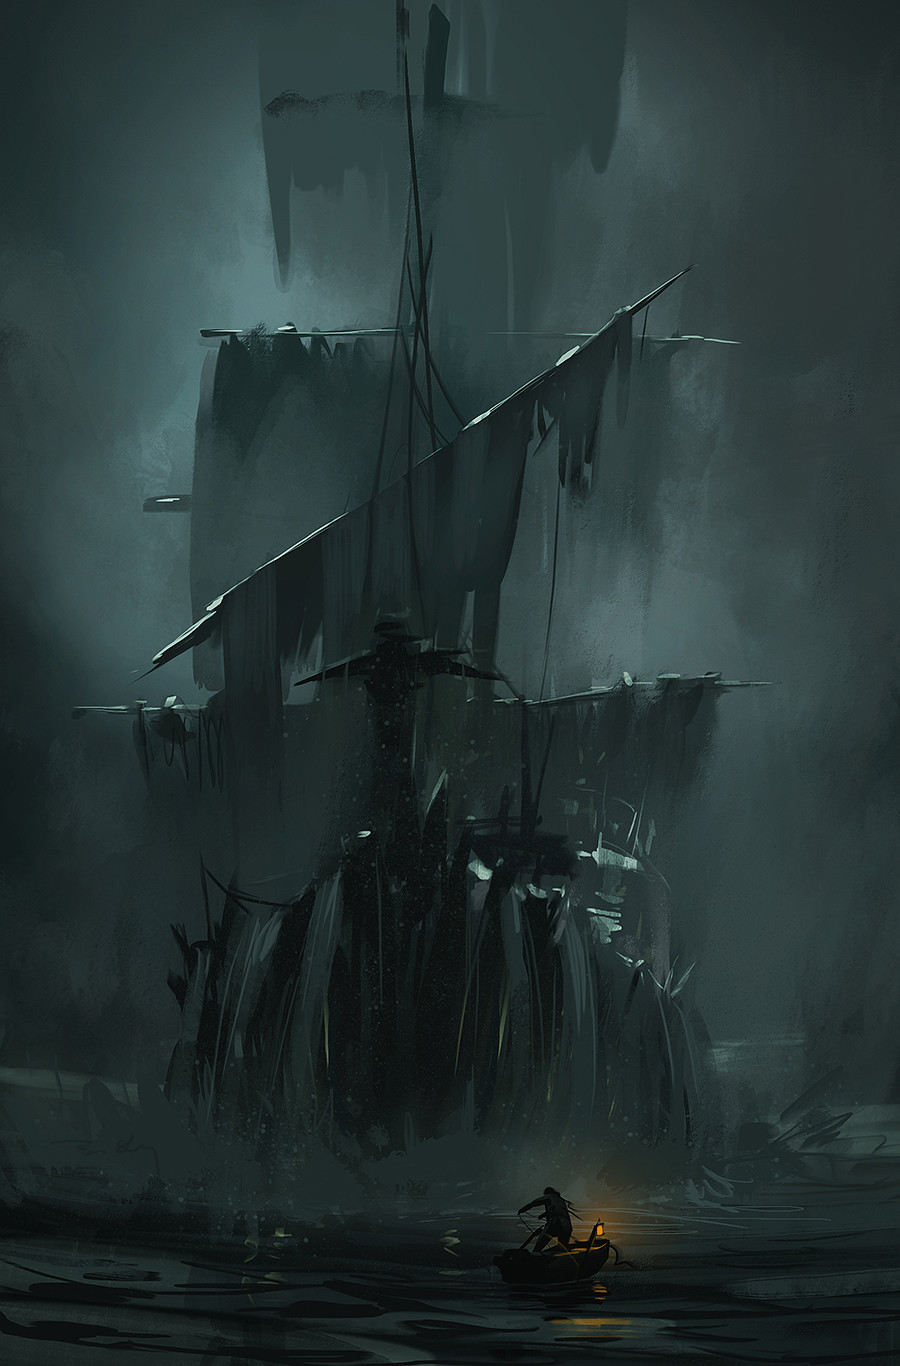
Undead Encounter

The characters run into random undead from the Undead Encounters table. The undead run amuck in the forest on their way to Claugiyliamatar’s lair and fight the characters to the death. The undead are loyal to Viantha and do not lead the characters to the deathlock unless magically compelled to do so.

Undead Encounters
d4 Loot
1 The characters encounter one ghast plus
two additional ghasts for every member
of the party, not including sidekicks.
2 The characters encounter one ogre zombie
plus two additional ogre zombies for every
member of the party, not including sidekicks.
3 The characters encounter one wight plus one additional wight for every member of the party,
not including sidekicks.
4 The characters encounter one wraith plus one additional wraith per two members of the party (rounded down), not including sidekicks.

Viantha Found

When the characters find Viantha, read the following boxed text aloud to set the scene:

    A strange, mystical chanting in a dry, crackling voice and a rank smell come from a small clearing ahead. At the center of this area, a robed woman with gray, cracked skin and red points of light where her eyes should be waves a wand made of bone in the air.

Viantha Cruelhex is a deathlock mastermind (see appendix A) in the process of summoning more undead to harass Claugiyliamatar with a magical ritual. Before the characters can attack, Viantha summons specters to her side. There is one specter for every member of the party, not including sidekicks. Viantha and the specters fight until captured or destroyed.

Roleplaying Viantha. If the characters restrain Viantha with chains or manacles, she willingly goes with them to Claugiyliamatar’s lair, but says nothing unless magically compelled to do so. All the deathlock knows of Ularan Mortus’s plans is that the necromancer wants her to keep attacking the dragon’s lair.

Return to the Lair

If the characters return to Claugiyliamatar’s lair with Viantha (or the deathlock’s remains), the green dragon thanks the characters. Unfortunately, the ghost of Ebondeath’s is nearby, waiting for this opportunity. Before she can say anything else, the dragon undergoes a terrible change, which is conveyed by reading the following boxed text aloud to the players:

    Claugiyliamatar falls to the floor, and her whole body begins to shake violently. Her tail thrashes, reducing stalagmites to dust and thunderously colliding with the cave’s walls. The dragon foams at the mouth as a dark, swirling shadow flies into the cave and snakes up into her nostrils. Then, as suddenly as Claugiyliamatar’s violent fit started, it stops.
    After a short pause, the dragon’s eyes snap open, revealing her once-green irises to be black, lightless pits. “I, Chardansearavitriol the Ebondeath, have returned! Praise be to Myrkul!”

After Chardansearavitriol possesses Claugiyliamatar’s body, the dragon has some initial disorientation while getting used to the new form. Rather than fight in such a state, Chardansearavitriol flees the lair, returning to Ularan Mortus in the Mere of Dead Men.

As the dragon leaves, a sword wraith commander (see appendix A) plus one sword wraith warrior (see appendix A) per two members of the party (rounded down), not including sidekicks, invade the lair. The sword wraiths are loyal to Ularan Mortus and attack the characters, fighting to the death.

Death Knight-Dreadnaught

The “Death Knight-Dreadnaught” quest is balanced for characters of 9th level, though characters of 10th level will still find parts of the quest challenging.

Location Overview

The dread cultist Ularan Mortus carried his acolytes over the sea in a cursed galleon imbued with the soul of a death knight. South of Neverwinter, the vessel was spotted by a local cult of Talos, god of storms, who directed the beam of a magical lighthouse onto the vessel to lure it onto the rocks. When this magic failed, the cultists sent their champion, Fheralai Stormsworn, to capture the vessel. After a terrible sea battle, Ularan Mortus was forced to dive overboard and flee to shore.

Unable to steer the dreadnaught, Fheralai crashed it onto the rocks. Once beached, she spoke to the grim soul of the ship and hatched a plan to appease it. The spirit inhabiting the vessel hails from the lost city of Anauria, a realm swallowed up long ago by the spread of the Anauroch Desert. Learning that it longed for its old home, Fheralai kidnapped a local bard, Tarbin Tul, and forced him to regale the ship with songs from its lost homeland. The ruse worked. As long as Tarbin sings to it regularly, the soul of the ship remains willing to carry out Fheralai’s commands. Since then, the storm lord has kept the dreadnaught beached on the rocks as a staging post for her upcoming invasion of the Sword Coast.

Quest Goals

To complete the Death Knight-Dreadnaught Quest (see “The Quest Board”), the adventurers must rescue Tarbin Tul from the dreadnaught’s hold or otherwise stop him from singing to the vessel. Doing so causes the dreadnaught to cast off from the rocks and return to sea.

Travel to the Ship

The dreadnaught is beached on rocks some twenty miles north of the town of Leilon, near an old lighthouse called the Tower of Storms (see Dragon of Icespire Peak for more information on this location). If the characters leave town on foot in the morning, they can reach the vessel an hour or two before nightfall. The windswept coastline of this region is lined with rugged granite cliffs and stacks of eroded rock.

Arrival

When the characters approach the vessel, read the following boxed text aloud:

    An armored dreadnaught made from metal and bones rests on a rocky outcrop in the bay. Flames leap from a brazier mounted to its mainmast and its ragged sails are stitched from worn leather. Barbaric half-orcs patrol its decks and standby, ready to employ its deadly siege weapons. A giant’s skeleton clutching a halberd is lashed to its bow. Over a dozen zombies are impaled on stakes set into the rocks around the vessel.

Scouting the dreadnaught or getting onboard without being spotted is the party’s first challenge. Characters who attempt to sneak up on the vessel must succeed on a DC 15 group Dexterity (Stealth) check, with advantage if they attempt this task at night. On a failure, the cultists on the deck spot them and open fire with the siege weapons mounted to their vessel (see areas D3-D5 and D7). The characters are 200 feet away from the vessel if spotted during the day, or 100 feet away if spotted at night.

Staked Zombies

Twenty zombies are impaled on stakes driven into the rocks around the dreadnaught. These undead were sent here by Ularan Mortus to recapture his vessel and have been staked out by Fheralai as a warning. Each zombie is spattered with an unusual amount of dried bird droppings. Characters who’ve already visited the ruins of Iniarv’s Tower recognize them as coming from that location (see “Iniarv’s Tower”). The zombies writhe and moan on their stakes but are unable to move unless they are cut down. If freed, they attack the nearest living creatures.

Where is Fheralai Stormsworn?

This champion of the Cult of Talos is onboard the dreadnaught when the characters arrive. You can place her anywhere on the ship or have her move between locations. If she learns that intruders are present, she moves to intercept them. Read the following boxed text aloud if the characters encounter her:

    A towering female half-orc steps into view. Her muscles are like iron bands and her face is fixed in a bestial scowl. Under her boar-skin hood, you see eyes crackling with lightning.
    “This is my ship now,” she snarls. “And I mean to keep it!”

Fheralai is a fanatical young half-orc war priest (see appendix A). She is one of the main villains of the story and is destined to return in Divine Contention, the conclusion of this adventure trilogy. If an attack drops Fheralai to fewer than half her maximum hit points or she feels outmatched, she tries to abandon the vessel and flee to safety. Don’t worry if Fheralai dies or is captured here, as her cultists use divine intervention to bring her back later in the campaign!

Death Knight’s Soul

The soul of the death knight Emberlost is bound into the dreadnaught’s bones. As a sentient, undead creature, Emberlost can see and talk through the skeletal figurehead (area D2), his own corpse below deck (area D17), or the hellfire orb mounted on the mainmast (area D4). The death knight has Wisdom (Perception) modifier of +3 and a passive Wisdom (Perception) of 13.

The death knight only serves creatures it chooses to obey. Fheralai Stormsworn appeased it by using a kidnapped bard to sing it songs from its homeland. If the bard stops singing against Emberlost’s will or is removed from the vessel, the dreadnaught shunts itself angrily from the rocks and withdraws to sea. At your discretion, the haunted soul of the death knight could be won over, using other means (see area D17 for further information on this cursed creature).

Dreadnaught Locations

The following locations are keyed to the map of the death knight-dreadnaught.

D1. Coastal Rocks

The dreadnaught rests on slippery sea rocks that are regularly dashed by waves. These rocks count as difficult terrain. During combat, any creature that ends its turn on the rocks must roll a die: on an odd result, a wave smashes into them and they must succeed on a DC 15 Strength saving throw or fall prone.

Dreadnaught Features

The death knight-dreadnaught is a galleon crafted from humanoid bones bound together by plates of iron and necromantic magic.

Ceilings. The lower decks of the vessel are cramped, with ceilings just six feet high. Creatures taller than this height must stoop to get around.

Light. The lower decks are lit by oil lamps that burn with eerie green flames. These cast dim light throughout the vessel’s interior, imposing disadvantage on Wisdom (Perception) checks that rely on sight.

Unholy Presence. The dreadnaught is imbued with the cursed soul of a death knight. All undead creatures onboard the vessel or within 60 feet of it have advantage on saving throws against features that turn undead.

D2. Skeletal Figurehead

The animated skeleton of a stone giant is lashed to the ship’s bow. This giant skeleton (see appendix A) cannot move and uses the following attack in place of a scimitar:

Halberd. Melee Weapon Attack: +8 to hit, reach 20 ft., one target. Hit: 21 (3d10 + 5) slashing damage.

The evil spirit of the death knight can see and speak through the skeletal figurehead (see “Death Knight’s Soul”). If the death knight spots intruders outside the ship, it alerts Fheralai below deck and she moves to confront her new guests (see “Fheralai Stormsworn”).

D3. Main Deck

The main deck contains a set of stairs that descend into the bowels of the ship, a ballista mounted on a rotating platform (see “Siege Equipment” in chapter 8 of the Dungeon Master’s Guide), and a hatch that opens into the ship’s stores. The hatch can only be opened by creatures with a combined Strength score of 18 or more.

Two anchorites of Talos (see appendix A) are stationed at the ballista, with an additional anchorite present on deck for every two characters in the party, including sidekicks. If combat occurs here, the anchorites on the forecastle and quarterdeck (areas D5 and D6) respond immediately.

D4. Hellfire Orb

The iron brazier mounted on the mainmast contains an ever-burning orb of flame. The spirit of the death knight can see and talk through this orb, perceiving its surroundings with darkvision to a range of 120 feet (see “Death Knight’s Soul”). Once per day, the death knight can hurl a magical ball of fire that explodes at a point it can see within 240 feet of it. Each creature in a 20-foot-radius sphere centered on that point must make a DC 18 Dexterity saving throw. The sphere spreads around corners. A creature takes 35 (10d6) fire damage and 35 (10d6) necrotic damage on a failed save, or half as much damage on a successful one.

D5. Forecastle

The front deck of the dreadnaught is fitted with a ballista mounted on a rotating platform. Two anchorites of Talos (see appendix A) are assigned to this weapon. When no threats are present, the cultists take turns daring each other to spit on the skull of the giant skeleton mounted under the bowsprit.

D6. Quarterdeck

The ship’s wheel is fixed to the quarterdeck. The wheel is the round, iron shield that Emberlost carried in battle. If a creature the death knight doesn’t know or like touches the wheel, the intruder must succeed at a DC 15 Constitution saving throw, taking 45 (10d8) necrotic damage on a failed save, or half as much necrotic damage on a successful one. After taking this damage, the creature can safely hold the wheel and steer the ship without taking further damage.

D7. Poop Deck

Two rear-facing mangonels (see “Siege Equipment” in chapter 8 of the Dungeon Master’s Guide) are mounted on the poop deck, guarded by two anchorites of Talos (see appendix A). As these weapons can only fire to the rear of the ship, the anchorites can’t use them to target the other decks. If combat ensues below, the anchorites move on foot to engage in melee or hurl lightning bolts down on the intruders.

The hatch here opens into a 20-foot-deep shaft leading to the ship’s magazine. During naval combat, a bucket and winch are used to haul rocks up from the magazine to load the mangonels. A character can climb down the chain to access the magazine at area D13.

D8. Chart Room

The desk is here is laden with sea charts, old maps of the Sword Coast, and enough instruments to assemble a complete set of navigator’s tools. Characters who study the ship’s course deduce that it set sail from the distant nation of Estagund four months previously. The old maps show the locations of dozens of long-lost barrows along the Sword Coast, indicating that the sailors came here to unearth something buried. Most of these tombs have already been looted or destroyed, but others could form the basis for your own dungeon-based adventures. Ularan Mortus was hunting for the mausoleum of the black dragon Chardansearavitriol. He took the map showing its location with him before he fled the ship.

D9. Storage Lockers

These lockers contain supplies for maintaining the vessel: spare rope, buckets, tubs of grease, and other mundane tools. A character who hides inside a locker gains advantage on any Dexterity (Stealth) checks made to evade the crew.

D10. Captain’s Cabin

This cabin belonged to Ularan Mortus but has since been claimed by Fheralai Stormsworn. Anyone who searches the cabin and succeeds on a DC 12 Intelligence (Investigation) check discerns that a new resident recently reclaimed the room.

A leather-bound journal lies open on the floor next to the bed. Characters examining the journal discover clues about the necromancer’s plans for the region. Give the players the “Necromancer’s Journal” handout from appendix C, the contents of which is reproduced in a sidebar below. A note in the journal indicates that Fheralai may have kidnapped a bard to appease the spirit bound in the ship.

Treasure. A liquor cabinet contains ten bottles of rare spirits worth 100 gp each. The historical tomes on the bookshelves have a combined value of 800 gp but weigh a total of 250 pounds.

Necromancer's Journal

This journal belonged to Ularan Mortus, a high priest of Myrkul, god of death. As a member of the Cult of the Dragon, Ularan Mortus colluded with evil dragons to plot the downfall of the Sword Coast. He hopes to reanimate the soul of Ebondeath, a legendary black dragon, and petition it to steal a magical artifact from the town of Leilon. The journal provides no name or clues about the nature of this artifact, but it seems vital to the high priest’s invasion plans.

Ularan Mortus sailed over the ocean onboard an undead galleon imbued with the soul of the death knight named Emberlost. The death knight’s homeland, Anauria, once lay in this region, and the high priest fears that Emberlost is becoming obsessed with this bygone realm. At this point in the journal, another hand has made a note in the margin: “Roadhouse? Could bard win him over?”

D11. Oar Deck

This gloomy oar deck looks like the belly of a whale, with gargantuan ribs sweeping from the walls to form rowing benches for the undead crew. The deck underfoot is littered with humanoid bones to a depth of 1 foot. Two large, unmanned drums are positioned to the rear of the deck.

If the death knight’s soul knows that intruders are onboard, it animates a team of minotaur skeletons to defend the deck. There is one skeleton present for every member of the party, including sidekicks. The skeletons hide underneath the bones until intruders draw near, and then arise to attack them with surprise. If combat ensues here, Gol Badwind arrives from area D12 to investigate after two rounds.

Skeleton Crew. Once per day when the dreadnaught needs to move, the death knight can animate a rowing crew of fifty skeletons from the bones piled here. This occurs at the end of the quest if the players stop Tarbin Tul’s singing (see area D17).

D12. Badwind’s Cabin

This cabin is occupied by Fheralai’s second-in-command, Gol Badwind, a grossly fat, grumpy half-orc male blackguard. Badwind is the cultists’ quartermaster.If the characters slay him, all anchorites left onboard become frightened of them.

Treasure. Badwind carries an alchemy jug at his belt, which he swigs from while doing his rounds.

D13. Magazine

This chamber holds iron balls, ballista bolts, and rocks for the vessel’s siege weaponry. A 20-foot-high shaft ascends from here to the poop deck (area D7), where a bucket and chain dangles from a winch. A character can climb the chain to ascend to the poop deck.

D14. Crew Quarters

String hammocks are strung up here like cobwebs. When they enter this area, the characters hear singing drifting from the cabin at D17. Due to the awkwardness of this space, any Medium or larger creature fighting in here counts as squeezing into a smaller space (see “Creature Size” in chapter 9 of the Player’s Handbook).

The hammocks are enchanted to attack anyone who enters without the death knight’s permission. Each hammock has the statistics of a rug of smothering except that it looks like a hammock when using its False Appearance feature. One hammock animates for every member of the party, including sidekicks.

D15. Galley

The old crew used this galley to prepare food, which consisted of spartan gruels and dry biscuits. There is nothing else in here but bad recipes.

D16. Surgery

The door to this compartment is boarded over with heavy planks of wood. Ularan Mortus was known for constructing obedient servants from the stitched-together bodies of former enemies. After the anchorites discovered that the golems in here were immune to lightning damage, they sealed them inside this chamber and boarded up the door.

There is one flesh golem inside the compartment for every two members of the party, including sidekicks (rounded down). The golems attack anyone who enters.

Treasure. An apothecary’s bag inside the surgery contains three potions of greater healing.

D17. Death Knight’s Soul

The corpse of a knight wearing plate armor slumps on a throne at the rear of this compartment. The ship’s bones spill from the knight’s chest and are entwined with his body, fusing him to the vessel. This was the death knight Emberlost, and though his corpse (as well as the ship itself, hosts his cursed soul, Emberlost may speak through the corpse and see through its eyes, but can’t animate it otherwise.

If questioned, the death knight reveals its yearning for Anauria, its lost homeland. Characters who succeed on a DC 20 Intelligence (History) check recall some tidbit of ancient Anaurian lore that impresses the death knight. It has no loyalty to Fheralai and gladly betrays her if the characters offer a better deal. The terms of such a deal (and if it’s even possible) are left up to you (the DM) and your players.

If anyone touches the corpse or strikes it with a melee weapon attack, Emberlost withdraws his body into the hull, swallowing it in bones.

The Bard. Tarbin Tul, a kidnapped male human bard (see appendix A) spends his waking hours singing songs of old Anauria to the death knight to keep it appeased. Tarbin wears an ankle manacle that is chained to a heavy iron ball weighing 50 pounds. He is desperate to escape but terrified of defying Fheralai Stormsworn. If Tarbin is taken from the dreadnaught, the soul of the death knight becomes enraged and it steers the vessel out to sea (see “Death Knight’s Soul”).

D18. Stores

The dreadnaught’s stores contain mundane supplies for the journey: barrels of salted meat, cords of wood, nails, and cloth.

D19. Prisoner Cell

When the bard Tarbin Tul (see area D17) becomes too exhausted to perform, the anchorites lock him in this cold cell to recuperate. The door is magically locked with an arcane lock spell and can only be opened by castig either knock or dispel magic. Unlocking the door alerts the death knight’s soul to the presence of intruders inside the vessel.

D20. Armory

This armory contains racks of maces, spears, and hammers for use by the ship’s crew.

Treasure. One of the racks contains a magical +2 mace called Bonecounter. Whenever this weapon is used
to destroy an undead creature, a single silver
piece appears in the wielder’s pocket.

D21. Flooded Hold

The hold is unlit and
flooded to a depth of
3 feet with dark,
briny water.

Iniarv’s Tower

The “Iniarv’s Tower” quest is balanced for characters of 10th level, though characters of 9th level can survive this quest if they are cautious and rest between encounters.

Location Overview

Iniarv’s Tower is a ruined stone keep. Iniarv, a mage who became a lich, first occupied the fortress over eight hundred years ago. When a war between a kingdom of goodly peoples and a horde of goblinoids broke out near the keep, it angered Iniarv. The lich called the ocean forth to destroy both armies, creating the Mere of Dead Men. He has not been seen since the incident.

Over the centuries, various bandits, thieves, orc war bands, and others used the tower as a temporary base while it fell further and further into ruin. The Chimera Crew, a group of bandits, currently occupies the lair. Ularan Mortus pays the criminals to guard a growing horde of undead that the necromancer stores in the towers for an imminent attack on Phandalin. The bandits have also decided to make some gold on the side by raiding caravans headed from and to Leilon.

Chimera Crew

The Chimera Crew is a group of bandits founded by Rega Swarn. Orphaned at an early age and raised by brigands, Rega found a baby chimera with no one to look after it. She named the baby Ashbreath and trained it to follow her commands. As the chimera grew, Rega and her monstrosity attacked caravans on the road. Soon their success had Rega running the brigand band, who renamed themselves the Chimera Crew.

If a member of the Chimera Crew is captured, the characters can get the bandit to reveal the following information with a successful DC 15 Charisma (Intimidation) check:

  • The history of Rega and the Chimera Crew’s founding.
  • The bandits were hired by priests of Myrkul to watch over the undead in Iniarv’s Tower’s ruins.
  • They do not know where the priests operate or what the priests plan to do with the undead.

Quest Goals

To complete the Iniarv’s Tower Quest (see “The Quest Board”), the adventurers must kill or drive out the bandits living in the ruins of Iniarv’s Tower.

Travel to Iniarv’s Tower

During the twenty-mile journey from Leilon to Iniarv’s Tower, the characters experience the following encounter as they pass by the Mere of Dead Men.

Zombie Escape

Set the scene by reading the following boxed text aloud:

    Groans fill the air as moaning humanoid figures covered in dried bird droppings sprint toward you on the road. As these beings near, their grayish rotting flesh becomes apparent. A pair of red-faced women in heavy armor run behind the undead crying, “Stop those zombies!”

Greater zombies (see appendix A) that escaped from Iniarv’s Tower by smashing a hole through a tower wall are chased by Chimera Crew members Alevene Windcoat and Niri Bronzecrown, who are chaotic evil human veterans. There are two greater zombies plus one additional greater zombie for every two members of the party (rounded down), not including sidekicks. The zombies attack the characters, fighting until destroyed.

At first Alevene and Niri help the characters fight the undead, but when only one zombie remains, they turn on the characters as the bandits do not want to leave witnesses. The brigands fight until one falls. At that point the other attempts to flee back to Iniarv’s Tower. If the characters capture one of the criminals, they reveal how the zombies escaped the ruins in addition to the information contained in the “Chimera Crew” sidebar with a successful DC 15 Charisma (Intimidation) check.

Inarv's Tower Features

The ruins of Iniarv’s Tower consist of three towers: one enormous 80-foot-high main tower connected to two smaller 30-foot-high towers by walkways. The towers are surrounded by parapets at the top of the walls that create the keep.

Arrow Slits. When using an arrow slit for protection, a creature gains three-quarters cover against outside threats. A Medium or larger creature can’t squeeze through an arrow slit, but a Small creature can with a successful DC 10 Dexterity (Acrobatics) check. Tiny creatures can move through the slits without squeezing.

Doors. The doors in Iniarv’s Tower are made of stone and have rusty iron hinges.

Light. Most of the light in the ruins comes from the sun or moon outside, but the shorter towers have hanging lanterns within which provide bright light.

Parapets. Parapets standing 3 feet high run along the outside of the keep’s wall walkways (area I1) and the roof of the main tower (area I6). When using the parapets for protection, a Medium or smaller creature gains half cover.

Walls. Climbing the stone walls of the ruin without equipment requires a successful DC 15 Strength (Athletics) check.

Arrival

As the characters approach the ruins of Iniarv’s Tower, read the following boxed text aloud:

    Atop an escarpment on the eastern side of the High Road stands a crumbling keep with thirty-foot-high walls supported by a gatehouse, two short towers, and one tall tower more than twice as tall as the keep’s walls. There is a large opening in the north wall where the defenses crumbled long ago.

As the characters approach the keep, scouts atop the keep’s walls (area I1) watch for danger. The characters must succeed on a DC 15 group Dexterity (Stealth) check to approach the keep unseen.

A 10-foot-deep ditch that was once a moat runs around the perimeter of the keep. The ditch is difficult terrain. A wooden bridge crosses the ditch and leads to the front entrance of the gatehouse (area I3).

There are three entrances to the keep: the hole in the wall (area I2), the gatehouse (area I3), and the rubble-sealed crack in the main tower’s first floor (area I5). The characters do not notice the last entrance unless they move around to that side of the keep.

Iniarv’s Tower Locations

The following locations are keyed to the map of the ruins of Iniarv’s Tower.

I1. Walls

The walls of the keep stand 30 feet high. Three human Chimera Crew scouts patrol the walls. If the scouts notice the characters approaching the ruins, they alert the Chimera Crew camp (area I4) then call out to the characters and ask them to state their business. A character convinces the scouts they are allies with a successful DC 15 Charisma (Deception) check, and the scouts allow the characters to enter through the gatehouse (area I3) then bring them to Rega Swarn in area I7. If the scouts attack the characters, the rest of the Chimera Crew in areas I4 and I7 join the fray.

I2. Pit Trap

The Chimera Crew dug a 10-foot-deep pit trap with a 10-foot-square opening in the ground along the hole in the north wall. The pit is covered by a large tarp anchored on the pit's edge and camouflaged with dirt and debris. A creature with a passive Wisdom (Perception) score of 14 or higher notices the pit.

Any creature that steps on the tarp falls into the pit and pulls the tarp with it, taking 3 (1d6) bludgeoning damage and landing prone. The bottom of the pit contains a swarm of poisonous snakes. Climbing the walls of the pit without equipment requires a successful DC 15 Strength (Athletics) check.

I3. Gatehouse

The stone gatehouse has two stories. The first story is one interior room with a 30-foot-high ceiling. The second story has no roof.

When the characters enter the first story, they immediately smell and see oil on the floor and walls. If set ablaze, the oil burns for 1 minute. While the oil burns, each creature that enters or starts its turn in the first story of the gatehouse takes 11 (2d10) fire damage.

Doors and Portcullises. The first story of the gatehouse has two sets of double doors behind iron portcullises. Each portcullis requires a successful DC 18 Strength (Athletics) check to lift and immediately slams back down when the creature that lifted the portcullis stops holding it. A portcullis has AC 19, 27 hit points, immunity to poison and psychic damage, and a damage threshold of 5.

The gatehouse’s front double doors are secured with an iron bar from the inside, and the back-double doors are secured with the same mechanism from the courtyard side. A creature that can reach a bar can lock or unlock the bar as an action. Forcing open a secured set of double doors requires a successful DC 20 Strength (Athletics) check. Each door has AC 19, 27 hit points, and immunity to poison and psychic damage.

Murder Holes. The second story has eight 1-foot-diameter murder holes in the floor that look down into the first story of the gatehouse. When using a murder hole to fight, a creature on the second story gains three-quarters cover against threats on the first story. A Medium or larger creature can’t squeeze through a murder hole, but a Small creature can with a successful DC 10 Dexterity (Acrobatics) check. Tiny creatures can move through the holes without squeezing.

Treasure. A small iron box in the northeast corner of the second story contains two flasks of alchemist’s fire, which the Chimera Crew can throw down the murder holes to set the oil on the first story ablaze.

I4. Courtyard

Most of the Chimera Crew stays in the mud-covered courtyard, which contains their tents. At any given moment, a member of the crew here could be cooking over a small campfire, drinking, eating, planning a raid, playing a game, preparing equipment, resting, or socializing. When the characters arrive, the Chimera Crew in the courtyard consists of three human scouts and one veteran for every member of the party, including sidekicks.

If the brigands in the courtyard notice intruders, they immediately attack. If combat breaks out here, members of the Chimera Crew in areas I1 and I7 join the battle. If only two members of the Chimera Crew remain, they attempt
to remove the barricade in front of the entrance to
area I5 and the chain on the door to area I9 to
flood the courtyard with undead to cover their
escape.

Slippery Mud. When a creature standing in the
courtyard is hit by an attack that is a critical hit, the
target must succeed on a DC 15 Dexterity saving throw
or fall prone.

I5. Main Tower

The main tower in the keep stands 80 feet tall. As the characters approach the tower, they notice it reeks of rot and animal waste.

Two entrances lead inside the tower: an entrance from the courtyard (area I4) barricaded with old wood furniture and a 3-foot-wide, 5-foot-high crack in the back wall filled with stone rubble. A creature can clear the blockage from either entrance with a successful DC 17 Strength (Athletics) check made as an action. If an entrance is cleared, the undead inside come out and immediately begin attacking any creatures they notice that are not undead. The Chimera Crew do not open an entrance unless they think it will give them an advantage in combat or they are with a priest of Myrkul who can command the undead.

The bottom floor of the tower contains zombies and ogre zombies covered in bird droppings thanks to the hole in the roof above (area I6). There are two zombies and one ogre zombie for every member of the party, including sidekicks.

Collapsed Cellar Entrance. The entrance to the keep’s cellar collapsed long ago and requires many days of work to clear. What this cellar might hold (perhaps a secret sanctum where Iniarv hides practicing magic) is up to you.

I6. Main Tower Roof

Ten swarms of ravens live on what remains of the main tower’s roof. They attack any creature that comes within 30 feet of the roof, fighting until the creature retreats.

If more than 100 pounds of weight are added to the remains of the roof, it collapses. Creatures inside the tower when the roof collapses must make a DC 12 Dexterity saving throw, taking 28 (8d6) bludgeoning damage on a failed save, or half as much damage on a successful one. Creatures on top of the roof when it collapses take 28 (8d6) bludgeoning damage from the fall and another 28 (8d6) bludgeoning damage from fallig roof debris.

I7. North Guard Tower First Floor

The first floor of the north guard tower has a 30-foot-high ceiling. The floor is covered in straw, which services as a bed for Ashbreath, a chimera. Rega Swarn, a chaotic evil human master thief (see appendix A) is feeding the chimera chunks of humanoid flesh, unless they joined a fight in areas I1 or I4. See the “Chimera Crew” sidebar for more information about Rega and Ashbreath.

If the characters approach Rega in a nonthreatening manner, she asks why they have come to Iniarv’s Tower. If a character claims to be an ally willing to help the Chimera Crew and succeeds on a DC 15 Charisma (Deception) check, Rega asks the characters to stick around and help raid the next caravan that passes. Otherwise she attacks with Ashbreath, fighting to the death. If a fight breaks out here, members of the Chimera Crew in areas I1 and I4 join the fray.

Ladder. A ladder leads to a trap door in the ceiling that leads to area I8.

Steel Box. A character with a passive Wisdom (Perception) score of 15 or higher spots a locked steel box hidden beneath the straw. Rega has the key to this box, which is trapped with a poison needle (see “Sample Traps” in chapter 5 of the Dungeon Master’s Guide).

The box has AC 19, 18 hit points, and immunity to poison and psychic damage. The lock can be picked with a successful DC 17 Dexterity check using thieves’ tools. The box can be forced open with a successful DC 13 Strength (Athletics) check. The box contains Rega’s treasure.

Treasure. The steel box contains a potion of diminution, 36 pp, and 1,215 gp.

I8. North Guard Tower Second Floor

The second floor of the north guard tower has a 10-foot-high ceiling. This area is stocked with trade goods (see chapter 5 of the Player’s Handbook) worth a total of 300 gp that were stolen from caravans on the road.

I9. South Guard Tower First Floor

The door to this area from area I4 is chained shut from the outside. A creature that can reach the chain can remove it as an action, or force the door open, breaking the chain by making a DC 20 Strength (Athletics) check as an action.

The Chimera Crew moved the greater zombies (see appendix A) to this location after they broke through a weakened area of the main tower (area I5). There is one greater zombie plus one additional greater zombie for every two members of the party (rounded down), not including sidekicks.

I10. South Guard Tower Second Floor

This area has the same features as area I8.

Leilon Point

The “Leilon Point” quest is balanced for characters of 9th level, though characters of 10th level will still find parts of the quest challenging.

Location Overview

Leilon Point is a small community of farmers and fishers, originally formed centuries ago to supply the town of Leilon with food. When Leilon fell, the village remained, but it has recently increased its production to support the rebuilding of the town.

One tenday ago, a band of sahuagin scouts made Salt Cave beneath Leilion Point their base of operations for performing raids on the farms. Gahza, the sahuagin’s high priestess leader, brought the raiders to the cave after they investigated the disappearance of the knight-dreadnaught near the Tower of Storms. Fheralai had turned the nuisance of the sahuagin into an opportunity when she used an illusion to appear as a sapient shark (an animal revered by sahuagin) before Gahza, telling the aquatic priestess to raid the farming community. The sahuagin fell for the ruse and now believe they are doing the work of their goddess, Sekolah.

Quest Goals

To complete the Leilon Point Quest (see “The Quest Board”), adventurers must kill or drive out the sahuagin in Salt Cave.

Arrival at Leilon Point

Leilon Point is ten miles from the town of Leilon. When the characters arrive at Leilon Point, read the following boxed text aloud:

    The farms of Leilon Point are deathly quiet and still. Every window in the community of thirteen quaint buildings is shuttered. Many of the village’s fields are reduced to blackened ash, and its single street is lined with overturned carts, destroyed sacks of grain, and the rotting, slaughtered carcasses of chickens and pigs.
    Though this village on a seaside cliff is mostly farmhouses, four buildings without attached fields stand out. The first, a large cottage, has a sign outside its door that reads, “Head House.” Second, a cubic wood building depicts the image of curling waves on its front door. Third is a brick building high up on a hill, its massive windows shuttered tight. The final place of interest is a stone shed with a smashed door at the edge of town, near a path that winds toward the water.

After the latest attack, the people of the Leilon Point have decided to stay shut up in their houses and wait for help.

Leilon Point Locations

The following locations are keyed to the map of Leilon Point.

Farmhouses

The families inside the unlabeled buildings on the map of Leilon Point are farmers, fishers, and their children. No amount of persuasion or intimidation can convince the terrified families to open their doors or speak to the characters.

Fishing Supply Hut

Nets, hooks, chains, rope, and other fishing supplies lay destroyed on the floor of this hut near the corpse of an old woman lying face down in a pool of dried blood. Manda Gutterpunch ran this shop that serviced the fishers in the village. A character who searches her body, making a successful DC 10 Wisdom (Medicine) check finds the tip of a blade made of bone in a fatal wound in Manda’s stomach, and with a successful DC 18 Intelligence (History) check can tell it is of sahuagin make.

Head House

The town’s leader, a nervous elderly human named Marciano Belta, occupies the Head House. As the town’s headman, Marciano settles disputes and keeps order, a relatively easy job until the sahuagin arrived. Marciano refuses to answer questions shouted through the door unless a character first succeeds on a DC 15 Charisma (Persuasion) check to gain his trust. Characters who break into his house have disadvantage on all Charisma checks made to interact with Marciano. Once the characters gain Marciano’s trust, he shares the following information:

  • A tenday ago, a band of violent shark people appeared out of nowhere on the eastern edge of town and began burning fields and killing animals. The attack stopped almost as soon as it began.
  • Marciano sent word to Leilon for help after the first attack, but more raids followed. There was one attack each day at a different time from a different direction. With every attack the shark people destroyed more property.
  • Seven days ago, some of the fishers in the town took weapons and their boats to Salt Cave to see if the raiders were in the caves. The fishers have not returned. *Five days ago, Marciano ordered everyone in Leilon Point to remain inside until further notice and wait for help to come from Leilon.

Marciano describes the raiders as green-scaled monsters with finned heads. After sharing this information with the characters, he begs them to find and drive off the aquatic raiders.

Huer’s Hut

If the characters inspect the huer’s hut they find the door to the one-room home is unlocked. Inside they find a bed, a fireplace, a table set with cook’s utensils and a spyglass, a chair, a large handbell, and a bookcase full of novels about adventure. This hut belongs to Callana Devro, who was killed in Salt Cave. A character who searches the bed finds a book beneath the pillow called Sea Devils, which contains all the information about sahuagin found in the Monster Manual.

A huer watches the sea for shoals from a cliff and calls out to ships below in danger of beaching.

Umberlee Shrine

The door to the one-room shrine of Umberlee, goddess of the sea, is unlocked. Characters who enter find the corpse of an elf priestess, Nava Wavecrash, lying in a pool of her own blood next to a stone altar. Characters who search Nava’s body find a potion of water breathing.

Wait it Out

The characters might decide to wait for the sahuagin to exit the cave to raid the town rather than assault the cave. If they take this course of action, roll a d10. The result equals the number of hours the characters wait. At the end of this time, all the sahuagin and the giant shark skeleton exit the cave and attack.

Arrival at Salt Cave

If the characters talk to Marciano Belta at the head house, they learn that the sahuagin utilize several entrances to Salt Cave to attack the town. The characters can find the southernmost entrance, which is not hidden, by simply walking down the path to from the village to the cave. The cave’s other two entrances can be found by tracking the sahuagin with a successful DC 15 Wisdom (Survival) check.

If the characters come to the cave’s southernmost entrance, they notice three abandoned rowboats left by the fishers that died in the cave.

Salt Cave Features

Salt Cave is a natural cave system.

Ceilings. The ceilings throughout the cave are 20 feet high.

Light. Unless otherwise noted in an area’s description, there are no light sources in the cave except for those the characters bring with them.

Walls. Climbing the rough stone walls of the cave without equipment requires a successful DC 13 Strength (Athletics) check.

Salt Cave Locations

The following locations are keyed to the map of Salt Cave. Sahuagin in the cave attack any characters they notice, fighting to the death.

S1. Head Hall

The severed heads of six humans on spears line the south wall of this cavern. The bodies of these humans are thrown at the back of the cave, covering a patch of floor where the glyph of warding spell was cast. If the bodies are moved, the glyph is triggered, and it erupts with magical thunder in a 20-foot-radius sphere centered on it. Each creature in the area must make a DC 14 Dexterity saving throw, taking 22 (5d8) thunder damage on a failed saving throw, or half as much damage on a successful one. The glyph disappears after it is triggered.

If the glyph is triggered, the sahuagin in area S2 investigate.

S2. Clam Cavern

A glowing clam made of coral stands atop a 10-foot-high cliff, filling this chamber with bright green light. The clam was gifted to Gahza when she became a high priestess. If she dies, the clam stops shedding light. Sahuagin in the clam’s light have advantage on attack rolls.

At the center of the chamber a 10-foot-deep pool is filled with seawater and a swarm of hungry baby sharks that use the statistics of a swarm of quippers.

Gahza, a sahuagin high priestess (see appendix A), stands next to the clam, leading a group of swimming sahuagin blademasters (see appendix A) in wild prayer to Sekolah. There is one blademaster plus one additional blademaster per two members of the party (rounded down), not including sidekicks.

S3. Training Cavern

A sahuagin blademaster (see appendix A) trains a group of sahuagin to fight on the bottom level of this chamber. There are two sahuagin for every member of the party, not including sidekicks.

A boulder atop the 10-foot-high platform in this room mostly covers a small hole where Gahza hides her treasure.

A character with a passive Wisdom (Perception) score of 16 or higher notices the edges of the hole around one side of the boulder. A character can move the boulder to get to the treasure beneath with a successful DC 13 Strength (Athletics) check.

Treasure. The hole beneath the rock contains a black pearl worth 500 gp, 1,321 sp, and 426 gp.

S4. Ritual Cavern

A circle of sahuagin symbols are drawn in blood around the bones of a giant shark. Several sahuagin priestesses chant around the bones, which come to life as a giant shark skeleton controlled by the priestesses. There is one sahuagin priestess plus one additional priestess for every member of the party, not including sidekicks.

The giant shark skeleton has the statistics of a giant shark with the following changes:

  • The shark is undead and doesn’t require air, food, drink, or sleep.
  • The shark is vulnerable to bludgeoning damage, immune to poison damage and the poisoned condition, and cannot gain levels of exhaustion.
  • The shark has had skeletal feet attached by some demented necromancer and gains a walking speed of 20 feet.

Ending the Adventure

The adventure can end one of several ways. Ideally, it concludes with the adventurers witnessing Claugiyliamatar’s body becoming possessed by Chardansearavitriol’s spirit and the completion of all the The Quest Board. By then the characters should be 11th level. Give the players a chance to wrap up loose ends before declaring the adventure over. For example, the characters might need to return to Leilon to collect an outstanding reward or notify the town council of Claugiyliamatar’s possession. The story doesn’t have to stop there. If you play Divine Contention, the next adventure in the Beyond Dragon of Icespire Peak series, the characters will have final showdowns with the cults of Myrkul and Talos that decide the ultimate fate of Leilon.

If the worst happens and the characters die, their adventure is also over. You can let the players roll up new characters and pick up where the last ones left off, or you can also start the adventure over with new characters, tweaking quests as you see fit to surprise your players who might otherwise be familiar with them.

You might expand the adventure by inventing new quests and new locations. Several other D&D adventures, Out of the Abyss, Princes of the Apocalypse, Rise of Tiamat, and Waterdeep: Dungeon of the Mad Mage, take place in the Forgotten Realms and include challenges for characters of 11th and higher levels.

Appendix A: Creatures


ALKILITH

Medium fiend (demon), chaotic evil


  • Armor Class 17 (natural armor)
  • Hit Points 157 (15d8 + 90)
  • Speed 40 ft.

STR DEX CON INT WIS CHA
12 (+1) 19 (+4) 22 (+6) 6 (-2) 11 (+0) 7 (-2)

  • Saving Throws Dex +8, Con +10
  • Skills Stealth +8
  • Damage Resistances acid, cold, fire, lightning; bludgeoning, piercing, and slashing from nonmagical attacks
  • Damage Immunities poison
  • Condition Immunities charmed, frightened, poisoned
  • Senses darkvision 120 ft., passive Perception 10
  • Languages understands Abyssal but can’t speak
  • Challenge 11 (7,200 XP)

Amorphous. The alkilith can move through a space as narrow as 1 inch wide without squeezing.

False Appearance. While the alkilith is motionless, it is indistinguishable from an ordinary slime or fungus.

Foment Madness. Any creature that isn’t a demon that starts its turn within 30 feet of the alkilith must succeed on a DC 18 Wisdom saving throw, or it hears a faint buzzing in its head for a moment and has disadvantage on its next attack roll, saving throw, or ability check.

If the saving throw against Foment Madness fails by 5 or more, the creature is instead subjected to the confusion spell for 1 minute (no concentration required by the alkilith). While under the effect of that confusion, the creature is immune to Foment Madness.

Magic Resistance. The alkilith has advantage on saving throws against spells and other magical effects.

Actions

Multiattack. The alkilith makes three tentacle attacks.

Tentacle. Melee Weapon Attack: +8 to hit, reach 15 ft., one target. Hit: 18 (4d6 + 4) acid damage.


ANCHORITE OF TALOS

Medium humanoid (half-orc, shapechanger), neutral evil


  • Armor Class 13 (hide armor)
  • Hit Points 58 (9d8 + 18)
  • Speed 30 ft.

STR DEX CON INT WIS CHA
16 (+3) 13 (+1) 14 (+2) 9 (-1) 15 (+2) 12 (+1)

  • Skills Nature +1, Stealth +3, Survival +4
  • Senses darkvision 60 ft., passive Perception 12
  • Languages Common, Orc
  • Challenge 3 (700 XP)

Innate Spellcasting. The anchorite’s innate spellcasting ability is Wisdom (spell save DC 12). It can innately cast the following spells, requiring no material components:

1/day each: augury, bless, lightning bolt (8d6 damage), revivify

3/day: thunderwave (2d8 damage)

Shapechanger. The anchorite can use its action to polymorph into a boar or back into its true form, which is humanoid. Its statistics are the same in each form. Any equipment it is wearing or carrying isn’t transformed. It reverts to its true form if it dies.

Actions

Clawed Gauntlet (Humanoid Form Only). Melee Weapon Attack: +5 to hit, reach 5 ft., one target. Hit: 5 (1d4 + 3) slashing damage.

Tusk (Boar Form Only). Melee Weapon Attack: +5 to hit, reach 5 ft., one target. Hit: 6 (1d6 + 3) slashing damage.


ASSASSIN VINE

Large plant, unaligned


  • Armor Class 13 (natural armor)
  • Hit Points 85 (10d10 + 30)
  • Speed 5 ft., climb 5 ft.

STR DEX CON INT WIS CHA
18 (+4) 10 (+0) 16 (+3) 1 (-5) 10 (+0) 1 (-5)

  • Damage Resistances cold, fire
  • Condition Immunities blinded, deafened, exhaustion, prones
  • Senses blindsight 30 ft., passive Perception 10
  • Languages -
  • Challenge 3 (700 XP)

False Appearance. While the assassin vine remains motionless, it is indistinguishable from a normal plant.

Actions

Constrict. Melee Weapon Attack: +6 to hit, reach 20 ft., one creature. Hit: The target takes 11 (2d6 + 4) bludgeoning damage, and it is grappled (escape DC 14). Until this grapple ends, the target is restrained, and it takes 21 (6d6) poison damage at the start of each of its turns. The vine can constrict only one target at a time.

Entangling Vines. The assassin vine can animate normal vines and roots on the ground in a 15-foot square within 30 feet of it. These plants turn the ground in that area into difficult terrain. A creature in that area when the effect begins must succeed on a DC 13 Strength saving throw or be restrained by entangling vines and roots. A creature restrained by the plants can use its action to make a DC 13 Strength (Athletics) check, freeing itself on a successful check. The effect ends after 1 minute or when the assassin vine dies or uses Entangling Vines again.


BARD

Medium humanoid (any race), any alignment


  • Armor Class 15 (chain shirt)
  • Hit Points 44 (8d8 + 8)
  • Speed 30 ft.

STR DEX CON INT WIS CHA
11 (+0) 14 (+2) 12 (+1) 10 (+0) 13 (+1) 14 (+2)

  • Saving Throws Dex +4, Wis +3
  • Skills Acrobatics +4, Perception +5, Performance +6
  • Senses passive Perception 15
  • Languages any two languages
  • Challenge 2 (450 XP)

Spellcasting. The bard is a 4th-level spellcaster. Its spellcasting ability is Charisma (spell save DC 12, +4 to hit with spell attacks). It has the following bard spells prepared:

Cantrips (at will): friends, mage hand, vicious mockery

1st level (4 slots): charm person, healing word, heroism, sleep, thunderwave

2nd level (3 slots): invisibility, shatter

Song of Rest. The bard can perform a song while taking a short rest. Any ally who hears the song regains an extra 1d6 hit points if it spends any Hit Dice to regain hit points at the end of that rest. The bard can confer this benefit on itself as well.

Taunt (2/Day). The bard can use a bonus action on its turn to target one creature within 30 feet of it. If the target can hear the bard, the target must succeed on a DC 12 Charisma saving throw or have disadvantage on ability checks, attack rolls, and saving throws until the start of the bard’s next turn.

Actions

Shortsword. Melee Weapon Attack: +4 to hit, reach 5 ft., one target. Hit: 5 (1d6 + 2) piercing damage.

Shortbow. Ranged Weapon Attack: +4 to hit, range 80/320 ft., one target. Hit: 5 (1d6 + 2) piercing damage.


CLAUGIYLIAMATAR

Gargantuan dragon, lawful evil


  • Armor Class 21 (natural armor)
  • Hit Points 385 (22d20 + 154)
  • Speed 40 ft., fly 80 ft., swim 40 ft.

STR DEX CON INT WIS CHA
27 (+8) 12 (+1) 25 (+7) 20 (+5) 17 (+3) 19 (+4)

  • Saving Throws Dex +8, Con +14, Wis +10, Cha +11
  • Skills Deception +11, Insight +10, Perception +17, Persuasion +11, Stealth +8
  • Damage Immunities poison
  • Condition Immunities poisoned
  • Senses blindsight 60 ft., darkvision 120 ft., passive Perception 27
  • Languages Common, Draconic
  • Challenge 22 (41,000 XP)

Amphibious. Claugiyliamatar can breathe air and water.

Legendary Resistance (3/Day). If Claugiyliamatar fails a saving throw, it can choose to succeed instead.

Innate Spellcasting. Claugiyliamatar’s spellcasting ability is Charisma (spell save DC 19). She can innately cast the following spells, requiring no material components:

1/day each: invisibility, legend lore, protection from energy, true seeing

Spellcasting. Claugiyliamatar is an 8th-level spellcaster. Her spellcasting ability is Wisdom (spell save DC 18; +10 to hit with spell attacks). She has the following druid spells prepared:

Cantrips (at will): druidcraft, mending, produce flame

1st level (4 slots): cure wounds, detect magic, entangle, speak with animals

2nd level (3 slots): animal messenger, pass without trace

3rd level (3 slots): dispel magic, plant growth

4th level (2 slots): blight, locate creature, stoneskin

Actions

Multiattack. Claugiyliamatar can use its Frightful Presence. It then makes three attacks: one with its bite and two with its claws.

Bite. Melee Weapon Attack: +15 to hit, reach 15 ft., one target. Hit: 19 (2d10 + 8) piercing damage plus 10 (3d6) poison damage.

Claw. Melee Weapon Attack: +15 to hit, reach 10 ft., one target. Hit: 22 (4d6 + 8) slashing damage.

Tail. Melee Weapon Attack: +15 to hit, reach 20 ft., one target. Hit: 17 (2d8 + 8) bludgeoning damage.

Frightful Presence. Each creature of the dragon’s choice that is within 120 feet of the dragon and aware of it must succeed on a DC 19 Wisdom saving throw or become frightened for 1 minute. A creature can repeat the saving throw at the end of each of its turns, ending the effect on itself on a success. If a creature’s saving throw is successful or the effect ends for it, the creature is immune to the dragon’s Frightful Presence for the next 24 hours.

Poison Breath (Recharge 5–6). The dragon exhales poisonous gas in a 90-foot cone. Each creature in that area must make a DC 22 Constitution saving throw, taking 77 (22d6) poison damage on a failed save, or half as much damage on a successful one.

Legendary Actions

The dragon can take 3 legendary actions, choosing from the options below. Only one legendary action option can be used at a time and only at the end of another creature’s turn. The dragon regains spent legendary actions at the start of its turn.

Detect. The dragon makes a Wisdom (Perception) check.

Tail Attack. The dragon makes a tail attack.

Wing Attack (Costs 2 Actions). The dragon beats its wings. Each creature within 15 feet of the dragon must succeed on a DC 23 Dexterity saving throw or take 15 (2d6 + 8) bludgeoning damage and be knocked prone. The dragon can then fly up to half its flying speed.


DEATHLOCK MASTERMIND

Medium undead, neutral evil


  • Armor Class 13 (16 with mage armor)
  • Hit Points 110 (20d8 + 20)
  • Speed 30 ft.

STR DEX CON INT WIS CHA
11 (+0) 16 (+3) 12 (+1) 15 (+2) 12 (+1) 17 (+3)

  • Saving Throws Int +5, Cha +6
  • Skills Arcana +5, History +5, Perception +4
  • Damage Resistances necrotic; bludgeoning, piercing, and slashing from nonmagical attacks that aren’t silvered
  • Damage Immunities poison
  • Condition Immunities exhaustion, poisoned
  • Senses darkvision 120 ft. (including magical darkness), passive Perception 14
  • Languages the languages it knew in life
  • Challenge 8 (3,900 XP)

Innate Spellcasting. The deathlock’s innate spellcasting ability is Charisma (spell save DC 14). It can innately cast the following spells, requiring no material components:

At will: detect magic, disguise self, mage armor

Spellcasting. The deathlock is a 10th-level spellcaster. Its spellcasting ability is Charisma (spell save DC 14, +6 to hit with spell attacks). It regains its expended spell slots when it finishes a short or long rest. It knows the following warlock spells:

Cantrips (at will): chill touch, mage hand, minor illusion, poison spray

1st–5th level (2 5th-level slots): arms of Hadar, blight, counterspell, crown of madness, darkness, dimension door, dispel magic, fly, hold monster, invisibility

Turn Resistance. The deathlock has advantage on saving throws against any effect that turns undead.

Actions

Deathly Claw. Melee Weapon Attack: +6 to hit, reach 5 ft., one target. Hit: 13 (3d6 + 3 necrotic damage).

Grave Bolts. Ranged Spell Attack: +6 to hit, range 120 ft., one or two targets. Hit: 18 (4d8) necrotic damage. If the target is Large or smaller, it must succeed on a DC 16 Strength saving throw or become restrained as shadowy tendrils wrap around it for 1 minute. A restrained target can use its action to repeat the saving throw, ending the effect on itself on a success.


GIANT SKELETON

Huge undead, neutral evil


  • Armor Class 17 (natural armor)
  • Hit Points 115 (10d12 + 50)
  • Speed 30 ft.

STR DEX CON INT WIS CHA
21 (+5) 10 (+0) 20 (+5) 4 (-3) 6 (-2) 6 (-2)

  • Damage Vulnerabilities bludgeoning
  • Damage Resistances poison
  • Condition Immunities exhaustion, poisoned
  • Senses darkvision 60 ft., passive Perception 8
  • Languages understands Giant but can’t speak
  • Challenge 7 (2,900 XP)

Evasion. If the skeleton is subjected to an effect that allows it to make a saving throw to take only half damage, it instead takes no damage if it succeeds on the saving throw, and only half damage if it fails.

Magic Resistance. The skeleton has advantage on saving throws against spells and other magical effects.

Turn Immunity. The skeleton is immune to effects that turn undead.

Actions

Multiattack. The skeleton makes three scimitar attacks.

Scimitar. Melee Weapon Attack: +8 to hit, reach 10 ft., one target. Hit: 15 (3d6 + 5) slashing damage.


GREATER ZOMBIE

Medium undead, neutral evil


  • Armor Class 15 (natural armor)
  • Hit Points 97 (13d8 + 39)
  • Speed 30 ft.

STR DEX CON INT WIS CHA
18 (+4) 10 (+0) 17 (+3) 4 (-3) 6 (-2) 6 (-2)

  • Saving Throws Wis +1
  • Damage Resistances cold, necrotic
  • Damage Immunities poison
  • Condition Immunities charmed, exhaustion, frightened, paralyzed, poisoned
  • Senses darkvision 60 ft., passive Perception 8
  • Languages understands the languages it knew in life but can’t speak
  • Challenge 5 (1,800 XP)

Turn Resistance. The zombie has advantage on saving throws against any effect that turns undead.

Undead Fortitude. If damage reduces the zombie to 0 hit points, it must make a Constitution saving throw with a DC of 5 + the damage taken, unless the damage is radiant or from a critical hit. On a success, the zombie drops to 1 hit point instead.

Actions

Multiattack. The zombie makes two melee attacks.

Empowered Slam. Melee Weapon Attack: +7 to hit, reach 5 ft., one target. Hit: 7 (1d6 + 4) bludgeoning damage and 7 (2d6) necrotic damage.


LHAMMARUNTOSZ

Huge dragon, lawful good


  • Armor Class 19 (Natural Armor)
  • Hit Points 212 (17d12 + 102)
  • Speed 40 ft., fly 80 ft., swim 40 ft.

STR DEX CON INT WIS CHA
25 (+7) 10 (+0) 23 (+6) 16 (+3) 15 (+2) 19 (+4)

  • Saving Throws Dex +5, Con +11, Wis +7, Cha +9
  • Skills Insight +7, Perception +12, Stealth +5
  • Damage Immunities Lightning
  • Senses Blindsight 60 ft., Darkvision 120 ft., Passive Perception 22
  • Languages Common, Draconic
  • Challenge 15 (13,000 XP)

Amphibious. The dragon can breathe air and water.

Innate Spellcasting. Lhammaruntosz’s spellcasting ability is Charisma (spell save DC 17). She can innately cast the following spells, requiring no material components:

1/day each: create food and water, detect thoughts, fog cloud, speak with animals

Legendary Resistance (3/Day). If the dragon fails a saving throw, it can choose to succeed instead.

Regeneration. Lhammaruntosz regains 5 hit points at the start of her turn.

Spellcasting. Lhammaruntosz is an 8th-level spellcaster. Her spellcasting ability is Charisma (spell save DC 17; +9 to hit with spell attacks). She has the following sorcerer spells prepared:

Cantrips (at will): light, mage hand, mending

1st level (4 slots): charm person, detect magic, expeditious retreat, sleep

2nd level (3 slots): darkness, invisibility, suggestion

3rd level (3 slots): dispel magic, protection from energy

4th level (2 slots): dimension door, stoneskin

Actions

Multiattack. The dragon can use its Frightful Presence. It then makes three attacks: one with its bite and two with its claws.

Bite. Melee Weapon Attack: +12 to hit, reach 10 ft., one target. Hit: 18 (2d10 + 7) piercing damage.

Claw. Melee Weapon Attack: +12 to hit, reach 5 ft., one target. Hit: 14 (2d6 + 7) slashing damage.

Tail. Melee Weapon Attack: +12 to hit, reach 15 ft., one target. Hit: 16 (2d8 + 7) bludgeoning damage.

Frightful Presence. Each creature of the dragon's choice that is within 120 feet of the dragon and aware of it must succeed on a DC 17 Wisdom saving throw or become frightened for 1 minute. A creature can repeat the saving throw at the end of each of its turns, ending the effect on itself on a success. If a creature's saving throw is successful or the effect ends for it, the creature is immune to the dragon's Frightful Presence for the next 24 hours.

Breath Weapons (Recharge 5–6). The dragon uses one of the following breath weapons.

Lightning Breath. The dragon exhales lightning in a 90- foot line that is 5 feet wide. Each creature in that line must make a DC 19 Dexterity saving throw, taking 66 (12d10) lightning damage on a failed save, or half as much damage on a successful one.

Repulsion Breath. The dragon exhales repulsion energy in a 30-foot cone. Each creature in that area must succeed on a DC 19 Strength saving throw. On a failed save, the creature is pushed 60 feet away from the dragon.

Change Shape. The dragon magically polymorphs into a humanoid or beast that has a challenge rating no higher than its own, or back into its true form. It reverts to its true form if it dies. Any equipment it is wearing or carrying is absorbed or borne by the new form (the dragon's choice).

In a new form, the dragon retains its alignment, hit points, Hit Dice, ability to speak, proficiencies, Legendary Resistance, lair actions, and Intelligence, Wisdom, and Charisma scores, as well as this action. Its statistics and capabilities are otherwise replaced by those of the new form, except any class features or legendary actions of that form.

Legendary Actions

The dragon can take 3 legendary actions, choosing from the options below. Only one legendary action option can be used at a time and only at the end of another creature's turn. The dragon regains spent legendary actions at the start of its turn.

Detect. The dragon makes a Wisdom (Perception) check.

Tail Attack. The dragon makes a tail attack.

Wing Attack (Costs 2 Actions). The dragon beats its wings. Each creature within 10 feet of the dragon must succeed on a DC 20 Dexterity saving throw or take 14 (2d6 + 7) bludgeoning damage and be knocked prone. The dragon can then fly up to half its flying speed.


MASTER THIEF

Medium humanoid (any race), any alignment


  • Armor Class 16 (studded leather)
  • Hit Points 84 (13d8 + 26)
  • Speed 30 ft.

STR DEX CON INT WIS CHA
11 (+0) 18 (+3) 14 (+2) 11 (+0) 11 (+0) 12 (+1)

  • Saving Throws Dex +7, Int +3
  • Skills Acrobatics +7, Athletics +3, Perception +3, Sleight of Hand +7, Stealth +7
  • Senses passive Perception 13
  • Languages any one language (usually Common) plus thieves’ cant
  • Challenge 5 (1,800 XP)

Cunning Action. On each of its turns, the thief can use a bonus action to take the Dash, Disengage, or Hide action.

Evasion. If the thief is subjected to an effect that allows it to make a Dexterity saving throw to take only half damage, the thief instead takes no damage if it succeeds on the saving throw, and only half damage if it fails.

Sneak Attack (1/Turn). The thief deals an extra 14 (4d6) damage when it hits a target with a weapon attack and has advantage on the attack roll, or when the target is within 5 feet of an ally of the thief that isn’t incapacitated and the thief doesn’t have disadvantage on the attack roll.

Actions

Multiattack. The thief makes three attacks with its shortsword.

Shortsword. Melee Weapon Attack: +7 to hit, reach 5 ft., one target. Hit: 7 (1d6 + 4) piercing damage.

Light Crossbow. Ranged Weapon Attack: +7 to hit, range 80/320 ft., one target. Hit: 8 (1d8 + 4) piercing damage.

Reactions

Uncanny Dodge. The thief halves the damage that it takes from an attack that hits it. The thief must be able to see the attacker.


SAHUAGIN BLADEMASTER

Medium humanoid (sahuagin), lawful evil


  • Armor Class 20 (plate armor and shield)
  • Hit Points 97 (15d8 + 30)
  • Speed 30 ft., swim 40 ft.

STR DEX CON INT WIS CHA
16 (+3) 12 (+1) 14 (+2) 12 (+1) 11 (+0) 12 (+1)

  • Saving Throws Str +6, Con +5
  • Skills Athletics +6, Intimidation +4
  • Senses darkvision 120 ft., passive Perception 10
  • Languages Sahuagin
  • Challenge 6 (2,300 XP)

Blood Frenzy. The blademaster has advantage on melee attack rolls against any creature that doesn’t have all its hit points.

Limited Amphibiousness. The blademaster can breathe air and water, but it needs to be submerged at least once every 4 hours to avoid suffocating.

Shark Telepathy. The blademaster can magically command any shark within 120 feet of it, using a limited telepathy.

Actions

Multiattack. The blademaster makes three attacks with its wavecutter blade, or one attack with its bite and two with its claws.

Wavecutter Blade. Melee Weapon Attack: +6 to hit, reach 5 ft., one target. Hit: 12 (2d8 + 3) slashing damage.

Bite. Melee Weapon Attack: +6 to hit, reach 5 ft., one target. Hit: 8 (1d10 + 3) piercing damage.

Claws. Melee Weapon Attack: +6 to hit, reach 5 ft., one target. Hit: 7 (1d8 + 3) slashing damage.


SAHUAGIN HIGH PRIESTESS

Medium humanoid (sahuagin), lawful evil


  • Armor Class 14 (natural armor)
  • Hit Points 71 (11d8 + 22)
  • Speed 30 ft., swim 40 ft.

STR DEX CON INT WIS CHA
14 (+2) 12 (+1) 14 (+2) 12 (+1) 16 (+3) 10 (+0)

  • Saving Throws Wis +6
  • Skills Insight +6, Perception +6
  • Senses darkvision 120 ft., passive Perception 16
  • Languages Sahuagin
  • Challenge 5 (1,800 XP)

Blood Frenzy. The blademaster has advantage on melee attack rolls against any creature that doesn’t have all its hit points.

Limited Amphibiousness. The blademaster can breathe air and water, but it needs to be submerged at least once every 4 hours to avoid suffocating.

Shark Telepathy. The blademaster can magically command any shark within 120 feet of it, using a limited telepathy.

Spellcasting. The high priestess is a 7th-level spellcaster. Her spellcasting ability is Wisdom (spell save DC 14, +6 to hit with spell attacks). She has the following cleric spells prepared:

Cantrips (at will): guidance, mending, resistance, thaumaturgy

1st level (4 slots): bless, detect magic, guiding bolt

2nd level (3 slots): hold person, spiritual weapon (trident)

3rd level (3 slots): bestow curse, fear, mass healing word, tongues

4th level (1 slots): banishment

Actions

Multiattack. The high priestess makes two attacks with her toothsome staff, or one attack with her bite and one with her claws.

Toothsome Staff. Melee Weapon Attack: +5 to hit, reach 5 ft., one target. Hit: 11 (2d8 + 2) piercing damage.

Bite. Melee Weapon Attack: +6 to hit, reach 5 ft., one target. Hit: 8 (1d10 + 3) piercing damage.

Claws. Melee Weapon Attack: +6 to hit, reach 5 ft., one target. Hit: 7 (1d8 + 3) slashing damage.


SWASHBUCKLER

Medium humanoid (any race), any non-lawful alignment


  • Armor Class 17 (leather armor)
  • Hit Points 66 (12d8 + 12)
  • Speed 30 ft.

STR DEX CON INT WIS CHA
12 (+1) 18 (+4) 12 (+1) 14 (+2) 11 (+0) 15 (+2)

  • Skills Acrobatics +8, Athletics +5, Persuasion +6
  • Senses passive Perception 10
  • Languages any one language (usually Common)
  • Challenge 3 (700 XP)

Lightfooted. The swashbuckler can take the Dash or Disengage action as a bonus action on each of its turns.

Suave Defense. While the swashbuckler is wearing light or no armor and wielding no shield, its AC includes its

Actions

Multiattack. The swashbuckler makes three attacks: one with a dagger and two with its rapier.

Dagger. Melee or Ranged Weapon Attack: +6 to hit, reach 5 ft. or range 20/60 ft., one target. Hit: 6 (1d4 + 4) piercing damage.

Rapier. Melee Weapon Attack: +6 to hit, reach 5 ft., one target. Hit: 8 (1d8 + 4) piercing damage.


SWORD WRAITH COMMANDER

Medium undead, lawful evil


  • Armor Class 18 (breastplate, shield)
  • Hit Points 127 (15d8 + 60)
  • Speed 30 ft.

STR DEX CON INT WIS CHA
18 (+4) 14 (+2) 18 (+4) 11 (+0) 12 (+1) 14 (+2)

  • Skills Perception +4
  • Damage Resistances necrotic; bludgeoning, piercing, and slashing from nonmagical attacks
  • Damage Immunities poison
  • Condition Immunities exhaustion, frightened, poisoned, unconscious
  • Senses darkvision 60 ft., passive Perception 14
  • Languages the languages it knew in life
  • Challenge 8 (3,900 XP)

Martial Fury. As a bonus action, the sword wraith can make one weapon attack, which deals an extra 9 (2d8) necrotic damage on a hit. If it does so, attack rolls against it have advantage until the start of its next turn.

Turning Defiance. The sword wraith and any other sword wraiths within 30 feet of it have advantage on saving throws against effects that turn undead.

Actions

Multiattack. The sword wraith makes two weapon attacks.

Longsword. Melee Weapon Attack: +7 to hit, reach 5 ft., one target. Hit: 8 (1d8 + 4) slashing damage, or 9 (1d10 + 4) slashing damage if used with two hands.

Longbow. Ranged Weapon Attack: +5 to hit, range 150/600 ft., one target. Hit: 6 (1d8 + 2) piercing damage.

Call to Honor (1/Day). To use this action, the sword wraith must have taken damage during the current combat. If the sword wraith can use this action, it gives itself advantage on attack rolls until the end of its next turn, and 1d4 + 1 sword wraith warriors appear in unoccupied spaces within 30 feet of it. The warriors last until they drop to 0 hit points, and they take their turns immediately after the commander’s turn on the same initiative count.


SWORD WRAITH WARRIOR

Medium undead, lawful evil


  • Armor Class 16 (chain shirt, shield)
  • Hit Points 45 (6d8 + 18)
  • Speed 30 ft.

STR DEX CON INT WIS CHA
18 (+4) 12 (+1) 17 (+3) 6 (-2) 9 (-1) 10 (+0)

  • Damage Resistances necrotic; bludgeoning, piercing, and slashing from nonmagical attacks
  • Damage Immunities poison
  • Condition Immunities exhaustion, frightened, poisoned, unconscious
  • Senses darkvision 60 ft., passive Perception 9
  • Languages the languages it knew in life
  • Challenge 3 (700 XP)

Martial Fury. As a bonus action, the sword wraith can make one weapon attack, which deals an extra 9 (2d8) necrotic damage on a hit. If it does so, attack rolls against it have advantage until the start of its next turn.

Actions

Longsword. Melee Weapon Attack: +6 to hit, reach 5 ft., one target. Hit: 8 (1d8 + 4) slashing damage, or 9 (1d10 + 4) slashing damage if used with two hands.

Longbow. Ranged Weapon Attack: +3 to hit, range 150/600 ft., one target. Hit: 5 (1d8 + 1) piercing damage.


WAR PRIEST

Medium humanoid (any race), any alignment


  • Armor Class 18 (plate)
  • Hit Points 117 (18d8 + 36)
  • Speed 30 ft.

STR DEX CON INT WIS CHA
16 (+3) 10 (+0) 14 (+2) 11 (+0) 17 (+3) 13 (+2)

  • Saving Throws Con +6, Wis +7
  • Skills Intimidation +5, Religion +4
  • Senses passive Perception 13
  • Languages any two languages
  • Challenge 9 (5,000 XP)

Spellcasting. The priest is a 9th-level spellcaster. Its spellcasting ability is Wisdom (spell save DC 15, +7 to hit with spell attacks). It has the following cleric spells prepared:

Cantrips (at will): light, mending, sacred flame, spare the dying

1st level (4 slots): divine favor, guiding bolt, healing word, shield of faith

2nd level (3 slots): lesser restoration, magic weapon, prayer of healing, silence, spiritual weapon

3rd level (3 slots): beacon of hope, crusader’s mantle, dispel magic, revivify, spirit guardians, water walk

4th level (3 slots): banishment, freedom of movement, guardian of faith, stoneskin

5th level (1 slot): flame strike, mass cure wounds, hold monster

Actions

Multiattack. The priest makes two melee attacks.

Maul. Melee Weapon Attack: +7 to hit, reach 5 ft., one target. Hit: 10 (2d6 + 3) bludgeoning damage.

Reactions

Guided Strike (Recharges after a Short or Long Rest). The priest grants a +10 bonus to an attack roll made by itself or another creature within 30 feet of it. The priest can make this choice after the roll is made but before it hits or misses.


WOOD WOAD

Medium plant, lawful neutral


  • Armor Class 18 (natural armor, shield)
  • Hit Points 75 (10d8 + 30)
  • Speed 30 ft., climb 30 ft.

STR DEX CON INT WIS CHA
18 (+4) 12 (+1) 16 (+3) 10 (+0) 13 (+1) 8 (+4)

  • Saving Throws Athletics +7, Perception +4, Stealth +4
  • Damage Vulnerabilities fire
  • Damage Resistances bludgeoning, piercing
  • Condition Immunities charmed, frightened
  • Senses darkvision 60 ft., passive Perception 14
  • Languages Sylvan
  • Challenge 5 (1,800 XP)

Magic Club. In the wood woad’s hand, its club is magical and deals 7 (3d4) extra damage (included in its attacks).

Plant Camouflage. The wood woad has advantage on Dexterity (Stealth) checks it makes in any terrain with ample obscuring plant life.

Regeneration. The wood woad regains 10 hit points at the start of its turn if it is in contact with the ground. If the wood woad takes fire damage, this trait doesn’t function at the start of the wood woad’s next turn. The wood woad dies only if it starts its turn with 0 hit points and doesn’t regenerate.

Tree Stride. Once on each of its turns, the wood woad can use 10 feet of its movement to step magically into one living tree within 5 feet of it and emerge from a second living tree within 60 feet of it that it can see, appearing in an unoccupied space within 5 feet of the second tree. Both trees must be Large or bigger.

Actions

Multiattack. The wood woad makes two attacks with its club.

Club. Melee Weapon Attack: +7 to hit, reach 5 ft., one target. Hit: 14 (4d4 + 4) bludgeoning damage.

Appendix B

Sidekicks

This appendix presents the game statistics for sidekicks, of which there are three types:

  • Expert, an agile and exceedingly helpful jack of all trades
  • Spellcaster, a magic-user who can cast spells to harm your foes or heal you and your friends
  • Warrior, a martial companion who specializes in striking your foes or defending you and your allies

You can tell the players which type of sidekick to use or let the players choose. It’s up to you and the players to decide who controls the sidekick in play.

If the characters have already played through Storm Lord's Wrath, they can use the same sidekicks from that adventure. This appendix can also help you level up those sidekicks.

Sidekick Cards


DONNABELLA FIASCO

Human Spellcaster


Donnabella is a young magic-user who wears a papier-mâché unicorn mask because it makes her feel more magical.

Use the Spellcaster sidekick stat block to represent her.

Personality. “I’d rather talk to a book than most people.”

Ideal. “We all have a little magic in us. The trick is finding it and bringing it forth.”

Bond. “I want to join a prestigious wizards’ academy one day. I just hope they accept unicorns!”

Flaw. “I can’t keep a secret to save my life—or anyone else’s.”


GALANDRO LUNA

Human Expert


Galandro’s most treasured possession is a fiddle that he tunes and plucks constantly.

Use the Expert sidekick stat block to represent him.

Personality. “I love a good insult, even one directed at me.”

Ideal. “I like seeing the smiles on people’s faces when I perform. That plus their adoration is all that matters.”

Bond. “My fiddle was gifted to me by a good friend. I cherish it above all other things.”

Flaw. “I’ll do anything to win fame and renown.”

(bottom center)


INVERNA NIGHTBREEZE

Moon Elf Warrior


Inverna has a scar on her cheek where she was grazed by an orc’s javelin. She is cautious by nature and suspicious of strangers.

Use the Warrior sidekick stat block to represent her.

Personality. “I choose my words very carefully. Sarcasm, I’m told, is my sharpest weapon.”

Ideal. “All people deserve to be treated with dignity, regardless of their station. Of course, orcs aren’t people.”

Bond. “Orcs are a blight on the land. For the sake of the natural and civilized worlds, I kill them on sight.”

Flaw. “I can’t admit when I’m wrong.”


NIB ADDLESPIR

Lightfoot Halfling Spellcaster


Nib is a happy-go-lucky gambler who keeps a deck of Three-Dragon Ante cards in her vest pocket. She also has a goldfinch named Lil.

Use the Spellcaster sidekick stat block to represent her.

Personality. “I can’t resist a sure bet or a friendly wager.”

Ideal. “The more complicated the scheme, the better.”

Bond. “I love birds and will do what I can to look after them.”

Flaw. “Deep water terrifies me. I would rather be swallowed by a dragon than get in a boat or go for a swim.”


PICKLED PETE

Human Expert


Pete likes ale and tends to function better while tipsy. At his best, he’s quite the handyman and comes up with all sorts of crazy ways to get things done.

Use the Expert sidekick stat block to represent him.

Personality. “My friends know they can rely on me, no matter what.”

Ideal. “I like coming up with new ways to do things. What problem can’t be solved with a little ingenuity?”

Bond. “A full flask of wine is worth ten pockets full of gold.”

Flaw. “All this drinking is bad for my memory. Seriously, I can’t remember my last name.”


QUINN HIGHTOPPLE

Lightfoot Halfling Warrior


Quinn is a happy little scrapper who likes to punch people in the groin.

Use the Warrior sidekick stat block to represent him.

Personality. “Nice set of teeth you got there. Be a shame if something bad happened to ’em.”

Ideal. “No challenge is too big to overcome. As Papa Bartho always says, the bigger they are, the harder they fall.”

Bond. “Nothing’s more important than friendship. That’s why I’ll never leave a friend behind.”

Flaw. “I can’t resist punching tall folk in the groin. I call it the Halfling Hello.”


RUBY HAMMERWHACKER

Shield Dwarf Warrior


Ruby lacks the customary dwarven stoicism and greets every day with a warm smile and a renewed sense of optimism.

Use the Warrior sidekick stat block to represent her.

Personality. “Nothing can shake my optimistic attitude.”

Ideal. “We should all seek the betterment of ourselves. There’s always room for improvement.”

Bond. “I fight for those who cannot fight for themselves”

Flaw. “Tell me I can’t do something, and I must prove you wrong.”


SHANJAN KWAN

Human Spellcaster


Kwan died and was raised from the dead as an infant, whereupon a tiny black glyph—the symbol of necromancy—appeared on his forehead.

Use the Spellcaster sidekick stat block to represent him.

Personality. “I’ve cheated death once. I can do it again.”

Ideal. “Great beauty can hide great ugliness. The reverse is also true.”

Bond. “I’ve been searching my whole life for the answer to a simple question: Am I a god?”

Flaw. “I don’t like mysteries. Unraveling them keeps me up at night.”


TALON THORNWILD

Human Expert


Talon loves gold and adventure, and dreams of being a famous gold prospector.

Use the Expert sidekick stat block to represent him.

Personality. “Yes, I eat like a pig and have bad manners, but those are my only flaws, I swear. I’m darn near perfect otherwise.”

Ideal. “The low are lifted up, and the high and mighty are brought down. Change is the nature of things.”

Bond. “I like gold. I like its color, its texture, its majestic gleam.”

Flaw. “It’s not stealing if I need it more than someone else.”

Sidekick Stat Blocks

The following stat blocks work with any character race. If you and the DM agree, you may enhance your sidekick with the appropriate racial traits presented in chapter 2 of the Player’s Handbook.

Proficiencies

A sidekick is proficient with any armor, weapons, and tools included in its stat block. In addition, experts are proficient with simple weapons, rapiers, shortswords, and light armor; spellcasters are proficient with simple weapons and light armor; and warriors are proficient with simple and martial weapons, shields, and all armor.

Sidekick Level

In this adventure a sidekick starts as a 9th-level character. As the characters and sidekick adventure together, the sidekick gains experience points and reaches new levels the same way a player character does, using the rules in the Player’s Handbook.

When a sidekick gains a level, look at the sidekick’s table below, and consult the new level’s row, which shows the sidekick’s new hit point maximum and features.


EXPERT

9th-level Medium humanoid


  • Armor Class 16 (studded leather)
  • Hit Points 55 (10d8 +10)
  • Speed 30 ft.

STR DEX CON INT WIS CHA
10 (+0) 18 (+4) 12 (+1) 14 (+2) 10 (+0) 14 (+2)

  • Saving Throws Dex +8
  • Skills Acrobatics +10, Performance +6, Persuasion +6, Sleight of Hand +8, Stealth +12
  • Senses passive Perception 10
  • Languages Common, plus one of your choice

Helpful. The expert can take the Help action as a bonus action, and the creature who receives the help gains a 1d6 bonus to the d20 roll. If that roll is an attack roll, the creature can forgo adding the bonus to it, and then if the attack hits, the creature can add the bonus to the attack’s damage roll against one target.

Evasion. When the expert is not incapacitated and subjected to an effect that allows it to make a Dexterity saving throw to take only half damage, it instead takes no damage if it succeeds on the saving throw, and only half damage if it failed.

Tools. The expert has thieves’ tools and a musical instrument.

Actions

Extra Attack. The expert can attack twice, instead of once, whenever it takes the attack action on its turn.

Shortsword. Melee Weapon Attack: +8 to hit, reach 5 ft., one target. Hit: 7 (1d6 + 4) piercing damage.

Dagger. Melee or Ranged Weapon Attack: +8 to hit, reach 5 ft. or range 20/60 ft., one target. Hit: 6 (1d4 + 4) piercing damage.

Shortbow. Ranged Weapon Attack: +8 to hit, range 80/320 ft., one target. Hit: 7 (1d6 + 4) piercing damage.


SPELLCASTER (HEALER)

9th-level Medium humanoid


  • Armor Class 13 (studded leather)
  • Hit Points 45 (10d8)
  • Speed 30 ft.

STR DEX CON INT WIS CHA
10 (+0) 12 (+1) 10 (+0) 15 (+2) 18 (+4) 13 (+1)

  • Saving Throws Wis +8
  • Skills Arcana +6, Investigation +6, Religion +6
  • Senses passive Perception 14
  • Languages Common, plus one of your choice

Potent Cantrip. The spellcaster can add its spellcasting ability modifier to the damage it deals with any cantrip.

Spellcasting (Healer). The spellcaster’s spellcasting ability is Wisdom (spell save DC 16, +8 to hit with spell attacks). The spellcaster has following cleric spells prepared:

Cantrips (at will): guidance, light, resistance, sacred flame

1st level (4 slots): bless, cure wounds, shield of faith

2nd level (3 slots): aid, lesser restoration

3rd level (3 slots): protection from energy, revivify

4th level (3 slots): banishment, death ward

5th level (1 slot): greater restoration

Actions

Quarterstaff. Melee Weapon Attack: +4 to hit, reach 5 ft., one target. Hit: 3 (1d6) bludgeoning damage, or 4 (1d8) bludgeoning damage if used with two hands.


SPELLCASTER (MAGE)

9th-level Medium humanoid


  • Armor Class 13 (studded leather)
  • Hit Points 45 (10d8)
  • Speed 30 ft.

STR DEX CON INT WIS CHA
10 (+0) 12 (+1) 10 (+0) 18 (+4) 14 (+2) 14 (+2)

  • Saving Throws Wis +6
  • Skills Arcana +8, Investigation +8, Religion +8
  • Senses passive Perception 12
  • Languages Common, plus one of your choice

Potent Cantrip. The spellcaster can add its spellcasting ability modifier to the damage it deals with any cantrip.

Spellcasting (Healer). The spellcaster’s spellcasting ability is Wisdom (spell save DC 14, +6 to hit with spell attacks). The spellcaster has following cleric spells prepared:

Cantrips (at will): fire bolt, light, mage hand, minor illusion

1st level (4 slots): burning hands, shield, sleep

2nd level (3 slots): flaming sphere, invisibility

3rd level (3 slots): fireball, fly

4th level (3 slots): polymorph, wall of fire

5th level (1 slot): cone of cold

Actions

Quarterstaff. Melee Weapon Attack: +4 to hit, reach 5 ft., one target. Hit: 3 (1d6) bludgeoning damage, or 4 (1d8) bludgeoning damage if used with two hands.


WARRIOR

9th-level Medium humanoid


  • Armor Class 20 (plate, shield)
  • Hit Points 65 (10d8 +20)
  • Speed 30 ft.

STR DEX CON INT WIS CHA
18 (+4) 14 (+2) 14 (+2) 10 (+0) 12 (+1) 10 (+0)

  • Saving Throws Con +6
  • Skills Athletics +8, Perception +5, Survival +5
  • Senses passive Perception 15
  • Languages Common, plus one of your choice

Battle Readiness. The warrior has advantage on initiative rolls.

Improved Critical. The warrior’s attack rolls score a critical hit on a roll of 19 or 20 on the d20.

Indomitable (1/Day). The warriorcan reroll a saving throw that it fails, but it must use the new result.

Martial Role. The warrior has one of the following traits of your choice:

  • Attacker. The warrior gains a +2 bonus to attack rolls.

  • Defender. The warrior gains the Protection reaction below.

Second Wind (Recharges after a Short or Long Rest). The warrior can use a bonus action on its turn to regain hit points equal to 1d10 + its level.

Actions

Extra Attack. The warrior can attack twice, instead of once, whenever it takes the attack action on its turn.

Longsword. Melee Weapon Attack: +8 to hit, reach 5 ft., one target. Hit: 8 (1d8 + 4) slashing damage, or 9 (1d10 + 4) slashing damage if used with two hands.

Longbow. Ranged Weapon Attack: +6 to hit, range 150/600 ft., one target. Hit: 6 (1d8 + 2) piercing damage.

Reactions

Protection (Defender Only). When a creature the warrior can see attacks a target other than the warrior that is within 5 feet of the warrior, the warrior can use their reaction to impose disadvantage on the attack roll. The warrior must be wielding a shield.

Experts Beyond 9th Level
Level Hit Points New Features
10th 60 (11d8 + 11) Ability Score Improvement. The expert’s Dex. score increases by 2, raising the modifier by 1,
so increase the following numbers by 1: the Dex. saving throw bonus; the Armor Class; the
Acrobatics, Sleight of Hand, and Stealth bonuses; and the bonuses to hit and damage of
the expert’s weapon attacks.
11th 66 (12d8 + 12)
Spellcasters Beyond 9th Level
Level Hit Points New Features
10th 49 (11d8) Empowered Spells. Choose one school of magic. Whenever the spellcaster casts a spell
of that school by expending a spell slot, the spellcaster can add its spellcasting ability
modifier to the spell’s damage roll or healing roll, if any.
Spellcasting. The spellcaster learns another cantrip: spare the dying (healer) or
shocking grasp (mage). The caster also gains one 5th‐level spell slot and learns one new
5th‐level spell: mass cure wounds (healer) or hold monster (mage).
11th 54 (12d8) Spellcasting. The spellcaster gains one 6th-level and learns one new 6th-level spell:
heal (healer) or chain lightning (mage).
Warriors Beyond 9th Level
Level Hit Points New Features
10th 71 (11d8 + 22) Improved Defense. The warrior’s AC increases by 1.
11th 78 (12d8 + 24) Extra Attack. The warrior can attack three times, instead of once,
whenever it takes the attack action on its turn.

Appendix C

Necromancer’s Journal

How does one woo a legendary dragon? Great treasure for certain. I wonder how Ebondeath might feel about the prospect of immortality.

Once my collegues in cultus draconis have prepared the proper rituals, we can take command of the wyrm and add its strength to our own. Then I, Ularan Mortus will command their respect as well as the fears of that pathetic alliance of lords.

If we can accomplish this, certainly no task shall be too great for a true devotee of the lord of bones. At that point, taking possession of the artefact from that ridiculous little berg of Leilon should be child’s play.

The dreadnaught grows restless. Emberlost seeks hopelessly to be reunited with his fallen homeland of Anauria. How does one ease the obsessive behaviors of eques mortem? Particularly in its current state?

[A note in the margin, written in a different hand]

Roadhouse? Could bard win him over?

Appendix D

Player Maps

Appendix E

Additional Locations

Locations not Described in this Adventure

The DM’s Sword Coast map on page 5 shows additional locations not detailed in this adventure, Most of them are from Dragon of Icespire Peak which can be found in the D&D Essential Kit; see that reference for additional information. Others can be found in Lost Mine of Phandelver, which can be found in the D&D Starter Set.

You may acquire access to those adventures from D&D Beyond. A short description is provided here for ease of reference.

Agatha's Lair

Agatha is an elven banshee with wizardry abilities. She is often seen roaming the region, and known to be very knowledgeable on the local history.

The lair is located a few miles northwest of Conyberry, at the edge of Neverwinter Wood. It it made of a simple screen of warped branches of trees standing close together, woven into a domelike shelter in the shadows, with a low doorway leading inside.

Axehome

Axeholm is a dwarven fortress carved into the base of a mountain fifteen miles south of Phandalin. The site was abandoned and sealed up long years ago after being haunted by a banshee. When the evil spirit started filling Axeholm's halls with deathly wails, the dwarves abandoned their stronghold.

Butterskull Ranch

Alfonse Kalazorn used to be the sheriff of Triboar. a town 40 miles to the east (see the adventure Princes of the Apocalypse for more information), where he was known as Big Al Kalazorn. He retired a decade ago, but retirement didn't sit well with him. Looking for a new challenge, he claimed a plot of fertile land five miles east of Conyberry and turned it into a cattle and horse ranch, a pig farm, chicken coops, vegetable gardens, corn fields, and an apple orchard. Most of his money comes from the sale of butter skulls lumps of butter cleverly molded into the shapes of humanoid skulls.

Circle of Thunder (*)

The circle of standing stones atop the hill has been known to help focus magic used to summon monsters of various sort.

Conyberry

The Triboar Trail runs right through this abandoned town, which was sacked by barbarians years ago and now lies in ruins. A dirt road extending south of the town leads to a supposedly abandoned shrine dedicated to Savras while a path leads northwest toward Agatha's Lair.

Cragmaw Castle

Though it has recently been occupied by the Cragmaw goblin tribe, Cragmaw Castle is not a goblin construction, nor is that the structure's original name. Raised by a talented wizard-noble of old Phalorm, an ancient realm that once controlled much of the North, the stronghold consists of seven overlapping towers; however, its upper levels have long since collapsed to heaps of crumbling masonry. Only the ground floor is still sound enough to be habitable.

Cragmaw Hideout

The Cragmaw tribe has established a hideout from which it can easily harass and plunder traffic moving along the Triboar Trail or the path to Phandalin. The Cragrnaw tribe is so named because each member of the tribe sharpens its teeth so they appear fierce and jagged. The hideout is a small complex of caves and passages on each side of a small stream bubbling out of the hillside.

Dragon Barrow

Lady Tanamere Alagondar was a royal scion of Neverwinter more than a century ago. Along with two parties of adventurers, she fought and killed Azdraka. a green dragon that had long terrorized the High Road. Lady Alagondar died in the battle and was laid to rest beneath a barrow near where the dragon fell. The remains of her fallen compatriots and the corpse of Azdraka were sealed in the barrow with her, in accordance with Lady Alagondar's dying wishes.

Dwarven Excavation

This ancient dwarven settlement has been buried by an avalanche long ago. Behind the settlement, carved into the back wall of the canyon, an old temple of Abbathor, the evil dwarven god of greed, has recently been excavated.

Falcon's Hunting Lodge

This lodge is a sanctuary in the heart of Neverwinter Wood. Falcon the Hunter maintains this hunting lodge to cater to nobles from Neverwinter. He offers his services as a guide to those nobles, most of whom wouldn't last long in the forest without his protection and survival skills. Falcon abhors city life, preferring a rustic existence and simple pleasures. His lodge has all the creature comforts he requires, though he never turns down a good bottle of wine (or even a bad one) from a visitor.

Gnomengarde

The caves of Gnomengarde are carved into the base of a mountain southeast of Phandalin, around a narrow waterfall. The rock gnome wizards who occupy these caves form strategic alliances with their human and dwarf neighbors as needs warrant. Reclusive and secretive. the gnomes craft minor magic items and useful, nonmagical inventions to pass the time. In these endeavors, their failures outnumber their successes. They seldom stray far from home, subsisting largely on the mushrooms that grow on misty islands outside their caves.

Icespire Hold

lcespire Hold is a stone fortress perched on the icy northeast spur of lcespire Peak. A warlord named Delsendra Amzarr built the stronghold and dwelled there for many years while she and her soldiers kept the orcs of the Sword Mountains in check. When supply lines were cut off by heavy snow and blizzards during a brutal winter, Delsendra and her followers starved to death. Orcs later took over the fortress, which was damaged by an earthquake ten years ago and never repaired.

Logger's Camp

Years after the eruption of Mount Hotenow, the city of Neverwinter continues to rebuild itself after the destruction wrought by that event. Loggers have set up camps along the river that flows out of Neverwinter Wood, using the river to transport logs to the city.

Mountain's Toe Gold Mine

The mine is owned by a business consortium in Neverwinter and has been troubled by recent pro- ductivity problems.

Old Owl Well

Built thousands of years ago by a long-vanished empire, Old Owl Well is a ruined watchtower that now consists of little more than a few crumbling walls and the broken stump of a tower. In the tower's courtyard stands an old well that still delivers clean, fresh water. Old Owl Well lies in the wild and rugged hills south of the Triboar Trail. The site is relatively easy to find, and any inhabitants of the region can provide directions to the ruins.

Shrine to Savras

Five miles south of Conyberry is a shrine dedicated to Savras, god of divination and fate. Many years ago, the shrine's priest-seers foresaw a barbarian attack on Conyberry, giving the townsfolk time to escape. Not all the townsfolk chose to flee, but those who did went to the shrine and brought much of the town's gold with them. The barbarians eventually tracked the townsfolk to the shrine, besieged it, and slaughtered everyone inside.

The Crags

These rocky. windswept hills are dotted with old mines that have become infested with monsters.

Thundertree

Near the place where the Neverwinter River emerges from Neverwinter Wood stands the abandoned village of Thundertree. This once prosperous community on the outskirts of the forest has been destroyed following the eruption of Mount Hotenow thirty years ago. In the wake of the natural disaster, a plague of strange zombies swept over the area, killing or driving off those who survived the eruption. Though most of the zombies have long since crumbled to dust, strange magic permeating the area has mutated the local vegetation into new and dangerous forms. Few people dare to venture into the ruined village now, and those who do so seldom stay long.

Tower of Storms (*)

This lighthouse is built atop a barren, 80-foot-bigh outcropping of rock. At low tide, a narrow causeway extends from the shore to this outcropping, allowing easy access to the lighthouse. This causeway is 5 feet above sea level at low tide. At high tide, the causeway and the sandy beach arc submerged under 5 feet of water.

Umbrage Hill

Umbrage Hill got its name after two feuding dwarf clans fought a pitched battle atop it. The cause of their umbrage is a ta le lost to time, and on ly the cairns of the dead now remain. The stone windmill on the hill is a later addition. but is still more than a hundred years old. Adabra Gwynn, a midwife and apothecary devoted to Chaumea (goddess of agriculture), resides here.

Wave Echo Cave

Fifteen miles east of Phandalin, in the deep vales of the Sword Mountains, lies Wave Echo Cave. The rich mine of the Phandelver's Pact was lost five hundred years ago during ore invasions that devastated this part of the North. The pact was made between clans of dwarves and gnomes, by which they would share the mine riches and its great magical power. Human spellcasters allied themselves with the dwarves and gnomes to channel and bind that energy into a great forge (called the Forge of Spells), where magic items could be crafted. In the centuries since, countless prospectors and adventurers have searched for the lost mine, but none succeeded until the Rockseekers, three dwaren brothers, found the entrance in the recent years.

Woodland Manse (*)

Many years ago, a half-elf wizard interested in the exploration of ancient elven ruins built a stone house in Neverwinter Wood, not far from several ruins that piqued her interest. In the course of her explorations, the wizard disappeared, and the protective magical wards on her home expired. The house fell into disrepair, then eventually into ruin. Ivy has all but engulfed it in the years since.

Wyvern Tor

This crag is a prominent landmark in the rugged hills northeast of the Sword Mountains, and is easily visible from twenty miles away. People traveling along the Triboar Trail in the vicinity of Conyberry catch glimpses of Wyvern Tor to the south as they go. The tor was formerly the home of a large and dangerous nest of wyverns, but a band of bold adventurers dealt with the monsters years ago. Though the wyverns never returned, other creatures lair here from time to time. Wyvern Tor's current squatters include a band of ores and their ogre ally.

(*) Notes

In Dragon of Icespire Peak, these locations form part of quests involving anchorites of Talos.

The

Adventure

Continues

Despite the depredations of those in the service of the Stormlord Talos, citizens of Neverwinter continue their work to rebuild the town of Leilon and reestablish it as a fortified waypoint on the High Road between Neverwinter and Waterdeep.

However, to make matters worse, a cadre of villains devoted to both Myrkul, god of death and the Cult of the Dragon, have risen from the Mere of Dead Men to strike out as well.

A D&D 5E adventure for 9th-level characters

PDF created by phixium
Original version available online on D&D Beyond

Adventure Credits
  • Story Creators: Bill Benham, Christopher Lindsay
  • Story Consultant: Christopher Perkins
  • Lead Designer: James Introcaso
  • Developers: Will Doyle, Shawn Merwin
  • Editors: Hannah Rose
  • Managing Editor: Christopher Lindsay
  • Graphic Designer: Rich Lescouflair
  • Illustrators: Eric Belisle, Olga Drebas, Claudio Pozas, Ned Rogers, Cory Trego-Erdner
  • Cartographers: Stacey Allen, Will Doyle
  • Playtest Coordinator: Bill Benham
Art Credits
  • Cover Art: Ulisses Spiele
  • Sword Coast Map: Mike Schley with additions by u/MetalGearHorus, u/Waistel and u/vinternet
  • Adventure Background Art: D&D Sword Coast Adventurer's Guide Cover Art
  • Quest Board: Felipe Gaona
  • Claugiyliamatar and Crystal Ball: Forgotten Realms Wiki on Fandom
  • Dragon Hoard: Unknown
  • Deathlock: Reign of Darkness' Deathlock, on the Obsidian Portal Wiki
  • Ghost Ship: Krystian Biskup
  • Chimera: Wizards of the Coast
  • Marshland: Lyno3ghe
  • Salt Cave Picture: Weshm Island (Iran), (C)Tasnim News
  • Ending the Adventure: Wizards of the Coast
  • Giant Skeleton: PabloQ
  • Zombie Horde: Peter Mohrbacher
  • Master Thief: Satibalzane
  • Sahuagin: Wizards of the Coast
  • Sidekicks Siblings: B-Dunn
  • Leather Book: LadnostyLeathercraft on Etsy
  • Map Table: Cloth Map on Geekify Web Site
  • Appendix E Art: Cover for Lost Mine of Phandelver
  • Other Art: Original Adventure Illustrators (see above)
Other Adventures in the Trilogy