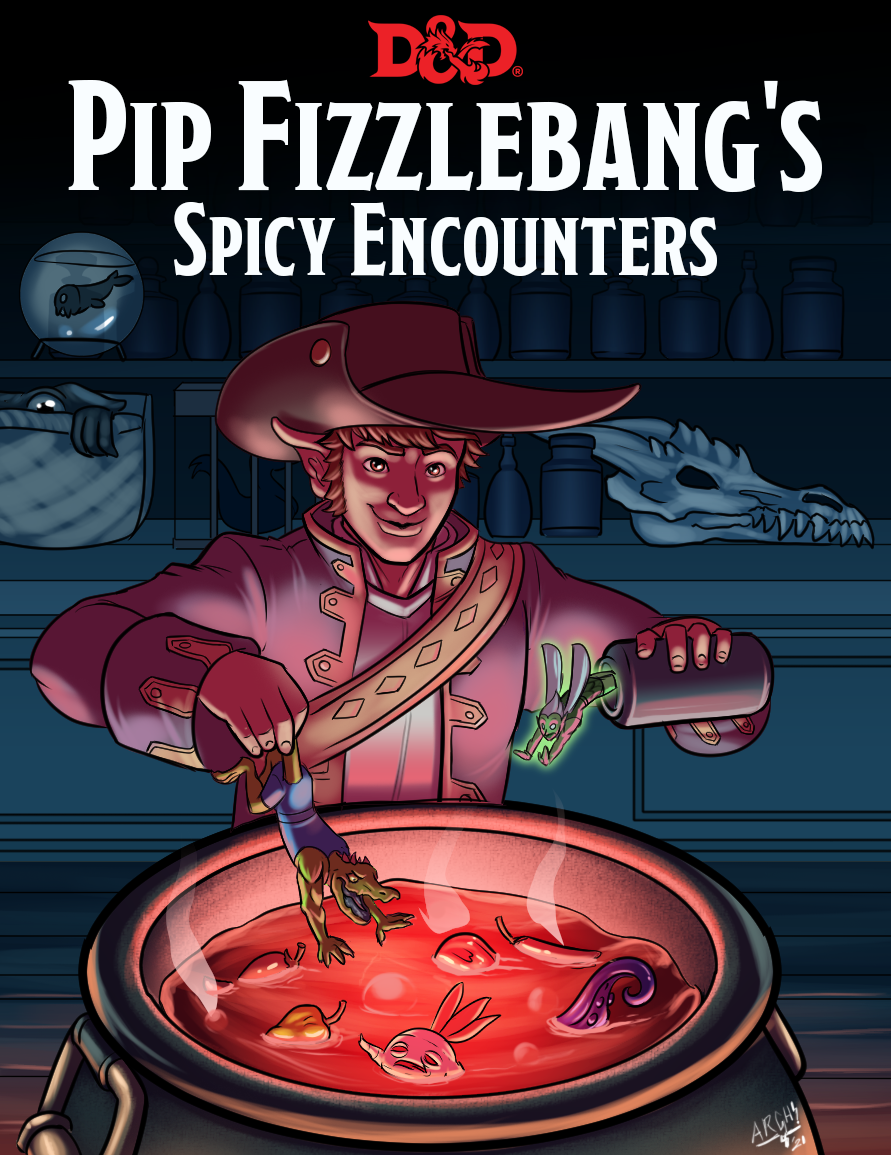
Volume 2
FREE PREVIEW
To get the full book, click here
D&D 5e Compendium of prewritten Encounters with Round by Round Tactics to Make your Fights Spicy!
Introduction
Tired of random encounter tables leaving you disappointed in their genericness? Have some veterans in your party, not challenged by prewritten hordes of mooks? Just want to feel like your monsters were actually worth the XP they gave?
Well this book is for you! These single encounters can be introduced as random encounters, side quests, boss fights, or even to fill rooms in your dungeon. Just pick a recipe, and get to cookin!
An Encounter Recipe?
Rather than limit these encounters to a particular to the level and number of characters in your party, these encounters focus on strategy the enemy uses and how to combine monster's abilities in interesting (and challenging) ways. When my recipe says "1 Ogre, 4 goblins", you should think of it as roughly a 1 to 4 ratio of Ogres to Goblins, but feel free to add more or less to fit your party's dietary needs!
On that note, Most of my encounters will even give guidelines on how to scale the encounter up for more players or higher levels, but I still can't possibly know what your party's real strength is. If you have them kitted to kill zombies, for example, and you throw them into my Zombie Zoo, take that into consideration when deciding how to scale them.
Spiciness?
Spiciness describes the synergy between the creatures in an encounter. For example, a CR 1/4 and a CR 2 creature doesn't sound like a threat to a level 10 party member. But if that party member is low on health, and that CR1/4 can cast Sleep, then the CR2 Intellect Devourer can insta-kill it with one intelligence check. Because of that, Intellect Devourers are very spicy when combo'd with anything that can stun, sleep, or otherwise leave someone Incapacitated. Here's a breakdown of my system:
| Spiciness | Meaning |
|---|---|
| 1-2 | The abilities of these creatures do not synergize in any meaningful way. I won't waste my time writing any of these for this book. |
| 3 | These creatures have some light synergy in their abilities that makes for a unique tactical approach. Expect the party to think that their opponents were clever in how they used their skills, but not that it will make the encounter much harder. |
| 4 | Enough synergy that players will need to bring some tactics of their own if they want to all come out alive. Expect some downed players. |
| 5 | This encounter involves insta-kill abilities, AoEs, or combinations so effective that a TPK is more likely than if you used random creatures of equal CR. Bossfight Material. |
Table of Contents
Encounters (Bold = Included in Preview)
- The Aria Spectre
- Nilbog's Whack-A-Booyagh!
- Florabarian
- Star Shinobi
- Special Leigh, The Wizard
- Mimics Among Us
- The Evil Under (Demons of the Sea)
- The Orcs of Yurtrus
- The Hellhive Queen (Hellwasps revisted!)
- Little Dragons (Kobolds)
- Hobgoblin Ambush
- The Dire Owlbear
- Corrosive Cube
- The Cackling Gnolls
- Ogre-Kill
- Ankheg Assault
Thank You Page!
THIS IS A PREVIEW
While this book's table of contents shows the full book's contents, only a portion of it is viewable in this document.
Get The Full Book here:
ko-fi.com/pipfizzlebang
The Aria Spectre
Thanks to @TheOperaGeek for sponsoring this encounter!
Spiciness: 5/5 (Boss Fight)
This performance is deadly; your players will need strategy to survive.
Feeds about 3-5 players, level 4-6
Scales for: Number of Players, Player Level
Ingredients:
Stat blocks are on the next page or Monster Manual!
- The Aria Spectre
- X Stage Hands (One Per Player)
- X Will-o-Wisps (One for every level over 4)
Scale the Save DCs: At level 6, add +1 to their Save DCs.
Preparation
The Aira Spectre is a hauntingly beautiful spectre. In life, she was the center of the show, and in death-- she refuses to yield the stage. After all-- the show must go on!
Based on the Banshee and Shadow statblocks, these two custom creatures have been modified to more perfectly compliment each other, with the Aria acting as a soloist performing massive AoEs attacks and debuffs, while the stage-hands remain hidden and protect her. At higher levels, I've added Will-O-Wisps to add an additional threat to the players, forcing them
Cooking the Will-O-Wisps
Round 1+: The role of the Will-o-Wisps in this fight is partially asthetic (I loved the idea of floating lights on the stage), and partly for their Consume Life ability. Consider keeping them invisible until someone drops to 0 (which may be immediately due to Killing Aria). Then, consume life as a bonus action and use your action to return to invisibility.
Defensive Note: Be sure to end their turns away from visible creatures to avoid them getting hit by a fireball while invisible! If they take any damage, they're likely to lose concentration on their Invisibility (+0 Con Save) or just perish outright (they only have 22hp)
Cooking the Stage Hands
Round 1+: The Stage Hands have 3 jobs, keep Aria well-lit, remain in the shadows, and prevent people from stopping the show! Keep Cue Lights on Aria, try to use Fly Rigging to prevent melee people from getting close to her by hoisting them in the air, or finish off downed party members.
Reactions: Always try to end your turn next to party members to get the most use out of The Show Must Go On!
Don't forget! If you're not in bright light, use Preserve Immersion to stay Hidden. Otherwise, you must move to an area that isn't brightly lit. (After all, stage hands are not meant to be seen in the show!)
Cooking the Aria Spectre
Round 1: If she's in bright light, she can use her Killing Aria (which is her best ability). If your Stage Hands have used Cue Lights on her, or you can simply move to bright light, then do that. Otherwise, fly upwards and use your Tessitura to do a little damage. While it may be tempting to Coloratura, your Aria will damage all of them, so it would end the effect if used before that.
Round 2: If you've used your Killing Aria, use your Coloratura now to prevent the remaining party members from healing them (and giving your stagehands / will-o-wisps time to finish them off), using your bonus action for Arcane Crescendo. Otherwise, definitely use your Killing Aria now!
Round 3+: By now, it should be a cleanup job: Either the party has gotten lucky on their saves and avoided the worst of Killing Aria, or the party is in dire shapes. Either way, the strategy is the same: Keep your Coloratura active (it's concentration & recharges on 6), and throw in some extra damage through Tessitura when you have a free action.
When you reach 0HP for the first time: Your Cadenza activates, recharges all your abilities, and gives you an immediate action. If you're brightly lit, use Killing Aria. Otherwise, Coloratura might be enough to keep you alive until the start of your next turn.
Note on Cue Lights: Since your spotlight follows you, you can position yourself better before using Killing Aria to hit more party members, but be careful with your movement. You could accidentally reveal the location of the stage-hands by moving through them (and thus, brightly lighting them).
Aria Spectre
Medium undead, chaotic evil
- Armor Class 12
- Hit Points 58 (13d8)
- Speed 0 ft., fly 40 ft. (hover)
STR DEX CON INT WIS CHA 1 (-5) 14 (+2) 10 (+0) 12 (+1) 11 (+0) 17 (+3)
- Saving Throws Wis +2, Cha +5
- Skills Performance +7 (expertise)
- Damage Resistances acid, fire, lightning, cold, psychic; bludgeoning, piercing, and slashing from nonmagical attacks
- Damage Immunities necrotic, poison
- Condition Immunities charmed, exhaustion, frightened, grappled, paralyzed, petrified, poisoned, prone, restrained
- Senses darkvision 60 ft., passive Perception 10
- Languages Common, 2 it knew from life
- Challenge 4 (1,100 XP) Proficiency Bonus +2
Care Selve. Aria has resistance to Psychic Damage.
Incorporeal Movement. Aria can move through other creatures and objects as if they were difficult terrain. She takes 5 (1d10) force damage if she ends her turn inside an object.
Arcane Crescendo: While concentrating on a spell, the Aria may use a Bonus Action to continue singing the vocal components of that spell. Until the start of her next turn, creatures have Disadvantage on their saves against it.
Cadenza. When Aria would be reduced to 0hp for the first time, she is instead reduced to 1hp. Her abilities recharge, and she may immediately take an action.
Actions
Thunderous Tessitura. Aria projects a violent vocalization. Ranged Spell Attack: +4 to hit, 30ft range, one target. Hit: 12 (3d6 + 2) Thunder damage.
Coloratura. (Recharge 6) Aria may cast Hypnotic Pattern without a spell slot. When doing so, you sing until the start of your next turn, and the spell is centered upon you and does not effect Undead.
Killing Aria (1/day). Aria releases a powerful solo performance, provided that she is in bright light. This song has no effect on constructs and undead. All other creatures within 30 feet of her that can hear her must make a DC 13 Constitution saving throw. On a failure, a creature drops to 0 hit points. On a success, a creature takes 10 (3d6) psychic damage. Aria continues singing until the start of her next turn.
Stage Hand
Medium undead, chaotic evil
- Armor Class 12
- Hit Points 16 (3d8 + 3)
- Speed 40 ft.
STR DEX CON INT WIS CHA 6 (-2) 14 (+2) 13 (+1) 6 (-2) 10 (+0) 8 (-1)
- Skills Stealth +6 (expertise)
- Damage Vulnerabilities radiant
- Damage Resistances acid, cold, fire, lightning, thunder; bludgeoning, piercing, and slashing from nonmagical attacks
- Damage Immunities necrotic, poison
- Condition Immunities exhaustion, frightened, grappled, paralyzed, petrified, poisoned, prone, restrained
- Senses darkvision 60 ft., passive Perception 10
- Languages common, Thieve's Cant (theatre jargon)
- Challenge 1/2 (100 XP) Proficiency Bonus +2
Preserve Immersion. While in dim light or darkness, the shadow can take the Hide action as a bonus action. If a creature is singing or performing, they have advantage on this check.
Stage Fright. While in bright light, the stage hand is Frightened. While The Stage is frightened, it must use its movement to head towards dim lighting or darkness, if possible.
Actions
Cue Lights. The Stage Hand targets a creature it can see within 60ft. While the Stage Hand maintains concentration, that creature's space is brightly lit by magic, and the surrounding 20ft radius around it becomes dimly light (even if it was brightly lit before).
Fly-Rigging. Melee Weapon Attack: +4 to hit, reach 5 ft., one creature. Hit: 9 (2d6 + 2) piercing damage, and the creature is Restrained. While Restrained in this way, they are hoisted 10ft off the ground via rope, which can be severed (AC 10, HP 5).
"Good Luck!". The Stage Hand casts Bane against a creature by wishing it luck.
Reactions
The Show Must Go On. When a creature adjacent to the Stage Hand would target a singing or performing creature with an attack or spell, the Stage Hand may use Fly Rigging against that creature.
Nilbog's Whack-A-Booyagh!
Thanks to @Goblins_Mordor for sponsoring this encounter!
Spiciness: 5/5
Feeds about 3-5 players, level 5-8
Scales for: Number of Players, Player Level
Ingredients:
- Booyahg Wielder (VGM, Necklace of Fireballs, 1 bead, Possessed by Nilbog Spirit at start of battle)
- Booyahg Booyahg Booyahg (mage armor already cast)
- One Goblin per player.
Scaling for Level: For each level over 5, convert one Goblin to a Booyagh Wielder (Wand of Wonder). At Level 8, use Goblin Boss stat block for each (with Wands of Wonder)
Preparation
Usually, all you need to know about a monster (for combat) is in their stat block-- but the Nilbog is so sneaky and mischievous that one of it's most flavorful (and powerful) ability is actually on an entirely different page!
Nilbogism. A nilbog is an invisible spirit that possesses only goblins. Bereft of a host, the spirit has a flying speed of 30 feet and can't speak or be attacked. The only action it can take is to attempt to possess a goblin within 5 feet of it.
A goblin targeted by the spirit must succeed on a DC 15 Charisma saving throw or become possessed. While possessed by the spirit, the goblin's alignment becomes chaotic evil, its Charisma becomes 15 (unless it was already higher), and it gains the nilbog's Innate Spellcasting and Nilbogism traits, as well as its Reversal of Fortune reaction. If the save succeeds, the spirit can't possess that goblin for 24 hours. If its host is killed or the possession is ended by a spell such as hallow, magic circle, or protection from evil and good, the spirit searches for another goblin to possess. The spirit can leave its host at any time, but it won't do so willingly unless it knows there's another potential host nearby. A goblin stripped of its nilbog spirit reverts to its normal statistics and loses the traits it gained while possessed.
Things to know:
- The Nilbog doesn't die, it keeps fighting until it runs out of goblins to possess.
- It says that goblin gains those traits in addition to whatever it already had. Spellcaster goblin nilbog? Goblin boss Nilbog? If it's on a goblin stat block, the Nilbog can have it!
- Volo's says that the position of Jester is coveted-- it makes sense that the goblins may choose to let it possess them! If that's the case, forgo the Charisma Save.
Map Setting
The battle takes place on a trail with two very steep hills or otherwise difficult terrain on the sides of it, which is where all the goblins but the necklace-wielder are hiding. When not hidden, this rubble can provide partial cover for them, giving them +2 to AC and Dex Saves.
Pre-Battle
The Goblins are hiding, ready to play a deadly "prank" on passerbys. When the party approaches, have the Nilbog (dressed as a Jester), dancing in the middle of the road, alone. It pretends to not notice the party at first, but of course it already has (it only reveals itself if it sees the party).
It jumps and kicks its heels, causing its hat laden with bells to jingle, and its necklace of red pearls to bounce and shine. and asks the party, "What would a wizard want when wet, whenever weary, or while a whacko?" While the party tries to answer him, he stealthily reaches for the necklace (Perception or Insight DC 16 to notice). On failure, the party member is rightfully surprised that the Nilbog Wielder throws the bead at his own feet, hitting the entire party!
Note on Surprise: The Nilbog is taking an aggressive action here (throwing the beads), it cannot be done outside of combat. Instead, the party members who both are not surprised and roll higher than him on initiative will have a chance to stop him, or flee. If they try to damage him, they'll need to pass the Charisma Save, and even then he can negate the damage as a reaction! Don't let 'em stop you!
Cooking the Wielders
Round 1: The Nilbog wielder with the fireball necklace explodes it at his feet, hitting all the party members (ideally). He will not survive this. All other Wielders pop out of hiding, use the Wand of Wonder, and then Bonus action to hide again (make sure there's plenty of bushes/rubble on your map). Keep spread out-- these guys do not have much HP and one fireball or Sleep can do them in!
Round 2+: They continue the guerilla warfare, trying to remain as defensive as possible. The Wands of Wonder don't present a huge threat, since most the effects are non-damaging, but the party should take them down fast. The longer they last-- the more likely a second fireball is coming!
Cooking the Goblins
Round 1+: Any regular goblins on the field act as reinforcements. If a Wielder dies, have them bonus action disengage or dash, run over, and pick up the wand of wonder (free action). Tada, they're now a Wielder! If the Nilbog needs a body, they can provide that too! Otherwise, just stay in the shadows and use your shortbow to stay out of any potential AoEs that are happening. Make use of that 80ft range! Don't forget to bonus action Hide!
Cooking the Nilbog
Round 1: It will immediately be in spirit form due to the answer of the riddle being "FIREBALL." Go possess the Booyagh Booyagh Booyagh to give it some major defensive buffs.
Round 2+: If they manage to kill the Booyagh Booyagh Booyagh before killing the rest of the goblins, try to possess a regular goblin and then use your Confusion / Hideous Laughter to disable party members. If there are no regular goblins left, go for a Wielder. And if no one is left-- fight's over, flee!
When you would take damage: One per turn, you can negate ALL damage done in an attack or spell effect via Reversal of Fortune, and instead heal d6. That's super good!
When Attacked: The someone tries to damage you (via attack roll or saving throw ability), Nilbogism fires off and might cause them to entirely lose their turn.
Pro tip: Give the spirit it's own turn in the initiative, so when it "possesses" a goblin, it doesn't take up their whole turn too!
Cooking the
¡Booyahg! !Booyahg¡ ¡Booyahg!
Round 1: The Booyahg is far more powerful than the Nilbog's magic, so even while possessed, prioritize the Booyagh's spells. Since the party is likely still grouped up, Ice Storm or Fireball could be great openers. Don't use Cone of Cold just yet-- we're pretty far away from them so it might not hit everyone.
Round 2: You're possessed by now, which is great since that means both 1. The party will need to make a Charisma Save to even target you, and 2. If they succeed, you can still negate one source of damage and heal instead (from Nilbogism). That's major defense on a caster! If the party is still grouped up, hit them with the AoE's from turn 1 again (because they need to learn from their mistakes).
Otherwise, Magic Missile can be used to insta-kill a downed player (3 hits = 3 failed death saves) or to simply nuke a player who's low, or Fly+Disengage can be used to get you out of danger (great against paladins, barbarians, & hex-blades!)
Round 3+: Oh god, they haven't killed this guy yet? Position yourself well and Cone of Cold. Enjoy your party-cicles, then just keep blasting them with spells until you're out of them.
Every Turn
Wild Magic: Don't forget that, unlike Wild Magic Sorcerers, BOOYAHGs roll on the wild magic table every single time they cast a spell. That combined with the Wands of Wonder are going to make for absolute arcane chaos.
Nimble Escape: You can disengage as a bonus action, meaning you never have to take an attack of opportunity!
Reactions
Reversal Of Fortune vs Counter Spell vs Shield: If the only person effected by the spell would be the Nilbog and it's a damaging spell, it may be better to use Reversal Of Fortune to negate the damage rather than burn a spell slot. If it's a big AoE that's gonna take out all your Gobbos-- Counter spell! Alternatively, if it's an attack-roll based spell (or weapon attack), it's actually best to use Shield that way you get that tasty +5 to AC for the rest of your turn.
Florabarian
Thanks to @HottingerLauren for sponsoring this Encounter!
Spiciness: 5/5
Feeds about 3-5 players, level 5-7
Scales for: Number of Players, Player Level
Ingredients:
- Florabarian (stat block on next page!)
- X Poison Vine Blights (One Per Player)
- Use the Vine Blight stat block but add the following ability: Toxic Thorns. Any creature that grapples the Blight or otherwise comes into direct contact with the Blight's vines must succeed on a DC 12 Constitution saving throw or become poisoned for 1 minute. A poisoned creature no longer in direct contact with the Blight can repeat the saving throw at the end of each of its turns, ending the effect on itself on a success.
Scaling for Level: At level 7, add +1 to their Save DCs.
Preparation
The Florabarian is named such because they are intoxicatingly beautiful, yet dangerous. They utilize their vicious vines to brutalize their enemy, poisoning them and twisting their minds until they can no longer discern friend from foe.
This fight is all about Poison & Charm. Each ingredient in it can either inflict poison (and help the Florabarian get her Intoxicating Charm off), or has other means of crowd control to prevent the party from simply ganging up on the florabarian until she's downed.
Things you should know for this fight:
- Reactions can happen even on the turn of the person triggering the reaction (thus if the Florabarian poisons someone, she can use her reaction on her own turn).
- Poisoned gives them disadvantage on Attack rolls and Ability Checks.
- While charmed, they follow Florabarian's orders without hesitation or misinterpretation.
Cooking the Florabarian
Round 1. Start off by isolating Florabarian-- you don't want the party getting close to her. Spike Growth is a great option for keeping melee people distant.
Round 2: Fun note, spike growth damage applies for every 5ft a creature moves within there. So pick a target, Thorn Whip them to pull them within 10ft of you (and dragging them through the spiked growth), then use your Poison Ivy to maybe poison them. If that succeeds, Intoxicating charm them. Order all your new charmed friends to run... through the spiked growth!
Round 3+: Once you lose concentration on Spiked Growth, you've lost a large deal of your damage output. You can combo Ray of Enfeeblement with Instinctive Strike to get someone charmed in a turn, play defensively with Dispel Magic to shut down buffs & concentration spells, or even just focus someone down with Blight.
Reaction. Instinctive Strike is fantastic for quickly charming enemies who've been poisoned. Between that and being able to use Intoxicating Charm as an action, you could charm up to 2 party members a round!
Cooking the Poison Vine Blights
Round 1+: Their one job is to poison as many people as possible and keep them grappled. Note that the reach on their Constrict is 10ft, and it inflicts grapple + restrained. So you can grapple a melee person from 10ft away, and they won't be able to hit you on their turn until they've broken out of the grapple (which takes an action to escape anyways), though melee fighters are likely to be able to escape since it uses their athletics or acrobatics to escape. The good news is that since it uses a check and not a save, being Poisoned gives them disadvantage on it!
Round 2+ Once they have someone grappled (and poisoned), use your Entangling Plants to make the whole area difficult to navigate. You don't want your party members getting close! The Entangling Plants only affects creatures you choose for it to affect as well, so don't have it restrain your charmed friends!!
Florabarian
Medium Plant, Neutral Evil
- Armor Class 14 (bark armor)
- Hit Points 88 (16d8 + 16)
- Speed 30ft.
STR DEX CON INT WIS CHA 11 (+0) 15 (+2) 12 (+1) 12 (+1) 17 (+3) 16 (+3)
- Saving Throws: Con +4, Wis +6
- Damage Immunity. Poison
- Condition Immunity. Poisoned
- Skills Arcana +4, Insight +6, Nature +4, Religion +4
- Senses darkvision 60 ft., passive Perception 13
- Languages Common, Sylvan, Druidic
- Challenge 5 (1,800 XP) Proficiency Bonus +3
Telepathic Bond. The Florabarian can communicate telepathically with a creature it has charmed. The two don't even need to be on the same plane of existence to do so.
Spellcasting. The Florabarian is an 8th-level Druidic spellcaster. Its spellcasting ability is Wisdom (spell save DC 14, +6 to hit with spell attacks), and has the following druid spells prepared:
- Cantrips (at will): poison spray, thorn whip
- 1st level (4 slots): entangle, ray of sickness
- 2nd level (3 slots): Ray of enfeeblement, spike growth
- 3rd level (3 slots): dispel magic, plant growth
- 4th level (2 slots): blight, giant insect
Actions
Multiattack. Florabarian casts one cantrip and uses her Poison Ivy once.
Poison Ivy. Melee Weapon Attack: +6 to hit, reach 10 ft., one creature. Hit: 6 (1d6 + 3) piercing damage plus 14 (4d6) poison damage, and the target must succeed on a DC 14 Constitution saving throw or be poisoned for 1 minute. The target can repeat the saving throw at the end of each of its turns, ending the effect on itself on a success.
Intoxicating Charm. The Florabarian targets a Poisoned Creature within 30ft of it that it can see to activate the toxin's hallucinogenic properties. That creature must make a DC 14 Wisdom Saving Throw or become Charmed by Florabarian. The charm lasts until the creature is no longer poisoned. The charmed target obeys the Florabarian's verbal or telepathic commands.
Reactions
Instinctive Strike: When a creature within 30 feet of the Florabarian becomes poisoned, she may use her reaction to use her Intoxicating Charm.
Star Shinobi
Thanks to @StarShinobi for sponsoring this encounter!
Spiciness: 4/5
A lot of single target Damage, but not going to TPK.
Feeds about players 3-5, level 5-7
Scales for: Number of Players, Player Level
Ingredients:
- 2 Star Shinobi (Based on the Star Spawn Mangler, MToF)
- X Star Spawn Grue (One Per Player, MToF)
Scale the Save DCs: At level 7, add +1 to their Save DCs.
Preparation
Star Spawn are the demons of aberrations-- Chaotic, Evil, looking to destroy things. But unlike the animalistic, primal demons that use brute force or arcane might, the Star Spawn can be hyper intelligent.
As an example, the Star Spawn Mangler is very stealthy. Between having a +7 to stealth, darkvision, Ambush, AND Shadow Stealth, it already felt like a ninja, so adding the two abilities Time Warp and Substitution Jutsu make it feel way more interesting and "ninja like". Of course, the encounter has to be an ambush as well, so here's the pre-battle prep!
Before the Combat: The Star Shinobi are hiding in shadows (possibly on the walls or columns as they have a climb speed), while the Grue are behind total cover. As the party walks into their trap, they each roll Perception (DC 17) to notice the Shinobi, who are quickly beginning the fight. On a failure, that creature is surprised.
Things you need to know for this fight:
- Any time the Shinobi has advantage on its claw attack, it deals 2d6 extra psychic damage. On a critical, this number would also be doubled (to 4d6).
- If you're surprised, you can't move or take an action on your first turn of the combat, and you can't take a reaction until that turn ends. You may still take a bonus action.
- Recharge X–Y: The notation “Recharge X–Y” means a monster can use a Special ability once, and that ability then has a random chance of recharging during each subsequent round of Combat. At the start of each of the monster’s turns, roll a d6. If the roll is one of the numbers in the Recharge notation, the monster regains the use of the Special ability.
Cooking the Star Spawn Grue
Round 1+: The role of the Grue is straightforward: hit people with Confounding Bite so the Shinobi deal way more damage. Easy peasy. Don't forget their Aura of Madness, so players have disadvantage on the save against the Confounding Bite. Be sure to end your turn near the party as well, to keep that Aura on them.
Simple, but Spicy! The Grue isn't the most complicated stat block ever-- it has 2 abilities, one of which is passive. However, everything they have combos very well with the Shinobi, both flavorfully (as they're both Star Spawn) and mechanically (as it gives the Shinobi a steadfast way to get advantage on attacks). This is a great example of how simplicity can still be interesting!
Cooking the Star Shinobi
As Initiative is Rolled: Time Swap to get a better spot in the initiative! Try to use this on someone within 20ft of a Grue so they have disadvantage on the save.
Round 1: You have advantage on all attacks against people who haven't had a turn, so use Flurry to get close to them (you won't provoke AoOs and can dash as a bonus action), then hit them with SIX Claw attacks from the Flurry. Since you have advantage, you deal the extra psychic damage for a total of about 90 damage Average, assuming no crits. This will likely down a player, maybe two in the first round.
Round 2+: Now that Ambush is offline, we have to get creative on how to get Advantage. Creatures confused by the Grue are easy targets for this, or you can use your bonus action Hide from Shadow Stealth to get advantage on 1 of those attacks. Don't forget to Recharge Flurry and use that again if you can!
Reactions: As a reaction to being the target of an attack roll, you can try to make someone else take that attack for you. If your health is pretty high, try to swap with a party member. There's a chance it fails and you get hit, but there's also a chance that the party hits themselves this way. If you're low on health, it may be better to switch to a Grue or someone who can tank the shot (since they get no save against this and it won't fail).
Star Shinobi
Medium aberration, chaotic evil
- Armor Class 14
- Hit Points 71 (13d8 + 13)
- Speed 40 ft., climb 40 ft.
STR DEX CON INT WIS CHA 8 (-1) 18 (+4) 12 (+1) 11 (+0) 12 (+1) 7 (-2)
- Saving Throws Dex +7, Con +4
- Skills Stealth +7
- Damage Vulnerabilities damage_vulnerabilities
- Damage Resistances cold
- Damage Immunities psychic
- Condition Immunities charmed, frightened, prone
- Senses darkvision 60 ft., passive Perception 11
- Languages Deep Speech Challenge 5 (1,800 XP) Proficiency Bonus +3
Ambush. On the first round of each combat, the Shinobi has advantage on attack rolls against a creature that hasn't taken a turn yet.
Shadow Stealth. While in dim light or darkness, the Shinobi can take the Hide action as a bonus action.
Timewarp. The Star Shinobi can bend space and time to gain an advantage. When initiative is rolled, it may target a creature. That creature must make a Dex save (DC 15), or that creature and the Star Shinobi trade Initiative Scores.
Actions
Multiattack. The Shinobi makes two claw attacks.
Claw. Melee Weapon Attack: +7 to hit, reach 5 ft., one target. Hit: 8 (1d8 + 4) slashing damage. If the attack roll has advantage, the target also takes 7 (2d6) psychic damage.
Flurry of Claws (Recharge 4–6). The Shinobi makes six claw attacks against one target. Either before or after these attacks, it can move up to its speed as a bonus action without provoking opportunity attacks.
Reactions
Substitution Jutsu When the Shinobi would become the target of an attack roll, you may choose another creature that you can see within 30ft as a reaction. The target creature swaps places with the Shinobi, and becomes the target of the attack. If the creature is unwilling, it may prevent this effect with a DC 15 Wisdom Save.
Special Leigh, The Wizard
Thank you to @DavvyChappy for sponsoring this encounter!
Spiciness: 5/5
Some creatures can hold their own against the action economy... Especially the Wizard.
Feeds about 3-5 players, level 8-10
Scales for: Number of Players, Player Level
Ingredients:
- Special Leigh, The Wizard (Next Page!)
Scale the Save DCs: For every level over 8, add 15hp to Special Leigh. At level 10, add +1 to their Save DCs.
Preparation
When writing Special Leigh, the Wizard, there were some no-brainers in the design, such as giving them Fireball, but what makes Special Leigh Special? They went to all the schools. Leigh is an abjurer, conjurer, diviner, enchanter, evoker, illusionist, transmuter, and necromancer!
The problem usually faced by single-creature boss fights is that the action economy is stacked so far against them that the creature either has to nuke them down immediately to have a chance or has to abuse bounded accuracy to survive more than a round or two (and it's not fun for the players to constantly be missing).
To fix that, we're doing a couple things:
- Scaling the number of Legendary Actions they have to party size-1
- Scaling the number of Legendary Resistance they have to half the party's size.
- Buffing the shit out of them pre-battle.
Pre-battle:
- Special Leigh has stoneskin, mind blank, & Mage armor already cast. They regained these spell slots through Arcane Recovery or some other bullshit though (power pearl? Used Scrolls?)
- Special Leigh begins the fight with their Abjurer Shield shield active at 30HP, the Illusion from Illusionist active, & the Transmuter's Stone giving them +10 to their movement speed.
- Leigh begins the fight as an Enchanter.
When to Choose what School? Rather than choosing what spell you want and simply picking the school that goes with it, I'd prioritize picking what benefit you want and then choosing what spell you want after. Remember that you still have to recharge each of these abilities through casting a spell of the same school while that school's effect is active on you.
Note: Abjurer is particularly good because you can switch to it as a legendary action, and then heal your Arcane Ward as a reaction through casting Shield.
Cooking the Wizard
Before your first Turn: Your Instinctive charm is active, so if someone targets you with a ranged attack or they target you with a melee attack and have an ally next to them, use it!
Round 1 (Active buffs: Displacement, Arcane Ward, Instinctive Charm, Transmuter's Stone, Stoneskin): At the start of the fight, you have all your defensive buffs active, and we want to keep it that way! Getting hit will remove your Displacement, reduce your Arcane Ward, and force a concentration check on Stoneskin, so play some cat-and-mouse with your 40ft movespeed. Don't worry about attacks of opportunity, we can cast Shield if necessary (and it will last until the start of your next turn, giving you a full round of its benefits). We can't use a Concentration spell yet without losing Stoneskin, so use fireball or cone of cold to hit as many of them as possible.
Round 2: It's time to trigger a trap! I'd wager there's at least 1 melee person next to you now (who probably had to Dash to catch you), so use Wall Of Force to exclude everyone else from the fight, and cantrip that person down with legendary actions. Note that Wall of Force is concentration, so you lose Stoneskin if it was still active (though I doubt it is).
Round 3: Switch to Necromancer if you've lost 15+ hp, or Diviner if you haven't. If someone is in the wall of force with you, hit them with Finger of Death to kill them, and then heal for 21hp if that person dies & you chose Necromancer; if you chose Diviner, you can make them re-roll their save if they pass (and you should!). If no one is in the wall with you, switch to Enchanter and target the party's spellcaster with a Power Word Kill. That likely kills them outright, and recharges your Instinctive Charm. Since only spells can get through Wall of force, if that was their only spellcaster... you're effectively invincible at this point.
Round 4: With 2 people down, we can gain a lot by removing a third from combat. If your Diviner is ready to use, switch to that before using Mental Prison on one of the survivors. That drops Wall of Force, but also prevents that person from doing something to pick up a downed party member by turning this effectively into a duel between whoever is left and Special Leigh. If you'd rather not lose Wall of force, hit the remaining party members with Synaptic Static instead to potentially down more of them but also to debuff them.
Round 5+: At this point, if things have gone as written above, it's going to be a TPK. While we're not aiming to TPK as a DM, this encounter will absolutely require your players to be smart to avoid it!
Legendary Actions: Notice that my tactical breakdown doesn't say "Turn X", but rather Round X. If you can do the suggested strategies as a legendary action, do it!
Reactions: You have both Counterspell and Shield. If someone is casting a spell at you that uses attack rolls (or magic miss), it's actually better to use Shield. It costs a lot less (level 1 spell vs 3) and provides better benefit
Special Leigh, The Wizard
Medium humanoid (any race), any alignment
- Armor Class 12 (15 with mage armor)
- Hit Points 99 (18d8 + 18) + 30THP (arcane ward)
- Speed 30 ft. (40ft with Transmuter's Stone)
STR DEX CON INT WIS CHA 10 (+0) 14 (+2) 12 (+1) 20 (+5) 15 (+2) 16 (+3)
- Saving Throws Int +9, Wis +6
- Skills Arcana +13, History +13
- Damage Resistances damage from spells; nonmagical bludgeoning, piercing, and slashing (from stoneskin)
- Senses passive Perception 12
- Languages any six languages
- Challenge 12 (8,400 XP) Proficiency Bonus +4
Legendary Resistance (X). When Special Leigh fails a save, they may choose to succeed instead. They may do this a number of times equal to half your party's size.
Magic Resistance. Special Leigh has advantage on saving throws against spells and other magical effects.
Scholastic Expertise. At the beginning of each of Special Leigh's turns, you may choose a school of expertise on the Scholastic table (next page). You gain the benefits of that school until you select another. If a benefit has a lingering effect, such as the Arcane Ward's shield, it remains after switching.
Spellcasting. Special Leigh is an 18th-level spellcaster. Its spellcasting ability is Intelligence (spell save DC 17, +9 to hit with spell attacks). Special Leigh has the following wizard spells prepared: (See Descriptive Block on right).
Legendary Actions
Special Leigh can take X legendary actions (where X is the number of party members -1), choosing from the options below. Only one legendary action can be used at a time and only at the end of another creature's turn. Special Leigh regains spent legendary actions at the start of its turn.
Cantrip. Special Leigh casts one of its cantrips.
Switch Schools. Special Leigh can trigger their Scholastic Expertise, causing them to switch schools.
Cast Spell (Costs 2). Special Leigh casts a spell of level 1 through 4.
Special Leigh Spell List
- Cantrips (at will): fire bolt, light, mage hand, prestidigitation, shocking grasp
- 1st level (4 slots): Chromatic Orb, Shield, mage armor*, magic missile
- 2nd level (3 slots): Mind Spike, mirror image, misty step
- 3rd level (3 slots): counterspell, fireball, Slow
- 4th level (3 slots): banishment, fire shield, stoneskin*
- 5th level (3 slots): cone of cold, Synaptic Static, wall of force
- 6th level (1 slot): Mental Prison
- 7th level (1 slot): Finger of Death
- 8th level (1 slot): mind blank*
- 9th level (1 slot): Power Word Kill
Special Leigh casts spells marked with a * before combat.
Spicier Variant
Rather than at the start of each turn & as a legendary action, you can choose to instead run Special Leigh as being able to switch their school any time they cast a spell, up to twice per round. This makes them a bit easier to run (since you don't have to set yourself up for your next spell ahead of time), but it also makes it a lot more challenging for your players since you basically now have the benefit of essentially whatever school of expertise you need at any given time.
Scholastic Expertise Table
| School | Spells To Pair With | Effect |
|---|---|---|
| Abjurer | Shield, counterspell | Arcane Ward. The abjurer has a magical ward that has 30 hit points. Whenever the abjurer takes damage, the ward takes the damage instead. If the ward is reduced to 0 hit points, the abjurer takes any remaining damage. When the abjurer casts an abjuration spell of 1st level or higher, the ward regains a number of hit points equal to twice the level of the spell. |
| Conjurer | Misty Step | Benign Transportation (Recharges after the Conjurer Casts a Conjuration Spell of 1st Level or Higher). As a bonus action, the conjurer teleports up to 30 feet to an unoccupied space that it can see. If it instead chooses a space within range that is occupied by a willing Small or Medium creature, they both teleport, swapping places. |
| Diviner | Mind Spike | Portent (Recharges after the Diviner Casts a Divination Spell of 1st Level or Higher). When the diviner or a creature it can see makes an attack roll, a saving throw, or an ability check, the diviner can roll a d20 and choose to use this roll in place of the attack roll, saving throw, or ability check. |
| Enchanter | Synaptic Static, Power Word Kill | Instinctive Charm (Recharges after the Enchanter Casts an Enchantment Spell of 1st level or Higher). The enchanter tries to magically divert an attack made against it, provided that the attacker is within 30 feet of it and visible to it. The enchanter must decide to do so before the attack hits or misses. The attacker must make a DC 17 Wisdom saving throw. On a failed save, the attacker targets the creature closest to it, other than the enchanter or itself. If multiple creatures are closest, the attacker chooses which one to target. |
| Evoker | Fireball (it's the only evoc spell you have that can hit you) | Sculpt Spells. When the evoker casts an evocation spell that forces other creatures it can see to make a saving throw, it can choose a number of them equal to 1 + the spell's level. These creatures automatically succeed on their saving throws against the spell. If a successful save means a chosen creature would take half damage from the spell, it instead takes no damage from it. |
| Illusionist | Mirror Image | Displacement (Recharges after the Illusionist Casts an Illusion Spell of 1st Level or Higher). As a bonus action, the illusionist projects an illusion that makes the illusionist appear to be standing in a place a few inches from its actual location, causing any creature to have disadvantage on attack rolls against the illusionist. The effect ends if the illusionist takes damage, it is incapacitated, or its speed becomes 0. |
| Necromancer | Finger of Death | Grim Harvest (1/Turn). When a necromancer drops a creature to 0hp that is neither a construct nor undead with a spell of 1st level or higher, the necromancer regains hit points equal to twice the spell's level, or three times if it is a necromancy spell. |
| Transmuter | Slow | Transmuter's Stone. The transmuter carries a magic stone it crafted that grants its bearer one of the following effects: Darkvision out to a range of 60 feet OR An extra 10 feet of speed while the bearer is unencumbered OR Proficiency with Constitution saving throws OR Resistance to acid, cold, fire, lightning, or thunder damage (transmuter's choice whenever the transmuter chooses this benefit). If the transmuter has the stone and casts a transmutation spell of 1st level or higher, it can change the effect of the stone. |