Introduction
This adventure is designed for a party of 4 adventurers of 3rd level. It takes place in the High Republic era, during the events of the Light of the Jedi novel. In this story-driven adventure, the player characters have volunteered to (or been recruited by) the Galactic Republic and Jedi as they respond to a mysterious large-scale disaster in a system in the Outer Rim.
Credits
Story, mechanics, layout: RogueEnterprise
Editors: Vsauce Marr, Dozus
Images: Google, property of their original creators
Creators of SW5e and Wizards of the Coast
Background
The year is about 232 BBY, many generations before the Clone Wars. The Galactic Republic is experiencing a golden age. Under the direction of the Jedi, the Republic is expanding into the Outer Rim territories, bringing peace and order to an area of the galaxy fraught with danger.
Starlight Beacon, a massive Republic station, is about to officially open its doors. Located in the Outer Rim, the station is a symbol for all to see what the Republic brings to the region.
But when disaster strikes, only the Republic and Jedi have the resources to respond to such a large-scale emergency…
Setup
Player characters: Adventurers should be 3rd level and can be of any class. Force users do exist and are likely part of the Jedi Order. Any race that exists in the High Republic era (~230 BBY) should be available to play.
Light alignment: Because this mission is about working with the Republic and Jedi to save the day, characters of Light alignment are best, though it can also work if you are of Balanced alignment and have a plausible reason to join the rescue effort.
Mission Outline
Part I: Call to Action
On board Starlight Beacon, the characters are recruited by Jedi Master Avar Kriss to help with a mysterious, large-scale hyperspace disaster.
Part II: Arrival
Arriving in the Hetzal System with Republic and Jedi forces, the characters must determine the nature of the disaster and how they can help.
Part III: Evacuation
The characters are assigned to evacuate the Museum Immemorial on Hetzal Prime before the hyperspace shrapnel destroys it.
Part IV: Desperation
With the character’s ride off the planet destroyed, they must find another way to leave before it’s too late.
Part V: Finale
While the characters have escaped Hetzal, the Jedi with the characters are called upon to stop a surprise crisis, before making it back to Starlight Beacon to claim a reward for helping to save the star system.
v1.13, 01-May-2023
Part I - Call to action
Opening Crawl
THE GREAT DISASTER RESCUE
Calamity strikes! A number of strange hyperspace anomalies have entered the heavily populated HETZAL SYSTEM, threatening billions of lives.
While STARLIGHT BEACON, a massive Republic space station in the Outer Rim, is not yet fully operational, heroes within are mobilizing as most of the Outer Rim flees from the event in terror.
JEDI MASTER AVAR KRISS has put forth a last minute call for volunteers before her ship responds to the catastrophe….

Starlight Beacon
The characters begin on Starlight Beacon. Why they are there is up to them: Jedi characters may have been assigned to the Jedi Temple, other characters may be travelers using the station as a waypoint, mercenaries looking for work or even Republic soldiers waiting for their next assignment.
Regardless of why they are on the station, the characters are all responding to a general call for volunteers by one of the senior Jedi on the station, Master Avar Kriss. Kriss has instructed any volunteers to immediately report to the docking bay.
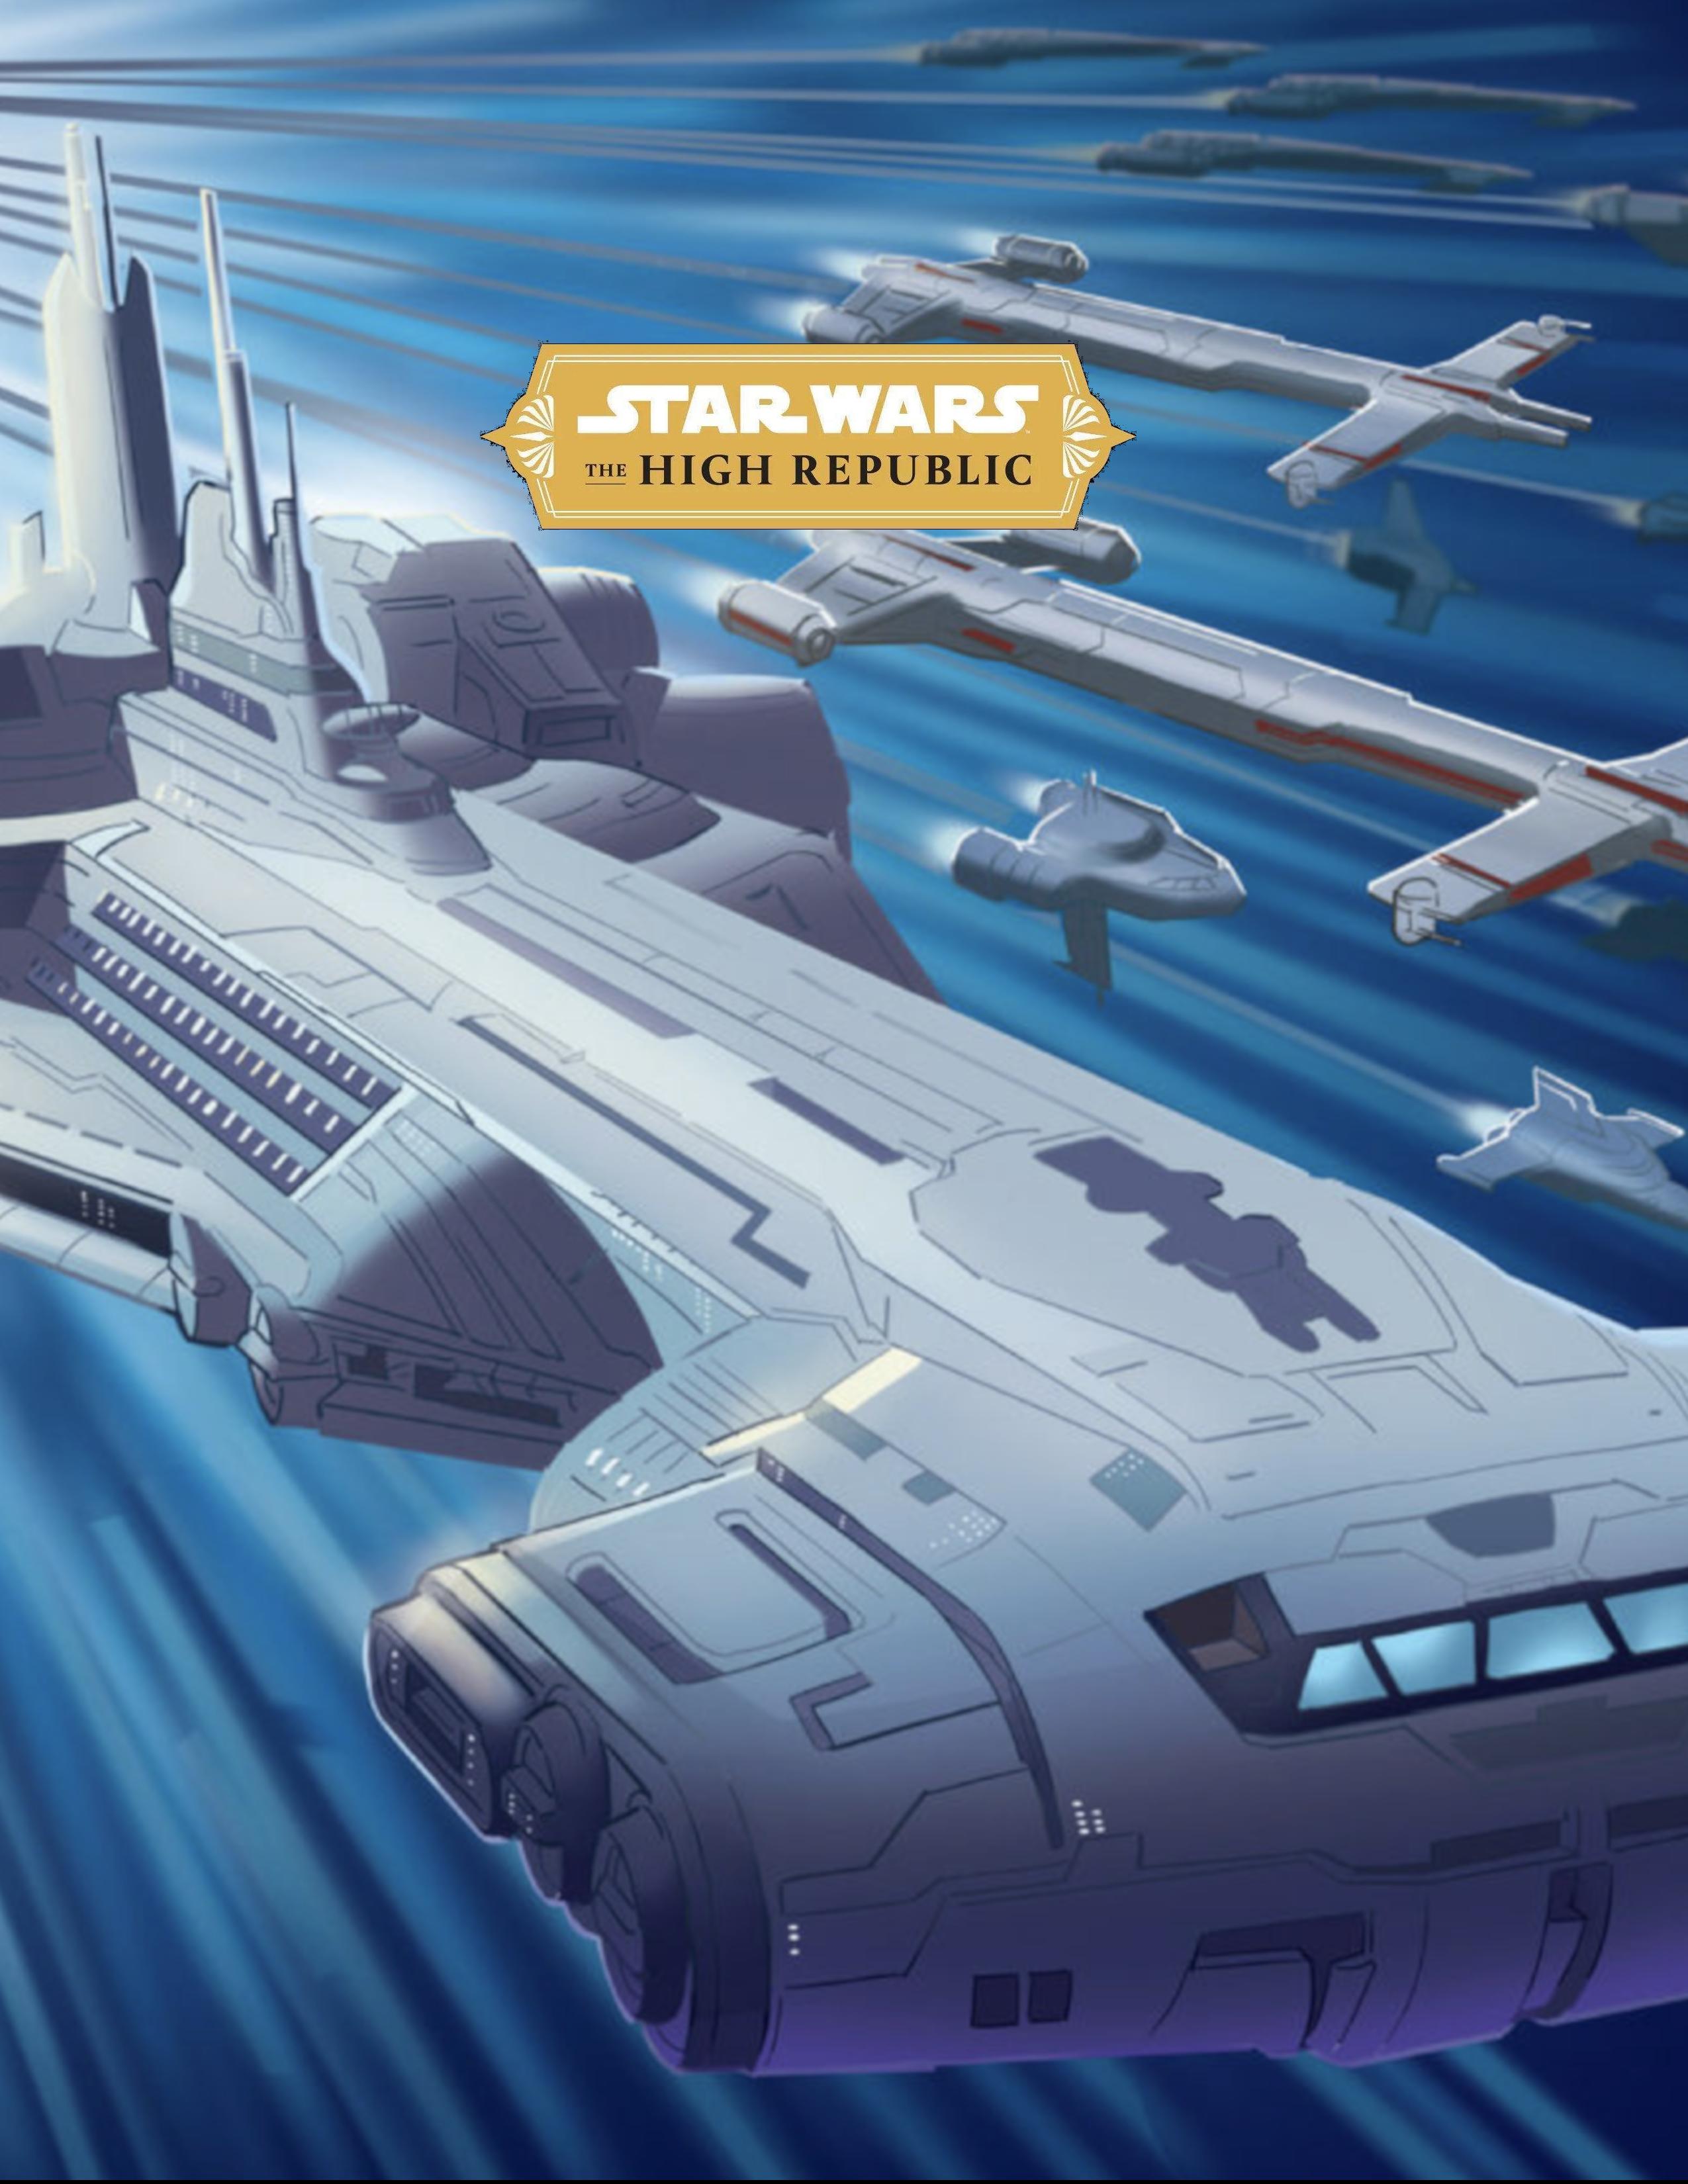
When the characters arrive at the docking bay, the scene is one of controlled chaos. The huge bay is full of shuttles and Longbeam cruisers, all in the process of being crewed, refueled or taking off. In space, just outside the docking bay, hangs an Emissary-class Republic cruiser, the Third Horizon. Several smaller ships and shuttles are docking with the huge cruiser.
A crowd of volunteers are being sorted by a Republic Defense Coalition officer, who asks for their name and any special skills they may have. For those that ask for a reward, the officer brusquely notes that a credit reward will be dispensed upon completion of the mission. Once everyone in the party has done so, the officer directs the party toward a Longbeam cruiser making final preparations for takeoff.
The characters are greeted at the boarding ramp by a Zabrak male in his mid 30s named Brastix, a good natured but somewhat inexperienced RDC officer. He brings the characters to the bridge, just as a message comes in from the Third Horizon, a last call for ships to dock before it departs. Brastix notes that his ship, the Aurora VII, is undermanned but is equipped with an advanced sensor suite. He can double as both captain and pilot, but if any of the characters are capable, they can stand in for the pilot and/or sensor tech roles.
Once the Aurora VII docks with the Third Horizon, the huge cruiser maneuvers away from Starlight Beacon and makes the jump to hyperspace.
Once the cruiser is underway, all ships receive a signal from the Third Horizon. Brastix routes the signal to the bridge’s holoemitters, and a holo of a female Jedi, with shoulder-length blonde hair held in place by a gold circlet, light skin and blue eyes, looking solemn and regal in her jedi robes. She provides the following briefing:
Transmission from the Third Horizon

“This is Master Avar Kriss on board the Third Horizon to all ships. Thank you for joining this rescue effort. We’re currently en route to the Hetzal System, a populated trinary system here in the Outer Rim.It’s suffering some measure of serious emergency, though we know very little detail. We received a partial distress call from a monitoring station that triggered a system-wide emergency alert before going silent.
We’ll be arriving in the system within the hour. Be ready for anything. Good luck to all. Remember - we are all the Republic!”
Part II - Arrival
The Third Horizon emerges from hyperspace on the outskirts of the Hetzal System. The Aurora VII receives instructions to remain docked with the larger cruiser. Brastix remarks that the charts say that the monitoring station is supposed to be nearby, but there’s nothing on sensors.
Reconnaissance
Soon, a message comes in from the Third Horizon - a specialized message meant for the Aurora VII. With the ship’s specialized sensor array, they have permission to undock and carry out a few sensor scans. Brastix recommends the following scans:
- Sensor scan for the monitoring station - DC10 Technology check reveals that there is no conventional debris from the monitoring station, which would be consistent with an attack. Instead, it appears that the station was atomized in a pattern that indicates collision with an object going at near-light speed.
- Sensor scan for anomalies - The character performing this scan should make a Technology check. Automatically detected are dozens of objects in the system moving at incredible, near-light speeds. Expanding a holo of the system shows the path of the shrapnel heading toward the populated planet of Hetzal Prime and its two moons. In addition, if the character’s Technology check surpasses DC15, the character detects incoming debris ahead of the proximity alarm below.
Evasive maneuvers!
Just as the characters complete reporting on the scans, a proximity alarm sounds. Brastix reports that a piece of debris is approaching fast!
A character or Brastix can perform a DC15 Piloting check (Brastix has a +4 to Piloting) - this check can be made with advantage if sensors picked up the approach early. On success, the Aurora VII evades the debris. On failure, the debris punctures a hole through the ship (even if shields are up): All characters on board must make a DC 14 Strength saving throw to hold on, or a DC14 Dexterity saving throw to maintain their balance, or take 1d4 bludgeoning damage as they crash against the floor or other objects. Blast doors can easily close to contain the affected areas of the ship, luckily it did not hit a critical system!
Hyperspace Hop
Once the findings are transmitted back to the Third Horizon, Brastix announces a message incoming from Master Kriss:
Transmission from the Third Horizon
“This is Master Kriss to all ships. We’ve received sensor data that shows a number of objects moving at near lightspeed are in the system. Hetzal Prime and its moons are at risk. We are going to attempt to evacuate as many people from the planet as we can before the debris hits.To that end, we are going to do an intra-system lightspeed jump to the core planet and then launch all ships. Your individual orders should come thereafter. For light and life.”
The Third Horizon maneuvers for a jump to lightspeed toward Hetzel Prime. Brastix mentions the hyperspace exit point should be close to Hetzal’s trinary sun, but can be dangerous. A character can perform a DC13 Piloting check to execute a hyperspace mini-jump (Brastix has a +4 to Piloting). On success, the ship arrives next to the Third Horizon, close to Hetzal Prime.
On failure, the ship exits hyperspace too close to the trinary suns, and the ship hull creaks as it is caught in the suns’s gravitational pull. A character must then make a DC16 Piloting check. On a success, the pilot successfully performs the slingshot maneuver. On failure, the maneuver is performed messily, and all characters take 1d6 fire damage.
Part III - Evacuation
The Third Horizon has arrived in orbit and is deploying all of its docked ships: over 2 dozen Longbeam cruisers and over 50 Jedi Vector fighters, all of which are spreading out all over the system.
Brastix relays orders from the Third Horizon: the characters will be dropped off at the Museum Immemorial, a museum that houses some of Hetzal Prime’s best minds and most historically significant technological advances (Author’s note: similar to the Smithsonian Institute). There, they must gather the staff for evacuation, while Brastix takes the ship back into orbit so the fleet can gather more information on the hyperspace anomalies.
Smaller pieces of debris are already striking the planet and moons with devastating effects, and the characters only have two hours before a large piece of debris strikes the area containing the Museum Immemorial, decimating the surrounding area.
The characters can maneuver the Aurora VII toward the Museum Immemorial, located in a more sparsely populated agricultural area, with a landable location located near the main entrance. The building itself is an immense, three-story-tall structure artistically constructed of carved stone and a roofed with grassy flora that gives it an earthy feel despite the gargantuan nature of the structure.
As the characters leave the ship, Brastix offers a commlink to whomever of the characters he believes would be best suited to be in charge, likely a Jedi or one who is affiliated with the Republic. The commlink is hooked up to the fleet network.

Time limit
Characters only have two hours to complete the extraction and evacuate before the debris impacts the surface and destroys the museum and the surrounding area. This will force characters to work together to complete challenges and leave time for a possible short rest before the final conflict in Part IV. However, the GM should feel free to adjust the time remaining (communicated via commlink) if it is beneficial to the flow of the game.
Hetzal Prime
Region: Outer Rim Territories
Suns: 3, including R-type star
Moons: 2 (populated)
Population: 40 billion sentients
Major exports: Agriculture, experimental bacta
Commlink Transmissions
At the GM’s discretion, the characters can use the commlink to communicate with Brastix on the Aurora VII and receive updates on the system wide crisis, as the ship is equipped with a sophisticated sensor array. The updates below are provided in rough chronological order.
Update The hyperspace debris appears to be ship parts from a ship blown apart in hyperspace The Jedi have sensed that some of the debris have passengers that are still alive and are attempting rescue The Third Horizon is landing near a major city to pick up as many civilians as possible.
Museum Immemorial

Exterior. Outside the Museum Immemorial, speeder parking and other landing pads appear completely deserted, and there does not appear to be any civilians around, however there do seem to be a few speeder bikes parked outside the main entrance. A large blast door that leads into the building is closed. A holo next to the door reads “CLOSED UNTIL FURTHER NOTICE.”
Upon inspection, the secure outer doors appear to have been recently cut open using a fusion cutter, and access to the lobby can be gained without issue.

Lobby. This brightly lit chamber is designed to funnel people into and out of the main hangar chamber ahead, which is sectioned from the lobby by sliding glass doors. Two inactive droids appear on either side of the entrance (close inspection reveals that several key components have been sabotaged by a cutting tool, rendering them inoperable. The Thugs in the Artifacts Room disabled them before entering). Holos play along the walls advertising the various attractions inside the museum, including starships, droids and agricultural and pharmaceutical achievements.
A half-dozen kiosks on the west side of the chamber advertise entry badges for 3 credits each. Close inspection of one of the kiosks reveals that it has been forced open. Inside are 17 additional entry badges and 293 credits.
The east side of the lobby is made up of tables of various sizes, with various tchotchkes including scale ship models, stylized caf containers, low concentration bacta test tubes and more.
The glass doors are locked, only opening if the approaching humanoid has an entry badge. It has AC10 and 5HP. Most attacks shatter the glass, alerting the thugs in the Artifacts area.
Hangar. This cavernous chamber measures about 350ft by 550 ft, clearly designed to hold hundreds of people. It is lit by the Hetzal suns streaming through a translucent ceiling, despite the fact that agricultural plots line the top of the building. The main highlight of the room is a large starship occupying the back half of the chamber, though it looks old it appears to be well maintained, though it appears to be resting on struts that seem to indicate it has been here for years. In the front half are several fighter-sized ships arranged in a neat row, appearing to be variations on a singular ship design, and each has the transparisteel of the cockpit removed and a ladder that leads up to the pilot’s seat. Each of the fighters and the larger starship are large plaques with text on them. Next to the plaque for the larger ship is an old astromech droid on its own stand. Smaller doors appear to lead to adjacent chambers, labeled “Agriculture”, “Artifacts”, and “Bacta.” All the doors are unlocked, though the door to the “Artifacts” room is open, and voices from inside are easily heard. A close inspection of the roof reveals that it may be designed to be opened, but the controls are not visible, and the scientists have never operated it before.
- Cruiser: The exterior of the ship appears generally whole but poorly unkempt and rusted and may not be flyable, though the interior components are difficult to identify from the outside. The only way into the ship is via a landing ramp that can only be accessed wirelessly via B3-EP. Interior details can be found in Part IV of this adventure.
- Fighters: The four fighter craft show minor structural improvements and variations across the series. It is obvious that the ships are all missing some key components, including weapons, electronics, fuel canisters and most anything else of value.
Ship Plaques
Each ship has an ornate, engraved plaque on a stand in front of it.
Large ship: THE SIRENA. A multi-purpose vessel, the Sirena was in the original convoy to colonize Hetzal Prime over 200 years ago, and was subsequently used as an agricultural seed ship, patrol ship and delivery of the first shipment of Hetzalian barley with an armed droid escort before she was retired. Though she will never fly again, she remains here for the appreciation of all. Long time ship astromech B3-EP remains by her side.
Fighters: SCYTHE-CLASS CROPDUSTER. Agricultural one-man ship, the Scythe-class Mark I, Mark II, Mark III and Mark IV were iterations on a design used by Hetzalians who had the need to maintain their first crops before droids were widely available. Each featured significant updates from the previous model until they were phased out 100 years ago.
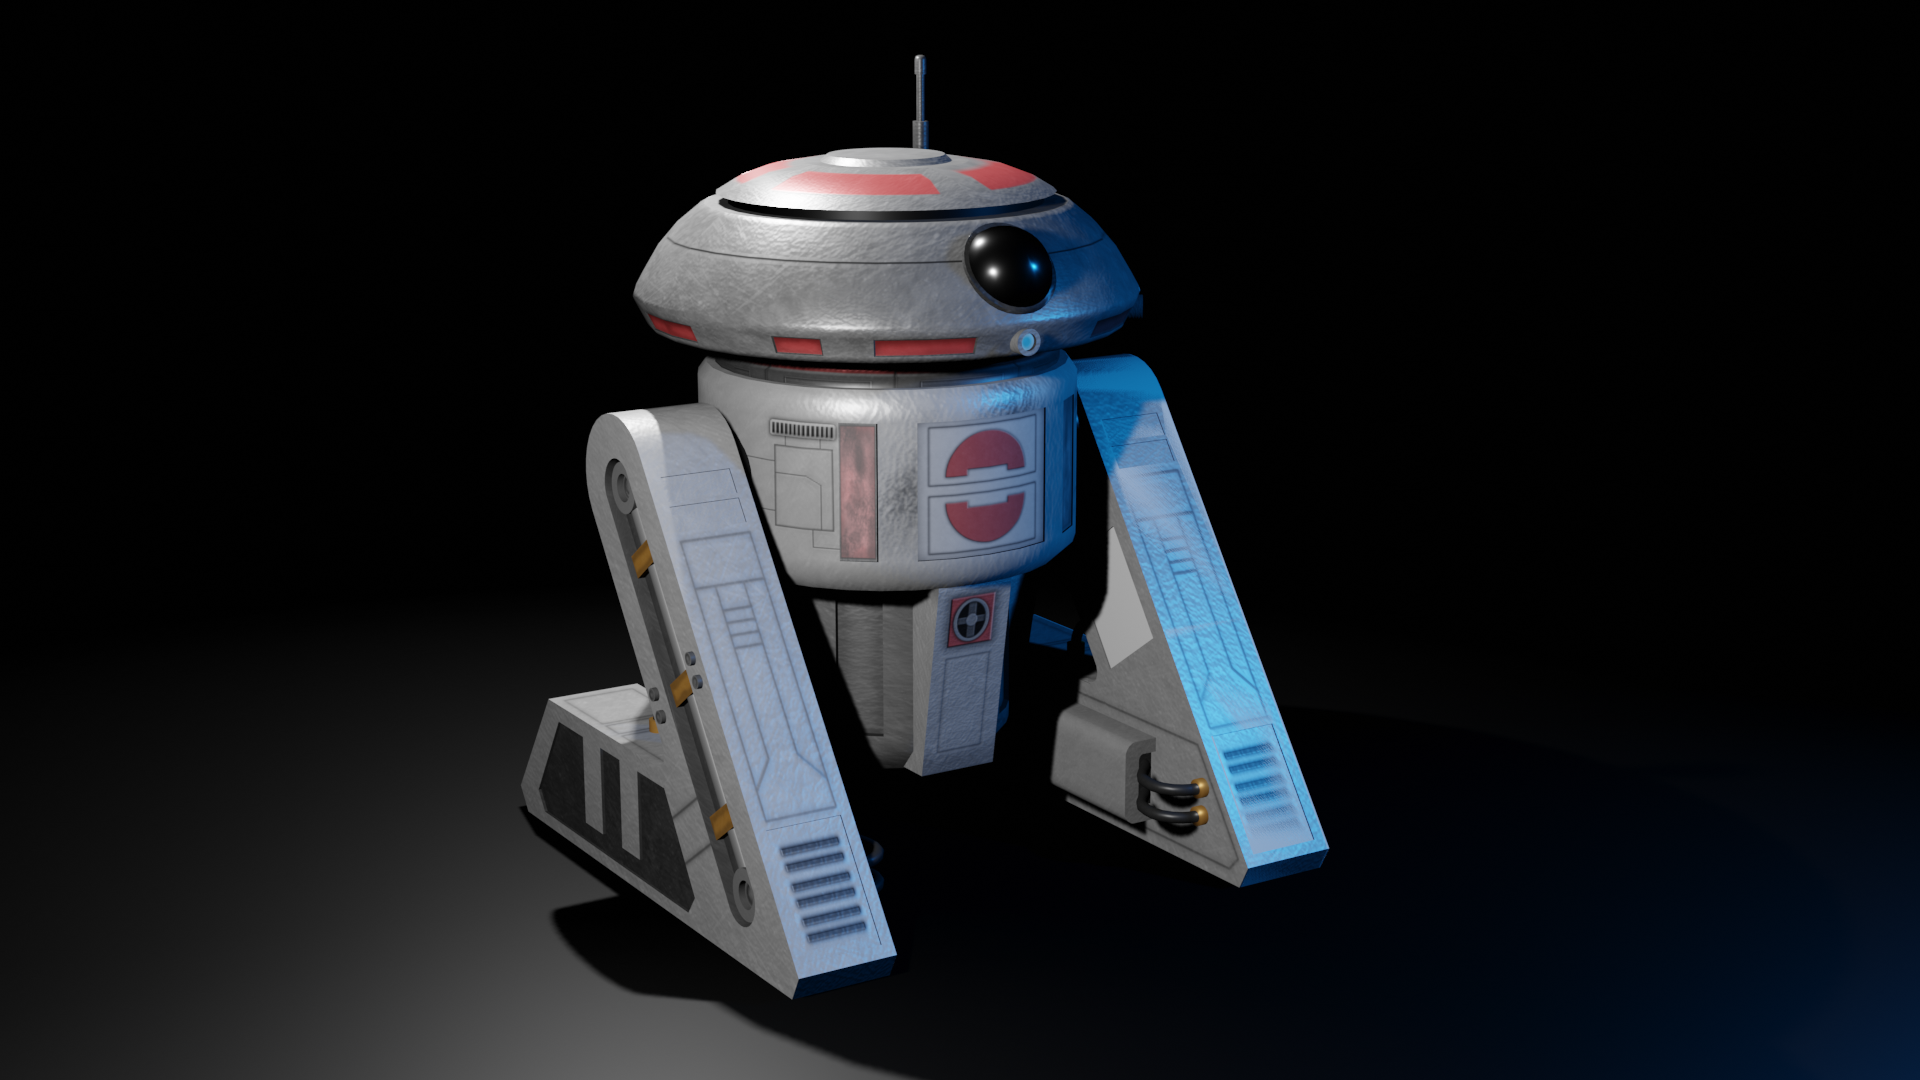
B3-EP Astromech
Small droid, chaotic light
- Armor Class 12 AC (armor plating)
- Hit Points 7 (2d6)
- Speed 25 ft
STR DEX CON INT WIS CHA 6 (-2) 13 (+1) 11 (+0) 16 (+3) 12 (+1) 5 (-3)
- Skills Technology +5, Slicer's Kit +5, Piloting +3
- Damage Vulnerabilities Ion
- Damage Resistances Necrotic, Poison, Psychic
- Condition Immunities Poisoned, diseased
- Senses Darkvision 60 Ft., passive Perception 13
- Languages Speaks binary, understands Basic
- Challenge 1/8 (25 XP)
Traits
Circuitry. The droid has disadvantage on saving throws against effects that would deal ion or lightning damage.
Actions
None
Examination of B3-EP reveals that the droid is mostly intact except for weaponry and power converter being removed. A droid power converter can be found in the Artifacts room and can be installed with a DC12 Technology check and 10 minutes per installation attempt. The check is automatically successful if using Astrotech Implements.
If activated, B3-EP is grateful for being included with the characters’ group, but will notify them (in a dialect of Binary that involves mainly beeping at varying volume levels) that some of his cognitive functions are disabled due to age.
It will not suggest any courses of action to the group, but will be as helpful as it can for any of the characters’ needs. He can automatically lower the landing ramp of the Sirena without performing a check and can perform any checks involving repairs of the Sirena with advantage. He also has knowledge of the droid defenses onboard the Sirena but will not volunteer that knowledge unless asked.
Artifacts Room. The Artifacts room is dimly lit, about 30ft by 50ft, and a stark contrast to the brightly light cavernous Hangar. It is arrayed with 10 4ft high pedestals illuminated by overhead spotlights, each one topped with an electronically locked, magnetically sealed transparisteel container with an artifact inside each, and a small label plaque. Opening a transparisteel container can be sliced with a DC16 Slicing Kit or Security Kit check that takes 5 minutes per attempt, and is immune to most weapons. A lightweapon or fusion cutter could cut through a container with 10 minutes required per container.
In the center of the room, between the rows, a group of four armed humanoids are brandishing weapons and wearing cheap-looking military armor over attire that would be bettre suited for a swoop gang. The leader, a human named Boryl, has an intense look and a bit of a sadistic streak that the disaster is providing an outlet for. The group (Composed of Boryl, two Blaster Thugs and one Fusion Cutter Thug) is holding three scientists under guard as one of them who is strapped with a bandolier with grenades and a fusion cutter works on cutting open the transparisteel containers, with three open so far. They will attempt to intimidate anyone that interrupts them to try and make them leave.
While the whole group cannot be persuaded to leave, a DC16 Intimidation check will convince two of the gang to stand down. This check is lowered to DC14 if a Jedi identifies themselves in the attempt, as the Jedi are rumored to be mighty warriors with the Republic.
If the sound of the characters entering the Hangar area are heard, Boryl sends one of his minions to investigate. If the minion spots any threats, he reports back to Boryl and they set up an ambush in the Artifacts room.
Defeating the thugs yields two Fragmentation Grenades, a Fusion Cutter and three Power Cells.
Being held hostage by Boryl’s crew are four scientists, employees of the museum who returned to the deserted area after sending their families to safety in order to extract what they consider to be high value items from the museum before they escape. They are too scared to speak while the thugs are in the same room. They are:
- Chief Scientist Biala Typho. A devaronian female who often speaks for the group of scientists. Along with the others, refuses to leave the Museum Immemorial until key items have been secured. While in a position of leadership, Dr. Typho ensures her position of authority by ending most sentences in an exclamation. She promises that the Hetzalian government can provide a credit reward for each item they recover. However, Dr. Typho could be convinced to only leave with two of the three items with a DC17 Persuasion or Intimidation check. If asked about the Sirena, Dr. Typho discourages it. She does not know if the hangar chamber opens at all, and has heard rumors that some particularly stubborn anti-piracy droids could not be removed from the interior of the ship before it was laid out in the hangar. Luckily, the droids remain inside the ship at all times.
- Scientist Astin Finnall, Artifacts specialist. A human male who curates the Artifacts hall, Dr. Finnall insists on saving the platinum-gilded mandoviol. He will argue that the impact of the owning artist Gwio Bin’s impact on Hetzalian culture justifies retrieval of the artifact.
- Scientist Tamet Pringbey, Agriculture specialist. A quiet human female who is really into geometry as it pertains to flora proliferation. Tends to view most life as math equations. She wants the master Ice Melon picked from the Agriculture Room, as its seeds are the most potent with which they could regrow the crop if necessary, by a complex heating and re-freezing process. She knows the master Ice Melon is the melon with the coldest core temperature in the crop, and that there is a portable freezing unit on display next to the Ice Melon plot in the Agriculture room.
- Scientist Daro Anen, Bacta specialist. A human male who loves barley and is only in the bacta business because of the economic implications for Hetzal and medical implications for the galaxy, though he still considers it critical to retrieve the bacta sample in the Bacta Room. He will profess his love of barley to anyone who will listen, including its role in bacta creation, use in beer and whisky, animal feed and more. Dr. Anen carries a special Bottle that can safely transport the unstable bacta sample.
 Artifacts Room
 Chief Scientist Biala Typho
Boryl
Medium humanoid, neutral dark
- Armor Class 14 (combat suit)
- Hit Points 30 (4d8 + 12)
- Speed 30 ft
STR DEX CON INT WIS CHA 12 (+1) 12 (+1) 15 (+2) 9 (-1) 11 (+0) 14 (+2)
- Skills Athletics +3, Intimidation +5
- Senses passive Perception 10
- Languages Galactic Basic
- Challenge 1 (200 XP)
Traits
Aggressive. As a bonus action, Boryl can move up to his speed toward a hostile creature that he can see.
Reckless. At the start of his turn, Boryl can gain advantage on all melee weapon attack rolls during that turn, but attack rolls against him have advantage until the start of his next turn.
Actions
Vibroaxe. Melee Weapon Attack: +5 to hit, one target. Hit: 9 (1d12 + 3) kinetic damage.
Blaster Carbine. Ranged Weapon Attack: +5 to hit, range 60/240 ft., one target. Hit: 6 (1d6+1) energy damage.
Fusion Cutter Thug
Medium humanoid, chaotic balanced
- Armor Class 16 (durasteel armor)
- Hit Points 16 (2d10 + 6)
- Speed 30 ft
STR DEX CON INT WIS CHA 13 (+1) 14 (+2) 16 (+3) 10 (+0) 10 (+0) 9 (-1)
- Skills Technology +2
- Senses darkvision 60 ft., passive Perception 10
- Languages Galactic Basic
- Challenge 1/2 (100 XP)
Actions
Fragmentation Grenade (3/day). The thug throws a grenade, choosing a point within 35 feet. Each creature within 10 feet must make a DC 12 Dexterity saving throw. A creature takes 2d6 kinetic damage on a failed save, or half as much as on a successful one.
Blaster Pistol. Ranged Weapon Attack: +4 to hit, range 40/160 ft., one target. Hit: 5 (1d6+2) energy damage.
Blaster Thug (X2)
Medium humanoid, chaotic balanced
- Armor Class 13 (combat suit)
- Hit Points 13 (2d8+4)
- Speed 30 ft
STR DEX CON INT WIS CHA 10 (+0) 14 (+2) 15 (+2) 9 (-1) 10 (+0) 10 (+0)
- Senses passive Perception 10
- Languages Galactic Basic
- Challenge 1/4 (50 XP)
Actions
Multiattack. The thug makes two blaster carbine attacks or two vibroblade attacks.
Blaster Carbine. Ranged Weapon Attack: +4 to hit, range 60/240 ft., one target. Hit: 5 (1d6+2) energy damage. Vibroblade. Melee Weapon Attack: +4 to hit, reach 5 ft., one target. Hit: 5 (1d6+2) kinetic damage.

Artifacts Room Container List
| Container | Artifact | Description | Plaque Label |
|---|---|---|---|
| 1 | (Opened) Ancient Droid Power Converter | An old droid component that still looks in fairly good condition. | Power converter from the protocol droid that first reported the Vratixia renanicus barley type on Hetzal Prime. (~50 years old) |
| 2 | (Opened) First Minister’s Formal Robe (Clothes, fine) | A set of formal clothes colored in the light greys and yellows of Hetzal, worn with age, but still appearing to be in good condition. | Worn by the first elected minister of Hetzal Prime Wyn Minnick during her inaugural address and multiple occasionals afterward. ~190 years old. |
| 3 | (Opened) Drimen’s Shield Generator (Medium Shield Generator - Absorptive 1, Strength 13) | An obviously modified wrist-mounted shield generator with a peculiar extended design. | Shield used by farmer Hugo Drimen during the Honeyfruit Revolt. The revolt led to better droid support and workers’ rights. Heavily modified, this shield deflected many blaster bolts before Drimen was shot dead. ~180 years old. |
| 4 | Farmer Armband | A black cloth armband with the text “Farmer” written in Basic. | In the early years before droids were implemented, farmers wore this armband to identify themselves as part of the workforce. ~190 years old. |
| 5 | Platinum-gilded Mandoviol (Worth 800cr) | A mandoviol instrument that appears to be gilded with platinum. | While singer/songwriter Gwio Bin did not used this mandoviol until later in his career, this particular one was used in performances from age 40 to his death. ~80 years old. |
| 6 | Camtono (Contains 1000cr of ornate jewelry | A secured camtono container colored a light gold. | Naboo royalty during diplomatic negotiations, this camtono’s delivery was never accepted, and it remains in Hetzal’s possession today. ~50 years old. |
| 7 | Broken Lightsaber (Burning Cell, Returning Weapon Hilt) | Two halves of a broken metallic cylinder makes it look suspiciously like it was a lightsaber. | Found in an area of caves that suffered a rock slide on the west continent, this object was never identified but contains a sophisticated apparatus. ~80 years old. |
| 8 | Power Cell (Average) | Power cells for blaster type weapons that seem to glow with an unusual dim orange light. | These high-quality power cells were used in the early ministerial guard, when such specialized security was considered necessary. ~150 years old. |
| 9 | Restraining bolt | An old droid restraining bolt. | The last restraining bolt, used in agricultural droids before they were deemed unnecessary in any aspect of Hetzalian operations. ~100 years old. |
| 10 | Pitcher (Worth 300cr) | A simple white pitcher with a curved handle that appears to be made of alabaster or similar material. | A ceremonial pitcher used to pour the first drink between incoming and outgoing First Ministers. Eventually phased out when the practice became considered antiquated. ~75 years old. |
Agriculture Room. The Agriculture Room is divided up into three plots of land that are designed to appear like fields of crops. There are three plots that hovering holos above them label as Ice Melons, Honeyfruit and Kingsberries.
The ice melon plot involves a square plot of melons that smells vaguely sweet and is somehow much colder than the rest of the room; frost covers all the fruits and vines in this area. A refrigeration system underneath the melons helps them stay at below-freezing temperatures, and a frost-resistant irrigation system keeps the vines watered. All of the 100 ice melons are cold to the touch, and are organized into one large vine matrix measuring 10 x 10 ice melons. Ice melons removed from freezing temperatures go bad and turn a sickly brown color after one hour. On a display table next to the plot is a portable refrigeration unit big enough to hold one ice melon and keep it frozen for 6 hours.
If she is with the characters, Dr. Pringbey wants the characters to retrieve the master Ice Melon, which is the coldest melon in the plot. Without the use of specialized equipment, comparing ice melon temperature by hand requires holding two melons for 1 minute. Alternatively, a bioanalysis kit could identify the master ice Melon with 5 minutes spent scanning the plot.
When comparing two melons within two melons of the master Ice Melon (blue area below), 2 minutes are required.
 GM Map (Download)
 Player Image (Download)
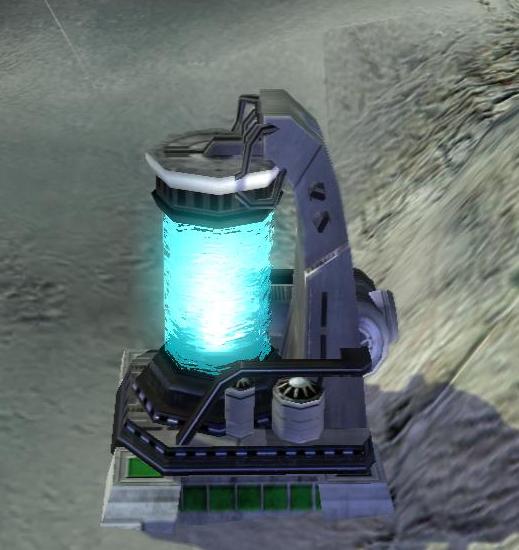
Bacta Room. The Bacta Room features a dimly lit space, filled with large holos describing the origins and potential applications of Bacta, a liquid substance that is poised to overtake kolto in the one-size-fits-all medical applications field.
One wall of holos describes the scientific makeup of bacta: a combination of kavam and alazhi bacteria and a type of barley known as Vratixia renanicus. One of the only places to grow the barley in question is on one of Hetzal Prime’s moons.
Another wall of holos shows the various applications of bacta in critical and noncritical medical applications, which appears to outclass kolto. Examples include concussions, internal organ damage and broken ribs, along with superficial injuries like cuts and burns.
The final wall features a transparisteel container on a pedestal with a liquid-containing vial and a syringe inside (the vial contains the first bacta sample, the syringe is a Medpac (Exceptional) with three uses, devised from bacta. Opening the transparisteel container can be sliced with a DC16 Slicing Kit or Security Kit check that takes 5 minutes per attempt, and is immune to most weapons. A lightweapon or fusion cutter could cut through a container with 15 minutes required per container. Next to the pedestal is a plaque.
Bacta Plaque
The vial next to the transparisteel container seems to reference the vial within.
BACTA SAMPLE: The first vial of the bacta substance ever created on Hetzal Prime. This sample contains all of the genetic tags to assist scientists in the creation of further samples. It is volatile and cannot be handled by any but the most specialized personnel.
BACTA MEDPAC: The first medpac created from bacta, several times more effective than its kolto counterpart, with each medpac providing multiple uses before it is expended. Production is estimated to begin within the next few years.
The bacta sample is very volatile and requires 15 minutes and a DC17 Sleight of Hand check to handle long enough to transfer to the bottle that Dr. Anen possesses. Anyone proficient with and possessing a biochemist kit are automatically successful on the check. Upon failure, the flask froths over and becomes worthless.
Extraction
Once all scientists agree to extract, the characters can signal the Aurora VII for pickup. Brastix acknowledges the signal, and characters can exit the museum and await the ship’s arrival. If appropriate, Brastix communicates the information from the Commlink Transmissions sidebar at the beginning of this chapter.
Just as the Longbeam cruiser comes into visual range, an urgent message comes over the commlink from Master Avar Kriss onboard the Third Horizon: a new piece of debris, while smaller than the impending impact the characters have already been aware of, has exited hyperspace close to the planet and is closing in fast! Brastix confirms he’s going to come in for pickup as quickly as possible.
The characters watch as the silhouette of the Aurora VII appears in the sky, heading toward them. But then a sudden streak of an object flashes down through the heavens, striking the ground a few miles away. The shockwave sends the Aurora VII tumbling out of control, and it explodes in a ball of fire as it gets close. A moment later, the shockwave hits the characters, knocking any standing outside off their feet, shattering the front windows of the Museum. The structure shudders, and the characters can make out a partial collapse of the ceiling of the building.
Any call for help is responded to by jedi aboard the Third Horizon, who let the characters know that no other extraction method won’t arrive in time. It’s up to the characters to find another way off the planet.


Part IV - Desperation
Debris rains down overhead outside the museum after the impact. For every 30 seconds a character is outside, they must do a DC14 Dexterity saving throw, and suffer 2d6 kinetic damage on failure or half as much on success.
The nearby impact has caused significant structural damage to the museum. In the lobby, most of the glass has shattered and tables are knocked over.
Time to Impact
At this point, the characters should be dramatically under time pressure to escape. If appropriate, adjust the amount of time remaining until impact to allow the characters just enough time to escape - they will need to bring B3-EP onboard the Sirena and conduct repairs, at minimum. Master Avar Kriss can communicate an update via commlink.
The hangar doors on the ceiling of the Hangar room, hidden before now, have partially collapsed, crushing the front halves of the Scythe fighters underneath and giving a view of the sky overhead.
If the characters are unsure what to do next, Dr. Typho suggests their only hope is to get the Sirena working in the Hangar area.
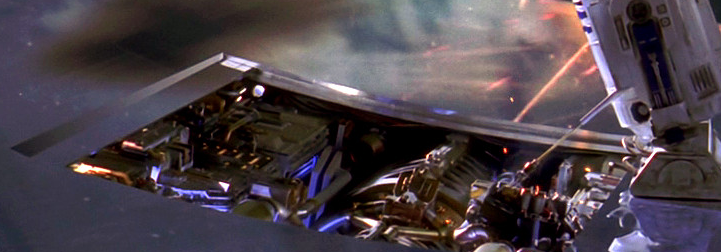
 The Sirena's engine room
Boarding and Repairs
Boarding the Sirena requires accessing a loading ramp that cannot be manipulated by an exterior control point. The only way to lower it is to restore B3-EP and request he lower the ramp.
Hallway. The ramp leads up to a hallway in the middle of the ship. Dim interior lights illuminate, indicating there must be some measure of power left on board. The hall leads to openings at the front (bridge), side (modular bay) and rear (engine room).
Engine Room. A layer of dust on the controls indicates that nobody has been in the engine room in some time, though all the hardware appears to be intact. The main interface panel is operational, right next to a droid interface port. B3-EP can, if requested, plug in and acquire the list of repairs required. This takes 5 minutes, or 10 minutes for any character to run the diagnostic manually instead.
The diagnostic reveals that ship power reserves are at 5%, with the only power draw being diverted to the Modular Bay. 5% should be enough to lift off. All that is required to get the ship going is reactivating the ship’s power modulator, which can be done instantly by anyone with Technology proficiency.
Success on a DC17 Perception check reveals a small ventilation shaft that opens to a tiny crawlspace.
Modular Bay. The huge lower level runs from one side of the ship to the other, and is clearly designed to be modular (for example, cargo or extra living quarters). The only exception is four droid power sockets that are connected to the ship’s main power grid. On the nearby wall, a smaller-than-human-sized ventilation shaft entrance has been opened.
Bridge. Many of the bridge consoles and chairs have been removed, replaced with dust that has caked most of the remaining surfaces. Light streams into the dim room from the open hangar doors through the cockpit window.. One basic station remains that controls a basic sensor suite and piloting controls, but they are not operational until power is restored.
Success on a DC17 Perception check reveals a small ventilation shaft that opens to a tiny crawlspace.
Lifting Off
With power restored, the characters are able to gain control over the Sirena’s propulsion systems, either one of the characters or B3-EP is able to navigate the ship out of the museum and toward open space.
As they do, one aged but large and obviously heavily armed Anti-Piracy Droid with two floating Combat Remote escorts burst from the ventilation shafts on the bridge. The large Anti-Piracy Droid intones “Pirates have been detected. This ship must be returned to the museum,” then attempts to take control of the ship at the helm console with the Combat Remotes creating a perimeter. Negotiating with the droid is impossible, and allowing the droid to take control means the destruction of the ship and the characters with it. If the players interfere with that action or attack, the droid group engages.
Combat Remote (x2)
Small droid, unaligned
- Armor Class 12 (armor plating)
- Hit Points 6 (1d6+3)
- Speed fly 30ft
STR DEX CON INT WIS CHA 2 (-4) 16 (+3) 8 (-1) 2 (-4) 12 (+1) 4 (-3)
- Skills Acrobatics +3
- Damage Vulnerabilities Ion
- Damage Resistances Necrotic, Poison, Psychic
- Condition Immunities poisoned, diseased
- Senses Blindsight 60 ft., passive Perception 11
- Languages ---
- Challenge 1/8 (50 XP)
Traits
Droid Swarm. When an ally of the combat remote hits a hostile creature that it can see with a weapon attack, the combat remote can use its reaction to make one weapon attack against that creature.
Circuitry. The droid has disadvantage on saving throws against effects that would deal ion or lightning damage.
Actions
Blaster pistol. Ranged Weapon Attack: +5 to hit, range 10/30 ft., one target. Hit: 1d4 energy damage.

Anti-Piracy Droid
Medium droid, unaligned
- Armor Class 17 (armor plating)
- Hit Points 58 (9d8 + 18)
- Speed 30 ft
STR DEX CON INT WIS CHA 15 (+2) 16 (+3) 14 (+2) 14 (+2) 15 (+2) 11 (+0)
- Skills Perception +4, Piloting +5, Technology +5
- Damage Vulnerabilities Ion
- Damage Resistances Necrotic, Poison, Psychic
- Condition Immunities poisoned, diseased
- Senses darkvision 60 ft., passive Perception 14
- Languages Binary, Galactic Basic
- Challenge 4 (1,100 XP)
Traits
Circuitry. The droid has disadvantage on saving throws against effects that would deal ion or lightning damage.
Actions
Multiattack. The Anti-Piracy droid makes two weapon attacks with its strike or wrist blaster.
Strike. Melee Weapon Attack: +4 to hit, reach 5 ft., one target. Hit: 4 (1d4+2) kinetic damage.
Wrist Blaster. Ranged Weapon Attack: +5 to hit, range 60/240 ft., one target. Hit: 6 (1d6+3) energy damage.
Wrist Blaster Volley (Recharge 5-6). The Anti-Piracy droid sprays a 10-foot-cube area within normal range with shots. Each creature in the area must make a DC 13 Dexterity saving throw, taking normal weapon damage on a failed save.
Part V - Finale
With the Anti-Piracy Droid defeated, the Sirena is able to depart the planet surface just in time, as the hyperspace debris races past the ship and impacts on the surface, completely leveling the Museum Immemorial and the surrounding several miles.
With that, the mission is accomplished. Rescue operations continue on Hetzal Prime and its two moons, and the ship’s antiquated sensors are picking up several Republic and Jedi ships in the process of destroying or halting the larger pieces of debris. The Third Horizon is taking off from one of the highest population centers on the planet, and can easily take the Sirena into its docking bays. A drift of Jedi Vectors pull into formation nearby, heading away from the planet toward the Third Horizon to dock.
Tibanna Bomb
(Note: If there are no Jedi characters, you can skip this section)
But any Force sensitive characters can sense something is wrong. Regardless of the players waiting for docking permission with the Third Horizon, attempting other rescue efforts or attempting to leave the system, a holo of Avar Kriss is broadcasted to the fleets.
Avar Kriss Holo
My Jedi friends, this is Avar Kriss. I am on the surface of Hetzal Prime. You know I’ve been watching you all work so hard to save this system and its people. You’ve done incredibly well. But something else is about to happen, something terrible, and we all need to act together to stop it.
One of the hyperspace anomalies is headed directly for the system’s largest sun--and it is a container of liquid tibanna. I am told that when it hits, a rare chain reaction wil result that will destroy everything in this system.
It is up to us to move the container to a new path. We will ask the Force to come to our aid. It might not be possible, and anyone who stays runs the risk of dying if we fail. The Third Horizon is about to transit the system. Anyone who wants to leave can dock with it. My good wishes will go with you… Let’s begin.
Exhaustion Levels
Note: This information can also be found in Appendix A of the Player’s Handbook.
Level Effect 1 Disadvantage on ability checks (Including Forcecasting) 2 1 slowed level (Speed reduced by 15 ft) 3 Disadvantage on attack rolls and saving throws 4 Hit point maximum halved 5 4 slowed levels (Speed reduced to 0) 6 Death
If the Force-sensitive characters reach out with the Force, they come into contact with Avar Kriss’s consciousness, and they experience the Force as she does - as song. You can feel the collective efforts coming together with Kriss, joining your own will. During the progression below, characters can remove themselves from the collective Jedi effort at any time.
Find it. You feel Kriss’s will, channeling everyone together. “There is a thing, moving very fast. It is very large, and very heavy. We will find it together.” Participating characters must make a Forcecasting check to contribute to locating the tibanna canister. The effort takes a toll.
| Forcecasting result | Effect |
|---|---|
| 1-5 | Suffer 1 level of exhaustion |
| 6-19 | No effect |
| 20+ | Advantage on next roll, Ignore disadvantage effect from exhaustion on next roll |
Along with the rest of the Jedi in the system, the characters reach out and are able to sense the location of the tibanna canister.
Move it. With all Jedi now focused in the right location, Kriss changes her focus to moving the object. You feel her will: “We will move it.” Participating characters must make a Forcecasting check to contribute to the effort. The strain starts to mount.
| Forcecasting result | Effect |
|---|---|
| 1-6 | Suffer 2 levels of exhaustion |
| 7-12 | Suffer 1 level of exhaustion |
| 13-19 | No effect |
| 20+ | Advantage on next roll, Ignore disadvantage effect from exhaustion on next roll |
The collective effort on the canister mounts, but the effect is negligible so far. Some Jedi begin to struggle to stay focused. The canister begins to enter the star’s photosphere.
Move it! Kriss is drawing upon the effort of the Jedi, trying to force the canister to change trajectory. Her will urges you on: “We WILL move it.”
| Forcecasting result | Effect |
|---|---|
| 1-7 | Suffer 2 levels of exhaustion |
| 8-14 | Suffer 1 level of exhaustion |
| 15-19 | No effect |
| 20+ | Advantage on next roll, Ignore disadvantage effect from exhaustion on next roll |
The canister changes its trajectory, but it isn’t enough to avoid the star. Characters involved in this effort can sense many Jedi losing consciousness from the sheer effort. Outside the ship, one Jedi pilot loses consciousness and crashes his Vector into another’s ship, with three total destroyed.
MOVE IT! With one final push, Kriss reaches out, drawing together what strength remains with the Jedi in the system. The cadence of her use of the Force intones: “WE WILL MOVE IT, and it will not hit the sun!”
| Forcecasting result | Effect |
|---|---|
| 1-9 | Suffer 2 levels of exhaustion |
| 10-15 | Suffer 1 level of exhaustion |
| 16+ | No effect |
The tibanna canister is finally nudged completely clear of the sun, slingshotting around the star and out into open space. The contents of the canister are heated to dangerous levels, but immediately begin to cool off.
Kriss calls out to the fleet, sounding exhausted, but confirms the success of deflecting the canister, and even confirms that most of the largest pieces of shrapnel have been destroyed or recovered, with innumerable lives saved. The day is won!
Rewarding Jedi Efforts

> Any Force-using characters that live through participation of each stage of Master Avar Kriss’s plan to move the liquid tibanna container gain a permanent +1 to their Wisdom stat.
Return to Starlight
As the crisis has passed, all ships are able to return to and dock with Starlight Beacon. Waiting in the oversized docking bay is a crowd of civilians, greeting those that return with a cheer, and an RDC officer rewards the characters with an amount of credits based on the table below. Characters will gain access to Jedi Master Nubarron’s stores onboard Starlight Beacon.
| Objective Complete | Credits Received Each |
|---|---|
| Saved the Hetzal System | 1000 |
| Recovered the Sirena | 600 |
| Recovered gilded mandoviol | 300 |
| Recovered bacta sample | 300 |
| Recovered master ice melon | 300 |
