
Table of Contents
-
5 Introduction
- 5 Campaign Introduction
-
12 Chapter 1: The Mornset Countryside
- 20 Anger Ever-burning in Hayfield
-
26 Chapter 2: Dark Dealings Near Kymal
- 28 Dividing Plains
- 32 Lost Hall of Everforge
- 37 Kymal Adventures
-
56 Chapter 3: Kymal - Dragon Heist
- 57 The Search for Floon
- 64 Fireball
- 74 Chasing the Stone
- 80 The Vault of Dragons
-
87 Chapter 4: Wrettis
- 94 Wrettis
- 102 Caverns Beneath Wrettis
- 107 Journey Back to Vues'dal Waters
- 110 Forest of Gloom
-
118 Chapter 5: The Verdant War
-
128 Chapter 6: Ruhn-Shak
- 135 Ruhn-Shak
- 138 Ruhn-Shak Cathedral
-
148 Chapter 7: The Stormlord's Quest
- 149 Travel to Emon
- 155 Emon
- 170 Vasselheim
- 174 Journey to the Utesspire Mountains
- 179 The Stormlord's Mountaintop Temple.
- 186 Shorecomb
-
195 Chapter 8: Shalestep Horror
- 196 Shalesteps
Table of Contents
-
209 Chapter 9: Wizard's Playthings
- 209 Side Quests
- 214 Westruun
- 219 The Great Trial
-
249 Chapter 10: The Mirescar
- 249 The Mirescar
- 252 Cloaked Serpent Lair
-
260 Chapter 11: Fires Over Kymal
- 267 Cassalanter Villa
-
278 Chapter 12: Gauntlet of Flame
- 279 Serpent's Head
- 296 Serpent's Head Cult Lair
- 305 From the Adventures of Bramble Tickletoes III & Co
- 306 Level 20 Battle Royale
- 308 Epilogue
-
311 Appendix A: Magic Items
- 311 Magic Items of Exandria
- 315 Dwarven Power Runes
- 317 Vestiges of Divergence
-
326 Appendix B: Tal'Dorei Bestiary
- 326 Stat Blocks by Creature Type
- 362 NPCs
-
388 Appendix C: Handouts
- 388 Handout 1
- 389 Handout 2
- 390 Handout 3
- 391 Handout 4
- 393 Handout 4 translated to Common
- 394 Handout 5
- 395 Handout 6
- 396 Handout 7
-
398 Appendix D: Location Index
- 398 Tal'Dorei Gazetteer
- 402 Additional Locations
- 408 Map of Tal'Dorei
-
410 Appendix E: Variant Rules
- 410 Corruption
- 412 Overland Journeys
- 415 Overland Journeys - Player Cheat Sheet
- 416 Ruhn-Shak Despair Rules
- 421 Titan Seed Wild Magic Surges
-
425 Appendix F: Gambling Games & Drugs
- 425 Gambling Games
- 426 Drugs
-
429 Appendix G: Festivals
- 429 Competitions
- 431 Festival Games
- 432 Vendors
- 433 Food & Drink
-
435 Art Credits
-
437 Map Credits
-
438 Adventure Credits
-
439 Miscellaneous Credits
Introduction
This campaign is an adventure set on the continent of Tal'Dorei in the world of Exandria following the tale of Vox Machina as featured in the show Critical Role. This adventure uses milestone leveling and is designed to be started for four characters starting at 2nd level. The encounters can be altered if your party has more players. For more information regarding the world of Exandria, check out the Tal'Dorei Campaign Setting Reborn (TCSR) and Explorer's Guide to Wildemount (EGtW) written by Matthew Mercer.
For this campaign, you will need access to the Player's Handbook (PHB), Xanathar's Guide to Everything (XGtE), Dungeon Master's Guide (DMG), and Tasha's Cauldron of Everything (TCoE).
The creatures and monsters utilized in this campaign come from the Monster Manual (MM), Volo's Guide to Monsters (VGtM), and Mordenkainen's Tome of Foes (MToF), as well as from the following 3rd party sources: Monster Manual Expanded (MME), Monster Manual Expanded II (MME2), Tome of Beasts (ToB), and the Critter Compendium (CC).
Additional magic items utilized in this campaign come from the Griffon's Saddlebag (GS).
Adventure Background
Since the gods first came to Exandria, four distinct ages of the world have gone by: the Founding, the Age of Arcanum, the Calamity, and the Divergence. The events of this adventure take place in the fourth age.
The Founding is widely considered the first age of Exandria. During this time, the gods brought forth creatures to inhabit Exandria, before splitting into two factions in the war against the Primordial Titans: the Prime Deities and the Betrayer Gods. The age ended with the defeat of the Primordials, along with the Betrayer Gods, which made the world safe for civilization to flourish.
The Age of Arcanum was the second age of Exandria and began over 1,500 years ago. During this time, mortals tested the limits of arcane power, challenged the gods who created them, and brought about the escape of the once-defeated Betrayer Gods. From Ghor Dranas, the Betrayer Gods spread their influence and eventually made an assault on the bastion of Vasselheim. The battle lasted twenty days and nights but, with the divine aid of the Prime Deities, Vasselheim and its inhabitants stood triumphant, if battered, at the end.
The Calamity was the third age of Exandria. The exact timeframe is uncertain, but it is known that Ioun, the Knowing Mistress, who was wounded during this age, has been recovering for at least 800 years. This age encompasses the second war against the Betrayer Gods, which devastated civilization and, in some cases, rearranged the geography of the world. The age ends with the defeat of the Chained Oblivion and the construction of the Divine Gate.
Hoping to seal away the Betrayer Gods for good, the Prime Deities retreated from the Material Plane. Behind themselves and their defeated brethren, they erected a barrier known as
the Divine Gate, which would prevent any god from physically crossing into mortal realms. This departure of the gods from Exandria, and the diminishing of their influence, was an event that has since come to be known as "The Divergence."
A powerful barrier between the Material Plane and the divine realms, the Divine Gate both sealed away the Betrayer Gods and the Prime Deities to their respective domains in hopes of salvaging the new age and preventing another Calamity. Should the Divine Gate be destroyed by the unanimous effort of the Prime Deities, all powers will be unleashed, and Armageddon will be imminent. Thus, the gods patiently watch their creations from beyond the veil, lending what small power and chosen minions they can send through the gate to aid their faithful in their goals and pursuits.
Tal'Dorei Reborn
First there was the Calamity, the palaces of the gods were devoured by the earth. Then came the wars of Drassig, and his defeat at the hands of Zan Tal'Dorei. And then came Thordak, The Cinder King and the Chroma Conclave shook the very foundations of Tal'Dorei. Thordak "merely" turned Emon to slag, but out of fear, panic, and malice, the flames of destruction were spread across the continent by mortal hands. Today, at the dawning of the Republic of Tal'Dorei, the ruins of three civilizations lie buried beneath your feet, and some secrets long to be unearthed.
The corners of Tal'Dorei's maps are not heavily explored. North of the Cliffkeep Mountains are the trackless Neverfields and the northern edge of the map. South of the Verdant Expanse is the Rifenmist Peninsula, where vast jungles and the brutal Iron Authority prevent any explorer from filling in the southern tips of the map.
This adventure takes place in the year 825 PD (Post Divergence). A little over ten years have passed since Vox Machina slew the Chroma Conclave and banished Vecna, much of Tal'Dorei is already returning to prosperity. Major cities like Westruun and Emon are especially fortunate, for the vast amounts of wealth plundered from the dragons' ancient hoards have allowed them to hire legions of arcanists to magically restore much of what was lost. Tal'Dorei is on the road to recovery, but all is not well. The newly formed Republic of Tal'Dorei finds itself increasingly indebted to the mages who facilitated Emon's rebirth, and there is worry that the fledgling Republic will crumble under the pressure.
Beyond Emon, the landscape of Tal'Dorei has been forever scarred by the presence of the Conclave, especially the Cinder King. His hellfire left marks on Tal'Dorei that will never heal — magical wounds that bleed fire and ooze chaotic magic. Smaller cities beyond the reach of the Council have begun to succumb to sinister influences. The Betrayer Gods sense weakness within the world. The lightless madness of the Chained Oblivion churns beneath Gatshadow. The lost blade of Graz'zt the Seductive calls from the Umbra Hills for a new master. Zehir the Dark Serpent raises armies south of Syngorn and their cultists spread like a poison through Tal'Dorei's remote frontiers. Tal'Dorei needs heroes — and this time, Vox Machina alone will not be enough.

Adventure Synopsis
This adventure begins when the characters arrive outside the town of Byroden, a small settlement in the Mornset Countryside. Recently, there has been an increase in goblin attacks from the Rifenmist Peninsula. Something sinister seems to be spurring the goblins to attack and leave their ancestral home of the Beynsfal Plateau. Throughout Tal'Dorei, members of the Cult of the Cloaked Serpent are working in secret to unravel civilization and sow chaos and mistrust across the land. Characters start this adventure at 2nd level.
Chapter 1. The adventure begins when the adventurers arrive in Byroden, a small settlement in the Mornset Countryside. Arriving in the midst of a goblin incursion, the characters join the Byroden militia in defending the town and learn of a recently kidnapped child. After a search and rescue attempt for the missing child, the adventurers are asked to investigate a mysterious issue in the nearby hamlet of Hayfield. Their investigation identifies a mysterious poison affecting the denizens and With the help of a reclusive herbalist, the characters must collect the ingredients to create an antidote. Characters should reach 4th level by the end of Chapter 1.
Chapter 2. The adventurers make their way to Kymal to deliver a package. While in Kymal, the characters are approached and hired by a disguised Clasp member to save an important blacksmith that has gone missing. This may provide opportunities for the adventurers to explore the underground conflict between the Myriad and Clasp. The characters also have the opportunity to explore the city, offer their services in saving merchants from bandits, and retrieve an emerald in service of a rival mercenary group. Characters should reach 5th level by the end of Chapter 2.
Chapter 3. The adventurers are further enveloped in the underground conflict between the Myriad and Clasp. Both criminal organizations, along with the Cult of the Cloaked Serpent are searching for a legendary hidden treasure. Again, a disguised Clasp member reaches out to the characters and asks for their assistance in locating a missing informant. As the adventurers become involved in the search for the Stone of Golorr, they investigate an explosion and the noble family responsible for it. Eventually, their investigation leads them to determining the location of the treasure. Can they get there before the thieves' guilds or cultists? Characters should reach 6th level by the end of Chapter 3.
Chapter 4. Mysterious notes found in the Vault of Dragons lead the adventurers to seek out a long-lost tower. Heading south, characters will pass through the Vues'dal Water area and learn of increased goblin raids. The search for the lost tower leads adventurers to stumble upon Cloaked Serpent cultists in the process of collecting a large chunk of what they will later learn is a primordial titan seed. On the return journey to the Vues'dal Waters area, the characters notice signs of a large conflict and stumble upon a mysterious cave and a long-forgotten dwarf vault. Characters should reach 8th level by the end of Chapter 4.
Chapter 5. The war between the Iron Authority's Khad Dirukh and the Forces of Gwessar has begun. This chapter provides opportunities for the characters to seek out mercenary work. The army is in need of an elite strike force to rescue trapped soldiers and deliver barrels of explosive black powder to destroy a strategic mountain pass. Characters should reach 9th level by the end of Chapter 5.
Chapter 6. The mystery of Ruhn-Shak calls. This chapter provides the opportunities for the characters to explore the Underdark and the mysterious happenings within Ruhn-Shak. The madness that has suffused through the city stems from an aboleth that has made its home underneath the city in a long-forgotten temple. Will the characters find the source of the madness and defeat the aboleth before it accomplishes its goals? Characters should reach 10th level by the end of Chapter 6.
Chapter 7. Visions from the Stormlord point towards a long-lost temple and a legendary artifact. This chapter leads characters across the Ozmit Sea to the continent of Issylra. The group must traverse the wild countryside, relying on each other, their skills, and wits to keep themselves alive on the journey there and back again. After completing the Stormlord's quest, the characters should reach 11th level. On the return journey, the characters will head to Shorecomb to charter a ship back to Tal'Dorei. While in Shorecomb the group may be asked to investigate a lighthouse overrun with undead. In addition, spring begins with the Renewal Festival and the Shorecomb festival offers the group a day of fun, food, and relaxation before they sail back to Emon.
Chapter 8. Something is killing children in Midshale. One of the towns that makes up the Shalesteps, Midshale is roughly a day's journey northwest of Emon. The residents suspect Old Algie, but is there more to this case than meets the eye? The party will need to converse with the residents of the town and investigate this "who done it." Their investigation will lead them to explore the Whitaker's farm who have been killed by some mysterious creature. Can the group figure out what has been killing the children before another child dies? Characters should reach 12th level by the end of Chapter 8.
Chapter 9. Side quests abound for the party before they become embroiled in the final whirlwind of adventures as the Cloaked Serpent's cultists prepare for and enact their sinister plots. The party may choose to aid the Pyrah guarding the Flamereach Grove in quelling an increase in elemental activity or do research into their powerful magic items or the history of the Cloaked Serpent. Meanwhile, a powerful wizard is looking to kidnap adventuring parties to test the extra planar dungeon he has created. This chapter provides side adventures across the Dividing Plains from Emon to Westruun. Characters should reach 15th level by the end of Chapter 9.
Chapter 10. The schemes of the Cloaked Serpent are brought to the forefront of the campaign. The party learns through their research of a long-forgotten temple to the Cloaked Serpent buried deep within the Verdant Expanse. The group must first locate the underground cave system that houses the temple and has become the home to many yuan-ti cultists. These cultists have engineered a ritual where they can infuse a creature with residuum through torture to imbue their bodies with magical abilities. This ritual has led to a small army of goblin sorcerers, reminiscent of the ones the party first met around Byroden and the Gladepools. Finally, the temple holds clues to the cultists' connections with prominent Kymal families that hint at where the major set piece of the Cloaked Serpent's plan will come to fruition. Characters should reach 16th level by the end of Chapter 10.
Chapter 11. The cultists of the Cloaked Serpent are primed to deal death and destruction across Exandria, starting with Kymal. The culmination of the cultists' work is the summoning of a massive volcano through a planar incursion of the Elemental Plane of Fire. The volcano will be slowly drawn towards Kymal by a primordial titan seed that has been placed there as a homing beacon. The volcano will rain destruction across the city, and elementals will be able to pass through the veil between planes to wreak further death and destruction through the city. The group must defend the city and locate the titan seed in the temple beneath the Cassalanter Villa, all while they work with leaders to determine where this ritual is being performed. Characters should reach 17th level by the end of Chapter 11.
Chapter 12. The characters must travel to Serpent's Head, a small, ruined mining town nestled at the base of the Cliffkeep Mountains, just north of the Torian Forest. The lair and main temple of the Cult of the Cloaked Serpents has been constructed here because of the occasional rifts that flare open to the Elemental Plane of Fire. These rifts are used to mask any errant elemental activity they may be performing. The party must locate the entrance the cultists hid within the abandoned Serpent's Head Forge. In the intervening years, fire giants have made the Forge their home, so the cultists carved out a side entrance, but relied on the giants to further obfuscate their lair. Once past the fire giants, the group must battle their way through a series of challenges and puzzles placed by the cultists to test new recruits. Once they reach the cultists' lair, the party must fight their way past, ultimately reaching a caldera within an active volcano where the ritual is being performed by a red dragon, Igbalneum. The group must destroy the titan seeds being used to power the ritual while fighting the dragon. Once all the titan seeds are destroyed, the ritual will end, sending the volcano back through its portal to the Elemental Plane of Fire. Characters should reach 20th level by the end of the campaign.
After the events of the campaign, as the group is praised and celebrated for their role in saving Kymal, it might be fun for the characters to test out their level 20 abilities in a Battle Royale. The wizard that kidnapped the party in chapter 9 will nab them again to fight each other for his amusement.
Adventure Hook
You can let the players come up with their own reasons for visiting the Village of Byroden or you can use the following story hook.
A few of the characters start in one of Syngorn's jails. They were caught stealing a few trinkets from various NPCs at the Highsummer Festival. The party is approached in Syngorn and asked by Voada, a mage from the Spellbender's Guild, to investigate the disappearance of one of their mage apprentices, Lucan. The characters are offered their freedom with no further persecution in return for their aid in locating this missing mage apprentice. The characters are warned that if they attempt to flee without fulfilling their promise to investigate, the Syngorn guard will hunt them down.
The party sets out from Syngorn the day following the Highsummer Festival. They are able to follow Lucan's trail as he is dragged off into the Verdant Expanse. The party loses the trail eventually and begin to hear rumors from passing traders of strange goblin sightings near the small town of Byroden. These goblins seem to have magical abilities unheard of for goblins. The characters believe that these magic possessing goblins might be connected to their missing mage apprentice Lucan.
The adventure begins as the party is approaching Byroden. They have traveled for days south through the Verdant Expanse and west through the Mornset Countryside and are approaching Byroden when horns ring out loudly as our adventure begins...
From the Adventures of Bramble Tickletoes III & Company
Lia traveled to Syngorn with her friend Kayne for the Highsummer Festival. While exploring the festival, she noticed a small crowd around a halfling bard performing spoken word. A Tiefling bumped into her at one point, apologized, and moved on. Later in the day, a warden of Syngorn approached Lia and asked her to follow him to a jail. Inside, the wardens inform her that her Signet Ring and Scroll of Pedigree were stolen by two petty thieves, Bramble and Maoki. The guards return her belongings as a mage enters the jail. The mage, Voada is an instructor of the Spellbenders' Guild. She explains that one of their apprentices, Lucan, was kidnapped a few days ago. Voada explains that the two prisoners have been offered their freedom if they are able to locate the missing apprentice. She asks if Lia and Kayne would be willing to escort the two petty thieves and aid in the locating of the missing apprentice. The group follows the lost apprentice's trail deeper into the Verdant Expanse towards Byroden.
Meet the Characters
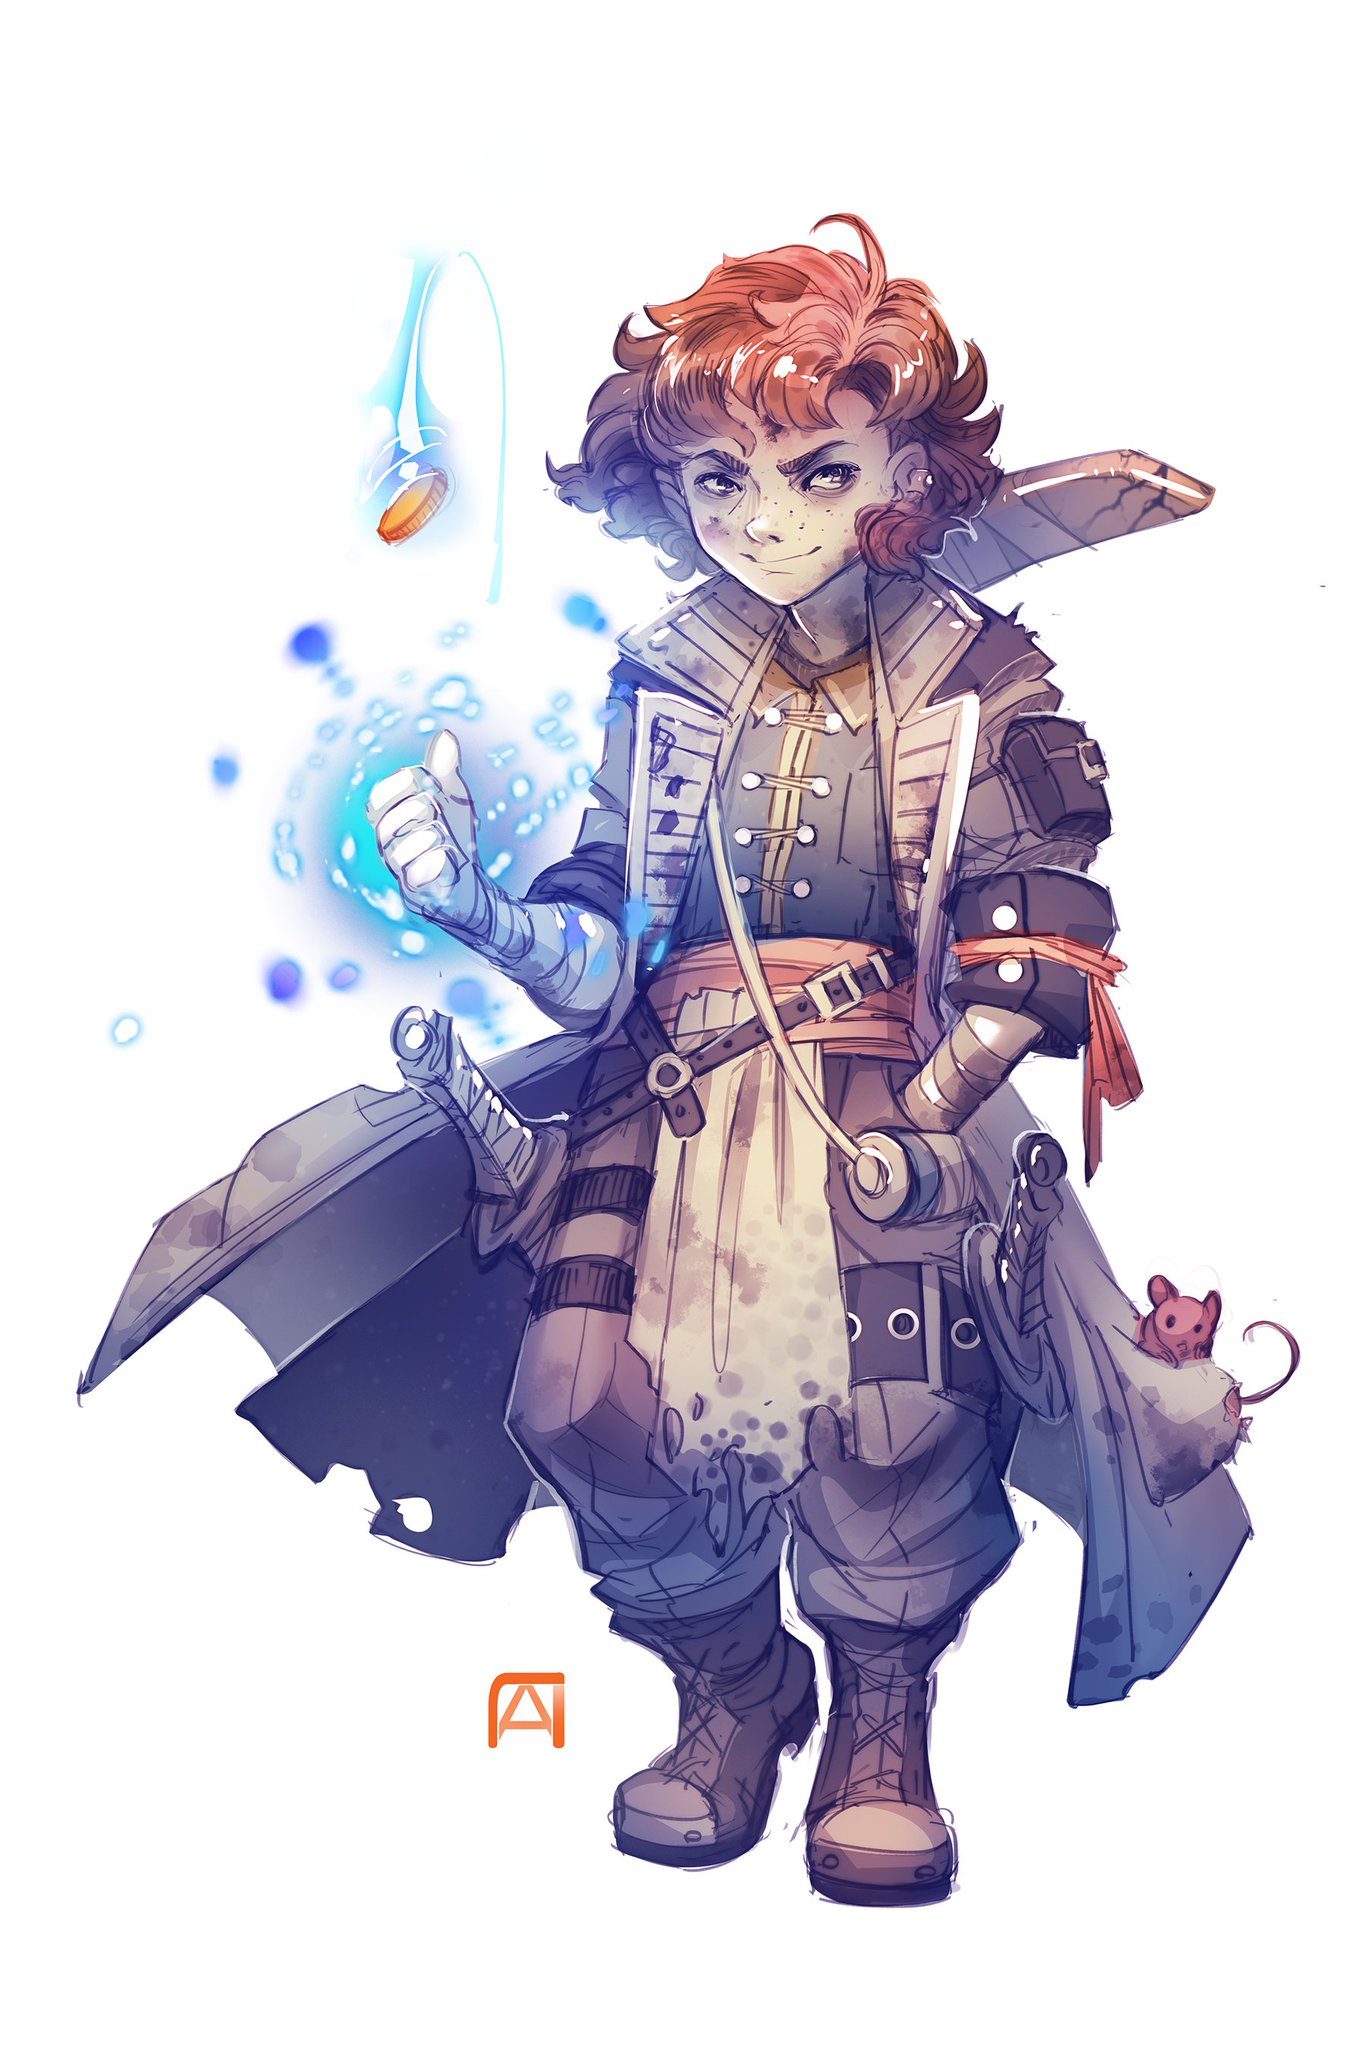
Bramble Tickletoes III
Race: Halfling
Class: Bard (Glamour)
Background: Entertainer
Age: 31 (tells everyone he's 29)
Secret Fact: Isn't actually the third, he's the first of his name
Bramble hails from Midshale, one of the three small, allied villages that comprise the Shalesteps. These villages are built along the side of the Seashale Mountains, Northwest of Emon along the coast. The name "Seashale" comes from their unique shape; appearing to look like a tidal wave about to crash on the inland territories, frozen in dynamic stone within the few broken bursts of forest that dot the perimeter of the mountain range. Crashing waves and salty sea breezes have carved miles of valleys between the jagged peaks.
Bramble grew up with his family on a small homestead just outside of the village. His parents are Garth and Callie. He has 4 siblings, an older sister Bree, an older brother Baskin, a younger brother Bobbin, and a younger sister Blossom. He maintains a good relationship with his family but has too much of an adventuring spirit to be satisfied staying in one place for too long. Bramble got his adventuring spirit from his great uncle, known around town as Crazy Uncle Algie.
Bramble first traveled to Emon and spent some time performing in taverns. Eventually, he traveled to Kymal and two years prior to the start of the campaign, met Maoki. Ever since, they have traveled the Tal'Dorei countryside together, never staying too long in any one place. They decided to spend the Highsummer Festival in Syngorn, where our story begins.
Kayne, the Storm's Wrath
Race: Human
Class: Paladin (Conquest)
Background: Acolyte
Age: 25
Kayne was born in the Realm of Elenen, an elven and human town located in the Dawnmist Pines. For the first few years, he lived down the street from Lia. His father, Axel, was a carpenter and moved their family to the Turst-Fields to make a better living when Kayne was 8 years old. He spent most of his time with his mother, Marisha, and his older sister, Kayla.
When Kayne was 10 years old, his family was murdered one evening by bandits. His sister, Kayla, hid Kayne inside a food barrel in the pantry which saved his life. She left the pantry to try and help their parents and was also killed during the attack. After the bandits had looted the house, Kayne, who had stayed hidden frozen in fear, finally crawled out of the barrel, and was found crying next to his sister's body by Bjorn, a monk acolyte to the Stormlord.
Bjorn brought Kayne back to the nearby Temple to the Stormlord to live and taught him how to defend himself. Kayne vowed he would never cower in fear again. One day, while Kayne was meditating, the Stormlord's voice came to him and requested that he take up the sword in His name to defend others. He also gifted Kayne the name: Storm's Wrath. Kayne only requested in return one thing: the promise to one day exact vengeance on those who killed his family.
Kayne moved back to the Realm of Elenen at the request of the Stormlord to strengthen the temple there. Kayne reconnected with Lia when he moved back, and their friendship re-strengthened. Kayne decided to journey with Lia on her adventures to protect his best friend. Kayne privately views Lia as his closest friend and would do anything to keep her safe.
It has been 8 months since Kayne last heard from the Stormlord. Kayne wonders whether he has been deemed unworthy. Not even Lia knows the Stormlord has stopped communicating with him.


Lia Arnuanna
Race: Half-elf
Class: Ranger (Gloomstalker)
Background: Noble
Age: 28
Lia's father is a human outlander, and her mother is an elf noble. When they married, they left Syngorn because her father was human and due to the politics of Syngorn, they knew any children they had would never be fully accepted. Throughout her childhood, Lia's family moved around frequently, which gave her an opportunity to meet many different creatures and is the reason why she can speak a lot of languages. This also bestowed in her an adventurous and independent spirit. Lia is also very friendly and can get along with all different kinds of people.
Eventually, her parents settled down in the Realm of Elenen. There, she met and fell in love with Engolan, heir to the throne of the Realm. They married and now live together in the castle. Because she has an elvish noble mother, she is more accepted here than she would have been in Syngorn, but she is still not fully accepted.
Lia is driven by a need to prove herself to the people of Elenen and make a name for herself in the community. Her husband, Marquess Engolan, is very busy running the land and manor, but because Lia is not fully welcomed into the kingdom, she does not have much to occupy herself with. As such, her adventurous spirit has driven her to go on an adventure with her childhood friend Kayne, and hopefully find a way to prove her worth to the Realm of Elenen. It is unclear what Lia is seeking to discover about herself on this adventure, but she hopes to find it along the way. It is particularly important to her to be accepted and she believes that this adventure is what it will take.
Maoki
Race: Tiefling (Purple)
Class: Rogue (Assassin)
Background: Criminal
Age: 28
Maoki was born in Jorenn Village to tiefling parents. Barakas, his father, was a blue tiefling and his mother, Makoria, was a red tiefling. At the age of 4, Maoki's mother was killed by the local rulers because of her tiefling heritage. He witnessed the whole thing, hiding scared to death, in the family room closet. After witnessing her murder, Maoki and his father started to train together with the monks in the local Temple of the Stormlord so they may be able to protect themselves.
One day in the temple, this tall, dark skinned, human man, Bashir, with a black goatee and scar down the left side of his face, approached them and whispered to meet him at the bar down the street, Forged through Fire, saying it was about Makoria.
Intrigued, they met him there and he told them how he had heard about the death of Makoria. He offered them a chance to join the Shadewatch. They agreed, knowing this could help them find and murder the men who murdered his mother. After months of working alongside the Shadewatch, Maoki's father was promoted and sent on a mission to Marquet. He left and never returned.
One night, months after his father's disappearance, Maoki overhead a conversation between two guards outside Lord Vidar's estate. They mentioned a man who had attempted to kill the lord's wife and the description matched his father. As the story concluded, the one guard said, “poor bastard got stabbed in the eye with a spear and died. The lord set him up using his connections to the Shadewatch." Maoki sat there stunned, the Shadewatch had betrayed his father for gold.
From that moment on, no one in the Shadewatch or Jorenn Village had seen or heard from Maoki again. He has lived in the Shadows, quietly stealing to live, never staying in one place for too long. It's been 10 years since Maoki left Jorenn Village training daily, honing his ability to hide, pickpocket, and kill.


1
Chapter 1: The Mornset Countryside
Every epic journey begins somewhere. A long night at sea brings fated friends together. The mystery of a bloodstained cloak causes talented minds to join forces to seek justice. A simple tavern gathering leads a number of eager dungeoneers to come together as one. Whatever the scenario, that first step that unites a would-be band of adventures is usually a challenging one.
Story Overview
Cassius lived in Byroden with his family. He had a mother, father, and younger sister. Cassius was 14 when Thordak attacked and decimated half of the village. Cassius was off in the fields with his friends when Thordak came but the rest of his family was home and were killed in the attack.
Afterwards, in his despair, Cassius prayed for the power to bring back his family. In his depression, The Cloaked Serpent came to him and offered him revenge. The Cloaked Serpent despises life, order, and love above all things. His surviving worshipers relish in using poison and fire to undermine civilization and consume nature.
Cassius in his hatred knew that Syngorn could have done something to prevent Thordak's initial rampage which would have prevented his family from being murdered. Cassius initially worked to find goblins and corrupt them to his bidding to form a strong hold. Cassius used the goblins for grunt work, spying on Byroden and Syngorn, aiding him in the capture of Lucan Aloro.
Cassius kidnapped Lucan Aloro from Syngorn 10 days ago and has been slowly corrupting him to his will. Once the apprentice has been corrupted, they will work together to capture more students until they have an army strong enough to take over Syngorn. The final step in the corruption process to make Lucan a true sorcerer of The Cloaked Serpent is having him perform a humanoid sacrifice.
Cassius sends an invasion of goblins to attack Byroden and capture a young child. They bring the child back to Cassius' cave and sets up a ritual in which Lucan will complete the sacrifice to prove his full indoctrinated into the Cloaked Serpent's worship.
Approaching Byroden
Encounter
Five goblins (MM p.166) can be seen running out of the forest from the north. They are headed in the characters' direction. In addition to their normal stat block, these goblins can cast the cantrip poison spray. Three village militia can be seen headed in the direction of the approaching goblins but are waylaid by goblins themselves. As the characters engage the goblins, it becomes clear they are twisted by some strange magic.
Aftermath
It takes the militia a minute to arrive at the characters location. As they arrive, they mention that this is the fourth time goblins have attacked Byroden in the last two weeks.
Treasure
If the characters search the goblins' pockets, they will find 8 - 12 cp per goblin.
Saving the Villagers
As the characters finish the above encounter, read or paraphrase the following:
Encounter
The characters are approximately 100 feet from the goblins when the fight starts. Five goblins (MM p.166) and two goblin Xvart Warlock of Raxivort (VGtM p.200). The militia are pincering the goblins from the far side of the house.
Treasure
If the characters search the goblins' pockets, they will find 6 - 10 cp per goblin. The warlock leaders have 4 - 8 sp each. With a successful DC 10 Investigation check the characters will also find that the warlock leaders each wear a serpent pendent. A successful DC 15 Religion check identifies the pendent as a Symbol of the Cloaked Serpent.
Aftermath
As the remaining goblins or dispatched, the young militia leader approaches the characters and introduces herself as War Ringer Mirna (Appendix B).
"Thank you for the help! I am War Ringer Mirna, captain of the Byroden militia." You see a tall young woman walking towards you with auburn hair and freckles. She appears to be in her late twenties and has the air of someone trying to appear older than she is. "We typically have no problem handling raids by goblins. Goblins will attack us periodically, though usually from the Rifenmist Jungle to the South, and our militia is well equipped to handle them. These goblins are different, seemingly corrupted somehow, and have started coming out of the Verdant Expanse to the north. As you saw, some of them even appear to have been taught magic, maybe by a sorcerer or wizard, which is highly unusual."
Next steps
Depending on what questions the characters ask, War Ringer Mirna is able to provide the following information:
If characters discuss the missing apprentice.
"Well, a missing magic user is a concern. It could be a coincidence, but these corrupted goblin attacks started about a week ago as well. I have no idea who is teaching these goblins magic, but someone must be. It's possible your missing mage could be involved somehow."
If characters discuss their ability to look into the goblins.
"The last time these goblins attacked was two days ago. They attacked the Southwind's Farm and kidnapped young Benji. A few others and I tracked the goblins to the Gladepools. We caught up to Benji and the goblins, but more goblins ran out of the forest at us than we could handle, and we had to retreat. We must have been close to their camp. We lost two good men trying to get Benji back."
"We can't afford to send more people after Benji, with the increase in goblin raids, from both the north and south, we have to increase the patrols, as sad as that is to say. If you all think that this might be connected with your missing apprentice, I can assure you that Baron Kayne would reward you well if you found and brought back Benji."
(Reward: 500gp)
"I will draw you a map of where we managed to track the goblins to. I'm sure we were pretty close to their camp. I know there are some caves in that area of the Gladepools; my guess is they are holed up in one of those."
Mornset Countryside
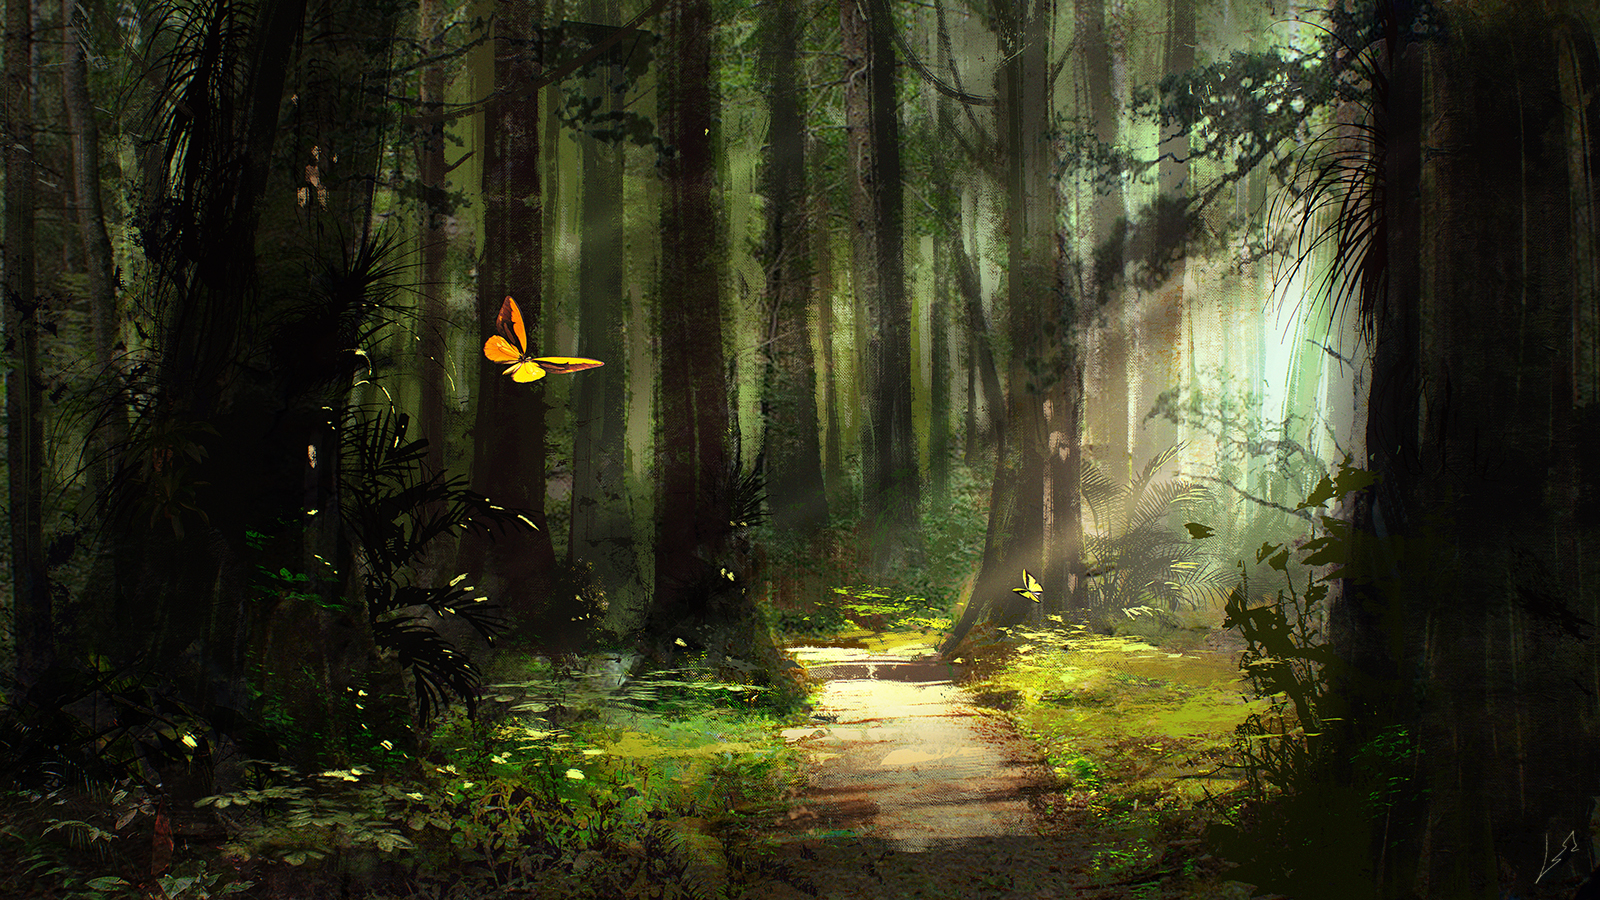
Spanning Tal'Dorei's distant southern reaches, buttressed against the Verdant Expanse, stand the massive Stormcrest Mountains. West of the Stormcrest Mountains, hundreds of miles of massive, unbridled forest shrouds the landscape in mystery and shadow. Widely understood to be the domain of the elves within Tal'Dorei, the dense timberland is traversed by few beside the elves of Syngorn. Brave, well-protected merchants travel from Emon to Syngorn along roads sanctioned for trade, hunters seek glory in tracking the wild beasts that roam the untamed wilderness, and the occasional band of dark elf raiders from Ruhn-Shak prowls the forest under cover of night. The enchanted nature of this wood holds the decay of the seasons at bay, the trees blooming evergreen year-round.
The Verdant Expanse sprung from the ley energies that shifted here following the Calamity, bringing vibrant, accelerated growth, and rampant magical flux to the region. This has instilled the forest with countless factions of stranded fey folk, and displaced aberrations that call the darker groves their home. Ruins slowly fall to the swelling overgrowth, and some say that parts of the wood move and hunt on their own, claiming the lives of those who wander too far from civilization. Even so, much of the Expanse is under watch of the Wardens of Syngorn, granting a measure of safety to those who travel beneath its dusky boughs.

As the Verdant Expanse and Gladepools give way to scrublands, and the Stormcrest Mountains break into rolling hills, an open plain of grass and scattered woodlands marks the Mornset Countryside. The only bastions of civilization anywhere near these forsaken peaks lie in the Mornset Countryside pushing along the Stormpoint range, far beyond the influence of the Council of Tal'Dorei. These rugged folk are used to fending for themselves and spit at the thought of returning to so-called "civilization", preferring life among the swamps and shadowed forests of their homeland. Home to many misfits and self-proclaimed "free folk" who either shun the guidance of northern governments, or have fled persecution for their illegal deeds, the people have maintained a simple, if occasionally tumultuous lifestyle.
Bound by necessity to survive in the outskirts, this land is held by a general code of honor and respect for all outcasts. Each denizen looks out for their neighbor, while the towns and homesteads are quite self-sufficient, if modest in living. This, however, does not absolve them of the occasional uncouth upstart wanting to seize power, or an incursion of dangerous creatures raiding from the Rifenmist Jungle tearing through the outlier communities. Most of the Mornset free folk are humans, but many free cities have alliances with the local hill giants, cyclopes, and ogres -- the "Lowborn" giantkin -- that help protect them against the hobgoblins to the south.
While comparably pleasant and welcoming on the outside, this lifestyle is protected by a fierce and intense drive to defend their way of life at the first sign of threat or danger. Most citizens are armed at all times and trained to rise as a communal militia at a moment's notice.
Byroden
Population: 750 (46% Human, 21% Half-elf,
15% Halfling, 10% Gnome)
Religions: Major - Changebringer
Minor - Wildmother
Byroden is set on the Northwestern edge of the Mornset Countryside, it borders the Gladepools, and marks the first stop for any traveler endeavoring to traverse the Rifenmist Jungle. Most who live here spend their days farming, fishing the pools, or manning the small chasm on the outskirts of the town to recover minerals and ore from the exposed earth.
Byroden is a small village with the main road running east to west. The town is not wealthy by any means; however, it is not ram shackled either. The denizens of this village seem to take great pride in their village. The main road is dotted with storefronts, and a few bars are dotted throughout the village. An inn is located at the eastern edge of town for any travelers that need a place to stay.
In the middle of town there is a square that has the Temple to the Changebringer on the Northwest corner. The temple to the Wildmother is found at the northernmost edge of the village, closest to the Verdant Expanse and the Gladepools. The Village Hall is on the southwest corner of the square. Most shops are found along the main road. The main barracks and stables are found on the way to the Baron's Manor. There is a farm on the southwest edge of town.
The eastern half of the village was largely destroyed by Thordak the Cinder King including Baron Kayne's Manor house up on the hill. The northeastern corner of the city was heavily populated and utterly decimated by Thordak. In the aftermath, since the area was no longer needed for houses, as a tribute to those that were lost, the area was turned into a beautiful garden. There is an orchard that borders the Mornset River to the north while walking paths crisscross the gardens. Two shrines have been built near the edge of the orchard with a statue of two half-elfs in between.
Much of this behavior stems from an event nearly three decades ago, when Byroden was brought to its knees by Thordak the Cinder King in an attack that reduced half of the town to ash and rubble and condemned a third of the population to burn in the wyrm's hellish flames. While most of the town has been rebuilt since the incursion, this tragedy has instilled the people of Byroden with an ever-present, underlying paranoia of another such attack.
Byroden Locations
The following areas, B1 through B12, are specific locations in Byroden and can be found labeled on Map 1.1.
B1. Temple to the Changebringer. Located at the northwest corner of the main square. This is the primary source of worship in Byroden.
B2. Village Hall. Located at the southwest corner of the main square. Where town meetings and events are held.
B3. Temple to the Wildmother. Located at the northernmost edge of the village, nearest to the edge of the Verdant Expanse. The cleric who runs this temple is Lodhili, a middle-aged male half-elf with long black hair.
B4. Byroden Barracks. This large stone and wood building is home to the Byroden militia. The barracks are located on the road leading to the Baron's Manor.
B5. Byroden Stables. This large barn houses the horses used by the militia.
B6. Baron's Manor. At the top of a small plateau on the southeastern edge of the village is the home of Baron Kayne Eghan, an aging human man in his mid-sixties with white hair. He, like most of the town, lost family members during the Thordak raid. His wife, Monica, and two of his children, Braiden and Tara, were killed. Baron Kayne and his son Lord Galvyn work to ensure Byroden's prosperity. Baron Kayne's daughter, Mirna, is the War Ringer, leader of the militia.
B7. Southwind Farm. This farmhouse on the southwestern edge of town belongs to the Southwind family of halflings which is where young Benji was kidnapped.
B8. Basil's Provisions. A single story timber framed building, with tall elf-wrought wooden shelves. A small dragon's skull hangs over the hearth inside. The proprietor is Basil, a pleasant middle aged male half-elf with blond hair who has lived in Byroden his entire life.
B9. The Ironhammer Forge. A single story sone-walled building with several stained-glass windows and a smooth stone floor. A large collection of armor hangs from the walls. The proprietor of the smith is Bennefre (Benne) Ironhammer, a dwarf male in his mid-sixties with black hair, a long black beard, and a matter-of-fact attitude.
B10. Countryside Inn. This single-story stone building is located on the eastern side of Byroden, along the main road into town. The interior is cozy and quaint with dwarf-wrought iron tables and chairs. Accommodations consist of several small rooms with wooden cots and a small private bathhouse for guests. An old gnome woman by the name of Shamil Sympony runs the inn. She has white hair, and can be curmudgeonly, sarcastic, and pleasant all in the same interaction. The meals here are delicious and range from salted trout to roasted mutton and chestnut bread.
B11. Round Hill Tavern. This is the largest tavern in Byroden. This large two-story timber framed building has a slate roof and is run by Pascual Mond. He is a slightly heavier human with dark skin and dark hair. He is a pleasant man with a loud belly laugh. This tavern is known for its meads, wines, and whiskeys. The food here is delicious and ranges from braised duck to roasted whitefish and steamed oxen.
B12. Small home attacked by goblins. This is the small wooden building that was attacked by goblins as the characters arrived in Byroden.
B1
B2
B3
B6
B4
B7
B5
B8
B9
B10
B11
B12
Map 1.1
Rumors Abound
If the characters spend time in town conversing with the villagers, they may learn of a few rumors.
Bennefre, Baron Kayne, Lord Galvyn. There have been an increase in wolf attacks to the outlying farms.
Bennefre & Shamil. The goblin incursions usually come from the Rifenmist Jungle but now the militia are overwhelmed by attacks from there and the Verdant Expanse.
Basil, Pascual. One of the ponds in the Gladepools has a reputation of being haunted. People have had creepy feelings and felt as if they were being watched.
All villagers. There have been rumors of people from nearby towns flying into a mindless rage and attacking neighbors. There have been whisperings between scouts about a shadow spreading in the Verdant Expanse.
Gladepool Rescue
If the characters agree to go in search of the goblin hideout, War Ringer Mirna will provide them with a map of where she believes the approximate location of the goblin hideout is. It is slightly west of one of the ponds that makes up the Gladepools. The characters can attempt to search for and follow the remnants of the goblin's trail with a successful DC 12 Survival check.
The characters will travel north out of Byroden, traveling into the Verdant Expanse. The path curves westward around the southern edge of one of the Gladepools. The map points out the location of a large rock with a tree growing horizontally out of it over the water. Mirna believes this is near where the goblins are hiding out.
When the party arrives at the rock marked on the map, they need to begin searching for tracks to locate their hideout. As they are searching, a character who makes a successful DC 12 Perception check hears two goblins approaching. The goblins are chatting and not paying attention to their surroundings. The party have a chance to hide before the goblins arrive if they choose.
Encounter
A goblin (MM p.166) and a goblin Xvart Warlock of Raxivort (VGtM p.200) approach the clearing where the characters are. Given the opportunity, the goblins will try to retreat back to their hideout, which is approximately an hour from this location.
Treasure
If searched, the goblin is carrying 7 cp and the warlock goblin is carrying 5 sp.
Aftermath
A successful DC 10 Survival check allows the characters to follow their tracks back towards their hideout. The tracks lead uphill, away from the Gladepools into rockier terrain. A rocky bluff begins to appear between the trees and the tracks appear to lead towards a large crack at the base of the bluff.
Future Story Seed
While walking past one of the Gladepools, a paladin or fighter notices a gleaming adamantine longsword embedded in the bank of the pond, just underneath the water. No one else can see the sword until they draw it from the mud.
The dark, gleaming sword has a green leather wrapped handle with spider and web engravings with an obsidian pommel. The sword feels much lighter than it should be. There are dark elvish runes engraved into both sides of the blade.
- "Whosoever draws this blade has the power to free Ruhn-Shak from madness."
It can be translated in Syngorn; however, the translator pauses before the name Ruhn-Shak, then stammers instead "the, uh city...from madness" and refuses to help further.

Sorcerer's Cave
This cave has been home to an evil wizard for quite a while. As such, the evil has seeped into the ground and suffuses the area. Characters that choose to long rest within the cave must roll saves against possible corruption (See Appendix E for Corruption Rules). As the characters reach the cave entrance, read or paraphrase the following:
See Map 1.2 for the complete layout of the cave.
L1. Entry Cave
This room is trapped. There is a trip wire that stretches across the center of the room and can be noticed with a successful DC 10 Investigation or Perception check. If triggered, a 10 foot square net falls from the ceiling and any characters in the center of the room need to make a DC 10 Dexterity saving throw or be restrained under the net. The net has tiny bells attached to it that alert the goblins nearby that there are intruders.
As the characters head down the passage, they reach an 8-foot-tall ledge. Flickering light can be seen above.
L2. Guard Cave
Encounter
There are 2 goblins (MM p.166) and a goblin Xvart Warlock of Raxivort (VGtM p.200) are sitting around the fire. If the net wasn't triggered in the previous chamber, they may be able to surprise them.
Treasure
Each goblin has between 10 - 14 sp in their pockets.
L3. Storage Cave
The lock on the gate can be picked with a successful DC 10 Thieves' Tools check. Characters looking through the gate with a DC 10 Perception check can notice there are a shelves built into the rock inside the room. The shelves appear to have a few objects on them. If the characters surpass a DC 15 Perception check, they hear some soft chittering noises and catch a quick glimpse of movement to the right near the ceiling.
Encounter
There are three Giant Wolf Spiders (MM p.330) that have made this room their home. They will attack as soon as the characters enter the room.
Treasure
Sitting on the shelves in here is a semi-rotten wooden box filled with 20 gp, 800 sp, and 600 cp. There are also 2 Potions of Healing and a small spell scroll wedged into a corner. A DC 8 Arcana check will identify the spell scroll as the sanctuary spell.
With a successful DC 10 Investigation check, a character will notice a wooden staff leaning in the corner. It has small carvings of various birds on it. A DC 10 Arcana check will identify the object as a Staff of Birdcalls (XGtE p.139).
L4. Star Cave
Trap
Both passages lead into the next chamber. In the mouth of the left passageway, there is a pressure plate inscribed with a hidden rune set in the middle of the floor. It is a Rune of Paralyzation. Characters can notice it if they are searching for traps with a successful DC 15 Investigation check. If a character triggers the trap, any character within 10 feet must make a DC 11 Constitution saving throw or be paralyzed for 1d4 rounds. In addition to being paralyzed, the goblins in L5 will be alerted to intruders and will send 2 goblins to investigate. They will arrive before the paralysis wears off.
L5. Living Quarters
Encounter
There are 6 goblins (MM p.166) sitting around the table. There are 8 goblins if the characters didn't set off the trap in the previous chamber.
Treasure
Each goblin has 8 - 10 cp in their pockets. Around the room are a dozen or so short bows and scimitars.
L6. Ritual Chamber
There is a large metal door built into the cave blocking the passageway to L6. The door is made out of a dark gray metal (adamantine) and is locked. A character can unlock the door with a successful DC 15 Thieves' Tools check. Conversely, a successful DC 18 Strength check can break the lock. Past the door, the passageway splits around a large pillar of rock before reconvening at the opening to another larger chamber.
Note: If the party takes a long rest before reaching L6, they will enter the room just as the ritual is being completed. The apprentice will not be able to be saved and no longer hesitant to follow Cassius and the child (Benji) will be dead.
An oval cavern opens here, forty feet wide and sixty feet long. Dark purple tapestries hang on the walls. Green torch light illuminates the room (represents the Cloaked Serpents obsession with both fire and poison) There is a stone altar set against the far wall. Above the altar is a mantle which holds a massive sigil: a human body with a half-dozen arms hold a gigantic serpent head, fanged and bared in aggression. Shadows swirl around the outside obscuring parts of the form.
A young child lies on the altar, not moving, chained down. Two men, one older and one younger, pore over an ancient tome. (The Rite of the Cloaked Serpent, written in Abyssal)
The Sorcerer will greet the party and welcome them to witness the final preparations for the ritual. If asked why he is doing this, Cassius will rant about how Syngorn allowed his family to be destroyed, and how Syngorn must pay for that.
Encounter
Cassius (Appendix B) will only attack if the characters try to intervene with the ritual in any way. If the ritual has not been completed, Lucan (Apprentice Wizard VGtM p.209) seems confused and hesitant and will try to stay out of the fight unless he is attacked. Cassius will attempt to get Lucan (the lost young male elf apprentice from Syngorn) to kill the child throughout the fight to complete the ritual.
Treasure
In addition to the tome, if searched, Cassius has 20 gp in one of the pockets of his robe. Lucan has 8 gp in his pockets. If the characters choose to search the room, a DC 12 Investigation check finds 2 Potions of Healing, a finely carved wooden staff (worth 25 gp), and 2 azurite stones (worth 10 gp each). The dagger Lucan carries is a finely made dagger with snake motifs engraved along the handle and pommel, a snake dagger (Appendix A). A DC 15 Investigation check also finds a Cloak of Many Fashions (XGtE p.136) tucked away in a corner.
Conclusion
If Lucan survives the fight, he has been corrupted by Cassius (see Appendix E for Corruption Rules) and currently has 7 points of corruption. Lucan is experiencing a cough and distraction due to the corruption he has sustained from Cassius. It takes one week or a lesser restoration spell to remove a point of corruption. A greater restoration spell can remove 1d4 corruption points. Ultimately, the party will need to escort Lucan back to the Spellbender's Guild in Syngorn.
If Benji isn't killed during the ritual, the characters will need to return him to his family. When they return to Byroden, Lord Galvyn seeks out the group to see if they would be interested in helping him investigate a mysterious illness plaguing the hamlet of Hayfield.
Upon returning to Byroden, after successfully defeating the sorcerer, the characters should reach 3rd level.
From the Adventures of Bramble Tickletoes III & Company
After making their way to Byroden, Lia, Bramble, Maoki, and Kayne agreed to go in search of Benji. When they made their way around the Gladepools, Kayne noticed a sword with runes under the water. No one was able to translate the runes and they hoped to find someone in Syngorn to translate it when they returned.
After locating the goblin cave hideout, the group began to fight their way through the cave in search of Benji. During the final battle, Cassius convinced Lucan to complete the ritual sacrifice. In a last-ditch attempt to save Benji, Bramble dove on top of Benji as Lucan plunged his snake dagger down into Bramble's chest. Afterwards, the group brought Benji back to his family, and they brought Lucan back to Byroden and had Lodhili, the Wildmother cleric, heal him of his corruption.

Map 1.2

Anger Ever-burning in Hayfield
The hamlet of Hayfield is a small farming community set deep in the Mornset Countryside, approximately 2 days journey southeast from Byroden. Hayfield is built on both banks of the Mornset River.
There is a large main square on the north side of the river. This square is where most festivals and events are held. Small stores and houses border the square and north side of the river. Hayfield is quaint, quiet, friendly, and is home to hardworking folks that take pride in their community. It is governed by Baron Kayne but has a local council of elders entrusted to make most decisions. The council is led by Hera, an older male human.
Story Overview
After the characters return to Byroden from the sorcerer's hideout, Lord Galvyn seeks out their assistance investigating the cause of a mysterious issue in the hamlet of Hayfield. There have been multiple instances of people flying into a mindless rage and attacking their neighbors.
The Cult of the Cloaked Serpent are working to sew chaos throughout Tal'Dorei. The villages in the Mornset Countryside rely on Syngorn for supplemental food supplies that aren't grown in the region. Recently, shipments from Syngorn have been getting hijacked and laced with a poison derived from the Ergon plant. Their goal is to create discord and distrust between Syngorn and the outlying villages. The cultists have been attacking shipment wagons, lacing the supplies with poison, and posing as the Syngorn merchants as they deliver the food to Hayfield.
During the days following the Highsummer Festival the townsfolk became more and more short-tempered with each other. Arguments and fights broke out between some of the citizens. People who usually got along quite well started arguing and fighting with each other. So far six residents have further escalated past simple short-temperedness. Four were killed after they killed neighbors, one died while trying to be subdued, and the most recent resident is in jail.
The characters must travel to Hayfield to investigate. During the Harvest Close Festival, Lord Galvyn begins to yell and grow increasingly belligerent and hostile towards the other festival goers, apparently poisoned. The characters must try to subdue him non-lethally.
Asking around town, there is an herbalist, Nedda Greenbottle, that used to live in Hayfield before her mystic powers began to frighten her neighbors. To avoid the discomfort, she isolated herself in a small glade about a day and a half northeast just inside the Verdant Expanse. She can identify the poison and knows the ingredients necessary to create an antidote.
The antidote requires the blood from a creature that lives in the swamps and has built an immunity to the poison. The blood must be combined with water and crushed yew berries. When the characters return to Hayfield, more residents are beginning to show symptoms and the antidote will need to be distributed quickly.
Hayfield Locations
The following areas, 1 through 10, are specific locations in Hayfield and can be found labeled on Map 1.3.
1. Temple to the Wildmother. This brick building is built on the southern bank of the Mornset River. An older halfling woman named Wena is the head cleric of the temple. She is also one of the members of the Hayfield council.
2. Stonehill Farm. This quaint wood farmhouse is home to the Stonehill family. Lili and Aras are nice neighbors who keep to themselves. Aras was one of the citizens that was poisoned and is currently in jail for attacking his neighbor.
3. Jaden's Blacksmith & Armory. The shop is run by Jaden Arryn, a retired human adventurer with a limp. This single-story timber framed building has a slate roof. It has several chimneys, each exhaling smoke and fiery sparks.
4. Hayfield Main Square. This large open area in the center of town is usually home to the weekly farmer's market. It is also used as the event space for holiday festivals such as Highsummer and Harvest Close.
5. Hayfield General. The shop is a two-story timber and brick building with large carved wooden doors. The space inside is filled with tiny floating motes of light. The owner is a willowy, middle-aged female half-elf.
6. Elder Hera's House. This large flagstone estate is set on the edge of the main square on top of a small hill. A large oak tree shades much of the front yard. Elder Hera is an aging human man who has lived here for over 50 years.
7. Graywind Farm. This small halfling run farm is known for their strawberries and blueberries. They work closely with the Riverside Inn and Bakery.
8. Sheriff's Office / Jail / Stables. This stone and brick building is the town's jail. There is a small stable on the property that houses extra horses. The sheriff is Arcos, an overweight human man with long golden hair and hazel eyes. He typically is seen around town wearing leather armor and carrying a longsword. He has a young male half-elf deputy named Edmund.
9. Riverside Inn and Bakery. The inn is a single-story timber framed building, with a large cellar. Accommodations consist of several small rooms with wooden cots. A small stable behind the inn has room for a few horses. The inn is built along the northern bank of the Mornset River. The owner and head baker of the inn is Saras, an older halfling.
10. Laughing Lord Tavern. The tavern is a large single story timber framed building, with well-made wooden tables and chairs. The tavern is locally known for its darts and throwing contests. The owner, Alin is a half-elf male and one of the town's council members.
Hamlet of Hayfield
Mornset River
Forest Road
Map 1.3
9
10

Initial Investigation
During the days after the Highsummer Festival, the townsfolk became more and more short-tempered with each other. Arguments and fights began to break out between neighbors over small, inconsequential incidents. People who usually got along quite well began arguing and fighting with each other. Ultimately, 6 people escalated to a mindless rage and ended up brutally attacking and in a few cases, murdering neighbors.
When the party arrives in Hayfield, they are met by Lord Galvyn who introduces them to Sheriff Arcos (Appendix B). The sheriff takes some time to discuss the information he knows and provides some background on the past incidents and on the one person in custody, the halfling man Aras Stonehill. The sheriff can provide the following information:
- Solva & Gedu Stonecleave, a dwarf couple, brutally attacked their halfling neighbors Mesym and Hamis.
- Lota, a female halfling, attacked the half-elf Bari with a knife in the tavern and was accidentally killed by the other patrons in their attempt to subdue.
- Adrian murdered his half-elf neighbor Elwina before Elwina's husband killed him trying to stop him.
- Elrolar was accidentally killed while being subdued by the townsfolk as he was attempting to break into Elder Hera's home.
- Aras Stonehill, the older halfling male in custody with silver hair and green eyes, attacked his neighbor Johny because he "stole" his shovel.
Hayfield is in the midst of setting up for the Harvest Close Festival. As the party begins to explore around the village, the following information can be obtained during their investigations:
- The six people who went crazy were all seen drunk at the Highsummer Festival.
- For festivals, Hayfield gets special food and drink for the celebrations, typically from Syngorn.
- Vyncis Finell is the male elf seller in Syngorn where the food comes from.
- Festival wine
- Exotic foods such as venison, oranges, and pomegranates
The Harvest Close Festival
As the third of Fessuran arrives, the festival preparations are well underway. A stage has been built and food and game stalls have been erected around the main square. The supplies that have arrived from Syngorn for this festival has been poisoned again, specifically the wine.
Encounter
Lord Galvyn (Appendix B) begins to become more belligerent, and the characters must step in before he severely hurts someone. He will attack anyone who attempts to subdue him.
Aftermath
If the party kills Lord Galvyn, they may have to answer to Baron Kayne and explain why his son is dead. If they are able to successfully subdue him, he can be brought to the jail house and locked up.
The sheriff wonders if there may be an antidote. He mentions there is an old witch who lives a day or so northeast of Hayfield just inside the Verdant Expanse. He asks if the group would be willing to visit her to see if she knows of an antidote and how to make it.
Search for an Antidote
Nedda Greenbottle (Appendix B) is an old wispy white haired gnome woman in her mid-nineties. She is extremely short and very eccentric. She lives in a small hut an hour or so inside the Verdant Expanse. Her hut is built on stilts on the edge of a marshy portion of the forest, it is small and wooden with a thatched roof. Her home is filled with plants of all kinds growing in dozens of pots and hanging from the rafters.
When the characters meet her and ask about poisons, she immediately begins describing various poisons she knows of. After describing the symptoms, Nedda recognizes it as Ergon, a powdered form of the Ergon plant. It is commonly found in the swamps nearby. She provides the party with a list of ingredients needed to make the antidote.
Antidote. The main ingredient for the antidote is the blood from a creature that lives in the swamp. It looks like a wandering mass of vegetation that commonly comes into contact with the Ergon plant and has built a natural immunity to the poison. In addition to the blood, the characters will need to collect yew berries.
Nedda's Quest. In exchange for the antidote information, Nedda asks the characters to bring a package of local plants to her brother, Hildo, who lives in Kymal. He relies on a plethora of plants and herbs for his store. Hildo will pay them for the package's delivery when they arrive.
Blood Retrieval
Nedda points the party deeper into the Verdant Expanse towards the nearest swamp. As they make their way closer, the mosquitoes increase, and the party has to start wading through a foot of water. A successful DC 20 Perception check notices a large mound of vegetation composed of decaying leaves, vines, roots, and other forest and swamp compost. It shifts slightly in a way that doesn't match the general movement of the environment around it.
Encounter
If the characters do not notice the Shambling Mound (MM p.270), it comes to life as a character draws near it. It attempts to seize and absorb any unwary prey. Use Map 1.4 as the battle map for this encounter.
Aftermath
The characters can try and collect as much of its sap-like blood as they can. A successful DC 12 Nature check allows the characters to collect enough blood.
As the characters are finishing up, a successful DC 15 Perception check notices three individuals wading through the swamp a few hundred feet away. The three are wearing Syngorn guard attire and are looking for more Ergon plants.
Secondary Encounter
The three individuals will attack the characters as soon as they notice them. One is an elf Bandit Captain (MM p.344) and the other two are elf Scouts (MM p.349).
Treasure
Each elf scout has 20 gp in their pockets. The bandit captain has a pouch filled with 50 gp. With a successful DC 12 Investigation check, the characters also find a hidden pouch on the captain containing a Potion of Healing and a letter (Handout 1). The letter is a code used by the cultists to organize the distribution of poison.
A DC 20 Investigation check notices that each cloak has a tiny slit near the base of the neck. It appears to be the size of a dagger.
Conclusion
After collecting the blood from the Shambling Mound, the characters will need to return to Hayfield with it and the other ingredients. To make the antidote, the characters will need to crush the yew berries and combine them with the blood and some additional water. The water thins the solution while the yew berries are used to slow the heart rate which makes the antidote more effective.
The distribution of the antidote begins with the people being held in jail, including Lord Galvyn. Then, the rest of the townsfolk can be inoculated against this poison.
After ensuring the townspeople of Hayfield are safe, Lord Galvyn requests the characters accompany him back to Byroden. He wants the group to discuss everything that happened with his father, Baron Kayne.
At the conclusion of this story arc, after retrieving the ingredients for the antidote and returning to Hayfield, the group should reach 4th level.
From the Adventures of Bramble Tickletoes III & Company
After returning Lucan to the Spellbender's Guild in Syngorn, the party returned to the Mornset Countryside and met Lord Galvyn in Hayfield to investigate the mysterious illness plaguing the residents. Lia, Maoki, Kayne, and Bramble attended the Harvest Close Festival when Lord Galvyn began to get angry and aggressive. While attempting to subdue him before he hurt anyone, Elder Hera, unsure of what was happening, tried to intervene. With a sweeping downward swing, Kayne nearly killed Hera believing he must be the one who was poisoning everyone. With quick healing from Bramble, they brought both to the jail tied up then quickly left town amidst the confusion to find the Old Witch, Nedda Greenbottle.
Bramble led the discussion with Nedda to learn of the necessary ingredients. In return, they agreed to bring a package of nature supplies to Nedda's brother Hildo in Kymal. The group ventured deeper into the swamp in search of the creature whose blood is key to creating the antidote. With the antidote ingredients in tow, they returned to Hayfield and oversaw its distribution.

Map 1.4


2
Chapter 2: Dark Dealings Near Kymal
After the characters finish their investigation in Hayfield, they must travel to Kymal to complete Nedda Greenbottle's request to deliver a package to her brother Hildo. It is roughly a 750-mile journey from Hayfield to Kymal. First, the party travels north leaving the Mornset Countryside and enter the dense canopy of the Verdant Expanse. Once through the Verdant Expanse, the characters will travel northward along the Wildwood Byway until they arrive in Kymal.
Story Overview
As the characters journey through the Verdant Expanse there is a chance for them to stumble upon the wreckage of a Syngorn merchant caravan. This caravan was attacked by the impostors the group met earlier in the swamp.
After a nearly two-week journey, as the group approaches Kymal, they stumble upon a merchant caravan in the midst of a bandit attack. The merchants come from small villages near the Foramere basin and are traveling towards Kymal to sell their wares. This encounter represents the increased bandit activity throughout the Dividing Plains as conflict between the Clasp and the Myriad cause increased instability in the region. The bandits seemingly have tattoos that identify them as members of the Myriad.
The Journey North
As the party travel along the road, with a successful DC 15 Perception check a character will notice a wagon wheel off the path laying amongst the underbrush.
Encounter
If the characters decide to investigate the wagon remains, they find signs of a struggle. The wagon has been partially broken apart, food remnants have been scattered around and is beginning to rot. There are also dried blood stains across the wagon and the dead bodies of a horse and two elves can be seen lying amongst the brush. The elf bodies have been stripped of their clothes.
A successful DC 12 Investigation check notices that the two elf bodies have small stab wounds near the base of their necks. (This corresponds to the small slits in the cloaks of the elves the characters faced before in the swamp.) The characters will also notice a faint trail of dried blood that leads farther into the trees. If the group follows the trail of blood for approximately 300 feet, the characters stumble upon another body, also stripped of their clothes.
Treasure
As the characters investigate around the third dead body, a DC 15 Investigation Check notices a fine-looking dagger with a snake carved into the pommel and handle lying underneath a nearby bush. This dagger is identical to the one Lucan had back in the cave.


Approaching Kymal
After journeying north for two weeks, the characters have noticed an increase in merchant caravans traveling the Wildwood Byway. When the characters are a few hours outside of Kymal, two wagons a little way ahead of them are attacked by bandits.
As the characters approach, the bandit leader tells the party to piss off and mind their own business. If the characters continue to press, the leader has his followers attack.
Encounter
A Bandit Captain (MM p.344) and 5 Scouts (MM p.347) are in the middle of tying up the merchants as the characters approach. They will attack if the characters refuse to leave them alone. Use Map 2.1 for the encounter battle map.
Treasure
If the characters choose to search the bandits, each of the scouts has 4 - 8 sp and the leader has 3 - 5 gp. The merchants will reward the characters with 15gp for saving them.
Aftermath
If the bandits are searched, the characters will notice a small sun tattoo on their forearms. A DC 15 History check will identify it as the symbol of the Myriad. If the character surpasses a DC 20, something about how blatantly obvious the tattoo is placed strikes them as odd. (These bandits were hired by the Clasp to pretend to be the Myriad to cause blame directed in their direction.)
The caravan is made up of five merchants traveling towards Kymal from near the Foramere Basin. This group makes the trek to sell their wares about once a month and is comprised of:
- Barry: a short, plump carpenter with brown hair and eyes
- Abdala: a tall farmer with auburn hair and dark eyes
- Redar: a curly red bearded blacksmith with hazel eyes
- Rik: a rugged tailor with silver hair and blue eyes
- Grace: a slender baker with blond hair and green eyes
Rumors. In talking with the merchants, the characters can gain some insight about the goings-on around Kymal. The merchants have heard the following pieces of information:
- The Myriad came in a few years ago to Kymal and there has been an increase in violence as the Clasp and Myriad engage in a turf war.
- The Kymal City Watch are overwhelmed with the in-fighting and all they can do is try and keep it from spreading.
- Goblins and Orcs have been attacking caravans and have grown bolder. It's odd seeing so many goblins this far north.
- Bandits have been attacking merchant caravans more often throughout the Dividing Plains.
Map 2.1
Dividing Plains
Tal'Dorei's vast heartland, framed by the Stormcrest and Cliffkeep Mountains, contains miles and miles of rolling hills, tall grass prairies, sky-blue rivers, and fertile farmlands. Within these plains, the hardworking people of the realm tend to their fields and businesses while the armed protectors of civilization battle back the wild beasts and wandering bandits looking to prey on these points of enduring society.
The Silvercut Roadway meanders across the endless plains, connecting the coasts, and bringing caravans with fresh trade and intrigue to the industrious pioneers of central Tal'Dorei. A caravanner's life is not without danger, though. Warbands of Ravagers, a chaotic horde of orcs and goblinoids rove the grasslands, slaughtering and pillaging indiscriminately.
Packs of nomad gnolls also steal from humanoid caravans, though diplomats have recently begun to broker a peace between humans and gnolls to unite against the greater threat of the Ravagers. Beyond the grassy plains, owlbears and other arcane monstrosities stalk the wooded regions. Tribes of wild centaurs also gallop across the open plains, delivering the Arch Heart's justice as they see fit.
Kymal
Population: approx. 8,000 (73% Human, 14% Dwarven,
13% Other
Religions: Major - Wildmother, Lawbearer
Minor - Stormlord, Everlight
Government:
Margrave - Jaktur Krishtan
Master of Information - Andes Turen
Master of Commerce - Geoffrey Weke
Master of Law - Witha Orryn
Master of Defense - Warryn Bathin
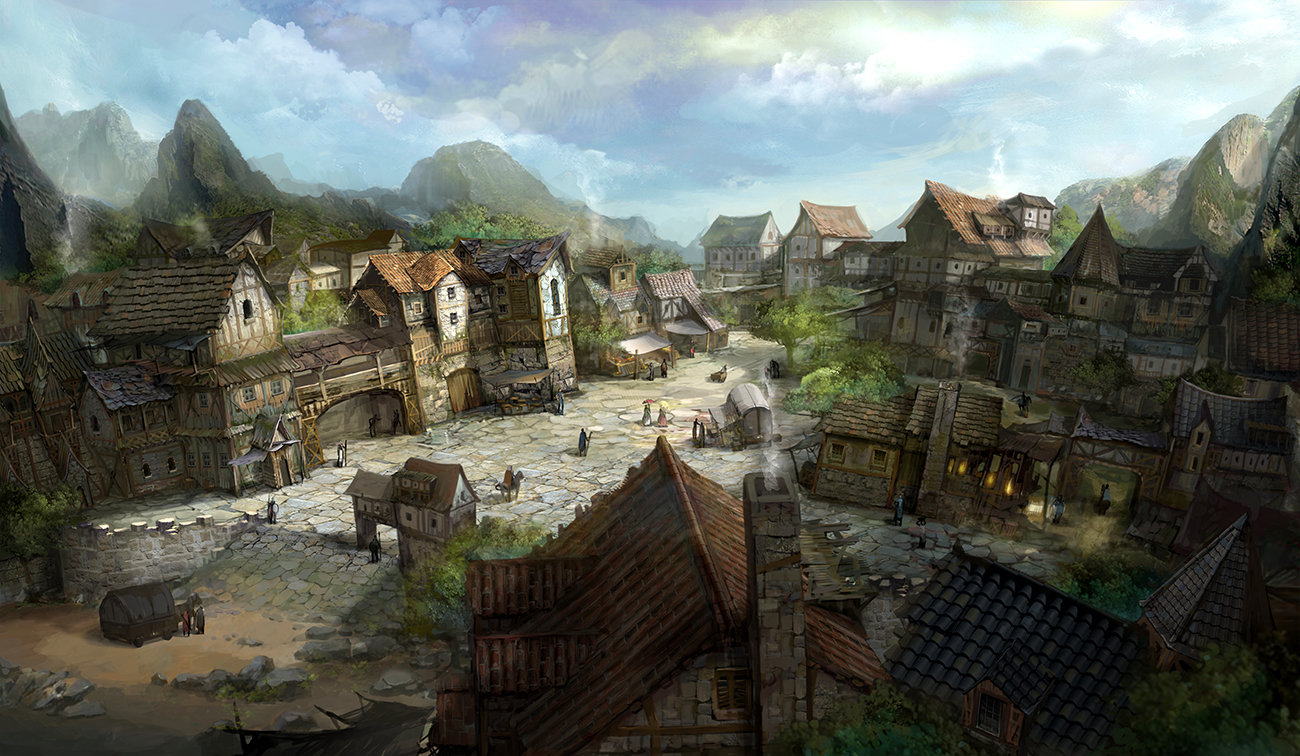
Kymal is a small city in the heart of the Dividing Plains. Glitzy. Gilded. Grimy. The city of Kymal stands as the grumbling ghost of a gold rush mining center which has now become a haven for gamblers and criminals; a city of gold built atop a mountain of mud. Kymal is built on the rocky foothills of the Ironseat Ridge. Exploring beyond the glamorous city leads one to nothing but a desolate expanse of boulders and scrub-brush.
Over two centuries ago, the discovery of rich gold veins within the Ironseat Ridge sent a rush of eager folk to its base. Kymal began life as their base camp, and over the next century grew into a lively, booming city. Gold and minerals came out of Kymal, and creature comforts like food, liquor, and illicit goods arrived in force. Sex workers quickly followed, and those who would abuse them and enslave them were close behind.
Unfortunately, the veins began to produce less and less, and in desperation, the mountain was ravaged by hungry interests unwilling to accept the signs. Within ten years, the mining industry in Kymal had died, poverty and hunger
becoming commonplace. Since then, the populace has shifted to survival through farming, fishing within the Foramere Basin, and trying to build interest as a trade center like Westruun, without much luck. The community had remained stagnant for decades when an entrepreneur from Ank'Harel named Calis Krishtan opened a small casino called "The Maiden's Wish". This gave the economy a vibrant boost, interest in the city grew, and people returned to Kymal as it rebranded as a haven for luck and quick currency.
Now expanded over the past two generations, Kymal has recovered somewhat due to this growing presence of sanctioned games of luck, even going so far as to name Calis' son, Jaktur Krishtan, heir to the Maiden's Wish, as the Margrave of Kymal. While large scale gambling is not illegal within Tal'Dorei, it is generally considered uncouth on a social level, and the council within Emon is happy to keep the bulk of that element away from the capital city. This type of industry does draw the attention of opportunists, however, and many competitive gambling joints, loan sharks, and criminal interests have sprung up in recent years.
Jaktur Krishtan is a businessman and celebrity-turned-politician, unusual within Tal'Dorei. His extravagant lifestyle is not unusual among Tal'Dorei's leaders, but his flamboyant, showy behavior certainly is -- and the people of Kymal love him for it. Instead of leading personally, Jaktur delegates most of his duties to his advisors, leaving him free to do what he likes best: being a fabulously wealthy public icon, making nightly appearances at the Maiden's Wish, throwing magnificent galas, and organizing street fairs. Jaktur's majordomo, an austere tiefling woman named Prudence, wearily manages the day-to-day minutiae of running Kymal.
Kymal is no longer the den of crime it once was, but there is still scum beneath its glitzy surface. Small-time cutpurses lurk in the shadows, waiting to make off with the small fortunes won by the casinos' luckiest patrons. Though not as significant as their Emon headquarters, the Clasp has a substantial presence in Kymal, and often utilizes petty criminals as freelance operatives when they need a job done quickly. Covertly, the hostility between the Clasp and their rivals, the Myriad manifests as a quiet proxy war, using these common thieves as fodder. The Clasp and Myriad both own casinos in town, the Wishing Well and the Dragon's Hoard, respectively.


Kymal Locations
The following areas, 1 through 25, are specific locations in Kymal and can be found labeled on Map 2.2.
Casinos
K1. The Maiden's Wish. This glitzy two-story brick building is the casino owned by Calis and Jaktur Krishtan. A Marquesian style interior greets patrons with gaming tables spaced throughout and a large bar near the back. The casino is best known for their weekly Quon a Drensal (Run of Luck), a traditional Marquet game where 5 small lizards race through a maze.
K2. The Wishing Well. This wooden building is operated by Mahel, a female dwarf with uneven gray hair and bright blue eyes. Mahel also happens to be a Clasp Spireling. The elegant interior boasts two bars and multiple lounge spaces in addition to various gaming areas. Gambit of Ord is the game this casino is most known for.
K3. The Dragon's Hoard. This stone building is the newest of Kymal's casinos. Owned and operated by Malia, an elegant female half-elf with cropped copper hair. Malia is also a lieutenant in the Myriad. This casino is smaller than the rest but is known for their signature drink, Dragon's Blood, which is an extremely strong, deep red liquid with a fiery finish (DC 10 Constitution saving throw or become drunk).
K4. The Luck's Hand (Closed). The smallest casino in Kymal is a recently closed casino after its owner, Mendel, died mysteriously one night. There are many different rumors regarding his death, but the one most believe is Margrave Jaktur had him killed to remove competition with his casino.
Inns & Taverns
K5. The Hunter's Hall. The inn is a two-story wood building with a smooth stone floor. The interior is warmly lit and has wooden stage built into one corner. Accommodations consist of several large rooms with beds and straw mattresses. The innkeeper is a heavyset human named Roguy Shyney, a retired soldier with a stash of weapons locked beneath the bar.
K6. The Scoundrel's Lodge. The inn is a large single story timber framed building, with several leaded glass windows and a collection of weapons hanging on the walls. Accommodations consist of small rooms with wooden cots. The inn can be found along one of the city's trade routes and is run by a young dwarf woman named Bali.
K7. The Playful Harper. The inn is a two-story stone-walled building, with carved wooden doors. The interior is pleasant with a collection of exotic drinking vessels rests upon a long shelf above the bar. The innkeeper is a cultured male human named Wilsi with accommodations consisting of several large rooms.
K8. The Skewered Dragon. This dive bar is located in the cramp streets on the western side of Kymal. It is operated by the Myriad with a grumpy dwarf bartender named Oswalt.
K9. Spouting Fish. This tavern is a tiny, hole-in-the-wall place that specializes in bubbly liquors. Geraldine is the elegant half-elf owner of this establishment.
Shops
K10. Unoch's Armory. This two-story timber and brick building is decorated with wrought iron furnishings. The owner is a red tiefling named Aered Unoch who specializes in creating armor and weapons from exotic beasts.
K11. Everforge Blacksmithing. This well-built stone building is home to Polla Everforge. One of the finest blacksmiths in the city, a large collection of her fine craftsmanship is displayed throughout. Polla often is working on commissions for the city.
K12. The Fox's Armaments. This simple but functional single story brick building has a large supply of weapons and armor. It is owned and operated by Vithmiro, a simple man with brown hair and an extremely bushy beard.
K13. Amin's Arcana Emporium. This two-story building catches the eyes of shoppers with its ornately carved wooden doors and glowing gemstone sconces adorning the façade. The interior of this shop is also well lit by glowing gemstones floating near the ceiling. The shopkeeper is a thin male gnome named Amin who is extremely charming and handsome. His shop has some rarer magical artifacts that Amin has acquired from friends in the Cobalt Reserve.
K14. Hildo's Medicinal Herbs & Spices. This small wooden building has a large window filled with plants and multiple bunches of tied herbs. The interior is littered with drying herbs hanging from the ceiling. The smell is strong but pleasant. Hildo is the eccentric owner of this shop. He is an older gnome with graying hair and sells organic potions that are half as strong as a normal potion but half the cost.
K15. Crumbs Bakery. This happy yellow building is home to Kenzo and his son Karl's bakery, Crumbs. Kenzo is a genial man, short and plump with dirty blond hair and is secretly an informant for the Clasp. He uses his stall he sets up in the market on Da'leysen as an opportunity to talk with a lot of people about the various goings-on in Kymal and is able to pass a lot of useful information to the Clasp.
K16. The Readers Nook. This small shop is owned by Joanna, a halfling woman who loves books. Her shop boasts the largest collection of books in Kymal, and she is always happy to help new readers find their passion.
K17. Nanna's General Provisions. This building looks like a barn and has one large interior room. Rows of food, supplies, tools, and other general provisions fill the shelves. The shop is run by an old gnome woman who goes by Nanna. She often has supplies that are shipped to and from Kymal by her partner, Gerald. Nanna is always hiring mercenaries to protect her shipments from bandits.
From the adventures of Bramble Tickletoes III & Company
The Hunter's Hall has long been the sole performance space of Bramble Tickletoes III in Kymal. Performances are at 8 o'clock when Bramble is in town. Maoki typically tries to steal from the audience during the performances. Roguy has struck a deal with Maoki that he will turn a blind eye to his thievery as long as he doesn't get caught and cuts him in for 20% of the take.
Places of Interest
K18. Kymal City Hall. This large gray stone building is set on the northern edge of the central square. Inside there is a large open meeting space in the center with offices for the various government officials along the sides as well as throughout the second floor. There is a secretary desk where people can check in for meetings with various officials. This desk is typically helmed by a bored halfling named Redmund.
K19. Central Market. This large square sits in front of City Hall and hosts a large market on Da'leyson for local farmers and merchants in the center of the city.
K20. Gralhund Villa. The Gralhund family are Kymal nobles and own a large estate on the edge of the entertainment district. Their estate consists of a large two-story mansion with servant quarters as well as a large stable to house the family's horses. Lord and Lady Gralhund are prominent members in Kymal high-society and have often been seen socializing with Margrave Jaktur in his casino.
K21. House of Inspired Hands. The House of Inspired Hands looks like a cross between a temple and a workshop. The Allhammer is the patron of craft and creation and is worshiped by smiths, artisans, and miners alike, granting inspiration where respect and prayer are given. Valetta is a bronze female dragonborn priest who is typically found among the many workshop spaces in the temple.
K22. Temple to the Stormlord. This temple is built from a dark granite and has an austere, imposing presence. A statue of a strong warrior is embedded into the building above the iron door. The interior is dimly lit with stark decorations. Storm Marshal Golfynor, a well-built dwarven man, is the head of the temple here in Kymal.
K23. City of the Dead. The City of the Dead is Kymal's large cemetery. It is open to the public during the day but is closed at night with the City Watch posted at each entry gate.
K24. Peabody's Pilsners. The Peabody family own a small home and store front where they sell their homemade beer, Peabody's Pilsner. This halfling family's cellar is home to their brewing supplies, and unbeknownst to the family, a secret tunnel that leads to one of the Myriad's hideouts.
K25. Cassalanter Villa. Victoro and Ammalia are the nobles who own an extravagant three-story mansion with white marble walls. It sits amidst a large, picturesque estate of gardens, hedges, and water features.

K1
K2
K3
K4
K5
K6
K7
K8
K9
K10
K11
K12
K13
K14
K15
K16
K17
K18
K19
K20
K21
K22
K23
K24
K25
Map 2.2

Lost Hall of Everforge
The small city of Kymal is built at the base of the Ironseat Ridge and has become a haven for gamblers and criminals. Arriving in Kymal affords the characters an opportunity to become embroiled in some of the city's less-savory dealings. The Clasp and the Myriad are waging an underground proxy war to establish a stronger presence in the city.
The Everforge clan of dwarves once held a place of honor and prestige in Kymal, their weaponsmiths unrivaled in the Dividing Plains. The clan welcomed all visitors to purchase their wares. However, no one outside the craftsmen were allowed into the Great Forge, which was magically linked to the Elemental Plane of Fire. Eventually, business began to dry up and it wasn't profitable to keep the massive forge open, so they shut it down nearly a century ago. The matriarch of the family, Polla Everforge, was skilled in elemental magic and severed the magical link to the Plane of Fire.
Story Overview
A few decades ago, kobolds discovered the forge and moved into the space. Recently, a human sage named Spencius, who serves a red dragon wyrmling named "Igbalneum" has decided to rekindle the Great Forge. Both are working for the Cloaked Serpent. There is a ritual that he believes will empower the dragon and make it nearly invincible which requires it can be bathed in elemental fire. Thus, he sent bandits to abduct Polla and bring her to the long dormant forge so that he can force her to reopen its connection to the Plane of Fire.
The disappearance of Polla Everforge is a problem for the Clasp. She was working on a large weapons order for Kymal's Master of Defense: Warryn Bathin. With the increase in tensions throughout the region, the weapons are a necessary upgrade for the City Watch. However, Kymal cannot afford the order and the Clasp have stepped in to foot the bill. This will enable them to gain favor and influence the Master of Defense if the order is completed.
Shortly after the characters arrive in Kymal, a Clasp Member posing as a city official approaches the group and asks for their assistance locating her. Their investigation will lead them to Polla's ancestral forge where the group will encounter kobolds and a Cloaked Serpent cultist who is using the magical forge to strengthen a young red dragon.
See Map 2.3 for the complete layout of the forge.
Adventure Hook
As the characters spend a day shopping and wandering around town, they hear about a dwarf woman who appears to have been kidnapped the night before. Her blacksmith shop has a broken window and there are signs of a struggle within. Rumors are that her ancestral forge up in the Ironseat Ridge may have hidden stores of dwarven armor and weapons.
At some point during the day, the characters are approached by a dwarven woman who introduces herself as Silvera Brighthelm, a Kymal city official. In reality, her name is Razur, a member of the Clasp. The Clasp are interested in saving Polla so she can finish the order for the city they helped pay for and consequently cement their influence over the Master of Defense.
-
"Hi there, would you happen to be the adventurers that saved the merchants from the bandit attack yesterday? My name is Silvera Brighthelm, and I work for the Council of Kymal."
-
"I'm not sure if you heard, but a prominent blacksmith appears to have been kidnapped last night. Her name is Polla Everforge. She has a number of important contracts with the city and it's important to us that we are able to find and rescue her. With the increased number of bandit attacks, the City Watch is spread fairly thin, and we unfortunately can't spare any to search for one individual."
If the party inquires about payment:
- "Well, I will have to check with the Master of Commerce, but typically the city pays 20 gp per bandit head or 10 gp per pair of kobold ears."
Entering the Forge
Asking around town, Polla's ancestral forge is located up in the Ironseat Ridge, a little over an hour outside Kymal. It is easily discerned from the other abandoned forges by the dwarven stone doors carved with an intricate flame motif.
Upon arrival, the doors do not appear to be locked. Being dwarven made, the doors open easily and noiselessly. The forge has the following features:
- Unless otherwise noted, all areas are lit by torches.
- The doors are closed, but not locked.
- Ceilings are 15 ft tall, except in the Great Forge (30 ft tall).
- The stonework throughout the forge displays incredible dwarven craftsmanship.
- Secret doors can be found with a DC 15 Investigation check.
There are two patrol groups of humans and kobolds that are rotating through the forge. They rotate through the rooms at approximately five-minute intervals.
Patrol 1. The first patrol is led by 2 Winged Kobolds (MM p.195) with another 10 Kobolds (MM p.195). When the characters enter the forge, this patrol starts in Room 11 and then progress through Room 10, 8, 7, 5, 6, 4, 3, 2.
Patrol 2. The second patrol has 8 Kobolds (MM p.195) led by 2 human Scouts (MM p.349). This patrol begins in Room 7 and then progress through Room 5, 2, 3, 4, 6, 8, 10, 11.
Room 1. Hall of Armaments
Traps
There are 4 floor traps at the end of the hall, near the entrance into the Great Forge. A DC 15 Investigation check allows a character to notice the presence of slightly raised stone tiles that have a tiny hole in the middle. The dart trap can be disabled with a successful DC 15 Thieves' Tools check or characters can choose to step around the traps. A creature that steps on the plate springs the dart trap. The darts have a +3 to hit and deal 2d4 piercing damage on a hit. In addition, if one of the traps is sprung the creatures in the Great Forge are alerted to the presence of intruders.
Room 2. Presentation Hall
Room 3. Room of Respite
If one of the patrols is encountered here, the defenders retreat through the secret door into Room 4 to use the rubble as cover.
Encounter
This room is where the bandits are staying when not patrolling. When the characters enter, there are 5 human Bandits (MM p.343) and 1 human Bandit Captain (MM p.344) currently in the room.
Room 4. Storage Area
Trap
The iron chest has a poison trap in its locking mechanism that will fill the room with poison gas if it is not disabled. A successful DC 20 Investigation check notices the lock is trapped. A successful DC 20 Thieves' Tools check disables the trap; however, if unsuccessful the trap is triggered. If triggered the poison gas sprays forth quickly filling the room. Anyone in the room must make a DC 12 Constitution saving throw or suffer 2d6 poison damage or half on a success. The character who springs the trap makes the save with disadvantage.
A successful DC 18 Thieves' Tools check is needed to unlock the iron chest.
Treasure
Once open, the chest contains 500 sp, 5 gems worth 50 gp each, a vial filled with a brown, silver, and gray layered liquid which is a Potion of Climbing. There is also a Potion of Healing, and a Bag of Holding. A DC 12 Arcana check is required to identify the Potion of Climbing as well as the Bag of Holding.
Room 5. Guest Chambers
Encounter
There are 16 Kobolds (MM p.195) in here that will attack the party when the characters enter the room. The barricade contains perches on both sides where the kobolds can stand and fire over. It can be leaped over with a successful DC 15 Athletics or Acrobatics check, otherwise it takes 20 feet of movement to move over it. Smashing through the barricade requires a successful DC 20 Athletics check.
A patrol encountered here uses the barricade as cover to snipe at intruders and retreats through the secret doors if the battle goes poorly.
Room 6. Kitchen
A patrol encountered here uses the barricade as cover to snipe at intruders and retreats through the secret doors if the battle goes poorly.
The barricade contains perches on both sides where kobolds can stand and fire over. It can be leaped over with a successful DC 15 Athletics or Acrobatics check, otherwise it takes 20 feet of movement to move over it into the adjacent area. Smashing through the barricade requires a successful DC 20 Athletics check.
An iron oven occupies the corner of the larger chamber. A character who succeeds with a DC 12 Investigation check notices arcane glyphs etched into the oven. With a DC 15 Arcana check a character will understand these glyphs are used to ignite the oven to cooking temperature instantly and learn the command word. Speaking the command word requires an action. If the oven is lit, any creature within 5 feet of it needs to make a DC 12 Constitution saving throw or suffer 1d6 fire damage.
Room 7. Hall of Ancestors
The many mirrors in here can be disorienting to visitors. The defenders of the place are accustomed to this room, making them immune to its effect. Each character must make a DC10 Intelligence saving throw at the start of each turn. If they fail their save, that character has disadvantage on their attack rolls.
Treasure
There is a secret compartment in the southwest pillar that can be found with a successful DC 12 Investigation check. Tucked inside it is a small vial filled with a purply liquid with silver specks. A DC 12 Arcana check identifies the vial as a Potion of Heroism.
Room 8. Empty Rooms
A patrol encountered in this area uses the area's passages and chambers to snipe and fall back, forcing the characters to track them down to continue the fight. The southern secret door serves as an escape route, if necessary, but patrols do not use the northern secret door.
Room 9. Smelting Hall
The jagged metal is dangerous to move through. The room is considered difficult terrain and moving through it requires 10 feet of movement for every 5 feet. The twisted metal fills the room so that creatures 5 feet away benefit from half cover and creatures 10 feet away are considered to be behind total cover.
The twisted metal is attached very loosely to the walls and ceiling. A creature can use its action to make a DC 15 Strength check to bring down the metal in any adjacent square. The falling metal deals 3d6 slashing damage to occupants of that square but there is a 30% chance of bringing the metal down in your own square.
Room 10. Weapon Room
Encounter
The armor and weapons in this room, left from the time when the Everforge clan worked here, are animated and guard against intruders. The dragon's servants avoid this room. When a creature comes within 5 feet, the armor and weapons attack. There is one set of Animated Armor (MM p.19) and 4 Flying Swords (MM p.20).
Room 11. Ore Room
Encounter
If a battle happens in here, the enemy attempts to hide behind the piles of ore to gain half cover. In addition, there are 8 Stirges (MM p.284) that have nested in the ore shafts. They will only emerge is a battle breaks out in this chamber or if the characters disturb the shafts they call home. If they emerge, they will target all creatures present equally.
Room 12. Great Forge
Steep steps lead up to a dais that dominates this chamber. Four large anvils rest next to large vats of water. The walls contain detailed murals that depict dwarven craftsmen creating radiant weapons and armor. Sitting on the dais is a red dragon the size of a large cow. An elderly male human in robes stands near it, glaring at an even older, manacled, female dwarf. As you enter, the top of the dais wavers in a heat-haze, and a jet of blue flame erupts upward from it. Eight kobolds, spread throughout the room, move toward you as you enter.
The dragon hisses in draconic: "After my transformation, I shall have a pleasurable meal indeed."
Encounter
In the Great Forge chamber, the dragon, Igbalneum, a Red Dragon Wyrmling (MM p.98) is near the top of the dais with the bound Polla Everforge and the human sage Spencius, an Acolyte (MM p.342). Additionally, 8 Kobolds (MM p.195) are spread throughout the chamber. The steps up to the dais are very steep and are considered difficult terrain.
The ritual to connect the Great Forge to the Plane of Fire has been completed by the time the characters enter the chamber. Each round the link strengthens. Igbalneum will enter the lava pool at the end of Round 4. If the group took a long rest at any point before entering to face the dragon, the first three rounds will be complete, and the characters will enter the battle at the top of Round 4.
Lair Actions. Igbalneum has come to claim this forge as its lair. Though only a wyrmling, it's magic has infused this chamber with lair actions. It uses the lair actions described in the Monster Manual on page 99 though the fire damage from the magma eruption is reduced to 2d6.
End of Round 2. The anvils glow red hot, and it is painful to stand too close to them. Any creature that starts their turn adjacent to an anvil takes 2 points of fire damage.
End of Round 4. The magma pool at the top of the dais flares, and if Igbalneum is still alive, dives into the pool.
Development
Igbalneum. The dragon will emerge from the lava pool 5 minutes after plunging in. It has grown into a Young Red Dragon (MM p.98). It climbs out, ignores the characters, and flies out of the chamber. The ritual will cause him to continue growing at an accelerated rate. His plots can haunt the characters until they gain enough power to face him again.
Polla. After the dragon flies away, if Polla is still alive, she will perform a 10-minute quenching ritual that severs the link to the Plane of Fire. She shows her gratitude to the party by offering to give them one of the last pieces of armor her clan forged here, a suit of adamantine chain mail. They can return with her to her blacksmith in Kymal to receive the armor.
Treasure
There is a small horde of gold in the northeast corner that the kobolds had collected and presented to the dragon which contains a total of 750 gp. A DC 10 Investigation check of Sage Spencius will allow a character to find another finely etched snake dagger (Appendix A).
Conclusion
As the group returns to Kymal with Polla, they witness a young man a few hundred feet in front of them scream and beg for his life as two cloaked figures drag him into a nearby alley and kill him. This event is not intended as an encounter, rather a tone setting for the conflict broiling under the city surface between the Myriad and the Clasp.
While Polla is shocked to have witnessed this, she isn't all that surprised. She explains to the group about the conflict occurring between the Clasp and the Myriad. She describes how the City Watch are doing their best to maintain order but it's nearly impossible to root out one thieves guild, let alone two.
The Myriad arrived in Kymal within the last year or so and the Clasp hasn't taken kindly to the guild's encroachment on their turf. The conflict between the two has gotten worse in the past month and nobody wants to get involved for fear of angering one of the guilds.

Map 2.3
Kymal Adventures
A plethora of side quests are available throughout Kymal for the characters to follow should they choose to. A blacksmith is interested in making specialized armor and in need of some exotic animal hides. Additionally, Hildo was expecting a shipment of supplies traveling with his neighbor when it was waylaid by bandits. The neighbor was kidnapped along with the supplies, but the son managed to escape and make it back to inform Hildo and seek help locating his father. More information regarding the conflict between the Clasp and Myriad can be learned when the characters stumble upon an alley fight. Finally, if a rival mercenary group is able to catch the characters in a compromised position, they will attempt to blackmail the characters into retrieving an emerald for them. These adventures include the following:
- Hunt for Displacer Hide (Aered)
- Silvercut Crossroad Bandits (Hildo)
- Alley Assault (Myriad)
- The Haunted Torthil Manor (Black Wolves)
Hunt for Displacer Hide
Story Overview
The proprietor of Unoch's Armory, Aered Unoch, is a red tiefling who specializes in making armor from less traditional sources. Recently, he has heard reports from hunters of an increase in the displacer population within the Ivyheart Thicket. Aered is interested in trying to make armor with displacer hide and is looking for a group of adventurers who would be willing to hunt and kill two for him. In exchange, he is willing to use one of the creatures to create two sets of armor for the characters.
Journey to the Thicket
The Ivyheart Thicket is located about 30 miles west of Kymal along the southwestern edge of the Ironseat Ridge. It takes adventurers around 8 hours of walking to reach the forest from Kymal. As the character's reach the Thicket, they are met by dense underbrush and a thick canopy that blocks out most of the light.
After a few hours hiking through the Ivyheart Thicket, a character that succeeds on a DC 15 Perception check will notice a few dark mounds roughly 20 feet off the trail. If the characters investigate, a DC 15 Nature check will identify the mauled bodies as Blink dogs, the mortal enemies of displacer beasts.
Encounter
Eventually, as the characters continue through the Ivyheart Thicket, the sound of a branch snapping behind them gets their attention. As the group turns, 2 Displacer Beasts (MM p.81) attack. The characters notice the one that snaps the branch, but a second attacks from the side, previously unnoticed by the group.
Treasure
After the displacer beasts are killed, the characters can skin them with a successful DC 12 Survival check. Once the hides are brought back to Aered, it will take him a week to create the two sets of armor. See Displacer Armor under Appendix A.

Silvercut Crossroad Bandits
Story Overview
While the party is staying in Kymal, the innkeeper where the group is staying informs them an older gnome by the name of Hildo stopped in looking for them. The party should remember Hildo from the supplies they delivered to him from Nedda Greenbottle.
Hildo is expecting a cartload of magical herbs and materials from Westruun worth roughly 2000 gp. This is his large yearly shipment, and he will not be able to keep his store open without the supplies. His neighbor and friend, Kenzo, the proprietor of Crumbs Bakery, makes the trip to Westruun once a month to get supplies. He and his son were bringing Hildo's supplies back as well.
Their wagon was attacked while Karl was off getting water for their evening camp. His father was taken along with the wagons. This occurred up at the Silvercut Crossroads and though Karl believes his father was attacked by Ravagers. In reality, it was a group of bandits aligned with the Shadewatch, a smaller thieves guild out of Jorenn Village.
Adventure Hook
Yesterday, Kenzo's son, Karl returned after having run back to Kymal from the Silvercut Crossroads. When the party arrive at Hildo's, he and Karl are having a cup of tea as Hildo attempts to keep Karl calm. Hildo stands and ushers the characters a little way off from Karl.
Journey to the Crossroads

Abandoned Campsite
If characters wish to know more about the history of this area and these two roadways, a successful DC 13 History check can provide the information in the note to the right.
As the characters arrive near the crossroads, they will need to search for the abandoned campsite. According to Karl, he and his father made camp a little bit south of the Silvercut Crossroads. Characters who succeed on a DC 13 Investigation check find an unused fire with some drops of blood on the ground nearby. There also appears to be groove marks that lead southwest towards the hills of the Ironseat Ridge. These groove marks appear to be consistent with wagon wheel tracks.
Encounter
If the group decides to camp near the crossroad before following the tracks into the Ironseat Ridge, there is a possibility they will encounter some undead during the night. If the group camps relatively close to the crossroad, they will hear haunting moans and see movement in the distance near the edge of their vision.
If the characters camp extremely close to the crossroad, during the middle of the night they will be attacked by 2 Deathlock Wights (MToF p.129) and 6 Zombies (MM p.316). If a character is keeping watch during the night, a successful DC 13 Perception Check will prevent the group from being surprised. Use Map 2.4 for the encounter battle map.
History of the Area:
Silvercut Roadway. Parts of the Roadway are older than the rule of the Sovereigns, established to connect Emon to Westruun after the discovery of immense silver veins near Westruun during the rule of Drassig. It now runs from the Bladeshimmer Shoreline to the Lucidian Coast, connecting most major hubs of civilization across the country. Travel by caravan is common, and escort by armed guard or mercenary is recommended, as the essential use of the roadway has also made it a prime target for outlaws, savages, and roaming beasts.
Wildwood Byway. After the relationship between Syngorn and Kraghammer eroded following the Scattered War, Tal'Dorei interests began to utilize the byway more than most. Syngornian elves sometimes refer to this path north of the crossroads as the "Traitor's Stair," in reference to the dwarven stronghold it leads to.
Silvercut Crossroads. During the rule of Drassig, many innocents and war heroes were executed by hanging at massive gallows that once stood at the crossroads, with bodies hung from signs as a warning to dissenters. The gallows were destroyed with the rise of Zan Tal'Dorei, while a large, unmarked grave site was left behind, set now with a stone monument in memory of those who were wrongfully killed. Most choose not to camp too closely to the site for this reason, and rumors of undead are used to spook curious travelers.
Map 2.4
Tracking the Bandits
The characters can follow the wagon tracks southwest into the hills of the Ironseat Ridge. To successfully follow the tracks, the characters will need to make 3 successful DC 12 Survival checks. If the characters fail a check, they will need to backtrack to where they last saw the trail. While easy enough to do, it does cost valuable time.
The wandering wheel tracks lead farther into the foothills of the Ironseat Ridge. As you progress farther into the hills, the endless fields of grass slowly give way to course shrubs and bushes and rockier terrain. As you continue to follow the tracks up into the Ironseat Ridge, larger boulders can be seen jutting out of the ground with more and more frequency. The wheel tracks wind this way and that, slowly weaving in and out of the rock protrusions.
About three hours into your journey, the tracks lead up through a tight ravine formed between two large rock bluffs that extend up thirty feet on both sides. It's clear that you have progressed fairly high up into the Ironseat Ridge. The path you are following leads farther into this ravine and as you continue, the walls of the bluffs are beginning to close in on either side as the path becomes narrower and narrower.
It appears that about 500 feet further up, the ravine bends to the left, and the bluffs on either side connect together closing off the end of the ravine somewhere around the bend. As you round the bend, you see the ravine ends 200 feet ahead as the rocky bluffs circle around and connect to form a circular area surrounded on all sides. There are large boulders and bushes that dot the ground here.
Encounter
This end to the ravine is approximately 80 feet in diameter with the bluffs reaching 30 feet in the air on all sides. The pathway into this area is only 10 feet across. Use Map 2.5 for the encounter battle map.
If the characters choose to approach stealthily, there is a chance they may remain unseen. There is an Archer (VGtM p.210) sitting up on the bluff above the cave entrance keeping lookout. Have the characters roll stealth checks and compare it to the archer's perception check. A character that rolls a successful DC 15 Perception check will notice the archer. There are also 2 Bandit Captains (MM p.344) sitting just inside the cave entrance.
Entering the Cave
The bandit hideout is cut into the end of the ravine. The tunnel entrance is roughly 7 feet tall by about 8 feet wide. The tunnel is just wide enough for a cart to fit through.
See Map 2.6 for the complete layout of the bandit hideout.
Trap
Just around the first bend in the tunnel there is a hidden pit trap with spikes at the bottom. With a successful DC 15 Investigation check, a character will notice a lack of foot traffic in a specific section of the floor which identifies it as a trap.
If the trap is not discovered and a character steps on the section of floor, the floor swings down and the character falls 15 feet down onto wooden spikes embedded at the bottom. The character must succeed on a DC 12 Dexterity Saving throw or takes 2d10 piercing damage or half on a success.

Map 2.5
C1. Storage Chamber
With a successful DC 15 Perception check a character will notice a few things about this chamber. First, the cart appears to still be intact, with most of the supplies still inside it. Second, there appears to be two large dogs resting near the right side of the cavern.
Encounter
There are 2 Mastiffs (MM p.332) resting along one side of the cavern. If the group gets within 15 feet of the dogs before the characters notice them, the mastiffs will bark and attack. The barks will alert the bandits in the next room there are intruders. The characters can prevent the dogs from barking by immediately offering them food.
C2. Main Campsite
Encounter
Sitting around the campfire are 4 Bandits (MM p.343) and 2 Shadewatch Cutthroats (TCSR p.232). Up on the ledge sits an Archer (VGtM p.210). If the party happens to capture one of the bandits, they might be able to interrogate them and learn some of the information listed in the note to the right.
From the adventures of Bramble Tickletoes III & Company
Maoki recognizes one of the Shadewatch cutthroats, Vhell. It's been close to 10 years since he last saw him. Vhell looks older and has a beard now, but Maoki definitely remembers him from when Maoki still worked with the Shadewatch.
Cutthroat Leaders & Information:
Braffin: a lean, clean-cut half-elf male with auburn hair.
Vhell: a muscular human man with a large scruffy beard, brown hair, and a scar down the left side of his face.Both have the Shadewatch symbol tattooed over their heart. Neither Vhell nor Braffin are extremely high up in the Shadewatch. Their bosses told them to camp out near the Silvercut Crossroads and pray on easy caravans heading towards Kymal. They are also given specific targets occasionally. This was an instance where they were told to target Kenzo. They don't know why him, but just to capture him and get whatever information they could out of him about the Clasp and anything else he may know about the goings on in Kymal.
Treasure
With a successful DC 12 Investigation check the characters can search the bandits and find 30 gp on each Cutthroat and 10 gp on each bandit and archer. Interestingly, the coin purses carried by the cutthroats are noticeably damp.
Development
Ruhn-Shak Information. Thrynan, the archer up on the ledge, will recognize the runes carved in the longsword if the character who wields it gets within 10 feet of him. If the fight begins to turn against the bandits, he will offer to translate the runes if the group lets him live and leave unharmed.
Thrynan grew up on the outskirts of Syngorn after his family was shunned from Syngorn when his father married his human mother. He grew up in a small half-elven community south of Tormor Falls in the Verdant Expanse. He learned dark elvish there and learned the story of Ruhn-Shak. He doesn't know exactly where Ruhn-Shak is but thinks it's located somewhere in the Stormcrest Mountains east/northeast of the Vues'dal Waters.
C3. Torture Room
Treasure
There are a few valuable things intermixed within the boxes and crates piled in the back of the chamber. A character who sifts through the mess of things, they can find various items based on their Investigation check.
A successful DC 10 Investigation check will find a small pile of weapons: shortswords, longswords, shortbows, longbows, and one greatsword.
A DC 15 Investigation check will also locate an Alchemy Jug, and a Driftglobe.
A DC 18 Investigation check will also find a Potion of Greater Healing, a bag filled with a handful of small gems worth 300 gp, and a Spell Scroll. A successful DC 12 Arcana check will identify the spell written on the scroll as conjure barrage.
C4. The Secret Stash
The water flowing out of the fissure is dark. A character who makes a successful DC 15 Perception check will notice the fissure twists left about 40 feet in. If the group decides to fjord upstream, a successful DC 12 Athletics check is required to move against the current. Moving against the current is considered difficult terrain and movement is very slow.
Once beyond the bend in the fissure, a successful DC 17 Perception check will notice a small eddy current in the water that means the water is hitting something just under the water. Feeling under the water with a successful DC 12 Investigation check will find there's a hole in the fissure wall just below the waterline. A small character can squeeze through it, otherwise a medium character will need to make a successful DC 16 Athletics check to pull their way through. The hole is the start of a short 5-foot tunnel that opens up into a pool in the center of small chamber.
Treasure
This chamber is the Shadewatch's secret stash. There is a small wooden chest filled with 8000 sp, 2300 gp, and 110 pp. There is a small rectangular chest which contains a Javelin of Lightning.
There is a small wooden box with an intricate lock. A successful DC 18 Thieves' Tools check can unlock the box. Inside is a necklace with an amber eye shaped gem with subtle runes, an Amulet of Proof Against Detection and Location. Additionally, at the bottom is a folded up dark cloak with bat embroidery: a Cloak of the Bat.
Finally, there is a large thin rectangular metal box. It is locked and trapped. If a character searches for traps, a DC 18 Investigation check is required to notice the trap. A successful DC 15 Thieves' Tools check neutralizes the trap and a subsequent DC 15 Thieves' Tools check is necessary to unlock it. If the chest is opened without disabling the trap or the attempt to disable fails, poison gas sprays out of the lock. Any character within 10 feet of the lock must make a DC 10 Constitution saving throw taking 2d6 poison damage on a failure, or half as much on a success. Once open, inside is a beautiful longbow made from dark wood with arcane runes carved into it. This longbow is a Weapon of Warning.

Conclusion
After rescuing Kenzo, when the characters return to Kymal, they will notice there is an increased level of unrest within the city. Guards are posted at the gates of the town and are questioning everyone coming in asking all to state their business in town. As the characters move through the city, they can see signs of recent riots. There is an increase in City Watch patrols throughout the city.
Hildo and Karl are both overjoyed to see Kenzo brought home alive. Hildo thanks the party and gifts them three potions he has made in his shop and offers the group a friends and family discount on any purchases moving forward.
From the adventures of Bramble Tickletoes III & Company:
After locating the bandit's hideout, Bramble walked purposefully into the campsite to talk with them and was promptly captured. Then, he tries to talk the bandits into releasing him and their captive. Bramble's tactics didn't seem to be working so Kayne, Lia, and Maoki decide to run in and fight the bandits, ultimately rescuing Bramble and Kenzo.
During the fight, Thrynan notices the sword Kayne is wielding. As the fight begins to turn in favor of the party, he offers to translate the runes on the sword if they let him leave unharmed. After recognizing Vhell as a member of the Shadewatch, Maoki mercilessly kills him and Braffin, the other cutthroat leader.
Thrynan keeps his word and translates the runes on the sword. This introduces the group to the name Ruhn-Shak as Thrynan tells them all he knows of the hidden drow city. The party let him leave unharmed. After finding the secret stash and doing what they can to heal Kenzo, they use the bandits' hideout to rest for the evening. In the morning, Kayne realizes Thrynan stole his horse, Waterwings, when he left last night. Furiously, Kayne and Maoki attempt to track him, but the tracks continue northwest toward the Torian Forest and after a few hours they abandon the chase.
Cart Storage
Cages
C1
C2
C3
C4

Map 2.6
Alley Assault
Story Overview
The Clasp and Myriad are fighting a shadow war as they vie for more power and influence in Kymal. One evening as the characters are walking through Kymal, they will see a dwarf get attacked by two hooded individuals and dragged into an alley. If the characters intervene, they may be able to question the dwarf or interrogate the hooded individuals and learn more information about the conflict between the two thieves' guilds.
Adventure Hook
Encounter
The dwarf's name is Dak, and he uses the Spy (MM p.349) stat block. The 2 hooded individuals are Myriad Cutthroats (TCSR p.232). If the characters engage and the battle begins to turn in their favor, the two cutthroats signal to each other in Thieves Cant to cut and run. Use Map 2.7 for the encounter battle map.
Development
Interrogating the Myriad Cutthroats. The two cutthroats are Arkur and Thava. Arkur is a male human with brown hair and a scar down the left side of his neck. Thava is a lithe female black dragonborn with tattoo sleeves down her arms.
With a successful Intimidation check, the group can learn these two were hired to kill this dwarf here. He is bringing drugs to one of the government officials and "we can't have our government leaders doing drugs now can we." They say if they were to turn him into the City Watch, he would "escape" in a manner of hours as the Watch takes coin from the Clasp.
Neither of the cutthroats will admit to working for the Myriad or will give any information about who tipped them off. They continue to insist they are simply concerned citizens.
Interrogating the dwarf, Dak. Dak is a middle-aged male dwarf with course black hair and goatee, dark skin, and brown eyes. He was in the Wishing Well and tried to pickpocket various patrons but got caught. He was brought in front of a halfling woman that offered him a choice: be turned over to the City Watch and rot in jail or deliver a small package to a manner and leave it with the butler.
Dak is not officially affiliated with the Clasp. He was bringing the package to the house of Geoffrey Weke, Kymal's Master of Commerce.
Treasure
Each of the Myriad Cutthroats carry 20 gp as well as a dagger and shortsword. The small package Dak carries contains dried green flakes that have a sickly-sweet smell. A DC 15 Arcana check identifies this substance as the drug Oloore Root which is worth about 100 gp per dose. The package Dak carries is enough for 2 doses.
From the Adventures of Bramble Tickletoes III & Company:
While staying in Kymal, the party spend some time exploring the city and partaking in some of the gambling opportunities the city offers. While gambling in the Dragon's Hoard Casino, Maoki's cheating is noticed by a couple of members of the Black Wolves mercenary group. They attempt to confront Maoki as he leaves to blackmail him, but Maoki escapes.
The same evening, Lia notices an individual that appears to take notice of the snake daggers they carry. Lia follows the cultist as they leave the inn and chases after him as he runs off towards the Ironseat Ridge. The cultist escapes Lia's tracking with the assistance of magic. Bramble, Kayne, and Maoki join Lia to continue the search and head into the Ironseat Ridge.
Deciding to split the party, Bramble and Maoki head in one direction searching for cultists. During their search, they stumble upon giant spiders in a cave. After killing them, they head back to rendezvous with Lia and Kayne.
Meanwhile, Lia and Kayne stumble upon an owlbear den; it attacks and both of them get knocked out. They awake a few hours later in pain, quickly leaving its den and travel back to meet up with Maoki and Bramble. This experience leads Lia and Kayne to develop a phobia towards owlbears.

Map 2.7
The Haunted Torthil Manor
While the characters have explored Kymal, participating in various side quests, they have had the opportunity to become enveloped in the goings-on of various factions. If during their time in Kymal, a rival mercenary group, the Black Wolves, is able to catch the characters in a compromised position, they will attempt to blackmail the characters into retrieving an emerald for them. This adventure should fall after the characters have completed a few of the other side quests.
Before beginning this adventure, the characters should be 5th level.
Story Overview
While in Kymal, the characters may explore the various casinos and do some gambling. The Black Wolves witness one of the characters cheating. The Black Wolves are opportunistic and see this as a chance to blackmail the group and collect money to keep their silence on the matter. The character who cheated while gambling is kidnapped in the middle of the night. A note is left detailing where to meet and the gold they want for their silence and friend back.
If the characters can't pay the price, the Black Wolves instead ask they retrieve a gem for them and take their newest member with for training. The job is to retrieve an emerald from an old manor house located in the Ruins of Torthil, a day's travel south of Kymal along the Wildwood Byway.
The character who was kidnapped is held by the Black Wolves to ensure the group follows through. That player will get the opportunity to play the Black Wolves newest member for this adventure. Make sure to check with your player first to make sure this will be alright.
The group will have to fight their way through the haunted manor in search of the emerald. Once they retrieve it and return to Kymal, the Black Wolves will honor the arrangement and release the group member they kidnapped and will keep their silence on the cheating they saw. The Black Wolves will treat the case as closed and will harbor no ill will towards the characters. The characters may not be quite as forgiving.
Adventure Hook
In the middle of the night, while the characters are sleeping at an inn, two of the Black Wolves kidnap the character they saw cheating in the casino. Everett and Remma are the rogues who do the kidnapping, and they take the character to a warehouse.
One morning, the characters awake to find one of their number missing. A note has been left on their bed. The note details that the group needs to bring 1500 gp to exchange for their friend. The note provides an address and time to meet.
Confronting the Black Wolves
The Black Wolves are a mercenary group that consist of five members. They are not connected with any thieves' guild. The Black Wolves do not want to fight the characters, they just happened to be in the right place in the casino at the right time to see the character cheating and want something for their silence. Otherwise, they would be happy to sell the information to either the Clasp or Myriad. The Black Wolves consist of the following members and their Tier 2 stat blocks can be found in Appendix B.
- Everett: a half-elf rogue (thief). He is the leader of the group and dresses in dark leathers.
- Remma: a female human rogue (assassin). She typically dresses in all black leather.
- Brendal: a male half-elf monk wearing dark blue clothes.
- Barry: a male dwarven bard that dresses in green leathers and plays a bagpipe.
- Fraxen: a female dwarf fighter that wears brown leather.
Encounter
The warehouse where the characters are told to meet the Black Wolves is small and comprised of three rooms, an empty upstairs floor, and a small cellar. If a fight breaks out, the stat blocks for the five Black Wolves are located in Appendix B. Use Map 2.8 for the encounter battle map.
When the characters arrive, Everett, Barry, and Fraxen are sitting at the large circular table in the main room. The edges and corners are filled with barrels and crates. Remma and Brendal are in the small north room guarding the character they've kidnapped, they aren't tied up, just unarmed, and guarded by the two Black Wolves.
Development
The Black Wolves offer a secondary choice for their silence and for the return of the kidnapped character. There is an emerald the Black Wolves need to retrieve from an old rundown manor house in the Ruins of Torthil. If the party will retrieve it for them and trial run their new recruit: Brendal, the Black Wolves will release the kidnapped character and no payment will be necessary.

Map 2.8
Ruins of Torthil
While traveling south of Kymal along the Wildwood Byway, just outside of the Ivyheart Ticket, travelers can spot a mile-wide cluster of broken stone, salted earth, and a single obsidian monument to the death of Warren Drassig, one of the most infamous and terrible figures in Tal'Dorei history. This scarred patch of landmarks the ruins of the village of Torthil, which played a vital role in the Scattered War, and harbored the ambush that led to the death of King Warren Drassig. Destroyed out of vengeance by Warren's son Neminar, the now long-weathered wreckage and broken foundations of the town harbor only ghosts and unsavory creatures drawn to places of such dark history. The manor house is located on the western edge of the ruins, just inside the edge of the Ivyheart Thicket.
History of Montarthas Manor
In ages past, there once stood a small city in these parts. The city, being subject to constant orc attacks, maintained a sufficiently defensive militia to ward away such attacks as they occurred. This militia stood for centuries, and many commanding officers came and went throughout the years. General Oscar Montarthas, known for being fair, firm, and stern towards his men, was the last to command this post.
Not long from retirement, General Montarthas employed an advisor, Gertrude, who assisted the General in decision making with the forthcoming yearly orc invasions. This advisor was in fact an evil night hag, who planned to ruin the city and use its population to feed, drawing her power from their life force. She achieved this by seducing the General and corrupting his heart with a powerful green emerald. As the night hag's power grew, Gertrude also corrupted his army and the city to turn against King Warren Drassig. The city was then destroyed by Neminar, the late King Warren's son.
What was left of the city was abandoned, with only the manor standing the test of time. To this day, the manor is the only still standing building to be seen for miles around. Since that time, Gertrude has fed from the unfortunate passers-by who happen to accidentally wander into Montarthas Manor!
This mansion was once the home to the appointed General who commanded a militia based in this area long ago. At the time of the General's death, the manor was cursed by a powerfully evil Night Hag, known simply as, Gertrude. It is said that a brilliant green emerald, imbued with a great and ancient power, lies at the heart of Montarthas Manor; this is rumored to be the source of the manor's evil.
See Map 2.9 and Map 2.10 for the complete layout of the haunted manor's first and second floors, respectively.
1. Manor Entryway
These doors will not open, no matter how well a character rolls for strength or thieves' tools checks. They are supernaturally held tight. The doors will only open of their own accord, once the heroes give up, turn away, or have been attempting to open them for more than a few minutes. On a successful DC 13 Arcana check, a character will notice there is an eerie essence that surrounds the doors, as if they themselves do not wish to be opened.
Once the heroes decide to give up on the door and turn away from it read or paraphrase the following:

2. The Foyer
Encounter
When a living soul passes beyond the line formed between the two statues in this room, the statues animate and fight to the death. They are both Gargoyles (MM p.140).
3. The Stairwell Waiting Room
Doll. Characters who make a successful DC 10 Investigation check will notice the doll's eyes are strangely similar to those seen peering through the window before they entered the mansion.
Staircase. The circular staircase in the north-east corner climbs up to the second floor and goes down to the basement. A portcullis blocks the way up until the party has explored at least 5 rooms on the ground floor; it will then open by itself.
Griffon. The statue is an opening mechanism for the secret doors that form the passage (area 8) between rooms 4 and 9. Pulling down on the griffon's raised talon will activate both secret doors. One will open, whilst the opposite will close, and vice versa. This means that the two doors will never be open at the same time.
4. The Tearoom
Development
As the heroes move through the room, the chandelier will suddenly fall and crash into the ground just behind the characters. Looking up the thick gold chain is broken and swinging with movement.
A successful DC 13 Perception or Investigation check will allow a character to notice the secret door embedded in the east wall if it hasn't been opened yet.
5. The Dining Room
The ghosts pay no heed to the party providing they do not interact with them. If the adventurers leave the room without interacting with anything, the dinner party will simply disappear as soon as they step foot into another room.
If the heroes attempt to interact with any of the ghostly dinner party, read or paraphrase the following:
The room abruptly becomes quiet; all talking and laughter has ceased. Every ghost in the room is now facing you when the man at the head of the table rushes toward you, floating right through the hard wooden dining table. "You should not be here! LEAVE THIS PLACE!!!!" He screams as he rushes closer. Then as quick as the party had started, the room is empty, dark, and cold again. The ghosts are nowhere to be seen, and there is no sign of the man who had rushed at you.
Trap
If the characters linger here too long, the room will engulf itself in flames. The flames are apparitions as well. Any characters in the room must succeed on a DC 15 Wisdom saving throw or take 1d4 psychic damage. Characters who continue to remain must repeat this save at the start of each round while inside the room.
Once the heroes leave the room, the flames will disappear as quickly as they began. Nothing in the room appears burnt, nor do the heroes appear to have burns on their bodies either.
6. The Ballroom
A beautiful woman enters from nothingness, dressed in a flowing black gown, her eyes dark and dangerous. He holds her and looks into those eyes, and she looks back into his. "We will disappear, just the two of us, my love" the man says dreamily. "Oh, General Montarthas, but what of your wife? And we have work to do." She reminds him. "Never mind her, she will cope. And your army of undead... Let's not talk of this tonight" he replies as their apparitions fade and the room is again empty.
The heroes will not find anything of note in this room other than the entrance to the alfresco area.
7. Alfresco Area
Encounter
If the heroes attempt to retrieve the sword from the opposite side of the pool, or if they come within 5 feet of the pool, a Beholder Zombie (MM p.316) emerges from the pool's murky green water and attacks the party.
Treasure
The weapon is a Flame Tongue Longsword.
8. The Secret Passage
This room is bare and only boasts hard stone blocks on each of its walls. At either end of the room is a door that can only be opened and closed by pulling the statue griffon's talon in area 3. The secret door system is designed so that only one door can be opened at any one time. When one opens, the other closes.
9. Empty Thoroughfare
This chamber is empty and provides a walkway for those who know the secret ways of the manor.
10. The Wizard's Bedroom
Treasure
A character that searches this room will find two scraps of parchment in one of the desk drawers with a successful DC 10 Investigation check. One is in pristine condition and appears to be a spell scroll and the other seems to be a journal entry (Handout 2) in such poor condition that it is likely to fall apart.
A DC 10 Arcana check will reveal the spell scroll to be inscribed with the spell invisibility. For the journal entry, a DC 13 Dexterity saving throw is required to lift the journal out of the drawer unharmed.
11. The Spell Practice Room
Secret way out. There is a secret door along the northern wall that can be found with a successful DC 15 Perception check. The trigger mechanism was destroyed long ago in the fire that also destroyed the library (12). A character can break down the secret door with a DC 15 Athletics check.
12. The Library
Encounter
This leather cloak is in fact a Cloaker (MM p.41) in disguise. If a character is suspicious, a successful DC 18 Nature check will identify it as a cloaker.
Once the heroes are beyond the threshold of the doors and inside the old burnt library, the cloaker will surprise them (if not discovered) and attack. When it has less than 10 hit points remaining, it will attempt to flee to another part of the wizard's quarters, only to surprise the party later.
13. Escape Preparation Room
This is a secret room that appears to be a kind of preparation room. There are four faded black cloaks with hoods hanging on hooks. This was once the escape route for the General and his Wizard should the manor be taken in a siege. A small hatch door forcing characters to crawl through leads out to a courtyard garden area.
14. The Courtyard
This courtyard garden area is lined with shrubs and hedge bushes. The hidden hatch allows those using the passage a ready escape to the woods beyond.
If the characters are attempting to enter the house through this area before they have discovered the hidden hatch, a successful DC 15 Investigation check will notice the entrance into the mansion.
15. The Basement
The heroes will find an open door at the bottom of the stairs. Once the heroes enter the basement, the door will slam shut and a noxious green gas will begin to fill the room. There is a half-made flesh golem lying on an operating table, with a bucket of body parts beside it. On the desk beside the operating table the heroes will find a waxy lab diagram with notes scribbled over it. One of the notes is an incomplete "formula" (number sequence puzzle). It will provide the heroes with the correct body parts to use. Each of the numbers will align to a tagged corresponding body part. Give players Handout 3 which can be found in Appendix C. Read or paraphrase the following:
Escaping the Basement
To escape the trapped room the heroes must:
- First: Figure out which body parts to use. As each of the numbers are correctly answered, that body part can be easily found in the bucket with its tagged number.
- Number Sequence Puzzle Answers
- 2, 7, 3, 8, ? (4: sequence is +5, -4, +5, -4)
- 3, 12, 6, 24, ? (12: sequence is x4, /2, x4, /2)
- 8, 16, 22, 44, ? (50: sequence is x2, +6, x2, +6)
- Number Sequence Puzzle Answers
- Second: A successful DC 13 Medicine check is needed for each body part to be attached by a character successfully to the flesh golem. If the PCs fail the skill check 3 times, the gas will render them unconscious (see the note below).
- Third: A successful DC 15 Arcana check allows a character to realize that electricity is needed to wake the golem. This can be accomplished by either starting the magical mechanism with the crank to conduct electricity through it or use any lightning-based spell.
Once the golem is complete, it will use the thoughts from the brain inserted into its body to open the door. Read or paraphrase the following:
Treasure
If the characters take a moment to investigate the basement room, they can find a small leather pouch tucked into a corner. Inside is a Deck of Illusions.
If the heroes are unable to solve the puzzle within 20 minutes of real time, the gas will render the characters unconscious. They will awake in Room 23 on the second floor in a pile. Run that scene as described when they wake.
The Second Floor
The second floor of Montarthas Manor is riddled with danger and evil creatures. Whilst the Ground Floor was primarily utilized to immerse the characters in the tragic story of the manor, the second floor is where the characters will finally experience the horrors for themselves.
Flavor Note 1: Sporadically, as the PCs explore the manor, they can hear a haunting girlish giggle now and then. It is the doll playing with them, scaring them for its own amusement.
Flavor Note 2: Describe the doll to have evidence of 'repairs' after the first fight. It shows up with twine and patches mended over its body. This suggests that it has been repaired and explains the doll's HP regeneration between encounters.
The Evil Doll
On entering each of the rooms on the second floor, roll a d100. There is a 40% chance that the evil doll will make an appearance. Each time that she does, refer to the table on the next page and run the respective events. If another encounter occurs in the room run that encounter first, then describe the sudden appearance of the doll. The stat block for the Evil Doll can be found under Appendix B.
16. The Hallway
There is a soft green glow flickering in this hallway, but there seems to be no source for the light. A DC 15 Arcana check allows a character to realize that the source of the green glow is necrotic energies moving about the manor's second floor, like blood through a vein.
The Evil Doll Appearances
| Appearance | Encounter |
|---|---|
| 1st time | The doll will be sitting on any piece of furniture, she will do nothing until the heroes leave the room, which is when she will activate her Frightening Lullaby feature, then she will move to attack with her Claw. On her second turn she will use her Shadow Blend ability to escape at the first opportunity. |
| 2nd time | The doll will actively turn its head slowly with an evil grin on her face and attack the heroes with a knife. For her second-round action she will use her Shadow Blend ability to escape. |
| 3rd time | The doll will use her Shadow Blend ability to surprise attack one of the heroes. She will drop from the shadowy corners onto their back with a knife attack. Then she will fight until her Shadow Blend ability recharges and she'll use it to escape. The doll will reappear again at a later part in the adventure (DM's discretion) to menace the party again. |
17. Guest Rooms
These rooms are standard guest rooms; both are dusty and full of sticky cobwebs.
Encounter
Upon entry to either Guest Room, roll 1d20; if you roll an even number, 2 Phase Spiders (MM p.334) will phase in and attempt to attack the heroes from above the doorway.
18. The Laundry Room
This is an old laundry room with a bench that runs along the southern wall, and a large iron stirring pot for washing clothes. A ghostly apparition is stirring an ectoplasmic load of dirty clothes. She fades once the party attempts to interact, or they enter the room.
19. The Guest's Washroom
This room has a large washing tub, a bench stretches around the south-western corner of the room. An old, bloodied towel hangs from a towel rack. Read or paraphrase the following:
Encounter
The 'body' is a Ghost (MM p.147) and will only attack if the heroes attempt to "save" it or interact with it in any way.
20. The Servant's Living Space
As the heroes approach this door from the hallway, they will hear a thumping sound, getting louder and louder the closer they get to it.
Encounter
Behind the door awaits a Ghast (MM p.148) who commands 2 Ghouls (MM p.148). They can smell the living flesh coming their way, and in their excitement are giving away their position of surprise. Neither party will be surprised when the door is finally opened.
The door is locked and has not been opened for a very long time. A successful DC 15 Thieves' Tools check will unlock the door. Due to their irrational state caused from hunger, the ghast and ghouls will attack and fight to the death. This chamber was the old servant's living quarters. The two small adjoining chambers are the shared lavatory and bathing area.
21. The Kitchen
The heroes will instantly see a small treasure chest set on the hotplate. It is locked and requires a successful DC 15 Thieves' Tools check to unlock it. Otherwise, a DC 13 Athletics check will break it open.
Encounter
It's a trap! When the heroes enter the room, a successful DC 15 Perception check notices the air has grown colder and the cupboard doors move slightly with a creak by themselves. As soon as the heroes reach halfway across the kitchen, an unknown force causes the cupboard doors to fling open and close as the pots, pans, and knives are flung across the room.
The cupboards contain the essence of a Poltergeist (MM p.279). Each cupboard has an AC 10 with 10 hit points. Destroying 4 of the cupboards will destroy the Poltergeist.
This should be treated as a combat encounter, have your players roll initiative as soon as the knives, pots, and pans detach themselves from their hooks. Any hero inside the room will need to succeed on a DC 13 Dexterity saving throw at the start of each of their turns, else be hit by multiple projectiles for a total of 1d6 bludgeoning and slashing damage.
Treasure
The small chest contains 248 gp. The markings on the coins are of an unknown origin, lost to history.
22. The General's Clerk
This is the clerk's office, where a writing desk sits in the south-western corner and a single door on the eastern wall. Behind the desk, a skeleton is busy at work writing down something in a translucent ethereal ledger book. Read or paraphrase the following:
As you enter the room you notice something that seems very unnatural, though not unexpected in a place such as this. It is a skeleton busy at work behind a writing desk, frantically writing notes in a translucent ethereal ledger book. It looks up at you with empty eye sockets, its jaw starts to move as a hauntingly high-pitched voice says "ahh, you are here! He has been waiting for you!... You may proceed Advisor Gertrude!"
From behind, you feel something evil and dark trespass through your bodies, as the aspect of a dangerously beautiful woman with dark and deadly eyes walks straight through you, a smirk on her ghostly smile. She walks straight through the closed door and disappears, whilst the skeleton clerk goes back to his duties.
If the heroes attempt to physically interact with the skeleton, it will fall limp and crumble to ash. Otherwise, it will ignore the characters.
23. The General's Waiting Room
A long bench stretches the northern wall of this extended waiting room. On the southern wall, two large oak doors stand closed. The door has a large tree carved into with leaves at the end of each branch. The leaves contain the names of the different generals that have served and lived within the manor as well as their years of service. The Generals' names appear from the earliest at the top to those later further down. The last name on the tree says, "General Oscar Montarthas." Read or paraphrase the following:
Encounter
If the heroes have not yet defeated the Evil Doll (Appendix B) in a final confrontation during exploration of the manor thus far, have the doll attack the heroes here. It will fight until it has only 5 hit points remaining, and then will attempt to use its Shadow Blend feature to escape once more.
If the doll has been defeated earlier in the adventure, the doll that has been left in this room is just an apparition and will disappear if the heroes physically interact with it.
24. A General's Broken Heart
The door, although unlocked, appears to be stuck from the other side. A successful DC 13 Athletics check will open the door. Upon opening, the heroes will notice a large, heavy, chest has been strategically placed to prevent the door from opening.
Trap
As the heroes open the door, have them each roll a DC 17 Strength Saving throw to resist being pulled involuntary into the dark room beyond as the doors slam shut behind them.
Note. If, by some miracle, they all pass the saving throw, then only the lowest roll will be pulled into the room. As the fight erupts within the room, those who resisted the 'pull' will have to contend with bashing down the door (AC 13, 40 HP) to save their comrade. Once the doors slam, read or paraphrase the following:
As soon as you hear the doors slam shut from behind, a great gust of wind blasts the room around you, sending dust, paper and curtains flying around the room. Piles of rotting corpses litter the creaky wooden floor.
Then you see him, on the ceiling, a shell of a man, shriveled, tortured, and used. His body and arms semi-molded into the blackened muck that replicates a ceiling. Slimy black vines creep through his flesh pinning him to the ceiling, as the ends of the vines expand into drooling suckers that feed from his life force.
A glow of green hue emanates from his chest where a green emerald spews out evil energies into the mansion distributing the feed to all areas of the living building. The most potent looking of these green energies flows directly into a lifeless body slumped with its head flung back over a wooden chair.


Encounter
Once the heroes move to investigate further, or attempt to leave the room, read or paraphrase the following:
This is Gertrude (Appendix B), an ancient night hag that has been feeding off these necrotic energies for millennia.
Tactics
- Round 1: Gertrude will cast create undead to create 3 ghouls (MM p.148) from the littered corpses around the room. She will command them to attack the closest hero.
- Round 2: She will cast Magic Missile targeting 3 different heroes if possible.
- Round 3: Gertrude will cast create undead again to create 3 more ghouls, ordering them to attack the nearest hero.
- Bonus action: She will pull green necrotic energy from her victim on the ceiling to regain 3d6 HP.
- Round 5: Gertrude will cast ray of enfeeblement on the largest and strongest looking PC.
- Round 6 and onward: She will attack to kill remaining conscious heroes, per the DM's discretion.
- Note: Gertrude has 1 more bonus action charge of 3d6 HP regain from her victim on the ceiling.
Aftermath
If Gertrude is defeated, she will shrivel and die, turning into a pool of black ooze. Her shriveled victim will still be attached to the ceiling; however, after a moment the black vines will wither away and die. As the vines die; they release the man with the emerald embedded into his chest, and he falls heavily to the floor. Read or paraphrase the following:
A successful DC 13 Arcana check will show that the energy emanating from the emerald is necrotic energy. Identifying this relic will reveal the emerald's power and details; it is referred to as the Leacher's Emerald (Appendix A).
Treasure
The chest that was blocking the door contains small iron bars, 12 in total, worth 10 gp each. There is also the Leacher's Emerald embedded in the body. If the characters search Gertrude's body, they will find her heartstone as well as her soul bag (containing 1 evil soul).
Development
Once the heroes have finished with this room, or if they linger too long, read or paraphrase the following:
The heroes will need to leave immediately. The building will start to collapse in on the characters if the heroes continue to linger too long in this room or after they move through three areas / rooms of the manor.
When the building starts to collapse, for every 15 feet the heroes move or if they linger in one spot, they must succeed on a DC 13 Dexterity Saving throw to dodge the falling debris or take 1d10 bludgeoning damage. After 8 Saving throws, Montarthas Manor will completely collapse into dust and rubble. Any hero still inside the manor will take 1d100+10 bludgeoning damage.
Epilogue
As the heroes escape the manor it will fall in a heap of rubble. Depending on how this adventure ends, and the fate of the evil doll, read or paraphrase one of the following epilogues:
If the evil doll survives: You manage to escape the falling manor, which has been the epitome of true evil. The night hag, Gertrude, has been defeated and the undead have been laid to rest. You know not who the hag's victim was, however, but they did leave you the emerald in their departure. Now, standing before you, are the piles of rubble and decayed remains of the manor; finally resting in peace. The night begins to grow old as the first hints of dawn start to creep over the horizon. It is then, amongst the woods that surround the manor; you all notice a pair of glowing crystal blue eyes. A horrifying girlish giggle carries over the, now, still night air, and the eyes fade into blackness.
If the evil doll was defeated: You manage to escape the falling manor, which has been the epitome of true evil. The night hag, Gertrude, has been defeated, the horrifying evil doll was removed from this world, and the undead have been laid to rest. You know not who the hag's victim was, however, but they did leave you the emerald in their departure. Now, standing before you, are the piles of rubble and decayed remains of the manor; finally resting in peace. The night begins to grow old as the first hints of dawn start to creep over the horizon. Today is going to be a good day, well a better day, you hope.
Conclusion
With the emerald in their hands, the characters can return to Kymal. Returning to the warehouse to meet with the Black Wolves with both the emerald and Brendal in tow, the mercenaries are happy to release the kidnapped character back to the group and consider the matter closed. While the characters may hold ill will towards the Black Wolves, the Black Wolves simply view it as a business exchange and hold no negative feelings of their own.
The character they kidnapped will have heard a few snippets of conversation over the course of their time with the Black Wolves. The snippets of conversation they overheard are as follows:
- "Ammalia wants it as soon as possible…"
- "….is looking for this thing called the Stone of Golorr…"
- "…are getting tired of protecting caravans…"
- "…talking about buying off Prudence…"
- "…did you hear about Mendel at The Lucks Hand?"
From the Adventures of Bramble Tickletoes III & Company:
While gambling at the Dragon's Hoard Casino, the Black Wolves witnessed Maoki cheating. They kidnapped him to extort money in exchange for their silence. Bramble, Lia, and Kayne met at the warehouse and reluctantly agreed to retrieve the emerald with one of their members, Brendal.
After defeating Gertrude, rather than making their way back through the manor to escape, the group decided to jump from the balcony on the second floor. They hit the ground and rolled out of the way just as the building collapsed.
Once the group returned with the emerald and Brendal, they traded them for Maoki. After spending a night back in the Hunter's Hall recovering, they decided to go back to the warehouse and confront the Black Wolves but found it deserted.

Map 2.9


Map 2.10
3
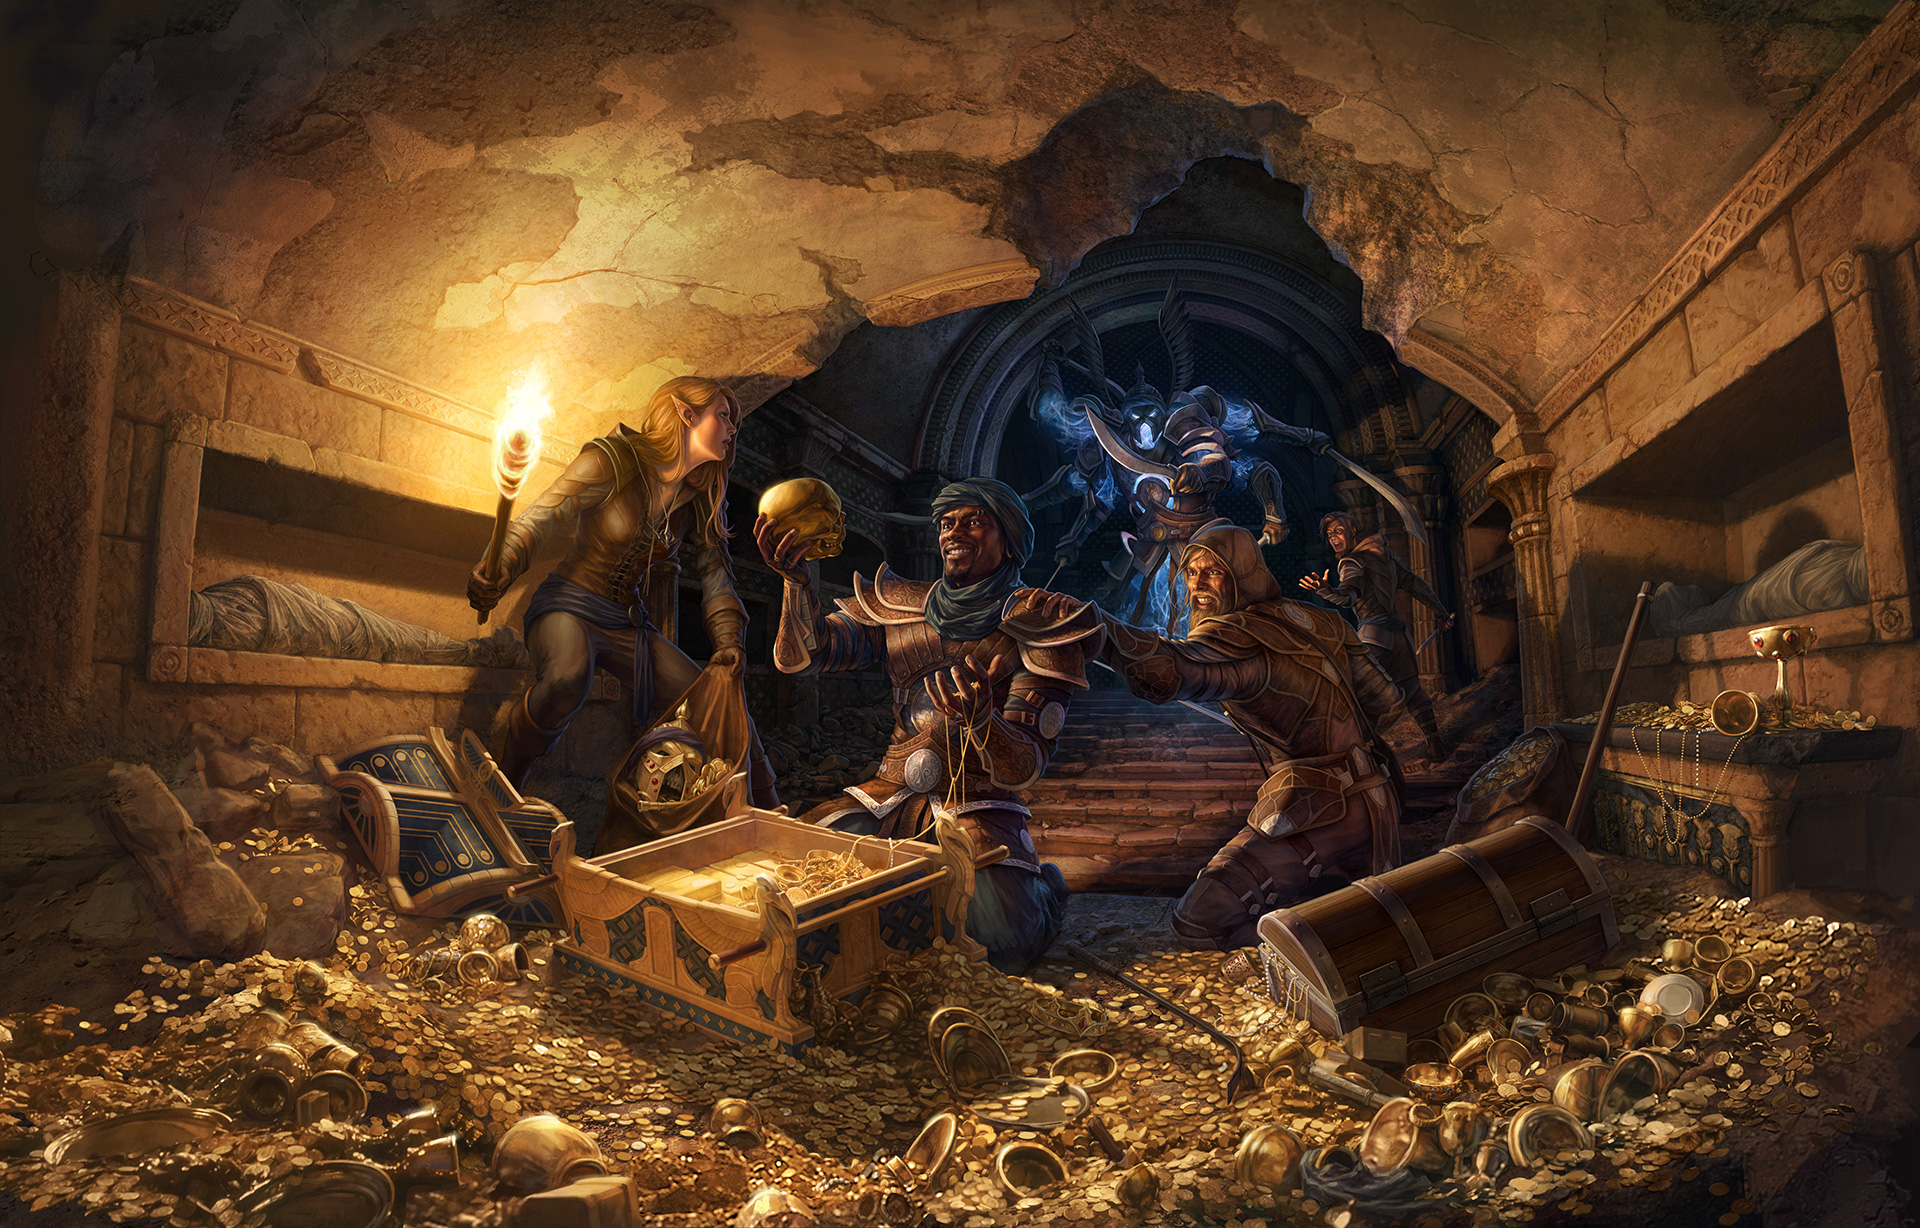
Chapter 3: Kymal - Dragon Heist
After the success demonstrated by the characters in finding Polla, the Clasp reaches out via Silvera Brighthelm again asking for the group's help locating a missing associate, Floon Blagmaar. Floon was last seen leaving the Skewered Dragon. This envelops the characters further into the underground conflict between the Myriad and the Clasp. Both criminal organizations are searching for a legendary hidden treasure trove. According to legend, an artifact known as the Stone of Golorr is required to find the treasure's location. The race is on to find the Stone of Golorr and learn the location of the hidden treasure vault before anyone else.
Story Overview
The search for Floon leads to the revelation that he was caught up in a case of mistaken identity, and the characters are actually looking for two victims. The intended target was the nephew of the Margrave, Renaer Krishtan. The Cloaked Serpent cultists that kidnapped them are looking for information about the Stone of Golorr and the location of the vault of dragons. Unfortunately, the cultists warehouse was subsequently attacked by Myriad members who took Floon to their sewer hideout. Renaer doesn't know where Floon was taken by the Myriad but is willing to help the party save his friend.
A few days later, as the characters spend a quite morning eating breakfast in their local inn, a fireball detonates nearby. The group is swept up in the aftermath of this horrific event and must try to get to the bottom of it. Who cast the fireball spell and why? Who was the intended target? Dalakhar, a rock gnome spy working for the Myriad was the intended target of the fireball and was carrying the Stone of Golorr. Cloaked Serpent cultists were attempting to steal the stone when the blast went off. One of the cultists, Urstul Floxin, survives the blast and flees with the stone.
The characters' investigation into the fireball will lead them to learn of a mechanical construct known as a nimblewright cast the fireball. This information will point towards the temple of the Allhammer known as the House of Inspired Hands. The group will learn of a second nimblewright and given a detector that can locate it. The detector will lead the group to the Gralhund's estate.
Arriving at the Gralhund Villa, the group can investigate themselves or let the City Watch handle it. If the characters choose to investigate, they will find a miniature war happening inside between Myriad agents and Cloaked Serpent cultists working for the family. During the conflict, the nimblewright escapes with the Stone of Golorr.
After locating the nimblewright, the group will find a map showing where it stowed the stone. This will spark a chase through Kymal as the Cloaked Serpent cultists attempt to keep it out of the characters' hands and bring it to their leaders, Lord and Lady Cassalanter.
Obtaining the Stone of Golorr will provide the attuned character with the legendary knowledge of the Vault of Dragons' location. This information will lead the group to the southwestern foothills of the Ironseat ridge where ancient ruins are located. The entrance to the vault is located underneath the altar. An undead creature guards the treasure horde and will attack if any attempt is made to take treasure from the vault.
Adventure Hook
A note is waiting for the characters on the nightstand inside the room they are staying in. The note is set against a small bag of coin containing 300 gp. The note reads:

The Search for Floon
Floon was last seen outside the Skewered Dragon, a dubious (and Myriad owned) tavern in the heart of the main trade district of Kymal. The following encounters kick off the characters' investigation. En route to the tavern, a bloody street fight provides a chance for characters to see the City Watch in action. If the characters decide to look around, they can gain a feel for their surroundings and may discover an eclectic curio shop. Upon arrival at the Skewered Dragon, the group has an opportunity to get information from the patrons, which will lead them to Candle Lane and the Cloaked Serpent Hideout.
Blood in the Streets
As the characters travel towards the Skewered Dragon, they come upon the aftermath of a bloody clash.
The skirmish that occurred here has nothing to do with Floon's disappearance but represents an escalation in the conflict between the Myriad and the Clasp and its effect on the town. A dozen guards and a veteran captain have arrested three thugs and are questioning witnesses while waiting for wagons to take away the criminals and corpses.
The survivors of the skirmish have been stripped of their weapons and forced to kneel with their hands on their heads. All three are loyal Myriad agents employed by Periad, the second in command of the Myriad's Kymal syndicate. These three are likely to be accused of murder and coldly catch the eye of anyone who passes by. The City Watch won't let the characters anywhere near the prisoners.
Searching the Neighborhood
The shop is named after the stuffed beholder in the window. The shopkeeper is a wizened deep gnome who spies for the Clasp. A few years ago, he survived the detonation of a gas spore in the underdark and inherited some stray beholder memories. Driven by a compulsion to carve out his own
domain, the gnome settled in Kymal, bought the Old Xoblob Shop from its previous owner. He tried remaining the store after himself, but everyone continued to call it the Old Xoblob Shop. He therefore restored the old name and changed his name to Xoblob. "No relation to the eye tyrant hanging in the window!" he says. If the characters decide to check out the shop:
Merchandise
The gnome sells an assortment of trinkets. As the characters search the shelves, roll on the Trinkets table in Chapter 5 of the PHB to determine what catches their eye. Xoblob sells any trinket for 1d6 gp.
Floon's Fate
The gnome doesn't know Floon by name, but he recognizes his description. He is reluctant to share information, but offering him a new purple item, some gold, or succeeding on a DC 13 Intimidation or Persuasion check loosens his tongue. He will tell the group that Floon and a well-dressed fellow of similar appearance and bearing were jumped outside the shop by rough looking men in black leather armor. He doesn't know anything about the second person but thinks there were five attackers, but none of them looked familiar either.

The Skewered Dragon
The Skewered Dragon faces an alley that runs between two streets in the heart of the trade district, not far from the Old Xoblob Shop. When the characters approach, read:
Floon's Fate
Floon has not been seen at the Skewered Dragon since the night of his disappearance, and the dive's patrons are loath to talk to strangers. A successful DC 13 Intimidation or Persuasion check can get some to open up; a bribe can grant advantage to a persuasion check.
- Several of the regulars remember seeing Floon drinking a couple of nights ago. After a while, Floon was joined by a friend.
- "Just another spoiled, rich noble who likes to rub our noses in it!" sneers one patron.
- The two drank and played cards before leaving around midnight. Five men followed them out, but no one in the tavern knows what happened after that. The men who followed Floon and Renaer have been seen frequenting a warehouse on Candle Lane.
- "Look for the snake symbol on the door" says one of the tavern regulars.
Candle Lane
The buildings on either side of Candle Lane are so tall and tightly packed together that sunlight reaches the street only at high noon.
The flickering comes from a single streetlamp set along Candle Lane. The building directly across from the lamp is a warehouse. As a character approaches the front door of the building, with a successful DC 13 Investigation check they will notice a small carving of a snake in the wooden door just above the door handle.
Cloaked Serpent Warehouse
The hideout on Candle Lane is a ramshackle warehouse. The entrance to the warehouse is along the alley. The alley slopes downward along the side of the building. The first floor is accessible from the back but is below ground level along the street. The side yard of the warehouse is fenced off from the alley creating a yard along the side. The second story of the warehouse is even with the street level of Candle Lane. The Cloaked Serpents have a couple of hideouts in run-down buildings like this throughout Kymal.
The fence runs along the alley with an unlocked gate built into the middle. The building has three points of entry along the side - a side door in the yard, a large warehouse loading door, and a painted over window. Each are locked but can be opened with a successful DC 12 Thieves' Tools check or can be forced open with a successful DC 14 Athletics check. Knocking at the doors or the window alerts the individuals inside. Any character with a Passive Perception of 15 or higher will hear a noise from inside as they scramble to hide.
The two individuals inside are Myriad operatives and are all that remain of the group that ambushed the five Cloaked Serpent cultists that arrived with the kidnapped Floon and Renaer. Floon was taken away, but Renaer succeeded in staying alive by hiding. Now, the young noble is trying to figure out how to slip past the two, who are lazily searching the warehouse for loot.
See Map 3.1 for the complete layout of the Cloaked Serpent Hideout.
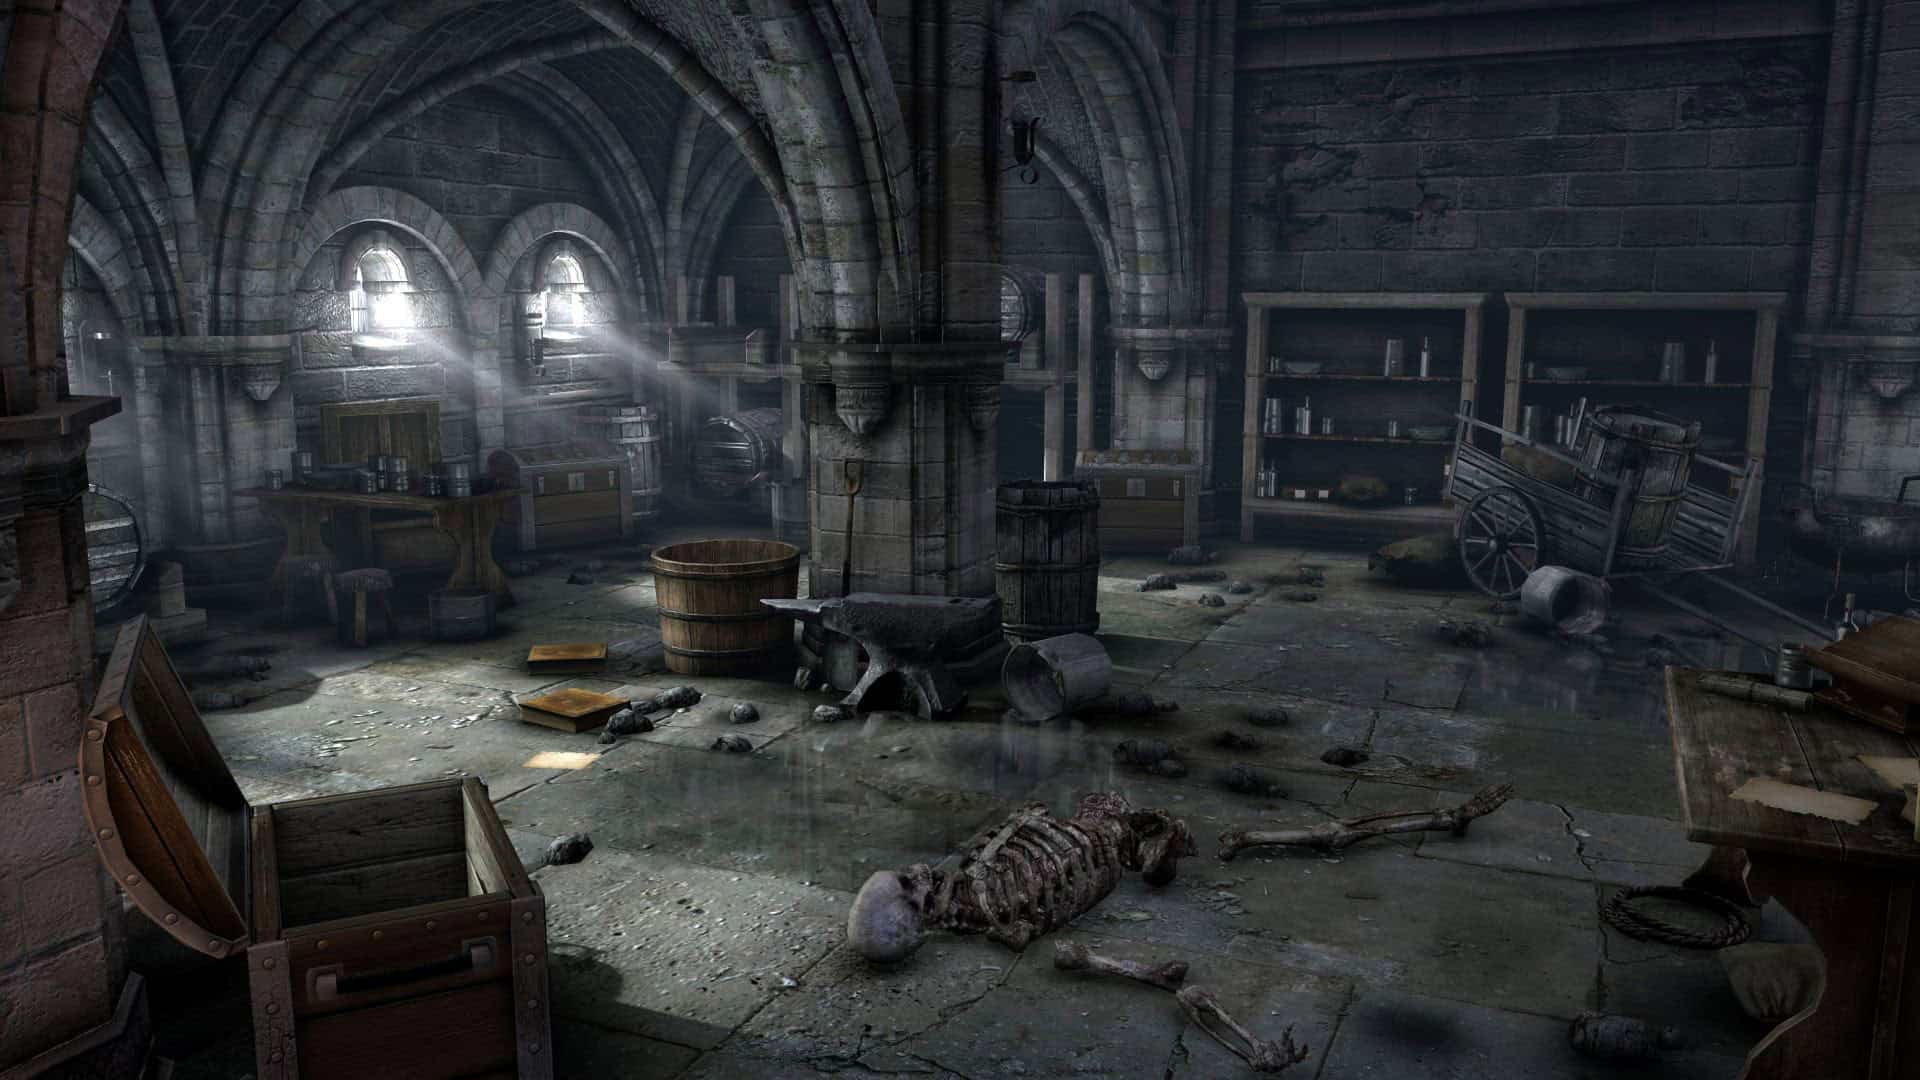

Z1. Main Room
This group of the Cloaked Serpent cultists focus on recruiting, training, and information gathering. Crates packed with weapons, rations, boots, black uniforms, and other gear fill the warehouse.
Characters who enter quietly can try to catch the Myriad Operatives by surprise. If the characters knock before entering or announce their arrival in some other way, the two are hidden within the warehouse. As the characters enter, determine if the two individuals are aware of their presence before reading the following text.
If the two are surprised, add: Two humanoid figures look over in surprise from where they stand in the middle of the warehouse. Each wears a hooded cloak and wields a shortsword.
The corpses belong to five human Cloaked Serpent cultists (the same ones who kidnapped Floon and Renaer) and five Myriad members, each of them clad in leather armor. Each Cloaked Serpent cultist has a black snake tattoo at the base of their neck. The Myriad members have a red and gold sun tattoo on the inside of their upper arm.
Encounter
The two Myriad members are a Master Thief (VGtM p.216) and a Martial Arts Adept (VGtM p.216). They will fight until one of them is killed, then the survivor tries to flee.
Interrogating a Myriad Operative. If the group manages to capture one of the Myriad members, a successful DC 15 Intimidation check will force the captured individual to divulge what they know:
- They received word that Renaer had been kidnapped and might be easy to pick up.
- He has information the bosses want.
- DC 18+: Follow the signs in the sewers (small suns) drawn on the walls of the sewer that leads to one of the Myriad's hideouts.
Z2. Storage Closet
Roleplaying Renaer
Renaer is unarmed. Marred by grime and a lingering stench, he speaks with grace and articulation, as befits his noble upbringing. His trust is easily gained but impossible to restore once broken. On the night of the abduction, Renaer was concerned that Floon was too intoxicated to find his way home by himself and offered to escort him. The two were jumped by five thugs as they left the Skewered Dragon.
Renaer feels guilty that Floon was taken, since he believes (correctly) that they mistook Floon for him. If the characters ask Renaer to join their search for Floon, he agrees to do so, arming himself with a dagger and a rapier scavenged from the dead cultists in the warehouse. (See stat block in Appendix B).
Development
If the characters ask Renaer why the cultists or the Myriad wanted to kidnap him, he gives the following truthful reply:
If the characters did not interrogate one of the Myriad members, Renaer overheard them talking and can provide the group with the same information.
Z3. Secret Room
This room is hidden behind a secret door that can be found with a successful DC 17 Investigation check. When the secret door is opened, the characters can hear the faint sound of a bell ringing upstairs, in Z5.
Treasure
The Cloaked Serpents have stashed two wooden crates in here. The first, has four wooden-framed paintings wrapped in leather. The paintings depict different cities (Emon, Ank'Harel, Vasselheim, Rexxentrum) and are valued around 100 gp each.
The second crate, stolen from a caravan along the Silvercut Roadway, contains 20 ten-pound silver trade bars stamped with the Emon crest, worth around 50 gp each.
Z4. Balcony
The open second level is stacked with crates where it overlooks the main warehouse. Characters who search through the crates find sorts of junk, including moth eaten bolts of cloth, bottles of spoiled wine and beer, and hundreds of pairs of wooden-soled sandals that were all the rage last summer but are now out of fashion. None of this junk is valuable.
Z5. Warehouse Offices
The upper floor contains a suite of offices that get little use. The rooms have desks, chairs, a few mice skittering about, and bare shelves covered with dust and draped in cobwebs. Mounted above each office door is a steel alarm bell. The bells are connected by wires to the secret door in area Z3, and they ring when the door is opened.
Treasure
With a successful DC 20 Investigation check, a character searching the offices will find 3 magical pieces of paper. A DC 10 Arcana check will identify these pieces of paper as Paper Birds (Appendix A).
Cloaked Serpent
Warehouse

Map 3.1
Tracking Floon
At this point the characters likely know that Floon was kidnapped by the Myriad who mistook him for Renaer, and that he was taken to one of their hideouts in the sewers. If the characters did not learn from the thieves where Floon was taken, asking questions of the locals can reveal that many people saw him being dragged off.
A successful DC 15 Investigation check, or 5 gp in bribes will allow the characters to trace the kidnappers' path through the back alleys to a sewer grate. The cover is easily lifted, revealing a ladder down into the sewers.
Navigating the Sewers
The Myriad's hideout is set within the labyrinth of Kymal's sewers. At every location where characters must make a decision of which direction to go, a symbol is scrawled near the ceiling in yellow chalk. The symbol is a stylized representation of the Myriad's sun symbol. These symbols are erased and changed every few days.
DC 13 Perception check: there is evidence of moss-covered bones and a few skulls intermixed in the green mass.
Encounter
The flowering mass of vegetation is a Corpse Flower (MToF p.127). It currently contains 7 dead humanoids inside it. Use Map 3.2 for the encounter battle map.
Development
After the characters defeat the corpse flower, they can press on following the corridor with the chalk symbol. It takes approximately 10 more minutes of walking through the sewer to reach the Myriad's hideout.
Ladder. If the characters who climb the ladder and push open the metal cover find themselves in the cellar of the Spouting Fish, a tavern near the cities western edge.
Myriad Guild Hideout
The Myriad Guild has hideouts throughout the Kymal sewers. The boss of this hideout is a half-orc named Grum-shar. When the characters arrive, Grum-shar is interrogating Floon Blagmaar in area M7. His display of torture techniques is a ploy to impress his other guest: a mind flayer named Nihiloor. All the doors in the hideout are unlocked. Grum-shar assumes that only those who have guild business will be able to find their way here.
See Map 3.3 for the complete layout of the Myriad Hideout.
M1. Central Hub
The characters approach this area from the east, slogging through 1-foot-deep water and sewage.
With a successful DC 12 Perception check the characters will notice a pair of arrow slits are carved into its outer walls, directly across from each other.
Secret Door. A secret door in the southern sewer tunnel wall leads into M11. Characters can find the secret door with a DC 20 Investigation check.
Encounter
If the characters talk loudly or otherwise make a lot of noise here, the 2 Hobgoblins (MM p.186) posted as sentries in areas M2a and M2b awaken and shoot arrows at them through the arrow slits. The slits provide the sentries with three-quarters cover.
M2a & M2b. Watch Posts
There is a Hobgoblin (MM p.186) station in each area: M2a and M2b. Allies of the Myriad, they came here from Stilben after defecting from the Iron Authority. The hobgoblins rely on darkvision to see and are supposed to be watching area M1, but both have dozed off. Characters who succeed on a DC 14 Stealth check can sneak past the sleeping hobgoblins without waking them.


Map 3.2
M3. Messy Room
M4. Empty Sleeping Area
This room contains six tattered, straw-stuffed mattresses and nothing of value. If the occupants of area M5 have not been dealt with already, the characters hear the sounds of activity in that room with a successful DC 12 Perception check. There is a thin wooden door that separates this room from the next chamber.
M5. Sleeping Area
This room contains six tattered, straw-stuffed mattresses and three members of the Myriad. When the characters arrive, Zemk and Krentz are using pieces of furniture to barricade the door to M6. Groff is trying to explain that their approach won't work and is telling him to plug the gap at the bottom of the door with blankets. None of them notice the intruders right away unless the characters make a lot of noise.
Encounter
Once combat starts, they fight to the death. All 3 are Bandit Captains (MM p.344) that report to Grum'shar.
M6. Lavatory
This room has a hole in the floor that opens into a cesspit. There is a large ooze that has emerged from the pit and killed the two hobgoblins that were sent into the room to dispose of it. The hobgoblins' bones float amid the ooze's gooey form, and their pitted weapons lie on the floor nearby. None of their gear is salvageable.
Encounter
The ooze in this chamber is an ochre jelly (MM p.243).
M7. Main Chambers
Encounter
The tentacled creature is Nihiloor, a mind flayer (MM p.222) that is caressing an intellect devourer (MM p.191). Upon seeing the adventurers, Nihiloor rises from the stone chair, sets down its pet and glides across the room intending to leave through the double door in the west wall. The mind flayer expects Grum'shar Myriad Enforcer (TCSR p.233) and the intellect devourer to cover its escape.
Strategy. Nihiloor uses Dominate Monster to control a character who gets in its way and turns any such individual against their allies. Grum'shar has the half-orc ability when reduced to 0 hit points, he drops to 1 hit point instead. He can only do this once.
Development
The half-orc, Grum'shar, is a low-level Myriad Guild boss. As soon as his minions retrieved who they thought was Renaer, the half-orc begged Nihiloor to stay to witness the interrogation of the captive, not realizing until after he did so that they had mistaken the prisoner's identity. Grum'shar viciously attacks the group hoping to salvage his reputation.
As a result of his torture, Floon Blagmaar has 1 hit point left. If he is healed by the characters, he is eternally grateful and shows his affection by hugging them. He stays close to them, trusting in their ability to protect him. If Renaer is with the party, he will shoulder the burden of protecting Floon
Treasure
Grum'shar carries 30 gp. Tucked behind the stone chair Nihiloor was sitting in is a small, unlocked wooden chest containing 2 healing potions and 250 gp.
M8. Getaway Passage
This room appears empty on first glance, but a thorough search accompanied by a successful DC 15 Investigation check reveals a rough-hewn tunnel hidden beneath a loose flagstone. The low tunnel leads north to area M9.
M9. Private Cellar
An innocent halfling family, the Loby Peabody, brew beer in this cellar, which lies beneath their home. Their cellar contains brewing supplies and lots of worthless clutter. The halflings haven't noticed the secret tunnel that leads to the Myriad Guild hideout; it's concealed beneath a large flagstone that requires a DC 12 Athletics check to lift.
If the characters ascend out of the cellar and enter the Peabody's small house, the halflings are initially alarmed but can be easily calmed. Upon learning of the secret trapdoor, they vow to seal it up again. If the characters return and need to make use of the secret tunnel, they allow it.
M10. Sleeping Quarters
Straw pallets lie on the floor, and rusty manacles are bolted into the walls. There is nothing of value in any of these rooms.
M11. Back Door
This hideout contains a secret route out of the hideout. This room has a large wooden table that is placed in the center of the chamber. A small flight of stairs leads up to a hallway that leads to the secret entrance back into the sewer.
M12. Hostel Cellar
A narrow passage in the sewer wall leads to the cellar of a halfling-owned hostel on Spices Street. Medium characters must squeeze to reach this area from the tunnel. The hostel is used as a base by the Shard Shunners, a gang of halfling wererats. They are aware of the Myriad hideout, and the two gangs are tenuous allies.
Roscoe Underbough, a Shard Shunner in hybrid form, guards the cellar with two other members. The 3 wererats (MM p.209) hide in the northwest storeroom, ready to jump out and scare away anyone who heads for the stairs. Not eager to commit murder, Roscoe allows retreating characters to flee back to the sewers.
If the characters defeat Roscoe or slip past him, they can make their way up into the hostel, which caters to a mostly halfling clientele. With none of the other Shard Shunners currently present, the characters are greeted warmly by staff and patrons, who point them in the direction of the nearest bathhouse.
Completing the Quest
Floon and Renaer both express their gratitude for saving them. If the characters need to call upon their new friends for an occasional favor, either of them is happy to oblige. Floon has little to offer the characters but friendship. Occasionally, he may have some gossip about the ruling class. Although Renaer is estranged from his uncle, Margrave Jaktur, he still has some friends in high places if the characters need information about the government.
Treasure
A day after rescuing Floon, a bag filled with 1000 gp is left for the group at their inn.
M1
M2a
M2b
M3
M4
M5
M6
M7
M8
M9
M10
M10
M10
M10
M11
M12
Map 3.3
Fireball
A few days after Floon is rescued by the group, residents along the street near the inn where the characters are staying are shaken awake by a loud whoosh, rattling windows, and the screams of city folk. A fireball has just detonated in the street and the neighborhood is thrown into chaos. The explosion occurs early in the morning, at a time when the characters are still inside the inn.
Windows rattle as the roar of an explosion fills the air inside the inn. Looking out the window, you see charred bodies and anguished screams fly through the air. A thick cloud of acrid smoke billows outward from the blast, which seems to have occurred in the entrance to the alley right across the street.
In the wake of the explosion, people emerge from their houses and shops to survey the devastation. The blast did not set any of the nearby buildings ablaze, but it left eleven people dead.
With a successful DC 13 Arcana Check, a character will recognize the source of the explosion as the spell fireball.
Background
Dalakhar, a rock gnome spy working for the Myriad was on his way to the Dragon's Hoard when the fireball went off, killing him and ten other people. The gnome is important because he was carrying the Stone of Golorr.
Three members of the Cloaked Serpents, including the assassin Urstul Floxin, were close to nabbing Dalakhar when they were caught in the blast. Of the three, only Urstul survived. He was heavily wounded by the blast but was able to pluck the Stone of Golorr from Dalakhar's pocket before fleeing the scene. While other survivors were coming to their senses, Urstul stumbled through the smoke and haze to eventually make his way back to Gralhund Villa.
The heads of the Gralhund noble family, Yalah Gralhund and her husband, Orond, are providing coin and shelter to Urstul and his fellow Cloaked Serpents for the promise of receiving their fair share of the hidden cache of gold and a chance to be a part of the revolution. The Gralhund's aren't fully trusting of Urstul, they sent out their own agent to shadow him, eliminate Dalakhar and obtain the Stone of Golorr on their behalf. Yalah gave the would-be assassin a necklace of fireballs with instructions on how and when to use it. When it seemed as though Dalakhar might give Urstul the slip, this agent hurled one of the beads from the necklace to stop the gnome in his tracks.

The Gralhund's assassin is a construct that escaped from the House of Inspired Hands about a month ago. The construct hitched a ride on House Gralhund's coach. Yalah befriended it, offered it shelter, and used it as a servant until she and her husband found a more sinister use for it.
The incident with the fireball has strained the alliance between the Gralhunds and the Cloaked Serpents. Urstul Floxin refuses to hand over the Stone of Golorr until he gets compensation for the betrayal. Meanwhile, the Gralhunds are weighing the risks of betraying and murdering Urstul in their own home. If the characters' investigation goes well, they will blunder into this den of snakes before Urstul is killed.
Unraveling the Plot
During their investigation, the characters should learn who or what cast the fireball (a nimblewright), why the attack was committed (to steal the Stone of Golorr), and where the stone was taken (Gralhund Villa). If the investigation stalls, friendly NPCs might step forward to help in exchange for compensation. One such figure is Vincent Trench, the private detective who lives near where the explosion occurred.
After the Blast
The characters have only a few minutes to search the crime scene before members of the City Watch arrive. After that, they aren't allowed anywhere near the bodies, although invisible and similarly hidden characters can search the crime scene further. The blast left eleven people dead.
- One elderly female human - was out for a walk, no one recognizes her
- Two black cloaked male humans - Cloaked Serpent sell swords, clad in black leather, with sheathed longswords
- Two female humans and a male half-elf dressed plainly - servants of wealthy families, killed while running errands
- One male gnome - Dalakhar wearing a burned cloak and clutching a dagger
- Two female halflings holding flutes
- Two male halflings in bright colored clothes
A search of the bodies with a successful DC 15 Investigation check reveals that one of the dead male humans has a black snake tattoo on the back of his neck. Additionally, the dead gnome has dry waste on his boots and cloak and has a pouch containing five 100 gp gemstones.
A character can try to snatch Dalakhar's pouch without being seen by NPC onlookers, doing so with a successful DC 13 Sleight of Hand check. On a failed check, the character still acquires the pouch, but someone observes the theft and reports it to the City Watch. The witness can be silenced with a bribe of 20 gp or more.
The characters have a few minutes to examine the crime scene before the City Watch arrives and cordons off the alley, posting six guards (MM p.347) at each end. The guards don't allow anyone in or out without permission from a superior officer. Another six guards (MM p.347), including a sergeant make their way to the crime scene and watch over the dead bodies until the investigators arrive.
Twenty minutes after the explosion, a City Watch captain arrives named Saeth Cromley (Appendix B) escorting an investigator named Barnibus Blastwind (Appendix B) to the crime scene. He quietly takes charge of the investigation, while Captain Cromley directs guards to begin questioning locals. Before allowing the corpses to be removed and taken to local temples, Barnibus inspects the scene closely and reaches the following conclusions:
- The gnome was running from armed pursuers, of which there were three. The third person who was chasing him is not among the dead.
- The gnome and his pursuers were moving towards the entertainment district.
- Neither the gnome nor his pursuers saw the blast coming.
Barnibus and Captain Cromley refuse requests by characters to join the investigation saying "that would introduce too many new variables into an already confounding equation."
Eyewitnesses
Characters that spend time talking with eyewitnesses can learn what the people saw or heard. No ability checks are required, they are eager to share their information.
Fala Lefaliir. She is the owner of the Corellon's Crown. She saw Urstul Floxin fleeing the scene with the Stone of Golorr in his clutches.
- I was watering plants in the greenhouse on the second floor of my shop when the blast blew out some of the windows. Lucky I wasn't injured! Through the smoke, I saw a cloaked man take something from the body of a dead gnome, then start limping away. He was severely burned and casting glances over his shoulder, like he was afraid someone might be following him. He was headed northward.
Jezrynne Hornraven. A wealthy woman, was leaving the Tiger's Eye having just hired Vincent Trench to spy on her philandering husband.
- I tell you; it was not a man. More like a puppet shaped like a man. A puppet without strings. It was on the rooftop. It hurled something into the crowd below that caused the explosion. I saw those halflings burned alive! I saw them!
Martem Trec. This 12-year-old boy watched as his halfling friends perished in the flames. He didn't see much beyond that but found something important after the blast.
- Right after the explosion, I ducked behind a rain barrel. Then I heard a 'plop' and found this in the barrel.
He produces a necklace of fireballs with two beads left and a broken clasp. Martem is planning to keep it, but a character can convince him to relinquish it with a DC 8 Intimidation or Persuasion check.
The Nimblewright
Characters who question Jezrynne learn the description of the creature that set off the fireball. A simple investigation provides the group with information that this creature bears a striking similarity to some constructs people have seen around the House of Inspired Hands. Characters might want to visit the temple and investigate a possible connection.
House of Inspired Hands
The House of Inspired Hands is Kymal's temple to the Allhammer. It is located on the edge of Kymal's Temple District.
The House of Inspired Hands looks like a cross between a temple and a workshop. The symbol of the Allhammer is a two-headed hammer. The Allhammer is the patron of craft and creation and is worshipped by smiths, artisans, and miners alike granting inspiration where respect and prayer are given.
DC 12 Perception check: You also see the silhouette of a humanoid shape perching on the rooftop. It extends an arm, releasing a tiny metal sparrow into the sky. The bird does a few loops in the air then veers right towards you.
The creature atop the temple is Nim, a nimblewright. Nim was gifted to the temple by a visiting Marquessian wizard and has been creating its own inventions on the sly. One of those inventions was the nimblewright that detonated the fireball. Another less dangerous invention, a mechanical sparrow, is on an accidental collision course with the party.
Battle with a sparrow. The mechanical sparrow swoops down towards the group. It has a flying speed of 60 feet, has an AC of 15 and 1 HP. It acts on Initiative Count 20 and is immune to poison and psychic damage. On its turn, it flies towards one party member and makes a Bite attack (+0 to hit). On a hit the bird deals 1d4 piercing damage.
After the attack, the bird dies on impact or crashes if it misses. After the attack, Nim withdraws into the temple's attic through a secret hatch in the roof and hides, hoping the characters don't report the incident to the temple's acolytes.
Inside the Temple
This temple to the Allhammer is open and abuzz with activity during daylight hours, then closes from sunset until sunrise. At night, acolytes retire to their private quarters to work on pet projects. The main hall of the temple holds two dozen marble pedestals. Each one holds a prize-winning invention or a miniature model some other extraordinary creation. Among the displays are several that stand out:
- A 4-foot-tall working model of a clock tower rings at the top of every hour. It is made of wood, iron, bronze, and glass, with brass bells and delicate hands of solid gold.
- A wooden flying machine that has wings that flap.
- A miniature model of a mechanical dragon turtle.
- A functional "waking helmet" equipped with small articulated metal arms and hands that gently slap the wearer if he or she falls asleep.
Meeting Valetta
The characters are met as they walk into the temple by Valetta, a dragonborn priest (MM p.348) of bronze dragon ancestry. If the characters mention the figure they saw on the roof of the temple, Valetta identifies it as Nim, a nimblewright that was gifted to the temple by a Marquessian wizard.
If they describe the incident involving the mechanical bird, Valetta sighs and leads them up a spiral staircase to an attic that Nim uses as a lair - only to find the attic's door fitted with a new lock. Valetta does not recognize the lock or have a key to open it. A successful DC 18 Thieves' Tools check will pick the lock.
Valetta will not allow a character to break down the door but will permit them to speak to Nim through it. A character can persuade Nim to unlock the door with advantage granted by Valetta who is also strongly urging Nim to comply with a successful DC 17 Persuasion check.
Meeting Nim
Nim understands Common but can't speak. It has developed a simple sign language that Valetta and other members of the temple staff understand. After the incident with the bird, Nim hides amid the clutter in its lair, but emerges if the characters find their way inside or coax it into unlocking the door. If the characters ask about the other nimblewright, Nim admits (through gestures to Valetta) that it built the other nimblewright to ease its loneliness. But then Nim's creation fled in confused terror a month ago, and Nim hasn't seen it since. In light of this revelation, Valetta angrily orders acolytes to remove Nim's tools and unfinished inventions from the attic, while she forces Nim to look on.
Nimblewright detector. Characters who search Nim's attic or watch the area as its being cleaned out can find a 1-foot-long copper contraption with an umbrella like metallic protrusion at one end. A detect magic spell reveals an aura of divination magic around it. If asked about it, Nim tells Valetta that it built this device to find the errant nimblewright and tied to seek it out, only to discover that Nim couldn't leave the temple grounds. Once Nim explains how the nimblewright detector works, Valetta allows the characters to take it.
Reward. If the characters track down the wayward nimblewright themselves, Valetta says the temple will pay them 500 gp if they return with proof of its destruction.
From the Adventures of Bramble Tickletoes III & Company:
The party agreed to search for Floon. During their investigation, they stumbled upon Old Xoblob's Shop. Bramble fell in love with the store and requested many things be painted purple.
During the fight in the Myriad's hideout, Maoki was attacked by the Intellect Devourer and was left catatonic. The group rushed to the Temple of the Stormlord and paid for a greater restoration to be performed to return him to normal.
After the fireball outside the Hunter's Hall, the group's investigation leads them to meet Valetta and obtain the nimblewright detector.
What Renaer Knows
At some point during their investigation, the characters might want to speak to Renaer about the fireball, given his own recent brush with The Cloaked Serpents. Conversely, he could decide to pay them a visit. If he is told about the gnome that was killed, he will divulge the following information:
If the characters tell Renaer about the man seen fleeing the scene, Renaer says he will reach out to some friends in the City Watch and see what he can find out. He will return in a day or so with the following information:
- The man seen fleeing matches the description of Urstul Floxin, a suspected murderer that the City Watch has been on the hunt for.
- A nobleman claims to have seen Urstul enter Gralhund Villa, on the edge of the entertainment district shortly after the fireball incident. The resident reported him to the City Watch because Urstul looked suspicious.
- Two City Watch constables spoke to Lord Gralhund. He assured them that no one had broken into the estate and that everything was fine. The constables had no grounds to get a search warrant, so they did not pursue the matter.
Gralhund Villa
After fleeing with the Stone of Golorr in his clutches, the hired assassin Urstul Floxin returned to Gralhund Villa to confront Yalah Gralhund about sending the nimblewright to meddle in his mission. Lady Gralhund decides she no longer likes Urstul and taking advantage of his injuries, wrests the Stone of Golorr from him at sword point. She orders her guards to lock him up until she decides what to do with him.
Lady Gralhund's motivation is a secret held by her and Hrabbaz, her loyal half-orc bodyguard. Yalah is a fawning member of their Cloaked Serpent worshiping cult and intends to deliver the Stone of Golorr to the Cassalanters as a demonstration of her fealty and friendship.
Having gravely misjudged and underestimated Lady Gralhund once, Urstul isn't about to do so again. Rallying despite his injuries, he manages to kill the two inattentive Gralhund guards who were watching over him and alert the other Cloaked Serpents in the estate who begin dispatching the other guards and servants. Urstul's goal is to capture Lord or Lady Gralhund, force the surrender of the Stone of Golorr, and deliver it to the Cassalanters himself.
Urstul's plans, unbeknownst to him, are dashed when Lady Gralhund orders her nimblewright to take the Stone of Golorr elsewhere. Amid the chaos, the nimblewright flees the estate.
Should They, or Shouldn't They?
The characters must proceed carefully, since they have no evidence that directly implicates the Gralhunds in the fireball attack. Their two basic choices are to share what they know with the City Watch or visit Gralhund Villa themselves.

Let the Watch Handle It
The characters can go to any City Watch station in Kymal and report what they have learned to the constables there. Shortly thereafter, the characters receive a visit from Barnibus Blastwind and Saeth Cromley, who have no reason to suspect the characters are lying. Their own investigation corroborates much of what the characters said. Barnibus concludes the meeting by saying, rather brusquely: "Thank you for the information." Cromley adds: "Rest Assured, we'll have this case resolved in no time."
A magistrate provides the City Watch with a warrant to search Gralhund Villa. The next day, Cromley visits the characters by himself and, as a courtesy, tells them what happened:
- Officers arrived to find Lord Gralhund unconscious, Lady Gralhund in shock, and their half-orc bodyguard bloodied but unbowed.
- Apparently, the Gralhunds had been held hostage for more than a week by agents of a dark assassins' guild. Most of the assassins were killed during a bloody revolt led by Lord Gralhund himself.
- Their leader, Urstul Floxin, was among those who got away. He's still at large. The Watch plans to step up its search for him.
- There was no sign of the nimblewright. According to the Gralhunds, the construct was delivered to Gralhund Villa weeks earlier and they didn't realize it was a spy.
- Lady Gralhund reported that it stole her necklace of fireballs.
Cromley's summary of events is based on information given to the City Watch by the Gralhunds and is riddled with falsehoods. Among the lies are the following:
- The hostage situation.
- Lord Gralhund's heroism.
- The theft of Lady Gralhund's necklace of fireballs.
- The nimblewright's affiliation with the assassins is a lie.
- The Gralhund's account further does not explain why the nimblewright would use the necklace of fireballs to inflict harm on the assassins if it was working with them.
- If characters raise that question, Cromley thinks for a moment and then ventures an explanation that the nimblewright underestimated the necklace's explosive power.
Investigate the Villa
The characters can insert themselves into Gralhund Villa and accost its residents with impunity if they're careful to pin the violence on the assassins or if they're able to enter and leave unseen before the City Watch shows up to arrest everyone. Sneaking in or out of the villa without being seen or heard by neighbors and passersby requires each character to succeed on a DC 15 Stealth check.
If the characters side with the Gralhunds in the conflict, Lady Gralhund is inclined to overlook their trespass. Her demeanor sours, however, if they start asking too many questions. She vigorously denies accusations that her family is involved with the Cloaked Serpents and claims they were holding her family hostage (a false claim also parroted by her husband, her bodyguard, her children, and her staff). If the characters assault any member of the household or brandish weapons in an attempt to intimidate, the Gralhunds inform the City Watch of the party's crimes.
During the characters' invasion of Gralhund Villa, the nimblewright flees the estate with the Stone of Golorr. If the characters are using Nim's detector to track the nimblewright, the device lets them know that it has fled the scene, but not the direction it went.
Villa Overview
Gralhund Villa sits in the middle of an upper-class residential neighborhood in the entertainment district. Here are some general facts to keep in mind:
- The streets around the villa have pedestrians and coaches traveling along them at all hours, though traffic is heavier during the day.
- The estate is enclosed by a 12-foot-high stone wall that requires a successful DC 15 Athletics check to negotiate without the aid of climbing gear or magic.
- Neighbors and bystanders alert the City Watch if they hear loud, disturbing noises coming from the estate or if they see anything suspicious.
- The Watch sends a mage (MM p.347) and 6 veterans (MM p.350) to investigate. It takes them 1d6 + 4 minutes for them to arrive.
- All ceilings in the mansion are 20 feet high.
The following encounter locations describe the Gralhund estate as it stands when the characters first arrive. The Cloaked Serpents have taken over the downstairs level of the mansion. The Gralhunds are fighting to hold the upstairs.
See Map 3.4 for the complete layout of the Gralhund Villa.
G1. Locked Gates
Through a set of ornate iron gates, the characters can see a yard with several large trees as well as two footpaths that lead to a two-story brick mansion and eastward toward a detached coach house.
An arcane lock spell is cast on the gates. Forcing them open requires a successful DC 25 Athletics check, while picking the lock requires a successful DC 20 Thieves' Tools check. The spell doesn't bar members of the Gralhund family, their staff, their guards, or Lady Gralhund's nimblewright from opening the gates.
G2. Yard
The estate is well tended. In spring and summer, large trees provide shade. The trees begin shedding leaves in the fall. By winter, their branches are stripped bare. Through the trees, the characters can see a large balcony (area G17) enclosed by an iron railing above the mansion's main entrance. The balcony is 20 feet above ground level and scaling the mansion's brick walls to reach it without the aid of climbing gear or magic requires a successful DC 15 Athletics or Acrobatics check.
Encounter
The yard is looked after by a menacing groundskeeper named Hurv Taldred, a male Marquessian cult fanatic (MM p.345) and his 2 mastiffs (MM p.332).
The Gralhunds paid a necromancer to perform a ritual on Hurv and his mastiffs. After sundown, the physical forms of these figures melt away. They become 3 shadows (MM p.269) until dawn. Characters who succeed on a DC 13 Stealth check can cross the yard without being detected. Otherwise, Hurv and his hounds detect the characters and attack, day or night.
G3. Coach House
This stone building contains a beautifully maintained coach and clean stables that house four draft horses and Lady Gralhund's jet-black riding horse, named Maladar. A sliding wooden door bars access to the street and has a padlock on the outside that holds it shut. Picking the lock requires a successful DC 20 Thieves' Tools check.
The larger room north of the stables contains tack and harness for each horse, as well as bales of hay and yard tools. The smaller room in the northwest corner has two cots: one for the groundskeeper, Hurv who sleeps during the day, and one for a stable boy named Ike, a commoner (MM p.345), who sleeps here at night. Ike is away if the characters arrive during the day.
Treasure.
Lady Gralhund's horse is outfitted with horseshoes of speed and two saddlebags, each of which holds four 5-pound gold trade bars worth 250 gp each.
G4. Guard Barracks
This one-story stone building attached to the mansion serves as quarters for twenty house guards. The main room contains ten bunk beds. Each comes with a pair of footlockers containing folded clothes and worthless personal effects.
The room in the northwest corner contains wooden mannequins and racks designed to hold armor and weapons. Since there are no guards present, the mannequins and racks are bare.
G5. Kitchen
An unlocked wooden door leads from the yard to the mansion's kitchen, which is stocked with cookware and utensils. A large fireplace is used for cooking meals.
G6. Pantry
This pantry is lined with shelves containing dry foodstuffs, spices, folded tablecloths, and jars of preserves. Casks of fresh water, ale, and wine are also stored here.
A back door leads out to the street. This sturdy wooden door is barred shut on the inside. Forcing it open from the outside requires a successful DC 20 Athletics check and makes a lot of noise.
Corpses. The Cloaked Serpents have killed two servants, an older male human (the head butler) and a younger male halfling (a cook). The bodies have been left on the floor.
G7. Laundry Room
This room is where servants wash clothing. It contains scrub buckets, wash basins, soap, mops, and chamber pots.
Corpses. The Cloaked Serpents have killed a servant, a middle-aged female human (the head maid), and left her body on the stairs leading up to the servants' quarters (area G19).
Treasure
The maid has a ring of keys on her belt that opens all the locked doors in the mansion and the cabinets in area G8.
G8. Great Hall
Characters who enter this hall for the first time notice the following:
Encounter
There are 3 thugs (MM p.350) holding bloody maces standing amongst the bodies. They are Cloaked Serpent cultists and ordered to hold the room against strangers or the City Watch.
G9. Parlor
Urstul Floxin was confined here when he returned to the villa, but shortly thereafter he killed his guards and escaped. The room is furnished for comfort and contains dainty chairs, a chaise lounge, a wine cabinet, and framed paintings of various long-dead members of the Gralhund family.
Corpses. The bodies of two guards lie atop blood-soaked rugs. The guards wear chain shirts and the livery of House Gralhund.
G10. Den and Trophy Room
Lord Gralhund's den has the heads of various beasts mounted on the walls and gleaming suits of armor standing at attention in the corners. Bearskin rugs and overstuffed chairs fill the room. Lord Gralhund recently took up falconry as a hobby. In the middle of the room, resting on a table, is a cage containing a hooded falcon. Use the hawk (MM p.330) statistics.
G11. Orond's Study
The door to this room is locked. The lock can be picked by a character who makes a successful DC 15 Thieves' Tools check. The room has a 10-foot square canvas wrestling mat sprawled on the floor in the middle of the room. Velvet armchairs, small statues of naked men on pedestals, and tall mahogany bookshelves are arranged neatly around the room. A mahogany desk in one corner doesn't look like it sees much use.
Books. Most of the books are fake boxes made of painted cardboard. A few have bawdy drawings and salacious poems hidden inside them.
G12. Family Library
Many of the books were handed down to Lady Gralhund by her parents. They are well kept and include historical texts, play scripts, novels, and poetry collections.
Locked Tome. Although it looks like it might be a spellbook, the tome on the lectern is a chronicle of the Gralhund family's accomplishments, embellished or recast to paint the family in the most favorable light. A detect magic spell reveals an aura of abjuration magic emanating from the tome.
The Gralhund family crest appears on the book's title page. The rest of the book is written in Common and describes births, deaths, and other family events between 639 PD, and 812 PD. Of particular note is the little-known fact that the Gralhunds forged pacts with devils in years past, giving rise to a strain of tieflings. All such members of the house were sent to live on a Gralhund estate in Jorenn Village, a city far to the north (or so the book claims in its epilogue), and there are passing references to some family members having been born with tails.
Encounter
The tome is meant to be unlocked using a key that Lady Gralhund wears on a chain around her neck. The lock can be picked by a character who succeeds on a DC 22 Thieves' Tools check or can be opened with a knock spell or similar magic. Opening the book by any means other than using the proper key causes 3 specters (MM p.279) to appear within 10 feet of the book and attack its opener.
The magic that binds the specters has weakened over time; they can exist on the Material plane for only 1 minute, after which they are banished back to the Ethereal Plane. The specters manifest as ghostly tieflings with elongated fingers.
G13. Upstairs Foyer
This elegant foyer is embroiled in a chaotic scene. A battle currently rages between several Cloaked Serpent cultists and house guards. The double doors to the master bedroom (area G16) stand open and Lady Gralhund is shouting from within "The City Watch are on the way!"
The door to area G15a is ajar. Beyond it characters can hear someone attempting to kick open a door. The floor is strewn with multiple dead bodies. It appears that six house guards have fallen along with two Cloaked Serpent Cultists.
Encounter
On the landing there are 4 veterans (MM p.350) of House Gralhund (each with 30 hit points remaining) fighting off an attacking force of Cultists consisting of 3 thugs (MM p.350) (each with 25 hit points remaining). The Cultists are trying to get to area G16, but the guards are blocking them. If the characters do nothing to affect the outcome of the fight, it will end with two House Gralhund guards still alive.
G14. Ballroom
The door to this room is locked. A character can pick the lock with a successful DC 15 Thieves' Tools check. The ballroom is unoccupied and contains the following features:
G15. Guest Suite
Until recently, this suite was set aside for the use of Urstul Floxin. Lord Gralhund has barricaded himself in area G15b using heavy furniture to block the door. Forcing it open requires a successful DC 18 Athletics check.
Area G15a. This is a bathroom with a curtain to the east that has been drawn back to reveal a claw-footed bathtub.
Area G15b. This is a wood-paneled bedchamber with a birdcage on a table and a permanent teleportation circle inscribed on the floor. The birdcage contains 3 flying snakes (MM p.322) that the Gralhunds use to deliver messages to spies throughout the city. The teleportation circle is linked with one in the Gralhunds manor in Jorenn Village.
Encounter
The characters encounter Urstul Floxin (Appendix B) in area G15a. Urstul is wounded with 50 hit points remaining and no longer has poison coating his weapons, which reduces his challenge rating to 3 (700xp). He's trying to kick open the door to area G15b in a desperate attempt to capture Lord Gralhund and trade him for the Stone of Golorr. If he is accosted before reaching Lord Gralhund, Urstul tries to flee the villa and uses any other surviving Cultists to cover his escape. He knows the same information that Lord Gralhund does but won't divulge it unless he's magically compelled to do so.
Development
Having blocked the bedroom door with a wardrobe, a desk, and an overstuffed chair, Orond Gralhund (Appendix B) cowers behind a bed in the southwest corner of area G15b. Although he's armed with a rapier, Orond throws himself at the mercy of the first person to bust through his barricade. Characters who have Lord Gralhund at their mercy can pry the following information from him with a successful DC 12 Intimidation check. The check is made with disadvantage if Lord Gralhund has reason to believe his wife can see or overhear the conversation.
The characters can learn the following information from Lord Gralhund:
- The Stone of Golorr is some kind of ancient creature transformed into an artifact. It knows the location of a hidden vault somewhere near Kymal that contains untold treasure.
- House Gralhund has been bankrolling the Cloaked Serpent's operations in Kymal, including the plot to kidnap Renaer as well as the plot to steal the Stone of Golorr from his uncle's gnome spy, Dalakhar.
- My wife was frustrated with the Cloaked Serpents and their inability to secure the artifact. She gave a necklace of fireballs to her mechanical servant and sent it out to help retrieve the stone. It was careless and caught a few Cloaked Serpent Cultists in the fireball by mistake.
G16. Master Bedroom
Encounter
The doors to this room have been thrown open. Yalah Gralhund (Appendix B) is in here wearing a breastplate and armed with a rapier. She stands next to her well-dressed half-orc bodyguard, Hrabbaz (Appendix B). If her situation turns dire and Hrabbaz is unable to protect her, Yalah unlocks the door to area G18, rushes insides, and locks the door behind her with her next action. She makes her final stand there, with her children cowering behind her.
Aftermath
Lady Gralhund gave the Stone of Golorr and a map of where to take it to her nimblewright servant, who has left the villa by the time the characters reach this chamber. Lady Gralhund and Hrabbaz are the only people who know where the nimblewright has gone, but they feign ignorance when questioned about it. Yalah carries a ring of keys that open all locked doors in the mansion, as well as the locked wooden trunk at the foot of the bed.
Treasure
The lock on the trunk can be picked with a successful DC 16 Thieves' Tools check. The trunk appears to only contain folded clothes and shoes. A character who examines the outside of the trunk with a successful DC 15 Investigation check will detect a small secret compartment in the bottom of the trunk.
The compartment holds two holy symbols of the Cloaked Serpent and two robes, each red and gold in color.
G17. Balcony
This large balcony is enclosed by an ornate wrought-iron railing with lounge chairs neatly arranged on it. The ground is 20 feet below, and open glass doors lead into the master bedroom (area G16).
G18. Children's Room
The door to this room is locked. The lock can be picked with a successful DC 15 Thieves' Tools check. Three beds line the south wall. Other furnishings include squat wardrobes, play rugs, and children's desks.
Children. Confined here for their safety are the Gralhunds' two youngest children: a 13-year-old boy named Zartan, and a 10-year-old boy named Greth. Their 18-year-old sister, Tomassin, is visiting a tiefling cousin in Jorenn Village.
G19. Servants' Wing
Three rooms in the southeast area of the upper floor are where the servants sleep at night. The head butler and head maid have rooms to themselves, but those places are currently unoccupied. The largest of the three chambers is a common room containing six bunk beds for the junior staff. A total of nine maids, cooks, and valets (commoners) are holed up in here, waiting for someone to rescue them. They are armed with improvised weapons: rolling pins, mops, brooms, and the like that are treated as clubs.
Conclusion
After fleeing Gralhund Villa with the Stone of Golorr, Lady Gralhund's nimblewright hides the artifact in a secret location in Kymal setting the stage for the characters to chase after the stone. Even if the bloody conflict at Gralhund Villa goes unnoticed outside the walls of the estate, the carnage cannot be hidden from the City Watch for long. There are too many murdered servants and guards for anyone to conceal what has transpired.
The arrival of the City Watch foreshadows the return of Barnibus Blastwind and Saeth Cromley, who arrive in due course with 20 constables (veterans). Barnibus thoroughly investigates the Gralhund Villa crime scene and questions neighbors and bystanders.
Characters who are seen leaving the scene become suspects. If the characters killed any members of the Gralhund family and left witnesses or evidence of the act, Barnibus instructs Sergeant Cromley to arrest them for the crime of murdering a noble, which carries a death sentence if they're found guilty.
From the adventures of Bramble Tickletoes III & Company:
After the fireball outside the Hunter's Hall, the group talks with eyewitnesses and learns of the involvement of some sort of mechanical being. Eventually, their investigation leads the party to the House of Inspired Hands.
The group meets Valetta and is led up to meet Nim. In a sign language conversation between Valetta and Nim, the group learns of a second nimblewright constructed by Nim. Nim provides the group with a detector it built to locate the errant nimblewright.
As they already learned of the Stone of Golorr from Renaer, Lia spends some time in the Kymal library doing some research on the Stone and various local legends. At the same time, Maoki checks out The Luck's Hand and investigates the mysterious death of its owner Wendel. Meanwhile, Bramble and Kayne use the nimblewright detector to search Kymal for the missing construct.
Eventually, the detector leads the party to the Gralhund Villa. Bramble approaches the manor and disguises himself as Samuel Smallfoot, a Kymal city official. Using this disguise, he persuades the guard to allow him entry to speak with Yalah Gralhund. After the conversation, "Samuel" is led back out but bribes the guard to allow him to pee first. While peeing behind a tree on the property, Bramble goes invisible and climbs the tree. Chaos ensued when Bramble threw his screaming stone into the bushes to distract the guards and dogs that were searching the property for him. Bramble then carefully makes his way through the tree to climb onto the manor's balcony and up onto the roof. Bramble spends time looking through the windows to get an idea of what may be happening inside.
When Bramble did not return from peeing, a guardsman was sent running to fetch the City Watch to help in locating the intruder. Maoki sees the guard running down the road and follows behind and assassinates him. Unfortunately, people saw Maoki murder the guard. The City Watch are called and posters pop around Kymal looking for information on a tiefling that bares a slight resemblance to Maoki, and a halfling by the name of Samuel Smallfoot for impersonating a city official.
The party returns to the Hunter's Hall for the evening but decides to infiltrate Gralhund Villa in the wee hours of the morning. As they approach the manor, they hear the faint sounds of fighting inside. They use message to let Lord Gralhund they are entering to help. The party assists the house guards to fight and kill the Cloaked Serpent cultists. The City Watch arrive and take the characters' statements. Lord Gralhund provides the group with a note granting them a single future meeting.


Map 3.4
Chasing the Stone
The Gralhund's are working for the Cassalanters and have therefore sent the nimblewright to deliver the Stone of Golorr to their family crypt in Kymal's cemetery, the City of the Dead. A halfling necromancer gets to it before the Cassalanters or the characters do.
The Cassalanters send cult members to seize the Stone of Golorr while deftly avoiding entanglements with local authorities. The characters arrive at the Cassalanter mausoleum to find several dead cultists inside. A left-for-dead survivor reveals that these cultists were betrayed by two of their own. The characters are pointed towards an old windmill near the southern edge of Kymal where a few of the cult fanatics practice their faith.
During the fight, spined devils swoop in, snatch the stone, and flee, setting up a chase across the nearby rooftops. If the characters are unable to catch up to the spined devils along the rooftops, the chase leads into an alley and through the streets of Kymal.
For additional encounters, see the Summer Encounter Chain in Chapter 4 of Waterdeep - Dragon Heist. Suggestions for additional encounters include the Alley, Street Chase, and Cellar Complex.
Finding the Nimblewright
If the characters cannot pick up the trail after the nimblewright escapes the Gralhund Villa with the Stone of Golorr, they might turn to the City Watch or another friendly faction for help. Otherwise, if the characters still have the nimblewright detector they can utilize it to search for it.
Encounter
When it is finally found, the nimblewright (Appendix B) is wearing a stolen cloak and hiding under a pile of uncollected garbage in an alley. Exactly where and when the characters stumble upon it is up to the DM. With nowhere to go and no other purpose, it fights until destroyed.
Background on the Cassalanters
Victoro and Ammalia Cassalanter struck a deal with the Lord of the Nine Hells. Three years ago, they traded away the souls of their children to escape financial ruin. The soul of their eldest son, Osvaldo, was taken immediately. What was left behind was transformed into a chain devil, which the Cassalanters confined to their attic.
Their two youngest children, Terenzio and Elzerina, are doomed to lose their souls when they turn nine years old, a mere two weeks after the Night of Ascension, the Matron of Raven's Holy Day during the month of Cuersaar.
After the deal was struck, the Cassalanters enjoyed a miraculous comeback. Their banking and money-lending business thrived while their competition suffered. The disappearance of their eldest son (and heir apparent) earned them sympathy. Their philanthropic endeavors brought them legitimacy and new friends. They became the envy of Kymal nobility in short order. Seemingly blessed, the Cassalanters attracted new followers to their cult of devil worship.
Reneging on a contract with the Lord of the Nine Hells is a luxury no mortal can afford, but there is a way for Lord and Lady Cassalanter to save the souls of Terenzio and Elzerina. A clause in the contract allows them to preserve their remaining (and future) children's lives by instead paying "one shy of a hundred thousand gold coins, and the sacrifice of one shy of one hundred unfortunate souls." The Cassalanters have most of the coin they need, but they require the gold from the Vault of Dragons to buy their children's salvation without bankrupting themselves.
Victoro is in charge of locating the Vault of Dragons and securing the gold within it. Ammalia, for her part, plans to sacrifice ninety-nine souls in one fell swoop by throwing a feast for the Night of Ascension featuring poisoned food. Both the souls and the gold must be paid to the Lord of the Nine Hells at the same time. Foiling either one of these schemes spells doom for the Cassalanters' plot and their youngest children.

Caught at Last!
Regardless of where and when this event takes place, six members of the City Watch, veterans (MM p.350), arrive as the fight ends. Drawn by the commotion, the watch couldn't care less about the nimblewright and believes any plausible story the characters tell them. As a construct, it has no rights to speak of and the officers are near the end of their shift and eager to move on; they urge the characters to go home.
Treasure
The characters can bring proof that the nimblewright has been destroyed to Valetta at the House of Inspired Hands to collect the 500 gp reward she promised.
In addition, Lady Gralhund gave her nimblewright a map showing where to take the Stone of Golorr. Characters who search the nimblewright's remains find the folded-up map, which depicts the City of the Dead. Written on the map is an X with the name "Cassalanter" written alongside. The X marks the location of the Cassalanter mausoleum.
Cassalanter Mausoleum
The City of the Dead is a public park dotted with mausoleums. The place is closed at night, with two City Watch guards posted at each gate. A character can slip over a wall undetected with a successful DC 15 Stealth check.
From sunset to sunrise, an aging servant to the Matron of Ravens patrols the cemetery. His name is Sir Ambrose Everdawn, a male human knight (MM p.347) with gray hair. Characters who creep around the cemetery in the dark have a 30% chance of running into him. If that happens, he escorts them out or alerts the guard if they refuse.
The Cassalanter mausoleum is built of gray quartz with the name "Cassalanter" engraved into the stone above its entrance. The outer door is locked when the characters arrive. A successful DC 20 Investigation check reveals that it has been opened recently as evidenced by dirt smears on the door. A character can try to pick the lock with a successful DC 15 Thieves' Tools check or the door can be forced open with a successful DC 22 Athletics check. A knock spell can also be used to open the door.
See Map 3.5 for the complete layout of the mausoleum.
M1. Ground Level
Inside, a family emblem is emblazoned on the floor between four ostentatious marble coffins. Footprints can be seen in the dust crisscrossing the floor.
Treasure
The coffins, engraved with the names of those interred within, contain a few gold rings and necklaces worth approximately 200 gp total.
M2. Underground Crypts
Empty sconces adorn the walls. Cobwebs and dust indicate that no one has tended to this place in a long time. Stone coffins in alcoves contain dust and bones.
A search of the underground crypt reveals the bodies of three humans: two males and a female, all dressed in hooded robes. A character that makes a successful DC 13 Medicine check will realize that the woman is still breathing, but unconscious with 0 hit points.
Development
The three cultists were low-ranking members of Victoro Cassalanter's faction of the Cloaked Serpents. They were betrayed by two cult fanatics acting on orders from Lord Cassalanter. He not only wants the Stone of Golorr, but also intends to eliminate cult members who know too much as a security precaution.
These three cultists were felled by daggers and inflict wounds spells. The survivor is Vaelle Lurval, a 30-year-old florist. She was brought into the cult by her boyfriend, Holiver Tornrudder. He is one of the bodies that lies nearby. The other dead cultist is named Arn Xalrondar.
If she is healed, Vaelle regains consciousness. She reveals that the cult fanatics, Kaeth Warloon and Seffia Naelryke, would have likely taken the stone to an old windmill near the southern edge of Kymal. They have held ceremonies worshipping the Cloaked Serpent there. Vaelle can provide directions, or she can lead characters there if she is healed fully in order to avenger her lover. Vaelle mistakenly believes that the cult fanatics acted of their own accord, not under Lord Cassalanter's orders. She will not reveal the Cassalanters as the leaders of the cult unless magically compelled to do so.
Map 3.5
Converted Windmill
This crumbling, two-story stone building was a windmill long before the city rose up around it. The walls are covered with graffiti with stone floors strewn with garbage and detritus. There are no light sources inside the building. The windows along the outside have all been broken leaving empty frames. The doors inside are wooden, and though closed, remain unlocked. There is an apartment suite on the second floor that houses the cultists who use this location for their rituals.
See Maps 3.6 and 3.7 for the complete layout of the windmill.
W1. Stone Staircase
A curved set of stone stairs climbs 20 feet to the upper level. The stairs are covered with bird droppings, broken roof shingles, mud, and mold.
W2. Squatters
Most of the year each of these rooms is home to 1d6+1 squatters, which are commoners (MM p.345). They have made dens for themselves out of old furnishings and things salvaged from garbage piles. The squatters aren't looking for trouble.
For some food or coin, a squatter can direct or lead characters to the locked apartment on the upper level (area W7) and describe the apartment's inhabitants. A character can also secure a squatter's cooperation with a successful DC 10 Intimidation check.
W3. Privy
Beyond the door is nothing more than a hole in the floor from which rises a terrible stench.
W4. Weak Ceiling/Floor
Area W4a is directly underneath area W4b. The floor of the upper chamber collapses under the weight of the first Small or larger creature to walk across it. A character who has the Stonecunning trait or proficiency with mason's tools can tell that the floor is unsafe to walk on.
Any creature standing on the floor of area W4b when it collapses falls 20 feet, landing in area W4a. Any creature in area W4a when the ceiling falls in must make a DC 11 Dexterity saving throw taking 1d8 bludgeoning damage from falling debris or half as much damage on a successful one.
W5. Ancient Millstone
An ancient millstone lies under a jumble of debris that includes machinery and pieces of the collapses roof. Dust and cobwebs cover everything.
W6. Pigeon Roosts
Large sections of the roof have caved in above these rooms, leaving holes through which birds and precipitation can enter. The floors are littered with broken shingles, bird droppings, wrecked furnishings, other detritus, with scores of pigeons roosting in the moldy rafters.
W7. Secure Apartment
The north door to this room has been fitted with a shiny new lock that can be picked with a successful DC 16 Thieves' Tools check. The door can also be forced open with a successful DC 20 Athletics check.
Encounter
The two treacherous human cult fanatics (MM p.345), Arn Xalrondar and Seffia Naelryke use this room as an apartment. They keep the door locked at all times. Lord Cassalanter sent Arn and Seffia on a mission to retrieve the Stone of Golorr from his family's mausoleum. He also gave them secret orders to dispose of three other members of the cult whom he couldn't trust to keep quiet about the stone. Arn and Seffia would be horrified to learn that they failed in so simple a task; they try to correct their mistake by killing Vaelle if she's with the party.
Devils' Arrival
As characters try to break into the cult fanatics' apartment, three spined devils (MM p.78) arrive. The devils fly to the tower, knock on the apartment window, and are let inside by Seffia, whereupon Arn gives one of them the Stone of Golorr. When the characters enter, they see the devils flying off with the stone. The cult fanatics do everything in their power to enable to devils to escape.
Aftermath
If the characters deal with the cult fanatics, they can chase after the fleeing spined devils by running across the nearby rooftops.
Rooftop Chase
The characters are trying to catch up with the three spined devils that keep low above the rooftops, so as not to be seen. The devils are 100 feet away from the characters at the start of the chase. If the devil carrying the Stone of Golorr becomes incapacitated, another devil snatches the stone and flees with it. Use Map 3.8 for a possible encounter battle map.
Encounter
The 3 spined devils (MM p.78) are flying away along the rooftops of nearby buildings. This encounter uses the chase rules that follow. Additionally, it also uses the Rooftop Chase Complications table on the next page, which applies only to creatures moving across rooftops on foot. Flying creatures do not need to roll on the table.
Running the Chase
Participants in the chase are strongly motivated to use the Dash action every round. Pursuers who stop to cast spells and make attacks run the risk of losing their quarry, and a quarry that does so is likely to be caught.
Dashing
During the chase, a participant can freely use the Dash action a number of times equal to 3 + its Constitution modifier. Each additional Dash action it takes during the chase requires a creature to succeed on a DC 10 Constitution check at the end of its turn or gain one level of exhaustion.
A participant drops out of the chase if its exhaustion reaches level 5, since its speed becomes 0. A creature can remove the levels of exhaustion it gained during the chase by finishing a short or long rest.
Aftermath
When the characters are close to getting the stone or when you want the chase to end, the remaining spined devils attempt to lose their quarry by ducking down below the roofs into an alley.
Treasure
Once the characters catch up to and defeat the spined devils, whether that is on the roof or through the alleys, they finally obtain the Stone of Golorr (Appendix A).


Map 3.6
Map 3.7
Rooftop Chase Complications
At the start of each character's turn, have them roll on the Rooftop Chase Complications table to see what may complicate their turn.
Rooftop Chase Complications
| d20 | Complication |
|---|---|
| 1 | You come to a 10-foot-wide gap between rooftops. You can jump over the gap is your Strength is 10 or higher (each foot you clear costs 1 foot of movement), and you must succeed on a DC 10 Acrobatics check or fall prone on the far rooftop. Or you can cross the gap using a 10-foot-long rope line that stretches between the two rooftops; each foot of rope line costs 2 feet of movement. |
| 2 | You come to a rooftop that's 10 feet higher than the one you're on. Make a DC 10 Athletics check. On a failed check, the height change counts as 10 feet of difficult terrain. |
| 3 | You come to a rooftop that's 10 feet lower than the one you're on. Make a DC 10 Athletics check to jump down safely. On a failed check, you take 1d6 fall damage from the fall and land prone. |
| 4 | A roof is slippery. Make a DC 10 Dexterity saving throw or fall prone. |
| 5 | You step on a rotten section of roof, and it collapses underneath you. Make a DC 15 Dexterity saving throw. On a failed save, you fall partway into the hole in the roof and become stuck. While stuck, you are prone and restrained. You can use an action on your turn to make a DC 10 Athletics or Acrobatics check, ending the effect on a success. |
| 6 | Roof shingles give way as you step on them. Make a DC 15 Dexterity saving throw. On a failure, you fall prone and slide back 10 feet. |
| 7 | A rooftop protuberance such as a chimney or weathervane gets in your way. Make a DC 10 Acrobatics check. On a failed check, the obstacle counts as 5 feet of difficult terrain. |
| 8 | You startle a flock of birds nesting on the rooftop, and they fly all around you. Make a DC 10 Dexterity saving throw. On a failed save, the birds act as 10 feet of difficult terrain. |
| 9 | You trigger a glyph of warding spell placed on the roof to discourage burglars. Make a DC 13 Wisdom saving throw. On a failed save, you are targeted by a Tasha's hideous laughter spell, the effect of which lasts 1 minute. |
| 10 | Someone on the ground throws a rock, a snowball, or a similar projectile at you. Make a DC 10 Dexterity saving throw. On a failed save, the attack deals no damage but distracts you and counts as 5 feet of difficult terrain. |
| 11 - 20 | No complication. |

Map 3.8
Obtaining the Stone of Golorr
After the group has obtained the Stone of Golorr, a character that attunes to the stone can learn the location of the Vault of Dragons and what three keys are needed to open its doors.
The Stone of Golorr is a glossy, greenish-gray stone that fits in the palm of your hand. The stone possesses an intelligent, alien intellect and is actually an aboleth named Golorr, transformed by magic into an object. The power of the Stone of Golorr could be called upon to access the aboleth's memory in a similar way as the legend lore spell. This power could be used up to three times, until the stone recharges at dawn.
As the trapped creature inside, the Stone of Golorr hungers for knowledge and does not like to stay attuned to the same individual for too long. It has an alien personality and sees itself as a god. If its user ignores the stone's demands, it could attempt to seize control of the user.
However, knowledge given by the aboleth is fleeting. Once a creature breaks the attunement with the Stone of Golorr, there is a chance that any knowledge acquired via the stone, and even possession of the stone itself, is forgotten by the user. This magically induced amnesia could potentially be removed by a remove curse spell, but more powerful spells such as greater restoration will have a larger chance of success.
A character's attunement to the Stone brings with it a minor beneficial effect and a minor detrimental effect:
- While attuned to the artifact, the character gains proficiency in one skill of the DM's choice.
- While attuned to the artifact, the character has disadvantage on saving throws against spells.
Vault Location
Using the Stone's Legend Lore ability, a character attuned to the Stone will learn the location of the Vault of Dragons. The vault was built underneath an ancient temple to the Arch Heart that used to be located within the Ironseat Ridge. In addition to the location of the vault, the Stone of Golorr will also inform the characters that three special keys are needed to unlock the vault. It will also hint, cryptically, of a guardian that protects the contents inside the vault.
Vault Keys
An additional use of Legend Lore will allow a character to learn the specifics of the three keys that are required to unlock the Vault of Dragons:
- An invisible creature
- A silvered warhammer (costs 100 gp to silver)
- A bar of adamantine (costs 500 gp)
Conclusion
At the end of this story arc, after the chase to retrieve the Stone of Golorr, the characters should reach 6th level.


The Vault of Dragons
In the southwestern foothills of the Ironseat Ridge lies a small rise with ruins atop it. The vault entrance is hidden inside the ancient altar. A puzzle chamber is the first obstacle that must be overcome before reaching the locked vault doors. With the three keys, the characters can unlock the main vault entrance. Inside the vault, various chambers are protected by magically infused doors. The largest chamber, home to the main collection of gold and treasure is guarded by an undead creature forced to protect the horde forever.
Throne of the Arch Heart
Encounter
Cultists abound! As the characters approach the ruins of the temple, they can see a number of humanoid individuals moving about the ruins. There are Cloaked Serpent cultists searching the ruins for signs of the vault's entrance. There are 3 cult fanatics (MM p.345) and 6 cultists (MM p.345). Use Map 3.9 for the encounter battle map.
Development
After defeating the cultists, a search of the ruins will lead the characters towards the altar. A successful DC 17 Investigation check will allow a character to notice that the altar top is not sitting squarely on top of its base. A character can try to move the altar top aside with a DC 12 Athletics check.
Opening up the altar reveals a set of carved steps that lead down into a small stone chamber, less than 10 feet across. A small wooden trap door in the floor opens up into a sun lit chamber below.
Map 3.9
Clock Puzzle Room
A stone door in the southern wall is closed and locked. There is no visible keyhole. The door has Dwarvish runes carved into it: "Flip the tablets that show Three. Afterwards, stand upon the stone platform and make the time 3:33." Use Map 3.10 for the chamber puzzle map.
Easily Obtained Information
Four of the pedestals have numbers engraved upon them. The northern most pedestal has a 12, the easternmost has a 3, the westernmost a 9, and the southernmost a 6.
Lifting a tablet reveals there to be a word carved into the underside, but each word is merely a number from one to twelve written on it. Each are in the position you would expect to find on a standard analog clock. The tablets can be moved to a different pedestal; however, each tablet will be too large to fit into any slot other than its own. Even if you swap two tablets, they both are too large to fit in the others slot.
Puzzle Solution
The puzzle asks the characters to flip the tablets that show Three. The intended solution is to show flip those that have three letters. Therefore, the characters must flip tablets "One", "Two", "Six", and "Ten". Flipping the tablet that says "Three" is optional and an additional challenge for groups that are particularly good at puzzles, as it technically does show "Three" as well.
After that, one of the characters must use their arms to cast the shadows of clock hands to show the time of 3:33. There can be other possible solutions to the puzzle.
Punishment for Incorrect Guessing
The magic light that just barely reaches past the pedestals is the source of damage for incorrect solutions to the puzzle. An incorrect solution will trigger everyone within the light to take 2d6 radiant damage. When the characters want to make a guess, they must have at least one person standing on the central stone platform in the light.
If characters are creative and attempt to shade themselves from most of the light with only their hands sticking out. The hands must be out to create the shadow of clock hands. With such creativity, the DM may choose to reward with reduced damage.
Hints
If the characters are smarter than the players, it is possible for successful ability checks to provide information such as how the light appears to be the source of the damage. In addition, the clock-like nature of the puzzle is not relevant to the first task asked by the riddle. There could be other pieces of simple information the DM can provide to the players if they are confused to help bring them back towards the correct path to the solution.
Development
Once the puzzle is solved, the locked double door will open into a stone hallway that leads down a set of stairs. The stairs descend roughly 100 feet before ending in a second hallway that ends in a massive 20-foot-hight, 20-foot-wide adamantine door.


Map 3.10
Vault Overview
The vault has been carved out of stone with mortared walls and doors constructed from solid stone slabs with stone handles and hinges. The vault is protected so that any spell that tries to contact a creature in the vault fails, as does any spell that attempts to scry within the vault. Teleporting into the vault from outside is impossible.
See Map 3.11 for the complete layout of the vault.
V1. Vault Door
The large stone corridor ends before a massive adamantine double door bearing Dwarvish runes. The doors have neither handles nor hinges. The writing on them reads, "The three keys. Bring them forth."
When the three correct keys are brought within 5 feet of the doors, they part, sliding back into the walls. The doors remain open while the keys are within 5 feet of the doors and can be used from either side. The doors cannot be forced open or damaged in any way. Attempts to circumvent them with magic fail.
V2. Entrance Foyer
Doors abound, doors all around.
Beyond is danger or treasure found,
Approach to answer, open to speak,
Our greatest love hides what you seek.
Dwarven Riddle Runes
Each set of doors are 10-feet-wide and embossed with images of dwarf warriors in plate armor. Each dwarf has a large dwarven rune embossed on the front of their plate armor. Each of the twelve doors has a single dwarven rune on it. If a character opens a door carrying the wrong rune, they find only bare rock and suffer an adverse effect.
Each door's rune and its corresponding consequence is listed on the "Dwarven Door Riddle" table to the right. The table lists the runes starting with the door on the bottom left of the chamber, immediately left of the vault door, and moving clockwise around the foyer. Ten of the double doors are false. Only two of them along the northern end of the west all push open to reveal area V3.
Dwarven Door Riddle
| Rune | Effect |
|---|---|
| Orc | An orc (MM p.246) appears, attacking immediately. |
| Wealth | All coin carried by the character turns to ash. |
| Power | DC 15 Strength save or be thrown back 20 feet and take 3d8 bludgeoning damage. |
| Kin | This is a dwarf's greatest love and leads to V3. |
| Clan | This is also a dwarf's greatest love and leads to V3. |
| Mead | DC 15 Constitution save or take 2d8 poison damage and be poisoned for 1 hour. |
| Child | DC 15 Intelligence save or take 2d8 psychic damage and intelligence reduced to 6 for 1 hour. |
| Rock | DC 15 Dexterity save to dodge rocks tumbling out. 3d8 bludgeoning damage, half on a success. |
| Beard | All hair on the character's body falls off. |
| Laugh | DC 15 Wisdom save or maniacally laugh for 1 minute, causing one level of exhaustion. |
| Luck | DC 15 Charisma save or take 2d8 necrotic damage and be affected by bane spell for 1 hour. |
| Song | The character is deafened by boisterous dwarven singing inside their head for 1 hour. |
Crumbling Bridges
The bridges connect area V4 to adamantine doors that seal off areas V6, V7, and V8. The eastern half of the north bridge and the western half of the southern bridge are unstable. Either bridge collapses if more than 150 pounds of weight is applied to it. A creature standing on a section of bridge when it collapses must succeed on a DC 15 Dexterity saving throw or fall 60 feet to the floor below. The middle bridge has a 15-foot-wide gap. A character can clear the gap with a jump, but part of the bridge breaks away under the character's feet on landing, forcing the character to succeed on a DC 15 Dexterity Saving throw or fall to the floor below.
V3. Stairs and Fresco
The north wall of this chamber bears a 20-foot-square fresco that depicts dwarves battling goblins. At the south end of this chamber, expertly carved stairs climb 70 feet to area V4.
Enthralling Fresco. A detect magic spell reveals an aura of enchantment magic on the fresco. Any creature within 30 feet of the fresco that can see it must succeed on a DC 12 Wisdom Saving throw or be charmed by it for 24 hours. While charmed in this way, the creature cannot willingly move out of sight of the fresco and defends it to the death.
If forcibly moved away from the fresco, the creature tries to fight its way back. The character cannot rest while under this effect and gains a level of exhaustion after 24 hours. The creature can repeat the saving throw if it can still see the fresco, ending the effect on a success and is immune to the effect of the fresco for 24 hours. Each 10-foot-square section has an AC of 17 with 25 hit points and immunity to poison and psychic damage. Destroying a section ends the effect.
V4. Hall of Moradin
This 20-foot-high hall has three pillars running the length of the hall carved to resemble warhammers, with their square heads pressed against the floor. The west wall bears a cracked mosaic that depicts a dwarf smith at a forge. The dwarves are crafted out of black metal and diamonds. Three archways in the east wall lead to crumbling bridges that span the entrance foyer (area V2) and end in front of adamantine doors (leading to areas V6, V7, and V8).
Encounter
A little more than halfway down the hall, a section of the western mural has broken off, forming a heap of shattered tile on the floor. A crack in the wall conceals a black pudding (MM p.241) that gushes out and attacks characters who inspect the damage.
Secret Door
A character who searches the hall for secret doors and succeeds on a DC 17 Perception check notices the outline of a secret door that leads to area V5. The door opens automatically when a dwarf touches it (or a creature transformed into a dwarf with an alterself spell or similar magic); otherwise, a successful DC 17 Athletics check is needed to push open the heavy door.
V5. Secret Room
Treasure
This room holds five copper urns, each worth 25 gp. Each urn contains various coins, precious gemstones, and other valuable trinkets. The contents are as follows:
- Urn 1: 5 tourmalines (100 gp each) mixed in with 200 cp
- Urn 2: a ring of warmth mixed in with 10 ordinary gold rings (25 gp each) and 650 sp
- Urn 3: 250 gp
- Urn 4: 33 blue quartz gemstones (10 gp each)
- Urn 5: a 9-inch-tall silver statuette of a dwarf priest of the Allhammer with amethyst eyes (worth 250 gp)
V6. Hammer and Anvil
The adamantine door to this room has an arcane lock spell cast on it, but it swings open freely when a dwarf or a creature transformed into a dwarf touches it. Another creature can force it open with a successful DC 22 Athletics check. A knock spell or similar magic also opens it.
Frescoes. A character who inspects the wall frescoes and succeeds on a DC 10 Perception check notices that the stone hammer being wielded by the smith in the fresco appears identical to the one resting on the anvil. The fresco depicts the moment the dwarf is striking a piece of metal on an anvil with the hammer.
Hammer. If a character picks up the hammer, a DC 10 Investigation check will reveal there are runes etched into the side of the hammer that was facing down. The inscription is in Dwarvish and reads "Let hearts be lifted and battles won."
Anvil. If the characters take a moment to clear away the cobwebs or make a successful DC 12 Investigation check, they will notice an inscription carved into the front of the stone block. The inscription is in Dwarvish and reads "Let the hammer fall and the anvil ring."
If the anvil is struck by the hammer, each creature in the room that can hear the anvil ring gains 10 temporary hit points that last for 24 hours. Once the anvil has bestowed this gift, it can't do so again for 24 hours.
V7. Ioun's Secret
This room is sealed by an adamantine door similar to the one in area V6. The room contains four suits of rusted plate armor standing in each of the four corners. The suits of armor stand sans helmets, sized for various humanoids, and draped in cobwebs.
Dwarvish runes are carved into the far wall. The inscription reads, "A secret never before told will part the Knowing Mistress' lips." A successful DC 14 Religion check identifies the Knowing Mistress as the god of knowledge.
Secret Stair. The engraving on the wall is a clue that this room holds a secret, specifically a trapdoor so well hidden that it can't be found using magic or searching. But when any creature in the room speaks aloud a secret, the trapdoor flips open, giving access to a spiral stone staircase that descends 120 feet to area V9. The spoken admission must be true, and it must be something the character has not previously revealed.
V8. Ol' Fire Eyes
This 20-foot-square room has a 10-foot-tall painted statue of an armored man wearing golden plate armor with a white cloak draped behind. The statue stands at the back of this room and where a head would be, instead there is a burning star. In front of the statue, set into the floor, is an adamantine trapdoor with a pull ring along one side.
Trap
A successful DC 15 Religion check enables a character to recognize the statue as a depiction of Pelor, the Dawnfather. The statue melds seamlessly with the floor and cannot be toppled. It also seems impervious to damage. A detect magic spell reveals an aura of evocation magic on the statue.
The trapdoor is false and can't be lifted. Anyone who touches the trapdoor or its pull ring must succeed on a DC 18 Dexterity saving throw or be struck by rays of magical fire that spring from the Dawnfather's eyes, dealing 4d10 fire damage. This magical fire springs from the Dawnfather's eyes each time a character touches the trapdoor.
V9. Main Vault
After the characters walk down the stairs, as they walk down either hall and the full vault chamber comes into view, read:
Although deep underground, this vault is lit by a couple small streams of sunlight that pour down from the ceiling, catching tiny motes of dust in their luminous pools. Ornate columns support a thirty-foot-high vaulted ceiling adorned with carvings of people basking in the presence of their gods. Deep alcoves line the walls and piled in one of them is a vast golden trove. Out of the dusty gloom steps an aged dwarf clutching a staff carved and painted black to resemble a snake with barred fangs. Despite the dwarf's age, his eyes are steady and bright. "I wasn't expecting anyone," he says plainly. "As you can see, the place is a mess. Perhaps you should come back later, after I've tidied up a bit."
The dwarf, who calls himself Barok Clanghammer was put here by Fendril Vas to guard the treasure forever. Fendril Vas was the heir to the Vas Estate of textile traders in Stilben. An older elf, Fendril was the first to locate this vault in hundreds of years, though it's been more than a hundred years since he last stepped foot in the vault.
Barok will let the characters leave peacefully without any treasure. If they try to take anything, he attacks.
Encounter
The dwarf, who calls himself Barok Clanghammer is actually a Deathlock Mastermind (MToF p.129) put there by Fendril Vas to guard his treasure in disguise. He guards the gold forever and holds a staff of the adder. He remains in dwarf form until combat breaks out. When combat begins, he takes his true form and is joined by 3 Deathlocks (MToF p.128).
Treasure
This chamber is a literal treasure trove of gold and magic items. The items the characters can find are organized below by different Investigation checks of increasing difficulty. Magic items will need to be identified by characters with successful Arcana checks. The difficulty of the Arcana checks should be assigned at the DM's discretion and reasonably reflect the rarity of the item.
DC 10 Investigation check. The characters will find 5,000 gp, a Potion of Fire Resistance, and a Potion of Water Breathing.
DC 15 Investigation check. The characters will find an additional 7,000 gp, a Mace of Disruption, a Potion of Growth, 2 Greater Healing Potions, and an elaborate golden key with a dragon wrapped handle inset with multiple diamonds: a key to an Ashen Gorge Vault (Appendix A).
DC 20 Investigation check. The characters will find an additional 100 pp, a Boots of Elvenkind, a Potion of Firebreath, Broken Fang (Appendix A), and journal pages with "Wrettis" scrawled on one of the pages (Handout 4).
DC 25 Investigation check. The characters will find an additional 200 pp, a Belt of Dwarvenkind, a Cloak of Protection, and Oblivion's Anchor (Appendix A).
DC 30 Investigation check or Natural 20. The characters will find an old, pitted flask made out of iron. It is the Iron Flask with a Nycaloth (MM p.314) inside. A character that casts identify on the flask will learn that there is a creature trapped inside but the only way to determine the type of creature is to open the flask.
From the adventures of Bramble Tickletoes III & Company:
Lia attuned to the Stone of Golorr and learned the location of the vault and the keys required to access it. The party spent two days hiking west in search of the Arch Heart's Throne. After being pointed towards some old ruins by a wandering shepherd, the group arrived at the Throne of the Arch Heart to find it crawling with cultists.
After defeating the cultists and finding the entrance to the vault, the party solve the clock puzzle and use the three keys to access the vault. It takes a few attempts to find the correct riddle door, "Clan", to continue deeper into the vault.
After a debacle with Lia losing all her personal gold to the "Wealth" door, the group, and especially Kayne, were hesitant at first to touch the gold they found in the Secret Room. Ultimately, the group were successful in defeating the Deathlocks and recovered much of the treasure with the use of a Detect Magic spell.
After a night spent resting inside the vault, they leave without checking any of the other dwarven riddle doors. As they exit, Kayne decides to hide the cultists bodies by throwing them down the stairs before sealing the altar entrance. The group are intrigued by the Wrettis journal pages and after a little research in Kymal, they decide to travel south in search of Wrettis.
The Cassalanters Post Dragon Heist
With the Vault of Dragons found and emptied by adventurers, the Cassalanters freed their children's souls from the bonds of the Lord of the Hells but were financially ruined in the process.
They heard rumors of cultists to the Cloaked Serpent in Kymal and turned to them not wanting to create a new contract with the Lord of the Hells. In exchange for helping sow chaos and aid in the destruction of Kymal, among other cities, the Cassalanters will receive a portion of the spoils and be in the Betrayer Gods' good graces if they are released.
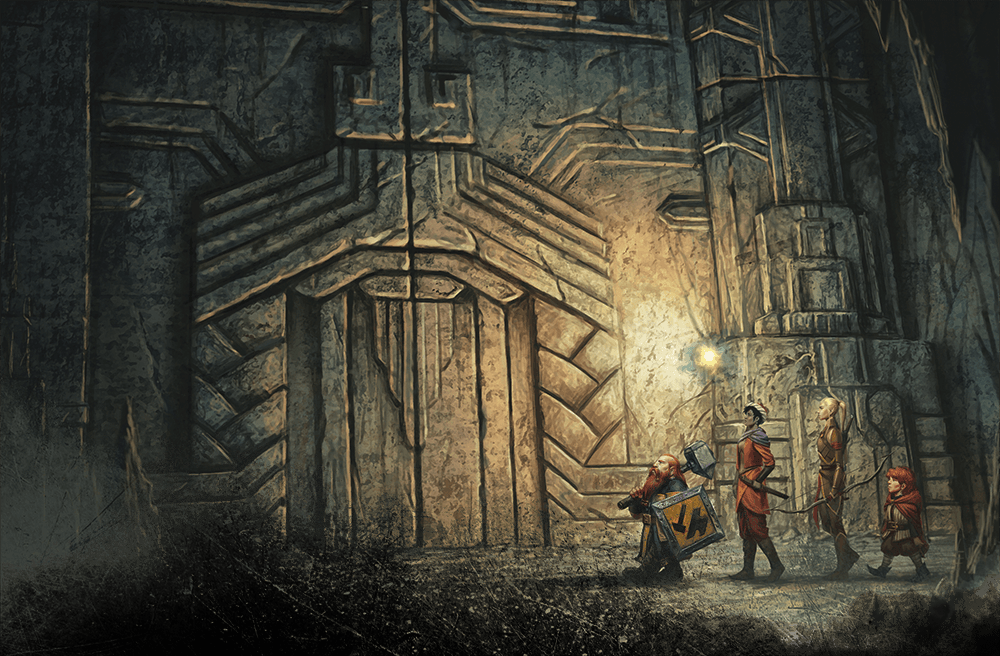


Map 3.11
4
Chapter 4: Wrettis
Rumors have spread that the Vault of Dragons has been found and subsequently emptied by a few adventurers that managed to get their hands on the Stone of Golorr. Either to avoid the multiple factions in Kymal searching for them, or to explore the journal entry found in the vault with Wrettis written on it, the characters may choose to leave the city. With a bit of research, the group can learn Wrettis was a wizard's tower that has long since been lost to time. Additionally, the characters can learn that scholars believe it to be nestled somewhere in the eastern foothills of the Stormpoint Mountains, a little south of Vues'dal Waters.
Story Overview
If the characters decide to go in search of the forgotten tower, there path will lead them south along the Wildwood Byway past Syngorn and on to the small towns that dot the shores of the Vues'dal Waters. As the characters travel south, they may begin to see signs and hear stories of increased goblinoid raids throughout the Mornset Countryside all along the southern reaches of the Verdant Expanse.
War is brewing as raiding parties from the Iron Authority attack towns and trade routes. The Iron Authority is the hobgoblin empire located at the southern tip of the Rifenmist Peninsula. While war hasn't officially broken out, Syngorn and the Council of Tal'Dorei are amassing their armies and marching south to protect their domains' southern border.
Arriving in Saewic, the northernmost town along the Vues'dal Waters, the town is built along both banks of the Feshun River where it empties into the massive lake. The towns along the Vues'dal Waters have been struggling with the increase in goblinoid raids and there are plenty of mercenary jobs available to the group if they wish to help out.
From there, to reach Wrettis the group must traverse the Stormpoint Mountains and travel south through the eastern foothills in search of the lost tower. Eventually, the characters will stumble upon the now buried tower and can investigate it for information and treasure. Unbeknownst to the group, the object the Myriad, Clasp, and Cloaked Serpents were hoping would be in the Vault of Dragons is located inside the Wrettis library.
The search of the tower will lead the characters to discover a massive underground cave system that leads south. If they choose to follow it, they may stumble upon a small group of Cloaked Serpent cultists in the process of obtaining a large chunk of verdant green rock. With later research, the characters can learn this stone is a primordial titan seed.
Vues'dal Waters
The Vues'dal volcano erupted for the last time in the early days of the Age of Arcanum. Its explosion shook the earth so terribly that the mountain itself was swallowed by the earth, creating the Vues'dal Basin which later filled in with water.
Today, the basin has been filled by the Feshun River and the land around the Vues'dal Waters is among the most fertile farmland in southern Tal'Dorei. The small farming communities of Saewic, Mannhal, and Falcon's Hollow have come to exist along the shores of Vues'dal. Half-elfs that were tired of being considered second-rate citizens in Syngorn make up the vast majority of the farmers in this community.
Saewic
Population: approx. 1,000 (60% Half-elf, 20% Human,
20% Elf)
Religions: Major - Wildmother, Arch Heart
Minor - Stormlord, Moonweaver
Saewic is the largest of the farming communities built along the shores of Vues'dal Waters. It is a small town built on both banks of the Feshun River. Parts of the forest were evidently cleared away to make room for its construction. Simple stone and wood buildings dot the town with a plethora of trees left throughout shading roads and homes.
Farmland spreads out east and west along the shores of the dark blue waters of the lake. Small farmhouses dot the landscape amongst the fields. A number of Verdant Guard can be seen patrolling the roads that boarder the farms. Along the shoreline, wooden piers extend out on either side of the river's mouth. A number of small fishing boats are anchored along with a small galley.
The farmers that make up this community are pleasant hard-working folk who enjoy being outside. Most of the half-elfs that live here have chosen to leave lives in Syngorn where high-elven society considered them second-rate citizens. Here, they live in peace with humans and those elves that were also tired of the xenophobic, racist society of Syngorn.
Saewic Locations
The following areas, 1 through 8, are specific locations in Saewic and can be found labeled on Map 4.1.
S1. The Verdant's Rest. This large two-story wooden inn is fairly plain on the outside but warm and cozy inside. Imrota is the rugged female half-elf owner. She wears modest garments, has brown hair, bright hazel eyes, and a very pleasant demeanor.
S2. Verdant Guard Housing. The large stone building on the northeastern edge of town is the Verdant Guard barracks. A stone fence surrounds the building, and it has a more austere air to it.
S3. Verdant Guard Outpost. This large wooden building serves as the outpost and main office for the Verdant Guard. Captain Masym is the elven commander for the 100 or so elven warriors stationed here.
S4. Farmer's Market. A large open-air square near the river has been set aside with semi-permanent wooden booths and tents set up. Farmers and craftsman from around the area come to sell their wares. The market is packed on Da'leysen but there are decent number of vendors every day.
Elmil is a willowy male half-elf with red hair and amber eyes and is known to sell fruits and vegetables.
Canda is an older female elf with long white hair. She is a craftsman that wears a simple leather apron with a number of tools hanging from her belt.
Dica is a short, plump female half-elf baker. She has golden hair, pleasant eyes, and wears a simple white apron.
S5. Golodor's Blacksmithing. A solid stone building that typically has black smoke rising from one of its three chimneys. Golodor is a simple male elf with blond hair, a flat nose, and amber eyes.
S6. Temple to the Wildmother. This large wooden building has beautiful green stained-glass windows. The head priestess is a female half-elf named Nelye with short gray hair and blue eyes.
S7. Temple to the Arch Heart. This large building has a gray brick base. The interior is adorned in blue and silver drapery. Dorendor is the male half-elf priest with cropped copper hair, brown eyes, and a round nose. He is typically seen wearing blue and silver robes.
S8. Beatrey's Larder and Provisions. A large warehouse style building, this is the town's general store. Beatrey Revay is a sturdy half-elf woman with messy brown hair tied back in a ponytail and green eyes. She usually wears a large wide-brimmed hat.
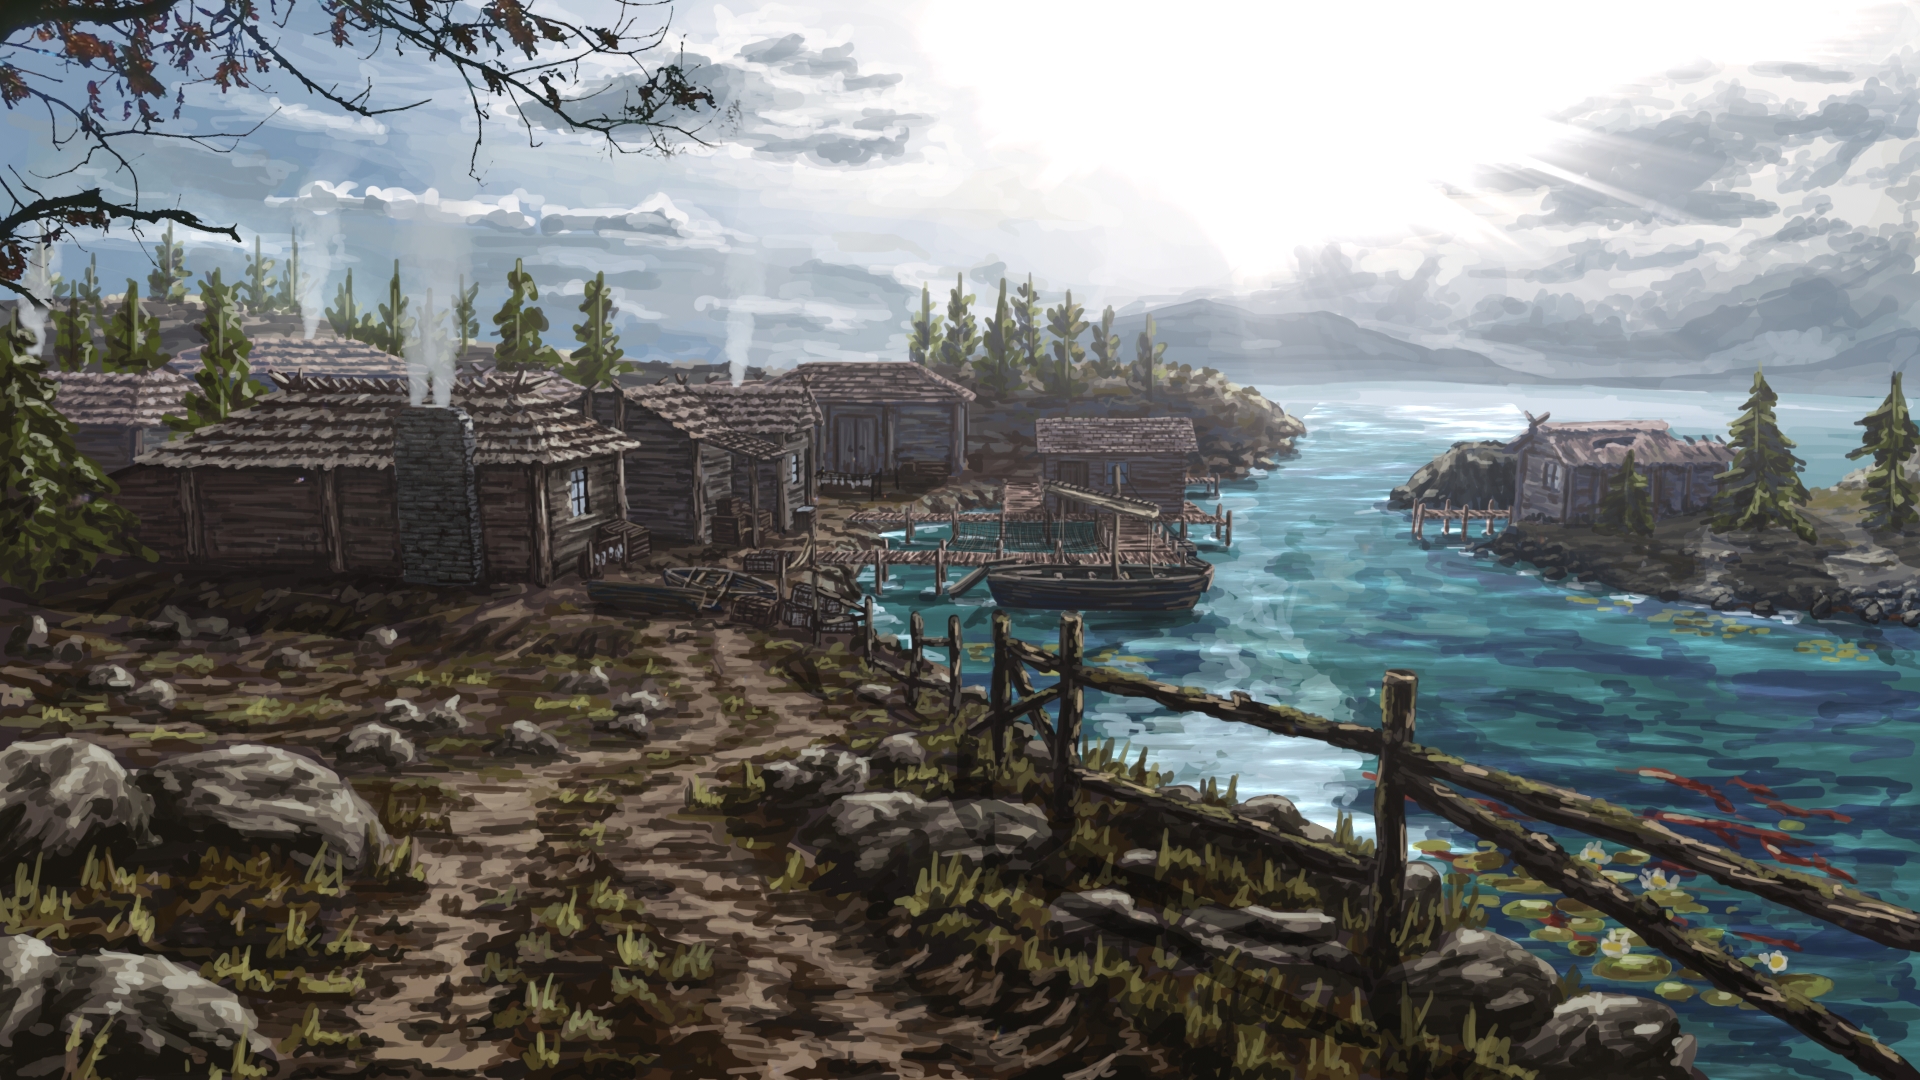

Map 4.1
Mannhal
Population: approx. 200 (90% Half-elf, 10% Human)
Religions: Major - Wildmother, Arch Heart
Minor - Stormlord, Moonweaver
This village sits atop a small rise in the landscape. It is approximately thirty miles east along the Vues'dal Waters from Saewic. Three dozen or so buildings make up this small community. The houses are well built, made of stone and wood. Standing water can be seen surrounding the hill in places as a small strip of marshland encircles the hill as a natural barrier. The path narrows slightly as it approaches the marshland and is banked up with extra dirt and stone to keep it above the water. On the opposite side of the town, peeking above the tops of other buildings, stands a large guard tower.
Mannhal Locations
The following areas, 1 through 6, are specific locations in Mannhal and can be found on Map 4.2.
1. Longhouse. This large building is a single-story wooden structure with a single large room. This building is a multipurpose gathering place for the community.
2. The Docks. At the base of the hill along the water's edge, two wooden piers jut out into the water. During the day the docks tend to be empty with all boats out fishing.
3. Watchtower. This stone tower sits at the southern edge of town and stands roughly forty feet tall. Captain Hamath is the elven commander of this post. He is known for wearing a feathered hat and commands a force of 40 Verdant Guard.
4. Guard Barracks. This wooden structure is a bunk house for the Verdant Guard that are stationed in Mannhal.
5. The Fish-tale Inn. This stone building is owned by Finny Bysshey, a male half-elf with blond hair and amber eyes. He is a jovial individual and is known for his lake trout.
6. Loth's General. This warehouse style brick building is the go-to spot for fishing equipment and anything else. Lothienye is the female half-elf proprietor who has thick white hair and sharp gray eyes.

Map 4.2
Falcon's Hollow
Population: approx. 75 (85% Half-elf, 15% Human)
Religions: Major - Wildmother, Arch Heart
Minor - Stormlord, Moonweaver
Falcon's Hollow is fifteen miles south of Mannhal along the shore of Vues'dal Waters. The lakefront in this area is a little elevated with small cliffs that lead sharply down to the water below. The piers that just out from the cliff face lead to wooden stairs that climb up about 30 feet to the village above. Approaching town, there is a wooden bridge that spans a chasm formed by a river flowing into the lake below. There is a small stable on the outskirt of town that houses horses for the Verdant Guard who are posted here. About two dozen wooden buildings make up this small village.
Falcon's Hollow Locations
The following areas, 1 through 4, are specific locations in Falcon's Hollow and can be found on Map 4.3.
F1. Falcon's Rest. This modest inn is run by a female half-elf named Kirdora. She wears modest clothing, has long red hair and large brown eyes. She makes a delicious fish stew.
F2. Guard Barracks. A bunk house has been constructed recently in response to the increase in goblin attacks. It currently houses thirty Verdant Guardsman. Captain Sanea is the female elf commander and has tangled brown hair and light hazel eyes. She wears simple leather armor, carries a long knife, and has a black cat named Athyen that follows her everywhere.
F3. Fin's Provisions. This small wooden store is the only spot for supplies in town. Finrasaer is the half-elf owner. He has narrow blue eyes and tends to be slightly pessimistic.
F4. Stables. This small barn and paddock sits across the river gorge from town. A few horses are stabled here for the Verdant Guard.


Map 4.3
Saewic Adventures
At some point while the characters are in Saewic, the town will be attacked by goblin forces. The Verdant Guard in Saewic are overwhelmed with the number of these attacks. If characters are interested in any mercenary work, the Verdant Guard are happy to pay for mercenary work. The options for mercenary work are as follows:
- Taken! The Mannhal Version
- Falcon's Hollow Hydra Attack
Taken! The Mannhal Version
In talking with the Verdant Guard in Saewic, they inform the characters that there were a group of fishermen traveling from Mannhal to bring their wares to Saewic. A group of travelers from Falcon's Hollow stumbled upon the bodies of the guards escorting them about halfway between Saewic and Mannhal and warned the Guard. This occurred two days ago and unfortunately, with the increase in frequency of hobgoblin and goblin attacks, the Verdant Guard can't afford to send anyone out looking for them.
The Guard are willing to pay 400 gp if the characters are able to bring their bodies back for their families. If they happen to still be alive, they will pay 800 gp.
Finding the Trail
As the characters travel the road between Saewic and Mannhal, a successful DC 12 Survival check will find a pile of broken and burned wagons a little way off the trail. The trail leads northeast towards the Stormcrest Mountains. The characters will need to make a second successful DC 12 Survival check to continue following the trail through the woods.
After roughly an hour of travel the group begins to approach the kidnappers' campsite. With a successful DC 12 Perception check read the following:
With a successful DC 15 Perception check, the characters will also hear a muffled scream followed by laughter.
Encounter
As the party approaches the campsite, the characters can make out 4 goblins (MM p.166) sitting around one side of the fire. There are another 4 goblins (MM p.166) posted as guards outside two large canvas tents. Sitting around the other side of the fire sits 2 large bugbears (MM p.33). Lastly, a hobgoblin devastator (VGtM p.161) and a hobgoblin captain (MM p.186) are taking turns throwing javelins at a half-elf (Gryl) that is gagged and bound to a tree.
Looking around the campsite, the characters can see a second half-elf male (Reder) tied to another tree. Unfortunately, he appears to be dead with three javelins sticking out of his chest.
Inside each of the tents are two bound and gagged half-elfs: Glendlyn and Fala in one, Lyn and Fado in the other. Use Map 4.4 for the encounter battle map.
Treasure
By searching the bodies of the kidnappers, the characters can find about 60 gp. There is also a pile of fishing gear set to the side along with a bag of 60 gp. If the characters decide to search the pockets of the hobgoblin captain, they can find a note tucked into his pocket. The note is written in goblin and are orders to attack and kill merchant caravans (Handout 5).

Map 4.4
Falcon's Hollow Hydra Attack
The Verdant Guard in Saewic have been informed of a hydra that is threatening the fishing area around Falcon's Hollow. A fisherman was killed by the beast and the others have started avoiding the area. In the past few days, however, the hydra has been seen further and further out and the fisherman are too afraid to go fishing. The Verdant Guard will reward the characters with 500 gp if they can kill the beast.
Finding the Hydra
Once the characters reach Falcon's Hollow, they will need to travel on foot over the steep cliffside terrain the encompasses the eastern side of the lake along the base of the Stormpoint Mountains. As they hike along the lakeshore, a character that makes a successful DC 12 Survival check will pick up signs of the Hydra. There are large, clawed footprints, some broken branches, and a number of drag marks. The marks seem to lead away from the water's edge towards a large cave entrance in the side of a rocky bluff.
Encounter
This cave is the home to a hydra (MM p.190). It is extremely territorial and will viciously defend its home. Use Map 4.5 for the encounter battle map.
Treasure
Inside the hydra's cave is a number of old bones. There is also a pile of miscellaneous weapons, among which is a snake dagger (Appendix A) similar to those the characters have found previously on Cloaked Serpent cultists.

Map 4.5
Attack on Saewic
One evening while the characters are staying in Saewic, the town is attacked by multiple groups of goblin and hobgoblin forces. Read the following:
As the characters emerge from the inn, if they stop to ask any soldier or person running around outside, they can get the gist of what's going on. A few sentries were patrolling the road to the east of town and spotted creatures moving through the woods. They rushed back to sound the alarm as the creatures broke the tree line and began running towards the town.
There are multiple groups of enemies attacking the town. The characters can choose to engage the closest battle or search out one of the other groups of attacking goblins. Use Map 4.6 for the encounter battle map.
Encounter - Eastern Tree Line
Running out of the tree line towards the town are 3 Venom Trolls (MToF p.245) led by 8 hobgoblin Iron Shadows (VGtM p.162). Following behind the trolls are dozens of goblins (MM p.166). This is where a sizable portion of Saewic's Verdant Guard is currently engaged with the enemy.
Encounter - Northern Path
After circling around the town to the north, dozens of goblins (MM p.166), 5 hobgoblins (MM p.186), and 3 bugbear chiefs (MM p.33) are attacking a smaller contingent of Verdant Guard posted there to defend.
Encounter - Wildmother's Temple
There is a small force of goblins and hobgoblins attempting to set fire to the temple of the Wildmother along the western side of town. There are 6 goblins (MM p.166), 6 hobgoblins (MM p.186), and 2 hobgoblin captains (MM p.186).
Conclusion
With the help of the adventurers, the Verdant Guard are successful at keeping Saewic safe, for now. Captain Masym is growing increasingly concerned with the frequency of these attacks and immediately sends two Guardsmen to plead with Syngorn for more support.
As thanks for the characters' help, Captain Masym gives them each a Verdant Guard medallion. This can be used to identify themselves throughout the area as friends of the Verdant Guard.

Map 4.6
Wrettis
A relic of the Age of Arcanum, Wrettis is the ruined tower of a powerful mage driven mad by the seductive whispers of beings from the beyond. What few legends survive of Wrettis' master say he was known as Clemain Astural, the Sight Shepherd, and that he was a powerful arcanist who peered into a realm beyond the planes in search of power.
Clemain Astural covered thousands of pages of parchment with his writings, ranging from alchemical formulas to powerful spells to esoteric star charts...but his later notes descend into paranoid, half-crazed ramblings. Astural's sanity crumbled as his power grew. A wizard by the name Atz Yuminor realized it was only a matter of time before Astural dabbled in magic too powerful to control. In an attempt to preserve some of Astural's most important work, Atz took as many scrolls of Astural's work as he could find and brought them back to his house in the Dividing Plains.
Yuminor's bloodline continues in Estella Ladimar, headmistress of the Westhall Academy in Westruun, and many of the Astural Scrolls are kept secretly by the Scions of Yuminor in the academy's observatory.
Ultimately, in a massive explosion of powerful magical energy, the earth beneath Astural's tower gave way and the tower sunk beneath the ground. Clemain Astural was never seen again. Over time his name passed into legend and myth.
A small town had sprung up nearby. Occasionally, Clemain would offer his knowledge and power to help those that asked. When the tower was swallowed by the earth, landslides and avalanches began to occur in the valley. A legend arose that the mage's power was what kept this valley protected from these natural phenomena. As more and more continued to threaten the valley, the denizens began to abandon the town. Over time, what was left of the town was slowly buried. Today, the only part of the town that is still visible is the chimney of the village hall, which stood 40 feet above the ground.
Journey to Wrettis
Where the southern cliffs of the Stormcrest Mountains mostly come to an end, a single bridge of raised rocky peaks continue to push southward, piercing into the Rifenmist Jungle itself. This extended range of mountains is known as the Stormpoints. These steep peaks are shrouded in low-sitting clouds and fog for most of the year, the rocky surface hidden from view from lush overgrowth fed by the near-perpetual rain. This region would be considered beautiful by most, were it not home to many vicious denizens. Treasure hunters are becoming more and more of a familiar site wandering through the Mornset, as rumors now spread of the long-dead green dragon Raishan's lair being hidden, and abandoned, somewhere within these jagged peaks.
The journey to Wrettis takes 6 days from the Vues'dal Waters. The trek over the Stormpoint Mountains is cold, snowy, and treacherous. The characters will need to be cautious when hiking across the mountain range as many dangerous creatures stalk these peaks.
Locating the Tower
As the characters hike south through the eastern foothills of the Stormpoint Mountains, a successful DC 18 Perception or Survival check will notice a faint dirt path that has become overgrown and does not appear to have been used in an extremely long time.
Following the path as it winds up through the foothills and into the mountains, it leads up over a hill and overlooks a small valley beyond, nestled between two peaks. This valley shows evidence of numerous landslides and avalanches. A few areas of the valley look like they have been freshly covered in dirt and stone.
While they are overlooking the valley, a character that makes a successful DC 18 Perception check will notice one thing that stands out. There seems to be what looks like a square pile of stones that rise two or three feet out of the grass along the far side of the valley.
Nearby, a small creek runs down the side of the mountain and flows under a large boulder and disappears beneath it. This is where the mage's tower was buried. A detect magic spell will pick up a faint aura of evocation magic. The use of a Wand of Secrets will point towards the ground just downhill from the boulder. The trapdoor in the roof of the tower is buried about a foot below the ground.
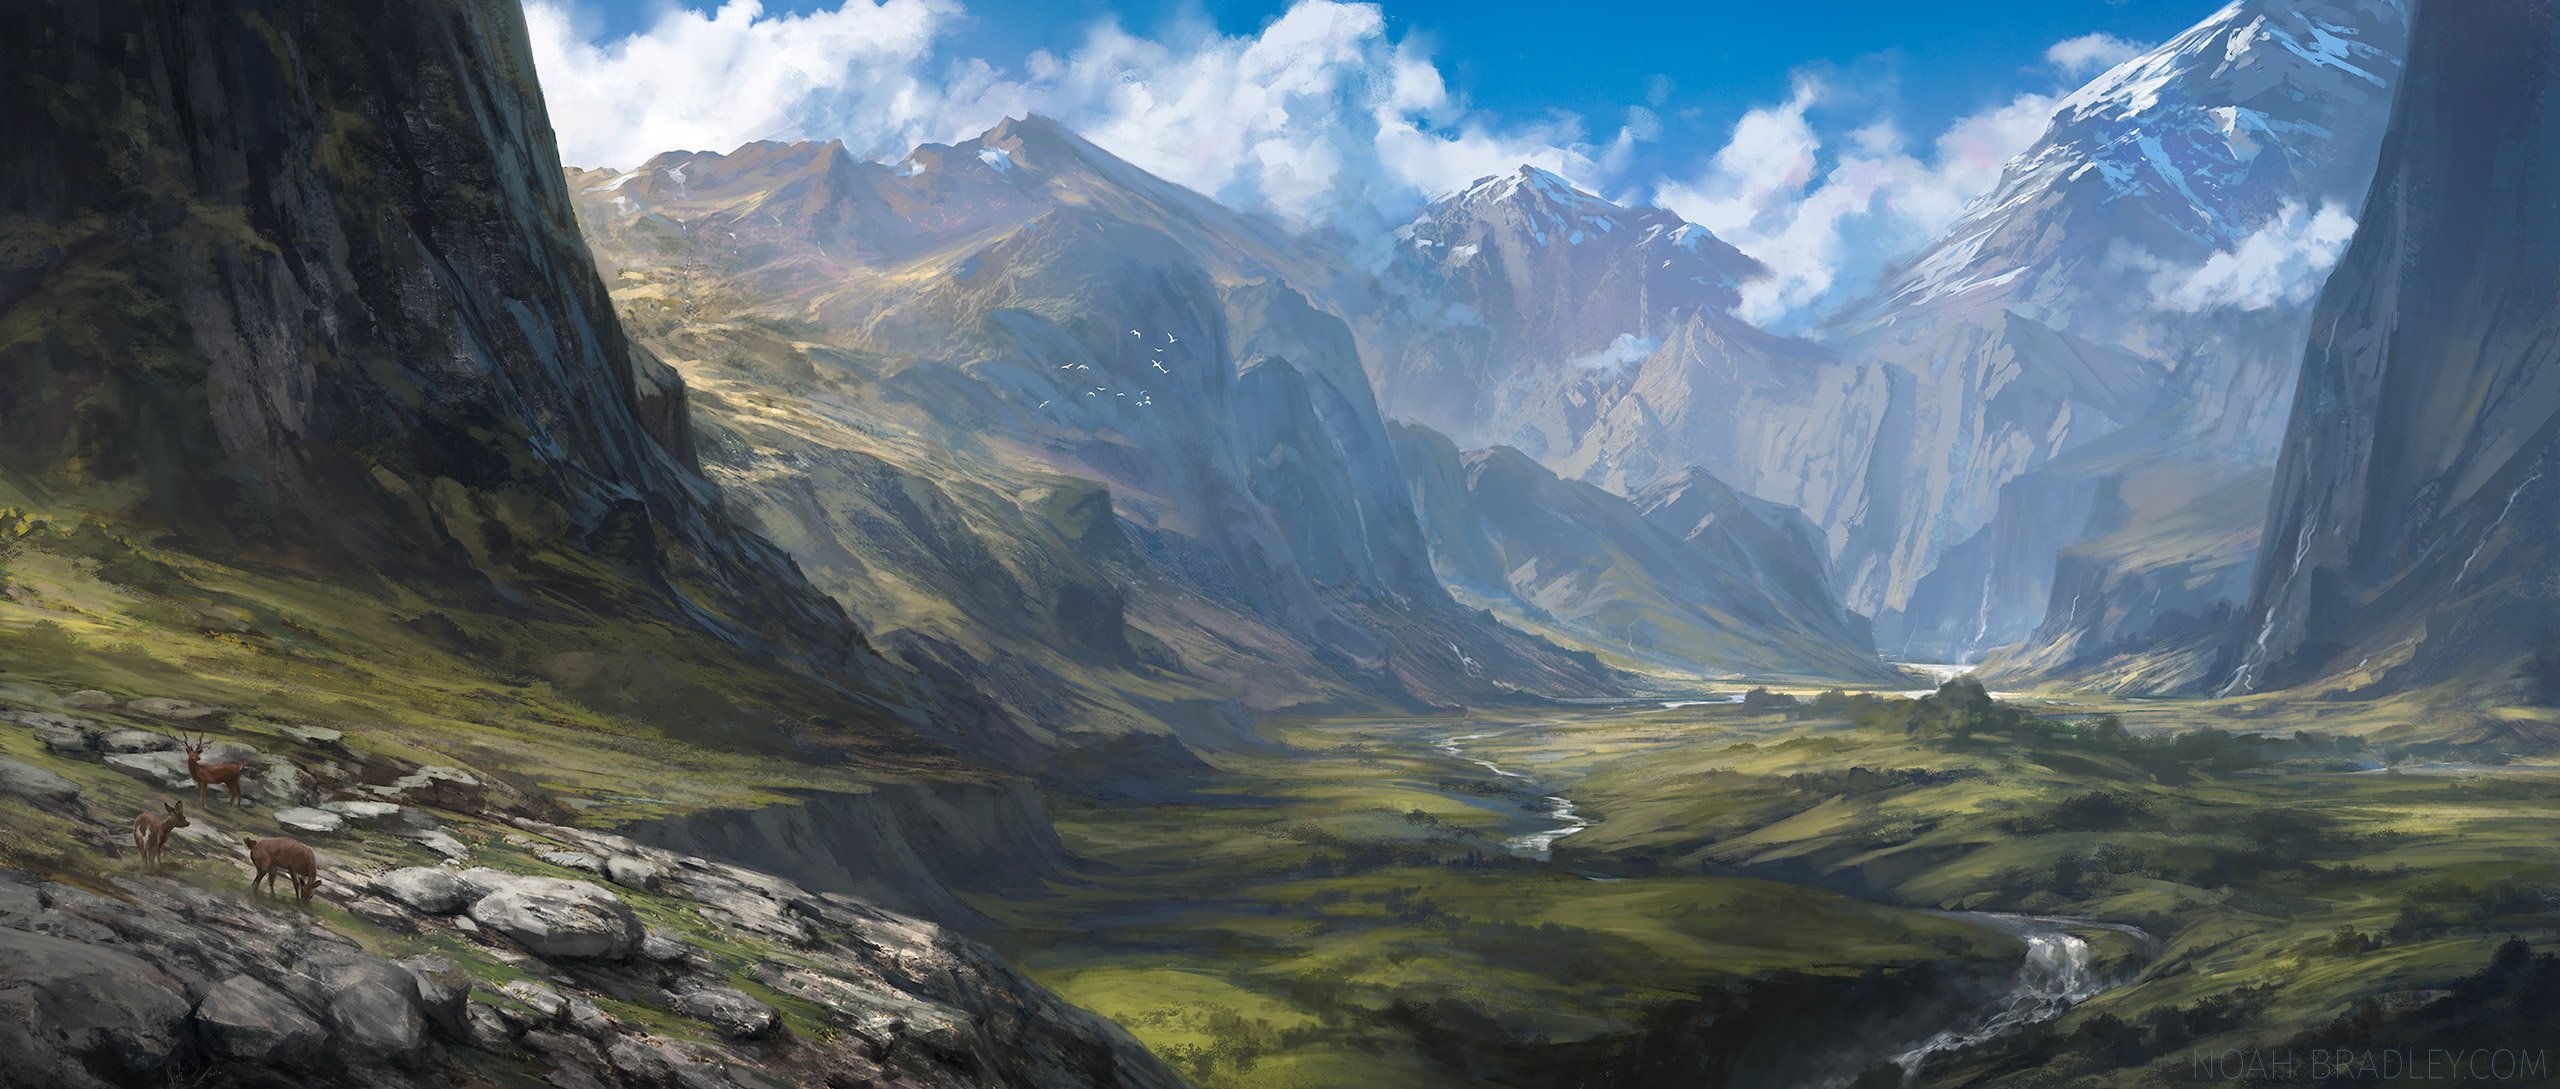
Wrettis Tower
The boulder has crushed a top corner of the tower. The creek flowing under the boulder and into the tower. This stream flows down the many staircases inside and ultimately falls into a large underground lake that has formed beneath it. The water has created a slick, damp environment on the inside. The stairs are all covered with algae and will require a DC 12 Acrobatics check. A failed check will result in the character slipping down the stairs suffering 1d6 bludgeoning damage. In a natural underground cavern that formed off the third floor has become the home of a group of massive spiders.
See Map 4.8 for the complete layout of the buried tower.
Floor 8: Roof
The roof of the tower is buried about a foot underground. A detect magic spell will pick up a faint evocation magical aura emanating just downhill from the large boulder. This is detecting a magical trap on the small trap door inset in the roof of the tower.
Trap
Once unburied, if the trap door is opened without disabling the trap, the character attempting to open the door must make a DC 16 Dexterity saving throw taking 3d8 lightning damage on a failed save or half as much on a success as stored electrical charges discharge through the character's body. The trap can be disarmed with a successful DC 20 Thieves' Tools check.
Floor 7: Workshop
The trap door opens, and you see a chamber about 20 feet below. An old rope ladder can be seen piled up on the floor, though it seems rotted with age. Glancing in, you can see a portion of the ceiling has been broken by a large boulder, the same one the creek above disappears under. In fact, you can now see the water running down the inside wall of the cavern.
The floor is covered in mud, rock, and water fills in pools as it makes its way through the room and appears to flow down the stairs that curve downwards along the wall. The room is well stocked with tools and materials for crafting. The floor in this room is riddled with holes. You can also see a bolt of azure silk sits partially in the water and is heavily deteriorated.
The floor of this chamber is unstable. As characters walk across it, they can hear it creaking. A character who succeeds on a DC 14 Investigation or Perception check recognizes the instability and inherent dangers of the deteriorated floor here.
Crumbling Floor
If two or more creatures are within 5 feet of each other while traveling across the floor of this room, the floor collapses, dropping any character within 10 feet of it to the floor 20 feet below. In addition to the 2d6 falling damage, characters also take 2d10 bludgeoning damage as debris from the crumbling floor falls down on top of them. A character standing on the floor below must succeed on a DC 15 Dexterity saving throw or also take the bludgeoning damage from the falling debris.
Treasure
A cabinet along the wall seems to be mostly intact, inside are a few spools of thread. Most have disintegrated over time, but two spools seem to be made of gold and silver thread. There is also a small bottle nestled behind some boxes and other rotted things. Inside is a white semi-translucent powder which is actually diamond dust worth roughly 1,000 gp.
Floor 6: Lounge and Balcony
Despite their appearance, the floor mosaics are simply decorative. The door to the west has buckled in and dirt can be seen slowly making its way in from the edges of the door. Opening the door will result in a deluge of dirt and stone pouring into the room. The character trying to open the door must make a DC 12 Dexterity saving throw taking 2d10 bludgeoning damage on a failure, or half as much on a success.
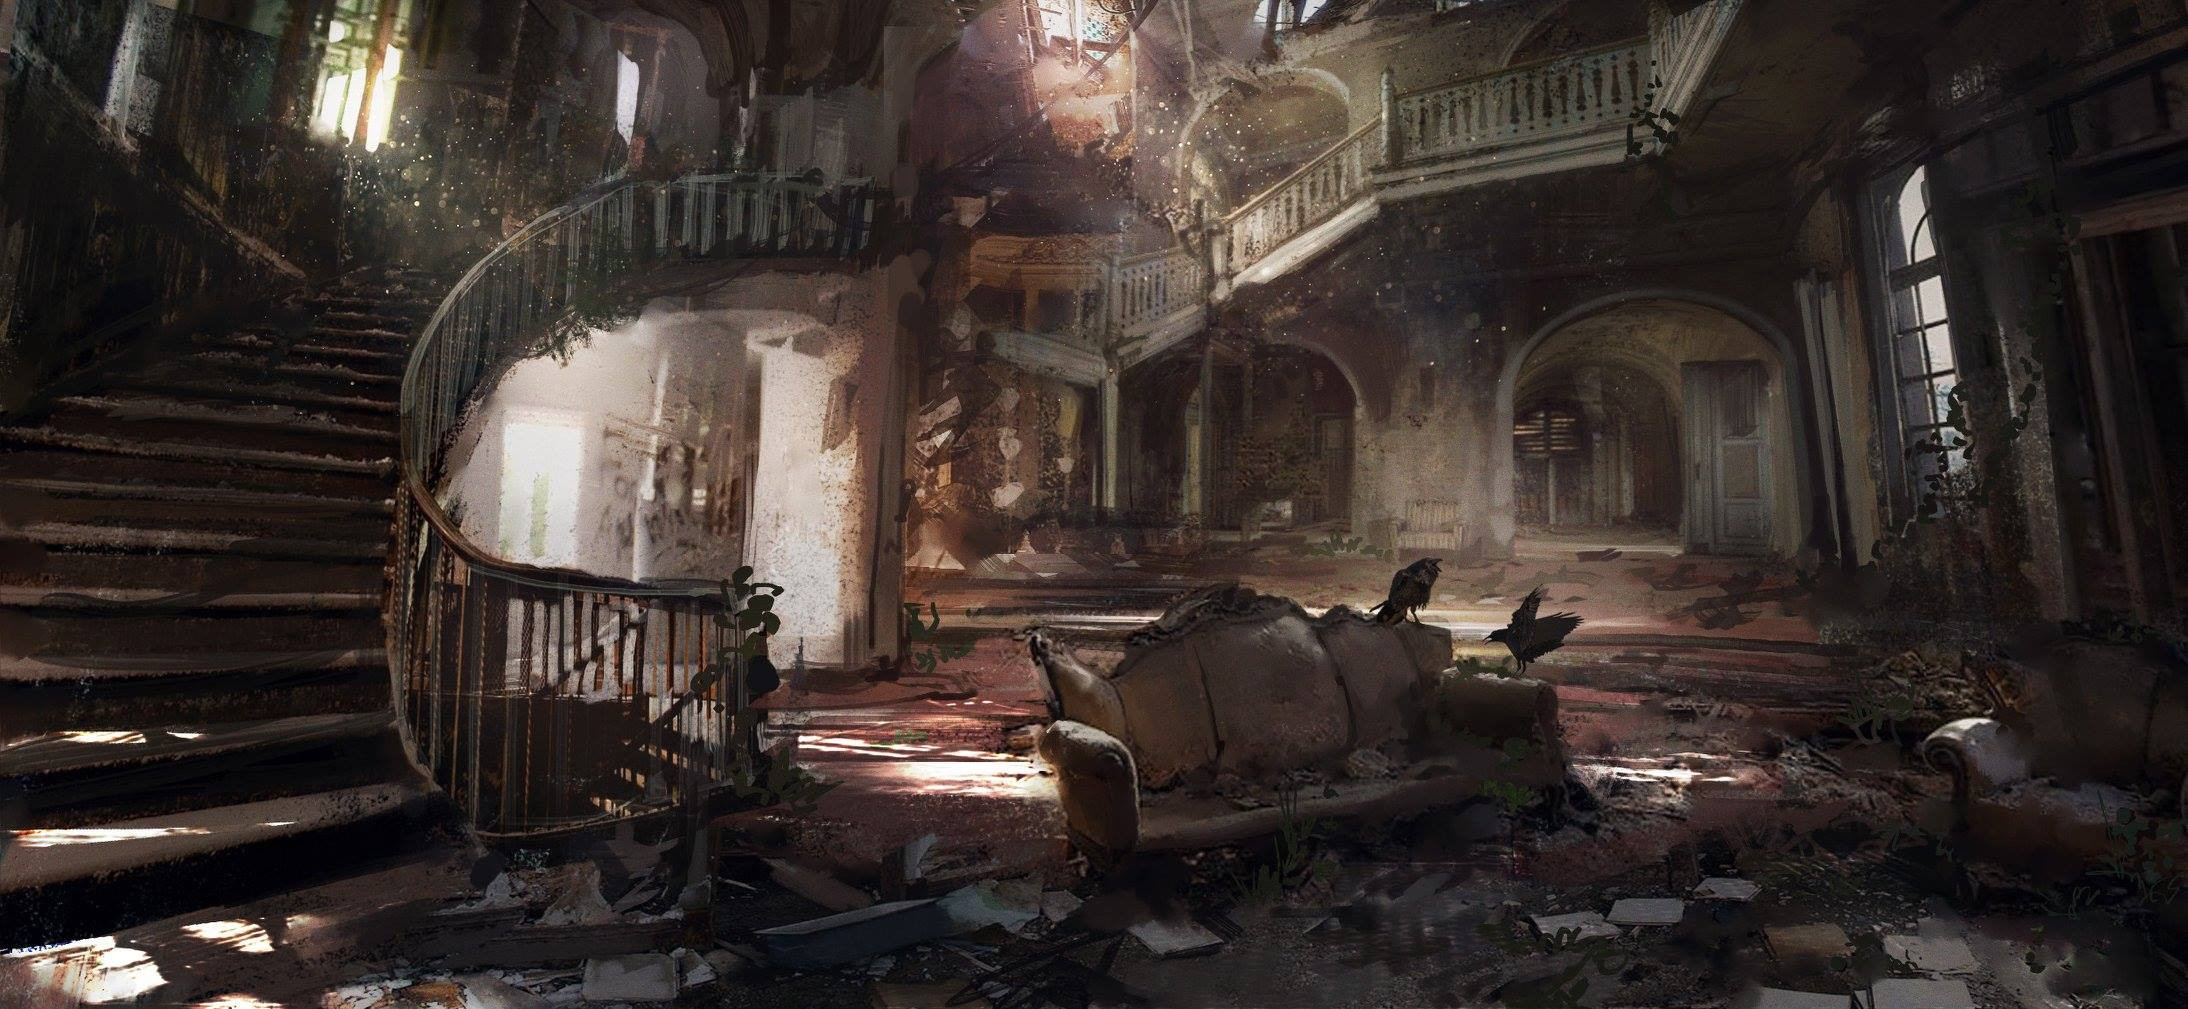
Floor 5: Library
Southeast Door. This room has a large boulder that is sitting in the middle of the room. The room has largely been destroyed and dirt and debris flow in through the hole in the wall. There is nothing of value in here.
Northwest Door: Library. This door is locked with an arcane lock. It requires a successful DC 25 Thieves' Tools check to unlock.
Most of the books in here are unimportant, except for the golden tome (see note below). There are reference books, books on biology, biomes, arcane traditions, schools of magic, various histories, public records, etc.
East Door: Study. Water covers most of the floor in here. A large moldy rug covers most of the floor in here, there is a desk across against the far wall and old books line a few small shelves in here. The books are so old and fragile that they fall apart when touched.
Encounter
The large rug in the study is a rug of smothering (MM p.20). It attacks as soon as a character steps on it.
Treasure
One of the desk drawers in the library contains two sheets of pristine paper, paper birds (Appendix A). There is also a small chest filled with 200 gp.
Golden Tome
The golden tome in the library is a magical teleportation device. A character who interacts with the tome is instantly teleported to Clemain Astural's extra dimensional library. It is a pocket dimension that has been locked into a mode of time dilation where one minute in the library is one hour on the material plane. The dimensional library is further explored to the right.
Clemain Astural's Extra Dimensional Library
Looking around, there are candelabras throughout the chamber that light up the space. Bookcases can be seen throughout the room as well. Looking at the books, they all appear to be locked in place by these brass locks, square-shaped manacles that are affixed around them. Whoever left these books here did not intend for anyone else to open them. Along a rear wall is a large, closed bookcase. There are two small desks along the other side of the room facing towards a large tapestry.
Across the room from the tapestry is a large ornate picture frame, approximately 12' x 6'. You see what looks like a portrait of a man, thin, light brown skin, bald, long braided beard, red robe with gold trim. He is wearing a handful of rings, billowing sleeves folded across his lap. He has a faint, knowing smile etched on his face. He has piercing amber eyes.
The Tapestry. It shows clusters of different colored circles and discs in a strange, tethered pattern. Different colored discs of different sizes, dark blues and grays in between. They are all tethered by these fine silver threads, in what appears to be a tangled web. With a successful DC 15 Arcana or History check, a character will realize this tapestry is an arrangement of the planes.
If a character surpasses a DC 18 Arcana or History check, they notice the following:
Encounter
The locked bookcase is actually a mimic (MM p. 220). It has a fake intricate golden bar affixed on the front of it. It will attack the characters if they interact with it in any way. Use Map 4.7 for the encounter battle map.
Treasure
As the characters explore the extra-dimensional library, there are many various books that can be found. Each locked book in the library can be unlocked with a DC 17 Thieves' Tools check. Some of the various books that can be found in the library are Elementals, Celestials, and Fiends: An Advanced Guide to Identification, Displacer Beasts and Blink Dogs: A Historic Rivalry, Ioun's Infinite Knowledge, or On Alchemy: A Memoir of the Craft.
In addition to the various books, there are a number of magic items hidden throughout the library. They are organized below by different Investigation checks of increasing difficulty. Magic items will need to be identified by characters with successful Arcana checks. The difficulty of the Arcana checks should be assigned at the DM's discretion and reasonably reflect the rarity of the item.
DC 18 Investigation check. Among the volumes on one shelf is one that seems slightly off. It's a wooden book that is wired to a secret compartment in the base of the shelf. It requires a successful DC 15 Thieves' Tools check to unlock. Tugging on the book causes the compartment to open, revealing a Wand of Binding hidden inside.
DC 22 Investigation check. One of the stones beneath the hanging portrait is inset into the wall slightly. The inset is difficult to see and is noticeable due to the slight shadow that plays along its edge as the candlelight flutters. After sliding the stone aside, there is a lead safe inside with a lead front panel that is etched with a riddle and locked by an arcane lock which requires a successful DC 25 Thieves' Tools check.
Ever nearing, never veering
Overarching, domineering
Chaotic, yet it's on its way
Despotic, beset, come what may
What is this unyielding lot
That can't be fought, that can't be bought?
It binds us tightly in its thrall...
The one thing that awaits us all.
Inside the safe is a pair of golden dice attached together with an intricately carved golden chain. It sits on a purple velvet pillow on top of a fine leather-bound tome with gold lettering. The gold chain is the Artifact of Chance (Appendix A) and the tome is Fate's Fickle Friend (Appendix A).

Map 4.7
Floor 4: Bed Chambers
Inside the first door off the stairs is a small sitting room, the door across leads into a small room with two beds in it. There is nothing of value in these rooms.
Encounter
The other room off the stairs is slightly larger, it looks like another bedroom. Laying across the bed in here is an old cloak that seems to be in decent condition. This cloak is a cloaker (MM p.41) and will attack anything that approaches within 10 feet of it.
Floor 3: Workspaces & Master Bedroom
Northwest Door. This room has been completely destroyed by a large boulder that collapsed the outer wall of the tower. The room is full of dirt, stone, and debris that poured in behind the boulder.
Southwest Door: Arcane Workshop. Three long tables sit in here. One holds glassware, burners, and jars of powders and liquids. The second holds crafting tools and scraps of metal, glass, and wood. The third is flanked by a pair of wooden stools and is piled with bolts of cloth and sewing instruments. A tall cabinet and shelves hold various materials in labeled bins, boxes, and jars.
East Door: Master Bedroom & Study. The door to this chamber is locked and requires a successful DC 18 Thieves' Tools check to unlock.
A character that makes a successful DC 15 Perception check will notice drag marks along the floor as if the trunk at the end of the bed has been dragged partially into the tunnel.
Through the locked door in here is a study. The desk in here is littered with papers. They are ramblings of arcane equations and spells that seem to be only partially created.
Trap
Throughout this floor of the buried tower are multiple traps that are detailed below.
Arcane Workshop. The glass cabinet in the arcane workshop is filled with toxic gas. The original trap has been discharged, but several glass phials were broken within the sealed cabinet when it triggered. The spilled chemicals interacted with one another and formed a toxic gas. If the cabinet is opened, the gas floods out and fills a 10-foot cube in front of the cabinet. Each creature in the area must make a DC 13 Constitution saving throw. On a failure, a creature takes 4d6 poison damage and is poisoned for 1 minute. On a success, a creature takes half the damage and is not poisoned. A poisoned creature can repeat the saving throw at the end of each of its turns, ending the effect on itself on a success. A successful DC 15 Investigation check notices the broken phials and some humidity on the inside of the cabinet's glass window, hinting at a gas contained within.
Study Door. The carved A on the study's door is a glyph of warding that protects the door and requires a DC 18 Investigation check to notice. A character who attempts to open the door is targeted by the glyph with a blindness/deafness spell and must succeed on a DC 18 Constitution saving throw.
Encounter
After the party spends some time searching the master bedroom, or if they try to enter the tunnel, 2 phase spiders (MM p.334) pop into existence from the Ethereal Plane and attack. If one is killed, the other attempts to phase into the Ethereal Plane and retreats, alerting the rest of the nest to the intruders. The nest is located in the Wrettis Spider Den.
Treasure
In the study, there is a small, locked chest underneath the desk. A character who makes a successful DC 20 Thieves' Tools check unlocks it to find 20 pp and 150 gp inside.
The closet door in the study is locked with an arcane lock which requires a successful DC 25 Thieves' Tools check to unlock. The small closet has a large bookcase filled with books on various research topics. Some of the books in here are Wayfinder's Guide to the Planes, Leomund's Grimoire of Spells and Spell Components, and Nystul's Anthology of the Pantheon.
In addition, a character that makes a DC 15 Investigation check will notice there are three spell scrolls tucked in between the various research texts: arcane eye, knock, and magic circle.
Floor 2: Meeting Rooms
East Door. This room appears to be a small bedroom, perhaps for a butler or someone of a similar position. There is nothing of value in this room.
South Door. This room appears to be a small sitting room that looks like it used to be quite cozy. All furniture in here has rotted and molded long ago. There is nothing of value in this room.
North Doors. Both of the north doors open into a large meeting room.
Encounter
If the players start searching the room the Thread-Bound Griffon (Appendix B) attacks. It leaps out of the tapestry growling and attacks the closest person to it. When the creature is killed, it returns to the tapestry, now appearing as if it has suffered a fatal wound. It resets again at dawn.
Floor 1: Kitchen & Dining Room
North Door. A large dining room is through this door. The dining table fills most of this room with chairs in various states of disrepair around it. There is nothing of value in here. There are two doors in the dining room. The eastern door leads into a decaying lounge. The western door leads through into the kitchen. There is nothing of value in here.
East Door. This seems to be a large closet for guests' belongings. A few scraps of moldy clothes and a nearly rusted through sword lean against the far wall.
West Door. The kitchen is through this door. A smell of long decayed food hits your nose as you open this door. Everything in here has molded and decayed. The water flows through this room and down a narrow flight of stairs descending into the cellar. There is a small pantry door that leads off the kitchen. In here, almost everything has disintegrated. Boxes line the walls and floor in here.
Trap
Opening the main double doors will result in a deluge of dirt and stone pouring into the room. Any character within 10 feet of the doors needs to succeed on a DC 14 Dexterity saving throw. On a failure the character takes 4d10 bludgeoning damage or half on a success.
Treasure
In the pantry, a character that makes a successful DC 15 Investigation check will notice a glint off a small glass jar hidden beneath an overturned crate. The glass jar is filled with multi-colored beads, which can be identified as Beads of Nourishment.
Cellar
The hole goes down over 250 feet. This leads to the section titled Caverns Below Wrettis.
Treasure
Inside the small room off the cellar are some old barrels that have rotted and spilled their contents long ago. Placed on a small table in the corner, however, are 4 small bottles filled with a reddish-brown liquid. These bottles are Student's Magical Ale (Appendix A).
Conclusion
At the end of this story arc, after the characters finish exploring Wrettis, the characters should reach 7th level.
Map 4.8
Wrettis Spider Den
See Map 4.9 for the complete layout of the spider den.
D1. First Chambers
As the characters reach the end of the tunnel, the cavern opens up both left and right. Spider webs cover most of the walls in here. A large crack in the wall across leads further in.
Encounter
There are 3 phase spiders (MM p.334) in here that will attack any characters that walk in.
D2. Matriarch Chamber
This large chamber has a massive nest of spider webs along one side that is home to the spider matriarch. A tunnel leads deeper into a couple more underground chambers. Sacks of eggs are covered in spider webs in the cavern recesses.
Encounter
The large queen spider is a phase spider matriarch (Appendix B). There are also 3 phase spiders (MM p.334) perched on spider web on the other side of the chamber.
D3. Spider Stash
Within a small side cavern, there is a thick coating of spider webs covering several clusters of eggs.
Treasure
A character that makes a successful DC 15 Investigation check will notice a metal chest buried beneath the webs. It is locked and requires a successful DC 17 Thieves' Tools check to unlock. Inside, the chest contains a vial of oil of slipperiness, an immovable rod, a jar of oil of etherealness, and a jar of Keoghtom's Ointment.

Map 4.9
Caverns Beneath Wrettis
The stream flowing through the tower of Wrettis falls 250 feet into an underground cavern. Subsequently, the river has carved through the rock and created an extensive cavern system beneath the Stormpoint Mountains. Characters that decide to explore these caverns can follow the underground river as it cuts its way through the rock. Eventually, after days of travel, the characters will stumble upon lake that is home to a massive, mysterious, slightly glowing green rock. With research, characters can learn this is an ancient primordial titan seed.
This system of caverns ends a day of travel or so beyond the lake. A crack in the ground extends upwards and creates a hole in the ground that opens into the Rifenmist Jungle. Above ground, there is an ancient temple built at the edge of this hole. Characters will emerge into the Rifenmist Jungle on the eastern side of the Stormpoint Mountains, roughly 150 miles south of Wrettis.
Lake Below Wrettis
The water flows over the edge of a hole that Wrettis' cellar ends at. The stream creates a waterfall that descends nearly 250 feet before pooling at the bottom. Over time, the water has built up and formed a small lake. The sides of the hole are about 15 feet across at the top of the waterfall and as the water falls down, the sides of the hole gently slope outward to form a cavern approximately 150 feet across.
A thin edge of rock forms a shoreline around the lake. Dirt and mud make up the edge of the lake and there are a few feet along the edge of the pool before the cavern walls slope up. The lake is clear, but the ground is muddy and dark and it's hard to tell how deep the water is. The lake that has formed has an outlet as water flows out of the chamber and has created an underground stream.
Encounter
This lake is home to 2 water leapers (ToB p.406). If the characters swim in the water or make a lot of noise in the chamber, the creatures will notice their presence and attack. Use Map 4.10 for the encounter battle map.
Treasure
There is a small chest at the bottom of the lake, directly underneath the waterfall where the lake is the deepest. The chest is almost completely buried in the silt at the bottom. Characters that explore under the water can find the chest with a successful DC 19 Perception or Investigation check. Inside the chest is a pile of gold worth 500 gp. Amongst the gold is a Potion of Stone Giant Strength and a single pea-sized black bead of force.

Map 4.10
Kobold Camp
If the characters choose to follow the stream further underground, most of the travel day goes by without incident until near the end. Read the following:
The underground tunnel the stream flows through wanders this way and that. You walk on for miles, with the smell of hard water and wet earth. Stalagmites and stalactites protrude from the floor and ceiling, occasionally forcing you into the stream to move around them. The stream winds through the occasional natural cavern and you see clusters of crystal and other beautiful minerals occasionally lining the walls and ceiling of these chambers.
After a number of hours, you can hear something ahead of you getting louder above the quiet babble of the stream and your footfalls. It sounds like a large amount of moving water, maybe 1000 feet in front of you.
Characters that make a successful DC 13 Perception check will notice a faint flickering of light dancing across the tunnel wall near where it intersects with a much larger tunnel. Flowing perpendicular across the mouth of the tunnel is a large river. The stream the characters have been following from Wrettis flows into the river ahead. As the characters approach the entrance into this larger cavern, they will see the source of the flickering light is a bonfire burning across the river on the opposite bank of the river. The bonfire sits along a wide rock bank roughly 100 feet south.
There are about two dozen small creatures moving around, sitting next to the fire, and chattering in a language that sounds like a mix of barking and growling. If the kobolds notice the group, they bark and grow but grow slightly fearful if the group approaches. Characters who speak Draconic can understand their demands: "Loud food! Loud meal!", "You! Give us stuffs! Give us foods! Drop things you have, or we stab stab!"
Encounter
There are 22 kobolds (MM p.195), a kobold chieftain (ToB p.263), and a kobold scale sorcerer (VGtM p.167). The characters can attempt to parlay with them. Avoiding battle would require a significant trade or intimidation. Use Map 4.11 for the encounter battle map.
Map 4.11
Titan Seed Wild Magic
Primordial titan seeds are immensely powerful magic artifacts. Their magical energy can powerfully impact the natural world that surrounds them. This magical energy suffuses the environment around like a static charge that can cause unintended magical discharges. The range of this magical static depends on the size of the titan seed.
- The 25-foot square titan seed located under the Stormpoint Mountains creates magical static in a 50-mile radius.
- A 5-foot square chunk creates magical static for a 1-mile radius.
- A palm-sized chunk creates magical static for a 15-foot radius.
Mechanically, whenever a spell of 1st level or higher is cast within the magical static, players must roll a d20. On a roll of 10 or lower, a wild magic surge occurs, and the DM must roll on the wild magic table found in the appendices.
Roper Attack
The characters can continue following the river south as it winds its way through small alcoves and caverns. The next few days of travel underground pass uneventfully for the most part. Somewhere along the journey, in a slightly larger chamber a successful DC 14 Perception check will allow a character to notice a few pieces of metal weaponry scattered against the wall along with a few errant gold pieces.
Encounter
Two nearby stalagmites are actually disguised ropers (MM p.261) and will attack when the characters get close enough. Use Map 4.12 for the encounter battle map.
Cultists and a Titan Seed
As the characters continue following the underground river southward, a few hours into the day's travel will have them approaching a large underground lake. As the characters approach, read the following:
Ahead, you can hear the roar of a waterfall as the tunnel you have been traversing through opens up into a massive underground chamber. Additionally, you notice a faint green glow glinting off the wet rock. The path drops approximately 50 feet down a series of boulders alongside the waterfall down to a narrow shoreline of a large underground lake.
This underground lake is roughly 130 feet across with two islands in the middle formed out of broken rock. On one is a massive chunk of glowing green stone, around which are a number of individuals. It appears that these people have broken off a large chunk of the green stone and you hear scraping sounds as they shift it along the ground.
Encounter
Around the massive primordial titan seed are 2 remnant cultists (TCSR p.252) in charge of the other 4 cult fanatics (MM p.345) and 6 cultists (MM p.345). Both cult leaders have one 7th level spell they are saving for teleport.
During the first round of battle, one of the leaders will use their action to teleport the chunk of titan seed away back to their base of operations. The other leader will save their teleport until they can gather their allies close enough to teleport as many away as possible. Use Map 4.13 for the encounter battle map.
Development
If the group manages to keep one of the cultists alive, a character that interrogates the cultist with a successful DC 15 Intimidation check will learn this stone is a primordial titan seed and that they are cultists of the Cloaked Serpent trying to spread chaos. The cultist will spit towards the character and yell "Enjoy the coming war!" before biting down on a poison capsule, killing themself.
Treasure
If the characters search the bodies, they will find that each cultist carries a snake dagger (Appendix A) and around 40 gp.
Aftermath
As the characters search around the area, a successful DC 12 Investigation check will notice that the cultists' tracks appear to emanate from the path at the southern end of the chamber.

Map 4.12


Map 4.13
Ancient Cloaked Serpent Temple
If the characters follow the cultists' tracks south from the underground lake, a day of travel will have them reach the end of this cavern system. The characters find themselves in a large chamber littered with thousands of bones. There is a glimmer of light coming from somewhere high above. The cavern goes up nearly 500 feet.
If the characters climb upwards, the cavern narrows to a hole roughly 50 feet across that opens up into the middle of the Rifenmist Jungle. Climbing the walls upwards will require three successful DC 17 Athletics or Acrobatics checks.
Once above ground, fading iconography identifies this as an abandoned Cloaked Serpent temple. This hole was used for sacrifices which is why there were thousands of bones below. As soon as the characters climb out of the hole and begin to collect themselves, read the following:
All of a sudden dozens of arrows whistle by and thud into the ground nearby as you hear a loud shout from the tree line:
"Don't move orfindes! What is your purpose here?"
Looking around, 30 individuals are slowly emerging from the tree line. It appears most are wood elves with a few half-elfs mixed throughout. One older wood elf strides a little farther forward and appears to be the one that shouted out. The group are wearing functional clothing of green and brown colors and are all well-armed.
Encounter
This is not intended as a battle encounter. There are way too many individuals for the characters to fight. This is meant to be a chance for the party to interact with a new group of individuals and potentially learn some information of the hobgoblin forces moving throughout the Rifenmist Jungle.
The tribal leader is a War Priest (VGtM p.218) and the lead ranger is a Warlock of the Archfey (VGtM p.219). The rest of the tribal forces are a mix of archers (VGtM p.210), druids (MM p.346), and veterans (MM p.350).
If the characters fight and are knocked unconscious, they will awake as prisoners of the tribe. Use Map 4.14 for the encounter battle map.
Development
If the characters engage in conversation, the leader will introduce himself as Dura Traki of the Haleya Clan, one of the Orroyen Tribes. His lead ranger is Thiala and she is the one who saw the Cloaked Serpent cultists.
"I am Dura Traki. Thiala here, brought word of orfindes climbing down into the ground here two days ago. We came to investigate and saw you emerge."
Dura Traki can provide the characters with information about a number of hobgoblin war parties trekking north along the eastern side of the Stormpoint Mountains.
Orroyen Tribes
Born from a wandering colony of shelterless elves fleeing the Calamity, these wood elves have not just survived within the deadly jungles of the Rifenmist for generations - they have flourished. Learning the dangers of the surrounding lands, refining their hunting techniques, and maintaining a healthy mistrust of the civilized world, the Orroyen call the jungle their domain and protect it furiously.
The Orroyen tribes have no central government, and their membership shifts as different clans move through the region and encounter other tribes, sometimes trading members as they go. Elders are given the most oversight and respect among a traveling tribe, the eldest given the title of dura (tribal master) and tribes commonly maintain between 100 and 1,000 members to a single unit. Temporary lodging is constructed at each resting point, or tomenda, and a tribe will generally remain based at that tomenda for a year or two before moving on due to depletion of resources, migration of game, or the jungle itself aggressively reclaiming the tomenda.
To come into prominence within the tribe, or request admittance into the tribes as an ally or member, a series of ceremonial trials are placed upon the individual. These trials change from dura to dura but are designed to test strength of body and mind. It is not uncommon for those who attempt these trials to return maimed, or not return at all, and many elders bear the marks and scares of their trials long past. Few orfindes - outlanders from the north - have been allowed into any of the dozens of Orroyen tribes, and the elders have little intention of changing this.

Map 4.14
Journey Back to
Vues'dal Waters
If the characters choose to travel back towards the villages along the Vues'dal Waters, the last bastion of civilization they were in prior to this trek into the wilderness, it will take roughly ten days of travel to reach Falcon's Hollow. The characters must travel north, leaving the Rifenmist Jungle and entering the Kirmont Valley along the eastern side of the Stormpoint Mountains. Eventually, the group will need to traverse west across the Stormpoint Mountains.
During their journey back towards Vues'dal Waters, the characters will face various encounters with the creatures that live in this wilderness. Other encounters than the ones outlined in the following sections are possible. Possible creatures encountered could include basilisks (MM p.24), a dune mimic (ToB p.162), or stone giants (MM p.156).
Additionally, there is a chance the party may stumble upon signs of hobgoblin forces heading over the mountains. If the group decides to follow them, they will traverse the mountains and end up along the southern edge of Vues'dal Waters. This may lead the characters to become involved in the war effort.
Trekking North through the Rifenmist Jungle
Where the Verdant Expanse is a massive landscape of fey-touched forest, the shadowed groves and glittering paths belying the threatening nature of the wood, the Rifenmist Jungle stands as an endless, tangled mass of unchecked natural chaos.
The vine-strangled floors of the jungle are clustered with swollen trunks, spine-laden ferns, and carnivorous plant life. The sweltering, humid jungle air is uninviting, with clusters of venomous insects buzzing through the mists and large lizards climbing along the many vines.
The characters will travel north for two days before finally leaving the Rifenmist Jungle behind them. As they travel on the second day, before leaving the jungle, read the following:
Characters that make a successful DC 12 Perception check will notice an old rope bridge that spans the forest canyon a few hundred feet upriver from them. An ancient path has been carved along the edge of the canyon to the bridge.
A ramshackle rope bridge sways in the wind; it is the only clear passage between the two ends of a perilously deep chasm. A coursing river rushes between the rocks hundreds of feet below, completely obscured by fog. A fall from this height would surely mean death
Encounter
As the characters attempt to cross the rope bridge, 2 harpies (MM p.181) and 2 owl harpies (ToB p.246) attack hoping for an easy meal. Use Map 4.15 for the encounter battle map.
Kirmont Valley
The Kirmont Valley is a dry rolling hills grassland between the Stormpoint Mountains and the Lucidian Ocean. On the second day of travel northward, the characters will begin to notice the occasional statue. For the next few dozen miles, a number of statues dot the landscape. If the characters decide to investigate, they are various races, and all appear to be carved in adventuring gear. A few of them have broken in half over time. There is a nest of basilisks in the area, and these are actually petrified adventurers.
As the day continues, there are a number of large gopher-like mounds of dirt that crisscross the landscape.
Encounter
As the characters travel, a successful DC 15 Perception check will allow characters to hear a rumbling that slowly gets louder. All of a sudden 2 bulettes (MM p.34) burst out of the ground and attack. Use Map 4.16 for the encounter battle map.


Map 4.15

Map 4.16
Tracking the Goblinoid Forces
As the Kirmont Valley narrows and the characters near the base of the mountains, characters that make a successful DC 13 Survival check will notice a significant number of goblin and hobgoblin footprints which seem to be about three days old. The tracks turn west and lead into the Stormpoint Mountains, south of where the characters first found Wrettis.
If the characters follow the tracks through the mountain range, it will take approximately three days to travel across. It can be dangerous crossing the mountain range, many beasts roam the peaks.
Encounter
As the characters travel across the frozen peaks, one morning the group will run into 4 owlbears (MM p.249) prowling around searching for food.
Development
After reaching the western side of the Stormpoints, as the characters begin hiking down out of the mountains, there are a number of things that they may be able to notice.
DC 15 Perception check. There is a significant amount of black smoke curling up into the sky far to the southwest. The fact that the smoke can be seen at this distance speaks to the volume of smoke there is.
DC 20 Perception check. Additionally, looking out towards Vues'dal Waters, the characters can see a ring of firelight along the southern edge of the lake.
DC 25 Perception check. The ring of firelight actually appears to be dozens of individual campfires set up in a wide semicircle from the shoreline.
Syngorn Planeshifts
In the middle of the night, Syngorn planeshifts to the Feywild in an abundance of caution as the war begins between the Forces of Gwessar and the forces of the Iron Authority. As the city planeshifts, there is a brief, bright flash of blue light that illuminates the sky far to the northwest.
The flash of light is similar to the haze of light pollution, but blue in color and extremely brief.
This occurs as the characters are crossing the Stormpoint Mountains. Any characters keeping watch at night will notice this with a DC 20 Perception check.


Forest of Gloom
Along the southern side of Vues'dal Waters is an eerie section of dense forest. This dark grove is a shadowy part of the forest where most of the light is blocked out by the interwoven branches of tall, ancient trees. Located at the edge of the western foothills of the Stormpoint Mountains, the forest canopy above grows so thick that all but the faintest slivers of the sky are blocked from view.
This section of forest is home to a cave system that leads to an ancient dwarven stronghold that has been abandoned for centuries. Characters will stumble upon a few skeletons resting against trees near a rocky ridge. Investigating a nearby cave system will lead to an eerie hollow and the entrance to an underground maze that ultimately leads to a long-hidden dwarven vault.
Mist and Shadow
As the characters walk through the trees, a stone ridge forms and meanders through the trees. Characters who succeed on a DC 15 Perception check will notice a small opening in the rock face that seems to be an entrance into a cave.
Additionally, the characters will see a couple of skeletons set up against nearby trees. Scattered around the remains are a number of small gems partially embedded in the soft loam. Taking some time to investigate the area around the cave entrance, the characters will find a total of four bodies. Three of the bodies are heavily decayed and mostly skeletal, one of which has a missing limb that appears to have been bitten off by some creature.
The fourth body seems to be much fresher than the others. It appears to be a dwarven woman dressed in leather armor. With a successful DC 12 Medicine Check, a character will determine the body to be only a few weeks old. Additionally, the character will notice there are several tiny burn marks and small scratches covering her body.
Treasure
Searching around, characters that make a successful DC 15 Investigation check will find the following things. The older bodies do not have anything but some simple weapons on them. One of the skeletons also has a small leather-bound journal (Handout 6) tucked inside the rags of its coat.
The fresher body has a number of small gems strewn around with a few in its arms as if it were carrying them. The gems scattered around are worth a total of 350 gp. The dwarf also carries a coin purse containing 194 gp, a Potion of Healing, and a map through the bioluminescence cave.
Bioluminescence Cave
Characters making their way through the cave with a successful DC 12 Perception check will notice various spots with the remains of campsites. There are rotting sleeping packs, rusted cookware, and ratty clothes. As the characters travel deeper into the cave, they will begin to hear a clicking sound.
Deeper in the cave, there are three distinct piles of broken branches littering the floor. The branches appear to be stuck together with spider webs.
Encounter
As the characters explore the cave system, 3 J'Ba Fofi Spiders (ToB p.362) burst out of their hidden ground tunnels to attack the party. Scribe mites float throughout the area. Use Map 4.17 for the encounter battle map.
Development
Near the back of the cave, there is a small hole in the wall that seems to continue further underground. The tunnel is only about 2 feet tall so characters will need to crawl through it. The tunnel extends about two hundred feet before it deposits into a small hollow.
Scribe Mites
Soft little motes of dancing light, faintly orange like little fireflies that slowly float through the air. They're referred to as Scribe Mites. They just freely float, but around the presence of magical spellcraft, incantations, or any sort of strong magical presence, they gravitate towards it to eat.
With a successful DC 15 Arcana check characters will recognize them as scribe mites and know they are attracted to magic.
The scribe mites will attach to a spellcaster whenever magic above a Cantrip is cast. The caster must make a DC 15 Constitution saving throw taking 1d6 lightning damage on a failed save or half on a success. The lightning damage increases by 1d6 for each spell level above first.
Once the scribe mites attach to a creature and spark, they detach and gently float away, seemingly sated.
Spooky Hollow
The tunnel leads from the bioluminescence cave into this hollow. The rock walls bordering this clearing reach up 40 feet. Mist suffuses the area, and the tops of trees can be just barely seen below. There are also a number of large pumpkins set around the hollow.
Encounter
A chill fills the air and deep shadows fill the corners of this clearing. Your eyes are drawn to the blackness, but nothing can be seen within. 6 glooms (Appendix B), 4 pumpkin puppets (Appendix B), and 5 pumpkin abominations (Appendix B). Additionally, scribe mites float throughout the hollow. Use Map 4.18 for the encounter battle map.

Map 4.17

Map 4.18
Development
There is a hidden stone door that is recessed into the wall along the far side of the hollow. A character that makes a successful DC 20 Investigation check will be able to find the door. This check can be made with advantage if the character uses the map they found earlier.
There are four small indents that each have a tiny amount of different colored dust. This door is sealed and requires a ruby, sapphire, emerald, and diamond to be placed individually in an indent. The gems disintegrate and the door cracks open.
A Small Maze
The door in the rock wall of the hollow opens into a well-made stone chamber. As the characters explore, they will come to realize the room is designed as a maze. After the characters walk through the door, it slams shut behind them. The walls of the maze extend fully from floor to ceiling and this maze is filled with scribe mites, the tiny motes of faintly glowing orange light.
See Map 4.19 and 4.20 for the complete layout of the maze.
1. Entrance
Trap
As the characters walk past the two globes of yellow light just inside the entrance, they must make a DC 15 Wisdom saving throw. On a success, the character feels a sense of danger from the corridor directly ahead. With a failure by less than 5, the character doesn't feel anything out of place. With a failure by 5 or more, the character feels a strong sense of attraction from the corridor directly ahead and must spend its turn dashing towards the wall at the far end.
2. The Checkered Corridor
This corridor is 50 feet long and has a checkered floor comprised of light and dark gray tiles. A single burning wall sconce illuminates the far end of the corridor where it dead ends.
Trap
If a character proceeds to the south end of the corridor by walking on every dark tile and only on the dark tiles, the secret door at the end of the corridor will open.
Characters need to succeed on a DC 10 Acrobatics check to not accidentally step on a light tile. If a character steps on any white tiles, poisonous gas will pour into the hallway through tiny holes scattered throughout the ceiling. Any characters in the corridor must make a DC 15 Constitution saving throw taking 3d6 poison damage on a failure or half as much on a success.
3. The Green Room
A long corridor leads to an area characterized by strong humidity and the presence of moss and other plants growing in the cracks on the floor and along the walls up to the ceiling. Water dribbles from the cracks in the walls and pools at the end of the corridor forming a stagnant, smelly pool.
Encounter
This pool at the end of the corridor is the den of a gelatinous cube (MM p.242) that awaits adventurers just around the corner. It is nearly invisible in the pool and a character can avoid being surprised with a DC 15 Perception check.
4. Dangerous Waters
Around the corner from the entrance hall, the humidity and moss increase. The floor here is mostly occupied by a pool of dark water. At the far end of the flooded hallway sits a dark gray stone pedestal with a large gem clearly visible resting on top. The gem is giving off a faint green luminescence. Th gem is actually ordinary glass that has been enchanted to give off the light to attract greedy adventurers.
Encounter
There is a water elemental (MM p.125) hidden in the pool of water. It lies in wait to ambush anyone who goes for the gem.
5. Trap!
This area is a bit more spacious than the previous corridors. To the south are two short corridors that come together behind a thick center all. The characters can see the glow of a strong light from a magic torch on the backside of this central wall. The light serves to attract the reckless as the source of it is hidden in an alcove out of sight.
Trap
As soon as a character passes over an activation tile, marked with an X on the map, the floor gives way and opens up into the most classic of traps: two 20 feet deep pits with sharp spikes. Characters that succeed on a DC 20 Dexterity saving throw manage to hang onto the side of the pit and avoid falling in. Otherwise, characters must make an additional DC 15 Dexterity saving throw suffering 2d8 piercing damage and 2d6 falling damage on a failure or half as much on a success.
6. Secret Passages
This small room connects three corridors. From the inside of the room, it is easy to see and open the doors, but from the outside it is more difficult. The north door opens only when and if all the tiles are correctly stepped on in area 2. The east and west doors can be found with a successful DC 20 Investigation check.
7. The Prisons
This particular area was built to allow 16 creatures to be chained up. There are currently 12 bodies chained up in the cages in an advanced state of decomposition.
Encounter
The 12 bodies in the cages are actually zombies (MM p.316) waiting to attack anyone that comes within reach.
8. The Beholder Statue
In this final room there is a monstrous statue of a Beholder that magically floats 3 feet off the ground. It is obviously a statue and shows no aggression.
Under the statue there is a large silver plate filled with coins and gems. On the floor in front of the silver plate is an inscription that reads "Leave half of your riches if you want to live and move on."
Trap
To be able to pass unharmed, it is necessary for the players to leave half of their coins and gems. Otherwise, anyone who tries to advance towards the exit will be attacked by the eyes of the statue exactly as if it were a real beholder (MM p.28) with the following change: it uses its Enervation Ray instead of its typical Rays 9 and 10.
From the Adventures of Bramble Tickletoes III & Company
After a struggle with the glooms, Bramble set up his tiny hut in the hollow next to the large boulder. An early start had the group entering the maze before dawn. Their curiosity got the better of them as they were attacked by the water elemental guarding the glowing green glass and then fell into the pit traps trying to determine the source of the bright light.
The Beholder statue offered a unique challenge for the group. They decided to place all of their belongings in the bag of holding, including their armor and most of their clothes. Bramble, Lia, and Maoki left a few coppers as they passed the statue. Kayne, carrying the bag of holding left a few hundred gold as payment which, unfortunately, was not enough and was targeted by an eye ray.

Map 4.19
Map 4.20
Overgrown Courtyard
This underground courtyard is filled with scribe mites, the tiny motes of faintly glowing orange light.
Encounter
Intermixed within the multitude or normal pumpkins are roughly a dozen evil, alive versions. As the characters attempt to cross the courtyard, they are attacked by 5 pumpkin abominations (Appendix B), 7 haunted pumpkins (Appendix B), and 1 Pumpkin King (Appendix B). Use Map 4.21 for the encounter battle map.
Aftermath
The large adamantine set of double doors on the opposite side of the courtyard is locked. A successful DC 22 Thieves' Tools check is required to unlock the doors.
Dwarven Vault
With a successful DC 12 Perception check, characters will notice the dust is not uniform, as if it were disturbed at some point in the past.
See Map 4.22 for the complete layout of the vault.
Encounter
The dwarven statue in the hallway intersection is a stone golem (MM p.170). It will animate and seek out intruders if a lock is picked unsuccessfully.
Left Door
The room looks like it used to be a small kitchen and eating area. There's a dust covered table in here with a few chairs around it, one of which is knocked over. There is nothing of value in this room.
Right Door
There is a desk along the back wall and an old bookcase along the side. Spiderwebs cover the mostly empty shelves. There are a few pages on the desk that have yellowed with age. If they take a look at the pages, there isn't much there other than a short ledger of food and supplies. There is also a small stand-alone iron safe in the corner. Its closed and locked.


Map 4.21
Treasure
The safe requires a successful DC 20 Thieves' Tools check to unlock. Inside is 150 gp and a gold key.
Right Hallway
Treasure
The skeleton appears to have been human. His clothes are tattered with age and if searched, a character will find a set of thieves' tools. Both of the remaining safes can be unlocked with a successful DC 20 Thieves' Tools check and each contain 200 gp.
Left Hallway
There is another stone dwarven statue stands in what appears to be the top corner of a large room at the end of the left hallway. Benches line the wall in here and another short hallway leads to a smaller room. This room contains a large L shaped desk in the middle. In the back corner sits a large iron safe.
Encounter
The dwarven statue is another stone golem (MM p.170) that will attack if any locks are unsuccessfully picked in this area.
Treasure
Sitting on the desk are two sets of ledgers. The first has a list of coins and other prized items with a list of entry and exit dates. The other ledger is blank. If a character casts detect magic, the blank ledger glows with illusion magic.
The safe in the back corner can be unlocked with a successful DC 20 Thieves' Tools check. Inside the safe is 40 pp and a platinum key.
Main Vault
The path curves in either direction forming a large circle. Walking around to the backside reveals another dwarven statue standing resolutely on its plinth facing a giant set of vault doors.
Trap
The floor has a set of pressure plates that are triggered when a character moves to inspect the doors. If a character searches for traps, a successful DC 20 Investigation check will notice the pressure plates. Attempting to disarm the trap requires a successful DC 18 Thieves' Tools check. If triggered, darts shoot out of the walls and any character in the area must make a DC 15 Dexterity saving throw taking 2d8 piercing damage on a failure or half as much on a success. The trap resets every two rounds and will fire again
Encounter
The dwarven statue is another stone golem (MM p.170) that will attack the group if a character unsuccessfully picks the lock or fails to disarm the dart trap.
Treasure
The main vault door requires a successful DC 22 Thieves' Tools check to unlock. Inside the iron vault are two finely carved wooden boxes and a purple velvet bag. One box contains 400 pp while the other holds 500 gp. The purple velvet bag holds 2 Cantrip Candles (Appendix A). In a corner, perched on top of a metal shelf, are 3 bottles of Wavering Wonder Ink (Appendix A).
Aftermath
There is a hidden entrance to the secret vault. This is where the gold and platinum keys will be used. If characters search for a location to use these two keys, a successful DC 25 Investigation check will locate a thin seam in the stonework near the main vault. The stone slides behind the wall to reveal an adamantine vault door with an extremely complicated lock with a spot for three keys (one went missing decades ago).
Secret Vault
The vault door has an extremely complicated lock. The door requires a successful DC 30 Thieves' Tools check to unlock. If the characters found the gold and platinum keys, each key can lower the DC required to unlock the door by 5.
Treasure
The coin is placed into chests located on the bottom shelves and there are five nicely carved small boxes placed across the other shelves. Each box is locked and requires a successful DC 15 Thieves' Tools check to unlock. There is a total of 500 pp and 1000 gp in the chests.
There is a single stone inside each box. Each of the five are unique and are engraved with glowing runes. These are dwarven power runes and which five are in the boxes is up to the DM. See Appendix A for a complete list of rune options.
Conclusion
At the end of this story arc, after clearing the dwarven vault, the characters should reach 8th level.

Map 4.22
5
Chapter 5: The Verdant War
Over the past year, the towns throughout the Mornset Countryside have experienced more frequent raids by goblin and hobgoblin forces of the Iron Authority. Byroden has sent messengers to Emon in the hopes of receiving military aid from the Republic of Tal'Dorei. Additionally, Byroden has begun to build a stone palisade around the town. As these towns throughout the Mornset Countryside fight off more and more raids, people are fleeing north to escape the violence. Syngorn is fairly xenophobic and tends to send refugees north to the nearest city, Kymal where a shanty town has sprung up along the north side of Kymal.
In recent months, the goblin and hobgoblin raids have extended northward beyond the Mornset Countryside into the Verdant Expanse. The half-elven towns along the shore of Vues'dal Waters have seen an increase in attacks. The Verdant Guard are struggling to repel these raids and these towns are beginning to suffer from the violence and fear. With rumors of large numbers of hobgoblins marching north through the Rifenmist Jungle, Syngorn has beseeched the Council of Tal'Dorei for military aid and preparations have begun between the two with regard to mounting a full-scale military defense.
Warmaster Mikael Daxio and the four regiments of the Tal'Dorei army set out from Fort Daxio marching south. The four regiments are Dusk, Gale, Aegis, and Tide; they are commanded respectively by Generals Fei Yujian, Jillian Sylph, Elle Gorgofon, and Kay Clearsight. Mikael Daxio directs the regiment south to meet Verdant Lord Celindar and the Verdant Guard to establish their front line through the Mornset Countryside.
The Iron Authority's army is the Khad Dirukh and is primarily composed of goblins and hobgoblins. The leader of the Khad Dirukh is a spirit naga named Maledicta who is a follower of the Cloaked Serpent and has an incredibly strategic mind for warfare. She was an advisor to Iron Emperor Tz'Jarr before convincing him to let her lead the war effort. Maledicta secretly wishes to sew chaos and destruction throughout the southern reaches of Tal'Dorei to distract from other Cloaked Serpent cultists working out of Serpent's Head to create a planar incursion with the Elemental Plane of Fire near Kymal.
War Timeline
The Verdant War, as it will come to be known, lasts roughly six months. The dates below are used as an example to outline the general timeline of the war. The dates can be adjusted by the DM to fit the time frame for your campaign.
25th of Quen'pillar. The four regiments of the Tal'Dorei army march forth from Fort Daxio heading towards the Mornset Countryside. The Council of Tal'Dorei allocated a few battalions to head east to the cities of Drynna and Stilben to fortify the cities and protect against an increase in coastal goblin attacks. The Khad Dirukh have been sending strike forces to attack these cities in an attempt to spread thin the forces of Tal'Dorei.
29th of Cuersaar. Warmaster Mikael Daxio and the Tal'Dorei army arrive at the northern edge of the Mornset Countryside and combine with the Verdant Guard and Verdant Lord Celindar to form the Forces of Gwessar. The Khad Dirukh army is continuing its march north through the Rifenmist Jungle.
1st of Duscar. The Forces of Gwessar mobilize and begin forming their front line across the middle of the Mornset Countryside, a few miles south of Hayfield and Baygrove. As they finalize their positions and dig in, Gwessar leadership reach an agreement with the Orroyen Tribes to receive some aid in protecting their far-right flank within the confines of the Rifenmist Jungle.
4th of Duscar. The Khad Dirukh army attacks the Forces of Gwessar at dawn. A smaller group of hobgoblin warriors were sent out a week ago to travel along the eastern side of the Stormpoint Mountains and flank in behind the Forces of Gwessar to pincer their army. Warmaster Daxio and Verdant Lord Celindar underestimate the strategic approach the Khad Dirukh army would take during the invasion and prepared for a frontal assault. They did not anticipate being outflanked by a hobgoblin battalion.
The Forces of Gwessar decide to fall back into the Verdant Expanse. When word of the retreat reaches Syngorn, the city decides the best way to protect itself from a possible invasion is to plane shift the entire city to the Feywild.
Soldiers on either side create nicknames for their enemies. The Khad Dirukh become known as the Iron Savages while the Forces of Gwessar become known as the Scum Swarm.
The initial war front can be seen below. The Forces of Gwessar are represented in blue, the Khad Dirukh are green, and the Orroyen Tribes are yellow.

4th - 12th of Duscar. Verdant Lord Celindar recommends the Forces of Gwessar retreat back to the north side of the Feshun River which cuts through the Verdant Expanse from Saewic to the Feshun Narrows. As the army retreats, the Orroyen Tribes vanish back into the Rifenmist Jungle. As the army retreats, the denizens of the towns throughout the Mornset Countryside are forced to flee or stay and be killed or enslaved.
Verdant Lord Celindar and Warmaster Mikael Daxio set up their war room in a large cave built into Orencleft Mountain. This aids their strategic approach because Lord Celindar has a seeing crystal that he can use to view all of the Verdant Expanse. From this vantage point, they can command their forces like chess masters, always one step ahead of the Iron Savages.
During the retreat, a small battalion gets cut off from the rest are pinned against the southern shore of Vues'dal Waters. They have barricaded themselves inside the small Green Scar Outpost and trying to survive until reinforcements can come to rescue them. The retreat takes a number of days for the entire army to dig in along the north side of the Feshun River.
1st of Horisal. As the new year begins, the Forces of Gwessar have pushed the Iron Savages back in places. Where the Feshun River bubbles northward, the Khad Dirukh have been pushed back to form a straighter front line. There are reports of a strong evil entity that is commanding the Iron Savages. This would explain why their forces have been far more strategic than anticipated.
5th of Dualahei. The war ends. It officially ends when high ranking leaders of the Khad Dirukh are captured. The rest of the hobgoblin army retreats and flees back into the Rifenmist Jungle. The towns within the Mornset Countryside have been wrecked. In the months after the war ends, these towns are looking to hire workers and tradesman to help rebuild. Additionally, the Council of Tal'Dorei decides to build strategic outposts throughout the Mornset Countryside to keep a distant eye on the Iron Authority. It will take months, years even, before these towns are built back better than their former glory.


The Siege of Green Scar Outpost
As the characters wind their way down the western side of the Stormpoint Mountains, large trails of black smoke can still be seen far off to the southwest - in the direction of the Mornset Countryside.
Looking out in the distance, the characters can see light glinting off the waves of the Vues'dal Waters from a dozen or so large bonfires. The small furls of smoke from the fires are out along the far southern edge of the lake, roughly 120 miles from the base of the mountains. Reaching the base of the mountains puts the group about 30 miles from the eastern edge of the lake.
The small village of Falcon's Hollow is about 40 miles north of the characters when they reach the base of the mountain range, along the eastern edge of the lake. The foothills of the Stormpoints extend out slowly giving way to the southern edge of the Verdant Expanse to the southwest and marshy scrub land towards the lake.
Exploring the Siege Fires
During the second day of travel through the forest, clouds roll in and the day grows dreary. As the day goes by, the temperature slowly drops, and fog begins to roll in through the trees. As night approaches, the light fades quickly underneath the trees.
As the characters hike through the trees, a successful DC 15 Perception check will notice an orange glow ahead. Additionally, the characters will hear the occasional yell in goblin. There are dozens of fires that encircle the small Green Scar Outpost. Each fire has a troop of goblinoid forces around it enforcing the siege.
Encounter
The group of goblinoid forces around each fire contain a hobgoblin captain (MM p.186), 5 hobgoblins (MM p.186), and 10 goblins (MM p.166). Use Map 5.1 for the encounter battle map.
Development
There are far too many goblins and hobgoblins creating this siege line. This encounter was only around one of the many dozens of fires. This encounter is designed to demonstrate to the characters that there are far too many enemies to take on alone. The quickest way to bring this information back to the Verdant Guard is to head towards Falcon's Hollow.

Map 5.1
Return to Falcon's Hollow
Falcon's Hollow is the closest bastion of civilization from Green Scar Outpost. It is located east from the outpost, roughly 110 miles around the shore of Vues'dal Waters. As the characters travel, read the following:
As the characters travel, a successful DC 16 Perception check will allow them to notice a number of tracks through the mud and grass of the marshland. It appears that a few dozen individuals have traveled through this area. With a successful DC 13 Survival check, the characters will be able to follow the tracks for a few miles until they see a fire in the distance.
Ahead, is a small collection of tents setup in a clearing. As the characters approach, they will notice a number of goblins and hobgoblins keeping watch.
Encounter
This camp is keeping watch on Falcon's Hollow. There is one hobgoblin captain (MM p.186), a hobgoblin Iron Shadow (VGtM p.162), 10 hobgoblins (MM p.186), and 20 goblins (MM p.166). Use Map 5.2 for the encounter battle map.
Arrival in Falcon's Hollow
There is a fortified outpost set about 3 miles south of Falcon's Hollow. A stone wall serves as a fortified barrier at the top of a cliff. A small path winds its way down the side of the cliff. The goblin encampment was set about 1000 yards from the foot of the cliff.
The number of soldiers stationed in Falcon's Hollow has increased, over 150 soldiers are now garrisoned here. Captain Sanea is the elven captain in charge.
As you walk along the path, it zig zags up the cliff. A wooden bridge crosses over a small river that falls over the cliff side and flows past where the goblins were camped in the direction of the lake.
An elven woman walks forward as you are escorted around the wooden barricades that block the top of the path. She has tangled brown hair and light hazel eyes. She wears modest garments and carries a long knife. There is a black cat that seems to follow in her footsteps.
Information Available
Captain Sanea and the elven forces here are tasked with protecting the eastern edge of the Vues'dal Waters and guarding the army's eastern flank. She doesn't have any jobs for the party but recommends that they head to Saewic if they are looking for mercenary work.
The characters can talk with various soldiers or the captain to learn what has happened with the war so far. All captains would have a general idea of what has happened, though higher officers would have the most accurate information.
From the Adventures of Bramble Tickletoes III & Company
After the party investigated the circle of fires, Maoki used his Cloak of the Bat to fly past the siege line to see what was happening beyond. Meanwhile, Bramble, Lia, and Kayne had to retreat as more goblins arrived to search for the intruders. It takes quite a while for Maoki to find them again and required the group sending him a paper bird with their location.
On their return trip to Falcon's Hollow they notice the goblins' trail, snuck closer, and hid in the bushes to ambush them. When Lia is overwhelmed and nearly dies during the battle, Maoki decides to use the cursed Artifact of Chance. Unfortunately, the curse causes Maoki to drop dead an hour after the battle. In their rush to find a cleric, the group tries to beat a stable hand and steal a horse unsuccessfully. Instead, they have to travel on foot to the war camp north of Saewic and meet with Rineata, a half-elf war cleric.
In exchange for the raise dead spell Rineata performed on Maoki, General Jillian Sylph requires the party to assist the war effort on two missions.

Map 5.2
Green Scar Rescue
Five days ago, a company of nearly 200 soldiers was cut off from the rest of the Gwessar army by a force of hobgoblins and goblins. There are three ships ready to sail from the Saewic harbor immediately. General Jillian Sylph, commander of the Gale Regiment stationed just north of Saewic is looking for a powerful strike team to hold off any attacking goblins giving time for the trapped soldiers to board the ships. The rescue group will be leaving at dawn tomorrow. The characters must report to the Saewic docks before dawn.
Water Elementals Attack
The ships sail across the water at 2 mph, and it will take roughly 18 hours to sail across the lake. The Vues'dal Waters is home to a number of creatures including various water elementals. Occasionally, elementals will attack ships sailing across the lake.
Encounter
The three ships sail across the water side by side with the party on the middle ship. Halfway through the journey, 3 elder water elementals (CC p.248) attack the ships. Use Map 5.3 for the encounter battle map.
Ballista. The ballistae on the ship are manned by soldiers. They have a +7 to hit and deal 3d8 piercing damage on a hit. It is an action to aim and fire the ballista and a bonus action to reload.
Defending the Green Scar Retreat
Around midnight, the ships quietly slip into the Green Scar harbor. The characters are tasked with staking out the center of the outpost and protecting the wounded soldiers from possible attacking goblinoid forces as they are loading onto the boats. Some soldiers will be standing guard with the characters while others will be guarding both sides of the harbor along the shoreline.
Encounter
While guarding the center of the outpost, a force of goblins and hobgoblins come rushing over the makeshift barriers on the outskirts of the outpost towards the characters. In the initial raiding party there are 12 goblins (MM p.166), 6 hobgoblin scouts (MME p.154), and 3 hobgoblin dreadmaster (MME p.154).
When the time comes for the characters to begin retreating back to the ships, more goblins, hobgoblin scouts, and hobgoblin dreadmasters appear, racing towards the shoreline. Use Map 5.4 for the encounter battle map.
Development
It will take 15 minutes to fully load all the soldiers onto the ships. During the last five minutes, the characters will begin falling back towards the docks while holding off attacking goblins until everyone has boarded. The other groups of soldiers are fending off additional raids of goblins and hobgoblins coming in from the shoreline.

Map 5.3
Map 5.4
Defending the Boats
As the characters get back onto the boats, the ships set sail. The boats move 20 feet at the start of each round. The characters and unwounded soldiers must fend off the incoming goblins and hobgoblins as they shoot at the ships. Many of the wounded soldiers are still in the process of making their way down into the holds of the ships and are in danger of being hit by stray arrows. There are about 20 soldiers on each of the other boats that are manning the ballista and firing arrows at the incoming goblinoid horde.
Encounter
As the ships begin to leave the docks, dozens of goblins and hobgoblin scouts sprint towards the docks to try to prevent their escape. Use Map 5.5 for the encounter battle map.
Explosive Barrels
There are four soldiers on each ship that are igniting fire arrows and attempting to target small barrels placed at the base of each dock. The barrels have an AC of 18. Upon impact, the barrels will explode and any creature within 10 feet of the barrel will need to make a DC 15 Dexterity saving throw taking 4d10 fire damage on a failed save, or half as much on a success.
In retaliation, the goblins will begin shooting flaming arrows back at the boats. Each arrow impacting the deck will have a 20% chance of starting a fire. If the ship catches fire, it will take an action to put out the flames. If the fire persists, each round will require an additional action to put out.
Aftermath
After escaping out into the lake, as the ships move throughout the night, snow begins to fall from the sky as the blackness of the lake utterly envelops the boats. After the snow begins, large lanterns are lit at the front of each boat as a signal to the others of their location.
The trip back will take approximately 18 hours and the boats will arrive at Saewic's port in the late afternoon.
Return to Saewic
Captain Masym is standing at the front of the welcoming party. As the boats begin to unload, Masym greets the soldiers and as the party disembarks, he pulls the party aside to thank them. He directs the group to return to the main war camp two miles north of town to touch base with General Sylph for additional missions.

Map 5.5
The Black Wolves Return
As the characters are walking back towards the army's main camp, after clearing one of the many check points along the path, read the following:
The Black Wolves left Kymal after the Night of Ascension, The Matron of Raven's Holy Day on the 13th of Cuersaar. As news of the nearly hundred deaths at the Cassalanters' Villa spread throughout Kymal, they decided to leave town. They had worked for the Cassalanters in the past on some artifact acquisitions for fear of being associated with this massacre.
Roleplaying the Black Wolves
The Black Wolves hold no ill will towards the group. They see the previous interaction with the characters as business and view the group with indifference. The Black Wolves represent a rival mercenary group for the characters, and they level in conjunction with the characters and are currently Tier 3 NPCs.
Information
Having left the city of Kymal more recently than the group, they can provide information about the massacre and some political happenings. The Cassalanters held a large dinner party at their home and invited nearly a hundred Kymal nobles and city officials. The Margrave was in attendance, and everyone who attended the party was killed.
The next morning, the Cassalanters fled the city and haven't been seen by anyone in Kymal since. The Majordomo, Prudence, the Margrave's assistant took control of the government upon his passing. The city is largely in chaos at the moment. The Black Wolves have heard rumors in some circles that Prudence is working with the Myriad. They decided to leave Kymal to avoid the chaos and came here as mercenaries to offer their skills to the military and make some significant coin.
Encounter
The Black Wolves have no interest in fighting the group, however if the characters hold an understandable grudge for the kidnapping, they may initiate a fight. In the event of a battle, the Black Wolves' Tier 3 character stat blocks can be found in Appendix B.
There are a number of soldiers nearby who will get involved to try and break up the fighting. They will try to grapple both sides of the conflict equally. The soldiers are veterans (MM p.350).
Mountain Strike Force
The characters can return to the Saewic Regiment Camp for another mercenary assignment. The war camp is under the command of General Jillian Sylph, leader of the Gale Regiment. Upon reaching the camp, read the following:
Upon return to the Saewic war camp, you are led to a large canvas tent. The soldier leading you through the camp asks you to stop about 10 feet from the tent and approaches the two guards posted at the tent's entrance. You can hear him mention you all are here to meet with General Sylph. One of the guards step inside for a moment. When he returns, he says the general has asked you to wait here for a few minutes while she finishes up a meeting.
After about 10 minutes, half a dozen individuals in various military uniforms stride out of the tent and off in different directions. As they leave, one of the guards ushers you in to meet with the General. Entering the tent, glancing around at the interior shows a bed and nightstand in one corner with furs covering the mattress. In the middle of the tent is a large table that currently has a large map of the Verdant Expanse and surrounding area on it.
"Ah, welcome back. I heard that you were successful in retrieving our stranded soldiers in Green Scar. I appreciate your efforts to mitigate the slaughter it could have been. Now, let's discuss your next mission."
She gestures to the map, "Please gather round the map here." She points towards the pass through the mountains east of Falcon's Hollow. "We have received reports that there is a significant number of Iron Savages making their way up the eastern side of the Stormpoint Mountains attempting to come in behind our eastern flank. In talking with some of the other commanders, we've deemed it necessary to destroy the pass to minimize the number of Iron Savages attempting to use it. We would like you to head up to reinforce the soldiers stationed there. Additionally, we need you to bring with a number of barrels filled with an explosive powder developed for us in Whitestone. When you reach our Mountain Strike Force, please give the barrels to Captain Giles who will coordinate the destruction of the pass. Please help to reinforce the soldiers there until the pass is destroyed. Once destroyed, we shall view the mission completed. If you are interested in more work, the Gwessar Forces would welcome additional mercenary work."
"If you have no more questions, then you may take your leave. To pick up the barrels, please visit Lieutenant Audryn in the Quartermaster's tent and provide her this note. Good luck and may the gods smile upon us."
Visiting the Quartermaster
The quartermaster for the Gale Regiment is Lieutenant Audryn, a half-elf woman with short red hair. She is kind, but all business. When the characters arrive, she greets them:
"Hello there, how may I be of service to you?"
The characters will need to present the note given to them by General Jillian Sylph. The note details the mission and provides the authorization for Lieutenant Audryn to supply the group with the four barrels of black powder.
"Ah, okay. You'll be the ones transporting the barrels of black powder to Captain Giles. I will be right back." She returns a few moments later with four 3-foot-tall barrels. "I would highly recommend you keep these sealed, and I would avoid jostling them too much or have them anywhere near fire."
Travel to Mountain Pass
The Stormpoint Mountain pass guarded by Gwessar forces is about 90 miles southeast from Saewic. It will take the characters just over three days to travel there. The characters speed is slowed as snow begins to collect thicker and thicker on the mountainside as winter arrives.
Encounter
On the second day of travel, as the characters are pushing through a snowy valley in between mountain peaks, they are attacked by wild giants and must succeed on a DC 15 Perception check to avoid being surprised by the assault. Attacking the group are 2 wild giants (CC p.105), and a wild giant bearskin (CC p.105). Use Map 5.6 for the encounter battle map.
Destroying the Mountain Pass
Frostbite Platoon
Two dozen soldiers guard this mountain pass. Led by Captain Feldspar Giles, these soldiers have been stationed here for the past two weeks and have semi-affectionately named themselves the Frostbite Platoon. They have built fortifications from snow, ice, and rock.
Lieutenant Adrienne Orgash will meet the characters as they arrive and introduce them to her assistant, Kilyn. Once the characters arrive with the barrels of black powder, four soldiers will begin digging spots in the cliffside to place the explosives. The explosives will be placed roughly 100 feet beyond the fortifications. The remaining 16 soldiers are positioned to guard the pass.

Map 5.6
Encounter
As the soldiers are getting the barrels of explosives into place, the first wave of enemy soldiers attack. The first wave of Khad Dirukh soldiers is comprised of 4 Bugbear chiefs (MM p.33), 16 Bugbears (MM p.33), and 8 hobgoblin archers (VGtM p.210).
4th Round of Combat. At the start of the fourth round of combat, three dozen goblins (MM p.166) can be seen marching through the pass towards the soldiers.
6th Round of Combat. At the start of the sixth round of combat, the explosive barrels have been placed and are ready to be detonated using fire arrows. The barrels have an AC of 22. Their explosions create an avalanche of rock and snow that rain down burying the pass, making it completely impassable. Use Map 5.7 for the encounter battle map.
Conclusion
If interested, the characters can choose to return to the military and continue taking mercenary assignments. Otherwise, the characters are in the vicinity of Ruhn-Shak should they choose to explore the mysterious blade found earlier in the campaign.
At the end of this story arc, after assisting the military to blow up the Stormpoint Mountain pass, the characters should reach 9th level.


Map 5.7
6

Chapter 6: Ruhn-Shak
When or if the characters decide to move on from Verdant War mercenary work, they are in the vicinity of the Stormcrest Mountains and the mysterious hidden drow city of Ruhn-Shak. Earlier in the campaign, the characters stumbled upon a gleaming adamantine longsword with dark elvish runes engraved into both sides of the blade. When translated, the runes read "Whosoever draws this blade has the power to free Ruhn-Shak from madness."
Ruhn-Shak has devolved into madness. Neighbors slaughter one another in the streets as they succumb to paranoia. Legend says that a curse was put over the city and only someone of great strength and fortitude would be able to free it from the madness that consumes it
Story Overview
The search for Ruhn-Shak takes characters up into the storm-wracked peaks of the Stormcrest Mountains. These massive peaks buttressed against the Verdant Expanse are home to ferocious monstrosities and godless hordes of goblinoid butchers.
There are many tunnels dotted throughout the Stormcrest Mountains that lead down into the Underdark. After locating a metal arch built into a rocky cliffside, characters will have to travel underground and attempt to find the hidden city of Ruhn-Shak.
The tunnels carve deeper into the mountain and branch off in multiple directions. The characters trekking through the tunnels will need to rely on their survival skills to avoid getting lost. In addition, the tunnels are filled with dangerous beasts and treacherous traps that must be dealt with or avoided by the group as they find their way to Ruhn-Shak.
A ramshackle assortment of buildings has been built in a large cavern a few miles from Ruhn-Shak. The denizens of this tent city are drow that have chosen to leave the madness of Ruhn-Shak. This provides the party with opportunities to gather information about the madness before entering the city. A few years ago, a long-forgotten temple was uncovered underneath the city's great cathedral, Arach-Tinilith.
Entering Ruhn-Shak is quite the experience. Madness and crazy cults have taken over what is left of the city and there are a plethora of creepy experiences the characters will encounter as they traverse the city streets towards the Arach-Tinilith cathedral.
The catacombs beneath the cathedral hide the entrance to the uncovered ancient temple which has become the home of an abhorrent aberration. An aboleth arrived a few years ago and slowly began to infiltrate the minds of the drow that called Ruhn-Shak home, causing the madness. Currently, the aboleth is working with a few Shader-kai priestesses to open a portal to the Shadowfell. The Shader-kai are hoping to provide an escape for more of their people to break their bonds to the Raven Queen, unbeknownst to them the aboleth just wants more humanoids to enslave to its will.
The characters must investigate the catacombs and locate the entrance of the ancient temple. Will the characters be able to locate the aboleth's lair and stop the madness? Do they have the fortitude to avoid succumbing to its will and becoming enslaved?
Adventure Hook
The dark, gleaming sword found earlier in the campaign has dark elvish runes engraved into the blade. This sword can provide characters with a reason to seek out Ruhn-Shak in the hope of saving the city from madness.
Alternatively, as the characters travel near the Stormcrest Mountains a drow patrol attacks the group. During the attack, they hiss that the characters are strong and will make great slaves, at least until they succumb to the madness.


Path to Ruhn-Shak
The path to Ruhn-Shak from Vues'dal Waters takes characters up into the Stormcrest Mountains. It will take the party roughly five days to trek into the mountains and locate an entrance into the underground labyrinth of tunnels that lead down into the Underdark, to the city of Ruhn-Shak.
The following descriptions can be used to describe the various days of travel:
Day 1. After helping the Frostbite Platoon blow the mountain pass, you head out early the next morning following the valley west. As the day progresses, the valley widens as you crunch westward through the snow. The sun is shining and the snow throughout the valley sparkles in the crisp cold air. To fully leave the mountains, it will take almost two days. As the sun begins to sink lower and lower, as reds and oranges paint the sky, you find a somewhat secluded outcrop of rock to make camp.
Day 2. The day dawns cloudier. After having some breakfast, you begin another day crunching through the snow down out of the mountains. As the light begins to fade that afternoon, you make it out of the mountains and turn to start trudging north through the foothills. As it begins to grow dark, you find an area between a cluster of trees to set up camp.
Day 3. The third day of travel passes fairly uneventfully. You continue your trek northward through the western foothills of the Stormpoint Mountains. It's somewhat slow going trudging through the snow and weaving through trees. As the light begins to fade, you again locate a small clearing sheltered by overhanging pine boughs to make camp.
Day 4. The evenings rest passes uneventfully. As you are beginning to wake up, you hear the sounds of sniffing and scuffling. As you open your eyes, you see two extremely large owlbears prowling around the edges of your camp.
Encounter
Stalking around the characters' camp in the early morning are two large dire owlbears (MME p.221). They attack as soon as the group begins to wake. Use Map 6.1 for the encounter battle map.
Aftermath
After the encounter with the owlbears, the party begins their travel for the day. As the day progresses, snow begins to gently fall as the ground slowly rises more and more as the characters reach the Stormcrest Mountains. As evening falls, the characters must find a spot to make camp for the night.

Map 6.1
Drow Attack
Encounter
If the characters are keeping watch, their Perception check is compared against the drow Stealth checks. If the character fails to notice the drow sneaking towards the party, the drow will have a surprise round. This attack will break the group's long rest.
The drow hunting party is comprised of a Drow Arcane Guard (MME p.92), a Drow Dread Fang of Lolth (MME p.93), and 4 Drow Skirmishers (MME p.94). Use Map 6.2 for the encounter battle map.
Aftermath
If the group keeps one of the Drow alive to question, the hunter laughs at their questions and looks at them with disdain. He willing tells them how to find Ruhn-Shak because he says they will never make it. He proclaims the group looks strong and they'll make great slaves.
The entrance to the tunnel system that leads to Ruhn-Shak is roughly 30 miles north from here. The characters need to keep an eye out for old ruins in a small valley between mountain peaks. There is a small entrance carved into the nearby rock, it is a carved steel arch. Once inside the tunnel, tiny amethyst spiders are embedded into the walls at various intersections to mark the correct path to the city.
Treasure
Two of the drow hunters carry a Potion of Healing. Four of them carry finely made shortswords with carved spider handles and one used a spiked chain. The spiked chain has a reach of 10 feet and deals 2d4 piercing damage. Lastly, the drow carry a total of 250 gp amongst them.
From the Adventures of Bramble Tickletoes III & Company
One night, as the group is searching for Ruhn-Shak, Kayne is gifted with a dream by the Stormlord. The dream offers insight into the history of the conflict between the elves and drow. The vision ends with the appearance of a massive, pale green monstrosity emerging from an underground lake.
Visions of the Past
"Kayne, while you're sleeping, you dream you're walking through a dense fog. A sense of foreboding grips you as you slowly walk forward. Seconds stretch into minutes; you are not sure how long you've been walking when you begin to hear the sounds of a battle. The fog slowly dissipates in front of you, and you see movement ahead. As the fog clears, you find yourself in an underground chamber, partially submerged underwater. The color of everything around you seems to have faded to shades of gray and you see a number of elves, dressed in black and green armor fighting drow warriors."
With a successful DC 17 Religion check you recognize the black and green armor as the vestments of the Arch Heart.
"As the elven warriors fall, the scene dissolves. The surroundings reappear, but now you're in a different chamber. Some slight color has returned to your surroundings where a number of humans are fighting drow, but this time the drow are accompanied by other pale skinned elf-like creatures. The scene dissolves again."
With a successful DC 17 Perception check you can tell the warriors in this scene represent a variety of deities: the Arch Heart, Wildmother, Dawnfather, and Allhammer.
Surpassing a DC 24 Perception check will notice the eyes of the drow and shader-kai warriors are strangely blank.
"Over and over again the scene reforms, a dozen times. The color gets slightly more saturated each time, dissolving and reappearing in slightly different locations. The scene reappears back to the partially submerged chamber, the color now fully restored. A stronger sense of anxiety grips you as two men, dressed in silver and brown armor you recognize as followers of the Stormlord, appear fighting a number of drow and pale-skinned elves. The Stormlord's soldiers are doing well until you notice pale green tentacles emerging from the water. A large, pale green mass partially breaks the water, and you see three eyes emerge, in a line, before the tentacles grab the two warriors and you awake with a start."
"When you wake up, you get the feeling that while the Stormlord wasn't particularly invested before, things have now changed."
Map 6.2
Locating the Tunnel Entrance
From where the characters were attacked by the marauding drow, it takes a full day of travel to reach the ruins the drow spoke of. Climbing up and down mountain sides through the snow is exhausting. With a successful DC 15 Perception check, as the group crests over the top of a mountain peak, looking down into the valley below they can see a number of ruins dotting the valley floor, mostly covered with snow.
Once the characters have hiked down to the bottom of the valley, with a successful DC 17 Perception check they will notice a rock face that juts out from the mountainside at an angle along one side of the valley. A small crevice has formed between it and the mountainside. A glint of medal catches the eye as just inside the crevice is a metal archway embedded in the rock. There is a large amethyst spider embedded at the top of the archway. Spiderweb designs are carved down the sides of the arch.
These tunnels lead the party towards the underdark drow city of Ruhn-Shak.
Into the Underdark
The tunnels beneath the Stormcrest Mountains are a labyrinth. Twists and turns occur at random intervals and branching tunnels extend in every direction. Discreetly placed at many tunnel intersections are tiny amethyst crystal spiders that have been embedded in the walls to direct travelers in the know towards the city along the most direct route. After locating one of the tunnel entrances on the surface, the characters must traverse through this maze of tunnels to find the drow city of Ruhn-Shak.
It takes roughly four days to reach Ruhn-Shak from the tunnel entrance in the Stormcrest Mountains. As the characters begin their trek each day, they must make a DC 19 Survival check.
-
Success. The characters will locate multiple amethyst crystal spiders throughout the day's journey, thus keep them on the most direct path towards Ruhn-Shak.
-
Failure. The characters will not locate enough amethyst crystal spiders and will get lost. This may involve stumbling upon hazardous traps or dangerous monsters along the route.

Venturing Underground - Day 1
Success
Throughout the day, you come across a number of branches in the tunnel. Carefully checking the branches, you are able to find small amethyst spiders embedded in certain directions and choose to follow those paths. As the day progresses, clusters of moss and fungi dot the ceiling and walls. The air gets progressively more humid and little droplets of water can be seen glinting off stalactites.
Fail
The path winds downward in slow circles. You notice the rock of the tunnel wall beginning to glisten with moisture as you progress. Ahead, the tunnel appears to straighten out as it opens up into a grand cavern. As you near the cavern entrance, sprawling out in front of you is a large lake. Its crystalline waters extend into the inky blackness and large stalactites hang down from the ceiling. The occasional drop can be heard as water drips from them. To the right, along the stone shoreline of this underground lake is a large hemisphere, partially submerged at the water's edge. (See encounter below.)
Encounter
This large object is a young dragon turtle (MME p.81). The Dragon Turtle's tail is submerged underwater, and its head is currently inside its shell. If the group approaches without being stealthy, the creature will shift and awaken when they are 15 feet away.
Fungus Farm - Day 2
Success
Halfway through the day, passing tunnels here and there, doing your best to keep track of the amethyst spider markers, you come upon a large cavern. Large rows of fungi and moss run the length of the cavern. Some even give off a faint glow. Built out of the rock along the far side of the cavern is a small ramshackle cabin. If the party investigates the cabin, they can meet Elgos. (See Elgos' Farm to the right.)
Fail
Halfway through the day, passing tunnels branching off here and there, you begin to notice small patches of tangled, lacy moss clinging to the ceiling and walls. The vegetation slowly pulses with a faint yellow glow. Phosphorescent spores float gently from the vines hanging from the ceiling and gather on the tunnel floor. (See encounter to the right.)
Elgos' Farm
If the characters approach the cabin, a yell echoes out from inside the cabin:
Elgos is a middle-aged, male deep gnome with dark skin and green hair. He is a fungus and moss farmer who prefers his solitude and often travels to Ruhn-Shak to sell his produce. He can provide the group with the following information:
- About a year and a half ago, the city of Ruhn-Shak began to see extremely eccentric and odd behavior from its citizens.
- Over time it got worse and worse, and a significant amount of the population has abandoned the city for the time being. They've created semi-permanent tent cities in nearby caverns.
- Those that are left within the city are mostly the nobles, barricaded within their estates, or the destitute and insane.
Continuing along the path, the characters will stumble upon one of these tent cities in a day or two. There is a ramshackle inn that's been built, The Barking Spider, where they might be able to get more information. The owner is a friend of Elgos, a drow named Ferzo. If they mention Elgos' name, he will be more inclined to offer information.
Encounter
To avoid the hanging vines, characters must succeed on a DC 19 Acrobatics check. When agitated, the soft yellow glow of the moss flashes a brilliant, icy blue. 3 Cavelight Moss (ToB p.53) encompass this section of the tunnel and will attack if any character brushes up against one of its vines.

Underground Travel - Day 3
Success
As the passages twist and turn, a few small crystals of amethyst poke out from the walls and ceiling as you walk along. As the day progresses, the crystals slowly get larger.
Fail
Fog begins to suffuse the tunnel as it begins to slope downward. The fog makes it very difficult to see more than 20 feet away, light makes it even worse. The downward slope of the tunnel evens out after 150 feet of travel, but the passage is still filled with fog. Perched on the right wall, barely visible 20 feet ahead are hundreds of tiny spiders carved from different stones and gems. They do not move. (See trap below.)
Trap
This passageway is filled with an unholy vermin trap, a death trap of magically animated vermin carvings. The first set of vermin are spiders, and the rune on the floor, drawn in fresh blood, is dedicated to the Spider Queen. Every 20 feet down the passage is another group of carved spiders. The swarms of animated vermin cannot be destroyed with weapons or spells — only the runes powering them can be deactivated.
When a character enters the passage and moves adjacent to the first spider rune, the entire trap is triggered. When the trap is sprung, the four sets of carvings animate and attack.
On initiative count 20, the four different sets of runes fire purple bolts of energy. Each creature in the passage must make a DC 15 Constitution saving throw taking 1d10 necrotic damage per each set of runes passed on a failure or half as much on a success.
The runes that power the trap are visible on the floor, but characters must be within 20 feet of a rune to see it in the fog. The runes can be deactivated in a variety of ways, all requiring an action as described below:
- A successful DC 15 Arcana check allows a character within 20 feet of a rune to use knowledge of the arcane to deactivate a rune's power.
- A successful DC 15 Sleight of Hand check allows a character adjacent to a rune to subtly deface it, distorting its magic.
- A successful DC 20 Athletics check by a character adjacent to a rune lets them smash the rune enough to deactivate it.
- A dispel magic spell cast at 5th-level or higher can disable a rune.
Treasure
About 100 feet beyond the last rune, the passage dead ends at a shrine to the Spider Queen. A character that makes a successful DC 17 Investigation check will find a small vial placed beneath the shrine as an offering. It is a Bloody Marilith Potion (Appendix A).
Tent City - Day 4
Success
Throughout the day, as you walk through the tunnels, the pockets of amethyst crystals continue. Large crystals jut out from the walls, groups hang from the ceiling. It is rather beautiful walking through these crystal dotted tunnels. (See tent city section below.)
Fail
As you make your way through the tunnels, periodically, you begin to notice piles of rubble piled on the sides of the path. Interestingly, as you continue forth, it appears that the piles are symmetric. One on the right side, with one on the left side very close to almost nearly directly across from each other. (See encounter below.)
Encounter
All of a sudden, bursting out of the stone wall of the tunnel, is a giant Sathaq worm (ToB p.337). Sathaq worms are nightmarish predators from the Plane of Elemental Earth, with rugged brown hide embedded with stones. They devour stone and flesh with equal ease.
Tent City
As you near the end of another long day of trudging, you begin to hear the faint sounds of civilization start to echo through the tunnels. The occasional snippet of voice, impact of different materials, etc. As the tunnel turns ahead of you, it opens up into a large cavern illuminated by a soft purple light. Ramshackle homes are built throughout the cavern, some embedded in the walls, others free standing. A few hundred feet into the cavern is a larger building, a sign hanging from the front depicts a spider body with a dog's head.
The inside of the inn is comprised of a random assortment of unmatched furniture. A few tables dot the interior, mostly empty. A deep gnome and a drow are sitting in one corner deep in conversation. Behind the bar stands a drow cleaning out some cups as you walk in.
The bartender is Ferzo, the drow proprietor of The Barking Spider. He is the friend Elgos mentioned. If the characters are polite and choose to talk with Ferzo, he can provide them with information regarding the current state of Ruhn-Shak.
If the characters inquire about the temple, Ferzo will introduce the party to his friend Nullice, a female drow cleric of the Spider Queen.
Ferzo's Info
Ruhn-Shak is on the cusp of a "purge". Over a year ago strange things began to happen, there was a dramatic increase in murders, attacks, and people losing their minds.
After a few months of this, people began leaving the city and setting up temporary shelter in large caverns like this a few miles outside of the city. Last I heard, close to 80% of the city has emptied and there are four or five large caverns where most of us who left have made new homes.
The city is practically abandoned. Most of the denizens left are those that have either gone insane or are protecting their families and homes. In the case of the wealthy nobles, they have barricaded themselves inside their estates.
Most drow are not friendly towards humans and half-elfs. Right now, it shouldn't be too much of an issue, most have bigger problems than their dislike of humans and half-elfs. They may come across some though, so Ferzo still suggests they be careful.
Nullice's Info
"Sometime 500 years ago or so there was an attempt to merge the Shadowfell and the Material Plane. What we've been able to piece together from old records tells us this attempt was a collaboration between disenchanted Shadar-kai priests of the Raven Queen and frustrated dark elf priests of the Spider Queen. How much do you know of the Shadar-kai?"
Characters who succeed on a DC 22 History check will know that the shadar-kai are bound to the Raven Queen, cursed to forever serve her in the Shadowfell. They dwell in communities outside the Fortress of Memories in a pale imitation of the days when they dwelt in the life and light of their now-lost kingdom. (If the party doesn't succeed on the history check, Nullice will tell them the same information.)
"What we've learned is the shadar-kai feel enslaved by the Raven Queen; some dark elves feel the same about the Spider Queen. Some believe if they were to be able to merge the Shadowfell into the Material Plane the Raven Queen wouldn't be able to insert her influence on the shadar-kai any longer. Then they would be free to aid their dark elf cousins in earning their freedom. Now to be clear, this was hundreds of years ago. I don't believe any of our order feel that way now."
"About two years ago, an entrance to a long-buried temple was uncovered under the Arach-Tinilith, our great cathedral to the Spider Queen. Our head priestess, Alaundra, went down with some acolytes to investigate. Only Alaundra returned. But something had changed about her. She was different, changed somehow. She began excavating below the temple and became very secretive. That was when things began to devolve throughout the city, but its effects seem to only extend a few miles beyond the city and taper off as you travel further away. But for all of us, Ruhn-Shak is our home."
Ruhn-Shak
Population: approx. 16,670 (92% Dark Elf, 5% Deep Gnome,
3% Other)
Religions: Major - Spider Queen
Minor - Chained Oblivion
Government: Matriarchal theocracy worshiping the Queen of
Spiders
Commerce: Well-trained slaves, various fungi, exotic
creatures for food, poisons, potions, jewelry, etc.
If you find carved arches and steel gates in the mountain slopes, do not rest there, no matter the cold. There are no dwarf-halls among these forsaken peaks. Deep below the surface world, countless caverns and tunnels wind into regions where light finds no purchase.
It is here, beneath the Stormcrest Mountains, that the largest subterranean society of dark elves maintains its tyranny. Hidden entrances riddle not just the mountain range, but the Dreamseep, and darker regions of the Verdant Expanse, allowing hunting and raiding parties quick and easy access to the surface under cover of night, slaughtering many, enslaving the rest, and taking the spoils as gifts to the Spider Queen.
This twisted network of tunnels is easily collapsed and reopened through the use of "Pit Witches," dark elf druids who master the art of rock and dirt manipulation, making it near impossible to give chase. Syngorn is ever alert and seeking a way to find and destroy this center of dark elf society on Tal'Dorei, but the sly and cunning ways of Ruhn-Shak have yet to meet a match.
Ruhn-Shak is carved out and built within a great cavern the drow call Araurilcaurak, its vault soaring a thousand feet above the stone floor. Drow dwellings and strongholds are carved from massive stalagmites and stalactites, connected with delicate looking bridges of hardened spider silk, and lit with coldly glowing eldritch fires.
Ruhn-Shak General Features
Light: Most streets and building are lit by eldritch green, blue, and violet lights as bright as torches. Other areas are dark.
Stone Curse: The "stone curse" is an ancient enchantment woven by the ancient mages that carved the cavern to protect the city from cave-ins. Any character casting earthquake, move earth, or similar magic within the city triggers a reverse gravity spell (DC 18 Save) centered on the caster, which takes effect before the triggering spell is completed. The spell lasts for 1 minute and is accompanied by a peal of thunder that alerts everyone nearby. The caster of the triggering spell must make a successful DC 18 Constitution saving throw to maintain concentration or the spell fails.
Despair: Upon entering Ruhn-Shak, and after each long rest, players must draw one card from the deck of despair. After each long rest players can roll to rid themselves of their despair. See Appendix E for the full rules on Despair.
Ruhn-Shak Locations
The following areas are specific locations in Ruhn-Shak and can be found labeled on Map 6.3.
The Bazaar. This 750-foot-wide circle of bare bedrock is a crowded, untidy labyrinth of stalls.
The Braeryn. Also known as "the Stenchstreets", the Braeryn is a shantytown of ramshackle structures overlooking garbage-choked alleyways, inhabited by the dregs of drow society. Fallen priestesses, bankrupt merchants, escaped slaves, and the homeless or maimed are common here, as are visitors to the city who wish to go unnoticed. The population of the Stenchstreets has swelled in recent years with the madness getting stronger. Drow who have lost homes or businesses find what shelter they can, scratching out a meager existence among the roughest folk in Ruhn-Shak. It is a great place to find allies or meet an untimely end.
Donigarten. Donigarten is the name given a large lake and the surrounding farmland that dominates the eastern part of the cavern. Herds of rothe cattle graze the island at the center of the lake, whose northern and western shores hold broad stretches of slave-tended fungi fields that feed much of Ruhn-Shak. The dark, cold waters of the lake have a sinister reputation, dating back to when notable drow house leaders were cast into the lake. Many less important drow have been sent by rivals to the bottom of the lake as well.
Duthcloim. Known commonly as "Manyfolk", the area surrounding the Bazaar and bordered by the Clawrift to the east is home to Ruhn-Shak's merchants, tradesfolk, and crafters. Duthcloim features small inns, taprooms, and pleasure houses catering to locals, visitors and high-status drow seeking distraction.
Eastmyr. Eastmyr bridges the gap between prosperous Duthcloim and the down-and-out despair of the Braeryn. It is home to common merchants, tradesfolk, mercenaries, and crafters either making their way up the social ladder or trying to slow the downward descent of shifting fortunes.
Kyorbblivvin. Kyorbblivvin is a spider-haunted forest of giant mushrooms that spreads across the northern portion of the Qu'ellarz'orl plateau. Members of the great houses use Kyorbblivvin as a private hunting domain. Drow warriors patrol the forest, alert for poachers and intruders.
Narbondel. The most dominant feature within the city, Narbondel is a 1,000-foot-tall column of rock that helps support the cavern ceiling. At the same time each day, the city's Archmage magically heats Narbondel's base, causing the stone to glow. The light rose slowly up the column to mark the passage of time, taking 24 hours to reach the top. The madness caused the Archmage to leave Ruhn-Shak.
Narbondellyn. The estates of the various drow houses are clustered beneath the plateau of Qu'ellarz'orl in an area called Narbondellyn. The so-called "Broad Streets" district remains the bright center of Ruhn-Shak, as the lesser houses vie to outdo each other in shows of wealth, power, and influence. Soaring stalagmite towers and great manors rise across the area.
Qu'ellarz'orl. The high southern plateau of Ruhn-Shak is home to many of the oldest and greatest noble houses, with House Baenre situated at the plateau's highest point. Noble estates in Qu'ellarz'orl maintains their own militias.
The Rifts. Three large chasms score the floor of the cavern of Ruhn-Shak, the Clawrift, the Mistrift, and the Westrift. The Clawrift's uncharted depths have long been rumored to extend into the Abyss. A number of rope bridges extend across it. The Mistrift's long gorge at the city's center earned its name from the rolling clouds of steam that forever billow up from below. A number of subterranean streams flow out of the Mistrift's vertical walls, their icy waters cascading down into the darkened void below. Half a mile down, the runoff collects in an ancient aquifer, its waters superheated by an adjacent magma flow. Arcane watermills collect water from the falls, diverting it to an underground cistern that the drow can tap into. The Westrift is the newest of the city's large clefts, Westrift swallowed up three drow houses and a score of lesser dwellings when it opened its yawning maw three centuries ago. In more recent years, the rift has become home to hundreds of giant arachnids, which have filled much of the cleft with their webs and nests - to the extent that anyone falling into the rift has a 75% chance of being caught in a web, taking no damage from the fall but attracting hungry giant spiders.
Tier Breche. The Great Stair of Tier Breche rises from the floor of Ruhn-Shak to the cavern housing the three branches of the Academy. The Melee-Magthere is a pyramid-shaped edifice where drow warriors are trained. Arach-Tinilith is the spider-shaped cathedral where drow priestesses worship their demon goddess. Sorcere is the magnificent tower where drow mages learn to master the magical arts. The stone steps are some three hundred feet wide and rise nearly the same distance. A pair of giant jade spiders (Appendix B) flank the stairway at the top, ready to animate and attack non-drow that climb the steps. Non-drow are forbidden from entering this part of the city.
West Wall. The West Wall (also called "the Old Quarter") is a primarily residential neighborhood. The West Wall is a quiet district, as its residents like to keep their dark schemes and vile indulgences behind closed doors. Amid the twisted streets and quiet mansions of West Wall stand scores of stone monuments dedicated to important figures and moments in the city's history, as well as numerous statues and graven images of the Spider Queen. Beyond West Wall and Narbondellyn is a section called Lolth's Web. Its residents built their homes upward, crafting streets of magically calcified strands of spider silk from the cavern floor to the vaulted roof above. Hollow, cocoon-like dwellings are constructed both above and below the layers of webbing.
Ruhn-Shak

Map 6.3
Ruhn-Shak City Encounters
As the characters enter the area surrounding Ruhn-Shak, they begin to be affected by the madness that has taken hold within the city. When the characters get within a mile of the city, and after each long rest, characters must draw a card from the deck of despair See Appendix E for the full Despair Rules on how characters gain and remove despair.
As the group reaches the edge of the city, read or paraphrase the following:
Flayed Drow
Walking through the city, it is eerily quiet and very few people are out in the streets. Houses are boarded up. As you walk past a few buildings, a quiet sound catches your attention: giggling. Glancing into the next alley you notice a drow giggling, standing with a knife looking at something you can't quite see.
If the characters investigate, the drow is looking at a hanging form, another drow, that has been pinned to the side of the building. The giggling drow appears to be talking to itself in a language you don't understand. He is using the knife to peel the skin off the flesh of the hanging drow.
Encounter
If the characters interact with this drow, they will attack the group while laughing hysterically. The drow is a Drow Shadowblade (MToF p.187).
The One-Eyed Truth Seers
As you walk through the city, you notice someone with only a left eye. A little later, you see another person with just a left eye as well.
Three of the noble houses that remained in the city have begun a new cult, the One-Eyed Truth Seers. They have cut out their right eyes because "If you have 2 eyes, then one must be lying."
If the characters follow one of these drow with one eye back to a manor house, these nobles' homes are typically guarded by mind-wiped undead or zombie guards.
Encounter
These noble homes are guarded by an assortment of drow and undead. Some possible combinations are listed below:
- Drow Mage (MM p.129) and 6 zombie Drow Skirmishers (MME p.94)
- 12 undead Drow skirmishers (MME p.94)
- Drow Elite Warrior (MM p.128) and 8 Drow Skirmishers (MME p.94)
- Drow House Captain (MToF p.184) and 4 Drow Skirmishers (MME p.94)
Drow Temple Entrance
The stone steps are some three hundred feet wide and rise nearly the same distance. A pair of giant jade spiders flank the stairway at the top, ready to animate and attack non-drow that climb the steps.
Encounter
These two jade spiders (Appendix B) will attack any non-drow creature to reach the top of the cathedral steps.

Ruhn-Shak Cathedral
Ruhn-Shak's main cathedral, the Arach-Tinilith, stands as a massive temple with black marble walls and intricate purple stained-glass windows. The cathedral's entrance consists of two large jade doors with large carved amethyst spiders embedded into the walls on either side of the double doors. Typically, only drow citizens are allowed inside the cathedral. The interior is illuminated with faintly glowing purple torches.
Main Cathedral
The temple's main doors are locked and require a successful DC 20 Thieves' Tools check to unlock.
The small side chambers on the left and right sides of the cathedral host small tables designed as places of study. A few dusty tomes are laying around, most are religious texts concerning the Spider Queen.
At the far end of the temple, there are two small prayer rooms that are accessible via hallways to the left and right of the wide staircase located beyond the altar. Each has a small shrine to the Spider Queen along with a small table with a bowl for incense.
Additionally, the wide staircase past the altar leads up to a large set of black marble double doors. These doors are locked. A successful DC 18 Thieves' Tools check is required to unlock these doors. Alternatively, a successful DC 22 Athletics check can break the lock on the doors allowing them to swing open.
Encounter
As the characters move through the large cathedral space, 3 Shadow Elementals (Appendix B) will attack them as they explore. These creatures are invisible in the dim light. They can be seen with a daylight spell or divine sense. Use Map 6.4 for the encounter battle map.
Map 6.4
Last Rites Chamber
Once through the black marble doors, the chamber opens up into a small room with a pool of water with two drains. There is a stone bridge over the pool leading into a larger chamber. Ten pillars ring the center of the chamber with a large pit in the center. There is a black marble table near the back, just in front of a statue of a strong, religiously clothed female drow.
Encounter
The large pit in the center of this chamber has been used as a depository for bodily fluids as bodies are prepared for burial. At the bottom of is a Necrotic Slime (Appendix B) lying in wait for any creatures to approach close enough to attack. There are also 4 large humanoid skeletons (CC p.237) that climb up out of the pool of water when the slime attacks. Use Map 6.5 for the encounter battle map.
Treasure
Buried at the bottom of the pit, underneath the necrotic slime, is a Potion of Water Breathing. To find the potion, a character investigating the pit needs to succeed on a DC 18 Investigation check. Reaching into the slime causes the character to take 2d6 necrotic damage per round.
Puzzle Door
The door at the back of the chamber, to the right of the drow priestess statue, leads into the depths of the catacombs. This door is locked and has a puzzle to unlock.
Embedded in the door is a set of six thin disk-like hexagonal stones inset sideways into the door with the edges facing out. These stones are free to rotate, and each face of the hexagonal stone has a letter carved into it. See the table below for the order of the letters on each stone:
| Stone 1 | Stone 2 | Stone 3 | Stone 4 | Stone 5 | Stone 6 |
|---|---|---|---|---|---|
| B | E | O | V | A | N |
| S | R | I | N | L | R |
| P | P | S | Y | D | D |
| G | L | A | P | U | S |
| C | H | E | D | O | L |
| D | U | R | R | E | E |
The door unlocks when the correct combination of letters fulfilling the riddle requirement, (GRAVES), is facing out.
Trap
If the party selects the wrong combination of letters, a blast of elemental energy emanates from the door impacting any characters standing in front.
The type of damage is randomized, roll on the table below to determine the type of damage. Characters must make a DC 15 Dexterity Saving throw taking 1d10 damage of the type rolled on a failed save or half as much on a success.
| d10 | Damage Type |
|---|---|
| 1 | Fire |
| 2 | Cold |
| 3 | Lightning |
| 4 | Acid |
| 5 | Force |
| 6 | Radiant |
| 7 | Necrotic |
| 8 | Psychic |
| 9 | Thunder |
| 10 | Poison |
Once the door has been unlocked, it swings open of its own volition. Inside is a small landing before a stone staircase descends out of sight.

Map 6.5
Drow Catacombs
The spiral staircase descends down a few hundred feet. Reaching the bottom, the landing opens up into a small room lined with a few sarcophagi and has caved in partially in one corner. These catacombs look ancient with webs and dust in corners clearly showing these sarcophagi have been mostly undisturbed for ages. The walls are beginning to crumble in places.
Moving forward down the hallway, as you pass the first alcove, you notice three corpses piled together and dressed in the various religious garb of the Prime Deities.
All the drow and shader-kai located down here in the catacombs appear to be weirdly blank in expression. These creatures are being mind controlled by the aboleth that has made its home in the depths beneath the temple. During encounters, when they reach half health, there is a 33% chance they will wake up from the mind control.
See Map 6.6 for the complete layout of the catacombs.
C1. Prayer Space
This larger alcove has a prayer altar in the middle where drow priestess' come to pray. There are a number of drow and shader-kai stationed here to guard the catacombs.
Encounter
There are 2 Drow Elite Warriors (MM p.129) and 6 Drow (MM p.128). When they notice the party, they will attack.
C2. Catacomb Chamber A
This room is comprised of two rooms connected via a half staircase. The first room is empty. The second room has three plinths that are in various states of brokenness. The back part of the room is covered in rubble from an apparent cave-in.
C3. Catacomb Chamber B
A short thin hallway ascends a few steps into a rectangular chamber with four pillars. The door to the south opens into a small storage chamber that is mostly empty. A short set of stairs to the north climb up into a large chamber with roughly a dozen elaborately carved sarcophagi. The back half of the room is covered in rubble from an apparent cave-in.
Encounter
In here are 2 Drow Mages (MM p.129) and 8 Drow (MM p.128). When the party enter the chamber, the drow warriors attack.
C4. Catacomb Temple
This appears to be an underground temple. Two massive pillars support the ceiling in here, however, one has completely collapsed and is strewn across the floor. On the altar are two black marble sarcophagi elaborately engraved with spider web etchings and various runes. They appear to be for two high-priestesses from the founding of Ruhn-Shak.
There is a jade door in the north wall that appears to have been recently uncovered based on the piles of rubble and the rough-hewn rock around it.
Encounter
In this underground temple are 2 Shadow Dancers (MToF p.225) and 6 Shader-kai as reskinned drow stat blocks (MM p.128).
Trap
There is a small chest, partially covered by rubble, nestled into one of the corners of this chamber. The chest is locked and trapped. A character that makes a successful DC 15 Investigation check will notice the trap inside the lock. The trap requires a DC 15 Thieves' Tools check to disable. An unsuccessful attempt causes a plume of poison gas to burst from the lock. The character unlocking the chest must make a DC 13 Constitution saving throw taking 2d6 poison damage on a failed save or half as much on a success.
Treasure
Opening the chest requires a character to succeed on a DC 17 Thieves' Tools check to unlock it first. When the chest is opened, inside sits long rotted hay in which sits two small vials and a small sack of coin. The two vials are a Bloody Marilith Potion (Appendix A) and a Potion of Psychic Resistance. The bag of coin holds 400 gp with each coin emblazoned with an intricate spider imprint.

C1
C2
C3
C4
Map 6.6
Puzzle Chamber
The uncovered jade door leads into a small antechamber and subsequently into this large chamber. This chamber appears to be the resting place of an ancient high priestess. This chamber has six plinths that each have an imp statue crouching over a stone bowl placed on top. There is a large, elaborate tomb near the back that has been lined with lead and cannot be pierced by detect magic. There does not appear to be any other exits out of this chamber.
Treasure
Inside the tomb with the priestess are two magic items. Wrapped around the priestess' shoulders is a Cloak of Arachnida. Laying at her waist is a pristine rapier with a gleaming edge, which can be identified as the Bloodthirsty Bistoury (Appendix A).
Puzzle
Each of the six imp statues have been defaced in a unique way. There are eight stone orbs scattered along the ground in various alcoves. They all look identical save for one, which is a dark red. This puzzle is based on the five senses and a "sixth sense" which could be either divine sense or detect magic. The orbs will have unique properties that will point to which bowl they should be placed into. See Map 6.7 for a layout of the puzzle chamber.
- The first statue has had its eyes carved out.
- The second statue has had its tongue broken off.
- the third statue has had its ears chipped off.
- The fourth statue has had its nose broken off.
- The fifth statue has had its fingers cracked off.
- The sixth statue has scrapings carved into it all over.
Solution
The solution requires the party to inspect each orb and determine which bowl they belong to. Once all the stones are placed correctly the puzzle is "solved". When the last orb is placed into its corresponding bowl, there is a loud deep cracking sound as a concealed panel in the right wall slides down into the ground to reveal a passageway beyond.
Six of the orbs have different features as detailed below, while two are just normal stones. Try to give the characters clues about the orbs when they handle them in the correct manner. Perception or investigation checks can be used while looking at the stones to glean insight or clues.
The second and fourth stones are the normal ones. They are gray in color, taste like salt if licked, and make a hollow knocking sound when dropped. Additionally, they feel rough to the touch, and they smell faintly moldy. The other stones should be compared to these "normal" stones to aid in determining which bowl they should be placed into.
- The first stone, when licked, tastes like copper. (Bowl 2)
- The third stone makes a dull thud sound when striking the ground or impacting another hard surface. (Bowl 3)
- The fifth stone is obviously red in color. (Bowl 1)
- The sixth stone feels smooth when touched with an ungloved hand. (Bowl 5)
- The seventh stone has the slight scent of smoke that is only noticeable when held close to the nose. (Bowl 4)
- The eighth stone glows when divine sense or detect magic is used. (Bowl 6)

Map 6.7
Long Buried Temple
Once the puzzle has been solved and the hidden door opened, beyond it is a small stone landing with a stone staircase that descends, turns left, and continues out of sight.
The stairs continue down in a square spiral for a hundred feet or so. At the bottom is another landing with a large stone door that has three locks.
See Map 6.8 for the complete layout of the long-buried temple complex.
Trap
Only one of the three locks is the real one. The other two locks have poison traps inside that break if any character attempts to pick them. The poison fills the 10-foot landing with a purple poisonous fume. The locks are organized vertically and the bottom one is the correct one.
A character that makes a successful DC 20 Investigation check will be able to determine which lock is the correct one to open. If the poison is released, any characters on the landing must make a DC 15 Constitution saving throw taking 2d6 poison damage on a failed save and are poisoned for an hour or half as much damage on a success and are not poisoned.
T1. Ruined Foyer
Encounter
Guarding the entrance to the temple beyond are 12 Drow (MM p.128) warriors. Half of these are reskinned as shader-kai. Additionally, there are 2 Drow Elite Warriors (MM p.128).
Treasure
The two elite drow warriors each carry finely made shortswords with intricate spider web etchings and an amethyst pommel. The swords are not magical but are worth 100 gp each to the right buyer.
T2. Catacomb Hallway
Encounter
In four of the alcoves are the four skeletons from the previous room waiting to ambush anyone coming through. They've been woken up recently to guard the temple. The 4 Skeleton Champions (MME p.250) will attack the characters when they enter the hallway.
T3. Forgotten Temple
The door at the end of the sarcophagi filled hallway is locked. It requires a successful DC 18 Thieves' Tools check to unlock.
Encounter
The two drow priests in this temple are Drow Priestesses of Lolth (MM p.129) and appear to have blank expressions. They will attack the party when the door opens.
Treasure
A character who makes a successful DC 15 Investigation check while searching the priestesses' bodies will find they each have a Potion of Water Breathing.
Development
There are four stone carafes of water inside this temple. Inside one is the switch that opens the floor in the middle of the altar. A character searching the temple with a successful DC 23 Perception check will notice a few water droplets on the floor between one of the carafes and the central platform. The switch is located in the upper left vat and can be found with a successful DC 19 Investigation check.
T1
T2
T3

Map 6.8
Submerged Ritual Chamber
The stairwell underneath the altar leads down. The stairs continue straight down for a few hundred feet. As the characters move closer to the bottom, the sound of running water gets louder. If the characters wish to sneak down to the bottom without being noticed, it will require a successful group DC 20 Stealth check.
You can see a puddle of water at the foot of the stairs that is reflecting a slightly shifting blue light. As you look into the room, the floor of the chamber is cracked and tilted slightly. Water is pouring out of two carved fountains, overflowing their pools, and flooding the lower half of the room. In the center of the chamber is a raised stone platform, water lapping at the stairs along the far side. Atop the platform sits a tomb, open with a large glowing, slowly pulsing, blue stone resting in the middle of it. Wisps of blue energy swirl around the stone.
Standing behind it are two individuals. Nearest the stone is a drow priestess, dressed in a fine robe with an elaborate purple spider stitched across the front. Behind her stands another priest, a gray-white skinned shader-kai. The shader-kai priestess is holding a dagger to her throat.
As you take this all in, the shader-kai priest slashes the dagger, slitting the throat of the drow priestess, blood spraying across the blue stone. The stone glows brightly and begins to pulse faster as the priestess slumps over the side of the tomb and the priestess begins to chant.
Progression of the Ritual
The Ritual takes 10 rounds to complete. It began the moment the drow priestess' blood sprayed across the stone. Upon completion, the ritual opens a large portal to the Shadowfell where hundreds of shader-kai soldiers are waiting to come streaming through. The portal will remain open for an hour before the magical power fizzles out.
To end the ritual, the sword with the runic inscription on it must be plunged into the glowing stone with a significant amount of damage done in a single turn. A fighter would need to use all three attacks on it in a single turn. A paladin would need to channel divine smite into the attack to sufficiently damage the stone to end the ritual.
Encounter
The shader-kai priestess is a Soul Monger (MToF p.226). The aboleth (MM p.13) will appear in Round 2 on its turn. The aboleth's lair actions (MM p.14) will begin on initiative count 20 during Round 3. See Map 6.9 for the encounter battle map.
If anyone in the party is attuned to the Stone of Golorr, on their first turn after the aboleth appears, they must succeed on a DC 16 Wisdom saving throw or be unable to attack the aboleth. On a failed save, they must continue to make the save each turn until they succeed.
When the aboleth is near death, the characters will hear in their heads the voice of the aboleth say:
"Death matters not, it is but an inconvenience. I shall return. I've learned from these mistakes, next time there will be no stopping me. The gods are powerless behind their pitiful gate. I'll return to destroy their creations. You won't stop me again!"
Conclusion
After destroying the ritual, if the characters return to the tent city and talk with Nullice. After requesting some time to verify the destruction of the aboleth, she returns to the group with tokens of her appreciation.
The characters are given symbols of Ruhn-Shak and the Spider Queen priestesses they can use for safe entrance to Ruhn-Shak in the future. Additionally, she gifts the group with a legendary weapon, a bow that was taken from elvish forces in a past conflict. This bow is a Vestige of Divergence known as Arch Heart's Wrath.
At the conclusion of this story arc, as they leave Ruhn-Shak behind, the characters should reach 10th level.
From the Adventures of Bramble Tickletoes III & Company
On the way to Ruhn-Shak, the party met and befriended the mushroom farmer, Elgos, who pointed them to Ferzo at the Barking Spider. To better fit in, Bramble disguises himself as a deep gnome named Bramble Knucklestump and Lia disguises herself as a drow.
After talking with Ferzo and Nullice, the group made their way into the nearly abandoned city of Ruhn-Shak. They run straight to the cathedral, stealthing through the city and ignoring possible distractions. Bramble used his wind fan against the necrotic slime under the cathedral to great success but the puzzle door stumped the group for hours.
As they picked their way through the catacombs, Bramble used his bow which shouted, "I am Bramble, hear me roar!" when used which alerted the other groups of drow scattered throughout the catacombs to their presence. When they stumbled upon the temple puzzle, Bramble figured it out fairly quickly when he began licking the stones.
Ultimately, in the final fight, the rest of the party confronted the aboleth as Kayne killed the shader-kai priestess and then plunged his Ruhn-Shak blade into the titan seed with a 3rd-level divine smite. The divine lightning coursed down his arms, burning lichtenberg figures into the back of his hands as the electricity flowed through the sword into the stone, cracking both. The electricity spider-webbed through the stone causing it to explode into small shards, stopping the ritual.

Map 6.9
7
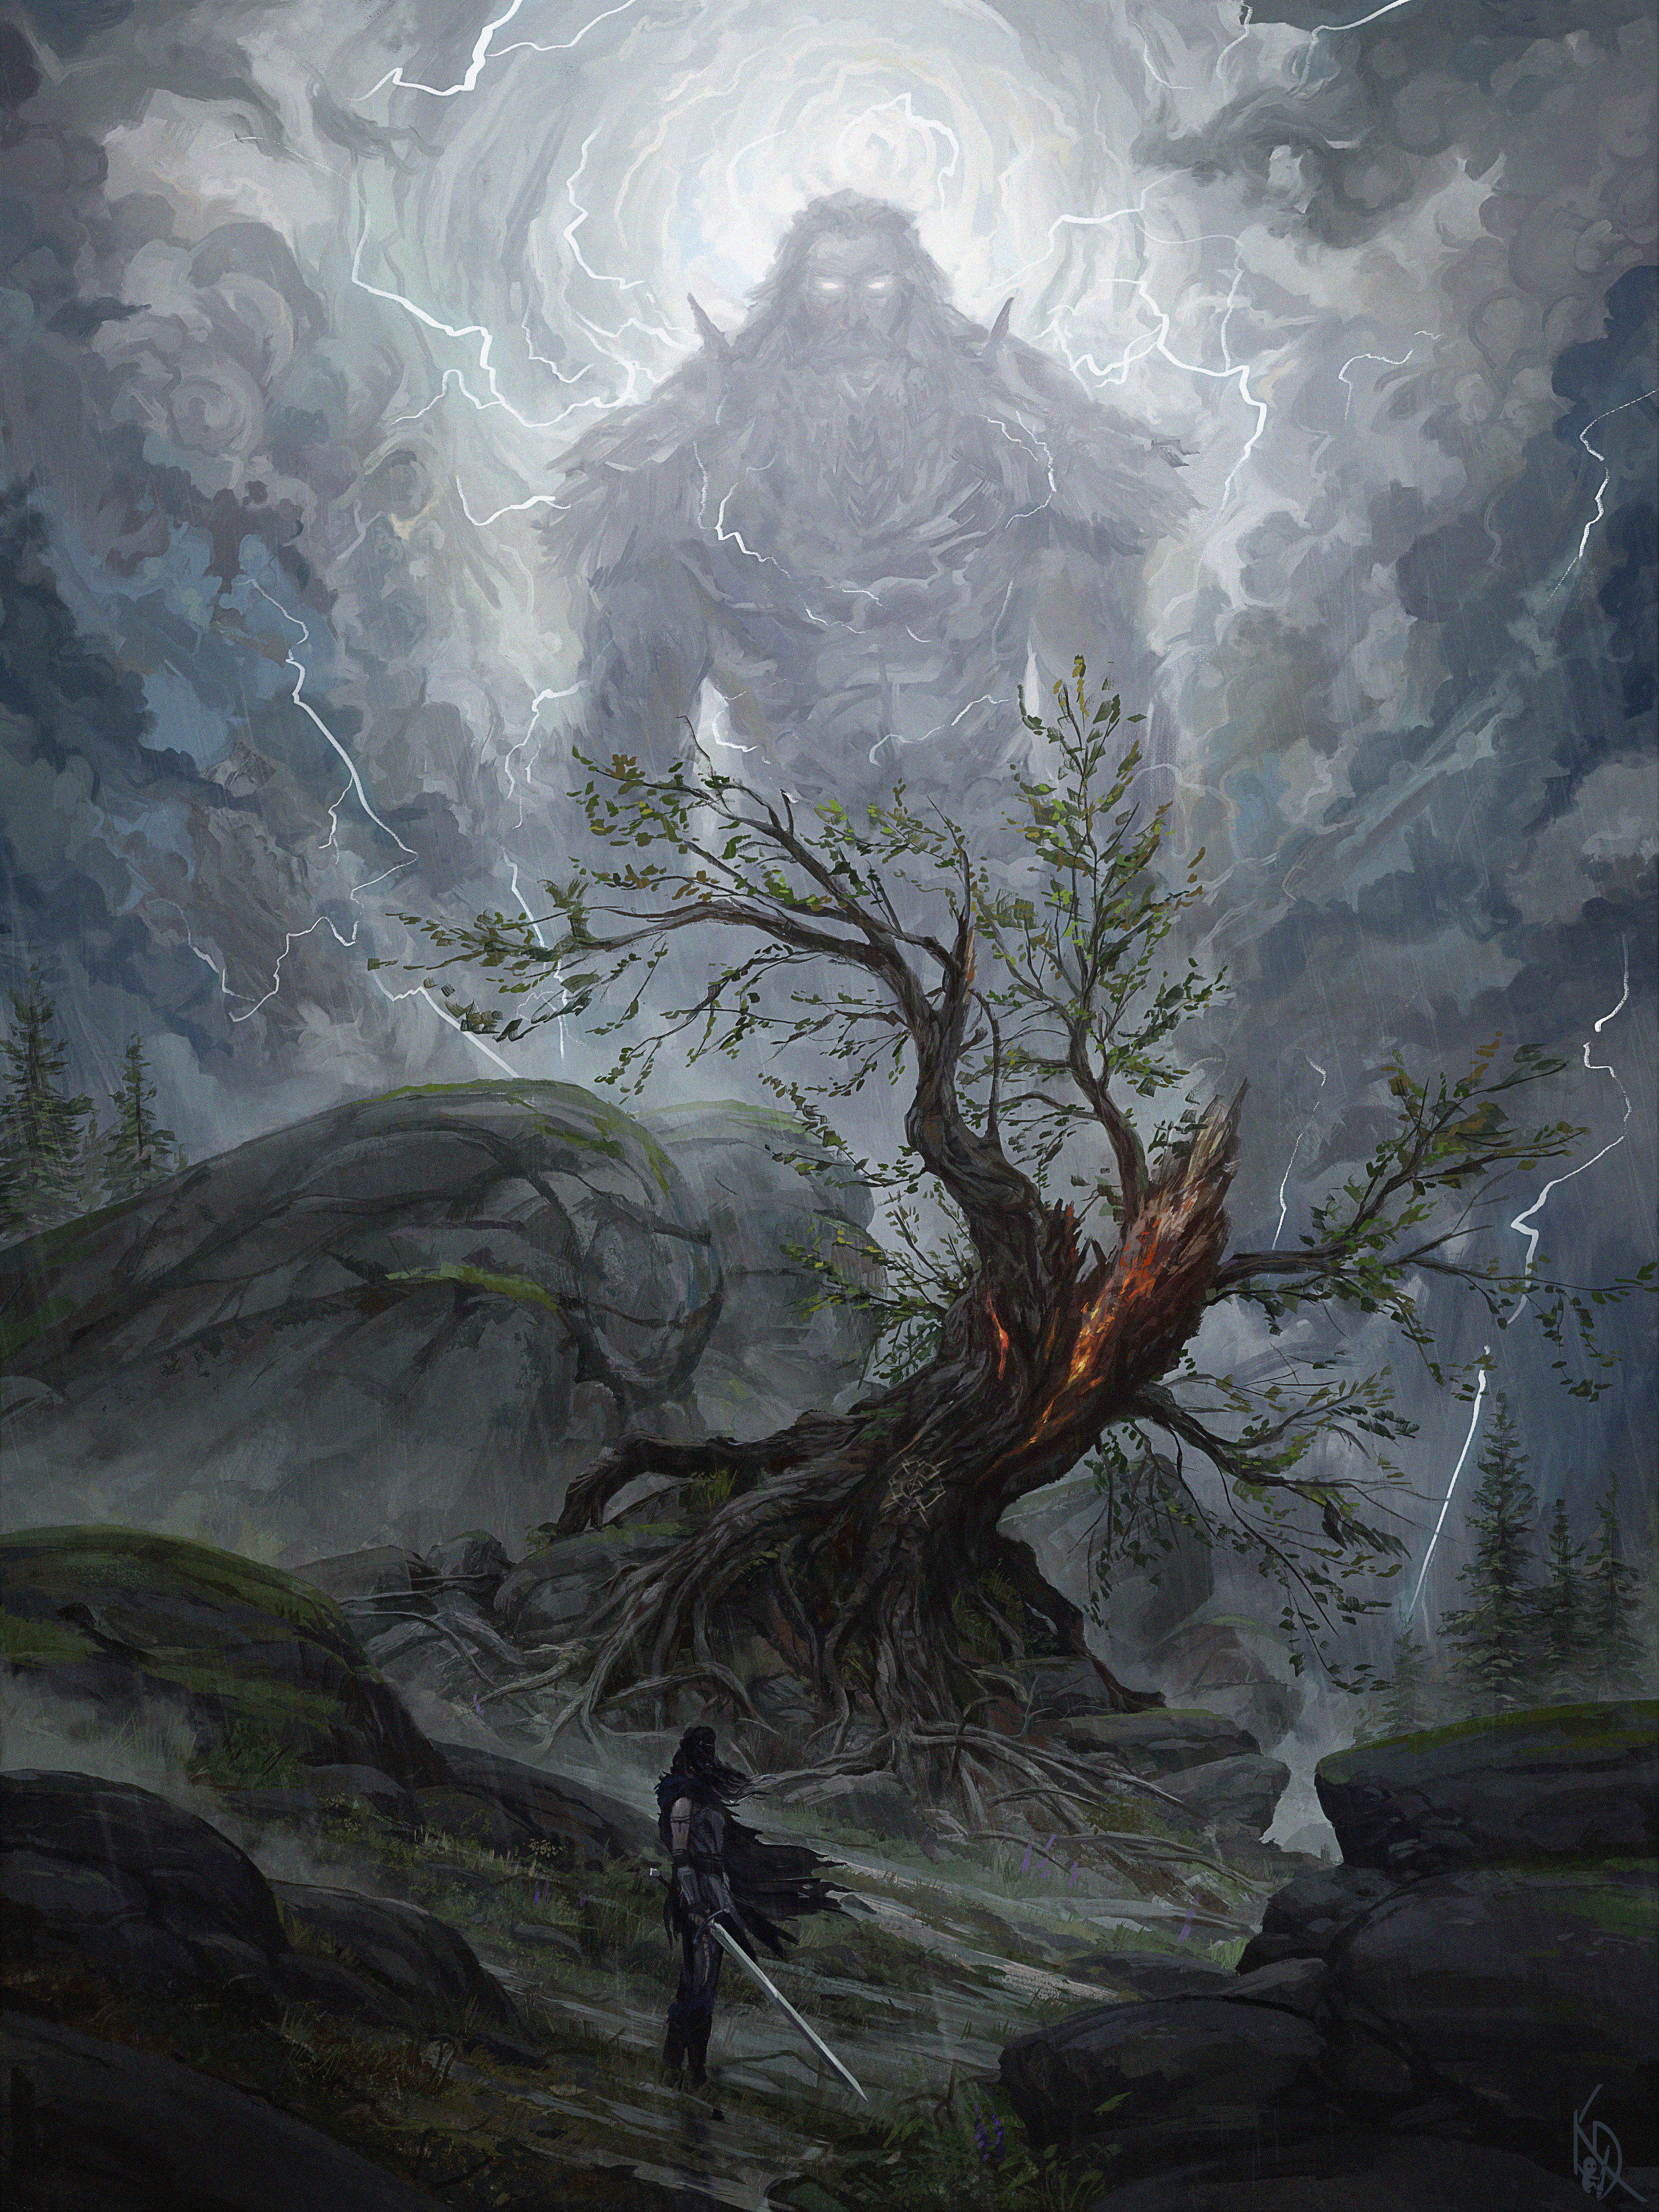
Chapter 7: The Stormlord's Quest
Quests from the gods are not unheard of in Exandria. The Prime Deities watch from beyond the Divine Gate and can occasionally lend what influence they can through the veil to aid their faithful in their goals and pursuits. This story arc represents a quest for a long-lost Vestige of Divergence, an artifact rumored to have been gifted by the Stormlord himself during the Calamity.
The Vestiges are legendary artifacts that grow in power with the experience, force of will, and strength of character of the bearer. Eventually, through extreme personal challenge, evolution, and achievement, the Vestige can reach its full potential in its exalted state. This is the true power of the Vestige, the state when it was originally utilized in the Calamity against battle-ready gods.
The specific vestige and its location can be altered to fit your campaign. Keep in mind, the Vestiges of Divergence are immensely powerful magical items, so consider the intended power level of your campaign before including them, and ensure their discovery and acquisition is treated with the proper amount of weight and responsibility. To be a bearer of a Vestige is to be considered a mighty champion.
Story Overview
The Blade of the Stormlord is a greatsword crafted from a single piece of jagged obsidian forged from lightning and encased in sea glass. The pommel is fashioned out of wood from a lightning struck oak tree.
The quest takes characters across the Ozmit Sea to the continent of Issylra. The characters must traverse across the wild untamed wilderness of Issylra in search of an ancient Stormlord temple somewhere high in the peaks of the Utesspire Mountains.
The characters must first travel to Emon where they can find travel across the Ozmit Sea to Issylra. A sailing ship to Shorecomb or an airship to Vasselheim can be chartered.
Once across the sea, the characters must traverse the wild countryside, relying on each other, their skills, and wits to keep themselves alive in the dangerous, untamed wilderness filled with a plethora of dangerous creatures. This journey tests the characters against one of the commandments of the Stormlord, which says "Bravery above all. There is no glory in cowardice."
Reaching the long-lost temple is not the end of the journey. "Strength is the path to greatness, but greatness is the responsible use of strength." The characters must make their way through the temple, facing the challenges that await. A final test will measure the characters strength and will before the vestige is presented.
After acquiring the Blade of the Stormlord, the group must traverse back through the wilderness of Issylra to ultimately return to Tal'Dorei. Do they have the strength and bravery to meet the challenge set forth by the Stormlord, to travel far afield in search of a legendary weapon?
Adventure Hook
A religious character may be visited in their dreams or granted a vision by their chosen deity. Below is an example of a dream granted to a paladin of the Stormlord.
As you sleep, your dreams transition through rolling clouds with flashes of lightning and peals of thunder until you are standing at the base of a vertical stone mountain peak. Storm clouds fill the sky above as an occasional roll of thunder fills the air. Looking around, a dense forest stands at the edge of the horizon, rocky steppe and shrub grass encompass the base of this mountain. Looking upwards, you see a set of rough-hewn steps climbing and disappearing behind a ragged outcrop of rock. You stand at the base of this mountain stair.
What do you do?
The climb is not easy, the steps have worn over centuries and chunks are missing in places. At times, the stairs climb almost vertically up the side of the mountain. You climb, and you climb, for what feels like hours. You're muscles strain with the effort. Finally, when you feel like you can go no further, you reach the top. Two imposing stone doors are built into the wall of the mountain. They are almost completely indistinguishable from the rest of the mountainside.
What do you do?
As you walk through the doors, the vision shifts forward, and you stand in a large open area. Crumbling stone walls surround what appears to be a carved altar. As you walk forth from the tunnel, a streak of light illuminates the mountain around you as a bolt of lightning courses down and strikes the altar. The ruins are thrown into stark relief by the bright light. You walk slowly forward, there's something on the altar, seemingly left behind by the bolt of lightning.
Do you walk forward?
You see upon the altar a large, beautiful sword. The blade forged from a single giant piece of obsidian encased in shimmering sea glass. The pommel, a piece of charred oak. A voice booms out from the sky: "Your challenge awaits." "Prove yourself". As you survey the sky around for the source of the voice, your vision extends out, eastward, farther than seems possible, to a great sea, and beyond. Past the sea, your vision flies over mountains, forests, and plains you're familiar with, over which dark, unnatural clouds slowly creep across the sky covering the land in darkness. The voice speaks out again, "A storm is coming".
Travel to Emon
Emon is the capitol of the Tal'Dorei empire and sits along the western coast, the side closest to the continents of Issylra and Marquet. After the characters have spent time working as mercenaries as part of the war effort and/or journeying into the Underdark to explore and free the drow city of Ruhn-Shak from the madness that has taken hold over it, they must travel to Emon to begin their journey across the Ozmit Sea as they follow the Stormlord's quest.
It is roughly a 700-mile trek from the Vues'dal Waters area where the Gwessar Forces are camped to Emon. From the tunnels in the Stormcrest Mountains that lead into the Underdark and Ruhn-Shak, it is roughly a 750-mile journey to Emon. The trip to Emon has the characters travel north out of the Verdant Expanse following the Wildwood Byway until they intersect with the Emerald Path. The Emerald Path turns west, curving around the Daggerbay Mountains on its way to the Emerald Outpost. From the Emerald Outpost the path curves north and leads to Emon.
Below are a few ideas for possible encounters the characters can come across as they travel to Emon.
- Shrine of Safe Travels
- A Memorable Inn
- Gnoll Attack
Shrine of Safe Travels
Just inside the northern edge of the Verdant Expanse, along the Wildwood Byway stands a small shrine to the Changebringer. Known as "She who makes the path," the Changebringer is the goddess of freedom, travel, trade, and adventures across the land. The shrine is a simple grey stone arch over the path with a small altar engraved with the Changebringer's holy symbol, the face of a beautiful woman with long hair that cascades to form the road behind her.
Bless or Bane
A worthy offering by a character grants them advantage on their next saving throw. If a person is in dire need, they can take what they need from the shrine without penalty. However, taking something unnecessarily or desecrating the shrine will cause a character to have disadvantage on their next 1d4 saving throws.
Treasure
Resting atop the altar are several items: a few silver coins in an ornate bowl, several candles, a ribbon tied to a wooden stick-figure, a bouquet of dried healing herbs, and a healing potion hidden near the base.
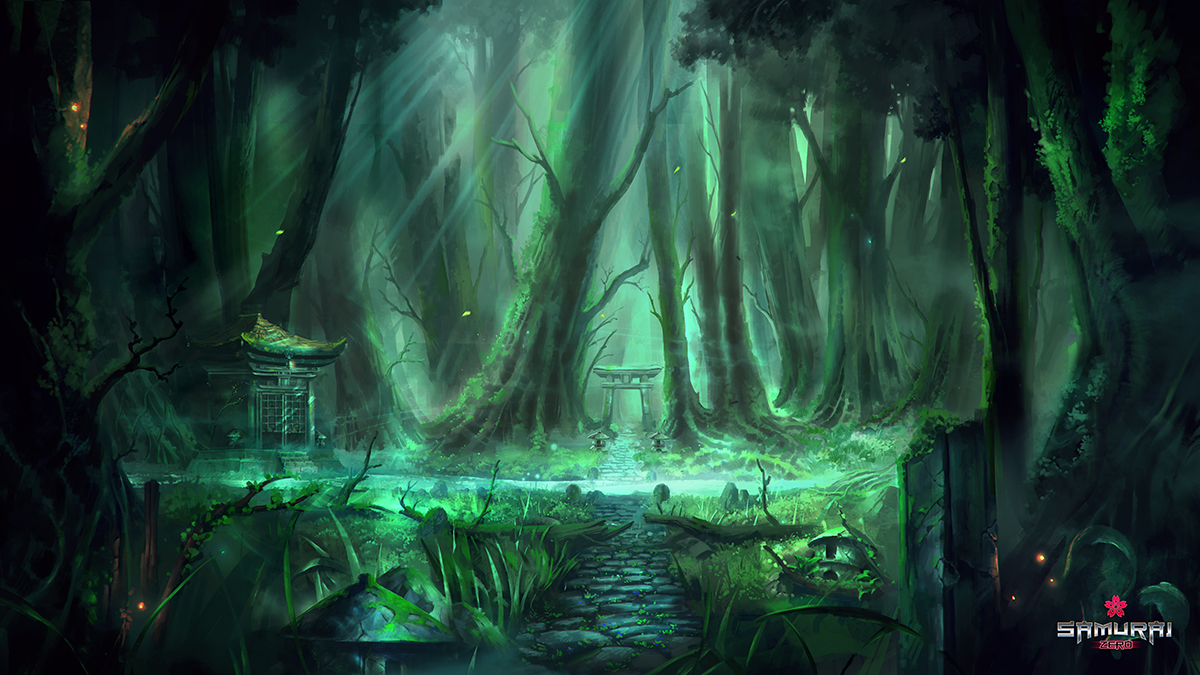
A Memorable Inn
The Second Circle, a regionally renowned inn, is situated along the Emerald Path, roughly a day's travel west of the Wildwood Byway. Surrounded by a stout palisade, the large stone inn and stables is pretty similar to other stopover points along the road but has a special claim to fame the characters may decide to explore.
The Second Circle is run by a half-orc named Dante who has made it his life's ambition to create the spiciest sauces and beverages ever to grace the palates of the denizens of the mortal plane. To broaden both the fame of his inn and to make some extra coin, the Second Circle hosts a competition most nights that has become something of a regional sensation.
Entry
Each entrant must pay 5 gp to Dante to enter the competition, as well as another 10 gp into a communal pot. Each night, no more than 15 applicants are allowed to partake - on a first come, first served basis.
Competition Description
The contest is simple - contestants are given a tall shot glass full of fiery liquor of Dante's own creation. He sets each drink aflame and on the count of three competitors race out the single door of the inn to the well in the courtyard.
When each competitor reaches the well, they must drink their shot, enduring the raging fireball of spice and flame they've just imbibed. The contestants must then immediately run three circles around the well while their eyes water and tongues burn from the shot. The top of the well is lined with numerous glasses of cool, tempting water. Those who cannot take the heat and drink a glass of water are disqualified.
Finally, competitors race back to the bar, typically with much shoving, pulling, and occasional brawling, trying to be the first to arrive and touch the redwood bar to claim victory.
Prize Money
It is a winner-take-all prize of 150 gp. In the rare case of a tie, Dante rules in favor of the contestant with the highest charisma score.
Running the Competition
This competition is a series of 4 skills checks.
Skills Check 1: Running out the Door
At the start of the race, all contestants must make an Athletics check to get out the door of the inn with the following DC's listed below:
- 20+: the contestant gets out the door first and has advantage on the next skill check
- 15+: the contestant gets through the door normally
- 10+: the contestant is last out the door and has disadvantage on the next skill check
- 9 or below: the contestant trips and falls before exiting the inn and spills their shot
Skills Check 2: Race to the Well
The contestants must next sprint across the yard to the well. The contestants must succeed on a DC 14 Acrobatics check to reach the well without spilling their drink or allowing the fire to go out. Contestants who do not succeed on this skills check are disqualified.
Skills Check 3: Drink the Shot & Circle
When each competitor reaches the well, they must drink their shot and run 3 circles around the well. Contestants must succeed on a DC 15 Constitution saving throw to endure the spiciness of the shot without drinking any of the water. Those who do not succeed on the saving throw cannot take the heat and drink the water, disqualifying themselves.
If a contestant surpasses the constitution save with an 18+, they have advantage on the final skills check.
Skills Check 4: Race Back to the Bar
Finally, competitors race back to the bar, typically with much shoving, trying to be the first to arrive and touch the redwood bar and claim victory. Contestants must succeed on a DC 5 + 2d10 Athletics check to reach the bar first.
If multiple contestants compete and succeed on the first three checks, the contestant who rolls highest on the final Athletics check (and still beats the 5 + 2d10 DC) is the winner. In the rare case of a tie on the final roll, Dante rules in favor of the contestant with the highest charisma score.
Gnoll Attack
As the group travels along the Emerald Path west through the Dividing Plains, they have an opportunity to intervene in a gnoll attack. During one of the days of travel, read the following:
As the characters get closer, they can see a number of birds circling in the distance, probably about an hour ahead. As the party progresses, they come across a small wagon that has dug partially into the ground about 30 feet off the road. Vultures, hawks, and other birds of prey are circling above.
Abandoned Wagon
As the characters reach the wagon, they will see the remains of a horse. Half of the body is left tangled up in the reins in front of the cart. Additionally, a woman's body can be seen lying along across the top of a slight rise in a nearby hill.
With a successful DC 17 Investigation check, characters will notice horseshoe prints running off with what appears to be overlapped with a number of large dog shaped prints. If the characters take time to investigate the woman's body, they will notice it is covered in bites and scratches. Additionally, there is a set of drag marks and a few boot prints heading up and over the nearby hill.
Horse Search
If the party decides to track the horseshoe prints, they can do so with a successful DC 15 Survival check. The group will follow the prints for about 10 minutes as they zigzag haphazardly in all directions. As they track the horse, characters that make a successful DC 15 Perception check will hear frantic whinnying over the next rise.
Encounter
Over the rise, the characters will see a panicked horse backed against a small rocky outcrop by 5 gnoll havoc runners (ToB p.230).
Gnoll Cave
If the party decides to track the footprints and the drag marks, they are easy enough to follow across the landscape. Again, there are large dog prints intermixed with a set of boot prints and drag marks. As the party crests over a nearby small hill, two slain gnolls are strewn on the far side.
The boot prints stop at these slain gnolls and another set of drag marks begin. Following these tracks leads to what appears to be a small cave entrance in the rocky base of the next hill. It appears to be a natural cave formation. The entrance is small and the passage beyond is barely 5 feet high. The passage leads into the hill and turns slightly left before it opens up after about 30 feet to form a small chamber roughly 20 feet across.
A character that makes a successful DC 18 Perception check will hear barks and growls echoing down the tunnel that leads further in.
A short passage opens up into a large chamber. Rough-hewn walls surround the chamber and extend upwards about 30 feet. Two large pits take up a large portion of the chamber's center. There are a number of gnolls present in this chamber, a few along the southern edge and the rest on the northern side. The bodies of two teens are currently being eaten by the gnolls closest to the entrance with a third body visible across the pits.
Encounter
There are a total of nine gnolls in this chamber, most are currently eating from the various bodies. There are 6 gnoll flesh gnawers (VGtM p.154), 2 gnoll pack lords (MM p.163), and a gnoll Fang of Yeenoghu (MM p.163).
The pits in the main chamber are 50 feet deep and have extremely sheer sides. If a character falls into a pit will suffer 5d6 falling damage. A character must succeed on a DC 25 Athletics or Acrobatics check to climb the walls out without assistance.
During the 5th Round of combat, a flind (VGtM p.153) and an additional 4 gnoll flesh gnawers (VGtM p.154) will enter in from the ramp on the far side that leads up into a final small chamber. See Map 7.1 for the encounter battle map.
Treasure
Tucked away in various corners of the final chamber is various silverware and gold pieces worth 250 gp. Additionally, there is an assortment of small jewelry pieces worth 50 gp.
Aftermath
If the party is able to save the horse and want to use it with the broken cart, they will need to fix the cart's broken axle. The axle can be fixed but it will take multiple characters and should be treated as a group skill challenge.
To successfully fix the axle, the characters must work together to acquire 2 successes before receiving two failures. The characters can determine what they want to do to help fix it, and an appropriate skill and DC should be assessed based on their ideas.

Map 7.1
Emerald Outpost
Population: approx. 1,460 (89% Elven, 6% Human,
3% Halfling, 2% Other)
Religions: Major - Lawbearer, Wildmother, Platinum Dragon
Minor - Moonweaver, Matron of Ravens, Dawnfather
Government: A military partnership between 2 captains
Tal'Dorei captain - Jorn Krastef
Syngorn captain - Maina Rusalla
Commerce: Wool, livestock, fruits and vegetables, knit items
Originally established by the elves of Syngorn as a hidden outpost to keep watch over the growing empire of Drassig, the Emerald Outpost fell out of use after the Scattered War. Now it stands as a trade post between Emon and Syngorn, and many day-to-day matters between the alliance of cities are handled here within the Emerald Chambers - previously the outpost's war room.
The Outpost is neutral ground, but its elven majority population and heavy Syngornian military presence occasionally makes non-elven civilians and diplomats uneasy. The outpost is governed by an agreed partnership between two appointed captains, one by the Council of Tal'Dorei, and the other by the Wardens of Syngorn. The two captains hold a well-known rivalry, and their bickering tends to hold up political negotiations. A small military presence is still kept here by both Emon and Syngorn as part of the arrangement, though mostly as combat reserves.
Emerald Outpost Locations
The following areas, 1 through 8, are specific locations in Emerald Outpost and can be found on Map 7.2.
E1. Emerald Chambers. This large wood and stone two story building is set on a small hill nearest the mountain cliff wall. A large courtyard is ringed by offices. This is where the governance of the Emerald Outpost occurs by the two captains: Maina Rusalla and Jorn Krastef.
E2. Syngorn Guard Barracks. A large stone building with clear elvish architecture and a courtyard houses the Verdant Guard soldiers stationed here by Syngorn.
E3. Tal'Dorei Guard Barracks. This walled in space has many small barracks building enclosed within a wooden palisade. These barracks house the soldiers stationed here from Tal'Dorei's Gale Regiment.
E4. Emerald Market. A large open-air market sits in the center of town. Large permanent open-walled structures protect semi-permanent stalls from severe weather around a large courtyard. An assortment of food and grocery stalls sit amongst craftsmen, traders, and various sellers of knick-knacks.
E5. The Feisty Goat. A large wooden structure is the town's most well-known tavern and inn. It sits just inside the town's gate. Large bay windows showcasing the warm interior that always has a large fire in the hearth is a tempting sight for most travelers. It is owned and operated by Evrham, a well-built older human man with salt and pepper hair.
E6. Griffon's Saddlebags. A large red brick building built in the shape of a U houses three different stores. One is the General Store, owned by a comely middle-aged halfling woman named Cassandra. Another section of the building houses a blacksmith operated by a sturdy, gruff looking human man named Flint. The final section is a very ornately decorated specialty store that focuses on slightly more magical wares, owned by a young elf woman named Zuria.
E7. Temple to the Lawbearer. This gray stone building dedicated to the Lawbearer doubles as a small courthouse when needed.
E8. Temple to the Wildmother. This large temple is built to be a wilderness escape for the elves here. Trees and bushes grow throughout the courtyard to give a space for the elves living here to enjoy nature. An ornately designed wooden structure with colorful stained glass surrounds the courtyard.

E1
E2
E3
E4
E5
E6
E7
E8

Map 7.2
Emon
Population: approx. 287,550 (68% Human, 7% Dwarven,
6% Elven, 19% Other)
Religions: Major - Lawbearer, Wildmother, Platinum Dragon
Minor - Stormlord, Matron of Ravens, Dawnfather
Government: Council of Tal'Dorei
Master of Development - Hearthmaker Theodorn Krazz
Master of Arcana - Arcanist Allura Vysoren
Master of Law - Arbiter Brom Goldhand
Master of Commerce - Coinmistress Hanna Wasseran
Master of Information - Seeker Assum Emring
Master of Defense - Guardian Tofor Brotoras
Master of War - Warmaster Mikael Daxio
Emon stands defiantly against all who would threaten Tal'Dorei and its people. It is the cultural heart of human civilization on this continent, and as the republic's capital, Emon is a nexus of politics, justice, business, industry, and education within the realm. It sits among the Bladeshimmer Shoreline, which stretches across the central western coast of Tal'Dorei. It is named for the distant glimmering of sun across the Ozmit Sea.
Inland Bladeshimmer is mostly temperate grassland, intercut by cool, winding rivers. The bulk of western Tal'Dorei's produce comes from farms here, blessed with clean water and non-salinated soil, despite the ocean's proximity. Emon's nearby military presence lends the region some stability, but the yeomen living beyond the city's walls still struggle to defend their small plots from burrowing ankhegs, nomadic gnolls, hungry goblin scavengers, and other terrors.
Emon is the cradle of human civilization on Tal'Dorei and bears the marks of the first human colonists to set foot on this continent, as well as the heart and capitol of the Tal'Dorei empire. This side of the landmass is the closest to the continents of Issylra and Marquet, and dozens of tall-masted trading ships set sail to and from its calm shores each day — as well as the occasional Skyship drifting towards Emon.
While classically the heart of a human empire, Emon boasts a diverse populace, with citizens of nearly all races from all of Exandria's many nations, thriving on the new innovations and ideas of its diverse citizenry. Tal'Dorei's tight alliances with the elven nation of Syngorn and the dwarven hold of Kraghammer invited some of those nations' greatest artisans inside Emon's walls, and their friends and families soon followed until Emon was home to a significant minority of elves and dwarves. Under the rule of Zan Tal'Dorei, Emon developed into a city whose people valued innovation and collaboration, especially in small, cohesive groups - virtues that some historians believe has given rise to the prominence of the modern adventuring party.
Encircled by 60-foot-high walls that stretch from the eastern fields to the western shore, Emon is accessible only through its heavily patrolled gates and by skyship, the denizens of the city are generally well protected from outside attackers and sieges. A well-trained force of guards known as the Arms of Emon enforces the laws of the land from the Military District. Dense farms and farm communities surround the northeastern boundary of the city, while large slums cap the northern and southern landscape outside of the city walls.
Emon is still recovering from its destruction at the talons of the Chroma Conclave and Thordak's subsequent occupation, rebuilding the districts most marred from the short-lived reign of the Cinder King. Thanks to the Clasp's underground networks and established hierarchies, Emonian society and culture was able to bounce back more swiftly than any other major settlement in Tal'Dorei. Because the last Sovereign relinquished his power, without heirs, before he was killed by Thordak, the Council of Tal'Dorei was able to transition their nation from an imperial power to a republic without war or insurrection.
Emon is not a tourist destination for its climate - the city is more temperate and prone to rain showers than most - but those who call it home swear they wouldn't trade their rain for all the sun in Kymal. The city is blessed with cool summers and warm winters, thanks to its proximity to the cool Ozmit Sea. Though snow rarely falls on the city itself, it relies on springtime snowmelt from the Cliffkeep Mountains to fill its reservoirs throughout the year. Emon is, in almost all senses, a city fated by water; were there anyone powerful enough to starve its farms and reservoirs, the city would be theirs.
Districts of Emon
Abdar's Promenade
Abdar's Promenade is an open marketplace district and massive bazaar that dominates eastern Emon, named for the legendary spicemonger from Marquet who helped fund the construction of Emon. To this day, the name of Abdar is synonymous with both generosity and business savvy. Nearly everything a person could want can be found within the tents, carts, warehouses, and shops of the promenade. Its intertwining roads stretch for miles, and it has dozens of tiny neighborhoods, each with their own distinct cultures and identities. The promenade is heavily patrolled by the Arms of Emon, for its sunny reputation is shrouded by an equally significant reputation for literal back-alley criminal deal. Its most renowned establishments include the four-story Laughing Lamia Inn, the metalworker's paradise called the Anvilgate, and the emporium of mystical riches known as Gilmore's Glorious Goods.
The Central District
This is the largest residential district within Emon's walls. It houses most of the city's merchant class, including traveling traders, ship captains, and guild journeymen. The Central District is a patchwork of thousands of personal homes, tenements, and guildhalls of all shapes and sizes, peppered with small taverns and inns on nearly every street corner.
These neighborhoods lay clustered together among tightly set streets, occasionally broken up by park grasses or the Ozmit Waterways that snake through the region between the promenade and the port. Visitors to the Central District are advised not to go out at night; the wide disparity of wealth from home to home here has seen a recent rise in crime, and the city watch seems reluctant to find a constructive solution. Residents who know the lay of the land have an easier time at night and can help visitors avoid the most dangerous streets.
The Cloudtop District
Out of all of Emon's districts, the Cloudtop has, in some ways, changed the most over the decades. In Drassig's time, a monstrous fortress loomed over the manors of his sycophants. In the age of Zan Tal'Dorei's descendants, countless mages transfigured that decadent citadel into a sleek, elegant palace. By the time the Chroma Conclave came, decadence had once more crept up on Emon, and though the Palace of the Sovereign remained much the same, the Cloudtop District was once again a nest of luxury and the throne of the social elite. The latest additions in that era were skyship platforms, so that the wealthiest and most connected in Tal'Dorei could travel in exclusive luxury -- soaring through the skies rather than enduring arduous trips over land or sea.
All of that was reduced to slag by the advent of the Cinder King. Thordak made the Cloudtop District his home, and the palace itself his throne. His very presence caused magma to surge from the caverns beneath Emon, where previously no fires burned. Thordak ruled there for only a matter of months, but those few months were enough to annihilate unknown millions of gold pieces' worth of art and creations of untold value -- though the greedy dragon took care to command his minions to save the most beautiful for his treasure hoard.
Today, the Cloudtop District is rebuilt, though the most stubborn elemental influences of the Cinder King linger in Thordak's Crater. A new castle called Cloudwatch Palace has been built atop the city of Emon, and it contains the chambers of the Tal'Dorei Council, as well as grand dining halls and guest quarters for visiting dignitaries. Much of the castle is a museum, displaying what regalia and objects d'art survived the wrath of the Cinder King. The private chambers of the palace also contain a number of teleportation circles that leading councilmembers can use to return to their homes at night -- particularly if they live in far-off cities such as Whitestone.
The Temple District
Some say that this northern district contains more temples than in the rest of Tal'Dorei's cities combined. This is a flagrant exaggeration, but at first glance, most people believe it. Emon is a city of many people, from many different places, with many different faiths. Even folk who worship the same gods worship them differently and have built their own temples. Legend has it that shrines and temples used to be built all across Emon (and there are still some small sanctuaries elsewhere in the city), but a cleric of the Dawnfather declared her temple the greatest in all Emon. Her boast was met with scorn from a nearby church of the Stormlord. Their clerics, always eager to rise to a challenge, built an even greater temple across the street, and soon, people of all faiths were building the most significant structures they could, all in one tiny corner of Emon.
Today, cathedrals to the Lawbearer and the Platinum Dragon stand at apex among smaller temples to the Dawnfather, the Stormlord, the Wildmother, and the Matron of Ravens. All Prime Deities have at least a moderately sized house of worship here, and even some of the Betrayer Gods are worshiped in secrecy.
Anyone who seeks shelter here, be they rich or poor, can find sanctuary in the Temple District. Even the faithful of gods of strength, such as the Stormlord and the Platinum Dragon, have mercy for those who need the aid of others to help them stand on their own.
Travelers and sailors come to leave tokens and gifts at shrines to bless their journeys, while people of all walks of life seek the graces of the Changebringer before undertaking risky endeavors. The meek search for wisdom in the great halls of the Knowing Mentor, as the artists and wistful folk give praise to the Arch Heart. However, not all folk are drawn toward religion, nor trusting of it, and temples past have been exposed as frauds -- or worse, cults who venerate power.
Recently, an off-kilter faith to a lesser idol called the Traveler has found purchase in the Temple Ward -- primarily in the form of puerile graffiti in back alleys. Other quasi-religious spiritual entities have small cult followings in the Temple Ward. They are generally allowed to flourish to whatever degree they can, so long as their beliefs don't advocate for any behavior that would break the laws of Emon.
The Erudite Quarter
This district is home to members of the educated upper-middle class and destitute academics alike. Several institutions of higher learning have their stately campuses here, ranging from well-to-do boarding schools to Tal'Dorei's most premiere academic and arcane institutions.
Beautiful towers in ancient Syngornian style stretch to the sky across a cityscape of centuries-old halls of learning and student boardinghouses. Here, the finest schools and colleges draw the wealthy, the gifted, and the brilliant -- and none more so than the Alabaster Lyceum, often lauded as the largest and most accomplished institute of arcane study on the continent. Though the district's walls were shattered, and its libraries crushed during the invasion of the Chroma Conclave, the Erudite Quarter has thankfully been mostly reconstructed, thanks to the efforts of the Lyceum's staff and students. The district's greatest loss was the hundreds of thousands of pages torched during Thordak's reign, destroying centuries of magical, mechanical, and historical documents.
Members of the Lyceum, under the direction of Headmaster Thurmond Adlam, performed the reconstruction themselves not simply because they sought to project an image of good work ethic and self-sufficiency, but because the heads of their colleges distrust the League of Miracles. Their motives and sources of funding are, in the eyes of the Lyceum, too opaque to be trusted. Their suspicion has often been derided either as elitism over the diverse array of mercenary mages the league hires, or as sour grapes over losing out on countless lucrative reconstruction contracts.
The Cemetery District
This smaller section of the city is filled with graveyards and small religious sanctuaries so that people with means to purchase a gravesite or a mausoleum can bury their dead in whatever luxury they can afford. Countless gravestones line the rolling hills of the district. They are sectioned off from the roads by tall iron fences, with mausoleums of more affluent families dotting the grassy hillsides. As surface space grew limited in centuries past, the city excavated a network of catacombs called the Undervaults. Upkeep, expansion, and general safeguarding of the sites are all overseen by the Gravewatchers, a guild of gravekeepers that have held political and social hegemony over the district for generations.
Their attempts to expand the Undervaults have had mixed results over the centuries. Most new excavations meet without incident (likely because the Clasp has learned to keep their tunnels far from this district). However, excavations in recent decades have broken into the Crystalfen Caverns, an eerie cave system filled with mind-bending inscriptions and horrific beings. The breach was promptly sealed off.
Yet the sealing of the caverns did not stop some members of the Gravewatchers from seeing an opportunity to gain fame and glory. Most who ventured into the caverns were never seen again, and those who have returned shudder unspeakably of the horrors they escaped. Still, passage is occasionally granted to the Clasp or adventurers willing to pay the Gravewatchers for entry to the dangerous realm below.
The Military District
Since Emon has no standing army, the Military District is one of the city's smallest wards. Nevertheless, it has the capacity to house and train a vast number of soldiers if an army needs to be levied from the people of Tal'Dorei. The Military District is mostly filled with several prisons and jails, including the infamous Black Bastille, as well as tightly locked barracks and instructional facilities for the Arms of Emon.
The Port of Emon
Emon is bordered on the west by the Ozmit Sea and is generally sheltered from the worst of its storms. The vast Port of Emon allows hundreds of thousands of gold pieces' worth of goods to flow through the city every single day. Well over a hundred ships fill this port at any given time, and the dock crews are ever working, carrying crates and goods away to Abdar's Promenade, or to empty vessels for exportation. The northern sector of the Port is mostly allocated to the Everline, a powerful fisherfolk's guild. They frequently feud with the Onyx Banner, Emon's most powerful shipping guild, over which docks they are permitted to use. Both guilds keep their hands clean, but it's an open secret that both hire adventurers and mercenaries to trash the other's ships and warehouses to intimidate them. Adventurers in need of fast cash who don't mind dodging the Arms of Emon can find good work as muscle for either of these two guilds.
The Outwall
During the reign of Drassig, a massive city of tents and hovels grew outside of Emon, filled with those too poor to pay Drassig's extortative taxes. By the end of the Scattered War, the slum had grown to a third of the city's size, and nearly half its population. Even during the reign of Zan Tal'Dorei, these slums continued to grow, as refugees of the Scattered War tried to earn enough money to find stability within Emon's walls.
Though their conditions were still meager when the magnanimous Zan Tal'Dorei ended Drassig's iron rule, the city's denizens chose to remain, having created a community with its own culture of inexpensive living and brotherhood in poverty, away from the bustle of the city's inner streets. A microcosm of Emonian society now exists within the city of Outwall, including its own trade square, shrines for worship, and makeshift farms on the outskirts.
As early as a decade ago, Outwall was called the Upper Slums -- a derogatory name given to it by Emon's Cloudtop elite. People within Outwall tried to transform the term "Upper Slums" into a symbol of civic pride, but it never stuck. The name Outwall eventually emerged after community leaders demanded an audience with the Tal'Dorei Council in an event that came to be called the Outer Wall Debates -- for they demanded the council convene in the slums' own town square.
These days, Outwall is becoming a trendy place to live, thanks to its vibrant culture and relatively inexpensive housing. Its locals are fighting hard to keep young people with money to burn from the Central District from gentrifying their home. It hasn't come to violence yet, but the angrier members of the Outwall community clandestinely meet with adventurers to burn down the stylish houses and mansions that are driving out local residents and businesses.
The Southgate Farms
Inspired by the civic action of the people of Outwall, the farmers of Southgate were able to break from the ugly name of "slum" in the last few years. This community of farmers and ranchers, formerly known as the Lower Slum, exists outside Emon's southern gates. It first formed when a large refugee band from Othanzia was barred entry into the city in the midst of the Scattered War. Instead of dispersing, they decided to lay down roots while Drassig's armies were out fighting a losing battle against Zan Tal'Dorei. These squatters eventually formed a community of farmers who petitioned Zan Tal'Dorei for land in exchange for providing produce and grown goods to the people of the city.
Thanks to the aid of the First Sovereign, the descendants of those Othanzian refugees have become one of the most significant sources of fresh food for the people of Emon. Frustrated by being saddled with the name of "slum," and inspired by the Outer Wall Debates, the leading families of the Lower Slums demanded recognition by the Tal'Dorei Council as well. They were met with little debate, and those humble farmers are now a respectable part of Emonian society -- even if they live outside the city's defensive walls.
This southern region of the city is also home to a famous site of modern history: Greyskull Keep, the former base of operations for Vox Machina in Emon. This fortress was gifted to them by the Last Sovereign as thanks for saving his life. The various heroes of Vox Machina have moved on to other homes (and now typically gather in Whitestone for holidays), and they allowed the keep to be turned into a museum of their heroic exploits.
The Shoreline Farms
Less respectable than the Southgate Farms are the communities along a stretch of murky shore north of Emon. These people of Outwall have tried for decades to turn terrible, salty land into effective farmland, to mixed results. They have successfully cultivated the few vegetables that grow in saltwater-soaked soil, leading to bountiful harvests of savory quattet gourds and the hard-to-grow brineroot. However, the farms' distance from the city gives them little protection from dangers that city folk think little of. Adventurers are always wanted to protect the farms from petty criminals and wandering monsters, but the farmers have little to pay. Generally, only utterly novice adventurers find their start in a place like the Shoreline Farms -- but all heroes have to start somewhere.
The Grotto
This sprawling series of underground chambers composes the Clasp's headquarters beneath the city of Emon. It's rumored that over a dozen entrances to the Grotto are concealed amidst the labyrinthine tunnels, which are both naturally occurring and a part of Emon's sewers. That doesn't even begin to get into the hundreds of other entrances and access shafts abandoned and filled in for fear of discovery. The very nature of the Clasp s business is to keep shifting out of sight, and as such, the actual core of the organization moves from base to base between multiple subterranean structures, ever building further underground, or repurposing a long-abandoned hideout whenever necessary.
Emon Locations
The following areas, 1 through 16, are specific locations in Emon and can be found labeled on Map 7.3.
1. Laughing Lamia Inn. While the city is home to countless taverns and inns for the weary traveler or practiced performer, few are as grand and well known as the Laughing Lamia. Almost as old as the city itself, this fine establishment has traded hands numerous times over the years, and has expanded with each transition, leaving the massive, four-story institution a hodgepodge mass of odd rooms and themes, all centered around a raucous central tavern room filled with dozens of tables. Currently under the ownership of a brash and cheerful lass called Luthania Wells, this hot spot for traveling traders and adventurers alike rarely sees an hour in the day (or night) where there isn't something interesting going on within.
2. Azalea Street Park. Azalea Street, within Abdar's Promenade, is one of Emon's oldest neighborhoods, and is full to bursting with small businesses, quaint homes, and hole-in-the-wall restaurants, such as the Laughing Lamia. Amidst the chaos of daily life, Azalea Street is also home to a peaceful park overlooking the Ozmit Waterways. When the stress of constant battles becomes too much to bear, adventurers in the known take a moment to visit the Azalea Street Park and recover, maybe even swapping stories with other relaxing heroes. Legend has it that heroes who meditate among the flowers and drink in the sea air return invigorated by the spirit of the Wildmother. A statue of the Wildmother and Lawbearer dancing together graces a fountain in the center of the park. Once per week, a character can gain Inspiration by taking a short rest in Azalea Street Park.
3. Anvilgate. Made of stark black stone and adorned with intricate brass metalwork, this grand blacksmithy is one of the most striking buildings in Abdar's Promenade. Decades ago, a restless craftsman from Kraghammer of the name Grahf Tiltkettle grew weary of solitary pursuits and worried that interest in blacksmithing would give way to the emerging trend of mass-production. Tiltkettle retired in Emon and dedicated his respectable fortune to ignite the spark of inspiration in those who wished to learn the ways of the hammer and anvil, hoping to instill the joy of the All-Hammer in a new generation. He funded the creation of Anvilgate, a massive, public blacksmithy where any folk who wished to try their hand at the smithing of metals could do so under the All-Hammer's guidance.
Cheaper ores and materials were often donated by friends of Tiltkettle to aid the volunteer mentors in teaching their craft to the less fortunate, while folks who wished to bring their own ingots were welcome to do so. The location has become popular enough to begin expanding its facility to include kilns for ceramics and looms for weaving. While the tools are open for anyone to use on the premises, all are warned of the curse that will beset any wanton thief who steals from under the All-Hammer's gaze.
4. Traverse Junction. The most magically active structure in Tal'Dorei shines like a pyramid of pure sapphire in the bustling center of the Erudite Quarter, its walls thrumming with arcane energy. It is the Traverse Junction, and all visitors to the Erudite Quarter stop to see it when they visit.
In nearly every major Exandrian city, there are teleportation circles that link mages to other such circles around the world. Each and every one of these major circles has a twin in the Traverse Junction, a travel nexus for approved mages and world leaders. Any characters renowned in Emon or honored by the Alabaster Lyceum may make use of the Junction (for 50 gp, if they can't cast teleportation circle), allowing them to travel to major cities such as Westruun, Syngorn, Kraghammer, and Whitestone in Tal'Dorei; Port Damali and Rexxentrum in Wildemount; Ank'Harel in Marquet; and Vasselheim in Issylra.
The telemagi who curate the circles are always in search of new teleportation sigils to different lands; they are willing to pay a handsome sum for the services of powerful and magically skilled adventurers willing to seek out and catalog new circle sigils for their records.
5. Alabaster Lyceum. The gleaming white halls and elaborate gardens of the Alabaster Lyceum signal to all who see them that they gaze upon the greatest institute of higher learning in Tal'Dorei -- though numerous scholars in Kraghammer and Syngorn would heatedly dispute that claim. Regardless, this place is the heart of homegrown academia in the Republic of Tal'Dorei, boldly striving to make a name for itself alongside the ancient scholarly traditions of Issylra, Marquet, and Wildemount. The Lyceum (for those who can afford the impressive tuition) is an unparalleled center for study and research of history, economics, alchemy, art, and -- most of all -- magic and the arcane. Many of Tal'Dorei's greatest scholars and bards paid their dues in these halls, and the history of the Lyceum and its graduates are featured in all manner of superstitions and folktales.
6. Cloudwatch Palace. In the wake of the Chroma Conclave's destruction of Emon, the towering palace that stood as home to the sovereign and the center of governance within the city fell to fire and ruin. In the decades since, construction began with the aid of the League of Miracles to construct a new palace to help house the Tal'Dorei Council and be a symbolic center for all major political affairs within the region. The Cloudwatch Palace now sits atop the once-smoldering hill where Thordak once claimed his roost, a symbol of Emon's enduring will and optimistic hope for the future. Within these high-arched halls, countless chambers hold space for diplomats, meetings, and in the case of holidays, grandiose celebrations that draw the attention of powerful figures all across Exandria.
7. Thordak's Crater. One last unsettling element of the Cloudtop District is the elementally scarred remains of Thordak's Crater. Even after a decade of healing from the Ashari of Pyrah, Thordak's fires still burn beneath the Cloudtop. The smoldering entrance to the caverns remains cordoned off from the public because of its unsightly appearance and sulfurous stench, and because fiery creatures occasionally try to claw their way out into the fresh air. The crater is often forgotten, but every few months an adventuring party makes their way inside to seek treasure or glory within the volatile caverns -- and such expeditions are a favorite topic of conversation (and clandestine betting) among the politicians, political aides, remaining city nobility, and nouveau riche of Emon.
Why Thordak's magic lingers enough to create these mindless cinderslag elementals is a mystery; but it seems to be limited to the crater, as the elementals cannot go beyond it without collapsing into inert slurry.

8. Emon Skyport. This elevated port is complete with docking platforms solely for the use of skyfaring vessels. The original Emon Skyport was the first of its kind in Tal'Dorei, and its successor is every bit as revolutionary as the original.
The Emon Skyport was destroyed when the Cinder King claimed the Cloudtop District as his fiery throne, but like so much of Emon, it has since been rebuilt. Unlike other parts of Emon, this reconstruction was a joint venture between the Arcana Pansophical and the Alsfarin Union, a Marquesian guild responsible for the engineering and distribution of all skyships in Exandria.
Booking passage on a skyship isn't cheap, but the privilege is available to everyone that can pay. Generally, one passenger skyship leaves Emon per week to each of the following locations:
- Vasselheim, Issylra (passenger ticket costs 2,500 gp)
- Whitestone, Tal'Dorei (passenger ticket costs 900 gp)
- Port Damali, Wildemount (layover in Whitestone; passenger ticket costs 2,000 gp)
- Ank'Harel, Marquet (passenger ticket costs 2,500 gp)
Members of the Tal'Dorei Council can also usually pull strings to grant adventurers they hire free passage when on vital business.
9. Tomb of the Last Sovereign. Uriel Tal'Dorei II, the Last Sovereign, was slain by the noxious breath of the green dragon Raishan during the attack of the Chroma Conclave. Uriel's wife, Salda, survived him and petitioned the reformed Council of Tal'Dorei to build their last sovereign a tomb befitting his benevolence and magnanimity. They complied, and the monumental Tomb of the Last Sovereign is now home to not just Uriel's ashes, but to tribute from all who loved him. Those with wealth gave gold, while those whose hearts outweighed their purses gave more personal tribute.
10. The Godsbrawl Ring. Though the Temple of the Stormlord always has a fighting ring in its center, the annual Godsbrawl transforms the earthen, torch-lit sanctum into one of Tal'Dorei's most unusual tournament grounds. On the Day of Challenging, the god of athleticism's holy day, the brawny priests of the Stormlord invite warriors and worshipers of the entire pantheon to the Godsbrawl, asking that each temple offer forth their greatest warrior to act as their god's proxy in the tournament. The clergy of the Dawnfather and the Lawbearer send their champions, but rarely take it seriously, for they scorn the storm-priests' notion of "might makes right." Conversely, the champions of the Stormlord and the Platinum Dragon have a fierce -- though friendly -- rivalry, trading the title of Supreme Champion back and forth each year after a bloody (but rarely fatal) final round.
11. The Black Bastille. Named for its ash-blackened walls, the ominous Black Bastille is a single-story prison within the Military District that holds Tal'Dorei's most dangerous and irredeemable criminals. The compound has no windows, no open courtyards, and only one entrance: two imposing steel doors, flanked by watchtowers. During the reign of the Chroma Conclave, the prison was one of the first buildings attacked, setting hundreds of Tal'Dorei's worst criminals loose to sow chaos across Emon. The Black Bastille has since been rebuilt, but dozens of its most deplorable inmates still run free, and the Arms of Emon are eager to recover them.
12. Walls of Tribute. Anyone who wishes to uphold justice and keep the peace can apply to join the Arms of Emon. But before a recruit is given their armor and takes a vow to protect the city and its people, they must endure a grueling training regimen within the tall, featureless stone barricades of the Walls of Tribute, referred to wryly by recruits as the Quarry. There, they are trained in the physical aspects of peacekeeping, instructed on the habits of the city's criminal underbelly, and drilled in the laws and ideals of Emon.

13. House of Discipline. Emon does not have a standing army of its own. The skills imparted to the Arms of Emon are sufficient to maintain a rowdy populace, but they are carefully trained to use nonlethal force to restrain, rather than kill, all those whom they apprehend. Thus, when war comes to Tal'Dorei, the council appoints a Master of War and levies an army from the Arms of Emon, as well as the militias of its constituent settlements. They must report to the House of Discipline, where they are taught martial combat alongside the harsh realities of warfare. Those who endure their time in the House of Discipline are forged into an army ready to protect Emon and the rest of Tal'Dorei from the greater dangers of Exandria.
14. Gilmore's Glorious Goods. This broad, single-story façade of Shaun Gilmore's wondrous magical emporium belies the extravagance of its interior. Within, the air is thick with a dozen competing perfumes, each more pungent than the last. The interior is impossibly large -- certainly larger than its exterior walls would have you believe -- and filled with seemingly endless rows of arcane curiosities and artifacts, many of whose cryptic functions have been lost to time. Everburning candles in an array of unnatural colors light the shop, casting tantalizing shadows over every bubbling phial and mystical orb. Characters are greeted by a smiling half-elf woman named Rosalia draped in deep purple robes.
15. Frefil's Flavorful Foods. Frefil owns a food stall in the large market of Abdar's Promenade. He is an old male gnome with a long white beard and dressed in colorful robes. He specializes in magical candies.
16. Kynan's Curiosities. Kynan, the male halfling proprietor is middle aged and rather timid. His store is a single story, timber framed building that is dimly lit by flickering candles and has shelves piled with all sorts of trinkets.
17. The Griffon's Armory. This armory is owned by Gundrec, a male half-orc with pale green skin, and incredibly strong. This two-story wrought iron framed building has a burnt orange tiled roof. The interior holds a vast assortment of weapons and armor lining the walls and a smooth gray stone floor.
18. The Laughing Satyr. Rosie is a warm, welcoming female dwarf with auburn hair who always wears an apron. The tavern and inn is a two-story brick building with a warm interior with rustic decorations.
19. The Leering Stag. This dive bar is not the cleanest but is run by a male human named Eric. Its claim to fame is a secret, underground fight club. Access to the fight club is granted through the use of a code phrase, "many attractions."
20. Ivory Tower. Allura's tower is several stories tall and made out of what appears to be white marble. A large ornate oak door with a giant iron knocker sits at the base of the tower.
15
16
17
18
19
20
Map 7.3
Emon City Adventures
Emon is a metropolis and the largest city on Tal'Dorei. This is likely the largest city the characters have ever visited. It offers a plethora of opportunities to refill supplies, acquire new arms and armor, and even purchase magical items. While in Emon, characters can conduct research on various magic items they've collected or locations they may wish to visit. Opportunities abound in a large city like Emon.
When characters are ready to continue their divine quest, they need to book passage across the Ozmit Sea. The two routes across the sea are via a sailing ship or a skyship.
Research at the Alabaster Lyceum
The Alabaster Lyceum is the arcane college and research facility for magical and divine artifacts in the city of Emon.
The building appears to be built out of white marble, with very high ceilings, stretching up in some areas as high as 80 feet. The building has guards near the entrances adorned with silver and gold armor wearing elven-like helmets. Much of the building appears to be lit by magical orbs that are either set into the walls or into chandeliers. Some of the rooms have carved pillars depicting battles between devas and demons that spiral up the pillars.
As you step into the front, you can see a central chamber within the inside that's also cylindrical, so you have a small walk-around hallway on the immediate inside of this giant structure, and then the actual library is in the interior, and so on the outside, you see a few books and there are some paintings and tapestries on the walls and you see a few varying monks walking around, a handful that are curious and turn as you walk in, all dressed in the same uniform of white and silver robes. There is a desk at the front, where you have a young woman of olive skin sitting, her hair short and wavy with very thick spectacles adorning the front of her nose. Young-ish, maybe mid-twenties. She looks up as soon as you approach. "Good day, I'm Carol, what can the Alabaster Lyceum help you with today?"
An older dwarf man named Thorlin with white hair and a long white beard leads the group into the research section of the Alabaster Lyceum. Each group doing research here must be attended at all times by a member of the Lyceum.
In the center of the chamber, there is a spiral staircase that leads to an upper platform that has another series of chairs, either a research or reading section, and there are only a handful of people on the interior that are not dressed in the same way that these monks are, but each one of them is attended by a monk.
Research on the Stone of Golorr
This is a sentient magic item that was once a creature called an aboleth. It was magically transformed into this stone. It is powerful, evil, and continually hungers for knowledge. It seems to absorb all knowledge gained by its owner and those around it. It also seems to be able to assert some control over whoever is attuned to it.
There is a chance to destroy it. It requires the use of the antipathy spell targeting aberrations. When the spell is cast in this way, the stone transforms into mucus and is destroyed. However, Golorr the aboleth then appears in an unoccupied space within 30 feet of the stone's remains. The aboleth is incensed by the stone's destruction, and it attacks all creatures it can see.
Research on Oblivion's Anchor
The researcher will use identify on any magic items the party wishes to do research on. When he does this with Oblivion's Anchor his eyes go wide.
Before the Calamity, eight of the Betrayer Gods each forged a legendary weapon using the life force of a greater fiend and gave the weapon to a chosen champion in the kingdom of Ghor Dranas. The Calamity flung these weapons across Exandria, burying them in mountains, forests, fields, and underground. Several of these weapons have been recovered, but a few have never been found and are highly sought-after. When an Arm of the Betrayers is found, it grants its wielder some of the power of the Betrayer Gods and the wisdom of the fiend within. The bound fiends know that their war was lost long ago, but they still desire to be used in battle, win victories, and spill blood in the hands of skilled warriors. As a weapon's wielder becomes more powerful, so too does the weapon, which in turn is able to lend even more magic to the wielder. Whenever a weapon's wielder dies, the weapon disappears and reappears elsewhere.
If asked how to remove it, Thorlin provides the following:
It won't want to come out, it should be possible, but it may hurt, potentially a lot. A spell like greater restoration would probably be beneficial.
Research on Vestiges of Divergence
During the wars of the Calamity, great destruction rained across the many lands of this world. Broken remnants of history speak of battles between gods leveling mountains and sinking islands. Chosen heroes rose up to accept the artifacts of their patrons to combat the tide of death their adversaries harnessed. Powerful archmages harnessed the surging arcane powers of the war to forge incredible objects of potent strength and ability, further arming every side of the conflict. Relics of the Age of Arcanum were further enhanced, creating unheard-of magical capabilities.
When the battle climaxed in a wave of aberrant destruction, leaving much of civilization in ruins, many of these artifacts were buried among the ashes with their wielders. Others were passed down through bloodlines for generations, a sign of respect and importance within their culture. Some were locked away, the fear of their power giving temples reason to keep them from mortal hands, while a handful still see use to this day by great warriors or proven killers. These mighty echoes of the last great war, and the divine banishment that followed, are known as the Vestiges of Divergence.
The Vestiges are legendary artifacts that grow in power with the experience, force of will, and strength of character of the bearer. Many Vestiges, if sealed away or left without a worthy attuned individual for a period of time, will revert to their dormant state. A dormant state still imbues a modicum of power to the attuned, but with time, perseverance, and personal growth, the Vestige can regain access to some of its lost ability in its awakened state. Eventually, through extreme personal challenge, evolution, and achievement, the Vestige can reach its full potential in its exalted state. This is the true power of the Vestige, the state when it was originally utilized in the Calamity against battle-ready gods.
Temple to the Stormlord
The temple district is filled with temples to most of the Prime Deities. The Temple to the Stormlord is an imposing iron and stone structure. There are steps leading up to the front area: these giant reddish, looking almost rusted-over, iron doors that block the front entrance. Built into the façade is an iron statue depicting the Stormlord as a human-like man, barrel-chested, and with massive muscles. He wears iron bracers around his wrists. His long beard goes down to the middle of his chest. In one hand he carries a long, thick shortsword. His legs and midsection are clothed in furs and leathers.
As you enter the temple, a long hallway built out of similar reddish stone as the outside leads to a large central chamber with light streaming down. You don't know if the actual stone itself is built from a substance of this color, or itself has been stained or colored to match the rest of the Stormlord's reddish aesthetic. But as you step in, your footfalls clack against a black marble floor with what looks like gold streaks through it, almost like there are small veins of some sort of gold material that has been polished within the actual marble itself. The quiet interior is infused with the smell of sage and other burned herbs that are used ceremonially and to build an atmosphere of meditation and understanding. In the quiet interior you can hear your footfalls echoing throughout the hallway, and as you enter the central chamber and look up, you can see now the light source from above, there is what looks like a stained-glass domed roof to the top of the central chamber and through it, these beams of light are coming down, multicolored and cascading into this central chamber.
The characters are met by a bronze dragonborn who introduces himself as Storm Marshal Drake. If asked about a long-forgotten temple somewhere in the mountains of Issylra, he can provide the characters with the following information:
- He has heard of an ancient, Pre-Calamity, temple built at the top of a mountain somewhere in Issylra.
- It's said the Stormlord himself built the temple.
- Many of the more devout Storm Marshals have pilgrimaged in search of it but haven't been gifted the honor of finding it.

Acquiring Transport across the Ozmit Sea
There are two primary modes of transport across the Ozmit Sea. The first method is via a sailing ship that takes roughly 24 days to travel from Emon to the port city of Shorecomb. The second method is to book passage on a skyship that takes roughly 5 days to travel from Emon to the city of Vasselheim.
A sailing ship will cost roughly 2 sp per mile per passenger and can be chartered from the Port of Emon. A skyship will cost roughly 1 gp per mile per passenger, and characters will need to visit the Skyport to book passage on a skyship.
Port of Emon
Characters interested in the cheaper, slower alternative need to visit the Port of Emon to charter passage on a sailing ship. The harbormaster, Vyncent, a gruff human man always hurrying about, can help point the characters towards a possible ship to charter.
The Wave Breaker is a medium sized merchant vessel scheduled to leave port at dawn tomorrow. Captain Estefan is a water genasi with green skin. Little beads of moisture are perpetually visible on his skin. He wears a large brown captain's hat atop his black hair with dark brown leather armor. Passage across to Shorecomb on Captain Estefan's ship will run approximately 300 gp per passenger
From the Adventures of Bramble Tickletoes III & Company
As the party made their way back to Emon, they participated in the competition at The Second Circle where Kayne won the competition with Bramble coming in a very close second. Then, they stopped for the night in Emerald Outpost where Bramble bought a miniature toy version of himself.
When they arrived in Emon, the group spent nearly 15,000 gp between Gilmore's and Frefil's shops on magic items and candy, respectively. Then, Bramble and Lia head to the Alabaster Lyceum to do research on their powerful magic items and the continent of Issylra. Kayne, meanwhile, heads to the Temple to the Stormlord and meets with Storm Marshal Drake to discuss the quest he was given. Finally, Maoki discovers an underground fight club and competes against the reigning champion, a goliath named Oskar (Appendix B). He unfortunately loses.
The party splurges and books passage on a skyship to travel across the Ozmit Sea to Vasselheim to begin Kayne's quest to find the Stormlord's Vestige.
Skyport
If the characters are interested in a more expedient form of travel across the Ozmit Sea, they will need to visit the Skyport to charter passage on a skyship.
As you all make your way towards the northwestern side of the Cloudtop District, you see there is one thicker tower that makes up part of the wall that surrounds the Cloudtop District. This wall is essentially the bastion of defense for the inner part of the city. You can see this large tower has a spiral staircase in the interior, visible through small windows. At the top you see a platform that extends outward on both sides of the wall.
As you approach, there is a small building built into the base of the tower. Inside are two guards, dressed in the gold and white armor of the Citrine Garrison, standing in front of a counter beyond which sits a pleasant looking human man dressed in blue.
"Welcome to Emon's Skyport, I'm Desmond. I am in charge of all appointments, arrivals, and departures. What can I help you fine folk with today?"
Captains book their own passengers, so Desmond needs to lead the group up the stairs to discuss charters with captains directly.
Following Desmond up to meet with the captain to book passage leads you up the spiral staircase which eventually ends underneath what appears to be a wooden trapdoor. Desmond pushes it open as the bright daylight comes streaming in. You all step up through and are immediately buffeted by the strong winds present this high up.
On the platform are four Citrine Garrison guards and a number of deckhands moving about in the process of unloading a docked skyship. Gently floating next to the platform is a large, beautifully crafted wooden ship with its deck rail reaching a few feet above the platform. The ship has intricate golden scrolling across the entire length of the wooden ship. There are no propellers, but you see what looks like a wing-like protrusion on either side near the stern with a large blue crystal embedded into each. Another large blue crystal is embedded in the middle of the deck near the bow. Each stone slowly rotates in place and seem to vibrate with arcane energy. It is immediately apparent that these three blue stones are what holds the ship aloft. The ship is silent and beautiful.
Booking Passage
Captain Jacqueline is the half-elf female captain of the Crimson Aspect, the skyship currently being unloaded. She is a confident, lithe woman with silver hair wearing a turquoise cape and a sky-blue bandana.
The Crimson Aspect is visually unique due to its sails, which befitting its name, have been hand-dyed red. A skyship has a mast and main sails like a typical sailing ship, but they also have sails that stretch out horizontally from just beneath the deck on the starboard and port sides.
A charter on her ship, to Vasselheim, will cost 1000 gp per person. They are scheduled to depart at dawn the day after tomorrow. The price is steep, but the trip across the Ozmit Sea takes roughly one-fourth the time.
Skyships
Within the Cloudtop district lies the Skyport, a thin tower that climbs along the surrounding wall onto a massive platform that acts as a raised harbor for docking skyships. These beautiful airships range in size, but generally are built to a similar scale as a coaster merchant ship. Skyships are held aloft and guided via the levitating power of three or more enchanted crystals called brumestones installed along the hull or topside of the ship.
The enchantments required to produce and maintain these brumestones is a very closely guarded secret by the Alsfarin Union within the distant city of Ank'Harel, and while the Alsfarin Union does occasionally sell skyships to foreign businesses, they retain absolute control over the maintenance of and number of skyships in operation. Reserved for goods and individuals who require expedient travel without the hassles of sea-faring dangers, the cost to utilize a skyship is prohibitively expensive for the common man, leading to a sense of elitism in those who often make use of their services. Due to the exclusivity of skyports within major metropolises, few skyships in service will deviate from dedicated shipping routes between major cities.
Purchase Cost: 100,000 gp
Speed: 10 mph
Max Cargo: 10 tons
Crew: 6 - 10
Max Passenger Occupancy: 30
Personal Travel Cost: 1-2 gp per mile per passenger
Shipping Cost: 1 gp per 100 lbs. per mile.
Travel to Issylra
The mode of travel across the Ozmit Sea outlined here is via skyship. When the characters board the airship, read the following:
As you all climb your way onto the ship, the whole deck has this strange, slow-floating sensation. Once you're aboard you can hear this crackling hum around the large blue stones holding it aloft.
As the ropes are brought up, the crew all give thumbs-up. Captain Jacqueline steps behind the ship's wheel and takes something from her neck and places it into the center of the wheel. At which point the three blue stones spark with additional life. The humming gets louder, the ship lurches for a second, and begins to lift upward with this slow, gradual incline. Your stomachs all get that butterfly sensation for a second, at which point the captain leans forward. The wheel actually shifts forward slightly, and the whole ship lurches forward, up and over Emon. Those of you who are on the deck can look over the side and see the entirety of Emon from above slowly drift away as the endless ocean of the Ozmit Sea comes towards you, clouds ahead, beginning your trek to the distant land.
Crimson Aspect Crew
This skyship, The Crimson Aspect, boasts a six-person crew. All crew members are capable fighters and will vigorously protect the vessel from any threats. Below is a breakdown of their descriptions and stat blocks.
- Captain Jacqueline - half-elf female captain with silver hair. Druid (Appendix B)
- Maurice - halfling male First Mate with auburn hair. Swashbuckler (VGtM p.217)
- Orville - sea elf male crew member with pale blue skin and green hair. Archer (VGtM p.210)
- Wendy - dwarven woman weapon specialist with black hair. Martial Arts Adept (VGtM p.216)
- Lara - human woman crew member with long red hair. Archer (VGtM p.210)
- KnickKnack - kenku male rigger. Druid (MM p.346)
Ballista
The Crimson Aspect has two ballistae at the bow of the ship. They can be fired as an action and reloaded. The ballistae have a +7 to hit and deal 3d6 piercing damage on a hit.

Wyvern Attack
Early in the morning on the second or third day of the trip, read the following:
Encounter
In the dawn light, there are multiple creatures harrowing the skyship. There are 5 wyverns (MM p.303) flying around. There are 5 archers (VGtM p.210) riding on the wyverns. See Map 7.4 for the encounter battle map.
The Crimson Aspect

Map 7.4
Arriving in Vasselheim
As the skyship arrives in Vasselheim, the following description sets the tone of the city:
As the ship slowly begins to descend, you see in the distance from one of the various mountain ranges, there is a singular mountain spire that protrudes from the center of the forest, about 200 to 250 miles off the shoreline of the Ozmit Sea. As the skyship approaches the base of this mountain, you see what looks like hundreds upon hundreds of stone buildings. Additionally, you can see little details along the mountainside. Countless staircases are spiraling up this mountain in different directions in a chaotic fashion leading to large structures, fortresses, built into the side of this mountain spire. The city proper spreads out from the base of the mountain with layers of walls, within walls, within more walls. This is probably the most fortified city you've ever seen.
As you take in your first look at this city, you can't help but notice a massive rock outcrop that stands ominously over parts of the city. Two large stone pillars seem to protrude up out of the city to support the rest of this massive precarious outcrop above a large section of Vasselheim. It also seems to be where the ship is heading for.
As the ship is slowly brought lower towards the city, you can see the walls vary in color and material. Some look recently built. Some look like they've been constructed in the past 50 to 60 years or so from fine, smooth stone, using more modern architectural techniques. Some walls look extremely ancient, partially crumbled and have been refortified. You also notice the top of these walls are completely covered with what looks like these strange dragon-headed ballista. These defense ballista line every single row of walls. This city is meant to withstand any sort of siege or onslaught.
As the skyship descends further and further, more details of the city come into view. There are scars across some of the larger buildings. Some of the walls look like they have sections that have been knocked down and rebuilt several times. This is a very, very old city. Slowly, the ship descends towards a smoothed out, flattened platform on the side of one of the massive stone pillars. It looks much newer than the rest of the city and has been specifically designed as a skyship port.
Captain Jacqueline is slowly steering and shouting directions back and forth to her deckhands. The crew are gathering ropes and getting ready to secure the ship as it comes into dock.
Stepping out into Vasselheim
As the characters disembark and exit the base of the stone pillar where the skyport is located, read the following:
As you step down the staircase and exit onto the street, the first thing that catches your attention is the mud. The streets are not paved with cobblestones like Emon, they are dirt that quickly turns to mud with snow or rain. A recent snow has turned these streets into a mixture of mud and snow. The people of this city are a very hardened and rugged folk. Most clothing is swathed in furs and thick leathers, and armor is compiled in a patchwork way. Most of the men grow coarse facial hair; the women have long hair tied up in various wild knots or buns. The denizens of this city appear stoic and grizzled.
This seems to be a harsh environment for people to live in. The people who live here, you've come to realize, live her not because it's easy, not because there's many comforts, but because Vasselheim is the oldest bastion of civilization in the world. As far as it's understood, most human civilization stemmed from this city which is believed to be tens of thousands of years old. Some believe this city pre-dates both elf and dwarf civilization, though when asked, elves and dwarves staunchly disagree with this belief.
The oldest temples to the main prime deities have been uncovered within this city, and as such it is considered the holiest place in the modern world. Because of this, many wars have been fought over the city and it has survived many attempts to destroy it by evil forces. Those that live here, live here because they feel they can fight against this, and they actually call it a privilege to exist in this harsh landscape as devotion to their respective deities. Also, because of the numerous wars fought over the city, and as it is such a holy place, the arcane is considered, for the most part, profane in public and very carefully controlled otherwise.
The city buildings range from old to newer stone, or wood warped by the harsh weather. You can see a lot of the wood has a kind of mossy texture to it from the general overgrowth that tends to take the city. It's not kept for beauty; it's kept for function. There are scars across most of the buildings where you can see warfare has occasionally bled into the city. Some structures have ancient damage and have not been rebuilt but just left in ruin because the city has not found somebody to pay for it or a purpose to reconstruct it. It's a very different landscape than what you're used to, The folks that do take notice just kind of give a nod of acknowledgment or a gruff grunt as they pass by.
Vasselheim
Population: approx. 145,000 (54% Human, 19% Dwarven,
6% Halfling, 21% Other)
Religions: Major - Platinum Dragon, Stormlord, Lawbearer,
Wildmother, Raven Queen
Minor - Everlight
Government: Theocracy - Council of Dawn Marshals
Platinum Dragon - Highbearer of the Scalebearers
Vord the Silver-Touched
Stormlord - Earthbreaker of the Dawn Fist
Groon
Lawbearer - High Curator of the Holy Paramours
Curtis Uleas
Wildmother - High Heirophant of the Gladekeepers
Ophera
Raven Queen - The Maidens of the Raven Queen
Two nameless twins
Everlight - Chosen of the Everlight
Pike Trickfoot
Vasselheim is the capital of human civilization on the continent of Issylra. It is predominantly a religious city with several districts, each dedicated to a patron deity. Vasselheim is sometimes called the Dawn City, the Cradle of Faith, or the Cradle of Creation, as it is considered the origin of civilization and various religions.
The people of Vasselheim are generally rugged and stern. Many wear patchwork furs and have unkempt hair. The pious lifestyles and brutal environment of the Northwest make for hard living. Vasselheim has many guards, collectively called "the Bastion", that consist of volunteers from the various religions. The Bastions primarily operate within their respective districts but also serve as the militia if the city were to be attacked.
Located in the region of Othanzia, the city itself is built around a massive mountain called the Heaven's Stair, approximately 200–250 miles inland from the Ozmit Sea. Vasselheim has many walls, varying in age and composition, armed with dragon-headed ballista. The streets are unpaved and made mostly of packed mud. The only conventional way
to enter the city is by foot, as the journey to Vasselheim is considered a religious pilgrimage.
Arcane Magic is largely frowned upon in Vasselheim. Mages aren't trusted, due to the fallout after the Age of Arcanum, so any public display of semi-powerful magic that isn't divine in nature will draw attention and require an explanation by the keepers of order. Small fines and minor jail time may ensue.
The city's government is a theocracy. Each district of the city (and more importantly, the gods they represent) have equal status. As one Bastion put it, "Vasselheim is a divided and united city, as one." Each district is self-governed by the highest lord of its priesthood: the "Dawn Marshal". In matters concerning the city as a whole, the Dawn Marshals meet in council to debate and decide on the matter (i.e., when the representatives of the various priesthoods met in the Platinum Sanctuary when Vecna threatened Vasselheim).
Vasselheim has a large mining operation for cobalt in the mountain. Many of the stores tend to sell supplies for miners and workers that operate in the mountain.


Districts of Vasselheim
Silver Talon's Reach
The Silver Talon's Reach is a district dedicated to the worship of the Platinum Dragon, the god of life and order. It placed at the very northern part of the town attached to the Heaven's Stair, the giant mountain that bisects the northern portion of Vasselheim and overlooks the entirety of the city. The priests for this district are the Scalebearers.
The Braving Grounds
The Braving Grounds District is dedicated to the deity of war, the Stormlord. The district is in the western part of the city, which greets weary travelers incoming from Glasswalk Road. It runs northward from the city through the Vesper Timberland and toward the Zenwick Mountains. The Braving Grounds' priests are the warriors of the Dawn Fist.
The Quadroads
The Quadroads District venerates the law and civilization associated with the god Lawbearer. The district is named for the four roads, incoming from every other district of Vasselheim. They form two main routes and meet up together in the middle of the city, in a large bazaar. Its priests are known as the Holy Paramours.
The Abundant Terrace
The Abundant Terrace is the district of Vasselheim devoted to the worship of the Wildmother, goddess of the wilderness and the sea. Located in the eastern part of the city, it consists mostly of wooded areas and farmland and provides most of the food for Vasselheim. Various enchantments in the district keep the weather mild, allowing for year-long harvests from its orchards. It is the location of the Seed of Rebirth, a tree which legend says was planted by The Wildmother, the sister tree to the Arbor Exemplar in the Barbed Fields of Xhorhas. Its priests are known as the Gladekeepers.
The Duskmeadow
The Duskmeadow District is dedicated to the worship of the goddess of fate and death, the Raven Queen. The district celebrates death as a part of life and appears lively in contrast to the other parts of town. The buildings are dark, but the morbid celebration is constant here. Its priesthood is the leaderless order of dark-veiled maidens of the Raven Queen known as the Trust of Winter.
Vasselheim Locations
The following areas, 1 through 15, are specific locations in Vasselheim and can be found labeled on Map 7.5
V1. The Platinum Sanctuary. The oldest known temple to the Platinum Dragon in the world. The Horn of Orcus that Vox Machina recovered from K'Varn is interred here. The Platinum Sanctuary is built into the side of the Heaven's Stair. It is a grand stone fortress that has been weathered significantly with time, to the point that the points and edges of the stonework have been rounded and smoothed down. Along the outside are silver markings in a form of primitive Draconic that read platitudes such as "honor" and "justice." The entrance to the fortress is guarded by the Scalebearers. The doors are exceptionally large and made of stone with white marbling through it.
V2. The Trial Forge. An impressive sight from the exterior, the Trial Forge features steps leading up to giant, reddish, almost rusted-over doors that blocks the entrance. Bastions guard the front entrance. Atop the temple, a gargantuan statue of the Stormlord looms over the entire district. The statue depicts a musclebound titan of a figure standing heroically with a giant beard, bracers on his arms, and one knee raised. Inside the temple, sage and other herbs are burned to ceremonially cleanse the area of evil spirits and create an atmosphere conducive to meditation. The building itself consists of two long hallways built from a thick, sturdy, reddish stone that intersect into a central chamber with a raised dais, upon which shines multicolored beams of light. The floor is a polished black marble with gold streaks through it. Individuals in gold and red robes walk throughout the temple.
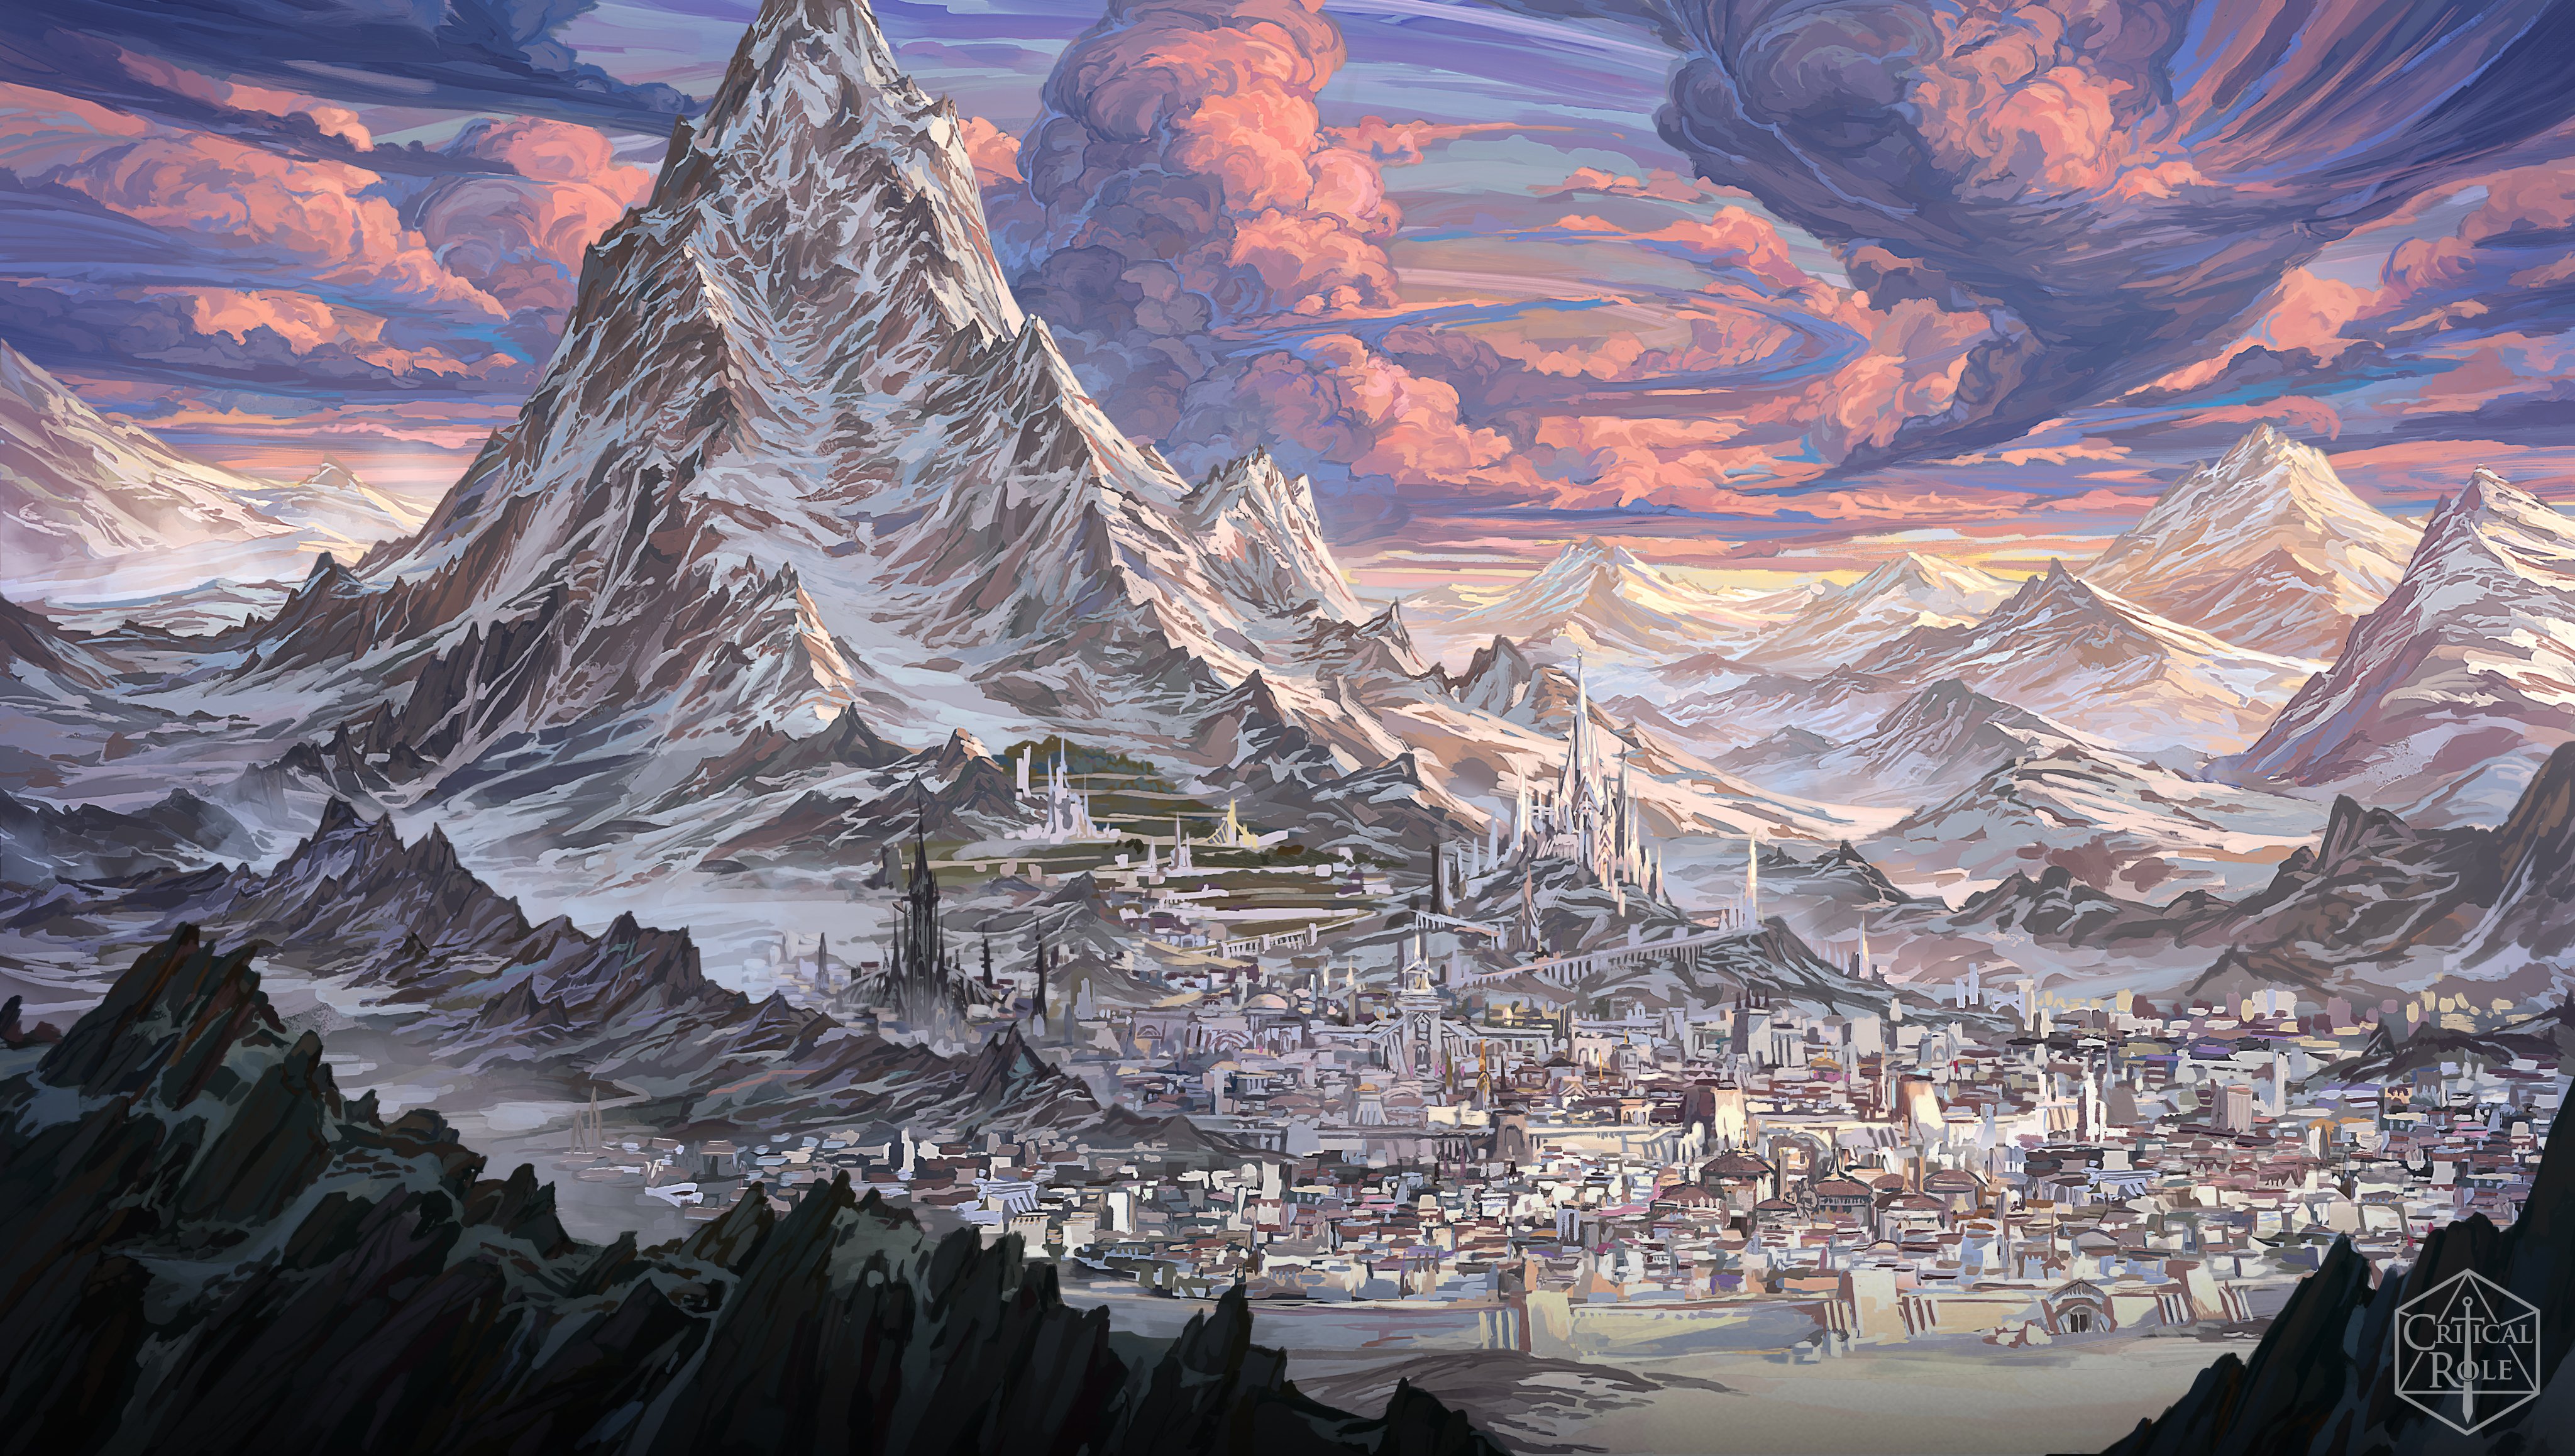

V3. The Crown of Erathis. Located in the Quadroads, the Crown of Erathis is a parthenon style building dedicated to the goddess of law and civilization, the Lawbearer. The temple is controlled by the Holy Paramours, the priests who oversee all magically binding contracts within Vasselheim. For example, the contracts under which the Slayer's Take hunts monsters and other creatures around Vasselheim.
V4. The Birthheart. An archway of branches and trees that knit into each other to form the entrance to the Birthheart. A heavy cluster of forest, an outside row of trees that have intertwined form a natural wall. The inside is open with the occasional stalk of tree that blossoms up into the higher portion. There is one large central tree in the center of the area that marks the Birthheart. There are a number of lanterns that are hung from the branches at various levels all throughout giving off a yellowish fairy glow within each point. There are a number of people walking off the path, just through the soft mulch wood and pine needle floor beneath the canopy, all wearing similar robes of greens and yellows, golds and whites, worshipers of the Wildmother. The central tree has a number of staircases that spiral up.
V5. Raven's Crest. The entrance to the Raven's Crest is through two large, glass doors at the top of a flight of stairs. The glass is one-sided; when one looks in from the outside it appears opaque, but those inside can clearly see out. The main chamber just inside the entrance serves as a walkway, and the lighting is low. The hallway leads in as the glass of the walls begins to change into a different material as one enters the next chamber. That next chamber is dark gray and ivory and feels as though it is carved of ice and bone. The most sacred chamber is the communion pool. The pool is in a room at the top of a 40-foot-tall staircase, behind a dark oak door with a large iron ring door knocker. Inside is a 100-foot-high room with a steepled dome roof. The dome is made entirely of multicolored stained glass, and in the center of the chamber is a large round pool full of ice-cold blood.
V6. The Temple of Renewal. A temple dedicated to worship of the Everlight, named after her realm, the Island of Renewal. The temple is located within the Braving Grounds District of Vasselheim. Beneath the cursed ruin of the tower of Syrac for hundreds of years, the temple had been lost to time and rediscovered in 810 PD; Pike Trickfoot, a cleric of the Everlight, led its restoration effort. Though the Everlight's following are much smaller than those of other districts, Pike is still afforded the same respect as any other Dawn Marshal.
V7. The Slayer's Take. The Slayer's Take is a local hunting guild in Vasselheim that is paid to hunt rare animals, typically for specific parts of the animal. The Slayer's Take pays homage to Ioun, the goddess of knowledge, prophecy, and skill. The guild is led by Vanessa Cyndrial, a no-nonsense tiefling. The second-in-command is her husband, Mertin Cyndrial, a halfling. There is an engraving on the doorway of the guild hall that reads: "Here is where the hunters gather, keen eyes and blades at ready. We cease the unknown's cackling laughter, our will is strong, our members plenty. We stand against the tide of darkness; we do the deeds few men can handle. Reap forth a trophy from the carcass, we are your strength, we are your candle."
V8. The Crucible. The Crucible is a brawling arena in the Braving Grounds District of Vasselheim. It fits the theme of the Braving Grounds, which are dedicated to the Stormlord, a god of battle and competition. The Crucible is a regular fighting pit, built for warriors to test their strength in competition, and often attracts gamblers.
V9. The Amaranthine Oubliette. This large opposing structure is the prison of Vasselheim. It is a two story, solid stone structure with tiny slits dotting the sides as windows. Rumor has it there are many more prison cells below ground than there are above ground. The Dawn Marshals send select bastion members from their districts to aid in keeping it secure.

V10. The Catacombs. An underground structure in which the dead of Vasselheim are interred. The priestesses of the Raven Queen oversee all burial preparations and maintain the security throughout the catacombs. It is a maze-like structure; the Maidens must always accompany visitors.
V11. The Cobalt Vault. Located in the southern region of the Quadroads, this archive of the Cobalt Soul is one of Exandria's leading libraries, ranking with that in Rexxentrum on the continent of Wildemount. The exterior of it is a light-grey stone, it's a cylindrical building with three different doorways around the outside and a giant, bright blue and black marbled dome on top. Inside is a central chamber that's also cylindrical, with a small walk-around hallway along the exterior wall. Bookshelves radiate out from the center, filled with books of all kinds. The exterior walls are covered with paintings and tapestries. There are a few monks walking around, all wearing the uniform, dark grey and blue robes of the Cobalt Soul. There's a desk at the front, just inside the door, with a young woman of olive skin sitting, her hair short and wavy with thick spectacles adoring the front of her nose.
V12. The Elegant Pint. A simple wooden and stone building in the Braving Grounds. The proprietor is Rosla, a female dwarf with black hair pulled back in a tight braid.
V13. The Midnight Breath Tavern. A simple stone building in the Abundant Terrace. It is owned by a gentleman named Dagon, who is an older human who has a somewhat patchy red and brown beard, a couple scars on his body, but nothing battle worn – more just a person who has existed in this harsh landscape for a while.
V14. The Velvet Cabaret. The Velvet Cabaret is a place of leisure for the wealthy and ostentatious of Vasselheim. It is located in the Dusk Meadow district. From the outside, it looks garish. On the inside, the atmosphere is extremely relaxed and tailored to the exclusive clientele. The interior is low-lit, with the primary source of light being Faerie Fire lamps that emit a soft purple hue. There are a multitude of low-set tables surrounded by luxurious cushions. Food and entertainment are plentiful in this palace of leisure. The staff includes servers wearing silk robes and collars around their necks, and guards that stick to the edges so as not to interrupt the atmosphere.
V15. The Sphynx's Armory. A squat red brick building at the edge of the Braving Grounds and the Duskmeadow. It is the home and shop of a muscular earth genasi named Asher. His specialty is in metal armor and shields and occasionally has adamantine weapons and armor.
V1
V2
V3
V4
V5
V6
V7
V8
V9
V10
V11
V12
V13
V14
V15

Map 7.5
Journey to the Stormlord's Temple
The territory known as Othanzia encompasses a majority of the continent's developed regions, keeping most domains protected and governed by the might of the theocracy of Vasselheim. Surrounding the city is the dark and sprawling Vesper Timberland, through which mountaintops occasionally jut; the Timberland stretches to the north of Vasselheim before becoming tundra.
Beyond Vasselheim's walls lies ever-cold seasons and savage wilds, as the ancient and magically rich nature of the area has led to dense wilderness, powerful beasts, and dangerous travel routes. Smaller camps, communities, and townships are scattered across the surrounding landscape, and those who call Othanzia home are a tough, hardened people who remain through duty, faith, or the need to protect. Beyond the Othanzian region, a handful of lesser republics hold smaller societies with varying moral interests, but the ferocious creatures that stalk the jagged Utesspire Mountains prevent expansion too far away from the Othanzian borders.
To the southwest are the steep Sunderpeak Mountains. Immediately appearing at the top of a path scaling the mountains is a valley caldera containing a rift to the Elemental Plane of Fire, responsible for the creation of the Cindergrove. The rift is overseen by the Ashari village of Pyrah, which was devastated in the wake of Thordak's escape from the Plane of Fire. Even farther south of Vasselheim, 300 to 400 miles away along the coast, is the small fishing village of Shorecomb.
The journey to the mountaintop temple will have the characters covering roughly 1100 miles of Issylra's vast, untamed wilderness. The journey will take the characters south through the Vesper Timberlands and across the rolling steppe past the southern end of the Sunderpeak Mountains. Then, the journey southwest takes characters through a wide swath of swamplands. Finally, as the characters approach the Utesspire Mountains, the final step of the journey is up over dry, rocky foothills. It is a dangerous journey that will put the characters in contact with extremely dangerous monsters. Will the characters have what it takes to face these dangerous beasts and reach the mountaintop temple?
Through the Vesper Timberland
Leaving Vasselheim has characters entering the Vesper Timberland. It will take 5 to 6 days of travel southward to make their way through the dense, dark forest.
You make your way through the muddy streets towards the southern gate of Vasselheim. The Bastions open the gate for you and lead you through. The road heads southward, into the Vesper Timberlands. As you enter the forest, you notice the pine bough canopy of the forest itself is so thick that there is only a slight dusting of snow on the ground. So little light comes through that it appears to be dusk even in the middle of the day. The trees vary in sizes, from small saplings to trees 10 - 15 feet in diameter.
You can hear birds and other wildlife living amidst the trees. There are certain portions of the trail that you see are being encroached upon by the undergrowth. There are roots and vines that stretch across the path, partially reclaiming the road. You get the sensation that the people that traverse this road must perpetually keep it clear. There is something about this forest that feels almost alive, like its breathing and full of life. When the day comes to a close, as the sun sets the forest gets even darker than it's been all day. The moons and stars are not visible through the thick forest canopy.

Encounter
On the second or third day of travel through the Vesper Timberland, the characters will face their first encounter with monstrous beasts. Characters can make a successful DC 17 Perception check to avoid being surprised by the attack. If successful, they will hear the snapping of twigs on both sides of the path followed by the pounding of feet as large gray creatures bound out of the trees on either side. These 2 creatures are Gray Renders (MToF p.209).
Across the Othanzian Steppe
After traveling through the Vesper Timberland, the characters must journey across the rolling, rocky hills of the Othanzian steppe as they travel south around the southern reaches of the Sunderpeak Mountains.
As the characters head south, following the Sunderpeak Mountains, one evening as the sun sets, they will have a chance to encounter a group of Ashari. As the group looks for a suitable place to make camp, a successful DC 17 Perception check will notice flickering firelight gleaming off some rocks a little way to the west.
Encounter
Sitting around a small campfire are 4 Ashari Firetamers (TCSR p.226). They are not necessarily combative but will react strongly if startled or attacked. They all wear some variant of red and brown armor. There is a half-elf woman named Pevra, a red dragonborn male named Gormak, a dwarf male named Hedmor, and a red tiefling female named Jora. See Map 7.6 for the encounter battle map.
Aftermath
These 4 fire ashari members have information they can give the characters. There has been some upheaval in the fire plane. They've noticed elementals are getting restless, rifts have been opening in unexpected places. There is something foul afoot in the elemental plane of fire, but the ashari are still working to figure out what.
Swamps of Central Issylra
South of the Sunderpeak Mountains, the rolling hills and rocks give way to wetter ground, and eventually into sprawling swampland. This swampland is so extensive that it will take characters 5 to 6 days to traverse.
Encounter
As the party are traversing through the swamp, they begin to feel like they are being watched, a feeling the group can't seem to shake. As the light begins to fade from the sky, they are attacked by a Urocher (ToB p.393). A character that makes a successful DC 18 Perception check will avoid being surprised. See Map 7.7 for the encounter battle map.

Map 7.6
Map 7.7
Black Dragon Territory
An adult black dragon has made its lair inside a long abandoned, ancient temple slowly sinking into the swamps of Issylra. The region around a dragon's lair is warped by the dragon's magic. This has led the swamps in the area to become acrid, with the vegetation showing black spots as it gets sicker due to the dragon's magic.
Acrid Swamps
As the characters travel deeper into the swamps, a successful DC 15 Nature check will allow a character to notice the natural swamp vegetation slowly grows sicker in appearance and the swamp starts to smell more acrid and sickly sweet. Black spots begin to appear on the leaves and bark of the vegetation. This is not a healthy swamp and seems to be getting worse as the water gets dark and darker, to almost black in color.
If characters choose to pay closer attention to the changes in the swamp, a successful DC 20 Perception check will catch something out of place. Read the following:
If the characters decide to investigate the ruins, read the following as they approach:
Entering the Temple
Vines cover the walls of the temple entrance. They protrude this way and that and are covered in large spikes. As the characters step in, naturally trying to avoid the spikes, a few of the vines move suddenly and lash out towards them
Encounter
In amongst the vines that cover the walls of the entrance into the temple are 3 Bloodstock Vines (Appendix B). They attack any living creatures that attempt to make their way through the tunnel.
Black Dragon Lair
The dragon has made its lair in the center of the temple. The temple is slowly sinking, and the center has become flooded with swamp water. The top of the temple has been broken apart by the dragon to give it a way into its lair.
As you progress into the temple, the black brackish stagnant water covers every inch of the temple interior. The interior of the temple seems open with a humid, fetid air flowing out. Were it not for the walls and ceiling above, the room would be nearly indistinguishable from the swamp outside. Foul water covers the floor and twisted plants grow all around the walls.
Slow laughter builds and reverberates throughout the hall. A voice seems to come from nowhere and everywhere at once. (In draconic) "Welcome to my home, thank you for coming to me, I was beginning to grow hungry." From the water in front of you a large black dragon slowly rises up out of the stagnant water.
Encounter
This temple is home to an adult black dragon (MM p.88). Additionally, as this encounter occurs within the dragon's lair, lair actions will occur on Initiative Count 20. The dragon's name is Murgyss. See Map 7.8 for the encounter battle map.
Treasure
The dragon has submerged most of its treasure horde under the swampy water. Some of it has become partially buried in the silt. Characters who succeed on a DC 15 Investigation check will find 2000 gp, various diamonds worth 250 gp, a bottle of Oil of Slipperiness, a Potion of Healing, and various gemstones worth a total of 1500 gp.
If the characters succeed on a DC 20 Investigation check, in addition to the above items, the party will find a Quaal's Feather Token (tree), a Potion of Acid Resistance, an additional 100 pp, 2 Potions of Greater Healing, and an additional 1000 gp worth of diamonds.
Alternate Temple Entrance
If the characters follow the interior temple path along to the other side, there is another entrance out of the temple. This is actually the real entrance, the one the party came through was made later. There is a small chamber that the entrance leads to.
Encounter:
Hiding in the acrid water just inside the temple entrance is a Monstrous Black Pudding (MME p.211). It attacks any creatures that move through the chamber.
Map 7.8
Utesspire Foothills
After traversing the swamps of central Issylra, the ground hardens and becomes a rocky steppe. It will take the characters roughly 3 to 4 days of travel through the rocky steppe to reach the base of the Utesspire Mountains. The mountain range will become visible on the horizon about two days before reaching it.
Stalked through the Foothills
As the group is picking their way around large boulders, a character that makes a successful DC 20 Perception check will catch the faint sound of metal scraping across rock. The sound begins to get louder and louder, quite quickly.
Encounter
All of a sudden two large blue-gray metallic scaled creatures moving swiftly towards the characters, 2 Steel Predators (CC p.192). See Map 7.9 for the encounter battle map.
Treasure
These creatures' hides can be used to make strong armor. However, it will take a DC 25 Athletics check to take any of the hide off. Characters will need three successful attempts for one set of armor.
Climbing the Mountainside
Upon reaching the base of the mountain, the characters must scale the cliff face to reach the temple entrance. It will take the better part of the day to reach the peak. Occasionally, the characters will come across the ancient, weathered remains of steep stairs carved into the rock face.
Throughout the day, characters will have to succeed on three separate DC 18 Acrobatics or Athletics check to keep climbing without slipping and falling. A character that fails a check will fall somewhere between 30 and 60 feet before landing on a rocky outcrop, taking 1d6 fall damage per 10 feet fall.
Encounter
As the characters climb, the wind begins to pick up as faint shapes appear, billowing around the group. As they climb, 3 air elementals (MM p.124) attack the party.
It is dangerous to fight while climbing the mountain. If characters attack on a turn, at the end of their turn they must make a DC 10 Dexterity saving throw, maintaining their hold on the mountainside on a success. On a failure, the character begins to slip and must make another DC 15 Dexterity saving throw at the start of their next turn, managing to catch their grip again on a success, or beginning to fall on a failure.
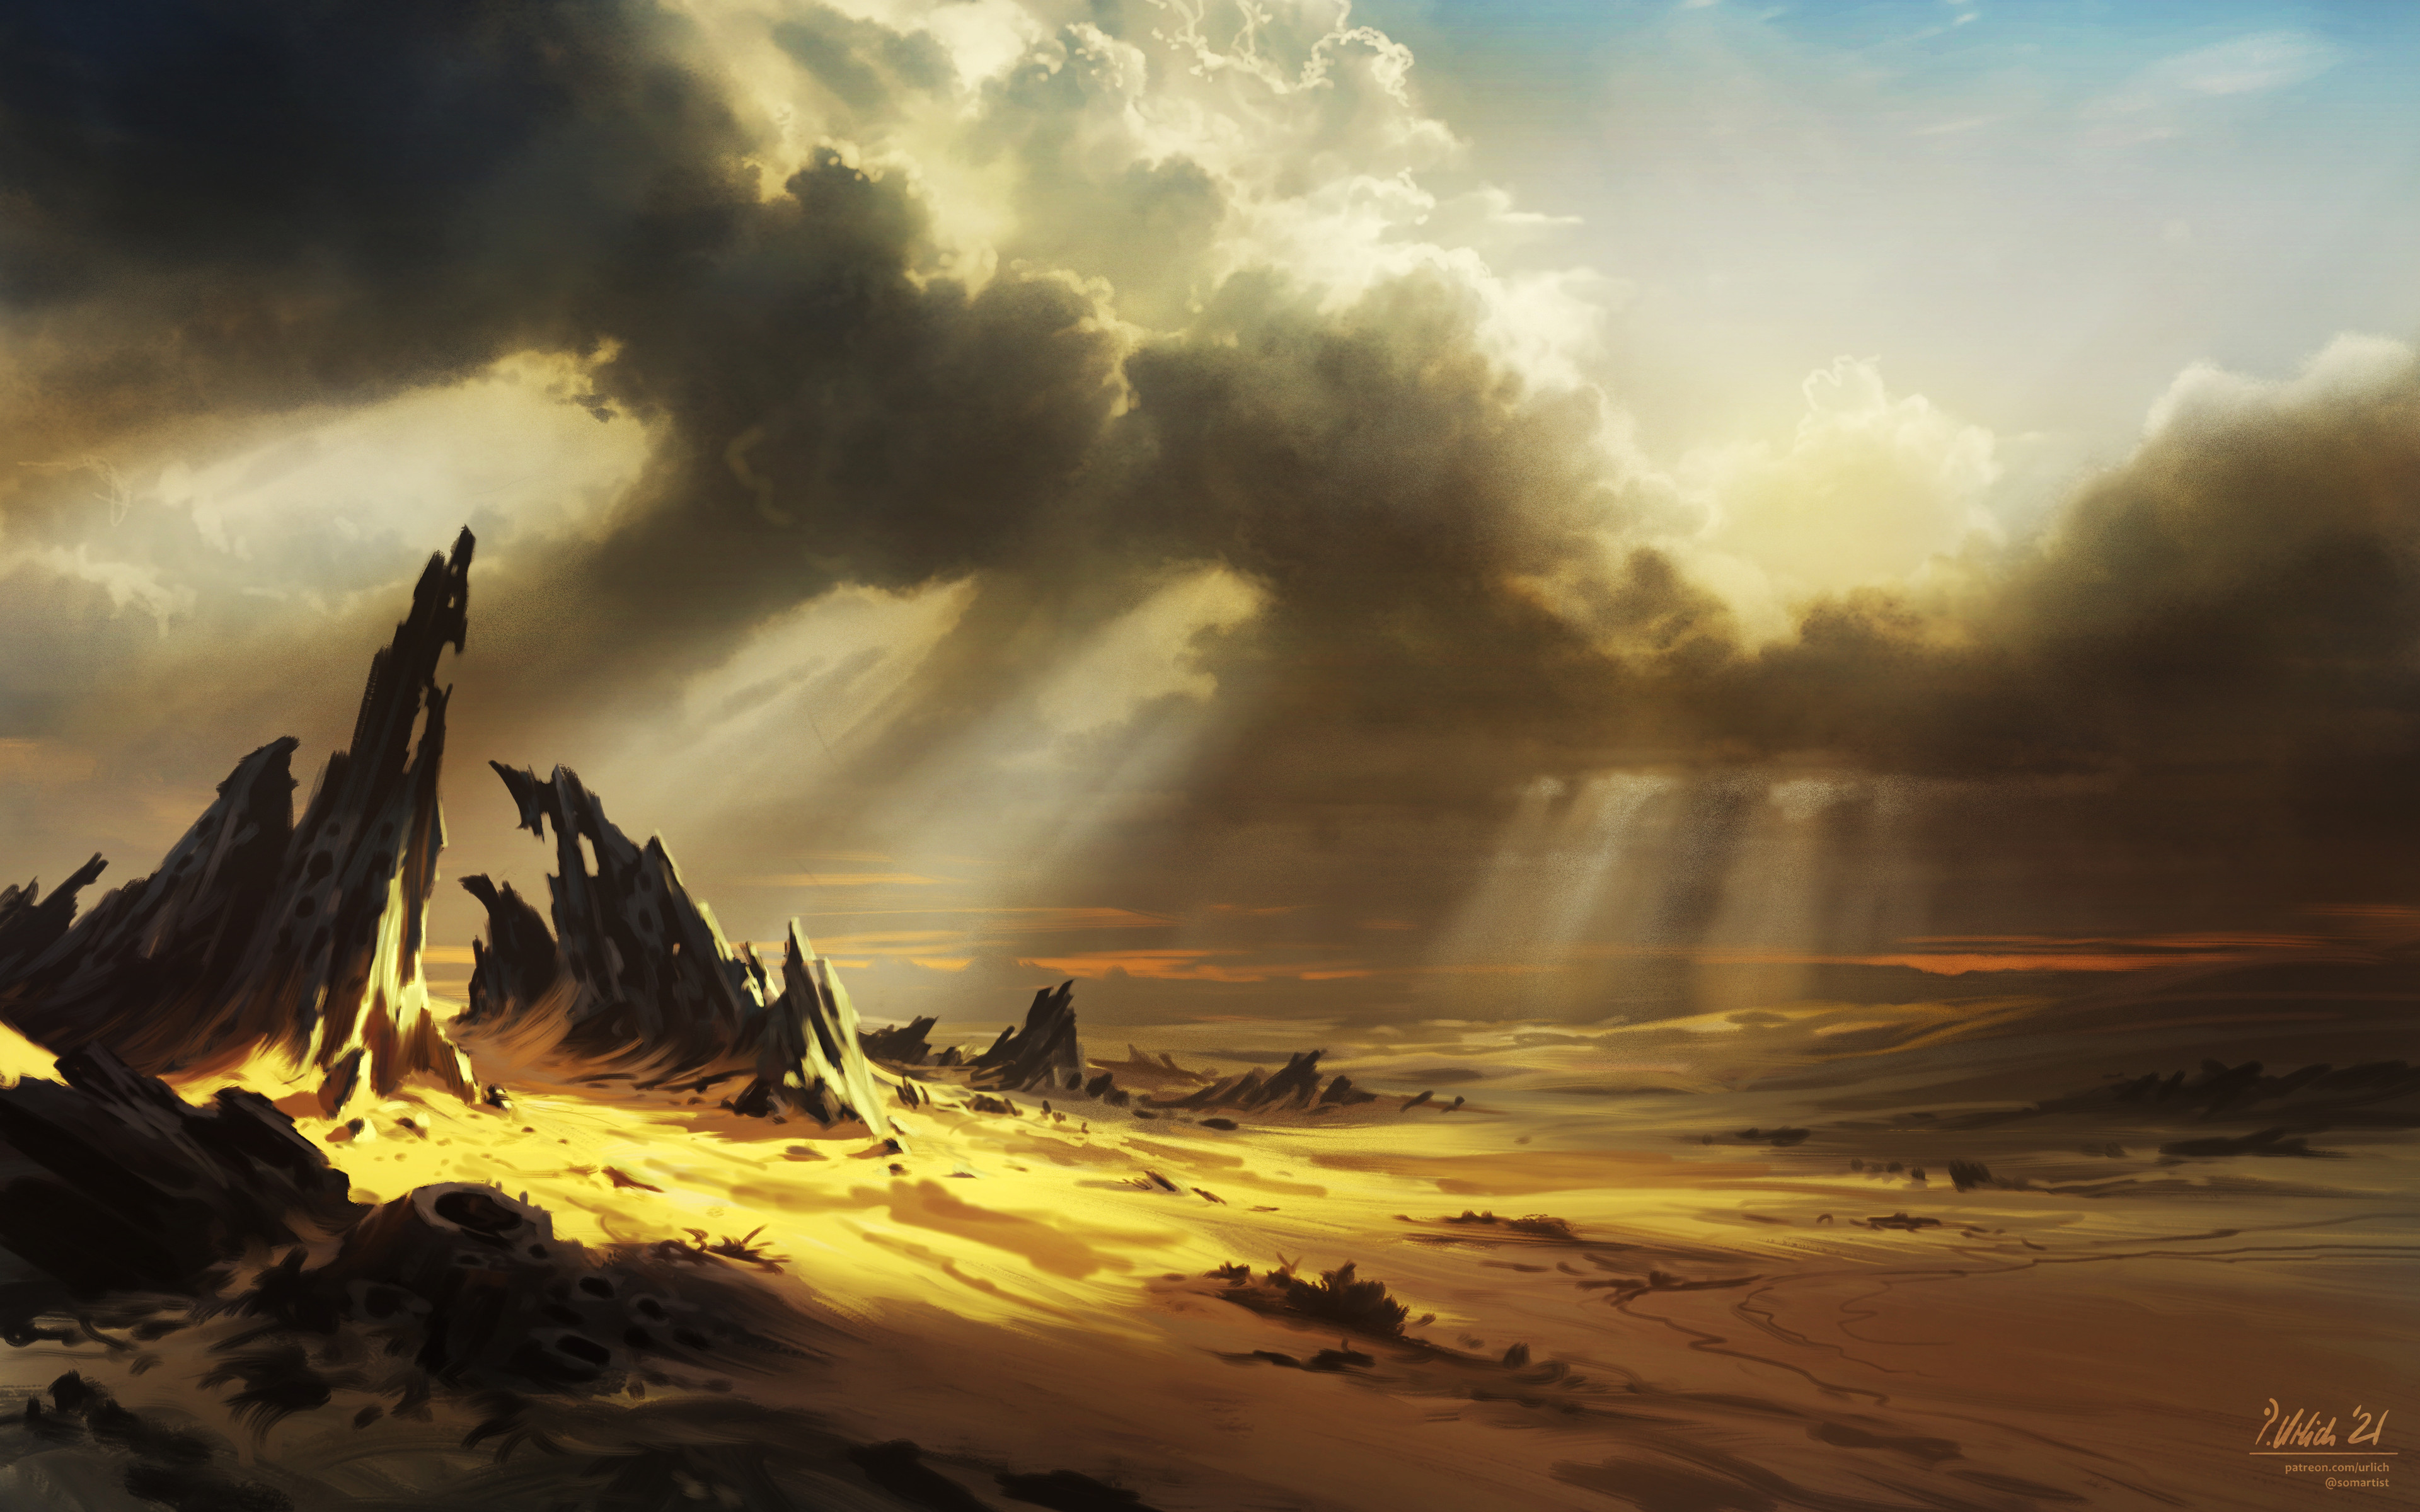
Map 7.9
The Stormlord's Mountaintop Temple
At the top of an ancient, crumbling path carved into the face of the mountainside are two imposing stone doors built into the side of the mountain. They are nearly indistinguishable from the rock face from a distance. There is no obvious way to open the rock, however, there is a large stone that has been carved into the shape of a giant knocker. Underneath the knocker are some weathered marks that look like runes carved into the stone. The runes are carved in Celestial. They read "If you seek entry, knock and prove your might."
Temple Entrance
After knocking on the stone doors, there is a sound of stone scraping upon stone that steadily grows louder until the ground around erupts.
After the elementals are destroyed, the door slowly grinds open outward.
Encounter
Springing forth from the rocky ground around the temple doors are 2 earth elementals (MM p.124) and 2 elder earth elementals (CC p.248). See Map 7.10 for the encounter battle map.
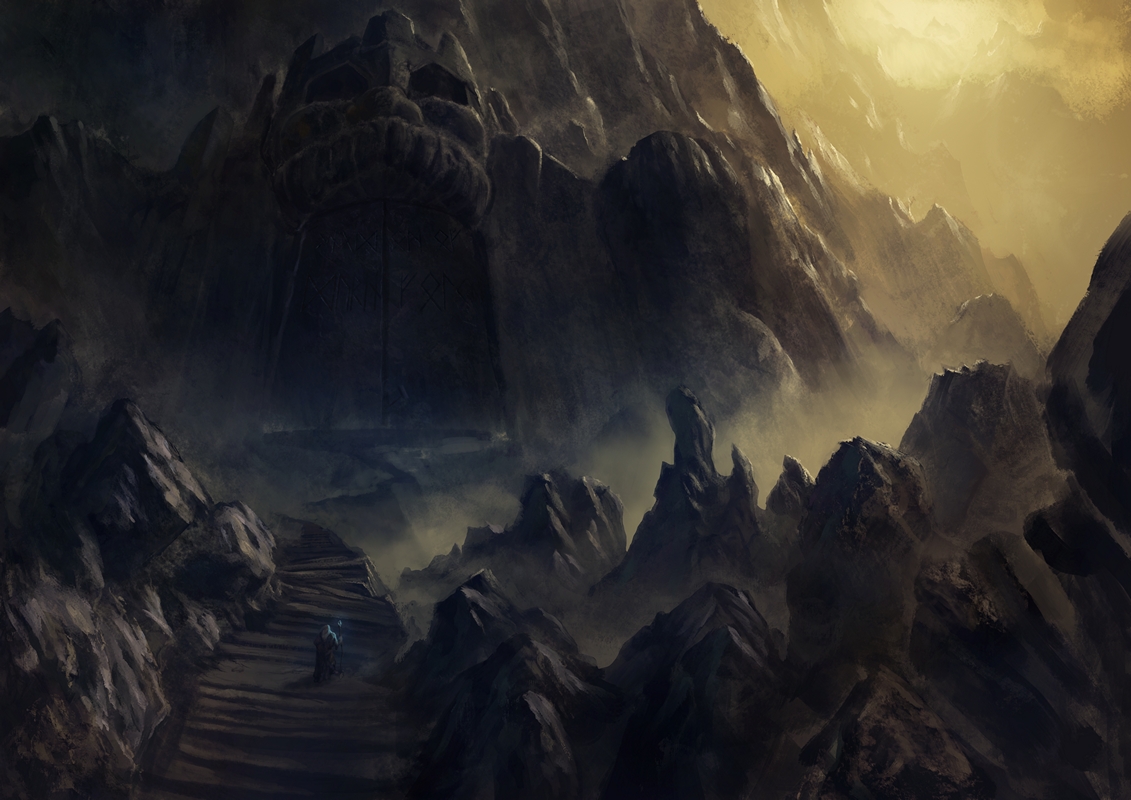

Map 7.10
Temple Arena
As the party enters into the temple, the outer stone doors slam close behind them leaving the chamber in complete darkness. There are torch sconces around the room if the characters want to light them. This room is a small stone foyer carved directly into the mountain. At the far end is a stone staircase that leads upwards.
When the characters reach the top of the staircase, read the following:
Embedded in the wall just to the right of the door is a metal plaque with words etched into it. It is a riddle written in Draconic:
One by one the drakes did fall
To his unbridled might.
First poison reeked and stripped the walls
And then the cold did bite
Then acid burned and lightning flashed
And fire did ignite
The dragon horde against our Kord
Could never win this fight.
Dragon Skull Riddle
In order for the steel gate blocking the passage to be lifted, the dragons' mouths need to be opened in correct order. The order is provided by the riddle etched into the metal by the gate. If the mouths are opened in the incorrect order, the mouth will release the corresponding breath weapon of a dragon. There is no way to tell which skull is which color dragon without testing them. The skulls are randomized and not in any particular order. This is where the characters' strength and fortitude are tested.
Each time the party attempts to open one of the mouths, it will require a successful athletics check with increasingly difficult DCs. When opened in the correct order, the mouths will click and lock into place. If a mouth is opened in the incorrect order, all open mouths shut. Their order and DC's are:
- Green (DC12 Athletics check)
- Poison Breath: 30-foot cone. Each creature in the cone must make a DC 14 Constitution saving throw taking 12d6 poison damage on a failure or half as much on a success.
- White (DC 14 Athletics check)
- Cold Breath: 30-foot cone. Each creature in the cone must make a DC 15 Constitution saving throw taking 10d8 cold damage on a failure or half as much on a success.
- Black (DC 16 Athletics check)
- Acid Breath: 30-foot line, 5 feet wide. Each creature in the line must make a DC 14 Dexterity saving throw taking 11d8 acid damage on a failure or half as much on a success.
- Blue (DC 18 Athletics check)
- Lightning Breath: 60-foot line, 5 feet wide. Each creature in the line must make a DC 16 Dexterity saving throw taking 10d10 lightning damage on a failure or half as much on a success.
- Red (DC 20 Athletics check)
- Fire Breath: 30-foot cone. Each creature in the cone must make a *DC 17 Dexterity saving throw taking 16d6 fire damage on a failure or half as much on a success.
Test of Piety vs. Arcane
Beyond the heavy steel gate, down a short hallway, lies a large chamber filled with mist. A giant chasm cuts through this chamber with a rope bridge that spans across. The other side of the bridge and the chamber cannot be seen through the mist. When characters enter the chamber, read the following:
At first glance, the sigils and symbols don't appear to be in a language the characters understand. As they take a moment to look at it, the symbols seem to twist and turn to form words that can be understood in each character's native language.
The phrases are different depending on a character's source of magical abilities.
- Divine Magic - "Your actions prove your worth, you are free to continue on your path."
- Nature Magic - "You walk the line; you are yet to prove yourself. Feel free to walk the path, but beware it is treacherous."
- Arcane Magic or No Magic - "You do not belong here; this path is not yours to take."
Rope Bridge Trap
The rope bridge is roughly 120 feet long and it spans across a 200-foot-deep ravine. The mist is a byproduct of a powerful divine magic that suffuses this chamber and prevents the characters from crossing the ravine using any sort of magical means of travel other than walking across the bridge. It will prevent things like polymorph or magical items that will allow characters to fly or float across.
The rope bridge is a trap to test characters resolve; it affects characters differently depending on where they fall on the piety versus arcane scale, based on the carvings in the stone initially.
- Divine Magic - There is no difficulty walking across the rope bridge.
- Nature Magic - The rope bridge is considered difficult terrain. A character must succeed on a DC 15 Acrobatics check or fall prone on the bridge.
- Arcane Magic or No Magic - The bridge is considered Illusionary Terrain. A character must succeed on a DC 15 Investigation check or be led to fall off the bridge. A character can make a DC 17 Dexterity saving throw to grab hold of the rope and prevent falling off on a success.
Upon reaching the other side of the chasm, there is another ledge similar in size to the other side. There is a stone door built into the wall. Carved into the door, in celestial, is the following:
The storm is a challenge to be faced
A path worth traveling despite the risk.
Lightning flashing, thunder crashing
Part of God's almighty fist.
Clouds descending, bowing deeper
Within their center, shadows form.
And, as an opponent to be bested
It lays waiting for the storm.
This stone door is unlocked but still. A character can push the door open with a successful DC 20 Athletics check.
Treasure
If the characters decide to investigate the bottom of the ravine, there are a few items that can be found from adventurers that have found an untimely end here in ages past. With a successful DC 15 Investigation check, characters can find 500 gp on the body of a dwarf skeleton. Additionally, with a successful DC 25 Investigation check, characters can find a Ring of the Ram on a different dwarf skeleton. There are multiple other skeletons at the bottom of the chasm, but nothing of note can be found in their remains.
Mountaintop Altar
Through the stone door is a short tunnel through the rock ending at a carved stone staircase. The staircase leads down to an open-air temple with a stone altar.
Encounter
As the character steps forward, a mote of electrical energy springs forth from the barrier surrounding the altar and hovers in the air, about 50 feet in front of the altar. It sparks and jolts before morphing into a stormy, sparking creature, similar to an air elemental.
This is a storm guardian (Appendix B). For each additional character who steps towards the altar, another storm guardian forms. See Map 7.11 for the encounter battle map.
Trap
The electrically charged area within 30 feet of the altar is considered difficult terrain. Additionally, any character who enters this area for the first time or begins their turn there must make a DC 15 Dexterity saving throw taking 3d8 lightning damage on a failure or half as much on a success.
If a character physically touches the sword, they take 3d8 thunder damage and are blasted backwards 15 feet on a failed DC 15 Strength saving throw. The sword cannot be removed from the altar until the storm guardians are defeated.
Treasure
After the storm guardians are defeated, the electrical charge surrounding the altar fizzles and the sword can be removed. This is the Blade of the Stormlord (Appendix A), a Vestige of Divergence made by the Stormlord, and is found in its Awakened State.
Conclusion
At the conclusion of this story arc, after retrieving the Stormlord's Vestige, the characters should reach 11th level.

Map 7.11
From the Adventures of Bramble Tickletoes III & Company
A five-day journey across the Ozmit Sea brings the party to Vasselheim, the Dawn City; the group's first excursion to a different continent. During the flight, wyverns attacked the skyship and the party worked alongside the crew to fight them off. Bramble obviously took the lion's share of credit for the success; however, he did acknowledge (begrudgingly) that the crew were quite capable.
With Vasselheim being the Cradle of Faith, the party decided to take this opportunity to have Bramble attempt to unattune with the Oblivion's Anchor and remove it from his chest. Kayne brought them to the Trial Forge, the temple to his god the Stormlord, for this ritual. Incense infused the chamber as they initially cast greater restoration to remove any possible curses on the anchor. Then, Bramble began unattuning, which turned out to be extremely painful as the anchor had grown stronger and developed barbs. As it was forced out, Bramble suffered 103 points of damage leaving him unconscious. Upon removal, Oblivion's Anchor reverted to its dormant state.
After stocking up on supplies, the group began their long journey south towards the Utesspire Mountains. During the trek, the party unexpectedly stumble upon the lair of an adult black dragon. After first running away, they steel themselves and return to face the dragon. Kayne scored a few critical hits on it which drew its ire. The dragon unwisely focused all its attacks on him, ultimately killing him, but left itself vulnerable to the attacks from Lia, Maoki, and Bramble. After defeating the dragon, Bramble used raise dead to return Kayne to the land of the living.
Upon reaching the base of the mountain that is home to the long-lost mountaintop temple, Bramble polymorphed into a giant eagle and flew Kayne up to the temple entrance. While Bramble flew back to pick up Lia and Maoki, Kayne knocked and was tested against powerful earth elemental guardians. He manages to stand his ground temporarily under their attack, using his Bear Potion, Power Rune for Sanctuary, and his Conquering Presence before being knocked unconscious and dying from his wounds.
Lia, Maoki, and Bramble arrive at the top to find Kayne dead. Bramble uses another diamond to cast raise dead to bring Kayne back. After resting on the mountain ledge, they knock and fight the elemental guardians, enter the temple, and make their way through in search of the sword Kayne has received visions about.
Kayne crosses the bridge by himself and faces the storm elemental alone. The fight forces Kayne to use nearly every ounce of his strength and power but does manage to defeat the final guardian. He walks forward to the altar and pulls the greatsword vestige free from the stone, fulfilling his quest.
Return Journey to Shorecomb
After traversing the wilds of Issylra and reaching the Stormlord's mountaintop temple high in the peaks of the Utesspire Mountain range, the party must return to civilization. The closest bastion of civilization is the port city of Shorecomb. It is an 18-day journey northeast from the Utesspire Mountains to Shorecomb.
First the characters must climb back down the mountainside to the base of the mountain. As they journey across the wild Issylra countryside random encounters can be added to break up the journey. The following descriptions can set the tone for the characters as they travel back to Othanzia and the port city of Shorecomb.
Out of the Utesspire Foothills
Travel through the Swamp
Once the foothills are behind you, the temperature begins to warm as the air grows warmer and more humid. The ground gets progressively wetter as the swamp begins. The next six days of the journey is slow as the path zigzags its way through the swamp, ranging from fairly sturdy peat moss to soft and squishy marsh. At times, no path can be found and it's necessary to slosh through swamp water until you find some firmer ground again. There is a perpetual layer of thick fog that lingers across most of the swampland.
Additionally, while parts of the swamp are still brackish with vegetation still showing signs of black decay, there is sign of change. The acrid smell of decay is not quite as strong, and the plants seem to show new growth forming without black decay. Eventually, over the course of the seventh day the ground begins to firm, and the mist slowly dissipates. It is a nice change of pace to camp again on hard, dry ground.

Through the Grassland Hills & Sunderpeak Foothills
The next seven days of travel are marked by fairly easy travel across the snow-covered rolling hills. This week of travel is marked by cloud covered days and temperatures in the mid-thirties. The snow is beginning to melt as spring approaches. The hills are dotted occasionally with large stone outcrops and small groves of trees.
One of the days in the grassland hills is interrupted by a pair of massive eagles flying through the sky towards you. The birds easily have 20 to 30 feet wingspans each. A trail of smoke seems to trail behind the birds, and as they fly underneath a cloud, you notice they appear to have flaming feathers. A small grove of trees ahead offers cover and refuge from attack, if you can get there unseen.
Encounter
These two birds are ember rocs (TCSR p.238). Attempting to reach the grove of trees unnoticed requires the group to succeed on Stealth checks measured against the birds' Perception checks. If the characters are unable to reach shelter without being noticed, the rocs may fly lower to investigate. Ultimately, the characters are too small of prey for the birds and will not attack unless provoked.
It takes a half hour or so for the birds slowly circling above to eventually more off north towards where the Sunderpeak Mountains begin to take shape in the distance.
Travel East across Othanzia toward Shorecomb
After traveling past the southern-most mountain in the Sunderpeak range, the path to Shorecomb turns east. The elevation begins to gradually increase as the coastline a few miles south of you becomes a sheer cliff. One evening, as the light fades from the sky, a reddish glow appears in the sky to the northwest. The dark outline of the Sunderpeak Mountains can be seen against the night sky as a faint glowing line of red appears to be moving slowly down the side of one of the peaks; perhaps as if lava were flowing down the mountainside.
The next morning, smoke is rising from the same mountain peak. As you travel east towards Shorecomb, the ocean can be occasionally glimpsed in the distance to the south. Around mid-afternoon on the eighteenth day of travel since leaving the Stormlord's temple, you begin to hear the sounds associated with civilization and catch your first glimpses of building roofs and smoke rising from chimneys. You have arrived in Shorecomb.

Shorecomb
Population: approx. 5,000 (19% Human, 14% Halfling,
12% Genasi, 8% Aasimar, 6% Tortle, 41% Other)
Religions: Major - Platinum Dragon, Stormlord, Wildmother
Minor - Lawbearer
Government: Council of Merchants
Commerce: Fish, pearls, oysters, carpentry, shipwright
Shorecomb has a few thousand residents who are unused to seeing well-dressed, dangerous people. It is a port city that does decent trade in this part of Issylra, with a particularly healthy fishing industry. The shoreline is not a gentle sandy grade, but rather sheer cliffs 150 to 200 feet high. There are wooden staircases built into the cliffs to allow people to traverse up and down them, with cranes to lift heavier items, like large quantities of fish from the boats below.
The harbor is bustling all hours of the day and night. Harbor Master Senth is the strong, commanding, middle-aged half orc Dock Master with braided black hair. She runs the dock with an iron fist and ships are loaded and offloaded with smooth efficiency.
The harbor is mostly protected by the cliff walls that curve around. There is a large rock that splits the harbor opening between the cliff edges. A lighthouse has been built on the rock to help guide ships in and out of the harbor.
Shorecomb Locations
The following areas, A through D and 1 through 13, are specific locations in Shorecomb and can be found labeled on Map 7.12.
A. Blood Beard's Squat. From the outside this inn looks uncomfortable, unwelcoming, and dull. Timber and hardwood beams make up most of the building's outer structure. It's impossible to see through the large, curtained windows, but the interior is warm and cozy. It is owned and operated by Rusty, an older dwarf with a red beard. His actual name is Jameson.
B. Maelstorm Marauders Layover. The tavern itself is packed. Passing traders seem to be the primary clientele here, which often means great company. Several long tables are occupied by happy, excited groups of people. The decorations on the walls are all sea themed. This inn is operated by Shelly, a friendly deep blue skinned sea elf woman.
C. White Caps Corner. As you enter the inn through the heavily used, metal door, you're welcomed by excitement as it is loud and boisterous on the inside. Party games are left throughout for the guests' enjoyment. The proprietor is a motherly brunette human woman named Cass.
D. Wave Riders Rest. From the outside this inn looks cozy. It has been built with sandstone and has white stone decorations. Tall, large windows let in plenty of light and have been added to the inn in a mostly asymmetric way. Chase, the burly half-orc proprietor has pale green skin and a no-nonsense attitude.
1. The Busted Barnacle. This is one of the largest buildings in Shorecomb. It is the only indoor event space that is utilized heavily during the rainy months of the year. The annual Winter's Crest dance is housed here. The proprietor is a rough dwarf man named Harley. While he gives off a gruff exterior, he has a tender side and enjoys using his space to host town gatherings, with a few well-worn grumbles.
2. Momma K's. This brick shop is a well-known butchery. Momma K is an older tortle hunched from years working in her shop, which specializes in seafood and red meat.
3. The Club House. This stone building is the first tavern at the top of the cliff. It is a dive bar that is frequented by sailors. It is known for its rowdy atmosphere. Zulo, the male water genasi bartender who is more than capable of throwing the unruliest patrons out the door.
4. Lozar's Marines. This wooden building is a bunk house for sailors. It also has a small shop alongside that specializes in sailing equipment, a place for sailors to replace broken items. Lozar is the male triton proprietor with aquamarine skin.
5. Kifyros Shrine. Three old halfling siblings have taken the initiative to maintain the various shrines throughout the town. They spend their days working to care for the flowers around them and cleaning off the dirt and salt that collects. They are very old and have made this their life's work. In recognition for the work they do, the town has put up plaques next to the shrines with the name of each sibling that maintains each one. This shrine is dedicated to the Stormlord is maintained by the oldest halfling, Kifyros.
6. Saronal's Shrine. This shrine is dedicated to the Wildmother and is maintained by the youngest halfling sibling, Saronal.
7. Rillian's Shrine. This shrine is dedicated to the Platinum Dragon and is maintained by the middle halfling sibling, Rillian.
8. Whisperer's Shanty. This worn-down wooden structure sits amidst a small neighborhood on the outskirts of town. It is considered an eyesore by the neighbors; this building is the Clasp's hideout and is the organization's first foothold on Issylra.
9. Shallow Port Share Holder's Association. This warehouse style building is built along the cliff edge where the stairs from the harbor reach the top. Shorecomb's Harbor Association is housed here, nicknamed Shallow Port. A large dockyard island sits in the middle of the harbor for larger ships because the water is too shallow along the docks. The Shallow Port Share Holder's Association is in charge of all harbor operations. Senth is the strong, commanding, middle-aged female half-orc Harbor Master with braided black hair and tattoos up both arms.
10. The Bazaar. In the middle of town, near the stairs that lead from the harbor, sits a large open-air market. Semi-permanent wooden stalls are covered with colorful canvas to protect from the rainy weather along the coast fill the plaza. Traveling merchants use these stalls to set up their wares. Many of the people who live in Shorecomb visit this market weekly as the merchants change frequently.
11. The Sentry Towers. Two stone towers sit at the harbor entrance, at the point of the craggy cliffs that encircle the port. Guards are stationed here to keep a lookout for pirates.
12. Rock of Contention. Sitting atop this rocky outcrop is a lighthouse that marks the entrance to the harbor. This rock is the bane of many ship captains, as it sits directly in the center of the cliff opening that forms the harbor.
13. Dockyard Island. The shoreline docks are too shallow for the largest ships that sail the Ozmit Sea from the distant lands of Tal'Dorei and Marquet. This sandy island was built by the Shallow Port Share Holder's Association to provide docks for these ships in the deeper waters near the center of the harbor.
Shorecomb
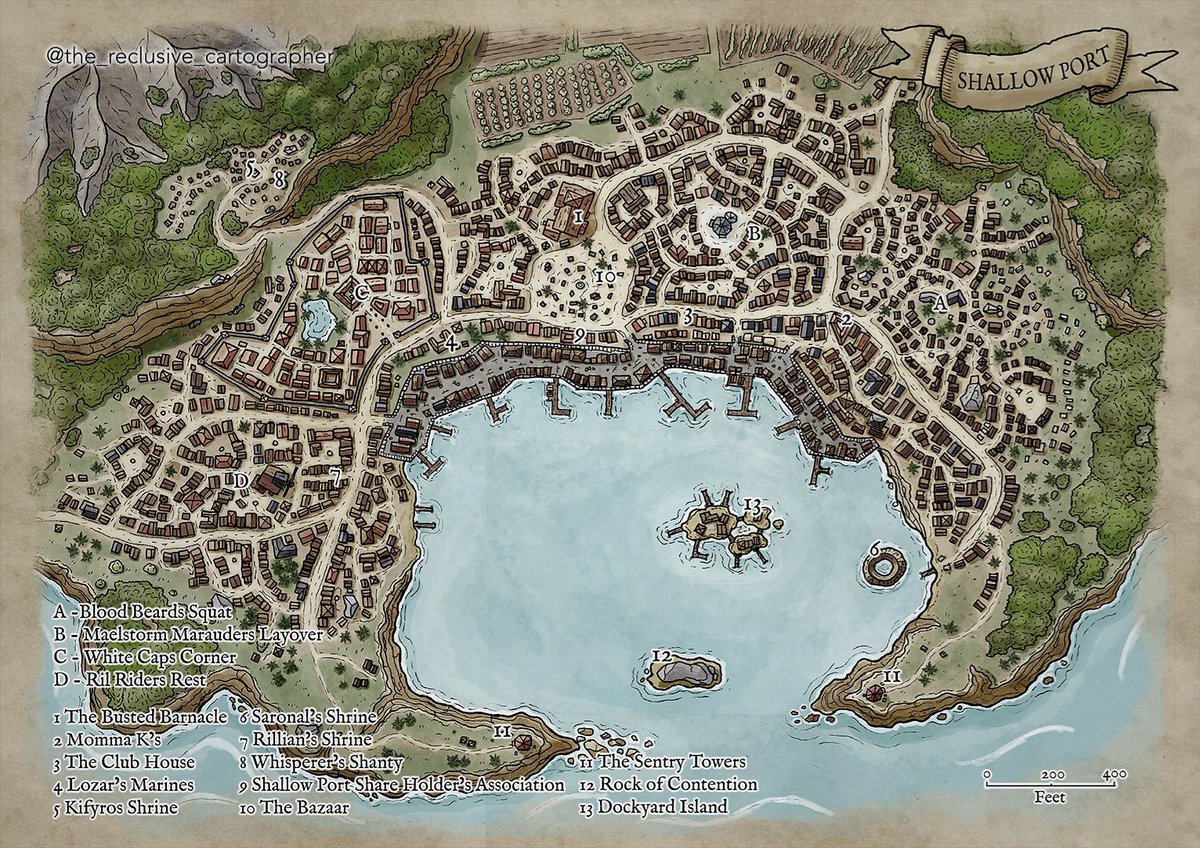
Map 7.12
The Lamenting Lighthouse
The lighthouse at the mouth of the harbor has not been lit for a few nights now. Wilbur is the old Kenku lighthouse keeper that has kept the lighthouse lit every night for the past 20 years. Two nights ago, undead washed ashore and killed him. The Shorecomb guard have seen creatures wandering around the rock, but none are willing to get close enough to investigate. Is this just a random event, or is something sinister drawing the undead here?
Adventure Hook
When the characters arrive at Shorecomb in search of passage back to Tal'Dorei, the harbor master, Senth, takes in the group and can tell they are adventurers. She offers free passage wherever the group would like to go in exchange for clearing out the lighthouse and ensuring the threat is gone.
Reaching the edge of the cliff, the harbor comes into view below. The cliffside curves around on either side, nearly encircling the harbor completely. The harbor mouth is a few hundred feet wide gap between the cliffs. A large rocky outcrop sits in the middle of the harbor mouth with a tall lighthouse perched atop. The port is built inside the cove formed between the curved cliff sides. It's clear why the town formed here. The cliffs clearly provide shelter and protection from the ocean. In the middle of the harbor sits the largest ships, docked at piers built in the middle of the water.
Reaching the bottom of the stairs, the hustle and bustle is clear as dockhands rush this way and that with supplies. A sturdy, commanding half-orc woman with long, braided black hair and tattooed arms can be seen barking orders and holding a clipboard.
Senth will allow the characters to borrow a small rowboat they can use to reach the lighthouse. She asks that they find Wilbur, the old kenku man who is the lighthouse keeper. If he is alive, she asks they bring him back to the dock so she can talk with him about what happened. If and when the group return with proof the threat is gone, Senth will keep her word and book them passage on a ship to wherever they want to go.
Lighthouse Island
As the characters approach the island in their rowboat, an incoming marine layer of fog blankets the area. Only the top of the lighthouse can be seen emerging from the fog. As the group gets closer, two small islands emerge -- little more than barren rocks jutting about 20 to 25 feet out of the sea. The islands are connected together by a rickety wooden bridge. The Shorecomb lighthouse sits atop the larger island.
See Map 7.13 for the complete layout of the lamenting lighthouse.
Lighthouse Island General Features
The following features are prevalent throughout the exterior areas of the lighthouse island.
Slick & Slippery. The rocks are exposed to weather and sea, and permanently slick with spray and wet weather. Any creature attempting to dash here must succeed on a DC 11 Dexterity saving throw or fall prone.
Fog and Spray. The fog, spray, and relative darkness cast by the approaching storm means that the entire island is lightly obscured, and creatures have disadvantage on Perception checks that rely on sight.
Sheer Cliffs. The only site accessible to beach a boat is the landing site on the main island. Climbing the rocky cliffs without climbing gear requires a successful DC 18 Athletics check. If a creature slips and falls down the cliff, they suffer 2d6 slashing damage from the sharp rocks.
Dangerous Waters. Swimming in the heavy seas requires a successful DC 14 Athletics check at the start of every turn. The waters around the island are about 30 feet deep and there are dozens of drowned zombies (Appendix B) under the water waiting to drag creatures below.
The Haunting. An allip (Appendix B) haunts the lighthouse island. Its moans can occasionally be heard by any character with a passive Perception of 15 or higher, but this gives no clue as to its direction or distance. The allip moves around the island to try to keep out of sight and uses its whispers of madness and howling babble abilities where it can without risking detection. Assume that the howling babble ability recharges after 1 minute. Only roll for initiative once a character spots the allip.
Landing Site
As the party approaches, allow each character to make a Perception check with disadvantage, due to the heavy sea, spray, and fog. This check can reveal the following:
- DC 12: you can smell seaweed, rotting fish, and damp wood. You can hear the rumbling of the surf, but otherwise it is eerily quiet. There seems to be a small safe landing spot on the south side of the small rocky island.
- DC 15: There is a strange forlorn moaning in the air.
- DC 19: the waves are breaking in a peculiar fashion at the base of the east side of the lighthouse island; a subsequent successful DC 16 Survival or Nature check identifies this phenomenon as pointing to a possible surf cave just below the water line.
The storehouse contains a workbench with tool racks lining the walls. Everything in here is well weathered and has seen better days.
Seagull Island
The smaller island is connected to the lighthouse island by a rickety wooden bridge. As the characters make their way across the bridge, read or paraphrase the following:
Encounter
The 8 dead bodies strewn across the island use the zombie beastfolk (CC p.240) stat block. When the characters step foot onto the rock of the island, the bodies animate and attack. Characters that make a DC 12 Investigation check will notice the zombies are dressed as sailors and appear to have been dead less than a week.
Development
The little shack that sits on this island is Wilbur's home. If the characters explore the home, a successful DC 15 Perception check will notice black feathers scattered throughout and a feathered limb under the straw mattress.
Lighthouse Interior
Stone steps lead up to a wooden door at the base of the lighthouse. The door is unlocked but barricaded from the inside. A character that makes a successful DC 20 Athletics check can push hard enough on the door to shift the boxes behind it and slide the door open enough to get through.
Three rooms make up the ground floor of the lighthouse. To the right of the entry way is a workshop with some tools and a worktable. To the left is a small larder and kitchenette. Each of these rooms lead into a larger room behind the stairs, a common area of sorts. It contains a rocking chair and an upholstered armchair. There is less chaos in these rooms than the stairwell, but a cupboard has been knocked over and broken dishes are scattered on the floor.
Climbing the Stairs
The stairs wind up in a tight spiral, open in the middle, 120 feet up to a trap door that opens up to the top. Because the stairs are so narrow, a character that wishes to climb past someone else requires a successful DC 12 Acrobatics check.
Encounter
The staircase is home to 2 Invisible Stalkers (MM p.192). They try to prevent anyone from reaching the top of the lighthouse.
Lighthouse Pinnacle
The glass sphere in the center is a sunbeacon (Appendix A). This magic item is used as the lighthouse beacon. It is ignited by the dwarvish word for "beacon." A character wishing to remove it from its housing must succeed on DC 30 Strength check to break it loose.
Encounter
The creatures that fly in to attack the group are a Dread Wraith (Appendix B) and 3 specters (MM p.279).
Outside the Lighthouse:
After the characters defeat the dread wraith at the top of the lighthouse, a wailing sound fills the air as the wind blows freezing spray across their faces. Looking below, a character that succeeds on a DC 12 Perception check will notice more waterlogged zombies climbing up the rocky cliffs and onto the island. Clearly these creatures are coming from somewhere and this should lead the characters to explore the underwater cave if they haven't yet.
Encounter
There are 8 drowned ghouls (Appendix B) meandering across the rock waiting to attack anything living. In addition, the allip (Appendix B) will finally attack the group if it hasn't already.
Below the Waves
As the characters swim through the tunnel, they need to be careful not to brush against the yellow mold.
Yellow Mold Encounter
Characters must succeed on a DC 15 Dexterity saving throw to avoid touching the yellow mold. On a failure, little, tiny barbs attach to the character as they brush against it and must make a DC 15 Constitution saving throw taking 2d10 poison damage and are poisoned for 1 minute or half on a success and are not poisoned. While poisoned, the character continues to take 1d10 poison damage at the start of each turn, repeating the saving throw at the end of their turn.
Sunlight or fire will instantly destroy a 5-foot patch of yellow mold.
Grotto Encounter
As the characters approach the opening into a larger underwater chamber, read or paraphrase the following:
The dark figures in this underwater cavern are 2 Dread Wights (Appendix B). See Map 7.14 for the encounter battle map.
Treasure
Characters that search the grotto with a successful DC 15 Investigation check will find a set of +1 Mariner's Studded Leather Armor on a skeleton in a corner. Additionally, hidden beneath some seaweed is the Dread Orb of the Whispered one (Appendix A).

Map 7.13

Map 7.14
Renewal Festival
The first blush of spring is felt as new flowers bloom on Wild's Grandeur, a holy day on the 20th of Dualahei. The official start of the season, however, is observed a week earlier and celebrated with games, music, and just-ripened food at the Renewal Festival.
Many festival games are, in fact, rigged. They are designed to make it appear easy to win, but use tricks of perspective, distraction, and faulty equipment to tilt the games in favor of the operators rather than the players. Furthermore, many carnies provide examples of the games being played to show how "easily" they can be won, at least, with their added benefit of standing in a different location than the players, knowing exactly where to hit, or using different equipment.
Aside from entertaining attractions and games of chance or skill, there are plenty more ways to lose your coin. Vendors will often set up with exotic wares, unique treats, or even just frivolous trinkets that most people wouldn't spend their money on otherwise.
The spirit of competition calls to many. Whether their eyes are on the prizes, or simply the glory of victory, there are often no shortages of people queueing to enter competitions and contests at festivals. Consider how the intrigue of a tournament can help further your plot, or it may simply present an opportunity for the party to have some fun and participate in various festival activities. Below is a list of possible festival games and competitions:
- Archery Contest
- Arm-Wrestling Contest
- Drinking Contest
- Eating Contest
- Milk Bottle Toss
- Strongman Test
The rules for the festival games and competitions, along with other activities and food options, can be found in the Appendices.
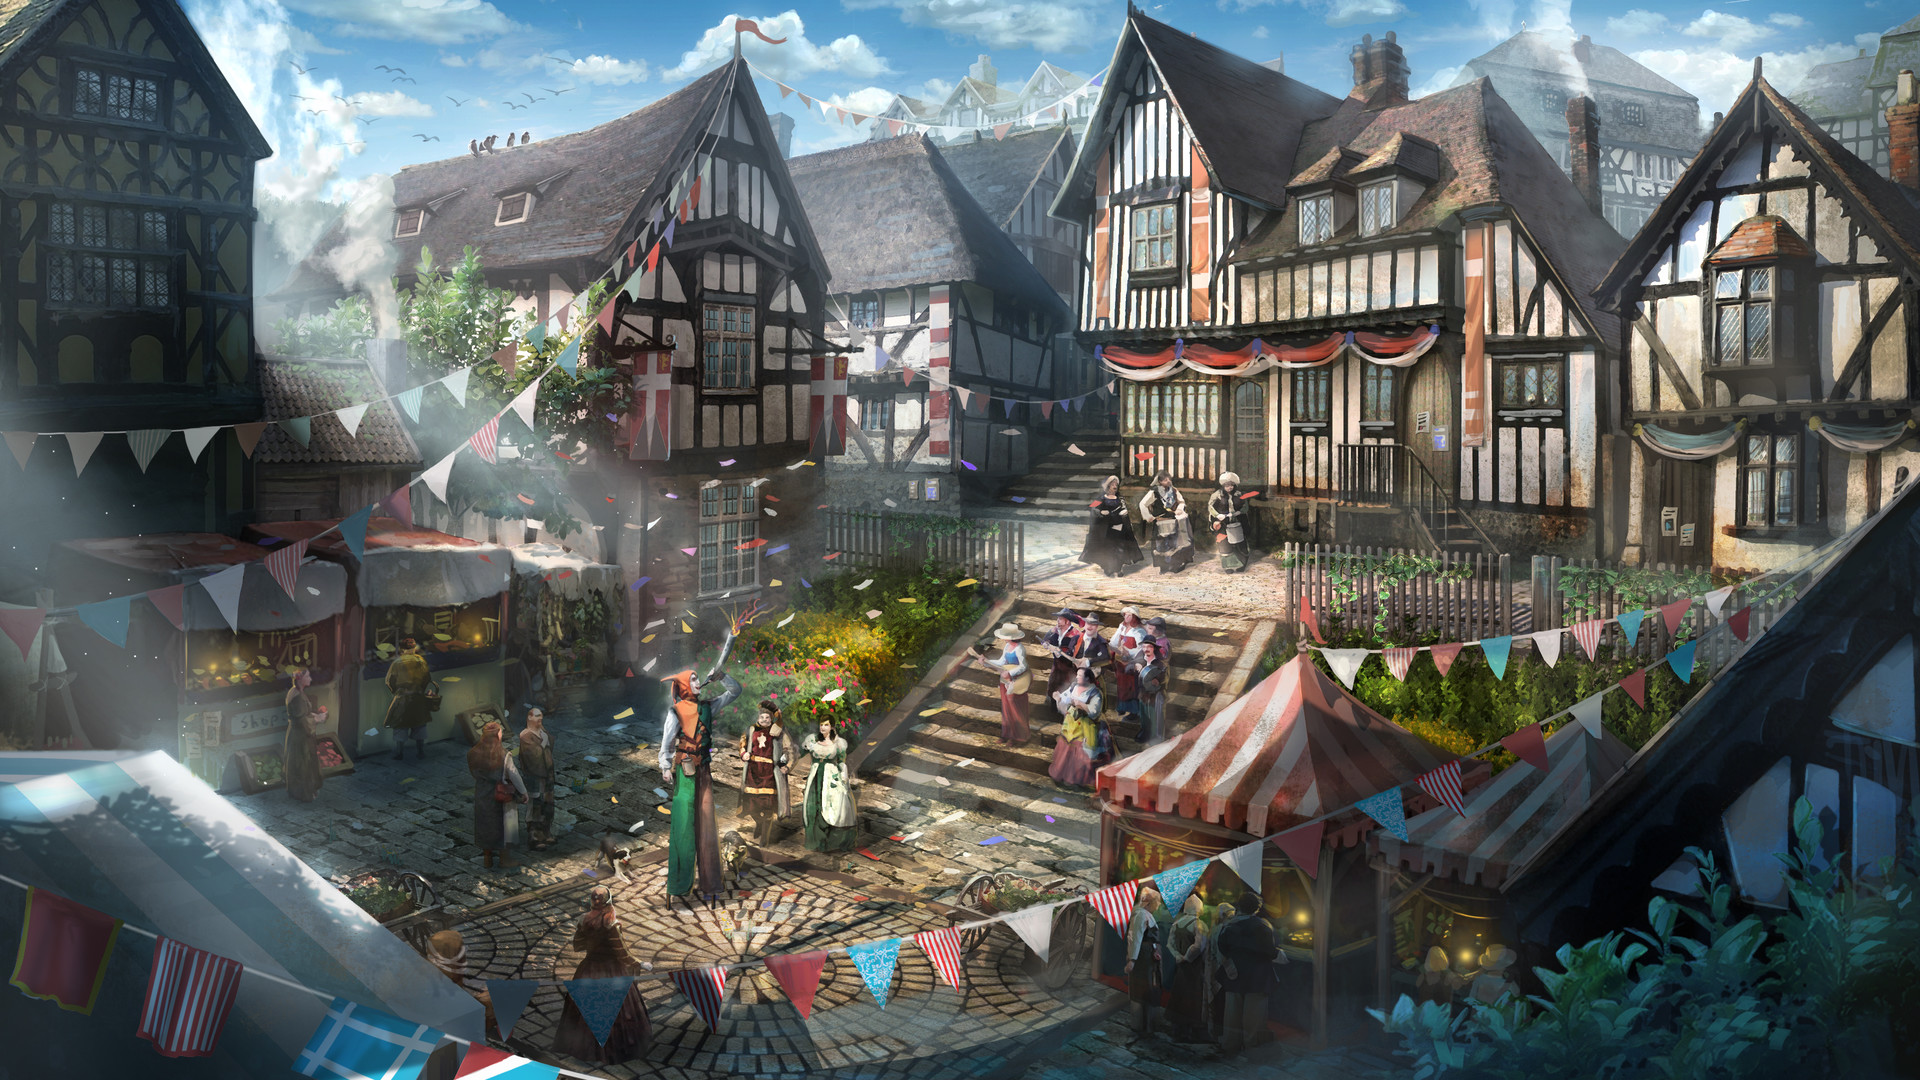
Dockside Dealings
For characters who may not be as interested in the festival activities and wish to explore Shorecomb. Their walk around the city may lead them back down to the docks and may witness some shady dealings. If a character spends some time on the dock, read or paraphrase the following:
A character that succeeds on a DC 17 Perception check will notice a ship being unloaded along one of the side docks. As the dock workers unload a number of crates and barrels, two other individuals appear to be hiding, watching this cargo being unloaded as well. They appear to be a human woman and a humanoid man with leathery, cracked skin like dry dirt.
As the pile of crates and barrels grow, five smaller greenish tinted wood cases are set along the edge of the pier. The two figures toss the apples they were eating and make their way along the dock, winding their way through the piles of crates. They each grab 2 of the smaller green boxes and continue walking.
Encounter
If a character chooses to engage with these two individuals, they both are Clasp Enforcers (TCSR p.233). See Map 7.15 for the encounter battle map.
Treasure
The small green boxes they are carrying contain illegals drugs. There are 4 doses of Oloore Root which look like small chunks of root worth 100 gp per dose as well as 6 doses of Zeal which are vials filled with a thick purple liquid worth 150 gp per dose. See the appendices for more information on these drugs.
Sailing Back to Emon
The trip across the Ozmit Sea via a sailing ship takes roughly 24 days to travel from Shorecomb to Emon. If the characters succeeded in ending the undead scourge that plagued the lighthouse, Harbor Master Senth introduces them to Captain Pinna, an amber skinned male dwarf with a blond beard and large black captain's hat. He captains a fine, wooden vessel called the Bearded Sun.
As the characters climb aboard the ship just after dawn, read or paraphrase the following:
Bearded Sun Crew
This ship, The Bearded Sun, boasts a six-person crew. All crew members are capable fighters and will vigorously protect the vessel from any threats. Below is a breakdown of their descriptions and stat blocks.
- Captain Pinna - dwarf male captain with amber skin and a blond beard. Monk (Appendix B)
- Melvin - water genasi First Mate with silver hair. Swashbuckler (VGtM p.217)
- Scilla - sea elf female crew member with green skin and blue hair. Archer (VGtM p.210)
- Whippa - halfling woman weapon specialist with black hair. Martial Arts Adept (VGtM p.216)
- Dot - human woman crew member with long black hair. Archer (VGtM p.210)
- Fallon - gnome male rigger. Druid (MM p.346)
Encounter
On the eighth day at sea, near dusk, a creature on lookout that makes a successful DC 15 Perception check will notice streaks in the water behind the ship. The streaks are moving faster than the ship and circle around in front as five spiky, green armored entities rise out of the water with tridents and move towards the ship. These 5 creatures are Water Elemental Myrmidons (MToF p.203).
Conclusion
At the conclusion of this story arc, the characters have completed the Stormlord's quest, have left the continent of Issylra behind, and have sailed back to Emon, returning to the continent of Tal'Dorei.
Map 7.15
8
Chapter 8: Shalestep Horror
After returning from their journeys across the Ozmit Sea, the characters have the opportunity to spend some downtime in Emon. Shopping, researching, and other downtime activities can be pursued by the group. Eventually, a friendly NPC, ideally from a character's past, will seek out the group and request their help in solving the mysterious killings of children in their hometown. This adventure is set in the Shalesteps, a day's journey northwest of Emon, but can easily be adapted for any relatively small rural village.
Story Overview
Something is killing the children of the Shalesteps. As the party arrives in the town, they find the little village apoplectic; in the last month, two children have fallen into strange comas, plagued by nightmares, eventually dying in their sleep. Now a third child has fallen ill, a local boy named Martin Henrikson. The people of this tiny village are ready to lash out at anyone they think might be responsible, and dark mutterings about the town's most eccentric inhabitant, Old Algie.
The characters will need to converse with the residents of the town during their investigation. A common thread of concern surrounds the Whitakers, a little family on a farmstead not far from town. It seems contact with the Whitakers stopped abruptly, right after Martin fell ill. Traveling to the Whitaker homestead, the characters will find the family savagely murdered and cursed to haunt the farm. The Whitaker daughter's journal describes a strange book that she found in the willow groves -- a book that is missing from the murder scene.
Soon after the characters arrive in the Shalesteps, the town has formed a small mob. Someone searched Old Algie's home and found something -- a doll supposedly belonging to Sara. Because toys had gone missing from the other sick children, the town believes him to be guilty and are prepared to execute him unless the characters choose to intervene.
Either way, Sara approaches the party afterward. She confesses that she and the other kids have been keeping a secret -- they have been sneaking away into the willow groves to visit someone they call 'Grandmother Bludge.'
Grandmother Bludge, it turns out, is an elderly bugbear. She lost her own children a year ago to whatever creature now haunts this little village. To her horror, she learned that the murderer dug up and ate the bodies of her slain family -- if the party checks the children's graves at the temple, they will find this to be true of the latest victims as well. Grandmother Bludge has devoted herself to the Everlight, and believes she has a ritual that will force the creature to reveal itself.
Whether by coercion, stealth, or force, the party takes Martin Henrikson from his home and brings him into the willow groves at night. Grandmother Bludge performs a ritual that will rebound the dreadful curse on its caster if they do not reveal themselves. Finally, the terrible thing makes itself known -- an Oni. When the creature is slain, Martin is freed from the curse and dawn creeps over Weeping Hollow, now freed from the monster that plagued it.
From the Adventures of Bramble Tickletoes III & Company:
During an evening performance at the Laughing Satyr Inn, Bramble noticed a familiar individual enter and take a seat near the back. This individual was Rose Tickletoes, Bramble's cousin, a brown, curly-haired halfling female.
After the show, Rose approaches Bramble saying "Bramble, it's good to see you! It's been what, almost a year now since you were last home? Maoki, good to see you again too."
Rose describes how last harvest went well, even though the Gamwichs outproduced them. But the Tickletoes were at least able to produce more than the Krustyfeet family.
"Some rumors of you and your friends' exploits have reached us, and everyone is very proud of you, especially your folks. I had heard you were in Emon a few months back and I thought I would see if you were still here because Uncle Algie is in some serious trouble, and he could use your help."

Shalesteps
Population: approx. 500 (40% Human, 30% Halfling,
30% Dwarf)
Religions: Major - Wildmother, Minority - Moonweaver
The Shalesteps are a series of small, allied villages that choose to live a simpler life outside of the hustle and bustle of the capital city, but close enough to enjoy ready imports and protection should the need arise. The Shalesteps are located in the Seashale Mountains. The name "Seashale" comes from their unique shape; appearing to look like a tidal wave about to crash on the inland territories, frozen in dynamic stone within the few broken bursts of forest that dot the perimeter of the mountain range.
Crashing waves and salty sea breezes have carved miles of twisted valleys between its jagged peaks, creating an unusual home for the many coastal creatures lurking within the cavernous rock, shoreside pools, and towering bluffs. High tide leads the briny waters into the Nightwash, a miles-long lagoon that wends its way through the base of the bluffs, carrying hosts of dangerous ocean life with each pass. Conversely, the tidal phenomenon also brings a bevy of deep-sea fish on occasion, which gave birth to the fishing community of the Shalesteps within these mountains.
Most of their food is sourced from the ocean and the Nightwash tide, while a small hunting community wanders the higher peaks for avian quarry and other sources of meat. Those who live here are sturdy and ready to defend themselves against the dangerous wilds surrounding them, and the occasional monstrosity that washes in with their nets.
The Shalesteps are comprised of three main villages (Puddlefoot, Midshale, and Shalevine) built along the side of the Seashale Mountains, Northwest of Emon along the coast. Puddlefoot is the lowest village along the mountainside which focuses primarily on fishing; Midshale is comprised of mostly farmers and craftsmen; Shalevine is located higher up in the mountains and is home to many wineries and orchards.
Midshale Locations
The following areas, 1 through 9, are specific locations in Midshale and can be found labeled on Map 8.1.
1. The General Store. This large barn-like building is home to Midshale's General Store. Owned and operated by Tommen Dredger, this store stocks all of the major farm supplies and resources needed by the outlying farms.
2. The Henrikson's Home. This small two-story brick home is the abode of the Henrikson family. It has brown shutters and small flowers planted in window boxes under the windows.
3. Sheriff's Office. A more austere brick building than the rest of the town, this building is both the sheriff's office as well as the town jail.
4. The Zutiel's Home. This two-story stone and wood house is shuttered, and the lawn has recently gone to seed. The Zutiel's were the first to lose a child and they have shuttered themselves in their home as they have not recovered yet from the loss.
5. Old Algie's. The small brick house at the eastern edge of town is home to Old Algie. One of the shutters hangs askew and the yard appears somewhat disheveled.
6. Wildmother's Chapel. A small wooden chapel to the Wildmother sits at the edge of the village. A low stone wall lines a small courtyard with a giant willow tree growing in its center.
7. Graveyard. The grassy lawn surrounding the chapel is home to the town's graveyard. Small, modest headstones dot the land baring many of the family names of the town's denizens.
8. Kylan Mateo's Hut. The old halfling priest lives in a small wooden hut at the edge of the chapel's property. He is often seen tending to the graveyards when not praying in the chapel.
9. The Polpi's Home. This square home near the southern edge of town is home to the Polpi family. The fine stonework and angled architecture clearly depict the dwarven ancestry this family holds. The Polpi family were the second to lose a child to this mysterious creature.
People of Interest
The denizens of the village are presented here for quick reference. More details about these characters will appear in the body of the adventure.
- Sheriff Erik Broodfist. Middle age male dwarf sheriff, aged 100.
- Tommen Dredger. Male halfling manager of the General Store, aged 63.
- Kylan Mateo. Old halfling priest of the Wildmother, aged 94.
- Old Algie. Older halfling male and town eccentric, aged 147.
- Sara. Halfling girl, aged 10.
- Whitaker Family. Human family. Parents Tom, male, aged 43, and Bryne, female, aged 42. Lillian is their teenage daughter, aged 15.
- Henrikson Family. Halfling family. Martin's parents are Torvald, male, aged 38, and Paula, female aged 37. Martin is a male 8-year-old child.
- Zutiel Family. Human family. Colias was the first child to fall ill and die. His parents are Cornelius, male, aged 50, and Penny, female, aged 48.
- Polpi Family. Dwarf family. Zachar was the second child to fall ill and die. His parents are Drummel, male, aged 68, and Fiona, female, aged 62. Penelope is their other child, aged 9.
- Grandmother Bludge. Bugbear female, aged 61. Family slain by the creature.
There are other residents in the town that are not considered named, noted characters. As a DM, you can provide other named residents of Midshale as needed. Some may have children and can provide other unique insights, as necessary.
Midshale
1. The General Store.
2. The Henrikson's Home.
3. Sheriff's Office.
4. The Zutiel's Home.
5. Old Algie's.
6. Wildmother's Chapel.
7. Graveyard.
8. Kylan Mateo's Hut.
9. The Polpi's Home.
Map 8.1
Investigating About Town
The group might begin finding specific named townsfolk to question. The information the party can learn by talking to specific people is outlined in the following sections below. The party may also decide to investigate various locations around town, such as the graveyard or the Henrikson home. These locations are also detailed in the sections below.
Additionally, a character that makes a successful DC 12 Persuasion check while talking with any general resident of Midshale will learn the following regarding the town's general attitudes and opinions:
- The main concern is for the children of the town. One of 'their own' falling ill is causing emotions to reach a boiling point.
- Most townsfolk think Old Algie is an all-right person, however his eccentricities are causing suspicion and fear.
- The townspeople have rallied around the Henriksons, who are desperate to save their son.
- New fears have sprung up surrounding the Whitaker family, who live on a farm near the village. The head of the house, Tom, was supposed to come in yesterday for supplies and hasn't been seen.
Old Algie
If the characters go talk with Algie, a successful DC 13 Persuasion check will learn about what he saw two nights ago.
Two nights ago, Algie was having trouble sleeping and got up to relieve himself. He was about to go back to bed when he saw something out the window; a large figure, obscured by a rough, heavy cloak walking through the edge of the forest. It was heading north, opposite the direction of the Whitaker farm. He went out and looked the next morning to see if he could follow the footprints, but there weren't any. Maybe he imagined the creature...
Secret Info. Old Algie won't reveal the following information easily and it will require a successful DC 20 Persuasion check. When he went to look for the footprints, he noticed a small stuffed animal lying on the ground nearby. He picked it up and brought it back to his home.
Sheriff Erik Broodfist
If the characters go talk with the Sheriff, a successful DC 15 Persuasion check will learn that the Whitakers have not been heard from since before the third child, Martin, fell ill two nights ago.
Additionally, the Sheriff asks if the party could check on them and make sure they're okay. The Whitaker Farm is about an hour southeast of town, and he doesn't feel comfortable leaving for that long at the moment.
Priest Kylan Mateo
Kylan Mateo can be found puttering around the chapel or graveyard. He is an amiable man of peace and bears no ill will towards Algie. Kylan doesn't have any particular insights into what might be affecting the children. He was the person who performed what blessings and rites he knew while they were ill, but none seemed to have any helpful effect.
A character talking with the priest can make a successful DC 12 Persuasion check to learn that Tom Whitaker was supposed to stop by the chapel for a blessing yesterday, but never showed up. Kylan assumed Tom simply forgot until he learned Tom never made it to town in the first place.
Tommen Dredger
Tommen Dredger tends to keep to himself and pours most of his waking hours into maintaining the General Store. He is a fairly pleasant person and most of the town gets along with him, he just is not very social.
A character talking with Tommen can make a successful DC 15 Persuasion check to learn that although he hasn't seen anything strange around town, he did notice yesterday that a book was missing from his inventory.
Several days ago, the Whitaker family came into town to order some supplies. Their teenage daughter, Lillian, asked about the small book section in the store while her father Tom filled out the order. It wasn't until the next day that Tommen realized a book was missing from the shelf, possibly taken by the Whitaker girl. His inventory lists the missing book as a language primer for reading Draconic and Abyssal text, possibly an introduction for spellcasters.
Tommen was going to mention this to Tom when he came to pick up his order yesterday, but Tom never showed up and now he has been hearing the same rumor as the rest of the town, that the family hasn't been seen or heard from since they last came to town.
The Graveyard
The grassy lawn around the Chapel to the Wildmother is dotted with tombstones. This space is the town's graveyard. The two children, Zachar and Colias, who died previously have been interred here.
Unbeknown to anyone in Midshale, someone or something is stealing the corpses away after their burial. A character that makes a successful DC 16 Investigation check at either Colias' or Zachar's graves will notice that both show clear signs of the earth being freshly disturbed.
A successful DC 18 Persuasion check will convince Kylan to allow the graves to be exhumed for examination. This check can be made with advantage if the group addresses Kylan's offended sensibilities -- taking steps to ensure respectful treatment of the gravesite or allowing Kylan and members of the community to conduct the exhumation with attention to proper rites.
Unearthing the coffins will reveal them to be empty. The children's bodies have been stolen.
The Henrikson Home
The Henriksons are a halfling family that live in a modest house near the General Store. Torvald and Paula are terrified for their son Martin, who has fallen into a nightmare-ridden sleep he cannot be shaken from. They fear that, similar to the other children, he will die within a week.
Concern for their son has given Torvald and Paula powerful feelings of helplessness and fear, which they have projected into suspicion of Algie. They have married this suspicion to their desperate need to find -- and stop -- a culprit. The Henriksons see the party as a potential outside ally, someone who might be able to help cure their son, or at the very least put Algie to justice if he is guilty.
With a successful DC 12 Persuasion check, a character talking with the family will learn Martin fell into this strange sleep two days ago, after a night where he complained of a vague, terrible nightmare. If asked about a missing toy, Paula notes that the day after his first nightmare, before he fell into his current state, Martin complained he could not find his stuffed goblin toy. She never ended up looking for it because she has been too worried about Martin.
Martin's Room
If the characters wish to see Martin or investigate his room, a successful DC 14 Persuasion check will persuade Torvald and Paula to allow them access.
Martin's little bedroom is dark, the curtains drawn. Martin is a young boy with a mop of brown hair, lying in his bed sleeping. Paula enters with the party while Torvald remains in the other room. Paula mentions that Martin occasionally sits upright for a brief moment in his nightmares, but never wakes up.
Magical Investigation
Casting detect magic reveals a vague magical aura around Martin's body. However, it does not register as any one school of magic.
Casting a spell such as detect thoughts will only give an impression of terror and isolation, the imprint of Martin's nightmares.
A spell such as dispel magic or remove curse has no effect. The magical aura might subside for a moment before renewing, suggesting that some outside influence is perpetually imposing this effect
Development
Paula mentions Martin often whispers or croaks out terrible things in his sleep, but she can't bring herself to listen for long.
Soon after she tells the characters about this, Martin begins to speak. Read the following:
Martin sweats and twitches on the bed. In the stillness of his little body rustling the blanket, you hear a whisper. A rushed, breathy voice emanates from the boy's mouth. It is the barely perceptible voice of someone half-asleep. As you listen to what he is saying, you hear:
"Hear me at the door you block,
Hear me at the window lock.
Feel me creeping up the stair,
At your door, already there."
Martin shudders a little at this point, drawing a few ragged breaths before continuing.
"See you crawl beneath your bed;
Tonight, I'll see those sheets turn red.
Doesn't matter if you hide,
Because, my dear, I'm at your side."
"Doesn't matter if you cry,
Because, my dear, you're still to die.
Please don't beg me not to harm,
As I gobble up your arm.
Please don't scream and please don't beg,
As I gobble up your leg."
Martin is shaking now, fresh sweat beading on his forehead as his eyes roll and shift beneath his eyelids.
"Doesn't matter if you squeal,
Tonight, you'll still be...still be...s-still be..."
He slows, stops, relaxes. His hands, which had been clutching the sheet, release. For now, Martin has slipped back into a dreamless, if uneasy, sleep.
Paula has never heard him finish the horrible little rhyme before, though he has said it in near completion several times now, or at least brief snatches of its lines.

The Whitaker Farm
The Whitakers are a family of farmers consisting of Tom, a 43-year-old human, his 42-year-old wife Bryne, and their 15-year-old daughter Lillian. They live about an hour's walk southeast of Midshale on a little plot of land on the edge of a large grove of willows. The family has a small garden, but makes their living with chickens and goats, trading excess eggs, milk, or even cheese in town for other supplies. There are only a few small buildings on the Whitaker farm.
Stable and Chicken Coop
A small, wide building acts as the stable for the family's goats. A smaller building nearby houses the chickens; both open up to a large, shared pen where the animals can roam during the day.
The goats in the stable have all been killed; most have had their heads twisted almost completely around, while a few seem to have died from crushed ribcages, blows so powerful that their bloodied bones can be seen jutting out. All of them were simply left on the floor of the stable where they were killed; the drone of flies fills the small space with a dull buzz.
The Farmhouse
The Whitaker home is a modest, two-story building of wood and stone. The house may have been once been a single story, with gray stone blocks forming the sturdy first floor of the home and timber comprising the second floor. While the first floor's windows are small and set deep into the stone, the upper floor's windows are larger, inviting in the sunlight -- and something else. One of the big second floor windows on the front of the house is shattered inward. A character that makes a successful DC 15 Perception check will notice there is a buzz of flies through the second-floor window.
The front door of the farmhouse is locked but can easily be picked with a successful DC 10 Thieves' Tools check or can be forced open with a successful DC 15 Athletics check.
First Floor
Once inside the farmhouse, the characters discover the mangled bodies of Tom and Bryne Whitaker. Read or paraphrase the following:
If the group takes a few minutes to investigate the bodies, a successful DC 14 Medicine check will notice Bryne was clearly choked by something large and powerful. Additionally, it's clear Tom's ribs have been crushed, possibly suggesting he was struck with a powerful force.
As the characters continue to explore the first floor, a successful DC 15 Investigation check will notice there aren't any footprints in the dirty floor belonging to anyone other than the Whitaker family.


Encounter
Upon entering the farmhouse, the party is confronted by 3 ghosts (MM p.147) resembling the Whitaker family. They may be able to convince Lillian's spirit that the party is here to investigate her death with a successful DC 20 Persuasion check if they haven't attacked, DC 25 if they have.
If successfully persuaded, Lillian's ghost will float up the stairs, beckoning to the characters, and leads them towards the desk in her room. If the ghosts are engaged in combat and defeated, they are released to the afterlife; otherwise, they will continue to haunt the farmhouse until their killer is slain. See Map 8.2 for the encounter battle map.
Second Floor
At the top of the stairs are two doors -- one opens to the master bedroom and the other to a smaller second bedroom. The master bedroom holds nothing of particular interest when searched, other than some personal belongings.
The smaller bedroom on the upper floor appears to belong to the Whitakers' daughter, Lillian. The young girl's body has been thrown back over a small writing desk, her throat torn open with dried blood pooled onto the desk and splattered across the wall. Flies swarm thickly over the girl's body, easily finding their way in from the big broken window. Shattered glass is scattered across the floor, the bed, and the desk. The desk's drawers have been flung open.
If the group searches the room, a successful DC 14 Investigation check reveals two items of interest, a book on translating languages into Common and a small leather journal. The translation book is the one that Lillian stole from the General Store. Surpassing a DC 17 will find a third item, a scrap of cloth with creases in it which appears as though it had been wrapped around something.
Lillian's Journal
The journal is mundane in its early entries -- the usual angst and dreams of a young girl in a modest small-town life. The last few entries, however, are far more grim (Handout 7). In the first of these, Lillian describes stumbling across a little cavernous hollow in the willow-groves a few hours walk from the house:
The next, and final entry reads:
Map 8.2
Mob in Midshale
As the characters return to Midshale from investigating the Whitaker's farm, they will be confronted with a mob calling for Algie's execution. Read or paraphrase the following:
As the party approaches the chaos, a character that makes a successful DC 12 Insight check will realize the angry townsfolks' presence here is clearly a result of panic and fear, and little to do with rational suspicion or evidence.
The Henrikson's searched Old Algie's home and found something -- a doll supposedly belonging to another child in town, Sara. Toys have gone missing from the other sick children, so now the town believes him to be guilty and are prepared to execute him unless the party intervenes.
If the party chooses to attempt to calm the crowd, it will require a successful DC 22 Persuasion check. This check is made with advantage if the party took time to visit with the Henriksons or other residents and acted with appropriate concern or sensitivity.
Doll Inspection
If the players decide to examine the doll, there are some odd details about it. It's easy to notice that the doll is unlike the other children's toys -- it is far more shoddy in its make, certainly not created by any detail-oriented craftsman. It has woven grass for hair and wears a little dress of soft willow bark that has been lacquered with hardened sap. With a successful DC 15 Investigation check, a character examining the doll will find a small symbol of the Everlight scratched onto the front of the doll's dress, and a small droplet of water appears to be trapped under the sealing layer of sap. A subsequent successful DC 13 Religion check will allow a character to identify the droplet as holy water that has been carefully included.
Sara's Confession
After the mob disperses, a small halfling girl approaches the party when they are alone. Her name is Sara, and she is around 10 years old. She nervously approaches the group and admits to the party that she and some of the other children have been sneaking away into the willow groves to visit someone they call "Grandmother Bludge." She explains it was her doll the Henriksons found in Old Algie's house, and it was Grandmother Bludge who made it for her.
Sara describes Grandmother Bludge as "not human" and "kind of big and hairy." According to Sara, Grandmother Bludge found the children playing out in the willow grove and told them she would stop whatever was cursing and killing their friends. Sara will not hear any suggestion that Grandmother Bludge is evil. Sara refuses to tell the party where Grandmother Bludge lives, and insists on taking them there herself, as long as the group promises not to hurt her.
Future Story Connection
After talking with the group about Grandmother Bludge, Sara motions to another little girl standing nearby, partially hidden behind some bushes. Sara introduces her as Penelope; Penelope pulls a fist sized chunk of rock that is cobalt blue in color and slightly glowing. A character that makes a successful DC 12 Arcana check will identify it as a chunk of primordial titan seed. Penelope and Sara describe finding it in a small cave by a creek that runs through the willows.
This chunk of titan seed represents another instance where the Cloaked Serpents are utilizing these powerfully magical artifacts to sew chaos throughout Tal'Dorei. A Cloaked Serpent cultist is responsible for summoning the Oni to this location to wreak havoc in a town near Emon in the hopes of drawing some of the Council of Tal'Dorei's attention to keep their other, more nefarious activities under the Council's radar.
This optional story element adds a connection to the other instances where primordial titan seeds have shown up and will show up in this campaign. It helps to demonstrate a connectedness through various story arcs throughout the campaign.

Grandmother Bludge
Sara leads the party approximately 3 miles east from the village, into the large grove of willow trees. As the group approaches their destination, read or paraphrase the following:
The willow trees thicken into dense clusters, their drooping branches obscuring your vision down to only a few paces, looking through one heavy green curtain to the next. These ancient trees spread their snarled roots across the moist earth, meeting the roots of other trees and tangling together. These oldest groves hold hands in silent rapture, whispering rustling prayers with every breath of wind.
Sara stops before a veil of leaves, knowing by some child's intuition that a destination has been reached. From somewhere beyond the curtain, an old voice calls out. "Sara? Child, you've brought others". The voice is not harsh, but deeper than you might have expected. Sara pushes the veil aside. There, huddled against the trunk of an ancient willow, sits an old bugbear.
Grandmother Bludge is an elderly bugbear. She is initially wary of the party, but with Sara's assurances that they mean well, she is willing to relax and exchange information.
Bludge's Backstory
A couple of years ago, Bludge's tribe began losing children in an identical fashion. One at a time, toys and trinkets would go missing and the children would fall into a cursed sleep, eventually passing away. Wracked by grief at the loss of their children, the tribe soon feel apart.
Bludge went to mourn at their graves and noticed something strange; the earth seemed disturbed where they were laid to rest. To her horror, all the graves ended up being empty. She spent more than a month searching the surrounding area before she made a grim discovery, a cavern full of gnawed bones. She believes the creature that killed the children is using some dark magic to slay them from afar, then stealing the buried corpses for its consumption. Bludge thinks it is a particularly intelligent and malevolent creature that understands this minimizes risk to itself.
In the wake of hers, and the other bugbear children, being killed Bludge found unexpected faith in the Everlight. The Everlight has blessed her with visions describing a holy ritual, one that would force a confrontation with the perpetrator. There are two things preventing her from performing it:
- First, she is unsure if she is strong enough to defeat this evil alone.
- Second, the ritual must be cast over someone currently in the throes of the curse. She knows of Martin Henrikson from Sara and the other children but cannot expect to walk into town and receive anything other than torches and pitchforks.
Grandmother Bludge will go to prepare a place for the ritual if the party can secure Martin Henrikson and bring him to her. She has chosen a spot approximately one mile outside of town, among the willows. The ritual must be performed late at night; once the evil is defeated, the Everlight's power will rise with the new dawn and cleanse Martin of his curse.
Securing Martin
Paula and Torvald Henrikson are less than thrilled about the idea of someone taking their son away into the trees at night. It will take some convincing, even if the party assures them that this is their best chance for saving their son. The following are various results to successful Persuasion checks of differing DCs:
- 18+: Paula and Torvald will reluctantly release Martin into the party's custody.
- 17 of less: One or both parents will refuse to hand over Martin without accompanying the party to the ritual location.
If one or both parents attend the ritual, they may need some further convincing when they see Grandmother Bludge. If one or both parents are present for the ritual, they have the statistics of a commoner (MM p.345) and will either flee the climactic battle or risk being killed.
As Martin is carried safely to the willow grove, he remains unconscious, sometimes repeating parts or all of the odd rhyme he has whispered before.
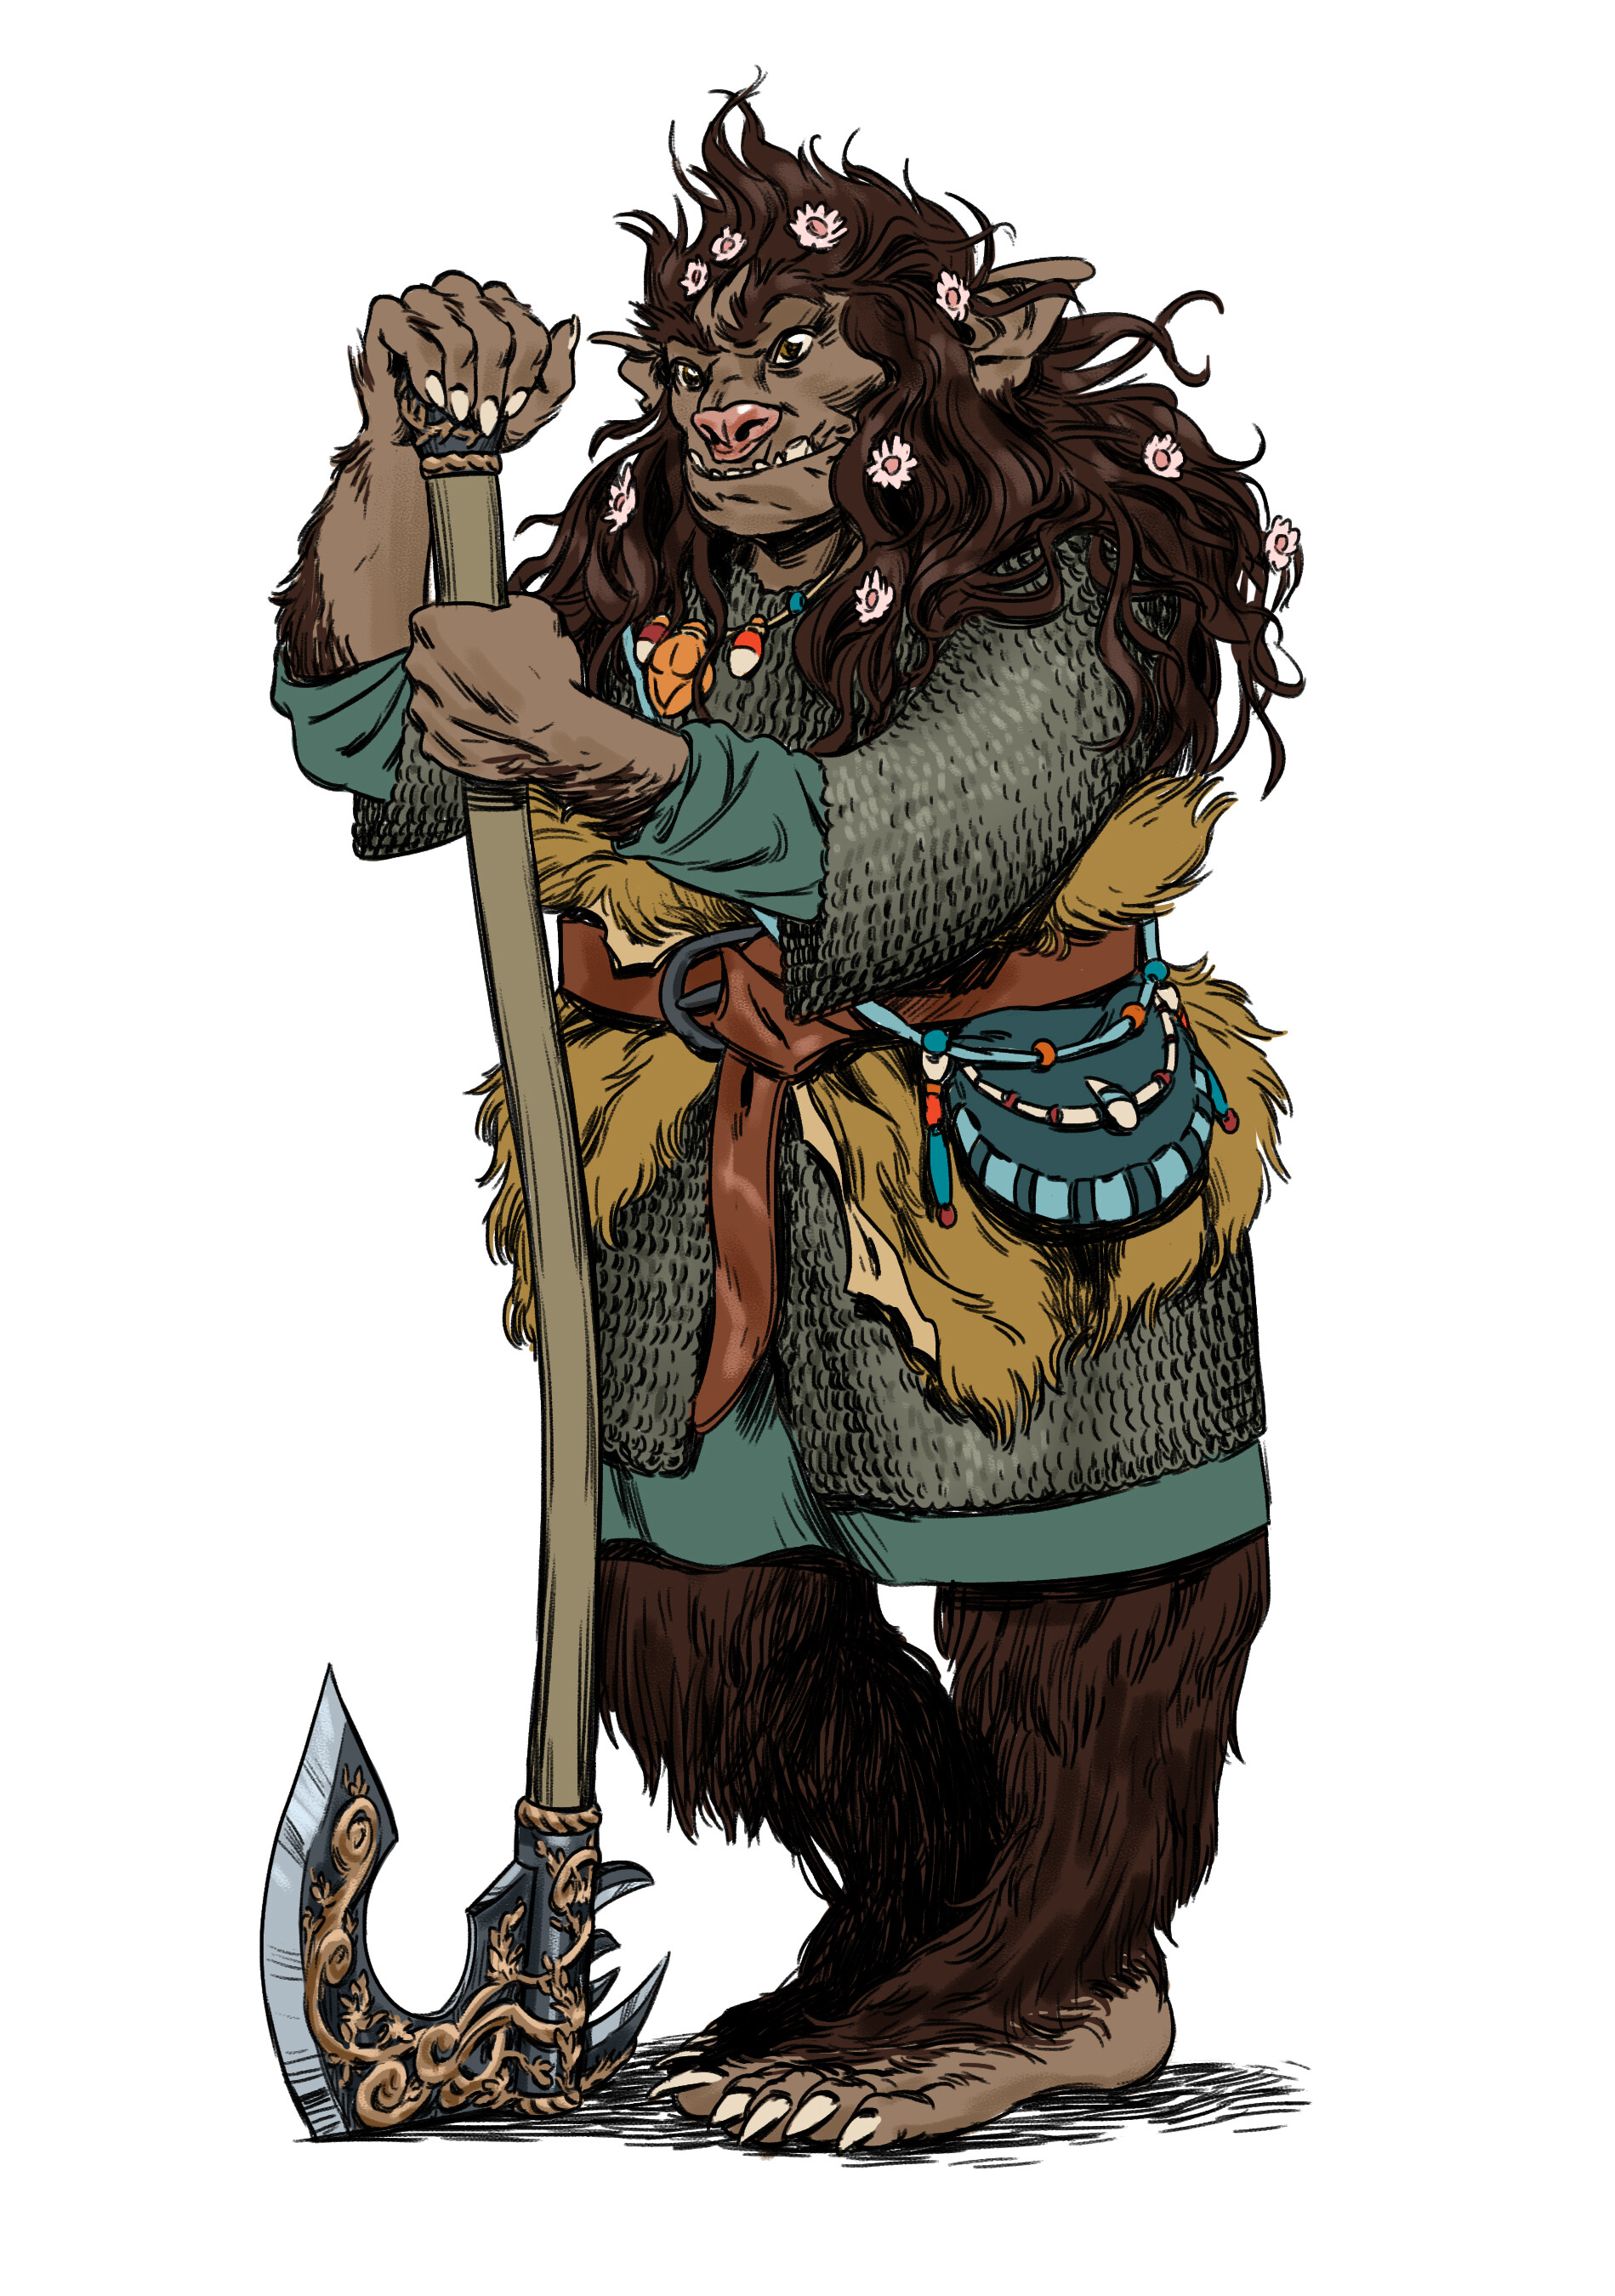
A Killer, Revealed
At any point after midnight, the party can bring Martin to the location Grandmother Bludge described. There is a sizeable clearing in the middle of a grove of willow trees that she has prepared for the ritual:
Grandmother Bludge stands in the center of a clearing some sixty feet in diameter, surrounded by the rustling willow trees. Next to her is a broad stump, the remnants of an ancient willow cut down long ago. She has placed torches on poles around the stump, bathing the clearing in the warm glow of flickering firelight.
As you approach, you see her add the finishing touches to an insignia that she is carefully painting onto the stump with a yellow paste. It's a half-circle atop a horizontal line. As she applies pointed lines radial out from the semicircle, you realize it's a symbol of the Everlight.
The Ritual Begins
Grandmother Bludge directs the characters to place Martin on the stump, his head haloed by the Everlight's symbol. He continues to occasionally shiver and cry out in the throes of some terrible dream but does not wake. Grandmother Bludge explains that the ritual will threaten to rebound the curse back onto its caster, forcing them to confront the ritual or risk this fate. She bids the party to be ready, warning them to keep watch for the killer's arrival.
As Bludge begins the ritual, read or paraphrase the following:
Grandmother Bludge makes pleas to the Everlight, often switching between Common and her native Goblin tongue. After some time, she begins casting amounts of holy water over Martin's sleeping form. As the ritual continues, Martin grows more and more restless in his sleep. His moans and soft cries increase as Grandmother Bludge's voice rises with penitent pleas for his healing, and he thrashes when she casts droplets of holy water over him.
Finally, Martin begins shrieking words, and it's a moment before you realize he is speaking the words of the macabre rhyme he has whispered intermittently in his dreams, the rhyme he cannot seem to complete. He cries out with such force that only his closed eyes could possibly suggest that he is still unconscious, despite the force of his words.
Grandmother Bludge raises her voice higher and higher, shouting over the boy's words. The two are in competition, a verbal sparring match between Bludge's prayers and Martin's foul words.
"Feel me creeping up the stair..."
"Everlight, heal this child..."
"...doesn't matter if you hide..."
"...let your light shine down on
this fevered brow!"
"...please don't scream and please don't beg"
"Sarenrae, let your light breach
the eyes of cursed sleep!"
Martin sits bolt upright, eyes snapping open; milk-white, pupilless, unseeing. Grandmother Bludge, startled, stops short.
"Doesn't matter if you squeal," Martin says in a guttural voice that is not his own.
"Tonight, you'll still be...". He falls back, but this time the rhyme is completed, with the same foul voice whispering from among the willows:
"Tonight, you'll still be Oni's meal."
Oni Background
Long ago, this particular Oni got its hands on a tome of dark magic, perhaps a reward for service to some other evil creature. It contained many rituals of summoning and necromancy, but one caught this Oni's eye. It was a ritual that could target the young or feeble, placing them into a nightmarish sleep and slowly sapping their life force until they died. The Oni saw an opportunity; people going missing while a 'strange new traveler' was in town could be a recipe for unwanted adventurer attention. This ritual created an additional degree of separation between the Oni and its prey, helping it conceal its presence. The ritual required an item from the victim, something of emotional significance, and what is more precious to a child than its toys?
The Battle Begins
The Oni appears at the ritual using its at-will invisibility. It knows the ritual keeps it trapped for the time being, so it remains invisible as it toys with the players, sneaking among the willows and taunting them. It will tease them with details of its story, mock the characters and the people of Midshale, and attempt to incense Grandmother Bludge by mocking her inability to save her tribe's children, and children from the village.
Encounter
The Oni that arrives at the ritual uses the Oni Lord (MME p.209) stat block. At the start of combat, the Oni summons 2 dread specters (MME p.259) to aid it during the battle. See Map 8.3 for the encounter battle map.
Oni's Strategy
In reality, the Oni is attempting to make Stealth Checks between the willow trees while invisible, looking for the best position to open the battle. It will likely try to open the fight with its use of cone of cold if it can catch multiple players in the area. It might cast sleep on only one character, hoping to take them out for the duration of the battle. If the Oni moves within 10 feet of a character or it speaks, the players should be able to make Perception checks against the Oni's Stealth checks to pinpoint its location.
Once revealed, or choosing to reveal itself, the Oni battles to the death. In a sick twist, the specters the Oni summons in the guise of two bugbear children, the children Grandmother Bludge knew and couldn't save. Due to the magical connection between them, Martin has nothing to fear from the Oni's cone of cold. The Oni ignores Martin as a non-threat, fixating its empty white eyes and unnerving smile on the characters.
From the Adventures of Bramble Tickletoes III & Company:
The party traveled with Bramble back to Midshale to assist in determining the source of what's been killing the children in the hopes of clearing Uncle Algie's name.
During the investigation, Lia talks with the families of the first victims, Kayne and Bramble fly around the area looking for clues, and Maoki is first in at the Whitakers farm but unfortunately becomes possessed.
After bringing Martin to the ritual space, the group prepares with Grandmother Bludge for the arrival of the creature. During the battle, Grandmother Bludge was killed and everyone except Maoki ends up falling unconscious one or multiple times throughout the battle. Maoki gets the killing blow on the Oni and then heals Kayne and Bramble with healing potions. The group brings Martin back to his parents and the town offers to create a commemorative park in their honor.
Grandmother Bludge Statistics
Base statistics of a bugbear chief (MM p.33) with the following differences:
- She has a Wisdom score of 16
- Her HP total is 80
- She can cast the following spells at will: sacred flame, light, mending
- She can cast three 1st level spells per day, between detect evil and good, cure wounds, and detect magic
Bludge is a bugbear female, aged 61
- Trait: My new faith will be my tool and salvation
- Ideal: I couldn't save my own family, but I can still save others
- Bond: This killer took my family from me. My life now revolves around hunting it down in kind.
- Flaw: I have grown frustrated with my lack of progress and my failures to save more children.
Treasure
The Oni's ragged clothes include a pouch that can be found with a successful DC 15 Investigation check. The pouch contains a large silver ornate ring inlaid with a large, beautiful jade stone etched with a wondrous carving of music notes and a blood stained, black leather bound spellbook. The ring is Zuwati's Song (Appendix A) and the journal is the Oni's Dark Tome (Appendix A).
Aftermath
When the Oni dies, Martin is freed from the creature's curse. His eyes open, and he begins weakly asking for his parents. The first faint traces of color begin to appear over the horizon, a hint of an oncoming dawn. The Oni's smile lingers even in death.
Assuming Martin's parents were either not present or survived the encounter, they are overjoyed at their son's recovery. They and the other residents of Midshale welcome Grandmother Bludge to stay in the Chapel whenever she likes, assuming she survived the battle. If not, they pledge to erect a memorial to her in the town center.
Conclusion
At the culmination of this story arc, after defeating the Oni terrorizing the residents of Midshale, the characters should reach 12th level.

Map 8.3
9
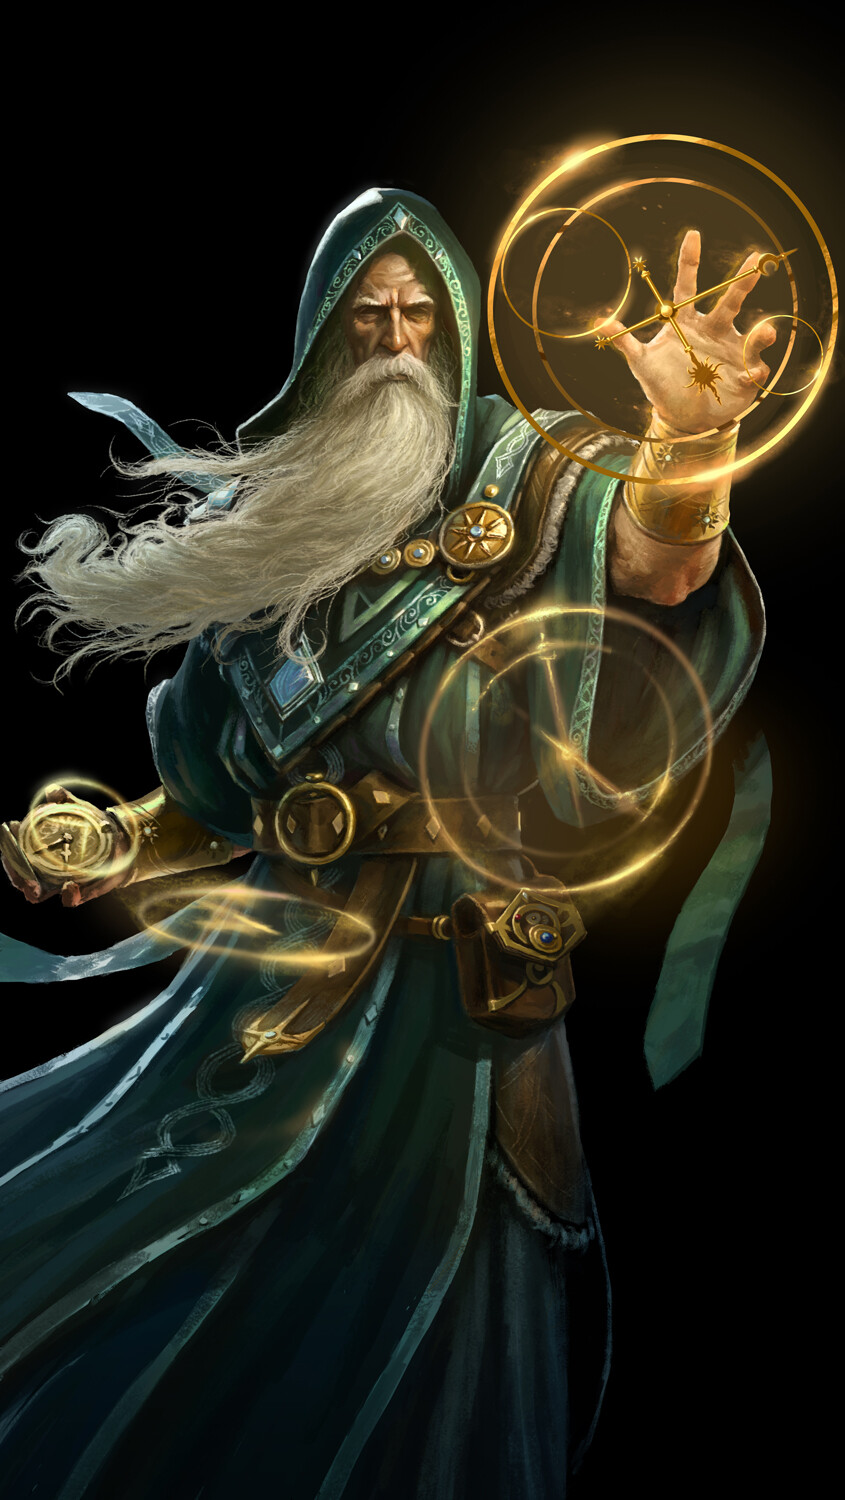
Chapter 9: Wizard's Playthings
Solving the Shalestep Horror mystery leaves the characters bereft of immediate plans. Returning to Emon provides an opportunity for the group to explore odd jobs, do some shopping, or some research. This chapter describes a few side quests to present to the characters before they become embroiled in the final whirlwind of adventures as the Cloaked Serpent's cultists prepare for and enact their sinister plots. The party may choose to explore a mysterious creature interfering with the Clasp's business in the sewers of Emon, answer the call for mercenaries to assist the Pyrah stationed at the Flamereach Grove in quelling a recent increase in elemental activity, or recent research on powerfully magical items may put the group on the radar of Arcanist Allura Vysoren who may wish to speak with the group about their items.
Perhaps the party wish to conduct additional research on magic items they have acquired through their adventures or possibly try to learn more about the Cult of the Cloaked Serpent, even possibly locating a lost temple. If the Alabaster Lyceum is unable to provide them the research they are looking for, the characters may choose to travel to Westruun and seek out the Cobalt Reserve. Unbeknownst to the party, a powerful wizard is looking for some adventurers to test the dungeon he has created and is more than comfortable making their choice for them.
Before arriving in Westruun to research at the Cobalt Reserve, the following adventures can be seeded into the campaign as side quests:
- Spawn in the Sewers
- Elemental Wounds in the Flamereach Grove
- Conversations with Arcanist Allura Vysoren
- Road to Westruun
Spawn in the Sewers
Rumors of terrible creatures of fire and teeth stalking the sewers begin to spark across tavern bars throughout Emon, with such mutterings going largely ignored. However, an investigator has recovered what looks to be broken remains of a large, leathery, red egg not far from a collapsed tunnel beneath the Cloudtop. It seems a couple of Thordak's primordial dragon spawn survives beneath the city and is growing quickly. They seem to have held up within an area of the sewers just underneath the edge of the Cloudtop District that the Clasp would like to retake.
A character walking through the streets of Emon that knows Thieves Cant can make a DC 15 Perception check to notice some recent Thieves Cant markings left about the city. It hints that individuals inclined to provide some muscle can inquire with the Diamond Nest Tavern and ask for The General.
Diamond Nest Tavern
The Diamond Nest Tavern is a wooden structure on the outskirts of the Cemetery District. Typically, the front doors stand open, the sounds of laughter, bustle and movement of people, and music playing very loudly from the interior drifts out along with the occasional cheer as glasses and steins clink inside.
Inside the tavern, a dwarven woman with red hair tied up in a ponytail manages the bar, handing out drinks to various customers. Her name is Helena, and if asked about "the General", she will discreetly motion to pass through the kitchen. "Kitchen storage, beneath the rice and grain."
There is a small stairway that goes down about five feet into the storage room, filled with a series of crates and barrels. But in the far back corner, there are two sacks that are labeled "rice" and "grain," that are leaned up against each other. The bags are false filled, and they are actually quite light. There is a locked hatch underneath. This is the entrance to the Clasp's lair. It is a complicated lock that requires a successful DC 23 Thieves' Tools check to unlock.
Language Lock Trap
Once open, a set of stairs leads down to a thick wooden door, wrapped in strips of iron to strengthen it. There are five locks down the side of the door. Characters that make a successful DC 17 Investigation check will notice there are small scratches next to each lock. These scratches appear to be in various languages:
- Top & Bottom are in Abyssal. They both say the Common equivalent of enter or pass.
- Middle is in Dwarven. It also says the Common equivalent of entry.
- Fourth from the Top is in Primordial. It says the Common equivalent of stop or halt.
- Second from the Top is in Goblin. It says the Common equivalent of no.
The second and fourth locks are trapped with poison. These locks are false and serve as booby traps. These locks can each be disarmed with a DC 25 Thieves' Tools check. The three real locks are not trapped and can be unlocked with successful DC 20 Thieves' Tools check. The door can be opened without unlocking the two trapped locks.

Meeting with the Clasp
As the characters open the door and step through, read or paraphrase the following:
A moment passes and you see stepping out of both sides of the hallway a number of hooded figures. Five. Ten. 15 individuals then begin to close in, all hoods up, cloaks around them, you can see through the dim light the crest of chins. Those of you that have darkvision can see some features, they all are humanoid, around human height, though a few are smaller, whether they are younger, halfling or gnomish in origin, you can't really make out their details. They close in as you all stand there in the center of the hallway.
As this happens, the crowd parts as one much larger Clasp member steps forward, pushing others out of the way. You see a thick, square jaw piercing out from underneath the shadowed hood. As a hand raises to pull it back, you now see the crooked pointed ears, snarling nose, and underbite of a burly half-orc. He beckons you through a doorway to the right. You enter a small, non-descript room with a simple wooden table. Across from the door sits a human, middle-aged, slightly grimy man. He introduces himself as Spireling Warren.
The half-orc stands silently just inside the door. Spireling Warren offers the group a job. Something has taken over a section of sewers that belongs to the Clasp, and they want it back. The Clasp is willing to pay 2,000 gp for the group to clear the sewer. If the group agrees to the job, they will be led to the obstructed section of the sewer immediately. The Spireling does not provide much information to the group about what they might find other than they've heard growling echoing through the sewers.
Encounter
Clasp members bring the party to a deserted section of the Emon sewer system. Upon arrival, characters that make a successful DC 15 Perception check will hear faint growling echoing through the tunnels. The Clasp members that led the group melt back into the darkness of the sewers and disappear. There are 3 young flame dragons (ToB p.130) that have called this sewer section home. See Map 9.1 for the encounter battle map.
Map 9.1
Elemental Wounds in the Flamereach Grove
As the characters walk through the streets of Emon, new posters have been put up on various job boards throughout the city. The signs have the following description:
Mercenaries Needed
Elemental herd control in the Flamereach Grove
Inquire with the Fire Ashari at the Flamereach Outpost
Reward: 200 gp per elemental
Flamereach Outpost
Flamereach Outpost is a stout, makeshift fortress of unassuming gray stone that stands at the edge of the Scar. Its denizens keep watch over the Shivergreen Grove, a small forest at the edge of the Scar that never stopped burning. The trees of Flamereach Grove, as it is now called, are little but blackened skeletons, but they burn eternally. The fortress was built as a base for the druids and elemental specialists who traveled to Emon to heal the Scar. Led by a half-orc fire ashari named Lorkathar, a group of firetamers from Pyrah keep constant vigil over the supernatural devastation, and those who watch the undying flames at night swear they can see creatures moving within.
Encounter
The party must travel into the fiery, ashen devastation of the Flamereach Grove. As the characters traverse the landscape, a successful DC 17 Survival check will allow them to locate a wandering herd of 8 Cinderslag elementals (TCSR p.231). See Map 9.2 for the encounter battle map.
Map 9.2
Conversations with Arcanist Allura Vysoren
The party may reach out to Arcanist Allura Vysoren regarding their powerfully magical items if they are unable to learn information about them through research. Otherwise Arcanist Allura Vysoren may reach out to the group to discuss the items in their possession. This meeting could provide the group with an opportunity to speak with a Tal'Dorei Council member about the elemental chaos they've been witnessing across Tal'Dorei.
The Cloudtop District
Allura will leave an invitation with the Citrine Guard at the entrance of the Cloudtop District to escort the party through the Cloudtop District to her home, the Ivory Tower. As the characters are escorted through the Cloudtop District, read or paraphrase the following:
The guards will stop at the edge of the lawn that surrounds Allura's tower. The tower is several stories tall and constructed from white marble. At the base of the tower is a single, ornate oak door with a giant iron knocker.
Ivory Tower
As the character's approach the door, it opens of its own accord and the group is greeted by a young half-elven woman with brown hair wearing light purple robes. She introduces herself as Jennifer, Allura's assistant. She is in her mid-twenties, polite and pleasant, and is part assistant, part apprentice. As the characters are led inside, read or paraphrase the following:
Jennifer leads you through a short entryway into a large comfortable space. You look around to see white stone walls around you with faint blue banners with beautiful calligraphy and design stitched into them. You can see some furniture in the corner of this chamber, including a blue couch stretched across a dark wooden frame and a central circular carpet in the center of the room. As you take in all of this, you hear a voice echo from high above, "Just a moment, hold on." After a few minutes, Allura, a middle-aged human woman with braided blond hair descends the staircase wearing dark blue robes.
Information Allura can Offer
Allura has connections with both the Council of Tal'Dorei as well as the Arcana Pansophical. She can provide quite a bit of information on any powerful magic items the group may bring forth for identification. Additionally, if the group displays any incredibly evil items, Allura will offer to have her partner Kima, to take the items and have them placed in the vault within the Platinum Sanctuary in Vasselheim.
Additionally, Allura can provide the group with information about titan seeds. With a mention of elemental upheaval happening across Tal'Dorei, Allura will offer to contact the leader of the Ashari to make her aware and see if she has any knowledge of other events or causes.
From the Adventures of Bramble Tickletoes III & Company:
Lia sent a letter to Allura asking for a meeting to discuss a few powerful magic items in their possession. After a delay, the group finally meet with Allura and discuss the Orb of the Whispered One and Oblivion's Anchor. They learn the Anchor is in fact an Arm of the Betrayers, the Betrayer Gods' version of a Vestige of the Divergence. The group agrees to relinquish these items in exchange for a line of credit at Gilmore's Glorious Goods. They also inform Allura to the elemental chaos and she agrees to make contact with the leader of the Ashari, an old friend of hers.

Road to Westruun
Traveling from Emon, the road to Westruun takes characters along the Silvercut Roadway. It is a twelve-day journey. As the weather gets warmer and the season moves further into Spring, more caravans can be seen out on the roads. The Silvercut Roadway meanders across the endless Dividing Plains, Tal'Dorei's vast heartland. Framed by the Stormcrest and Cliffkeep Mountains, the Dividing Plains are miles and miles of rolling hills, tallgrass prairies, blue rivers, and fertile farmlands. Small patches of trees dot the landscape here and there.
As the characters travel along the Roadway, they pass a number of merchant caravans, small groups of soldiers patrolling the roads, and the odd groupings of farm settlements here and there. The days are sunny but cool, and travel along the road is rather enjoyable.
Rotten Forest
Long ago, during a massive battle, an evil druid cast awaken on a massive tree. This evil druid and his massive minion were defeated by a band of heroes during the battle and most of the tree was destroyed. As years pasted the tree started to decompose and it became one with the soil around it. This caused a strange magical effect to take hold of the plant life that grew there. While not fully sentient the small plot of land became aware of its surroundings and developed a hive mind with the other plants in the area. With its newfound intelligence, the land has developed a strange system in order to feed itself and continue its growth.
As the characters travel takes them through this grove of trees, read or paraphrase the following:
Keeping Watch
If the party keeps watch throughout the night, they may notice some animals wandering nearby through the trees. Roll on the below table to determine what they see:
| 1d4 | Creatures |
|---|---|
| 1 | 2 deer |
| 2 | 2d4 wolves |
| 3 | 2 black bears |
| 4 | 1 giant elk |
During the third watch, the forest comes alive and attacks. The characters on watch must succeed on a DC 19 Constitution saving throw or be lulled into a trance by the smells and sounds of the forest.
Characters must succeed on a DC 19 Acrobatics or Athletics check to avoid being restrained. Any characters sleeping or in a trance by the forest make this check with Disadvantage. The wall of plants is roughly 10 feet high and forms a perimeter around the sleeping characters.
Encounter
Forcing their way through the wall of trees comes 2 corrupted treants (MM p.289). They will target anyone who uses fire first. During round 2, on initiative count 20, any creature that makes a successful DC 12 Perception check will begin to notice the ground beneath their feet rumbling and vibrating. During round 3, on initiative count 20, a gigantic mass of roots and vegetation in the form of a giant reskinned purple worm (MM p.255) bursts forth from the ground and attacks.
Westruun
Population: approx. 51,980 (61% Human, 10% Gnomes,
7% Tieflings, 5% Orcs, 4% Goliaths, 1% Gnolls,
12% Other)
Religions: Major - Lawbearer, Wildmother, Platinum Dragon
Minor - Stormlord, Everlight, Ruiner
Government: Lord Mayor Lysandra Kallos with a council
of ten advisors
Surrounding the base of the southernmost stretch of the Cliffkeep Mountains is the Bramblewood, a dark and tangled forest named for its jagged, thorny-barked trees. The Bramblewood's impenetrable canopy and thick, gnarled roots give it an ominous appearance, but its eerie boughs are populated with countless deadly beasts. It's a grim warning to all who would dare approach Gatshadow, the mountain of despair: come no closer if you value your life.
Yet despite this, without the abundant game and plentiful timber of the Bramblewood, the nearby city of Westruun would likely not exist. A trade city with nothing to trade rarely lasts long, and the Bramblewood ensures that local carpenters, artisans, and tradesfolk always have plentiful resources. For those brave enough to venture into the Bramblewood, a pair of well-tread paths have resisted its overgrowth; one leads to the iron-rich Murdoon Mines at the base of the Cliffkeeps, while the other winds upward to Gatshadow's storm-wreathed peak.
The city of Westruun is the center of Tal'Dorei, a crossroads of culture along the Silvercut Roadway that welcomes adventurers, traders, and vagabonds of all kinds. Despite its name, Westruun is more east than west, and was in fact named after Palest Westruun, the trader and philosopher who founded the city. Westruun suffered under the rule of the goliath tyrant Kevdak's Herd of Storms. Worse, its outlying towns and great stone buildings were ravaged by the acidic breath of Umbrasyl the Hope Devourer, an ancient black dragon of the Chroma Conclave who exacted tribute from her lair in the eerie mountain of Gatshadow. Despite the damage inflicted by its evil rulers, Westruun was one of the first cities in Tal'Dorei to recover from the Conclave. The city has long since reclaimed its place of importance as an economic, academic, and political power within Tal'Dorei.
Westruun underwent a political revolution in the wake of the Chroma Conclave's defeat. The former margrave, Brandon Zimmerset, was a tyrant who claimed absolute power for himself following Kevdak's defeat at the hands of Vox Machina. The title of margrave is a holdover from the authoritarian rule of Warren Drassig centuries ago. A group of local idealists called the Retrievers banded with adventurers and mercenaries to overthrow Zimmerset a decade after he took power and instated their leader as the lord mayor instead. Elections for the position of Lord Mayor of Westruun are held every five years, with no term limits. All adult citizens of the city who have lived there for at least five years have a vote, though only a fraction of the people actually use it.
Lord Mayor Lysandra Kallos is a middle-aged goliath and former leader of the Retrievers. She has never lost a vote for reelection, and holds executive power over the city's defenses, along with the ability to dissolve any business or guild, and to exile any person or group of up to ten people from the city at her discretion. She rules Westruun with the aid of a council of ten advisors.
The Clasp has become a major and public force in Westruun since the criminal organization's dubiously virtuous makeover following the Cinder King's defeat in Emon. Many Clasp agents enjoy the reputation of folk heroes across the Dividing Plains and make public appearances in taverns and town squares throughout Westruun. Nevertheless, the fact remains that the Clasp is still a criminal organization. They have controlled and efficiently run their shadowy trades for decades right under the noses of the Shields of the Plain, Westruun's city guard. Their network of fences runs from coast to coast, Stilben to Emon. Their hideout changes every few years when the Shields manage to track them down. Their current hideout is secreted away behind the storefront of the Saddled Plainscow, a popular tavern owned and operated by Clasp agents.
Folk in search of real folk heroes often seek the covert agents of the Golden Grin, who tend to wait and watch in local taverns. The Grin sometimes gets a bad reputation in Westruun, since people need help every day, but the Grinners prefer to wait for just the right moment to reveal themselves and strike against evil.
Miles of farmland and fields surround Westruun's towering stone walls -- except to the west, where the city is bordered by the Bramblewood and dwarfed by the mist-shrouded peak of Gatshadow. Nearly two dozen villages and towns surround the city's walls.
Wards of Westruun
The city of Westruun is divided into six wards:
Scholar Ward
Westruun's northwestern ward is home to the Cobalt Reserve, Tal'Dorei's largest public library and private archive. It's also home to a number of other erudite institutions that instruct knowledge-seekers from across the Dividing Plains. Westhall Academy is the most renowned of them all, but in the shadow of these revered institutions is the College of the Savvy, a school for the arts founded by the storied bard and champion of intuition referred to only as the White Duke.
Temple Ward
The city's small southern ward is replete with major temples to the Prime Deities and homes for their clergy. The most important gods of the Dividing Plains are the Lawbearer, the Wildmother, and the Platinum Dragon, and it's made obvious by their huge, resplendent sanctuaries in the Temple Ward. The greatest temples here are the First Bastion, the Wild Arbor, and the Platinum Dragon's Rest.
Opal Ward
Westruun's central district is also its municipal heart. The ward has no residential housing, but is home to the Lord Mayor's Residence, the Hall of Reason, and the public square.
Residential Ward
The northeastern section of Westruun is the city's most densely populated ward, housing over two-thirds of its population. There are no major landmarks in this ward, though every neighborhood in the ward has its own unique culture. Even though tourists might not visit the landmarks here, there are countless local bakeries, shops, and pubs beloved by its residents.
This ward is rife with crime. Westruun's poorest citizens are pressed together in tight quarters, sometimes as little as a single city block away from the city's wealthiest manor houses. The Clasp and the Myriad prey upon the poor and affluent alike, often stoking the tensions affecting the city's downtrodden to create chaos that masks their crimes. The Shields are stretched too thin to properly deal with these agitators. Unlike in the Temple Ward, free expression of religion is not a guaranteed right here, even within the privacy of one's own home. Though the Lawbearer, the Wildmother, and the Platinum Dragon are all benevolent deities, many of their Westruunian followers are not particularly tolerant of other faiths.
Market Ward
Westruun's southwestern ward contains the majority of its businesses, trade stands, and production warehouses. Some of these businesses are historic fixtures of the city, rebuilt in years past, but many sell overpriced wares to cater to tourists, adventurers, and the city's wealthy elite.
It's currently in fashion for store owners to live in a secondary story above their shops, though less scrupulous businesspeople have turned their residences into gambling dens, black markets, and illegal brothels. The most significant building in this ward is the Exandrian Exchange, a marble-walled auction house where hundreds of vendors hawk rare and unusual items from across Tal'Dorei. A satellite location of Gilmore's Glorious Goods, a famed magic item shop in Emon, is a beloved attraction of this district.
Underwalk Ward
The city's newest ward is underground. It's an extension of the residential sprawl built from repurposed sections of the sewers, underground military bunkers, and the wine cellars of mansions annihilated by Umbrasyl and the Herd of Storms.
The Underwalk was frantically excavated during the invasion of the Chroma Conclave in hopes of keeping the populace hidden. It has been largely abandoned since, save for those too poor to return even to the Residential Ward, but an effort has been made in the past two years to create a unique and vibrant ecosystem in the Underwalk. The optimistic entrepreneurs trying to popularize Underwalk housing hire adventurers in great quantities, for every day, new and unsettling rumors of many-headed monstrosities prowling the Underwalk's shadowed roads spread to the surface.
The best-known entrance to this tangle of tunnels is the Underwalk Gates, a forty-foot-wide staircase in the Residential Ward that descends into a gaping opening lit only by torchlight. Another entrance known mostly to the Clasp is a single unassuming manhole in the Opal Ward, topped with a metal cover emblazoned with the crest of Westruun.
Westruun Locations
The following areas, 1 through 14, are specific locations in Westruun and can be found labeled on Map 9.3.
1. Cobalt Reserve. With a grand dome of polished blue stone, this vast repository looks more like a house of worship than a library. Nevertheless, this landmark of the Scholar Ward is Tal'Dorei's largest house of knowledge, and it is maintained and fiercely defended by the monks of the Library of the Cobalt Soul. A character who spends 1 hour in the public section of the Cobalt Reserve can make a DC 15 History check, discovering any piece of common knowledge in Tal'Dorei. On a failure, this check can be repeated after another hour of study. The DM can decide if the knowledge the character seeks can only be found in the restricted archives, which only members of the Cobalt Soul, or characters in the Cobalt Soul's good graces, can access.

2. Westhall Academy. No university in Tal'Dorei can hope to compete with the prestige of Emon's Alabaster Lyceum, but the Westhall Academy does its best. Its sand-colored stone walls and copper-patina dome are an unmistakable landmark of the Scholar Ward. They imply a stately and refined institution with an unpretentious, workaday attitude. Most of the Westhall Academy's students come from humble backgrounds, and the lord mayor does her level best to ensure that the academy is funded enough to let anyone from the plains who shows great promise attend, free of cost. Mages, architects, poets, artists, agriculturalists, and people of all disciplines can find an education at Westhall.
3. Yuminor Observatory. Westruun is a fairly flat city, and one tower on the edge of the Scholar Ward looms high above the nearby Westhall Academy. It looks forever skyward, the arcanists inside constantly charting the movements of the heavens. A quasi-religious order of diviners and astromancers named the Scions of Yuminor study here, supported by the academy's headmistress, Estella Ladimar, who is herself a blood descendant of the heroic wizard Atz Yuminor. The observatory is open to all, and the diviners here will gladly give a star reading for 10 gp, once per day. Receiving this reading allows a character to roll 1d20. Note the result -- they can exchange it for any d20 roll made by a creature they can see. This divination fades after 24 hours. Despite the Scions of Yuminor's affability, something seems odd about them, like they have stared into the stars just a bit too long and seem something they wish they could forget.
4. First Bastion. The most magnificent of the temples within Westruun's Temple Ward is the First Bastion. Dedicated to the Lawbearer, this opulent sanctuary is a common attraction for visiting folk of all faiths. Its magnificent, even decadent, gold-and-marble exterior is a sight most people can't imagine exists upon the Material Plane -- it seems like nothing less than a building from the realm of the gods themselves. The First Bastion was a secret home for refugees during Kevdak's occupation, and many Westruun survivors have turned to the faith of the Lawbearer after being protected by her grace.
5. Lord Mayor's Residence. The Lord Mayor's Residence is a squat manor in the Opal Ward. It was originally named the Margrave's Keep, and as such, it is a defensible and highly fortified compound buttressed against military barracks. The interior has been livened up significantly by the lord mayor, but the exterior is still a spare, military edifice.
6. Hall of Reason. This beautiful courthouse in the Opal Ward is constructed in sweeping Lyrengornian style and bears a marble statue of the Platinum Dragon above its steps. The square before the courtroom steps is a forum for public gatherings and bears a fountain depicting Palest Westruun, the founder of the city, atop an onyx horse.
7. The Black King. Palest Westruun was not a king, but his new statue in the Opal Ward is often called the Black King, a subtle jab at the city's previous "Black King," the tyrannical dragon Umbrasyl. The high priest of the First Bastion blessed both the Black King and Westruun itself when the statue was unveiled. When the safety of all of Westruun is threatened, the Black King will animate and defend its people, becoming a stone golem (MM p.170) with a speed of 60 feet, Charisma and Intelligence scores of 18 (+4), and the ability to speak Common. It is single-minded in its desire to protect its city and its people.

8. Survivor's Legacy. The names of all those in Westruun who survived the reign of Kevdak and Umbrasyl are carved on a wall in the first chamber of the Underwalk. Legend has it that the memorial was created by Percival de Rolo when the people of Westruun first hid here from the wrath of the Chroma Conclave after Umbrasyl's death, but it has been expanded in the years since, now including the names of all who perished in the struggle as well. The Survivor's Legacy is a symbol of hope, warding away the sorrow and evil of the Underwalk beneath, and to this day common, folk make trips here to honor their lost loved ones. Some of the more generous folk give aid to the homeless living here as well, and some more adventurous travelers make prayers to the Dawnfather and the Matron of Ravens here before delving into the Underwalk's deeper reaches. Once per week, a character related to one of the people named on the Survivor's Legacy can pray there and gain advantage on death saving throws for the next 24 hours.
9. College of the Savvy. A school for the arts founded by the storied bard and champion of intuition referred to only as the White Duke.
10. Wild Arbor. Located in the Temple Ward, this beautiful temple is dedicated to worship of the Wildmother.
11. Platinum Dragon's Rest. At the southern end of the Temple Terrace lies the alabaster and silver temple to the great platinum dragon Bahamut. Home to the great paladin Lady Kima of Vord, Bahamut's Rest welcomes the forgotten, the oppressed, and the hungry. Simar, Keeper of the Temple, oversees the temple and its services.
12. Exandrian Exchange. The most significant building in the Market Ward is the Exandrian Exchange, a marble-walled auction house where hundreds of vendors hawk rare and unusual items from across Tal'Dorei.
13. Gilmore's Glorious Goods. A satellite location of Gilmore's Glorious Goods, a famed magic item shop in Emon, with a familiar purple exterior, is a beloved attraction of this district.
14. The Underwalk Gates. The best-known entrance to the tangle of tunnels that is the Underwalk Ward is the Underwalk Gates, a forty-foot-wide staircase in the Residential Ward that descends into a gaping opening lit only by torchlight.
15. The Sunkissed Tavern and Inn. A fair-sized tavern and inn, the Sunkissed Tavern largely houses local farmers after work hours and travelers that require cheap lodging. An attached stable makes for a convenient business for those passing through the city. A gruff half-orc barkeep named Ulf keeps his ears open for news and valuable information.
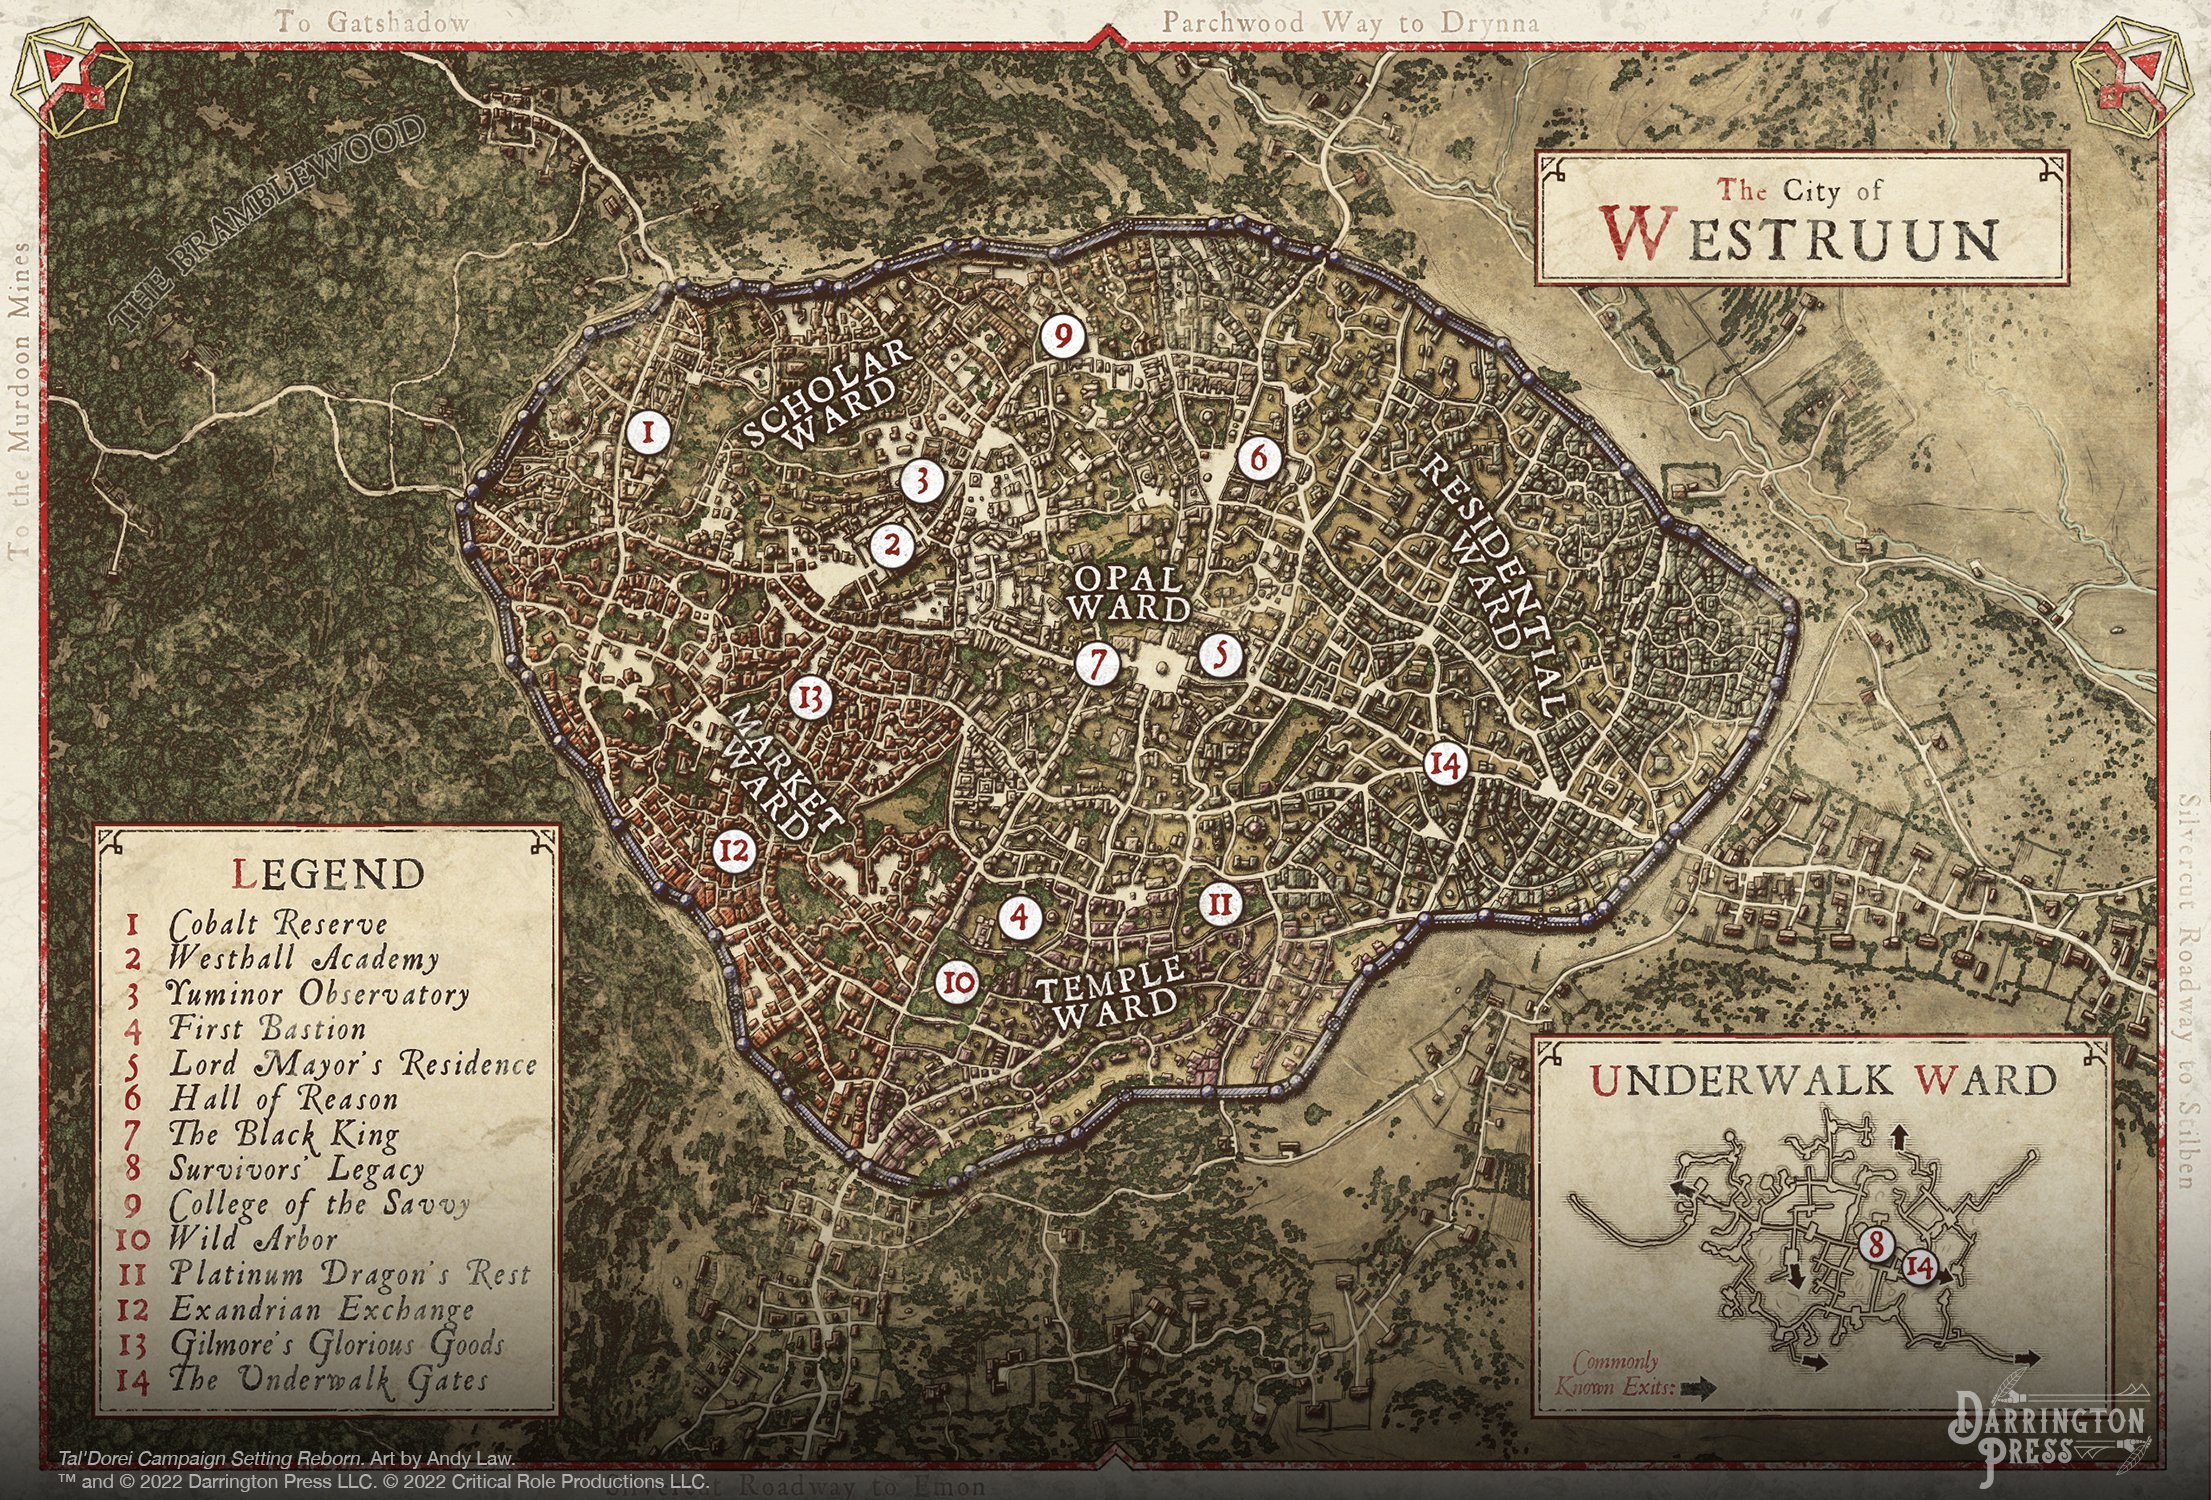
Map 9.3
15
Cobalt Reserve Research
Although it is open to the public, it is heavily watched, and has areas that are off limits to the general public, requiring special approval for access. After signing in, a monk is assigned as a watchful escort for visitors in the public areas where they can read and take notes of the materials within, though removing items from the library is strictly forbidden. Rooms that can be used for meetings, or for quiet research and study of the materials can be found within.
The archive has a tall, tapering tower that curves at the top into a dome-like pinnacle of polished blue stone. Flanking the sides of this tower are smaller spires. The stonework of the main tower has a smooth, concrete looking texture. In the sunlight, the tower shines brightly and reveals intricate carvings on the various tiers that spiral down the tower. The interior of this library consists of Several curved staircases that are carved through the bookshelves. Rising to different heights these staircases connect the library to its higher levels in various points.
Research on the Cloaked Serpent
Characters wishing to research Zehir, the Cloaked Serpent should make a DC 19 Investigation or History check. On a successful check, the following information can be found through research in various tomes:
A wanderer in the shadows and the creator of snakes and serpentkin, Zehir is the evil god of poisons, assassins, and darkness. Most of the Cloaked Serpent's worshipers were annihilated during the Calamity, and the rest are hunted for sport by the servants of Lolth, The Spider Queen and Torog, The Crawling King.
Zehir loathes Erathis, The Lawbearer and Melora, The Wildmother, for he despises life, order, and love above all things. His surviving worshipers use poison and fire to undermine civilization and consume nature, hoping to infuriate both gods and cast Exandria into chaos. The Commandments of the Cloaked Serpent are:
- Keep your acts obfuscated and secret. The night is your greatest ally.
- Strike quickly and without reason. Blind the target with their own confusion.
- Kill slowly, agonizingly, or worse, make them enjoy it.
Long Lost Temples. There are many forgotten temples one built in dedication to the Cloaked Serpent. There is an ancient temple deep within the western reaches of the Verdant Expanse, in a section of forest called the Mirescar. It is a section of extremely dense forest where very little sunlight penetrates down to the forest floor. The trees cluster and twist together into a labyrinth of knotted roots and branches with a tangled canopy of drooping foliage and moss. Additionally, there are a few ancient temples that can be found in the Swavain Isles.
Research on the Whispered One
Characters wishing to research Vecna, the Whispered One should make a DC 17 Investigation or History check. On a successful check, the following information can be found through research in various tomes:
The lich lord Vecna presides over villainous mages, conspiring politicians, and envious servants as the dark god of necromancy, undeath, and secrets. Once a dangerously clever and powerful archmage-turned-lich, his hunger for dominion over all mysteries and obsession with conquering the pantheon led to his own dissolution, leaving behind only his left hand and eye. His enduring spirit reformed through the ages and managed to reconstruct the Raven Queen's rites of ascension to become the newest of gods to walk Exandria.
Defeated by the legendary heroes Vox Machina and sealed behind the Divine Gate, the Whispered One now quietly rules over that which is not meant to be known. Vecna calls no place among the planes his home, instead wandering in search of powerful artifacts and secrets to further his unknowable plots. Those who claim to have looked on Vecna's form speak of a tall, skeletal lich swathed in tattered robes and enchanted jewels, missing both his left hand and left eye.
While Vecna loathes all other gods and wishes to destroy them and become the sole divine power in the planes, he has a particular hatred for Ioun, the Knowing Mentor. Ioun seeks to share with the world the same secrets Vecna guards for himself, and his followers work diligently to undermine and destroy the Library of the Cobalt Soul and any others who follow her path. The Raven Queen also despises Vecna and sees his presence as a mighty affront to her purpose. The Commandments of the Whispered One are:
- Learn all you can and keep hidden that which you know. Reveal what places you must, but never the whole.
- Express and cultivate the evil within yourself, and in doing so, recognize it in others to exploit them for your own benefit.
- Seed the ruin of all who worship other deities, until only those who kneel before Vecna remain.

The Great Trial
A powerful elf wizard, who happens to dabble with artificing and engineering, called Aenor Gleenwith, has been around for far too long and things were starting to get boring. One day, an idea surfaced. He had heard of legendary challenges and set out to find survivors in order to understand their experiences and gain insight into how the challenges worked. He realized these challenges were meant to kill without any kind of mercy or shame with only the smartest able to survive. He decided to spend his time and massive fortune to create his very own dungeon with the intention of challenging adventurers, creating the ultimate trial.
Over the intervening decades he designed the dungeon, blueprints, traps and so on. Finally, the dungeon was ready, but it needed to be tested. Aenor began to test his dungeon on various groups of adventurers. He scryed on them as they progressed through, taking notes on their successes and failures, making adjustments as needed.
Aenor always meets the survivors at the end, congratulating them on their success and offering to revive any fallen allies or restore any permanent harm done during the trial, like a lost limb, for instance. He also asks for feedback and offers the group a generous amount of gold. Even after numerous tests, Aenor is still not satisfied with the results, and hence, the trials must continue.
Story Overview
The Great Trial is a side quest designed to be inserted into a larger campaign. While investigating a missing heirloom or a missing person, the characters are kidnapped by Aenor. He brings them, unconscious, to his dungeon and locks them in individual cells. The first part of the adventure involves a brief individual introduction to the dungeon as the characters awake in their separate cells and must figure out how to escape. After exiting their cells, the characters reunite and will find themselves in the middle of the Entry Level.
The Entry Level. This is the first level, where the group will be faced with many challenges. They'll need to find three items scattered throughout the level to be able to ascend to the next one.
The Labyrinth Level. In this level, Aenor built an exploration challenge. it is a labyrinth which will contain a classic fight at its center, a massive minotaur. However, instead of flesh and blood, this minotaur is a construct carefully crafted by the powerful mage.
The Halas Level. Aenor gave this name to this level of his dungeon as an homage to the powerful wizard who created his own masterpiece, the Folding Halls of Halas. While the entire dungeon is located in a pocket dimension, this level takes that to a whole new place with the creation of an entire ecosystem. This level is composed by a tropical forest, grassy plains, rocky hills, and an offshore island. Aenor has populated it with hungry beasts: dinosaurs.
These are the levels that compose The Great Trial dungeon; however, Aenor is constantly tweaking and adding to it. His goal is to create a deadly and challenging dungeon that provides an interesting experience for its survivors.
Adventure Hooks
Presented below are two options for how this side quest can be introduced to the characters. In general, Aenor will trick the party into a job and kidnap them. He prepares more thoroughly when he is kidnapping a whole group. When the characters take the bait, he attacks them with the objective of dropping them unconscious, not killing them. After all, he needs his test subjects alive. He will cast foresight and stoneskin on himself before meeting the characters, just to be on the safe side. The two adventure hook options presented in this chapter are:
- Lost Heirloom
- Wanted: Private Bounty
Lost Heirloom
Aenor spreads the word and flyers around a big city and small towns that he needs a group of adventurers to retrieve a precious item. The flyer has the following description:
Lost Heirloom
Looking for Adventurers!
Interested parties: contact Mr. Plythe at Kraken St, house 18
Reward: 4,000 gp
The house mentioned at the address is large, and Mr. Plythe (Aenor in disguise) receives the party in noble clothes, nothing magical apparent on him. He asks the characters to come in so he may explain the request. He lets the party in the house, which is usually the house of someone that lives alone so he can "borrow" the house from its owner for a few days. Aenor usually keeps the owner restrained and gagged somewhere in the house.
Encounter
Once inside the house, Aenor (Appendix B) attacks with a 9th level Cone of Cold. If any characters are still conscious, he casts another one, this time at 8th level. If the characters attack or attempt to run, Aenor casts time stop from a scroll he has and ends this encounter. Aenor will stabilize the characters, drug them, and teleports them to his dungeon where he places them in separate cells.
Wanted: Private Bounty
Aenor spreads the word and flyers around a big city and small towns that he needs a group of adventurers to retrieve a missing person. The flyer has the following description:
Wanted Alive: Miss Teeny "Hot" Threel
Interested parties: contact Mr. Rhish at Eagle St, house 5
Bounty: 5000 gp
The house mentioned at the address is large, and Mr. Rhish (Aenor in disguise) receives the party in noble clothes, nothing magical apparent on him. He asks the characters to come in so he may explain the request. He lets the party in the house, which is usually the house of someone that lives alone so he can "borrow" the house from its owner for a few days. Aenor usually keeps the owner restrained and gagged somewhere in the house.
Encounter
Once inside the house, Aenor (Appendix B) attacks with a 9th level Cone of Cold. If any characters are still conscious, he casts another one, this time at 8th level. If the characters attack or attempt to run, Aenor casts time stop from a scroll he has and ends this encounter. Aenor will stabilize the characters, drug them, and teleports them to his dungeon where he places them in separate cells.
The Entry Level
Every room on this level is well lit, unless otherwise specified, thanks to crystals built into the stone ceilings and walls. These crystals can be picked off with some tool and a successful DC 20 Athletics check. They work as a torch, but the light from them is blueish in color, and they never go dark.
Any character with a Passive Perception of 17 or above, or any dwarf, will notice how "new" the place is: stones are still quite smooth, almost intact, no faded aspect, no spiderwebs, nor any dust. Most surfaces (floor, walls, and ceiling) are constructed from the same gray stone slabs,
Unless noted, all doors are made of metal, 2 inches thick, with reinforced hinges. They also contain built-in locks. Some doors are magically protected, and if that's the case, it'll be described. Check the table below to see how to open locked doors without their appropriated keys:
| DC | Action |
|---|---|
| 25 | Pick Lock |
| 30 | Forced Entry |
| 20 | Heat Metal + Forced Entry |
Aenor always keeps locks of hair from each character so he is able to scry on them, though he only uses that as a backup. His scrying spells can last for 4 hours instead of 10 minutes thanks to the magic blue, light crystals spread through the dungeon. Instead of scrying directly on a character, he'll scry on his crystals. The spell also allows him to switch crystals at will for the duration. In short, Aenor can be aware of almost everything going on in this level. Finally, the dungeon prevents spells that would summon things in, or characters teleporting out.
See Map 9.4 for the complete layout of the Entry level.
1. The Hub
The characters arrive in the Hub after they have passed the trials in their individual cells. See the Character Arrival section on the following page for more information about where the characters start.
In the north wall sits a double door made out of metal with reinforced hinges. There are six other single doors embedded in the east and west walls, three to each side. All doors in this room are magically protected. This protection blocks the passage of tiny creatures like bugs from going through any tiny cracks and prevents a knock spell from working to open them .
There is a small metallic chest secured to the floor just outside each of the six single doors. These chests contain all of the character's individual gear. They are keyed to the same key that opens their cell door. The chests are also magically protected and can be opened with the right key.
The large double door contains 6 keyholes. Once all the characters have successfully exited their cells, they can use their keys together to open the double door. Once characters open this door, they progress to area 8. North Corridor.
Character Arrival
For each character, roll 1d6+1. The resulting value will correspond to the cell they start in. Reroll any duplicates. Any unused rooms will have their respective keys already placed in the appropriate keyhole in the large double door of room 1.
When the characters begin to awake in their rooms, read or paraphrase the following:
You wake up and open your eyes, groggily. The room you are in is blurry as your eyes slowly begin to regain focus. You find yourself without armor or weapons. However, whoever did this to you at least had the decency to leave you in the simple clothes you typically wear underneath your armor.
It doesn't take you long, as you awake and begin to think clearer, to realize you have clearly been kidnapped, deposited in some dungeon all alone.
The characters awake in their own, individual cells, labeled on Map 9.4 as 2 -- 7. See their cell descriptions for further details.
2. Trial of Wisdom
You find yourself in a square room, 20 feet wide, made of stone with a black metal door set into the wall in front of you. In the ground between you and the door is a 5-foot-wide hole. Just before it, there is a gray metal plate embedded in the floor with writing on it and a pair of engraved footprints. "The answer is at the bottom of your heart."
If the character stands on the plate, it makes a "Click" sound. In order to pass this trial, the character needs to stand on the engraved footprints. They may either stay there for 1 minute, or step on it then step off.
In either case, after 5 minutes, a small stone block in the wall opposite the door slides in and down, revealing a small niche with an iron key hanging from a small hook.
If the character jumps into the hole, they fall 50 feet and pass through a tiny portal dropping them back into their cell. They must make a DC 13 Dexterity saving throw taking 5d6 fall damage on a failure, or half as much on a success.
3. Trial of Courage
The portal is 10 feet tall. The side that faces the character as they awake is blue; the other side is purple. The blue side allows entry, the purple is an exit only.
When the character enters the portal via the blue side, they arrive in a small demiplane composed of arid lands, pointy rocks, and a reddish sky. The character can see a purple portal roughly 200 feet away, behind a massive fiery demon standing guard in front of it with a flaming sword. There is no blue portal behind the character, however, there is a small wooden sign sticking out of the ground.
When the character steps through the blue portal, read or paraphrase the following:
As you step through the blue portal, you are met with a blast of hot air as your eyes adjust to take in your surroundings. You appear to be standing in an arid landscape, amongst jutting, pointy rocks under a reddish and intimidating sky. The portal behind you is gone.
Right beside you is a small wooden sign with some words scratched into it. Around the sign are various scattered items: an old sword, a rusty breastplate, a shield, a cracked helmet, and a worn cape. Across the landscape, roughly 200 feet or so stands a large glowing purple portal. But something else equally large catches your attention: a red, ugly demon with fire instead of hair, stands guard in front of the portal wielding a large flaming sword. It has not immediately noticed you.
The small wooden sign reads: "The only certainty in life is death."
Encounter
The character must make it back through the purple portal. If the character decides to fight the demon, it is an illusion of a balor (MM p.55). The illusion disappears when the character hits it with an attack or is about to get hit by an attack from it. The character can also attempt to sneak past the balor unnoticed, requiring a successful DC 22 Stealth check.
If the character decides to run through its space, they must make a DC 15 Dexterity saving throw taking 4d8 fire damage on a failure, or half as much on a success.
Once the character passes through the purple portal, they are instantly transported back to their cell where the key has been revealed hanging from a small hook behind a stone that has shifted.
4. Trial of Logic
If the character chooses to look at the room's reflection, there is a loud click from the stone tile beneath their feet as they step in front of the mirror. The clicking sound continues, almost like a timer. After 1 minute, a necrotic gas fills the chamber. The character must make a DC 13 Constitution saving throw suffering 3d8 necrotic damage on a failure, or half as much on a success.
Looking into the mirror at the room's reflection, a successful DC 15 Perception check will allow a character to notice the box appears to be in the northwest corner opposite the mirror, not in the northeast corner where it actually sits.
Once the box is shifted into the northwest corner of the room to match where it appears in the mirror, a stone in the wall near the door shifts down to reveal a recess behind it with a key hanging from a small hook.
5. Trial of Calmness
The portal is 10 feet tall. The side that faces the character as they awake is blue; the other side is purple. The blue side allows entry, the purple is an exit only.
When the character enters the portal via the blue side, they arrive in a small demiplane composed of brown grasslands, with roiling dark skies flashing with lightning. The character can see a purple portal roughly 200 feet away. There is no blue portal behind the character, however, a small wooden sign sticks out of the ground. When the character steps through the blue portal, read or paraphrase the following:
The small wooden sign reads: "All will be well."
Encounter
As the character takes a moment to read the sign, lightning strikes a foot away from them causing small stones to fly in all directions. Have the character roll initiative. The storm has an initiative count of 0.
If the character uses the Dash action, the lightning will strike on its turn, causing the character to make a DC 19 Dexterity saving throw taking 3d10 lightning damage on a failure, or half as much on a success. If the character just walks calmly towards the portal, without dashing, the lightning strikes a few feet away and does not deal any damage.
Once the character passes through the purple portal, they are instantly transported back to their cell where the key has been revealed hanging from a small hook behind a stone that has shifted.
6. Trial of Altruism
The girl is a simulacrum created by Aenor to test an adventurer. The metal bars divide this room from north to south and cannot be forced. The guillotine on the table has a 1-inch diameter hole in it. The girl is mute and only communicates with her head and hands.
After interacting with her for a bit, the character will notice she is obviously sad and appears to be missing the tip of her index finger. She has the door's key in her pocket and will trade it for a piece of the character's finger. The character must use the guillotine to cut off the tip of their finger, suffering 3d6 slashing damage in the process as the extreme pain of losing their finger takes hold.
When the girl is given the fingertip, she sticks it on where hers is missing and then takes out and hands the key to the character. Once the character exits the cell, the pain in their finger vanishes. While the blood remains, their finger is whole once more.

7. Trial of Power
This chamber contains an 8-foot statue of Aenor holding a staff. The statue is made of quartz and is set atop a 2-foot-high cube pedestal. A character that takes a moment to look around the room can make a successful DC 15 Investigation check to determine the staff is made of steel and appears removable from the statue.
The key for this door is already in the keyhole, but the statue needs to be moved to access the door. To move the statue, a character needs to succeed on a DC 17 Athletics check. Using the staff to help move the statue grants advantage on this check.
If a character fails a third time to move the statue, the elf's eyes glow, releasing a small, modified fireball that fills the room with fire. A character must make a DC 15 Dexterity saving throw suffering 5d6 fire damage on a failure, or half as much on a success. The blast breaks apart the stone statue leaving the door mostly clear and able to be opened.
From the Adventures of Bramble Tickletoes III & Company:
The party traveled to Westruun in the hopes of doing additional research at the Cobalt Reserve. Before returning to Emon for a meeting with Arcanist Allura Vysoren, a flyer for a bounty with a sizeable reward enticed the group to inquire. They were subsequently kidnapped by Aenor, causing them to miss their meeting with Allura.
Upon waking up in Aenor's Great Trial, they were angered, frustrated, and panicked with the situation they found themselves in, their lack of items, and the looming possibility they would miss their meeting with Allura. Each party member awoke to find themselves in a different cell, alone and unarmed.
Bramble awoke in area 6, the Trial of Altruism, ultimately realizing he had to cut off his own finger to escape his cell. Lia awoke in area 4, the Trial of Logic, and spent time thinking through the mirror puzzle before discovering the differences the mirror showed. Kayne awoke in area 3, the Trial of Courage, and had to steel himself to face a balor with naught but a few rusty weapons. Maoki awoke in area 5, the Trial of Calmness, and nonplussed by the lightning, he simply walked across the arid, stormy landscape back through the purple portal.
8 - 11. Main Corridors
These corridors are passages that lead to the various important hallways and rooms in this dungeon. These main corridors are trapped and are designed to test the group's ability to deal with tough situations. Many of these traps are designed to trick adventurers into making mistakes that could be considered unfair. Aenor understands that; his intent is to create a sense of despair within the group. The corridors are 10 feet wide, with 20-foot-high ceilings, and their features match the general dungeon features. Blue crystals are embedded in the walls every 40 ft providing a mix of bright and dim light.
False floors hidden by stone slabs are designed to hide any visual cues, so Perception or Investigation will not be useful to locate these types of traps.
8. North Corridor
This 10-foot-wide corridor extends roughly 40 feet left and right of the double doors the characters walk through out of area 1, The Hub. To the left, the corridor extends 30 feet before turning left, leading to 9. West Corridor. However, between the characters and that end is a large hole in the floor. The hole is 10 feet long and encompasses the entire width of the corridor. The hole is 50 feet deep and the natural light given off by the blue crystals does not reach the bottom. Dropping a light source down the shaft will illuminate the spikes at the bottom. A character that falls into the pit suffers 5d6 fall damage and 3d10 piercing damage.
To the right, the corridor extends 40 feet before turning right, leading to area 11. East Corridor. This half of the north corridor is clear of any traps.
Across from the exit from area 1, the Hub, a hallway extends perpendicularly from the north corridor. This leads to area 12. North Access Hallway.
Trap
The natural course of action is to jump over the visible hole in the corridor. After all, any character with a Strength score of 10 or more can do so without an ability check. However, the next 10 feet of corridor directly past the hole is trapped. A thin stone slab, identical to the corridor floor, covers an identically spiked pit. If a character has a Strength score of more than or equal to 15, they will land on the farther side of the stone slab which doesn't swing down. If a character has a Strength score of less than 15, they will land on the near side of the slab, which pivots down causing the character to make a DC 17 Dexterity saving throw, falling into the pit on a failure, suffering 5d6 fall damage and 3d10 piercing damage.

9. West Corridor
The west corridor is 10 feet wide and 80 feet in length and contains another trap (see below). Midway along the corridor is a hallway that branches off perpendicularly to the west, leading to area 13. West Access Hallway. At the southern end of the corridor is a set of stairs that lead down to area 10. South Corridor.
Trap
There are three 5-foot-wide sections of floor that are thin stone slabs designed to give way beneath the characters when triggered. A character that is searching for traps can make a successful DC 18 Investigation check to notice their footsteps across these 3 stone slabs sound slightly different.
On the wall, in line with these trapped sections of floor are three big arrows pained in yellow. They are angled to point at a small word carved into the stone. The word is spelled out with letters in different languages.
- G - in Common
- O - in Elvish
- T - in Dwarven
- C - in Draconic
- H - in Orcish
- A - in Infernal
If a character reads the word out loud, the trap activates, and the sections of floor give way. Alternatively, the first character to walk across all three, activating each pressure plate triggers the trap.
In a group of four adventurers, there is a high chance that at least one member will be safe, outside the pits if they walk in a line. However, to make sure that a character falls into each pit, a 3-inch-thick wall drops from the ceiling, separating each section of trap from the next.
Encounter
The two pits on either end contain 4 skeletons (MM p.272). Each pit drops 15 feet down. The middle pit has metal bars on either side, like a jail cell, allowing the character trapped in that pit to see into other two. The skeletons in the first and last pits attack the characters in those pits, while the character in the middle watches.
Once the trap has activated, the walls return to the ceiling. Any character that did not fall into a pit can try to help the others out. A character that investigates the corridor can make a successful DC 17 Investigation check to notice a lone torch in a sconce, halfway down the corridor. If a character pulls on the sconce, it will lock the stone slabs so the group can safely walk across them. It could also serve as a hook to tie a rope to, if needed.
10. South Corridor
Either end of the southern corridor connects to area 9. West Corridor and area 11. East Corridor via flights of stairs. The corridor is roughly 80 feet long and has a hallway midway along that branches off it perpendicularly to the south, leading to area 14. South Access Hallway.
Trap
The final step down on the left side, coming from area 9. West Corridor is trapped. An extremely thin sheet of stone covers this stair, and the first character to step onto it breaks through. Beneath the stair is a set of pikes that point down, diagonally, catching the character's foot like barbs once it falls past, causing 2d4 piercing damage. The foot is trapped underneath, with the spikes angled this way to prevent the character from simply pulling their foot free.
After a character's foot has broken through, a small metal plaque can be seen attached to the wall, just underneath where the step was. Carved into this plate, in very small letters, is: "At least you'll still be alive." Just beneath the plate is a small button.
Once the trap has been sprung, a character that investigates with a successful DC 17 Investigation check will notice a thin, wide opening in the wall opposite the plaque, underneath the broken step. If the button across is pressed, a wide blade comes out from this opening and nearly severing the characters foot, as well as breaking the spikes. The character suffers 25 slashing damage, and their speed is halved until they finish a long rest. Alternatively, enough spikes can be broken with a successful DC 25 Athletics check; however, during the process of breaking the spikes, the stuck party member suffers an additional 3d10 piercing damage.
11. East Corridor
This 80-foot-long corridor connects to the north with area 8. North Corridor and to the south with area 10. South Corridor. Similar to the other three corridors around The Hub, there is a hallway midway along that branches off it perpendicularly to the east, leading to area 15. East Access Hallway.
Trap
Between the southern end of the corridor and the hallway branching off is another trap. As a character walks across the trapped floor, it gives way beneath them into a pit. The pit is 20 feet deep that narrows approximately halfway down. At the bottom of the pit is a small lever with a plaque above that reads: "Pull me."
If pulled, the lever drops a 10-foot cube of stone down into the hole. It fits perfectly into the cavity and stops where the pit narrows, entombing the character underneath. The stone has 2 sets of thick metal chains attached to it, visible to any characters standing in the corridor above. A character that makes a successful DC 20 Athletics check can lift the block a few inches up but can't move it enough to free the stuck party member.

While the entombed character is stuck beneath, a successful DC 18 Investigation check will reveal a small round hole in the center of the stone. If the character pulls the lever again, the stone block begins to recede back into the ceiling, the chains ratcheting back up one link at a time. However, a dart also shoots out from the receding black, attacking the character at the bottom of the pit. The dart has a +9 bonus to hit, scores a critical hit on an 18 or higher. On a hit, the dart deals 1d10 piercing damage, plus the character must make a DC 13 Constitution saving throw suffering an additional 3d12 poison damage on a failure or half as much on a success.
12 - 15. Access Hallways
These hallways lead off from the main corridors to a set of three rooms. At the end of each hallway is a set of locked, reinforced metal double doors. These double doors have two key holes and carry the same protection as the door out of The Hub; knock won't work, nor can tiny polymorphed creatures scurry through the cracks. The two keys that open each set of double doors can be found in the side rooms, midway down the hall on either side; these side rooms are through the simple, unlocked wooden doors.
Light in these access hallways come from blue crystals placed in the ceiling, halfway down the hall. The access hallways are defended by weak creatures that are meant to give characters a sense of power, but it's only a ruse to lower their guard. The main rooms at the end of each hall contain difficult fights that will wear them down physically and mentally.
12. North Access Hallway
When the characters enter this hallway from area 8. North Corridor, read or paraphrase the following:
Encounter
The double doors are guarded by 2 stone defenders (MToF p.126) and 2 iron cobras (MToF p.125). They attack if the party gets within 10 feet or harms them in any way. An iron cobra always attacks alongside a stone defender so the defender can protect them from being hit.
Development
This hallway leads to the following three rooms:
- 16. Temptation through the right-side wooden door
- 17. Manners! through the left-side wooden door
- 24. Chill Out through the metal double doors at the end of the hall
13. West Access Hallway
When the characters enter this hallway from area 9. West Corridor, read or paraphrase the following:
Encounter
The hallway is guarded by a battle horror (MME p.152) that patrols, marching up and down the length of the hall. It attacks the group on sight.
Development
This hallway leads to the following three rooms:
- 18. Keep Calm and Relax through the right-side wooden door
- 19. Classic through the left-side wooden door
- 25. Indiana Jones Style through the metal double doors at the end of the hall

14. South Access Hallway
When the characters enter this hallway from area 10. South Corridor, read or paraphrase the following:
Any character with a Passive Perception of 15 or higher notices the floor of this hallway is littered with ball bearings.
Encounter
In front of the metal double doors at the end of the hallway sit 2 oaken bolters (MToF p.126). They attack as soon as the characters set foot in this area. The floor throughout the hallway is littered with ball bearings.
A character that makes a successful DC 15 Perception check or has a Passive Perception of 15 or more notices the ball bearings. Anyone wishing to move at full speed across the ball bearings needs to succeed on a DC 17 Acrobatics check or falls prone. This Acrobatics check is made at disadvantage by any creature that fails to notice the ball bearings. Any creature that moves at half speed automatically succeeds on this ability check.
Development
This hallway leads to the following three rooms:
- 20. Just Do It through the right-side wooden door
- 21. Watch Your Step through the left-side wooden door
- 28. This is the Way...Up through the metal double doors at the end of the hall
Troll Keys:
The keys retrieved from areas 20 & 21 have no use for anything, since the double doors leading into area 28 is already unlocked. Aenor's little prank.
15. East Access Hallway
When the characters enter this hallway from area 11. East Corridor, read or paraphrase the following:
If the characters walk down the hallway, read the following:
Encounter
This hallway has 8 stone cursed (MToF p.240). There are 4 on each side, facing each other. They'll only animate and attack when the group is "surrounded" by them, or if the group attacks them.
Development
This hallway leads to the following three rooms:
- 22. Say It! through the right-side wooden door
- 23. Ouch! through the left-side wooden door
- 26. Run Forrest! through the metal double doors at the end of the hall
16 - 23. Key Rooms
These are the side rooms, located through the simple wooden doors set midway down the four access hallways. Each of these eight rooms have the same layout:
- 35 feet long, 30 feet wide, with 20-foot ceilings.
- The rooms are trapezoids with the last 5 feet of the room narrowing to only 20 feet across.
- A large blue crystal is embedded in the middle of the ceiling, illuminating the chamber.
Each of these rooms contains various traps or puzzles the characters must solve before the hidden key is revealed. Each hallway has two of these rooms, and both keys are needed to unlock the main double door at the end of each access hallway.

16. Temptation
The chain connects the key with the spyglass. They are not secured to the pedestal and can simply be picked up and taken with the group.
Trap
The spyglass is trapped. A character that looks through it will see blurred images of the room, but it seems to show runes that are invisible to the naked eye. If they decide to turn the dials to bring it into focus, a thin sharp blade an inch long strikes them in the eye, dealing 14 points of piercing damage. Additionally, the pain is so bad the character cannot open their eye. Until they complete a long rest, any checks made based on sight are at disadvantage.
If a character looks through the spyglass, read or paraphrase the following:
As you look through the spyglass at [insert whatever the character is looking at], you can see the blurred outlines of what look like runes glowing on its surface. Dials on the spyglass appear to change the focus, do you wish to turn them?
As you adjust the image quality, you hear a small twang as you feel a blinding white hot, searing pain in your eye. A thin sharp blade an inch long just sprang backwards through the eye piece, striking you in the eye.
17. Manners!
If a character attempts to open the door, it immediately closes with a strong force as a floating hand materializes, doing one of the following actions:
| d4 | Action |
|---|---|
| 1 | Punches the character in the jaw, dealing 1d4 + 2 force damage. |
| 2 | Shows a middle finger at the character. |
| 3 | Makes a thumbs down. |
| 4 | Wags its index finger in a tisk tisk motion. |
If the group attacks the door, or does anything to damage it, the hand appears and punches the attacker each time.
All a character needs to do to open the door is to knock politely. The door will open, two hands will appear and clap, and a small stone slides down to reveal a hook with an iron key hanging from it.
18. Keep Calm and Relax
The DM should set a 5-minute timer, out of game. If the characters don't do anything, when the 5 minutes are up a stone block in the west wall slides down to reveal an iron key hanging from a hook. The door back into the hallway also unlocks at this time.
Trap
If, during the 5 minutes, the characters pull the lever, they activate the trap. Darts shoot forth from each of the tiny holes. The darts have the following stats:
- +7 bonus to attack
- 1d4 piercing damage per dart
There are 20 darts total, resetting each time the lever is pulled. The attacks from the darts are split evenly between the characters in the room. At the end of the 5 minutes, the key is revealed and the door back into the hallway unlocks.


19. Classic
Interacting with either key causes the lids of both to open revealing spikes around the lid's border and sets of thick chains that resemble tentacles. After the mimics are dispatched, a stone behind them in the wall slides down to reveal a small hook with an iron key.
Encounter
These two iron chests are mimics (MM p.220). Each have the following adjustments to their stat blocks:
- AC 16
- Max HP
- Immunity to poison and psychic damage instead of acid
20. Just Do It
The hole is pitch black due to a localized darkness spell cast into it, which cannot be dispelled. A detect magic spell will pick up the presence of evocation magic.
Around a foot into the hole is a lever which a character can pull to open the door. Opening the door reveals a small nook with an iron key hanging from a hook.
21. Watch Your Steps
Trap
The iron key is located inside the wooden box set atop the altar. The box is not locked. The characters must make a choice as to which path to follow, or not follow either path. Each path and whether it is trapped is outlined below:
Angel Path. This path is trapped. Carefully following the path made from mosaics of gods and offerings, as the characters reach roughly 15 feet from the altar, there is a flash of bright white light. Any creature on the Angel Path must make a DC 15 Charisma saving throw suffering 3d6 radiant damage on a failure, or half as much on a success.
Fiend Path. This path is not trapped. Carefully following the path made from the grotesque mosaics of demons and devils, the characters cautiously approach the altar as nothing happens.
Following Neither Path. This route is trapped. A character walking across the mosaic tiled floor, not bothering to follow either path, will cause a flair of dark black energy as they approach the altar. Any creature affected by this energy must make a DC 15 Charisma saving throw suffering 3d6 necrotic damage, or half as much on a success.
22. Say It!
This room is empty aside from a metal door embedded in the far wall without handle or keyhole. It does, however, have a finely carved relief of a face. The face seems alive as the eyes follow you as you walk into the chamber, and even blink occasionally. Underneath the face, also carved into the metal door, is a sentence that reads: "The secret word is Aenor."
In order to get the door open, to reveal the key hanging on a hook behind it, the face needs to say the word "Aenor." Of course, asking the face to simply say it won't work.
The face will converse with the group in a natural way. It needs to be tricked into saying the password. The face is nameless but knows the name of its creator: Aenor. If the characters ask who created the dungeon or the face, it'll reply "Aenor" and the door will swing open. If the party can find other ways to trick it into saying the magic word, allow them to be creative.

23. Ouch!
Trap
The pool is filled with rum. Once a creature gets close to the pool or the mirror, the mirror explodes, shooting tiny, sharp glass shards in a 20-foot radius out from the front side of the mirror. Any creatures in that area must make a DC 15 Dexterity saving throw suffering 2d8 piercing damage and 2d8 slashing damage, or half as much on a success.
At the same time, the stairs get instantly covered in grease and shift to form a ramp. Any character on the stairs when this happens must succeed on a DC 15 Dexterity saving throw to avoid falling prone and sliding into the liquid. Read or paraphrase the following:
The iron key is hidden at the bottom of this pool of rum. Each round a character spends in the rum pool while not at maximum hit points takes 1d4 acid damage. The pool is 15 feet deep and any character searching for the key can do the following per round:
- 1 round to swim down.
- 1 round to investigate.
- DC 20 Investigation check to locate the key with eyes closed.
- DC 13 Investigation check to locate the key with eyes open. Keeping their eyes open causes a character to suffer an extra 1d4 acid damage each round.
- 1 round to swim up and climb out of the pool.
24 - 27: Gem Rooms
Each of these rooms are different, but they all have -- or lead to -- the Access Gems. The Access Gems are a large ruby, sapphire, and emerald. The party will use all three gems to complete the dungeon's Entry Level with area 28. This is the Way...Up, and ascend to the next level.
24. Chill Out
Encounter
This creature is a legendary fire elemental (CC p.251). It is restrained but has a firebolt ranged attack (range of 60 feet) with the same statistics as its touch attack. It can use it as part of its multiattack action, releasing 2 bolts per turn, for instance.
The cauldron above the elemental contains an infinite amount of water; it has been linked with the elemental plane of water.
During the battle, the characters can interact with the cauldron or the chains in the following ways:
Hitting the cauldron. It has an AC of 15. If hit, it shakes and drops some water on the fire elemental, dealing 1d4 cold damage.
Breaking a chain. The chains have an AC of 18, and each have 30 HP. Once a chain breaks, the cauldron above tilts and starts pouring water onto the creature, dealing 2d10 cold damage to the elemental per round. Once two or more chains are broken, the increase in water deals 4d10 cold damage to the elemental per round.
Pulling a chain. Pulling a chain can cause the cauldron above to top and pour water on the elemental. It requires an action to pull and requires a successful DC 17 Athletics check. Pulling a chain has the same effect as breaking a chain above, but only lasts for one round unless characters continue to use their action on subsequent turns to repeat.
Treasure
Once the creature has been killed, the flames of its body extinguish, and a glowing red gem is left behind on the ground. It is a massive ruby worth 1,000 gp. The gem is incredibly hot and takes 10 minutes for it to cool enough to be touched. Any creature that holds it before it cools with their bare hands will suffer 1d10 fire damage per round. The characters will need to use this ruby in area 28. This is the Way...Up to unlock the next level.
25. Indiana Jones Style
Trap
The large emerald is sitting atop a stone pedestal. It is sitting on a pressure plate that is sensitive to the weight of the gem. To get the gem without triggering the trap that animates the three statues, the group needs to take the gem and immediately replace it with a bag of equal weight. First, a character must make a successful DC 22 Survival check to accurately determine the weight of the gem. Then, a character must make a DC 18 Dexterity check to seamlessly switch the gem with the bag.
If the bag is too light, the stone pedestal clicks and shifts up slightly. If the bag is too heavy, the stone pedestal clicks and shifts down slightly. Each time the emerald is removed from the pedestal, the door into this chamber slams shut and magically seals until the correct amount of weight is placed on the pedestal.
The party has three attempts to make the correct switch. After each failed attempt, one of the statues reacts with a stored 4th level fireball spell that targets the center of the chamber. On the fourth failed attempt, all three statues animate and attack.
Encounter
The three statues are shield guardians (MM p.271). Aenor has used their spell storing ability to store a 4th level fireball into each that they will use on the first three failed attempts made by the characters to switch out the emerald.
If during the fight, the characters are able to place the correct amount of weight onto the pedestal, the guardians retreat to their niches and refreeze in place.
Treasure
The emerald is worth 750 gp and the characters will need to use it in area 28. This is the Way...Up to reach the next level.
26. Run Forrest!
Trap
The entrance tiles into this corridor are trapped. Once the party steps through the metal doors into this space, a metal bar behind the black curtain shifts down releasing an 8-foot diameter sphere, allowing it to roll down the corridor until reaches the end. At the end of the corridor, it falls into a portable hole that transports it back to its starting point where it begins to roll down the corridor again.
- The sphere has a speed of 60 feet.
- Upon impact with a creature, it causes 5d10 bludgeoning damage and causes the creature to fall prone.
- Opening the door at the end of the corridor requires a Bonus Action.
Any character that attempts to protect itself from the sphere by ducking into one of the niches along the side of the corridor will be in for a bad surprise. All these niches are spiked pit traps. A character that steps into this space feels the floor give way and must succeed on a DC 17 Dexterity saving throw to grab hold on the ledge of the pit. Failing this saving throw results in the character falling 30 feet, suffering 3d6 falling damage and an additional 2d10 piercing damage from the spikes.
Opening the door at the end of this corridor leads into area 27. Leave Me Alone.


27. Leave Me Alone
Encounter
Aenor captured an aboleth slime lord (MME p.11) and used modify memory to make it think this chamber is its lair. It also has been made to think the sapphire underneath the slime is its egg. It attacks anyone that comes near the egg. The water in the pools is contaminated with the aboleth's mucous disease; falling in the water is the same as touching the aboleth while underwater, drinking the water automatically causes the disease.
The slime is sticky, if the party tries to touch it with mage hand, for instance, it gets stuck to it and isn't strong enough to break free. Any character can scrape off the slime with its hands or a weapon. If the group removes the slime during the fight and shows it to the aboleth, it will get very confused and pauses its attack on the group.
Aboleth's Strategy. All four water pools are connected and the aboleth can see through the water and decide which is the best spot to surface and attack. It will start by trying to charm the strongest and dumbest character. It tries to charm a creature twice, if both charm attempts fail, it will start attacking the group with its tentacles. It will use its legendary actions to tail attack or heal via its psychic drain if wounded.
Treasure
Beneath the slime the aboleth thinks is its egg is a large sapphire, worth 1,000 gp. The characters will need to use this ruby in area 28. This is the Way...Up to unlock the next level.
28. This is the Way...Up
There are two cavities in the stone wall, roughly 10 feet above the ground on either side of the large stone door in the corner of the east and west walls. A third cavity can be seen just above the door, roughly 20 feet off the ground, carved into the south wall.
Placing the Gems
The gems the characters collected in rooms 24, 25, and 27 need to be placed in the cavities around the door. Each gem matches the themes of the mosaic walls. The ruby must be placed left of the door in the east wall, the one covered in the red mosaic. The sapphire needs to be placed to the right of the door in the west wall, the one covered in the blue mosaic. The emerald needs to be placed above the door, in the south wall, the one covered in the green mosaic.
To reach any of these cavities, climbing is necessary. The border of this door is made of blocks that allow easy handholds. A character must make a successful DC 10 Athletics check to climb to either lower cavity. A successful DC 15 Athletics check is required for a character to climb to the upper cavity above the door.
Encounter
After the third gem is placed into its respective cavity, the large stone doors in the south wall open. Behind the doors are 2 ancient spirit nagas (MME p.199) who emerge and attack the group. Aenor captured these two creatures and used modify memory to make them believe they are defending an ancient temple of a dead god from malevolent invaders.
Treasure
Once the doors are open, the party can retrieve and keep the three gems if they wish.
Aftermath
Once the nagas have been killed, the party will see a wide set of stairs behind where they emerged that lead upwards. These stairs lead up into the next level of the dungeon, The Labyrinth Level.
At the conclusion of the Dungeon's Entry Level, the characters should reach 13th level.


Map 9.4
The Labyrinth Level
This level is connected to the previous one via a wide set of stone stairs that leads upward. It leads to a landing that marks the start of the dungeons second level. This level begins with a room filled with treasure as a means to motivate the group; however, all the coin in the room is fake. The level then continues into an entrance hall that requires the party to solve a puzzle before they can enter the labyrinth.
Once inside, the labyrinth will confront the group with a confusing mechanism that shifts the walls and intersections, making its exploration much more difficult. Upon arrival at its center, the group must battle Aenor's creation: the Minotaur. Afterwards, they need to proceed to the last room where the group will face yet another construct created by Aenor before locating the passage up to the last and uppermost level.
Unless otherwise noted, the ceilings on this level are 20 feet high. The crystals that illuminate this level glow red rather than blue, but function similarly. The stonework on this level is made with light gray tiles positioned in small arcs. This pattern of small tile arcs continues with the tiles on the walls as well as the ceilings throughout this level. Any doors made of wood on this level are unlocked, while locked doors are made of stone or metal. Two red crystals flank the entrance into the labyrinth and large braziers illuminate the center of the labyrinth where the minotaur is. Otherwise, the rest of the labyrinth lacks red crystals and is completely dark.
See Map 9.5 for the complete layout of the Labyrinth Level.
29. Fake Treasure
Along the west wall is a bookshelf, while along the east wall sits an iron chest. The chest lid is open, and you can see a pile of gold coins fill the interior. Across the room, in the center of the north wall is a large iron door. The two corners of that wall each hold a chest, one made of iron, the other wood.
The iron door in the north wall is unlocked and leads into area 30. Labyrinth Entrance Hall. Once the players make their way through this door, it closes and locks behind them.
Treasure
Each of the three chests are unlocked. They contain thousands of coins. At first glance, one of the chests contains 3,000 sp, another has 2,000 gp, and the last has 500 pp. If a character makes a successful DC 20 Perception check, they will notice there is an illusion on all the coins. All the coins in all three chests are actually all copper coins. The total wealth amongst the three chests is 5,500 cp or 55 gp.
On the bookshelf sit 4 greater healing potions. There are also a set of mundane items including a small wooden box containing sticks of chalk, a small vial of ink, and a feather. There is also a small scroll case with a hint inside for the characters. Inside the case is a piece of parchment with a phrase written on it in Deep Speech: "What seems to be the last important might save your life."
30. Labyrinth Entrance Hall
This room is larger than the treasure room. It has a massive, reinforced iron double door set into the north wall. It appears to have multiple reliefs carved into its face. In the center of the door is a large minotaur head, half of it carved into each door. On either side of the minotaur's head are carvings of an identical ax. On both are intricately carved runes on the blade with a sun in the center of the ax head. Above the minotaur's head is an engraved circle with small paths, carved in a maze-like design.
The east and west walls of this chamber have two wooden doors each. As you enter the room, you notice two paintings hanging on the south wall, on either side of the door you just walked through. One depicts someone clearly lost in the woods and the other shows someone alone in an empty void, crying.
The massive double doors in the north wall are closed and locked, magically protected so that spells like knock won't work. Characters that make a successful DC 17 Investigation check will notice there is no keyhole in the door, however, the reliefs of the minotaur head, the two axes, and the maze are slightly indented.
The party must search the four rooms off this chamber to find the objects that act as the key. The group must place the four objects against the matching reliefs; they will meld into the door and act as the key, opening the door.

31 - 34: Item Rooms
These four rooms are all the same size, roughly 20 feet wide and 30 feet long. Below is a list of which items are found in each room:
- 31. Don't Fall for it Again contains one of the greataxes.
- 32. Under the Sun contains the minotaur mask.
- 33. It's a Real One contains two halves of a greataxe.
- 34. Shield! contains a round canvas painting of a maze.
31. Don't Fall for it Again
Encounter
The chest is a large dune mimic (ToB p.162) without its engulf or dune capabilities. It will attack the party if they touch or interact with it in any way.
Treasure
The item they need from this room is the ornate double bladed greataxe. A character looking around at all the weapons must succeed on a DC 17 Perception check to locate it; it's the greataxe with runes and a sun carved into it. It is hanging near the ceiling, above the large chest.
32. Under the Sun
The lid of the sarcophagus is extremely heavy and requires a successful DC 17 Athletics check to open. Inside there is a corpse wrapped with old, cream-colored bandages from head to toe. Covering the bandaged head is a bull mask.
Encounter
As soon as the lid opens, the mummy warrior (Appendix B) attacks.
Treasure
Once the mummy has been defeated, the party can remove the bull's mask from its head. This is the item the party needed to retrieve from this room.
33. It's a Real One
The sign next to the chest reads "This one is real." Despite the sign, this chest is meant to make the group fear it may be another mimic. A character trying to pick the lock must make a successful DC 20 Thieves' Tools check.
Treasure
The chest contains an assortment of weapons, from shortswords, daggers, scimitars, maces, battle-axes, and so forth. Specifically, there are two single bladed battle-axes that have runes carved into their blades with half of sun painted on the back end of the blade. The group needs to collect both pieces. They are in fact the two halves of a greataxe. The group will need to hold them together to fit them into the door as the next key.
34. Shield!
This green banner with the apple tree is the Gleenwith's family banner. The Gleenwiths are an incredibly old and powerful elven family that have a history of raising competent mages, engineers, and artificers. Any character that makes a successful DC 17 Perception check will notice this room is kept well maintained and cleaned.
Inside the sarcophagus is a random skeleton that Aenor grave robbed. A rusty longsword lies alongside the body. Across the front, gripped by both the skeleton's hands is a large, round shield painted green with an apple tree painted in the center.
Treasure
Underneath the shield is another painting. It is a round canvas painted white, with black circles drawn over it in a maze-like pattern.
35. The Minotaur's Labyrinth
Once the group passes through the iron double-door into the maze, it closes behind them and reactivates its magical protections again. The only exit is through the maze in area 38. Almost There. The walls of the maze extend all the way up to the ceiling. Other than the two red sconces just inside the door, the maze is completely dark. The walls of the maze shift from time to time, retracing their steps is not always a guarantee the same path will still be there. As the characters enter the maze, read or paraphrase the following:
Skill Challenge
Rather than the characters actually solving the maze, their travel through it will consist of a skill challenge. It will require five successes to reach the middle of maze where the minotaur construct is. It will require ten successes to reach the end of the maze and area 38.
The characters can make an argument for which ability checks they may rely on for the skill challenge. Any ability check must succeed on a DC 20 check. The following ability checks demonstrate common methods for the characters to attempt the skill challenge:
- DC 20 Perception check to try to remember the pattern of walls, paths, and directions to avoid retracing their steps. Using the chalk or other marking methods grants advantage on this check.
- DC 20 Investigation check to investigate and analyze an intersection to determine which path seems most logical.
- DC 20 History check to remember information about mazes that may have been read previously on how best to explore, like keeping a hand on the same wall.
Failures
When a character fails an ability check during the skill challenge, roll on the failure table below and resolve any encounter before the next skill roll.
Failure Complications
| d6 | Outcome |
|---|---|
| 1 - 2 | Trap. Roll on the Maze Traps table. |
| 3 - 4 | Dead end, wastes 30 minutes of time. |
| 5 | Random Encounter. Roll on the Maze Encounter table. |
| 6 | Illusionary Wall. Initially, it looks like a dead-end, but if the group interacts with the wall, a successful DC 18 Investigation check will notice it's an illusion. Passing through the wall turns this failure into a success. |
Maze Traps
| d6 | Trap |
|---|---|
| 1 | The Crusher - The stone beneath the lead character's feet is propelled upwards at incredible speed. The character must make a DC 17 Dexterity saving throw managing to jump backwards and avoid being thrust up and crushed into the ceiling on a success. On a failure, the character is crushed and suffers 5d6 bludgeoning damage. |
| 2 | The Thruster - A spear is thrust out of the floor at a random character. The character must make a DC 15 Dexterity saving throw taking 4d8 piercing damage on a failure or dodging it completely on a success. |
| 3 | The Knocker - The floor underneath you drops to form a stone slide. A character caught by this trap must make a DC 15 Dexterity saving throw losing their footing and sliding down on a failure or grabbing a ledge to prevent themselves from falling on a success. A character that slides down smacks their head on a stone protrusion taking 1d10 bludgeoning damage and lands in a pool of acid, suffering 4d8 acid damage each round spent in the pool. |
| 4 | The Poisoner - Numerous darts shoot out of tiny holes in the wall and strike the group. Each character must make a DC 15 Dexterity saving throw taking 1d6 piercing damage with a failure. Additionally, if a character is stuck by a dart, they must make a DC 15 Constitution saving throw taking 3d12 poison damage on a failure, or half as much on a success. |
| 5 | The Piercer - The floor underneath the lead character gives way and they plummet into a pit full of spikes. The character must make a DC 15 Dexterity saving throw falling into the pit on a failure or managing to grab the edge to avoid falling on a success. A character that falls into the pit suffers 3d6 fall damage and 2d10 piercing damage. |
| 6 | The Joker - A wooden hand wrapped in soft wool, wearing a red glove, and attached to a spring, thrusts down from the ceiling. It punches a random group member on the head. The character must make a DC 17 Dexterity saving throw to avoid the impact. On a failure, the character suffers 2d6 bludgeoning damage. |
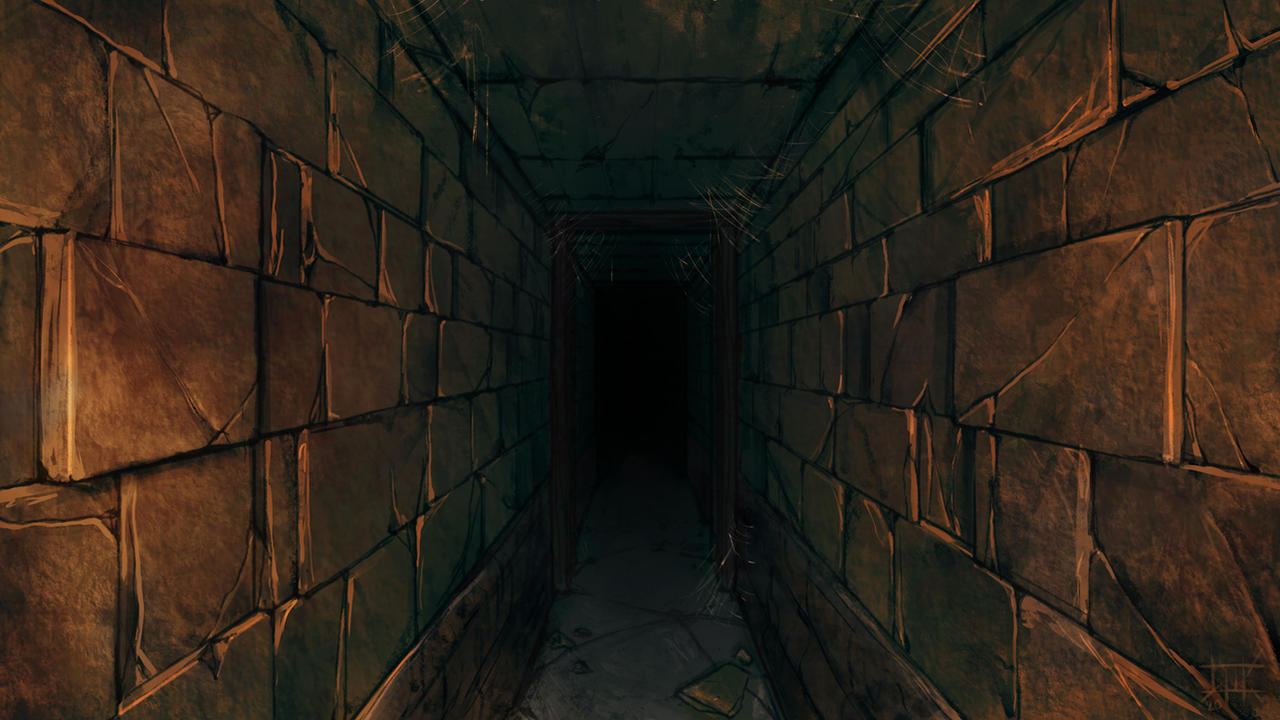
Maze Encounters
| d6 | Encounter |
|---|---|
| 1 | 2 Skeleton Champions (MME p.250) |
| 2 | Shadow Beast (ToB p.345) |
| 3 | 3 Aggarat (MME p.113) |
| 4 | Eldritch Scarecrow (MME p.244) |
| 5 | Fire Giant Skeleton (MME p.254) |
| 6 | 10 Spore Zombies (MME p.295) |
Successes
When a character succeeds on an ability check during the skill challenge, they advance the party further in the correct direction. Each success correlates to about 10 minutes of travel through the maze.
Even on a success, there is still a 25% chance the group gets caught in a trap. Roll 1d8, on a 1 or 2 the group gets caught in a trap; roll on the Maze Traps table. If a character succeeds on their ability check by more than 5, it cuts the travel time through the maze in half and eliminates any chance of getting caught in a trap.
Success Checkpoints. It requires ten successes to complete the maze; however, as the characters progress through it there are a few checkpoints they will encounter:
- After every other success: Roll 1d6, on a 1 or 2 the group finds a door embedded in the wall of the maze. If the result is a 1, the group locates area 37. The East Room. If the result is a 2, the group locates area 36. The West Room.
- After 5 Successes: The group arrives in the center of the maze to find the Minotaur Construct. See the Encounter section below.
- After 10 Successes: The group finds their way through the maze. They stumble upon a similar massive iron double-door like the one they entered the maze through. This one leads into area 38. Almost There.
Encounter
The Minotaur Construct (Appendix B) stands patiently in the center of the labyrinth, greataxe in hand, waiting for wanderers to come his way. This creature is an iron golem constructed to look like a minotaur that wields a greataxe. It fights until destroyed and will chase after the group if they try to flee.
Aside from its stats, the Minotaur Construct is under a permanent effect of a haste spell, unless the party messes up the ritual in area 36. The West Room. Additionally, the Minotaur Construct has Magic Resistance and Magic Weapons, unless the party destroys the crystals in area 37. The East Room.
Strategy. The Minotaur Construct tries to get in position for its Crushing Stride maneuver as often as possible. It will give preference to its Reaction of Reposition over Angry Bull. Once it drops to 0 hit points, a wall of force appears around it to protect it from further destruction. Aenor needs to repair it every time, so this is intended to minimize the cost and time for this task.
36. The West Room
The heptagon is a permanent ritual that activates the effects of a haste spell on the Minotaur Construct. While standing in the middle of the heptagon, any creature can feel the spell's effect. A character that uses detect magic will sense a strong presence of transmutation magic emanating from the runes.
Development
The group can attempt to deactivate this ritual to end the haste effect on the Minotaur Construct. Deactivating the ritual requires a successful DC 21 Arcana check. Alternatively, the ritual is considered a 7th level spell. A dispel magic spell can end the ritual if the caster succeeds on their roll for dispelling higher level spells.
37. The East Room
A character that uses detect magic will sense a strong presence of abjuration magic coming from the crystals. These crystals power the Minotaur Construct's Magic Resistance and Magic Weapons.
Development
The group can destroy the crystals to end the Minotaur Construct's Magic Resistance and Magic Weapons benefit. Each crystal has an armor class of 20 and 80 hit points. All three crystals must be destroyed to remove these effects. Once all are destroyed, the abjuration aura dissipates.


38. Almost There
This room is pitch-black; no red crystals illuminate this large chamber. Characters with dark vision can see part way into the room. Read or paraphrase the following description:
This chamber is a giant trapezoid, roughly 90 feet wide by the door, and approximately 130 feet long. The far side of the chamber narrows to only 50 feet wide. Two rows of stone pillars, about 5 feet in diameter, runs the length of the room. There is also a larger pillar, roughly 15 feet in diameter, in the center of the chamber.
As soon as the entire group enters the chamber, the iron doors behind them close and lock as the clockwork dragon awakes in its alcove at the far end of the chamber. Read or paraphrase the following description:
Encounter
The clockwork dragon (Appendix B) attacks the party with the goal of killing them. The dragon will attempt to stay aloft using its breath weapons to harm the group.
Once it drops to 0 hit points, a wall of force appears around it to protect it from further destruction. Aenor needs to repair it every time, so this is intended to minimize the cost and time for this task.
Staircase Trap
A spiral staircase is built inside the large central column. Stretching across the foot of the stairs is a 5 feet wide pit. Unbeknown to the group, a wall of force blocks the staircase. A character that attempts to jump across the pit will hit the wall of force and fall into the pit. The character must make a DC 18 Dexterity saving throw to grab the edge of the pit and arrest their fall. On a failure, the character falls 50 feet to the bottom, suffering 5d6 fall damage.
In order to get rid of the wall of force, the characters must pull the four levers, hidden underneath the wooden chests in the corners of the room, at the same time.
Chests and Levers. Each of the four chests around the room are 3 feet wide, 2 feet long, and 2 feet tall. They are made of wood and locked. Each requires a successful DC 15 Thieves' Tools check to unlock. Alternatively, they can be destroyed; they have an armor class of 12 and 20 hit points.
Once the chests are opened or destroyed, a metal lever is revealed to be sticking out of the ground. They can be pushed towards the wall. If this isn't done simultaneously with all four levers, they will click back into their original position. If the four levers are all pushed at the same time, there is a loud echoing click through the chamber and the wall of force vanishes.
Aftermath
Once the wall of force has been removed, the characters have access to the spiral staircase inside the stone column. The stairs circle upwards for a few minutes. At the top of this circular staircase, the players are met by a stone door. It is not locked and opens outward. Opening the door reveals the interior of a cave. The cave isn't very large, and the characters can see sunlight streaming in from the entrance approximately 40 feet away. As the characters enter the cave, the door slams shut and locks. This cave is the entrance to the next level of the dungeon, The Halas Level.
Conclusion
After completing the second level of The Great Trial, the characters should reach 14th level.


Map 9.5
The Halas Level
This level is connected to the previous one via the spiral staircase up through the stone column. This level was created as an homage to Halas and his Folding Halls. Aenor also thought it would confuse trial participants, for one moment they are running around in a dungeon, and the next they are in the middle of a vast wilderness.
The cave in which the party starts this level is under a hill in the middle of a lush jungle. This jungle sits in the northeastern corner of a wide valley surrounded on three sides by tall, jagged mountain peaks. Beyond the mountains is an empty void. The place simulates the Material Plane, so it has its own sun, moon, and stars. This level contains many different biomes: jungle, plains, mountains, rivers, lakes, and even a tiny sea with an island.
The goal is to survive while figuring out how to get out. Not an easy task. The party will need to find and access three ruins, easily identifiable by the bright yellow light, similar to a big laser, shedding light into the sky. Once there, they'll be challenged by puzzles, traps, or monsters as they attempt to extinguish the lights. Once all three ruins have been completed, the way out will be illuminated.
The main inhabitants of the "Halas Level" are dinosaurs of all kinds. This is surely the longest of all levels, and also the deadliest. But the trial is almost over.
See Map 9.6 on the following page for the map of the wilderness with the ruin locations marked.
Overview
This level is different than the first two. Rather than being broken up into various "rooms," this level is broken up into different biomes. Rather than having specific encounters laid out, each biome has its own specific Random Encounter table and outlines how often the DM should roll on it. In addition, there are three Ruins the party will need to visit in order to complete this level, The Mountain Ruin, The Lake Ruin, and The Island Ruin. These are each detailed in their own section.
Travel Distances. Each hex on Map 9.6 corresponds to 3 miles. At a normal pace, each hex can be traveled in one hour. At a fast pace, a hex can be traveled in 40 minutes; at a slow pace, each one takes an hour and a half. Travel times are doubled if the hex is considered difficult terrain.
Resting. Taking long rests could be a challenge on this level with the number of creatures wandering around. The best place would be higher ground or the mountains where few dinosaurs venture. The island could be a safe place to rest depending on the party's interactions with the lizardfolk. Resting anywhere else has a high chance of interruption.
Contaminated Water. All the water on this level has been magically altered to be poisonous to the group. If anyone drinks more than a sip from any water source, they must succeed on a DC 12 Constitution saving throw or be contaminated by disease. At the end of each long rest, the character must make another DC 12 Constitution saving throw suffering a level of exhaustion on a failure. These levels of exhaustion can only be removed once the character has been cured of the disease.
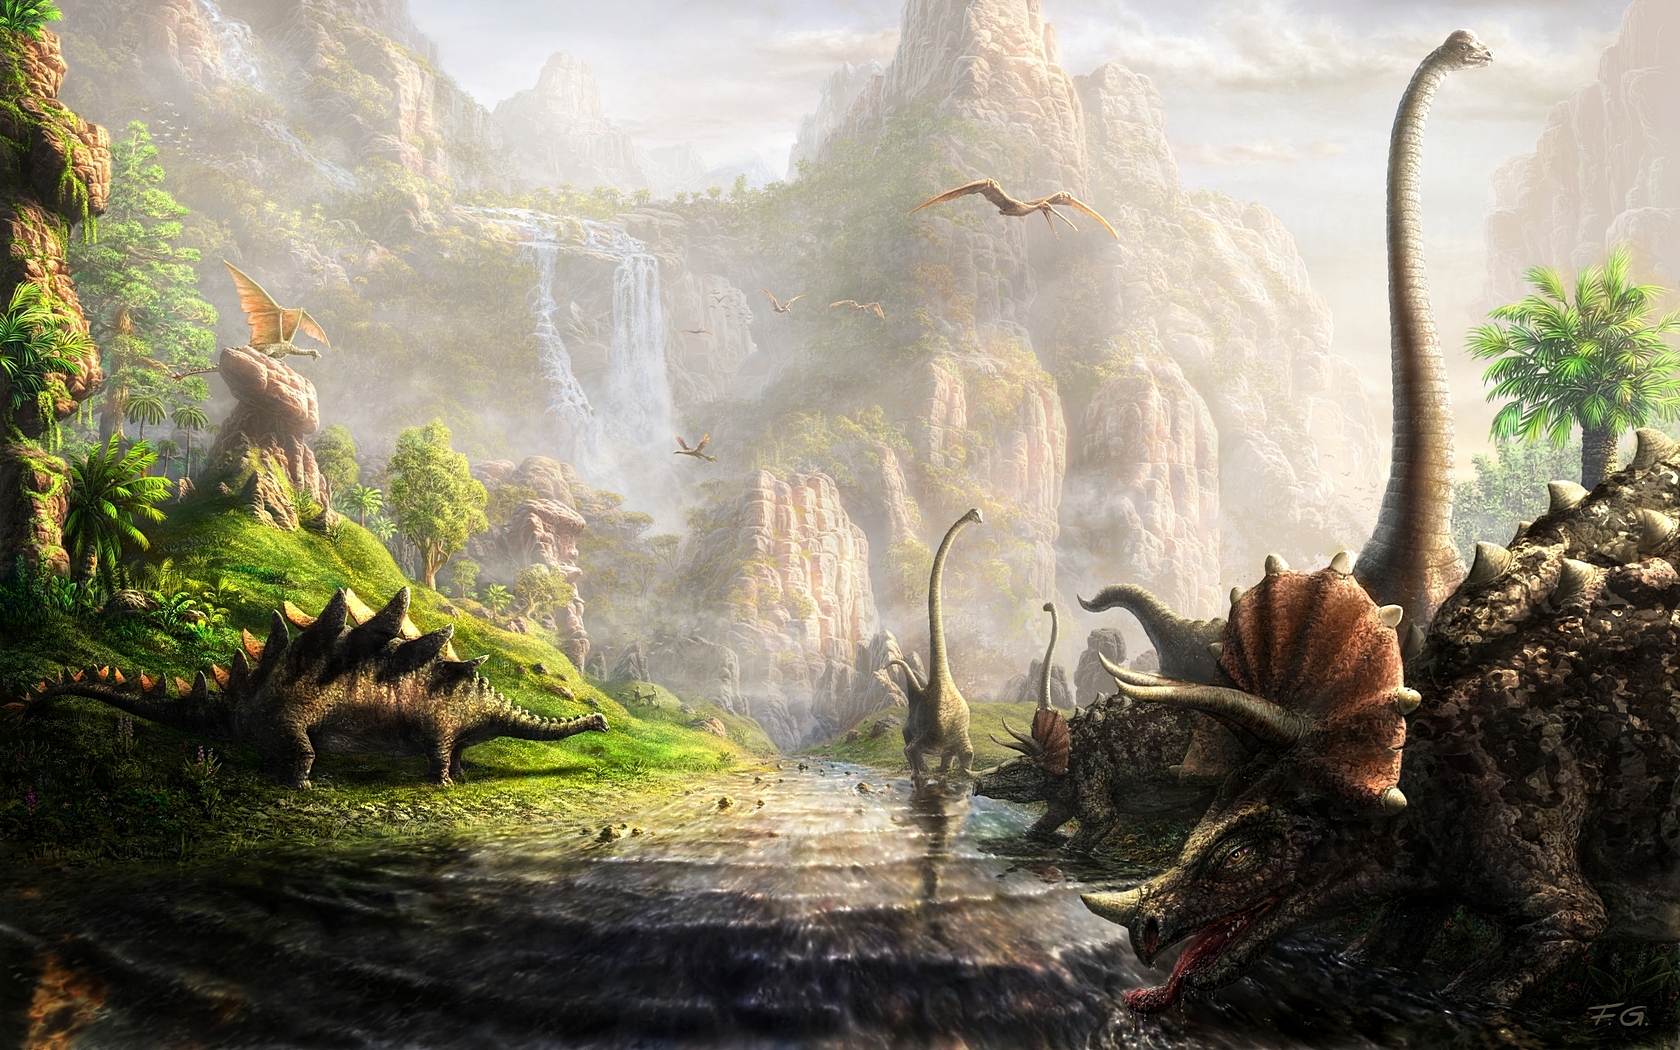

Map 9.6
The Cave
This is where the characters first arrive after climbing the spiral staircase from The Labyrinth Level. As they step into the cave, read or paraphrase the following:
Finding a Vantage Point
A character can try to climb a nearby tall tree to get a better view. Doing so requires a successful DC 17 Athletics Check. As they look out over the landscape, read or paraphrase the following description:
A sprawling jungle lies around you. A few miles away, the trees give way to an expansive plain with gently rolling hills that extends for miles. You can see a few large lakes dot the plains in the distance. Near to one of the lakes, there is a bright yellow beam of light that extends upward into the sky.
To the south, there appears to be an end to the plains. It looks like the grassland ends at a large body of water that extends beyond the horizon. It gets a little hazy out that far but you're pretty sure you can see a second beam of light extending upward from somewhere beyond the shoreline.
Far to the west, barely visible above the horizon are mountain peaks running from the seashore north past your location before the range turns east. Another beam of yellow light extends into the sky from somewhere in the foothills. This mountain range seems to entirely enclose this valley, in a "U" shape.
Biomes
As the characters explore this level of the dungeon, they will progress through different biomes. As the characters enter the various biomes, refer to each biome's section for its description and Random Encounter tables.
Jungle
The huge tropical forest in the northeastern area of this level is home to many different kinds of trees, plants, flowers, fruits, and animals. Besides dinosaurs, there are monkeys, apes, panthers, and other jungle animals. The jungle floor is made of soft earth, occasionally covered by moss, and filled with brush. Small rivulets cross the place providing the creatures that live here with water. The canopy is quite dense, but there are occasional breaks where the sky can be seen. A creature that wants to get a better view of the surrounding landscape could attempt to climb a tree, which requires a successful DC 17 Athletics or Acrobatics check.
Jungle Encounters
For each jungle hex on the map the characters traverse, roll 1d10. On a result of 1 -- 3, the group stumbles upon a random encounter. Roll on the jungle random encounter table below.
Jungle Random Encounter Table
| 1d8 | Random Encounter |
|---|---|
| 1 | 3 Earth Elemental Myrmidons (MToF p.202) |
| 2 | 3 Gorgons (MM p.171) |
| 3 | 3 Triceratops (MM p.80) |
| 4 | 2 Tyrannosaurus Rex (MM p.80) |
| 5 | 3 Grick Alphas (MM p.173) |
| 6 | 3 Weeping Treants (ToB p.388) |
| 7 | 4 Displacer Beast Stalkers (MME p.73) |
| 8 | Galeb Duhr, Elder (MME p.101) |
The "Alien"
The core of the jungle is actually a twisted experiment from Aenor. The trees and creatures are different, sick versions of themselves. Roots are alive and may attempt to grapple and restrain an unaware character. The creatures here are dire versions of themselves, with bones and bare skin showing. Creatures in the "Alien" have a +2 to AC and damage rolls.
For every 10 minutes the characters spend in the "Alien", roll 1d6. On an odd result, tree roots shift in an attempt to grab and restrain a random character, crushing it slowly. The character must succeed on a DC 15 Dexterity saving throw to avoid being grappled and restrained. A restrained creature suffers 1d10 bludgeoning damage per round. The roots have an armor class of 14, 25 hit points, and are immune to piercing and bludgeoning damage.
The chances of a random encounter here are increased. Check for a random encounter every 20 minutes of travel.
Plains
The plains are considered terrain that doesn't fall into any other category. It's mostly flat, although it starts as higher ground - a plateau of sorts - to the north and gradually slopes down towards the sea. It's comprised mostly of grasslands. There are a few scattered trees dotting the landscape. From almost any location, it's possible to have a decent view of most of this level: the hills, lakes, sea, and mountains. Additionally, it's quite clear the plains are filled with beasts, as various creatures can be seen regularly while the group treks across the plains.
The sun shines strongly here on your skin and the fields of grass. The grassland in front of you slopes gently downward toward the sea, providing a great view of this place you find yourself in. A chain of mountains and tall craggy peaks seem to surround the whole place. Between these mountain ranges lies a vast, green territory. You can see prominent features like green hills, rivers, lakes, and small jungles. Far to the south lies a large sea, its water a brilliant blue turquoise close to the shoreline transitioning to darker blue farther out.
However, there's something else that catches your attention. You can see that the place is filled with odd creatures; big, flying ones with pointy beaks, huge, heavy quadrupeds with long necks that can reach the treetops, creatures with spikes on their back, and others that you can't quite make out. Lastly, there are three big yellow lights being shed from the ground upward into the sky at various locations across the region.
Plains Encounters
Navigating the plains is fairly straightforward since the party has good visibility. The plains are considered normal terrain. For each plain hex on the map the characters traverse, roll 1d10. On a result of 1 - 4, the group stumbles upon a random encounter. Roll on the Plains Random Encounter Table below.
Plains Random Encounter Table
| 1d8 | Random Encounter |
|---|---|
| 1 | 3 Air Elemental Myrmidons (MToF p.202) |
| 2 | 3 Deinonychus (Appendix B) |
| 3 | 3 Triceratops (MM p.80) |
| 4 | 2 Tyrannosaurus Rex (MM p.80) |
| 5 | 3 Quetzalcoatlus (Appendix B) |
| 6 | 3 Carnotaurus (Appendix B) |
| 7 | 8 Velociraptors (Appendix B) |
| 8 | Indominus Rex (Appendix B) |
Hills
The hills are irregular masses of rock and earth covered by grasses with a few trees scattered about. They're reasonably high and require some physical effort in order to reach the top but climbing them isn't specifically necessary. There are also rocks of all sizes and shapes scattered across these mounds. The hills tend to range in height from 300 feet to 600 feet.
Caves
Scattered among the hills are random caves. Some are small complexes of tunnels; some are just a single chamber. Most of the caves play host to a variety of giant spiders. Dinosaurs avoid them because they struggle with webs.
If the party enters a cave, roll 1d4 on the Caves Random Encounter Table below to determine what the group will find.
Caves Random Encounter Table
| 1d4 | Random Encounter |
|---|---|
| 1 | 3 Harpoon Spiders (CC p.113) |
| 2 | 3 Sand Spiders (ToB p.364) |
| 3 | 3 Monstrous Scorpions (MME p.305) |
| 4 | Empty Cave, at most some dinosaur bones |
Friend or Foe?
As the characters walk along, they hear a sharp, shrill, annoying sounding voice, coming from a few feet off to their left: "Hey folks, I truly hope you're enjoying the hike." An instant later, a small flying creature with red skin, small horns, and a pointy tail appears flapping its wings and hovering close to the group.
Aenor placed this Imp (MM p.76) called Zyx on this level to mess around with his test subjects. The imp received an alert when the group arrived.
- Zyx can interact at will with the group.
- It can tell the truth, or lie, at its own discretion.
- If attacked, it'll go invisible and say there isn't any point in killing it. It will just go back to the Hells and be resummoned.
- Zyx cannot stay with the group for more than an hour.
Zyx can provide valuable information to the group regarding this level. Below is a list of suggested information that Zyx can share:
- Aenor is a powerful wizard that created this dungeon in a demi-plane to test adventurers.
- There is a tribe of lizardfolk on the island.
- There is a terrible creature that dominates this level. Zyx is truly afraid of it and refuses to speak its name.
- The light beams need to be extinguished in order for the exit to be revealed.
- Other adventuring groups have been through here in the past.
Rivers
Aside from the smaller streams that can be found flowing through the jungle, there are five main rivers through the landscape. Each river is quite wide, ranging from 100 feet to 600 feet across. The rivers range in depth up to 20 feet with a moderately strong current. If a character wishes to swim across, it requires a successful DC 14 Athletics check.
Rivers Encounters
These dinosaurs are pachycephalosaurs. They will run away if they feel threatened. Traversing the different rivers is not too difficult but will require the group to work together. Waterways often attract other animals. For each river hex on the map the characters travel, roll 1d10. On a result of 1 -- 3, the group stumbles upon a random encounter. Roll on the Rivers Random Encounter Table below.
Rivers Random Encounter Table
| 1d8 | Random Encounter |
|---|---|
| 1 | 3 Water Elemental Myrmidons (MToF p.202) |
| 2 | 3 Deinonychus (Appendix B) |
| 3 | 3 Triceratops (MM p.80) |
| 4 | 3 Brachiosaurus (Appendix B) |
| 5 | 3 Quetzalcoatlus (Appendix B) |
| 6 | Mosasaurus (MME p.72) |
| 7 | 8 Velociraptors (Appendix B) |
| 8 | Spinosaurus (Appendix B) |
Lakes
All lakes on this level are reasonably large and deep. They are full of fish as well as larger predators. There isn't anything interesting to do within the lake. In fact, diving into the lake could be extremely dangerous. The shoreline is fairly shallow for the first 100 feet or so before it begins to grow deeper. The lakes vary but can reach depths beyond 1000 feet.
Lakes Encounters
Traversing the shoreline around the lake is easy; however, water sources often attract other animals. For each lake hex on the map the characters travel, roll 1d10. On a result of 1 -- 2, the group stumbles upon a random encounter. Roll on the Lakes Random Encounter Table below.
Lakes Random Encounter Table
| 1d8 | Random Encounter |
|---|---|
| 1 | 3 Water Elemental Myrmidons (MToF p.202) |
| 2 | 3 Deinonychus (Appendix B) |
| 3 | 3 Triceratops (MM p.80) |
| 4 | 3 Brachiosaurus (Appendix B) |
| 5 | 3 Quetzalcoatlus (Appendix B) |
| 6 | Mosasaurus (MME p.72) |
| 7 | 8 Velociraptors (Appendix B) |
| 8 | Spinosaurus (Appendix B) |
The Sea
The island is approximately 10 miles offshore. Close to the where the river flows into the sea, there are a few rowboats on the beach. Each rowboat can hold two people. It takes two hours to cross each hex by rowboat. The party can land on the north side of the island and travel by foot, or row around and try to find a spot closer to where the light beam is emanating.
Encounter
As the party cross the sea, they attract the attention of a large predator. When the group gets within 500 feet of the beach, read or paraphrase the following:
This creature is a megalodon (Appendix B). Use Map 9.7 for the encounter battle map.
Fight Progression
If the characters decide to use their action to Dash towards the shore, they can use this action for a number of successive rounds equal to 3 + their Constitution modifier. After that, additional Dash actions require a successful DC 10 Constitution saving throw or the character also suffers 1 level of exhaustion.
When the characters reach within 200 feet of the shoreline, or if they start getting in rough shape, read or paraphrase the following:
If the group kills the shark, read or paraphrase the following:
This creature is a Mosasaurus (Appendix B) and is beyond the character's ability to fight. This is a flee scenario.
The Island
This small island is home to a mysterious tribe of lizardfolk that Aenor captured to test the reaction of the adventurers and also to break the "loneliness" of his dungeon. The island contains a small jungle, some hills and plains, and a short river which falls into a lake. This island has normal creatures like monkeys, panthers, apes, birds, fish, and no dinosaurs.
The community of lizardfolk live in the southwest part of the island, surrounded by some hills, a river, jungle, and the sea. There are around 150 lizardfolk living there, around 60 males, 50 females, and 40 hatchlings. They live in tents of wood and grass, eat mostly fish, hunting only rarely from the jungle beyond the hills. They have some canoes that they use to go to the mainland, although they only do that occasionally as the place is too dangerous for them.
As the characters approach the island, a successful DC 17 Perception check will notice a few curls of smoke from somewhere farther southwest from the beam of light. As they traverse the island, the ground also shows the occasional sign of these other creatures.
Lizardfolk Tribe
The lizardfolk tribe is led by Leader Oxot Yoxl, a lizardfolk king (MM p.205). He has been leading the tribe since the last one was killed 15 years ago while hunting on the mainland. The tribe members are a simple and humble people who only speak basic Draconic. They have interacted with previous participants from the trial but sometimes none of them speak Draconic, so communication fails. The rest of the adult members of the tribe are comprised by the following:
- 1 Lizardfolk champion (MME p.177)
- 4 lizardfolk sorcerers (MME p.176)
- 10 lizardfolk witch doctors (MME p.178)
- 30 lizardfolk swampstalkers (MME p.178)
- 60 lizardfolk berserkers (MME p.176)
If the party talks with the lizardfolk. The tribe lost a group of four hunters in the small jungle beyond the hills. They don't have much to offer the party but ask for their help anyway. In exchange, the leader is willing to accompany the group into the ruins if they are able to bring the hunters back, or at least their bodies.
Encounter
Trekking into the jungle, the group of hunters were set upon by 6 saber-toothed tigers (MM p.336).

Map 9.7
The Ruins
This is the main quest which will allow the group to leave the dungeon once and for all. All ruins shed a column of pure radiant light with a slight yellow color into the air. The columns of light can be seen from anywhere within line of sight. All ruins are similar, old stone structures, partially destroyed, with openings just wide enough for the light.
Ruin Features
A character that puts any part of their body within the column of light suffers 20d8 radiant energy. In addition, there is a modified anti-magic field around the ruins that prevent spells that Aenor considers "cheating." These spells would include dimension door, spider-climb, and fly.
Mountain Ruin
These ruins look they were once a well-crafted pyramid, but now sits in disrepair partially destroyed with parts caved in and completely covered in moss. Upon closer inspection, there are skulls embedded in the stonework. There is a damaged entrance with stairs leading down into the pyramid.
The stairs entering the pyramid lead down a few feet and open up into a large square room. The remains of a staircase is visible in the center of the room. There is a hole cut into the ceiling above where the staircase clearly once led. The room above is bathed in flickering yellow light. The remains of the staircase litter the floor of this chamber with large chunks still standing in place.
Any creature wishing to climb up the remaining chunks of staircase to the second floor must succeed on a DC 20 Acrobatics or Athletics check. A failure on this check results in the creature falling back to the main floor and suffers 2d6 fall damage.
Deactivating the Beam
In order to deactivate the light beam, the party must destroy the altar. It has an armor class of 20 and 200 hit points.
Encounter
As soon as any character does any damage to the altar, three tiles in the ceiling slide open and a stone and metal construct drops into the chamber through each opening. These are 3 Runic Shield Guardians (MME p.247).
Lake Ruin
This pyramid is falling apart and not much is left aside from an entrance that leads down. The entrance is surrounded by mounds of stone and debris. The light seems to be coming out of the far end of the ruins, shining up through a hole, encompassing the hole fully. Plants have overgrown and covered much of what's left of the structure.
Walking down the stairs leads you to one end of a long stone corridor that is still miraculously standing almost fully intact. Some blocks have fissures, cracks, and broken bits, but otherwise this corridor is in good condition considering. You notice a bright yellow light emanates from around the corner at the far end of the hall. However, what immediately grabs your attention is the corridor itself. It is filled with bladed traps of all kinds, swishing back and forth, spinning, and making all sorts of whirring and slamming noises.
The party must traverse this trapped corridor in order to reach the light chamber where they can attempt to deactivate the beam.
Traps
This corridor is filled with the following traps, listed in the order the characters must traverse them in. There is a short five-foot section of corridor in between each trap where characters can pause before attempting to pass the next trap.
Blade Pendulum. Two large blades are suspended from the ceiling and swing left and right across the corridor extremely quickly. Any character that wishes to pass through this trap must make a DC 18 Dexterity saving throw suffering 4d8 slashing damage on a failure. If a character fails this save by 5 or more, they take the damage but don't make it through the trap and must try again.
Crushing Spiked Wall. The east and west walls in this section are covered in spikes. The spiked section of wall is 30 feet long and the spikes travel 15 feet up each wall. The hall's ceiling here is 20 feet high with the top 5 feet of wall devoid of spikes. There are two long metal bars that run parallel along the ceiling in the middle of the hall across the length of this section. The spikes shoot forward randomly filling the hallway. The spiked wall sections shoot forward at random intervals. A pattern emerges after six cycles. A character can spend about 5 minutes following the pattern with a successful DC 16 Insight check to figure out the pattern. Succeeding on this check will grant the character advantage on subsequent checks made to get through this trap. There are pressure plates on the floors that cause the next section to shoot forward if any character attempts to run straight through along the floor. These pressure plates will also cause the spikes in its section to shoot forward a half second later in the event a character stops before the next section. Any character caught by each five-foot section of spiked wall suffers 2d8 bludgeoning damage and 4d10 piercing damage. To avoid the pressure plates, the characters can climb along the metal parallel bars. Reaching them requires a successful DC 18 Athletics or Acrobatics check.
Limb Cutter. This next section of the hallway has a set of guillotine type blades, one emanating from the ceiling and another from the floor, which slam together, cutting anything in its path. A character can spend a few minutes analyzing the behavior and timing of the blades. A successful DC 14 Insight check grants advantage on the DC 18 Dexterity saving throw made to get through the trap. On a failed save, a character suffers 3d12 slashing damage; a failure by 5 or more causes an additional 3d12 slashing damage.
Saw Blades. This last section of the hallway has six giant circular saw blades. Three whirr side to side along the ground and three whirr along the ceiling. Together the six fully encompass the corridor. There are three sections to this with what appears to be 5 feet of space between each set of saw blades. A character must make three successive DC 18 Dexterity saving throws to pass through each of the three sections. On a failed save, a character takes 4d6 slashing damage; on a failure by 5 or more, in addition to the damage taken the character doesn't make it through the set of blades and must attempt the save again.
Deactivating the Beam
Once past the corridor filled with deadly traps, the characters will enter a pentagonal chamber where the light beam is emanating from an adamantine iris in the middle of the chamber. In order to close the iris and deactivate the light beam, the group must solve the five riddles carved into the various walls of this chamber.
The answer to each riddle provides the characters with the item that needs to be placed on the corresponding shelf. These items must be placed simultaneously on each shelf in order to get the adamantine iris to close, deactivating the beam of light. Below are the riddles, the languages they are written in, and their answers.
Riddle 1 - Abyssal
More valued than gold, more precious than silk
Pouring like wine, flowing like milk.
A count's nightly feast, an offering of war,
A pact now sealed, forever more. (Answer: Blood)
Riddle 2 - Elvish
Relaxed I sit upon my perch
Till suddenly I give a lurch
And off I speed on wingtips three
Before my prey can think to flee.
I make its flesh and tendons part
And claw my way into its heart. (Answer: Arrow)
Riddle 3 - Celestial
Never resting, never still.
Moving silently from hill to hill.
It does not walk, run, or trot.
All is cool where it is not. (Answer: Sunlight)
Riddle 4 - Primordial
I ride the wind, I sail the sea,
I travel underground.
I nest in bird and fish and tree -
In everything I'm found.
Sometimes I sink into a hole
And wind up stranded there
But soon I overrun the bowl
Or take again to air.
I sneak into the smallest crack
To split a stone in twain.
Without a top or front or back
I never can be slain. (Answer: Water)
Island Ruin
Deactivating the Beam
This light beam is linked to the undead energy of the giant apes in this chamber. In order to deactivate the beam of light, the party must destroy all undead within the temple chamber. Once the final undead ape has been destroyed, the beam of light will extinguish. As the characters enter the chamber, read or paraphrase the following:
Encounter
This subterranean chamber is home to 6 Undead Giant Apes (Appendix B). On their first turn in combat, each ape will throw a large boulder at the party as they rush forward. They are stupid creatures and will spread out their attacks.
If Oxot is with the party, he will fight to the death if necessary. He views fleeing the fight as a far greater shame.
Leaving the Great Trial
Once all three beams of light have been extinguished, a new yellow beam is shining skyward from the direction of the jungle where the party began their journey on this level. The group needs to travel back to the cave where they started.
As the characters approach the cave where they first entered this level, read or paraphrase the following:
As you approach the cave mouth you see an elven man clad in expensive looking robes holding what looks to be powerful staff. He has blonde hair and sharp eyes. He murmurs something you don't understand and waves his staff. The sound of clapping fills the air around you, followed by him clapping his hands as well.
He says, "Adventurers, congratulations for this feat! You have passed Aenor's Great Trial. I thank you so very much for taking the time to help me with this endeavor, and I am truly sorry for the harm that has befallen you while you were here. I'll fix any lasting effects that may have been brought upon you and you'll also be handsomely rewarded."
Treasure
Aenor will give each character 7,500 gp for completing his dungeon. In addition, he will cast raise dead on any characters that have died or greater restoration on any suffering from any lingering effects.
After dispensing the characters rewards, Aenor will use plane shift to send them wherever they would like to go.
Conclusion
After completing the third and final level of The Great Trial, the characters should reach 15th level.
Time Dilation
The time within the demi-plane Aenor has constructed for his dungeon passes slower than back on Exandria. Each day spent in this realm is the equivalent to 3 days on Exandria. Depending on how long the party spends in this dungeon, world-changing events back on Exandria may be drawing nearer or may have already occurred.

10
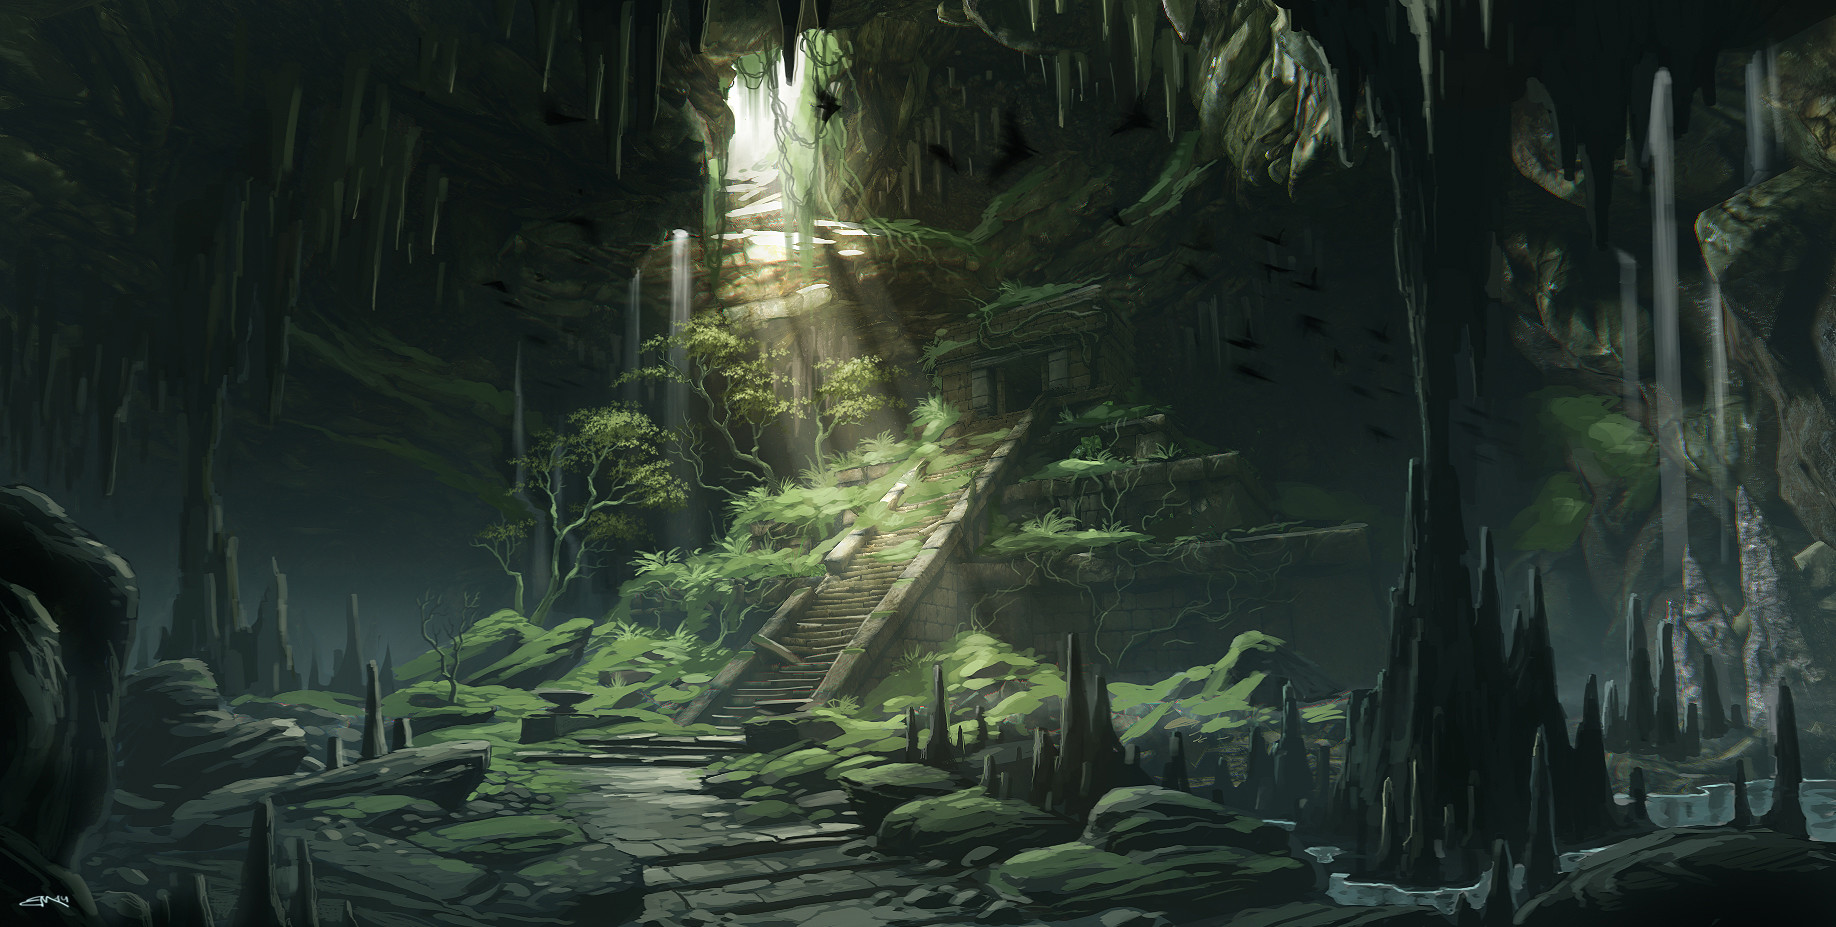
Chapter 10: The Mirescar
Quietly in the background, the cultists of the Cloaked Serpent have been secretly working to destabilize central Tal'Dorei. From an ancient, long-buried temple in the Mirescar, the cultists have been subtlety influencing events in Kymal. With the aid of a few noble houses in Kymal that have come to follow Zehir, the cultists are preparing to unleash a planar incursion from the Elemental Plane of Fire in the hopes of wreaking chaos across the Dividing Plains. If successful, this will be only the first of many future rips in the planar fabric.
Story Overview
This chapter brings the schemes of the Cloaked Serpent to the forefront of the campaign. The group has stumbled upon hints and story seeds throughout the campaign, but it required a significant amount of research to locate a possible base of operations.
After doing research either in Emon at the Alabaster Lyceum or in Westruun at the Cobalt Reserve, the group have discovered a long-forgotten temple to the Cloaked Serpent hidden away in the Verdant Expanse. It was built underground in a large cave system within the Mirescar -- a dark, twisted section of the Verdant Expanse avoided by most travelers and beyond the patrols of the Verdant Guard. The characters must travel to the Mirescar and seek out the temple to the Cloaked Serpent.
The underground cave system is home to many yuan-ti cultists in service to their high priestess. These yuan-ti have engineered a ritual through which they can infuse a creature with residuum through torture to imbue their bodies with magical abilities. This ritual, coupled with brainwashing, has created a small army of goblin sorcerers. These goblin sorcerers are reminiscent of the strange goblins the characters first met around Byroden and the Gladepools.
Finally, as the group fight their way through the temple, there is an opportunity for them to stumble on some letters that connect this group of cultists to the Cassalanter family in Kymal. This clue will lead the party back to Kymal to investigate where the major set piece of the Cloaked Serpent's plan will come to fruition.
Adventure Hook
Due to the different brushes the characters have had with the Cloaked Serpent cultists throughout the campaign, finding the location of their temple should be a sufficient reason for the group to go investigate. If it is not, perhaps Allura Vysoren could reach out to the group and ask them to look into it based on some rumors she has been hearing.
The Mirescar
Deep within the western reaches of the Verdant Expanse is a region where the trees grow so close together that sunlight is barely permitted to pass through their boughs. These ancient trees cluster and twist into a labyrinth of knotted roots and branches, while a tangled canopy of drooping foliage and gray moss blocks the sky from view. Strange powers dwell within the Mirescar, and beasts and travelers that wander into its depths often emerge with their hearts and flesh touched by a deep and corrupting evil, if they emerge at all. The woodlands surrounding the Mirescar are rife with dire beasts, cruel fey, and many-eyed aberrations.
The Mirescar is the subject of countless Syngornian folk tales, many of which purport to tell the true story of how it was formed. Some say it contains the bones of a titan. Others say that a meteor from Ruidus itself landed in the forest. Another, that the Spider Queen cursed it during the Calamity. Any one of the tales may be true, or none of them. Only adventurers of great courage and skill have the power to penetrate deep enough into the Mirescar to learn the truth and retain their humanity. More often than not, these tales serve to frighten the people of Syngorn and Byroden away from the region altogether.
Searching the Mirescar
Deep within the western reaches of the Verdant Expanse lies a section of extremely dense forest where nearly all sunlight is blotted out by the thick canopy. The trees cluster and twist together into a labyrinth of knotted roots and branches, while a tangled canopy of drooping foliage and gray moss choke the sky from view. As you venture deeper into this dark forest, very little animal life can be heard. There is a distinct lack of bird calls and only the occasional glimpse of a mangy squirrel; however, it's nearly impossible to shake this feeling of being watched.
Travel through the dense undergrowth is slow. Climbing over roots and pushing through the thick underbrush saps both energy and time.
As the characters travel in search of the Cloaked Serpent's temple, a successful DC 18 Survival check is required to continue traveling in the right direction.
Encounter
As the characters travel deeper towards the center of the Mirescar, the creatures become more and more corrupted by the forest. At one point during their travels, the group stumbles upon a Zuggtmoy-Touched Shambling Mound (MME p.246) and 4 Ancient Blights (MME p.29). Use Map 10.1 for the encounter battle map.


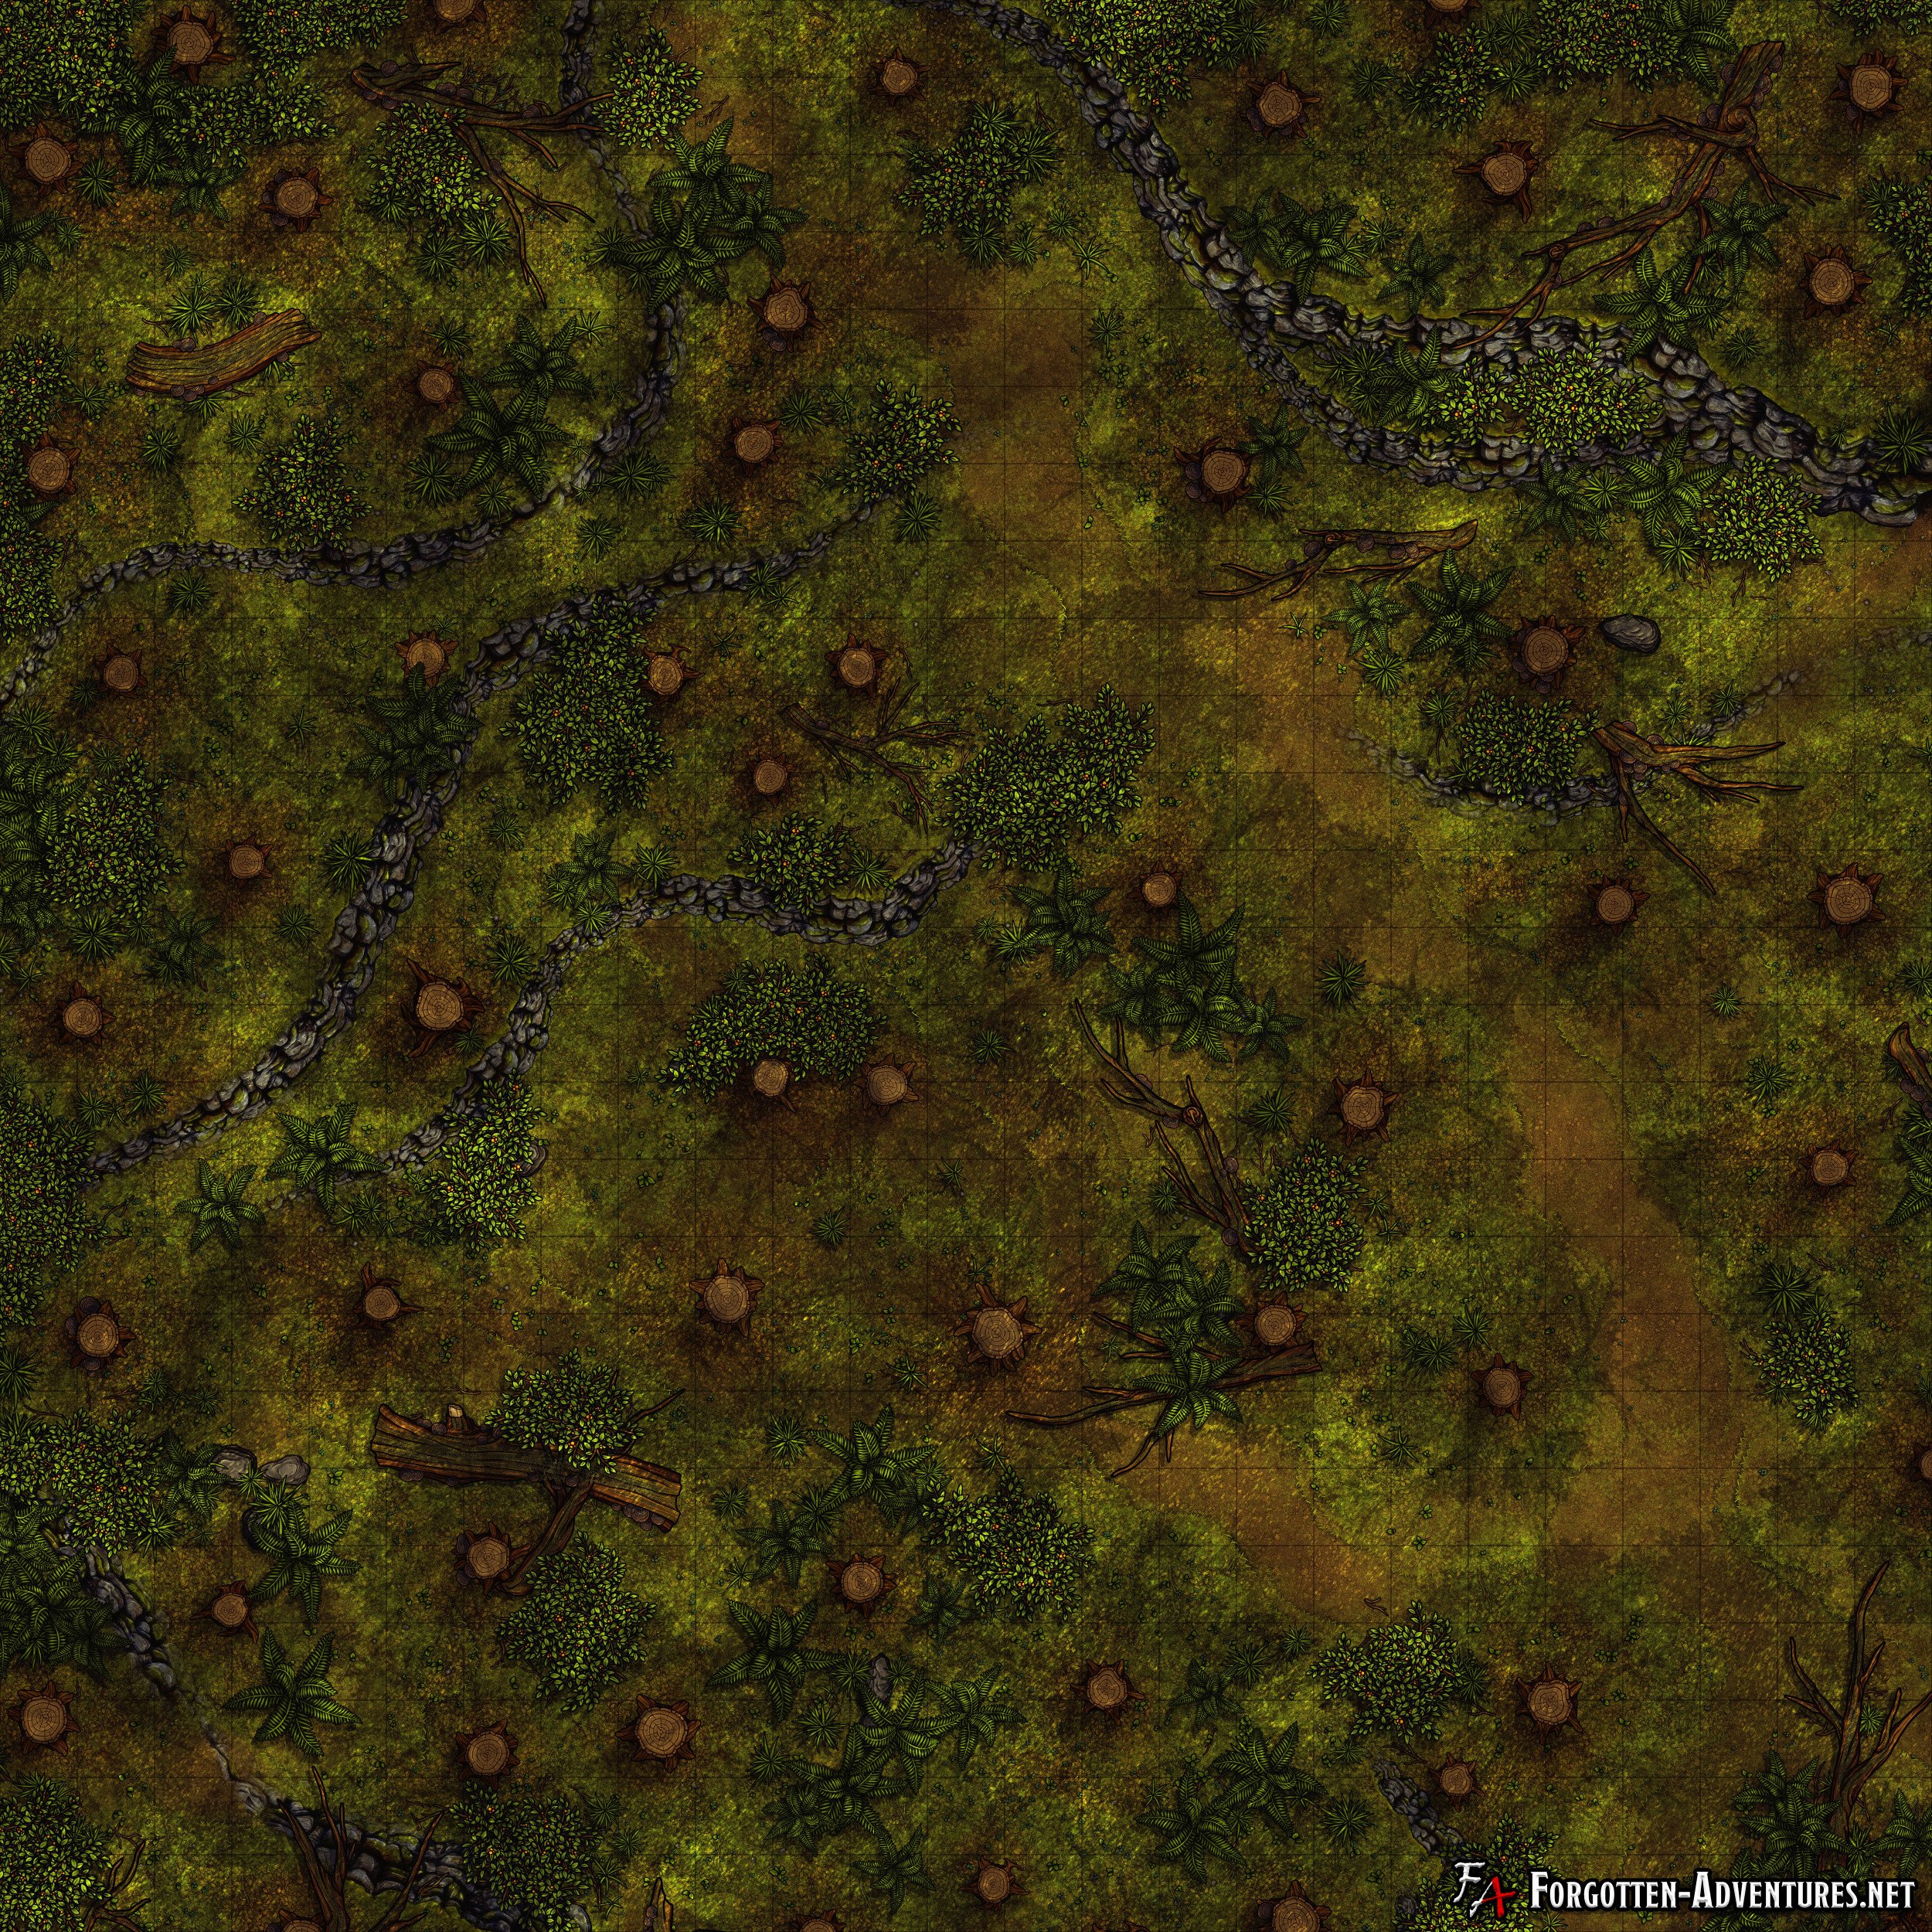
Map 10.1
Locating the Buried Temple
Trap
These stairs are trapped. Roughly 20 feet down, there is a stone step that turns the entire set of stairs into a slide when triggered. A character that looks for traps will notice the step is raised slightly with a successful DC 20 Investigation check. If the group fails to notice the trap, when triggered the group slides down the stairs and lands in the center of a large underground entrance chamber.
Encounter
Guarding the entrance into their underground lair are 2 Yuan-ti Abominations (MM p.308) and 4 Yuan-ti Malison Junglestalkers (MME p.293). Use Map 10.2 for the encounter battle map.

Map 10.2
Cloaked Serpent Lair
Zehir's cultists have rediscovered this ancient temple. The temple and surrounding cave system have long sunk beneath the forest floor. This sect has been working within the Mirescar for the last few years. In addition to the cultists' work to plan and implement a planar incursion around Kymal, they have also developed a technique to imbue non-magical creatures with magical abilities. These abilities are forced upon these creatures through torture and brainwashing and mimic the poison abilities of the Cloaked Serpent cultists.
Sunken Temple
The tunnel in the north wall of the antechamber where the six yuan-ti were standing guard leads downward a few hundred feet. The tunnel twists this way and that dodging around massive tree roots that partially poke out of the dirt walls. The tunnel then ends abruptly at an impassable wall of roots descending from the ceiling. These roots twist downward through what appears to be a hole in the floor of the tunnel. The twisting roots appear to form a makeshift ladder that descends down through the hole. The ladder extends down about twenty feet before burying into the moss-covered ground below.
See Map 10.3 for the complete layout of the Sunken Temple area.
S1. Moss-covered Altar
If the moss is scraped off the rectangular mass in the center of the room, the remains of a stone altar is uncovered beneath. It is pitted and beginning to crumble with faint, fading snake motifs etched into what remains.
This room does not appear to have an exit at first glance. However, with a successful DC 15 Investigation check will allow a character to notice that a section of moss growing along the north wall is springier than the rest and gives way with a push. The moss is hiding a doorway built into the wall.
S2. Moss-covered Chamber
Pushing through the moss covering the door from the previous chamber leads into this much larger chamber, equally covered in moss. Water laps against the moss in the far corner of the room.
Encounter
There are 8 goblin sorcerers (MME2 p.153) stationed as guards in this chamber. They have placed an alarm spell around the doorway into this chamber which alerts them to the group's entrance. They attack immediately.
S3. Waterlogged Chamber
Water laps at the edge of the moss at the north end of S2. The moss-covered ground slopes down to meet the water that fills S3. As this narrow, waterlogged chamber continues, the ground continues downward making the water about 15 feet deep. In addition, the ceiling similarly slopes downward until there is only about a foot of clearance above the surface of the water. The tunnel bends left sharply after twenty feet.
Before the water gets too deep, characters that initially wade into the water will find the mossy ground beneath their feet incredibly slippery. A successful DC 16 Dexterity saving throw is required to avoid falling prone into the water.
Encounter
As the characters are swimming through this chamber, they are attacked by 3 slithering trackers (MME2 p.225).
Developments
If a character spends some time looking around this room, a successful DC 17 Perception check will notice a narrow tunnel, mostly submerged under the water, that has been eroded away. It leads up into a chamber filled with roots (S4).
Additionally, a successful DC 20 Perception or Investigation check will notice two carved cracks in the west wall of this waterlogged chamber. They are perfectly straight and appear to form the outline of a door. It leads to S5.
S4. Root Chamber
A narrow, submerged tunnel has formed through erosion as water has leaked through a crack in the stone surrounding much of this chamber. The tunnel leads upward from S3 into a small, root infested chamber.
Treasure
A character that spends some time searching this chamber can find, with a successful DC 25 Investigation check, partially buried beneath the roots a small owl figurine carved out of a greenish, spotted rock. This is a Figurine of Wondrous Power; Serpentine Owl. The use of detect magic makes the investigation check unnecessary.
S5. Elemental Command Chamber
This door that leads into this chamber from S3 is locked with the lock submerged underwater. The lock requires a successful DC 20 Thieves' Tools check to unlock. Once opened, there are stairs that lead up out of the water into a small circular chamber with carved stone walls.
Treasure
Through the locked door, water pools at the same level, but there are a set of stairs that climb upwards out of the water into a small circular chamber with carved stone walls. In the center of the chamber is a quartz pedestal with a blue crystalline bowl placed on top, filled to the brim with water. This is a Bowl of Commanding Water Elementals.
S6. Chamber of Pools
The ground begins to rise up out of the water at the southern end of S3. The Waterlogged Chamber. A large tunnel twists and curves before it opens up into a much larger chamber.
A small crack in the stone in the north wall of this chamber leads to a small fissure in the ground where a waterfall cascades to a small underground river. A small campfire across the ravine is lit and appears to be a spot where food is cooked by the goblins.
Encounter
This chamber has a number of creatures standing guard. There are 4 goblin sorcerers (MME2 p.153), 6 Yuan-ti Malison Junglestalkers (MME p.293), and 2 water elementals (MM p.125) currently under the control of the yuan-ti.
Development
Beyond this chamber, there is a 15-foot-wide tunnel that curves slightly down and to the right. It seems to extend for a few hundred feet. This tunnel leads to the long hidden Cloaked Serpent temple.
From the Adventures of Bramble Tickletoes III & Company:
Returning from their extra planar kidnapping, the group were transported by Aenor back to Emon. The group rushed to the Cloudtop District in the hopes of still being able to meet with Arcanist Allura Vysoren. During their meeting, they agree to give some of their most dangerous magic items to Allura for safe keeping: Oblivion's Anchor, and the Dread Orb of the Whispered One. In exchange, they get a generous line of credit at Gilmore's Glorious Goods for new magic items.
After having 4 Earrings of Whisper made, with no other pressing matters in Emon, the party decide to teleport to the Gladepools and head into the Verdant Expanse in search of a long-forgotten temple to the Cloaked Serpent.
Lia leads them through the Verdant Expanse and locates the entrance to the underground lair. Unfortunately, Maoki misses the trapped stair and the party slide down into the antechamber. Lia attempts to use her immovable rod to arrest her fall but is not able to hang on when it locks in place. After a deadly battle with the yuan-ti guarding the entrance, the group enters the underground lair.
Bramble is the first through the moss-covered chamber, and when he notices the goblin sorcerers, decides to cast mass suggestion successfully charming all of them. The party is then escorted through the tunnels by the goblins towards the temple.
Bramble uses mass suggestion again, successfully, on the second group of enemies. Now, with an entourage of six yuan-ti and eleven goblins, the party head into the temple chamber. They are noticed immediately by the guards in this chamber and Bramble quickly decides to use arcane gate to teleport the party to the temple entrance, leaving their entourage to distract the guards as they fight to the death.

S1
S2
S3
S3
S4
S5
S6

Map 10.3
Cloaked Serpent Temple
The tunnel that leads from the series of sunken temple caves opens into a massive underground cavern. Across from the tunnel mouth sits a large square pyramid. This pyramid has a large stone staircase that climbs its surface to an entrance at the top. Water pools throughout the chamber and a number of dilapidated stone huts are still standing along the edges while the ruined outlines of others can be seen dotting the cave floor. Small trees and shrubs grow here and there as light streams down through a hole in the cave ceiling. The darker sections of the cavern are covered with moss.
Temple Cavern
This massive chamber is the home of the sixty or so cultists of the Cloaked Serpent. When the characters reach this chamber, a number of creatures can be seen moving about. If a fight breaks out here, more cultists will continue to arrive in waves to attack the party. When the group arrives, read or paraphrase the following:
In addition, a couple dozen small stone buildings are peppered throughout the chamber. A few dozen creatures can be seen moving throughout the chamber.
Stealthing through the Cavern
There are quite a few cultists moving throughout the chamber, far more than is safe to engage. Sneaking through the cavern to the temple entrance may be necessary. This will require a successful group stealth skill challenge. In order to successfully reach the top of the pyramid without being noticed by any of the cultists in the cavern, the group must succeed on three separate stealth rolls. Entering the cavern without being noticed requires an average group DC 18 Stealth check. Crossing the cavern and approaching the temple without being noticed requires an average group DC 22 Stealth check. Finally, climbing the temple without being seen requires an average group DC 25 Stealth check.
Encounter
Spread throughout this chamber are 24 Yuan-ti Malison Junglestalkers (MME p.293), 12 Yuan-ti Abominations (MM p.308), and 24 Goblin Sorcerers (MME2 p.153). If the group is unable to successfully meet a group stealth check, the DM should decide how many cultists are close enough to notice the group. Use Map 10.4 for the encounter battle map.
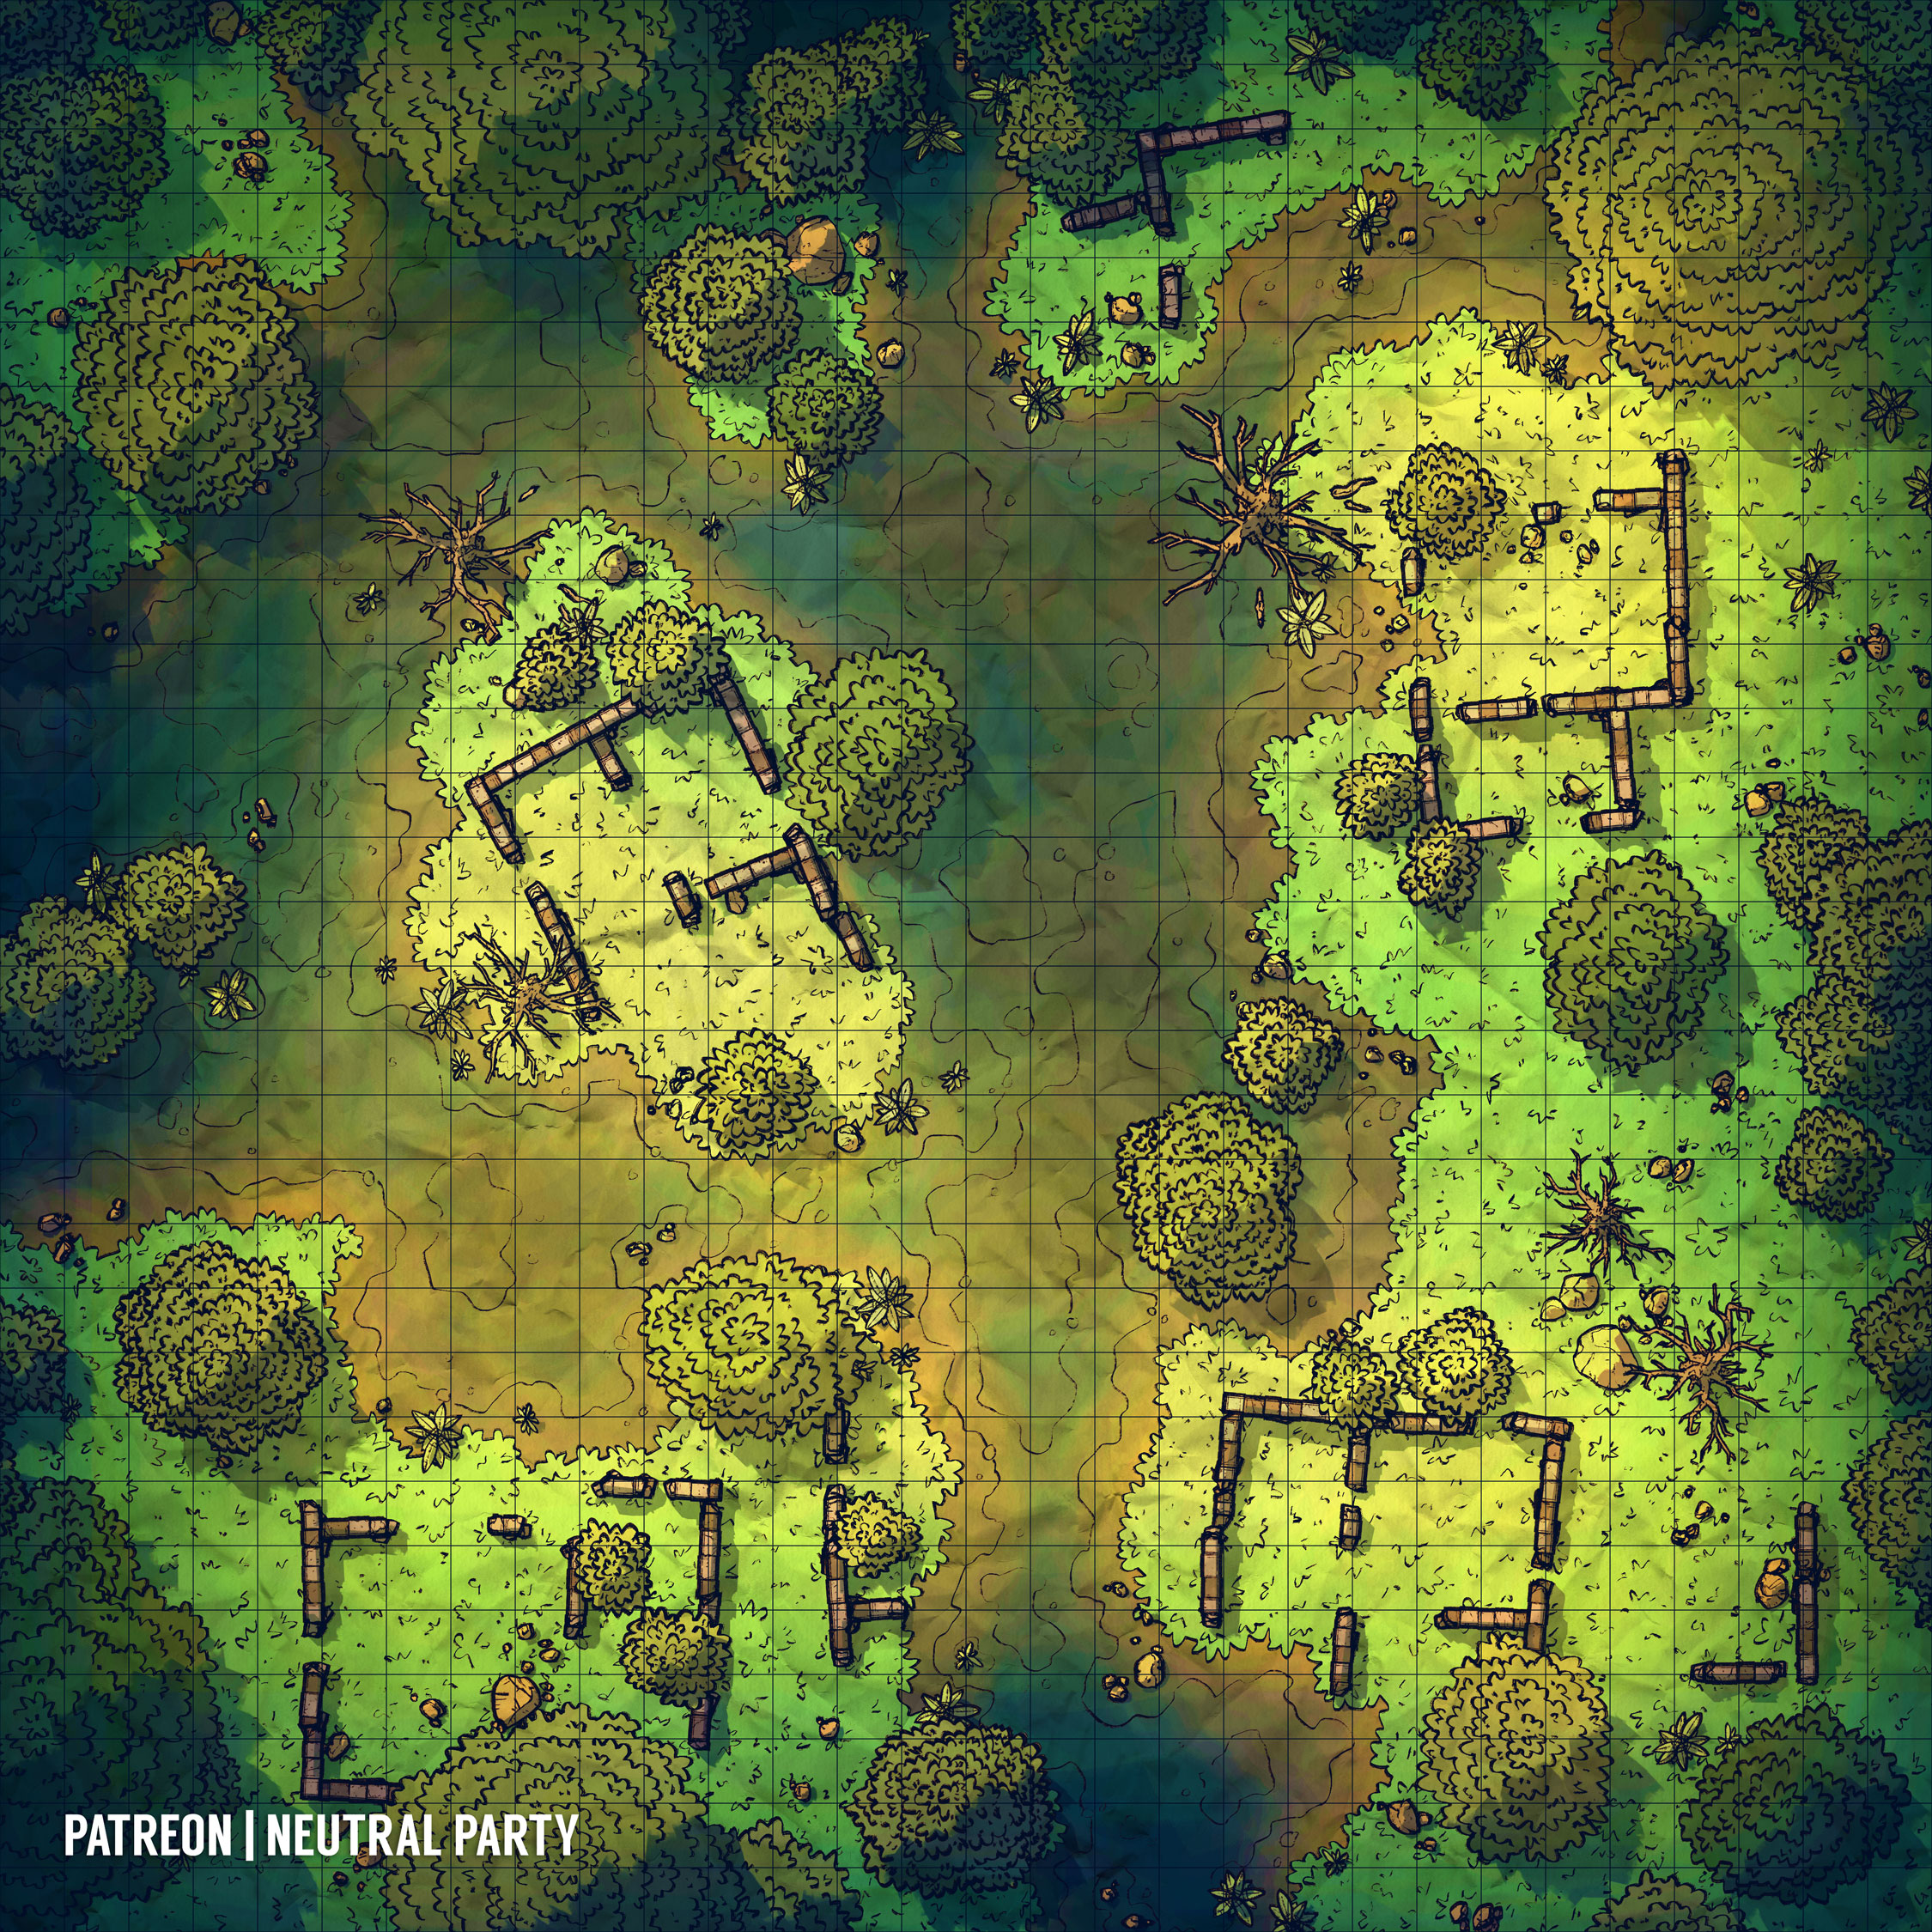
Map 10.4
Temple Entrance
An open doorway stands at the top of the pyramid. It leads into a simple square stone chamber. The temple is built out of a dark gray quartz. The walls in this chamber are slightly green with algae and moss. Along the wall opposite the entrance, there are two intricately carved snake sconces lit with a flickering green flame. The sconces are set about 8 feet apart, purposefully too far apart for most normal humanoids to be able to reach both. Any character that makes a successful DC 15 Investigation check will figure out that both sconces need to be pulled simultaneously in order to open a hidden stone doorway in between. Once open, a set of stairs is revealed descending into the darkness.
See Map 10.5 for the complete layout of the Cloaked Serpent Temple.
T1. Entry Hall
As characters descend the stairs, they turn and descend again, depositing into a chamber lit by a green glow. As the characters descend, read or paraphrase the following:
Encounter
The guards posted in this chamber are 6 Yuan-ti Pit Masters (VGtM p.206). They will attack anyone who is not a yuan-ti on sight as the goblin sorcerers are not allowed in the temple.
T2. Reticulated Hallways
There are four separate reticulated hallway sections. Two are to the east and west of Area T1 and two are to the east and west of Area T7. Each alcove holds a statue carved with a different depiction of the Cloaked Serpent.
Trap
There are pressure sensors on the floor that need to either all be covered or uncovered. The yuan-ti in the temple slither along the ground and are able to cover the sensors properly. A character that makes a successful DC 18 Investigation check will be able to detect the sensors in the floor.
If the trap is triggered, darts shoot out of the alcoves around the statues. These darts shoot out of each alcove along the hallway. Characters could get caught by multiple sections of this trap. Any character caught in the trap suffers 1d4 piercing damage and must make a DC 13 Constitution saving throw suffering 2d6 poison damage on a failure.
T3. Ramped Hallways
The stone floors of these hallways are incredibly slippery. A character wishing to travel up the ramps will need to make a successful DC 15 Acrobatics check to avoid slipping and sliding back to the bottom.
T4. Dining Chamber
This large chamber is home a long, rotting wooden table. There are also two side chambers used as food preparation areas. These chambers consist of cages of varying sizes. In one of the rooms, there is a raccoon and a rabbit in cages.
Encounter
There are 6 Yuan-ti Nightmare Speakers (VGtM p.205) in this chamber eating that will attack the party on sight.
T5. Jail
The jail cells in this chamber are mostly empty, except for one cell. The body is that of a goblin. If the group decides to investigate the body, they will notice it does not have any of the sickly appearances that the other goblins have shown.
T6. Poison Infusing Chamber
This room is a wicked looking workshop. Tools, papers, torture implements, and ingredients are spread across a long stone table against the far wall. There are two smaller stone tables with leather straps embedded into them in this room as well.
Encounter
There are 2 Yuan-ti Anathemas (VGtM p.202) working at the long table. When the group enters, these two creatures turn and attack.
Secret Passage
There is a secret passage in the floor of this chamber that leads to the Throne Room and emerges at the back of the altar platform. A character can find it with a successful DC 20 Investigation check. It requires a passphrase spoken in Abyssal to open, however, unless magically compelled to do so, the yuan-ti will not divulge the passphrase. The passphrase is open in the name of Zehir.
Treasure
After defeating the two yuan-ti, there is plenty of things in this chamber to interest the group. Any character that makes a successful DC 15 Investigation check will locate a snake etched dagger on each creature. Additionally, there are various emeralds scattered about worth a total of 1,000 gp, a bag of green residuum dust worth 1,000 gp, 3 fist-sized chunks of refined green glass residuum worth 500 gp each, and 4 Potions of Poison.
In addition to the monetary items, there are two maps that can be found. A character that makes a successful DC 15 History check will identify the first is a map of central Tal'Dorei with an X marked where the city of Kymal is. With a successful DC 20 History check, a character can identify the second map as a section of the Elemental Plane of Fire.
There are also notes scattered across the worktable on imbuing magic forcefully into others. It discusses the process through which magic can be forced into their body and the impact it will have on them and the symptoms they will show if it is successful.
Lastly, a character that makes a successful DC 22 Investigation check will locate a scrap of note that bares the signature: A. Cassalanter.
T7. Mausoleum
This large chamber houses eight large sarcophagi. Each are decorated with reliefs depicting various serpent iconography. Three of the sarcophagi have been overgrown by vines, roots, and other plant material. A set of stairs in the north wall lead upwards into a larger chamber. There is nothing else of note in this chamber.
T8. Throne Room
This large oval room has a 60-foot ceiling and is roughly 150 feet across by 100 feet wide. There is a wide set of stone steps that lead up to a central platform that holds a green marble altar. There are twelve stone support pillars set around the room, each intricately carved with snake iconography and various depictions of Zehir, the Cloaked Serpent. When the group enters the chamber, read or paraphrase the following:
Encounter
The massive priest perched atop the altar is a Yuan-ti Anathema Ascendant (MME2 p.247). In addition, stationed around the chamber near the stone pillars are 8 Yuan-ti Broodguards (VGtM p.203).
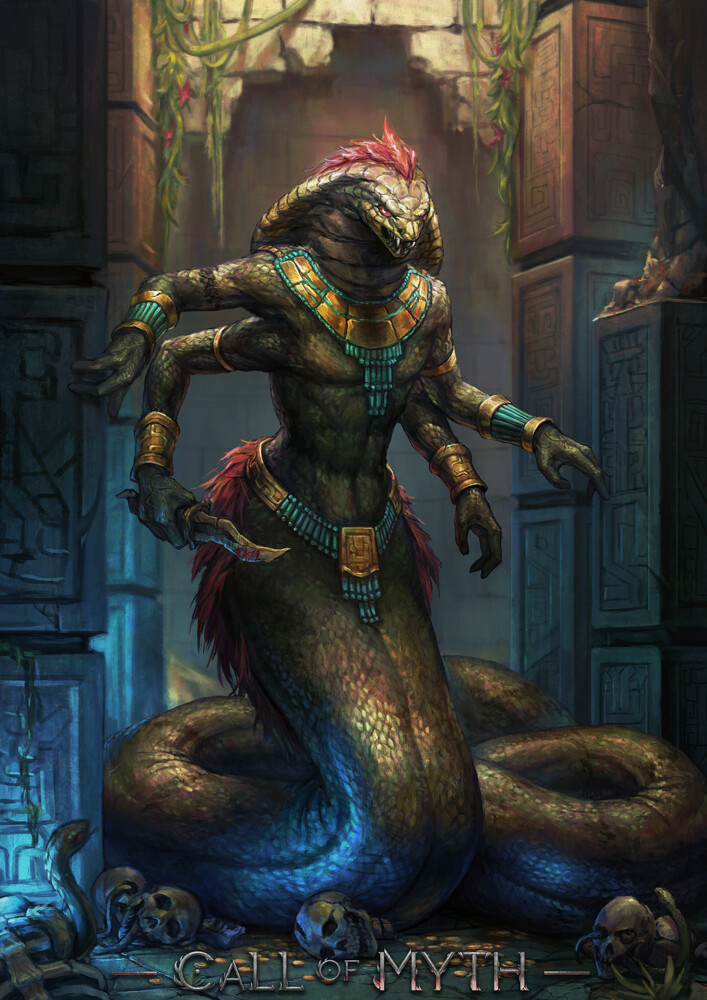
Treasure
The priestess wields two large +1 greataxes. They are both finely carved and clearly of dwarven make. If brought to a blacksmith, these greataxes can be identified as crafted by Dwarven smiths that used to make their home in the Serpent's Head. A character that makes a successful DC 15 History check will remember that Serpent's Head was destroyed a number of years ago when it was attacked by Thordak the Cinder King.
In addition, each broodguard wields a finely carved snake etched dagger.
Conclusion
If the group managed to find the slip of paper with the Cassalanter signature, this clue points to Kymal where the group can continue to follow this thread. Otherwise, the greataxes could point towards the Serpent's Head. In either case, these clues bring the group one step closer to the final arc of the campaign as the cultists of Cloaked Serpent begin their ritual to wreak havoc to Kymal by partially merging the Material Plane with the Elemental Plane of Fire.
At the conclusion of this story arc, after defeating the yuan-ti in the forgotten Mirescar temple, the characters should reach 16th level.
T1
T2
T2
T2
T2
T3
T3
T4
T5
T6
T7
T8
Map 10.5
11
Chapter 11: Fires Over Kymal
Members of the Cult of the Cloaked Serpent have spread like poison through the veins of Tal'Dorei's cities. They relish in the use of poison and fire to consume nature and undermine civilization in the hope of infuriating the Prime Deities and cast Exandria into chaos. If enough death and destruction is dealt across Exandria, their hope is that the Prime Deities will destroy the Divine Gate in order to intervene. If the Divine Gate were to be destroyed, the Betrayer Gods would be released from their prison planes and could also reach Exandria, casting Exandria into a second Calamity.
The culmination of the Cloaked Serpent cultists effort is to summon a massive volcano from the Elemental Plane of Fire and position it to rain destruction over the city of Kymal. The volcano is the focus of a ritual that, if allowed to complete, will permanently meld a portion of the Material Plane with the Elemental Plane of Fire.
Story Overview
The ritual will begin on the Zenith, the 26th of Unndilar, which is the summer solstice. However, this event could be switched to any solstice or equinox that better fits the timeline of your campaign. The solstice or equinox represents the days during the year when the veils between the planes is the thinnest. Once the ritual begins and the volcano appears, the characters will have a plethora of options within the city to focus their attention on. Ultimately, the volcano appears to be attracted and moving towards Kymal because the volcano is attracted to a titan seed located in an underground temple underneath the Cassalanter Villa. This chapter details the different options available to the characters as they deal with the volcano's appearance over Kymal.
As the ritual begins to merge the two planes together, portals begin flaring open randomly in the area. These portals only stay open for a few seconds, but its long enough for various elementals from the Fire Plane to crawl through and begin wreaking havoc through the city. Without support, the City Watch will soon be overwhelmed by the number of elementals.
The volcano initially appears northwest of Kymal, over the Ironseat Ridge. However, it appears to be slowly floating towards the city. Perhaps traveling into the air and investigating the surface of the volcano will provide insight into where the ritual is being completed. Be careful, for the volcano is crawling with dangerous elementals.
The group may learn that the Gralhund family moved out of Kymal a few days ago. This noble family was part of Kymal - Dragon Heist and they may warrant investigating. The group may unearth a temple to the Cloaked Serpent built under their villa. Unfortunately, it has been abandoned and is not being used as part of this ritual.
Finally, the group may wish to follow up on the scrap of note they found with the Cassalanter signature on it or have heard about the mass poisoning that occurred during a party at the Cassalanter Villa a few months ago. The Cassalanters haven't been seen in Kymal since. The reason the volcano is approaching Kymal is because it's being attracted to a titan seed located in an underground temple beneath the Cassalanter Villa. If the party discovers and destroys the titan seed, will it cause the volcano to disappear, or simply halt its approach? There is only one way to find out.
Adventure Hook
At dawn on the morning of the Zenith, a massive volcano is sucked through a portal that flares open in the sky to the northwest of Kymal, above the Ironseat Ridge.
If the party is outside at dawn, a character that makes a successful DC 20 Perception check will notice a quick bright flash of red light high in the sky to the northwest followed by a distant clap of thunder.
If the party is inside at dawn, a character that makes a successful DC 25 Perception check will hear a distant clap of thunder. This seems out of place since the weather appears to be clear and sunny.
From the Adventures of Bramble Tickletoes III & Company:
Bramble used project image while in the Mirescar to visit Kymal. He visited the Gralhund Villa and noticed how shifty the staff seemed. He managed to overhear that the family must leave Kymal before the Zenith. Then, Bramble went to speak with Polla Everforge about the goings-on in Kymal since they were last there and learned that nearly a hundred people were poisoned at a party hosted by the Cassalanters six months ago.
After defeating the yuan-ti at the temple, the party teleported to Kymal the day before the Zenith. The party spends the day attempting to warn allies to be ready for an attack and trying to determine how to stop the ritual. They decide to split the party with Maoki and Bramble heading to Gralhund Villa to investigate while Lia and Kayne head to the Stormlord Temple in an attempt to find a priest able to commune to learn more information. They manage to learn the ritual will begin at dawn on the Zenith.
The Volcano Appears
As the ritual commences, the volcano will emerge through a large portal that opens high in the sky. Read or paraphrase the following:
A flash of red light in the sky coalesces into a ball of fire, thousands of feet up. It quickly expands into a wreath of red flame with crackling purple lightning arcing through it. It expands to 20 feet in diameter, 50 feet, now 200 feet across and continuing to grow. Within the wreath of fire is an image from hell. A massive erupting volcano drawing ever closer. Blisteringly hot wind blasts across your faces as with this deafening sucking sound, the volcano is sucked through the portal. Windows shatter and people fall as the ground shakes violently and a deafening roll of thunder rolls across the city.
A titanic volcano now floats northwest of the city, sitting roughly a thousand feet in the air between Kymal and the Ironseat Ridge. Massive chunks of molten rock can be seen plummeting towards the ground. A few will most likely impact parts of the city. The group shakes violently when they impact as gouts of flame and debris are thrown into the air. A few seconds later, a wave of sound hits you as the sound of their impact reaches you. Screams and shouts fill your ears as panicked people begin running in every direction. Most are running away from the volcano, but a few run towards it, maybe heading home to get their loved ones.
The large chunks of molten rock plummeting towards the city are treated as multiple meteor swarms impacting the northwestern section of Kymal.
As the party stands transfixed by the arrival of the volcano, any character that makes a successful DC 15 Perception check will notice that lava is running in streams off the edge of the volcano and falling thousands of feet to the ground below. Additionally, the dark reddish-purple portal around the edge of the volcano seems to be continuing slowly to expand. Any character that makes a successful DC 20 Perception check will also notice the volcano seems to be moving slowly, incredibly slowly. The movement is almost imperceptible, but it appears to be floating slowly towards the center of the city.
Portals
Various sized portals begin to flicker open sporadically throughout the area. They stay open for a few seconds before vanishing. It seems like this massive volcano is merging the Material Plane and the Elemental Plane of Fire together and portals are opening between the two planes.
Through the smaller portals come slag spirits (Appendix B) and burning spirits (Appendix B). The larger portals allow larger elementals from the plane of fire to come through. If the party decides to spend time aiding in the fight against the elementals, a list of possible encounters will be provided on the next page.
City Defense
The city of Kymal has a few hundred City Watch members which represent a significant percent of the city's defense. These City Watch members are considered bodyguards (MME p.312). In addition, a number of notable NPCs will join in fighting to protect Kymal. They are:
- Polla Everforge - a strong female dwarf and owner of Everforge Blacksmithing
- Roguy Shyney - a heavyset retired male soldier and owner of The Hunter's Hall
- Aered Unoch - a burly male red tiefling and owner of Unoch's Armory
- Amin - a thin male gnome wearing the white and blue garb of the Alabaster Lyceum and owner of Amin's Arcana Emporium
- Valetta - a strong female bronze dragonborn and head priestess of the House of Inspired Hands
- Storm Marshall Golfynor - a strong male dwarf and head priest of the Temple to the Stormlord

Possible Elemental Encounters
As the barrier between the Material Plane and the Elemental Plane of Fire thins in this area, portals of various size open up allowing elemental creatures to walk through and wreak havoc and destruction. Below are two possible descriptions of portals opening as the party work to protect Kymal from further destruction:
A second possible description that can be read:
For any of the following encounters, see Map 11.1 for a possible encounter battle map.
Encounter Option 1
Stalking through a side street are two creatures of pure flame, 2 fire elementals (MM p.125).
Encounter Option 2
A portal flares open and a few different types of elemental creatures climb through. A dark roiling smoke elemental (Appendix B) flies through, followed by 2 lumbering molten rock lava elementals (Appendix B), and a rolling ball of hot dust which is an ash elemental (Appendix B).
Encounter Option 3
A building to the left down the next street explodes in fire. As the group makes their way around the corner, they see three giant creatures of pure fire. There are 2 fire elementals, huge (MME p.90) and a greater fire elemental Myrmidon (MME2 p.119).
Encounter Option 4
A flash of light illuminates an alley nearby. A portal appears, wreathed in fire, and numerous creatures clamber through. Climbing through are 2 dark roiling smoke elementals (Appendix B), followed by 2 lumbering molten rock lava elementals (Appendix B), and 2 rolling balls of hot dust which are ash elementals (Appendix B).
Map 11.1
Investigating the Volcano
Should the group decide to fly up to the volcano and investigate it for clues, they will be in danger of stumbling upon massive and dangerous elementals.
Unfortunately, there is nothing of interest located on the volcano, nor any hints as to where the ritual is being performed or what is drawing the volcano towards Kymal.
Encounter
As the characters investigate the volcano, there is a good chance they will stumble upon massive elementals that call this volcano home. If the group is not stealthy enough, they will stumble upon 2 magma elementals (Appendix B). Use Map 11.2 for the encounter battle map.

Map 11.2
Timeline of Events:
The following list is a suggestion for the series of events that will take place in the days following the volcano's appearance.
Note: it is roughly 250 miles from Zephrah to Kymal and will take three days for the Air Ashari druids to arrive on their skysails.
26th of Unndilar:
- Ritual begins at dawn and completes an hour later with the volcano's arrival.
- Elementals begin emerging through portals.
- Amin notifies Allura Vysoren.
- Allura reaches out to Keyleth, Voice of the Tempest for the Ashari.
- Keyleth will use transport via plants to arrive in Kymal near nightfall with 30 Air Ashari druids.
- Allura contacts the party that there is likely a focus in Kymal drawing the volcano nearer. Destroying it may halt the volcano's progress.
27th of Unndilar:
- Keyleth uses transport via plants to bring 30 Fire Ashari Firetamers to assist in battling the elementals.
- Allura contacts Pike Trickfoot who uses divine intervention to determine this ritual is taking place at the Cloaked Serpent's hideout at Serpent's Head.
28th of Unndilar:
- Keyleth must remain with her druids to try to slow the spread of the Fire Plane's influence.
1st of Brussendar:
- The rest of the Air Ashari druids arrive in Kymal on their skysails.
- Allura figures out this ritual completes and becomes permanent after seven days.
5th of Brussendar:
- The ritual becomes permanent at dawn.
Voice of the Tempest's Arrival
Allura reaches out to the party during the day to inform them the leader of the Ashari, the Voice of the Tempest, will arrive in Kymal near sunset. She instructs the group to meet her in the Central Market square.
As sunset approaches, the group should make their way to the Central Market square. Amin is also there, clearly waiting for the Ashari leader's arrival. Read or paraphrase the following for the Voice of the Tempest's arrival:
The Voice of the Tempest will introduce herself as Keyleth of the Air Ashari. Upon arrival, she quickly commands her druids to head towards the fires and work with the City Watch to beat back the invading elementals. Keyleth then will spend 10 minutes to cast control weather to change the skies to rain to help save the city from further destruction from fire.
Afterwards, Keyleth will speak with the group to learn about what has happened and any information they may have. Unfortunately, she will not be able to join the group in search of the cultists. Her priority is protecting Kymal from further destruction and will attempt to slow the spread of the planar merging. However, she will spend some time to ritually cast commune with nature to see if she can learn any information that may help the group. She will inform them there is a source of powerful magic in the eastern part of Kymal that appears to be drawing the volcano towards it. If it isn't destroyed, the volcano will reach Kymal's center in two days.
Amin (Appendix B) offers to aid the group in locating the source of powerful magic within Kymal; if it is accepted, he joins them for any further adventures within the city of Kymal. He remains behind to protect the city if the group leaves.
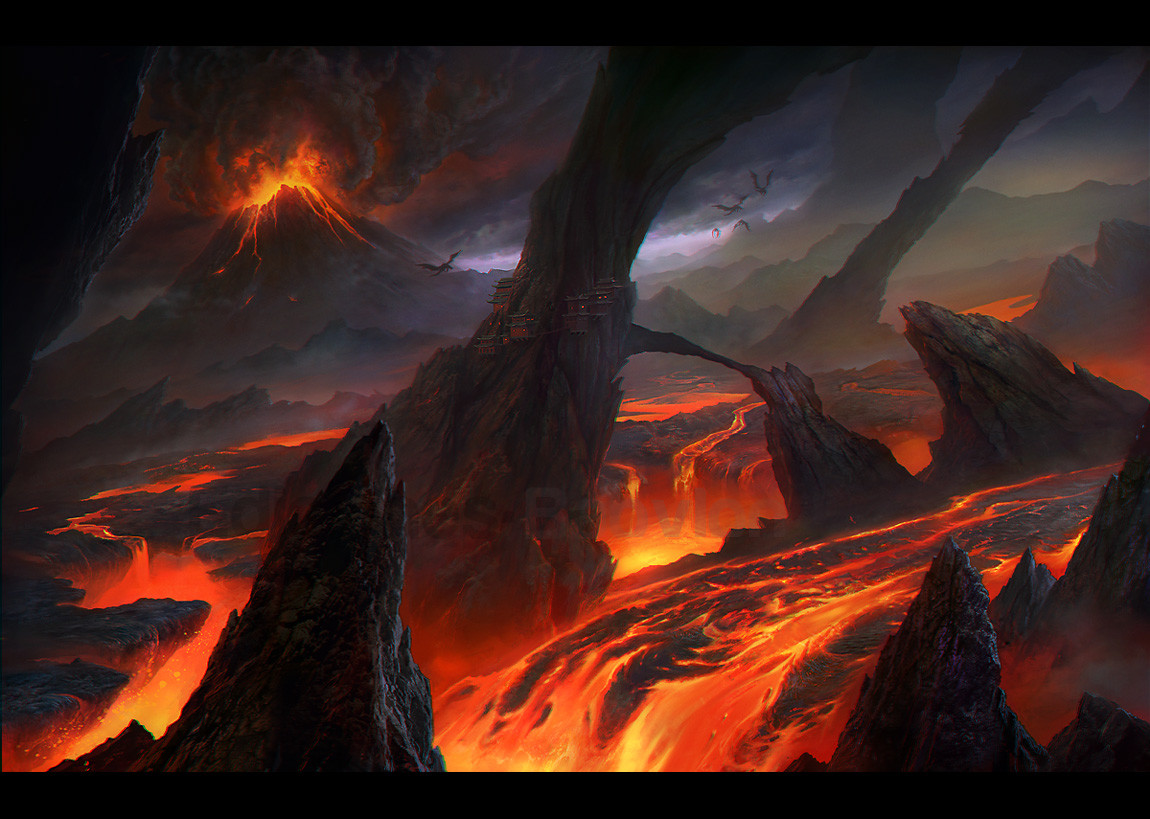
Gralhund Temple
The Gralhund Villa sits in the middle of an upper-class residential neighborhood in the entertainment district. The only room of interest this time around is Orond's Study. This is where the secret entrance down into the underground temple can be found. For a complete description of the Villa, see Chapter 3: Kymal - Dragon Heist.
Unlike the previous time the characters visited the Gralhund's estate, there are no guards posted inside the gate nor signs of anyone else on the property. The window curtains have all been pulled shut. The Gralhund's have left their manor ahead of the ritual; they've traveled to their summer home in Jorenn Village. Therefore, the underground temple has been abandoned, especially as the main Cloaked Serpent temple in Kymal is located underneath the Cassalanter Villa.
See Map 3.4 for the complete layout of Gralhund Villa.
G1. Locked Gates
A set of ornate iron gates block entrance into Gralhund Villa. Through the bars of the gate the party can see the yard with several large trees and footpaths that lead to the two-story brick mansion and eastward towards the detached coach house.
The gate has been locked with an arcane lock spell. Forcing them open requires a successful DC 25 Athletics check or a character can pick the lock with a successful DC 25 Thieves' Tools check.
G11. Orond's Study
The door to this room is locked. The lock can be picked by a character who makes a successful DC 15 Thieves' Tools check. The room has a large 10-foot square canvas wrestling mat sprawled on the floor in the middle of the room. Velvet armchairs, small statues of naked men on pedestals, and tall mahogany bookshelves are arranged neatly around the room. A mahogany desk in the corner doesn't seem to get much use.
Underneath the wrestling mat is a trap door that leads down into a small underground temple space. The door is trapped and locked with an arcane lock. Unlocking the door requires a successful DC 25 Thieves' Tools check or can be forced open. The door has an AC of 18 and 25 hit points.
Trap
The trap door is trapped. Attempting to unlock it or destroy it without disarming the trap releases the stored poison gas. All characters within the room must make a DC 18 Constitution saving throw suffering 6d6 poison damage on a failure and are poisoned for one hour. On a successful save, characters suffer only half the damage and are not poisoned.
Development
Opening the trapdoor reveals a wooden ladder that drops down 30 feet into a small square gray stone chamber. The chamber below has a set of stone stairs built into the north wall that descend further.
See Map 11.3 for the complete layout of the underground temple.
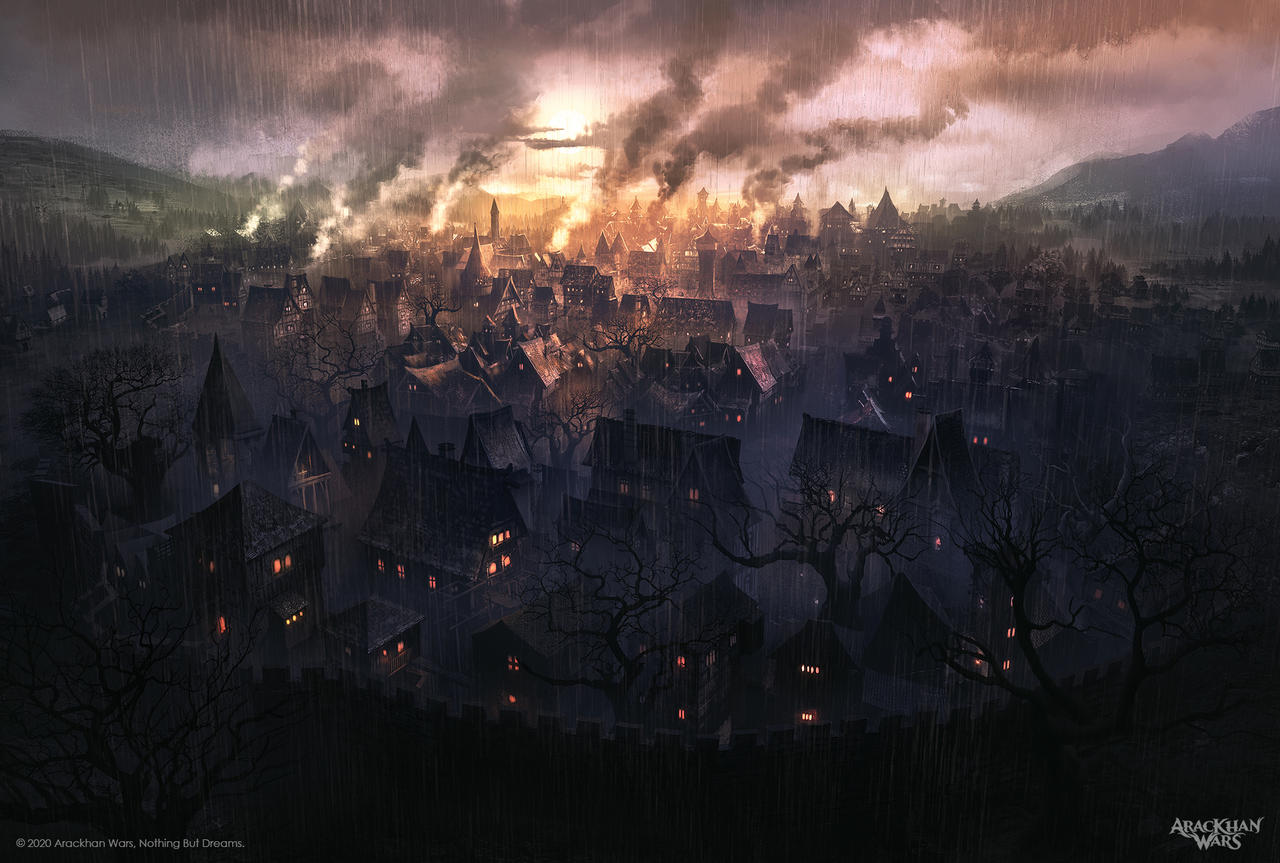
T1. Antechamber
This underground temple has been largely abandoned. Consequently, there is not much of value left to be found. In addition, no creatures will be found here except for a construct guardian that was originally placed down here to guard the temple space.
T2. Gathering Chamber
T2a. Acolyte Preparation Chamber
Treasure
One of the cubbies in here has a folded-up set of robes. The robe is emerald green in color with gold stitching. There is a black sash with red stitching that goes with it. These are the vestments of a cultist of the Cloaked Serpent.
T2b. Sacrificial Preparation Chamber
T3. Main Temple Chamber
Encounter
The metal statue is an iron golem juggernaut (MME p.136) that will animate and attack anyone not displaying a Cloaked Serpent holy symbol. The golem will animate whenever a creature passes through the first row of pillars.
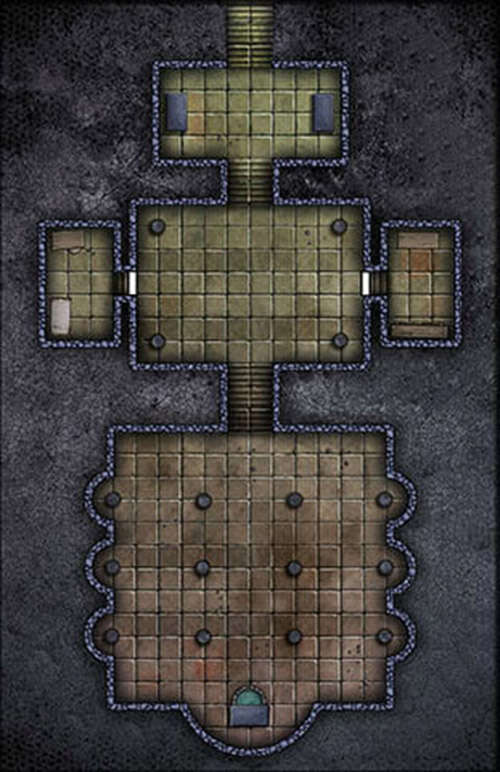
Map 11.3
T1
T2
T2a
T2b
T3
Cassalanter Villa
Cassalanter Villa was an extravagant mansion with dozens of lavish chambers for the masters of the house and their guests - but its splendor belied the terrible secret it holds. The temple of the Lawbearer that once lay beneath the estate has been desecrated by Victoro and Ammalia's devil-worship. However, since the evening when they poisoned all their guests to end their contract with the Lord of the Hells, the temple is now dedicated to the Cloaked Serpent.
Since the Night of 100 Sacrifices, the Cassalanter family has not been seen in Kymal and their manor was abandoned. The City Watch took ownership of it and has cleared out most of the valuables. What furniture is left in the house has been covered by sheets.
As the characters approach the gates of Cassalanter Villa, read or paraphrase the following:
The Cassalanter Villa's stark white marble walls and gleaming crimson roof and turrets stand out even among the other opulent estates of Kymal's Entertainment District. A three-story mansion lies in the midst of picturesque green gardens with hedges and water features. The estate is surrounded by a tall white brick wall, with a single wrought-iron gate as an entrance. The Cassalanter family crest (a green Y overlapping a stylized goose being fed) is emblazoned on the gate along with a sign that reads: City Watch Order: This property is now under the control of the City Watch. Keep Out!
Inside the gate is a cobblestone path leading to both the front entrance of the manor and the entrance to the coach house. The villa's grounds feature numerous deciduous trees and gardens that are currently overgrown and not well-tended.
The gate is locked. A character that makes a successful DC 18 Thieves' Tools check can unlock it, or a successful DC 22 Athletics check will break off the lock.
See Map 11.4 for the complete layout of the Cassalanter Villa.
Titan Seed Wild Magic
Primordial titan seeds are immensely powerful magic artifacts. Their magical energy can powerfully impact the natural world that surrounds them. This magical energy suffuses the environment around like a static charge that can cause unintended magical discharges.
However, although the party are in range of the titan seed's typical wild magic effect, because its magic is being used to attract the volcano as part of the ritual, the wild magic zone that typically surrounds it isn't functioning.
Cassalanter Lore
A character that makes a successful DC 20 History check will remember the following information about the Cassalanter Villa and its previous inhabitants.
- The Cassalanters fell on hard times a few years back, but they have since reversed their fortunes and restored their lucrative banking and money-lending business.
- Victoro and Ammalia's eldest son disappeared three years ago when the family was on the verge of bankruptcy. They have two surviving children, young twins named Terenzio and Elzerina.
- Lord Victoro Cassalanter is the only living heir of the late Caladorn Cassalanter, a former Kymal Lord and heroic general.
- Over the years, the Cassalanters have founded a number of philanthropic societies and made generous donations to temples dedicated to good-aligned deities. They are known to worship the Lawbearer.
Secrets to Uncover
The most pressing locations within the Cassalanter Villa will be found behind two secret doors that have not been discovered by the City Watch. Characters that are purposefully searching the villa for secrets will locate a trap door in the ceiling of Ammalia's study that leads up into the attic where their teenage son lives transformed into a devil. Characters will also find a secret door down in the cellar that leads underneath the manor to the Cassalanters' temple to the Cloaked Serpent.
Villa Features
The following features are found throughout the villa:
- Ceilings in rooms are 25 feet high, with 7-foot-high corridors and doorways connecting them.
- Doors are made of exotic hardwood. Any locked doors have been broken down by the City Watch.
- Floors are made of wood and covered with soft woolen carpets. Creatures walking in carpeted rooms have advantage on Stealth checks.
- There are no lamps lit in the home. All rooms are dimly lit with their window shades drawn.
- The Cassalanters do not keep any silver objects in their house since silver is harmful to devils.
- As very few people have entered the home in the last six months, a layer of dust covers most surfaces.
- Most large pieces of furniture are covered by sheets.
Areas of the Villa
The following areas correspond to the labels on map 11.4. The villa connects to the temple of the Cloaked Serpent through a secret door in area C28.
Guest House
The Cassalanters used to host guests in their stately guest house.
CG1. Mud Room. Guests used to remove and store their dirty cloaks and boots here.
CG2. Storage. Guests could store their traveling gear here.
CG3. Dining Room. This room is furnished with two dining tables, each surrounded by six chairs.
CG4. Kitchen. Guests were expected to dine with the Cassalanters in the manor but could prepare their own breakfast here.
CG5. Parlor. This room was furnished with a billiard table, a card table, and four luxurious armchairs that have since been removed.
CG6. Sitting Room. This room featured an upright piano and four luxurious armchairs that have since been removed.
CG7. Bedrooms. Each room contains a bed for two, a pair of wardrobes, a small vanity with matching stool, and a storage trunk for valuables.
CG8. Master Bedroom. This room has a balcony and contains a large, canopied bed, a standing mirror in a gilded frame, a writing desk and matching chair, a dresser, a tall wardrobe, and an owlbear throw rug draped over a padded chair with matching ottoman.
Coach House
The Cassalanters used to own three carriages -- one for their banking business, one for public appearances, and one for private use. The coach house has stalls for six horses though none reside here anymore. The tack, bridles, feed, and other necessities for the horses used to be stored here but have since been removed by the City Watch.
C1. Entrance Hall
A crimson carpet runs down the hall toward an open door to the foyer. A harpsichord sits in one corner covered in a sheet. An unlit crystal chandelier hangs from the ceiling in the center.
C2. Garden Mudroom
The floor is caked with mud. Several rows of muddy boots and gardening gloves are strewn about the floor. Small cubbies line the wall where personal belongings can be stored.
C3. Library
This is the Cassalanters' private library. Hanging on the north wall between two bookshelves is a 7-foot-tall portrait of Lord and Lady Cassalanter holding two infant children and standing beside their teenage son, Osvaldo. Shelves along the southwest wall used to house a number of glass bottles that all seem to have been smashed on the floor.
Secret Door
The Cassalanter family portrait typically hides a secret door, however, the painting has been slashed across revealing the secret passage beyond. The secret passage leads to the pantry (area C11).
C4. Reading Room
This reading nook has four tall bay windows that illuminate the room and look out on the butterfly garden (area C25). There is a large armchair in here that has been covered with a sheet and a door in the northern wall which has a butterfly-shaped stained-glass peephole.
C5. Foyer
A marble floor fills this chamber and there are seven exits:
- A door to the entrance hall (area C1)
- An open arch that leads to a large dining room (area C9)
- Three unmarked doors in the east wall that have all been flung open (areas C6, C7, and C8)
- A grand staircase ascends to the second floor (area C13)
- An unassuming door under the stairs that leads to the cellar (area C26)
C6. Victoro's Office
The door into this room has been nearly busted off its hinges. A solid mahogany desk dominates this room with papers and ledgers strewn all over the floor. A suit of armor has been bashed apart and its pieces flung throughout the room. A few of the locked cabinets in the desk have been pried open and relieved of its contents.
Treasure
The desk contains a secret compartment that was not found by the City Watch. A character can find the secret compartment with a successful DC 20 Investigation check. A character can pick the lock by succeeding on a DC 18 Thieves' Tools check. Inside is a holy symbol to the Lord of the Hells crafted from solid gold (worth 250 gp).
C7. Cloakroom
This walk-in closet has room for the garments of up to one hundred guests. It currently contains a few coats in piles on the floor, but none are of high quality.
C8. Covered Porch
This covered porch is the entryway typically used by the Cassalanters' servants.
C9. Family Dining Room
A dozen chairs surround a beautifully carved dining table in the middle of the room. The plates, utensils, and glassware have all been removed by the City Watch.
C10. Kitchen
The kitchen contains a large counter with wooden cabinets above. A large oven takes up a majority of the room. Stairs in this room lead to the banquet kitchen on the second floor (area C14).
C11. Pantry
This room contains shelves of foodstuffs and ingredients lining the walls. A number of casks are stacked up in the middle of the room. A number of the ingredients have gone bad and are growing mold. The back wall of the pantry is one large wine rack that is mostly empty.
Secret Door
The secret door to the library (area C3) can be detected by a character that makes a successful DC 18 Perception or Investigation check. The character discovers the rack can be pulled forward and reveals the passage beyond.
C12. Smoking Room
This room smells faintly of pipeweed. There are five armchairs in here covered with sheets. Additionally, there are a few oil paintings that have been ripped apart. There are portraits that seem to depict several generations of Cassalanters as well as a few that seem to depict the current Cassalanter family and their children.
C13. Ballroom
This room is an elegant ballroom. The marble floor is a dazzling mosaic that depicts a large double axe with golden scales engraved onto the blades, the holy symbol of the Lawbearer. Gilded mirrors and large tapestries festoon the walls. Along the west wall, windows have been covered with crimson drapes that stretch from the floor to the ceiling. Stairs lead down to the foyer (area C5) and up to a hallway outside areas C17 and C19.
C14. Banquet Kitchen
The banquet kitchen is an additional cooking space used in conjunction with the main kitchen during social functions. It is otherwise empty.
C15. Banquet Hall
The only piece of furniture in this expansive hall is a long wooden dining table. The room is also outfitted with dozens of chairs.
C16. Piano Room
A grand piano is pushed against the wall of this dusty room. It has been covered with a large black sheet. Behind it are several unmarked closets.
C16a. Storage Closet
This closet holds crates filled with winter blankets, mops, and other household necessities.
C16b. Powder Rooms
These rooms contain mirrors and small poofs for guests to use to freshen up.
C17. Playroom
This room clearly used to be the children's playroom. Strewn about the floor are giant stuffed toys, jack-in-the-boxes, dolls, and a rocking horse shaped like a warhorse.
C18. Twins' Bedroom
Two four-poster beds take up the bulk of this room. A few toys litter the floor in this chamber and a life-sized stuffed unicorn stands in one corner.
C18a. Closets
These closets are filled with stuffed animals and spare blankets.
C19. Master Sitting Room
This room appears as if it used to be furnished for comfort and includes overstuffed chaise lounge chairs covered in sheets as well as an empty wine bar along one wall.
C20. Linen Closet
This closet is packed with folded bedsheets and other assorted linens. There are feathers everywhere as it appears two downy duvets have been hacked to shreds.
Treasure
The head butler and maid keep their cult regalia in a gold embellished lockbox hidden under a stack of quilts. This box was not found by the City Watch and can be unlocked by a character who succeeds on a DC 17 Thieves' Tools check. It can also be pried open with a successful DC 16 Athletics check.
C21. Master Bedroom
The door into this chamber has been broken off its hinges. The walls in this chamber are surprisingly empty, though faded wallpaper markings make it appear that large wall hangings used to hang in here. A four-poster bed draped in deep red curtains and tipped with gold spires stands before an ornate door carved from dark hardwood that leads into area C22. This door has also been ripped off its hinges.
C22. Ammalia's Private Study
The walls of this room are lined with bookshelves packed with thick tomes. Similar to the library downstairs, a number of holes on the shelves indicate a number of books have been previously removed. There is a large desk carved from dark oak whose contents have been strewn across the room.
Trap Door
Built into the ceiling of the study is a trap door. A character that makes a successful DC 20 Investigation check will notice a ceiling tile that is inset slightly compared to the rest. The tile flips open along a hinge to release a rope ladder and a wooden door above. Climbing up the rope ladder, the characters reach the wooden trap door which is locked. It is locked with an arcane lock and requires a successful DC 25 Thieves' Tools check to unlock.
Development
As a character climbs through the trap door, as their head breaks through the plane of the door frame an intensely loud howling hits their ears. Read or paraphrase the following:
The trap door is the entrance to the attic. Characters climbing through the trap door will find themselves in area C23.
C23. Attic Landing
A thick scent of sulfur pervades the attic. The only illumination is a beam of light that shines feebly through a shuttered window at the west end of the room. A closed wooden door sits built into the east wall; the howling seems to be coming from beyond it. This door is also locked with an arcane lock and requires a successful DC 25 Thieves' Tools check to unlock. This door leads to area C24.
C24. Osvaldo's Prison
As the characters enter this chamber, read or paraphrase the following:
Osvaldo's chains are wrapped around the beams and timbers that frame the room. He can't damage the house, nor can he break his own chains. He can only howl impotently at the misery being inflicted on him. He is thoroughly insane and can't be reasoned with.
A detect magic spell reveals a powerful aura of Abjuration magic emanating from the pentagram. A character can make a successful DC 17 Arcana check to realize the pentagram prevents the creature from fully manipulating the chains tied to the beams and this effect might end if another creature were to enter the area of the pentagram. It is possible to dispel the pentagram's effect with dispel magic (DC 15).
If the chain devil is freed, the creature gains full control of all his chains and attacks indiscriminately.
Encounter
The Cassalanter heir apparent, Osvaldo, is a soulless abomination thanks to his parents' thoughtless greed and the deal they initially made with the Lord of the Hells. His empty shell of a body has been transformed into a chain devil ascendant (MME p.66). The chain devil is unable to use its Whirling Chains or Animate Chains abilities until it is released from the pentagram.
If the creature is killed, he cries out for his mother before melting into a pool of sickening black ichor.
C24a. Attic Storage
This room contains derelict furnishings draped in black linens: chairs, coat racks, freestanding mirrors, dress mannequins, and the like. These draped objects take on a sinister countenance in the gloom but are harmless.
C25. Butterfly Garden
In the spring, Ammalia Cassalanter's gardens attract caterpillars, which transform into butterflies come summer. The sweet scent of flowers and herbs filters up from the planters and rose bushes.
C25a. Garden Balcony
This balcony overlooks the grounds of the Cassalanter estate and even offers a view of the Ironseat Ridge to the west and the volcano currently floating slowly towards Kymal.
C26. Cellar
This cellar is unsettlingly cold, no matter the time of year. In contains spare furniture, a laundry tub, and trunks full of old clothing. Dust and cobwebs have accumulated since the Cassalanters' disappearance.
C27. False Vault
The door to this vault is made of solid iron and sports three different locks, though it has been bent outward and broken free of its hinges. The vault is empty except for the body of a thief killed by the trap in this chamber. When characters reach the cellar and look into this room, read or paraphrase the following:
Characters that take a second to look at the body will notice it appears to be dressed in simple black leather, not the livery of the City Watch or the Cassalanters' guards. This is most likely a thief that broke in here looking for treasure.
Trap
If a creature enters the vault without first saying "Gold is my shield," an intense blast of magical cold fills the room. All creatures in the vault at the time must make a DC 16 Constitution saving throw, suffering 8d8 cold damage on a failed save, or half as much damage on a success.
A detect magic spell reveals the secret to disabling the trap: a tiny magical glyph inscribed in the middle of the ceiling. If this glyph is dispelled with a successful casting of dispel magic (DC 16), the trap ceases to function.
C28. Wine Cellar
The east wall is lined with various casks of wine. Some of the casks have been broken open and dust marks show where some sat but have since been removed.
Secret Door
The south wall of the wine cellar contains a secret entrance into the Cassalanters' secret vault. A character that investigates this chamber with a successful DC 17 Investigation check will notice there is a slight draft coming from the southern wall of the wine cellar. Carved into the wall is a large depiction of the Lawbearer's holy symbol, a double-bladed axe with scales etched into the axe heads. If the right most scale is pushed, the wall grinds open, revealing area C29 beyond. A character who searches the wall with a successful DC 15 Investigation check will figure out how to open it.
C29. Secret Vault
What wealth the Cassalanters have that isn't tied up in investments used to be kept here. As the characters step through the secret door read or paraphrase the following:
At the back of the vault is a dark staircase that descends 30 feet to the secret temple of the Cloaked Serpent.

C5
C13
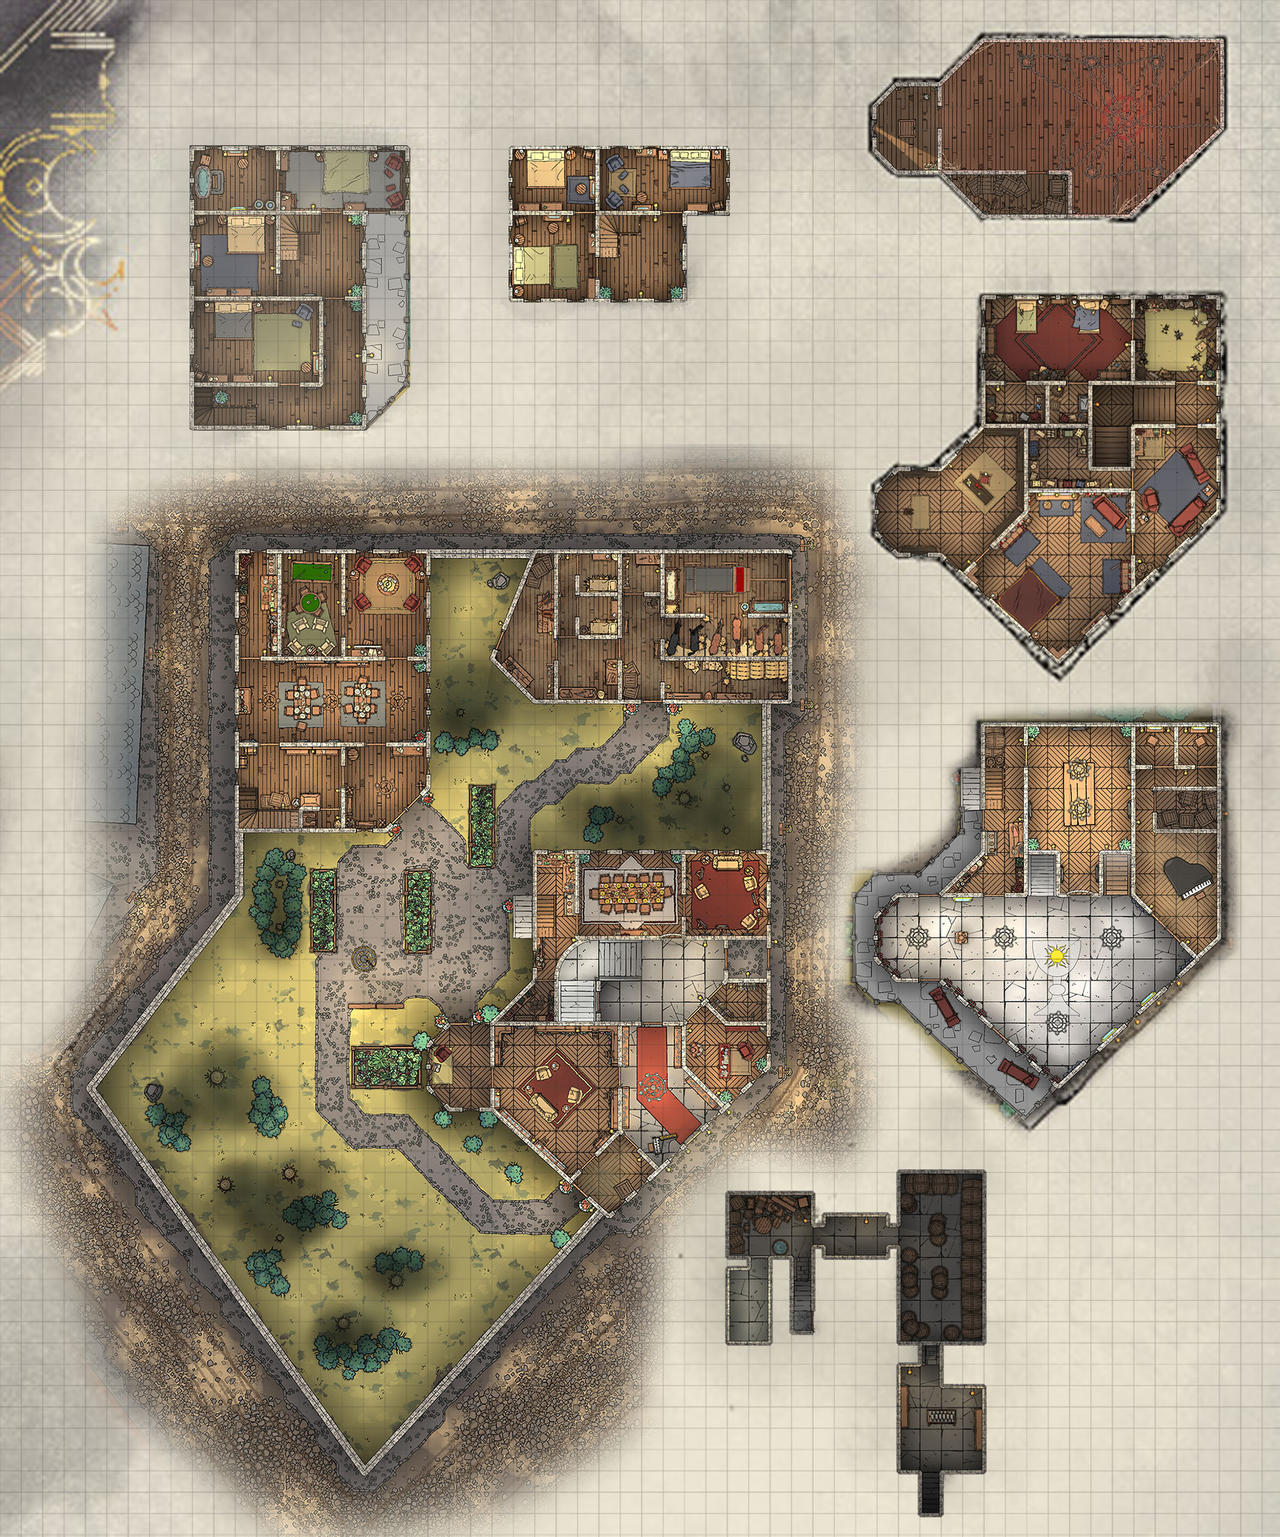
Map 11.4
Secret Temple of the Cloaked Serpent
Beneath Cassalanter Villa lies a secret temple where Ammalia and Victoro led a cult that worshiped the Lord of the Hells. Six months ago, after the Night of Ascension when they successfully broke their contract with the Lord of the Hells, they began transforming the temple into a temple dedicated to the Cloaked Serpent. Most of the cultists they had collected to the Lord of the Hells were evil-minded nobles that the Cassalanters carefully ensured were part of the sacrifice.
With the Vault of Dragons found and emptied by adventurers, the Cassalanters were financially ruined. Consequently, the Cassalanters sought a new benefactor to recover their wealth and standing. They reached out to cultists of the Cloaked Serpent; in exchange for aiding in the destruction of Kymal in addition to providing the use of their secret underground temple, the Cassalanters were promised a portion of the spoils and will be in the Betrayer God's good graces if the Divine Gate were to be destroyed and the Gods released.
See Map 11.5 for the complete layout of the Secret Temple to the Cloaked Serpent.
Temple Features
The following general features apply to the temple:
- Rooms are dimly lit by green flickering candles placed in tall, slender, wrought-iron candlesticks.
- Ceilings in rooms are 10 feet high unless noted otherwise. Passages are 8 feet tall, with 7-foot-tall doorways.
- Doors are made of iron-banded dark mahogany wood.
- Cultists wear emerald green robes with a black sash.
- Any remaining art or artifacts to the Lord of the Hells have either been piled and burned or heavily damaged and desecrated.
Areas of the Temple
The following areas correspond to the labels on map 11.5. The temple is connected to Cassalanter Villa by a staircase that connects with area A1. Also, an underground stream (area A9) leads away from the temple's lower level and eventually disappears into the rock.
A1. Hall of the Damned
In the middle of the hall, a spiral staircase descends 20 feet to the lower level (area A3). The faint sound of chanting is audible coming from a corridor to the northwest. To the south are three cells with iron-banded wooden doors. A small, barred window is embedded in each door at eye level. The cell doors face a stone pillar. Hanging from a hook on the pillar is a ring of keys.
Storage Space. In the alcove just north of the spiral staircase, there is a pile of burned and broken vestments and artifacts to the Lord of the Hells. There are the burned remains of red robes, devil masks, and broken metal amulets which look like the holy symbols of the Lord of the Hells. There is also a broken golden frame that has burnt edges of canvas still embedded along it, the portrait it once held has been burned away.
Cells. When the Cassalanters decide to sacrifice creatures in their rituals, they lure homeless Kymal citizens to their estate and confine them in these cells. The keys to unlock the door hang from the stone pillar. A lock can also be picked by a character who makes a successful DC 15 Thieves' Tools check. Two of the cells are currently empty. However, one of the cells has a bloodied unconscious cult member in it wearing green robes.
Development
If the characters try to awaken the cultist and interrogate her, a successful DC 15 Persuasion or Intimidation check will get them to provide the group with the following information:
- She got cold feet and wanted to escape Kymal before the ritual began but the other cultists knocked her unconscious and are planning to sacrifice her.
- There are a few dozen cultists in the temple chamber below.
- They were tasked with protecting the stone for the next three days until it has been consumed by the ritual.
- The stronghold of the Cloaked Serpent cult leaders is somewhere far to the northwest of Kymal. She has overheard higher order members talk about a volcanic lair.
A character that makes a successful DC 22 History check would recall hearing about a place called Serpent's Head that could fit this description of the volcanic lair.
A2. Balconies
Two crumbling balconies with stone railings overlook the temple's ceremonial hall (area A7). The distance to the floor below is 20 feet.
Trap
The balcony floors have weakened with age and are at risk of collapsing. There is a 10% chance for each 5-foot-square on the balcony that it may collapse whenever any Medium or larger creature steps onto it. If a section of floor crumbles and falls away, the character that stepped onto it must make a DC 15 Dexterity saving throw as the floor gives way beneath them leaving a gaping hole. On a failed save, the creature falls 20 feet and lands prone on the floor below (area A7) and suffers 2d6 falling damage. On a success, the creature avoids the fall by leaping to an adjacent, unoccupied space. The sound of the collapsing floor can be heard throughout the temple.
A3. Anterior Vestibule
The spiral staircase from area A1 ends at this chamber. The back wall of this chamber has a large rectangular section of stone that is a slightly lighter shade than the rest. The lighter color appears to be due to the stone being cleaner. Upon closer inspection, there are hooks embedded in the top where a picture frame used to be hooked.
Encounter
During cult gatherings, stone golem sentinels (MME p.135) guard each of the doors leading to area A7. They will attack anyone not wearing the vestments of the Cloaked Serpent.
A4. Family Crypt
Twelve stone sarcophagi are packed into deep recesses in the walls. The plaster lid of each sarcophagus is carved in the likeness of a noble clutching a chalice that bears a symbol of balanced scales. The sarcophagi contain nothing but dust and bones. At the end of the crypt are two doors, on the left and right. Both are closed but unlocked. The left one is empty, containing nothing but dust and cobwebs. The right has a dusty stone sarcophagus occupying the space, its plaster lid carved in the likeness of a handsome, cleanshaven nobleman clutching a chalice engraved with balanced scales.
The name carved on the front of the sarcophagus is Caladorn Cassalanter. If the sarcophagus is opened, an ethereal voice speaks, though it's impossible to pinpoint its origin. "Do you vow to use these items to defeat the forces of darkness?"
Encounter
An answer in the affirmative to the above question is sufficient to lay the unmounted ghost knight (ToB p.423) of Caladorn to rest and it will not attack.
Treasure
Caladorn's bones have turned to dust, but his suit of +1 plate armor remains. Also lying in the dust is a mace of disruption.
A5. Cultists' Chamber
Six wooden cots stand against the north and south walls. The west wall is carved with four reliefs of pit fiends. These seem to have been heavily damaged and almost unrecognizable.
Secret Door
Behind the relief on the west wall is a secret door, which can be detected with a successful DC 17 Investigation check. Pushing against the pit fiend's blade in the relief causes the secret door to swing open into area A6.
A6. Secret Vestry
This room is hidden behind two secret doors that are not disguised on the inside, where a stone knob on each door allows it to be pulled open with ease. The room contains two black, wooden wardrobes against the south wall. A pair of tall, slender mirrors are mounted on the west wall, their stone frames carved with serpents. Stacked in the middle of the room are six casks of wine used for cult celebrations. The wardrobes are all currently empty.
Development
If the group spends time searching this chamber, a character that makes a successful DC 20 Investigation check will find a few shattered pieces of emerald. The party recognizes this as the emerald they found in the haunted Montarthas Manor and had to give to the Black Wolves.
A7. Ceremonial Hall
This hall has a 30-foot-high vaulted ceiling and a pair of 20-foot-high balconies (area A2) overlooking it. As the group gets their first look into this chamber, read or paraphrase the following:
The group will easily recognize the stone sitting in the basin is a chunk of a titan seed, this one originally located under the Stormpoint Mountains. There are five cult leaders dressed in fancier black robes with a green sash kneeling before the bowl, chanting an abyssal hymn. Throughout the rest of the ceremonial hall stand twenty cultists, standing in rows, joining in the abyssal hymn.
Devil Statue and Sacrificial Bowl. The statue once depicted the Lord of the Hells but has had the head removed. The massive bowl at the foot of the statue was fashioned with stone shape; it radiates a strong aura of conjuration magic when subjected to a detect magic spell or similar magic. Magical flames erupt from the bowl as long as it remains intact. Any creature that enters the flames or starts its turn in them takes 4d10 fire damage. A creature reduced to 0 hit points by this damage turns to ashes. Nonmagical objects tossed into the flames are destroyed. If the statue is struck by a mace of disruption, it cracks and falls to pieces, shattering the bowl as it tumbles down.
Secret Door
The secret door leading to area A6 can be found with a successful DC 17 Investigation check. Pushing against that section of wall causes it to swing open.
Encounter
Kneeling around the titan seed are five Cloaked Serpent cult leaders. There is a Remnant Chosen (TCSR p.251) and 4 Remnant Cultists (TCSR p.252). Throughout the rest of the ceremonial hall, standing in rows, are 20 cult fanatics (MM p.345).
Destroying the Titan Seed:
This chunk of titan seed is a piece of the one located under the Stormpoint Mountains. There is a second, larger chunk that is currently being used in Serpent's Head as the nexus for this ritual. The chunk here in Kymal is how the ritual is locating its target. The volcano will slowly move through the sky until it is directly over this stone. The stone is slowly disintegrating as the volcano draws closer to its final resting place. If the stone is destroyed, the volcano will seize its lateral movement and remain where it stops.
Destroying the titan seed is an arduous task. The stone has an armor class of 20 with 300 hit points. It is immune to all nonmagical bludgeoning, piercing, and slashing damage as well as psychic and poison damage. As damage is dealt, pieces of the stone break off and quickly disintegrate.
A8. Storage Closet
Against the back wall of this closet stands an unlocked cabinet with a black rug laid out before it. The cabinet contains a golden decanter and shelves holding wooden wine goblets.
Treasure
The golden decanter in the cabinet is worth 250 gp.
A9. Stream and Pool
An underground stream flows through the west side of the temple and into a 5-foot-deep pool before meandering southeast and disappearing into the rock.
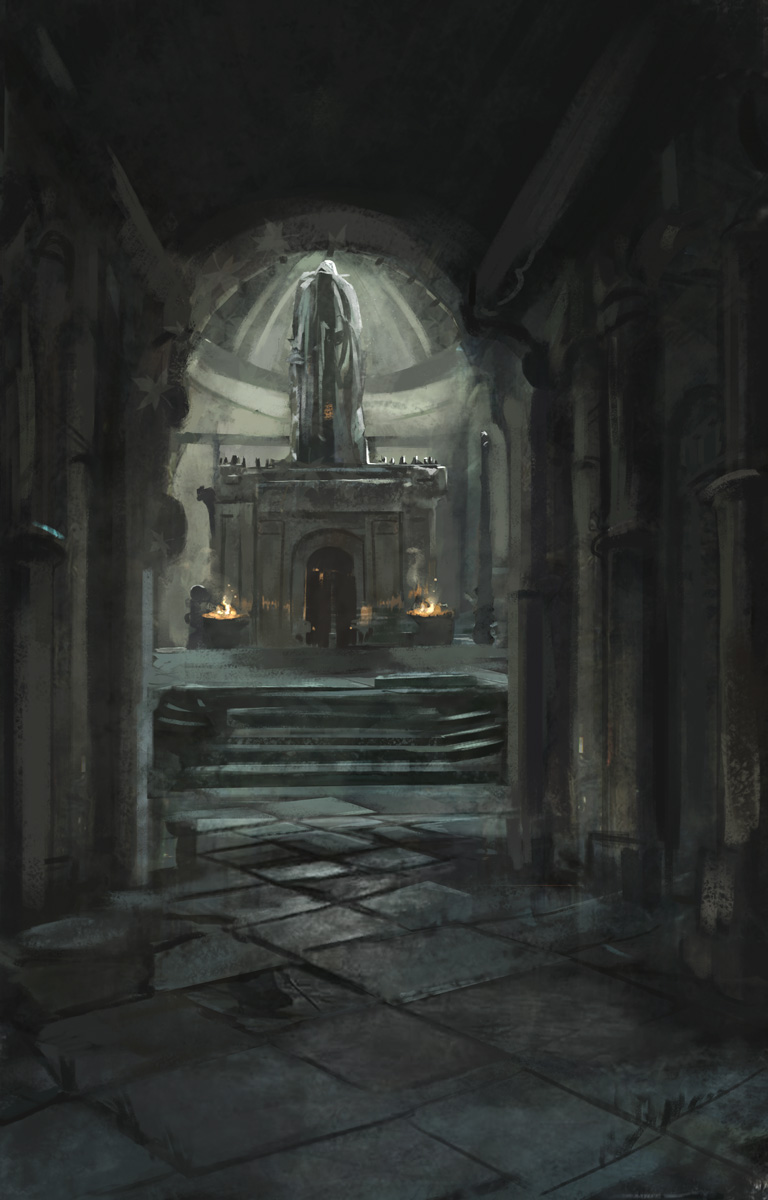

Conclusion
With the titan seed in Kymal destroyed, the volcano has seized its slow travel towards the city. However, the volcano is still present and the opening between the Fire Plane and the Material Plane continues to grow. It is of paramount importance to find and end the ritual holding the volcano here before it becomes permanent.
The day after the volcano arrives, Arcanist Allura Vysoren will contact the party to inform them of what she has learned about the ritual. She has been in contact with Pike Trickfoot, the Chosen of the Everlight, who has used a divine intervention to learn the location of where the ritual is being performed. Allura will tell the party the ritual is being conducted somewhere within an abandoned and destroyed dwarven stronghold that used to be located in Serpent's Head.
At the end of this story arc, after defeating the cultists in the secret temple underneath the Cassalanter Villa and subsequently halting the volcano with the destruction of the titan seed, the characters should reach 17th level.
From the adventures of Bramble Tickletoes III & Company:
With the arrival of the volcano, a whirlwind of a day begins for the party. Initially, the group heads towards the destruction to fight elementals and protect the city as best they can. Then, Kayne summons a flying steed while Bramble polymorphs Maoki into an eagle and they fly up to the volcano in search of a lair where the ritual could occur.
Allura informs them that the Voice of the Tempest will be arriving this evening, so they head back to Kymal to meet her. While waiting for her arrival, Bramble thinks up the group's tagline - "Equal parts brave and stupid."
Keyleth determines there is a powerful source of magic in Kymal, drawing the volcano closer. The party head off to the Cassalanter Villa in search of this source of power. They locate the underground temple and Bramble falling through the crumbling balcony starts the battle. Lia stays on the balcony and rains death from above. Bramble uses mass suggestion to have cultists defend them. During the fight, the cult leader uses Power Word Stun on Kayne before using Power Word Kill on Bramble. This chaos allows the leader to escape.
A1
A2
A2
A3
A4
A5
A6
A7
A7
A8
A9

Map 11.5
12
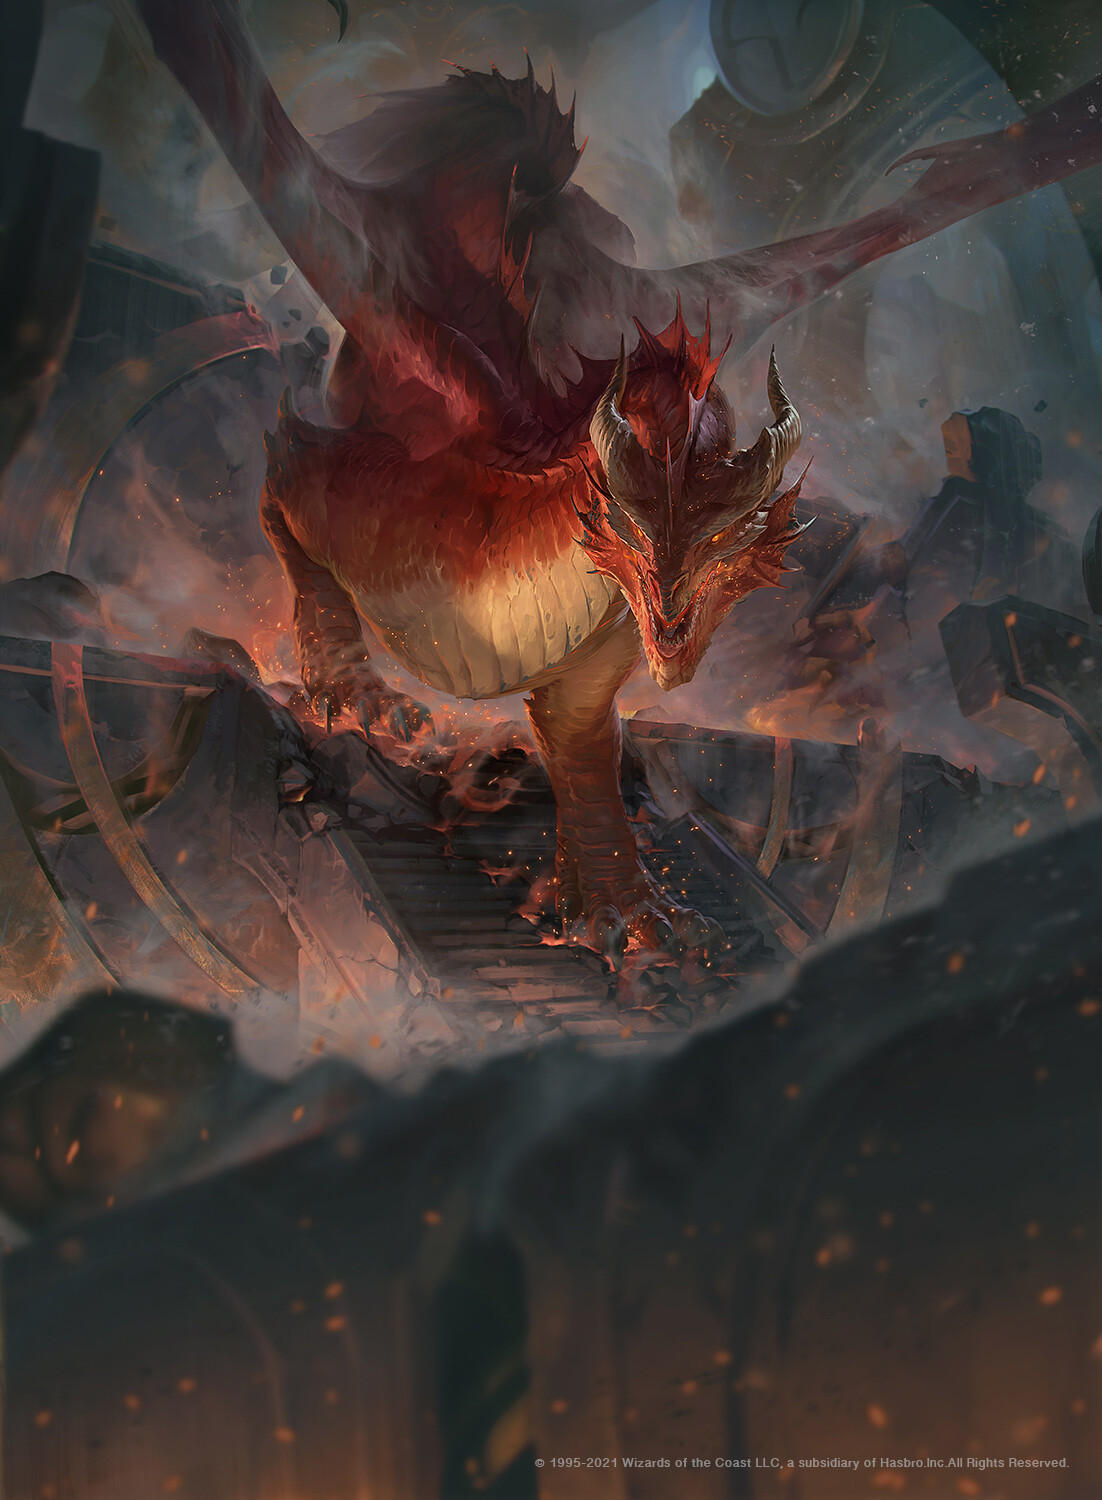
Chapter 12: Gauntlet of Flame
Nearly fifteen years ago, Thordak once flew to the Cliffkeep Mountains during his occupation of Emon. No one living knows why the nearly invincible Cinder King left his prized city to attack a single, isolated mountaintop village, but the ruins of Serpent's Head prove he did. Serpent's Head is a squat mountain in the southern reaches of the Cliffkeep Mountains. Its people were mostly dwarves and humans, miners and farmers. They had no militia to speak of, and most had already evacuated to Kraghammer when news of Emon's fall reaches them -- but not everyone.
The mountain itself was transformed into a small volcano by Thordak's magic, and mindless cinderslag elementals endlessly prowl the village's shattered buildings and fortifications. Earth tremors have cracked the foundation of the keep that lay at the center of the village, revealing deep magma caverns filled with precious diamonds infused with chaotic magic. Occasionally, small rifts to the Elemental Plane of Fire flash open within the depths, and sporadic groups of azer have come through.
In the intervening years, a small group of fire giants have claimed the Serpent's Head mine as their home. They have rebuilt the forge and have developed a relationship with the azers, working together to mine for gems.
Story Overview
It is because of these rifts in the Elemental Plane of Fire that the Cult of the Cloaked Serpents chose this place as their lair. In the event of any errant elemental activity, it would be unlikely to draw the eye of anyone of importance. Over the last decade, the cultists of Zehir have constructed this hideout and temple in secret. They hid the main entrance in the abandoned Serpent's Head forge. When the fire giants arrived, the cultists carved out the side entrance and relied on the giants to further obfuscate their lair. The fire giants are unaware of their presence and the series of challenges constructed in the lava tubes were designed to be both a barrier between them and the giants in the event the giants discovered their presence as well as a method of testing the resolve of new recruits. Higher level cultists are able to teleport directly into the lair.
Igbalneum, the red dragon initially met just outside of Kymal in Polla's Great Forge is the leader of the Cult of the Cloaked Serpent. He has grown into an ancient red dragon due to his bath in the magical forge. Igbalneum has made his lair inside the caldera of the volcano which is just beyond the rest of the cultists' lair.
In order to end the ritual currently merging the Elemental Plane of Fire with the Material Plane before it becomes permanent, the party must first arrive at Serpent's Head and search for the entrance into the mine. Making their way through the mine most likely means the group will need to fight their way through the deadly fire giants.
The entrance to the cultists' lair is hidden behind a massive dwarven head carved out of stone in the ceremonial forge. A
puzzle locks this entrance and must be solved to gain access to the lava tubes beyond. Once through the entrance, a series of challenges have been designed to test new recruits and protect against intruders. The lava tubes ultimately lead to the Cloaked Serpent's Lair. A group attempting to reach the ritual chamber will be faced with deadly encounters with cultists and the elemental guardians they have summoned to protect their leader.
If the party is able to make it past the cultists and elemental guardians, they will enter the caldera. They must fight Igbalneum, the ancient red dragon, in his lair while trying to destroy the three primordial titan seeds being used as the ritual's power sources. Will the party be able to defeat Igbalneum, destroy the three titan seeds, and send the volcano floating above Kymal back through its portal back to the Elemental Plane of Fire?
Torian Forest
Cradling the southwestern edge of the Cliffkeep Mountain range, the Torian Forest supplies much of Emon's timber and Kraghammer's firewood. Though its locals proudly proclaim the Torian to be the "most welcoming" and "least haunted" of Tal'Dorei's forests, this is more of a myth than people realize. The forest is welcoming and bright at its edges, with a beautiful wetland at its northern end, but within its deep and unexplored heart are spirits not studied since the Calamity.
Serpent's Head
Spanning the northern reaches of Tal'Dorei, the Cliffkeep Mountains are an impenetrable barrier between the known realm and what lies beyond in the distant north. The Cliffkeeps' southern foothills are dotted with forests and pockets of civilization, standing resolute against the unwelcoming topography. Unfortunately, one of those pockets of civilization, Serpent's Head, was destroyed nearly fifteen years ago by Thordak the Cinder King. The village that surrounds the Serpent's Head mountain is now nothing more than ash, and the immolated corpses of its people lay buried beneath the cinders.
The ashen ruins of the town can be found atop a narrow plateau situated just above the tree line of the Torian Forest below. What once were trees that dotted the plateau amongst the town are now blackened, burned stumps. Ash perpetually falls like snow all around. These ruins of the Serpent's Head village butt up against the side of the Cliffkeep Mountains.
Torian Forest Arrival
As the party trek through the Torian Forest and approach the base of the Serpent's Head plateau, read the following:
A stillness fills the air. Ahead, the foliage begins to thin as burnt stumps and logs begin to dot the forest floor. The lush green forest slowly transforms into a blackened, burnt wasteland. Ash drifts slowly through the air like snow, covering the ground near the base of a tall cliff face with a thin blanket of gray-white ash. A carved path switchbacks up the side of the cliff face to the plateau above.
As you reach the top of the plateau, the ash grows thicker the further forward you walk. It becomes so thick that visibility drops to roughly fifty feet. As you walk forward, you begin to see what appears to be the outlines of building foundations dotting the landscape around you.
Serpent's Head Village
When the party begins walking through the ruined village, read or paraphrase the following:
Encounter
The molten slag creatures lumbering towards the party are 2 cinderslag elementals (TCSR p.231). They are being herded through the ruins by 2 flame salamanders (MME2 p.218).
At the top of the 3rd round of combat, on initiative count 20, 2 ash elementals (Appendix B) enter the fray, seemingly drawn by the noise. Use Map 12.1 for the encounter battle map.
Development
If the party decides they want to stealth through the remainder of the village must make a DC 18 Stealth check. On a success, the group can make their way through the rest of the ruins without attracting the attention of any additional elementals. The elementals presence can be heard periodically throughout the ruins as slow lumbering footfalls in the distance. A group failure on this stealth check will result in an additional elemental encounter.
Encounter
Lumbering towards the group are 4 cinderslag elementals (TCSR p.231). Again, this fight will attract an additional 2 ash elementals (Appendix B) at the start of the 3rd round of combat.
Map 12.1
Chasm of Lava
In the center of the ruins of Serpent's Head lies a massive chasm in the earth. The chasm is a fifty-foot-wide gap with a river of lava flowing through it. The surface of the lava is roughly thirty feet below the edge. The red glow of the lava river is visible through the falling ash well before the chasm itself actually becomes visible.
The party must figure out a way to cross the flowing river of lava. Creatures that fall into the lava become partially submerged, taking 10d10 fire damage per round. Any creature that starts a second turn within the lava risks becoming fully submerged. They must succeed on a DC 15 Constitution saving throw or sink beneath the surface, taking 18d10 fire damage per round. On a success the creature remains partially submerged and continues to take 10d10 fire damage per round.
On the other side of the chasm lies another mile or so of Serpent's Head ruins before the Cliffkeep Mountains jut upwards out of the earth.
Reaching the Forge
The main path that used to lead through the center of town leads northward toward the Cliffkeep Mountains and ends at a massive set of double black iron doors embedded in the wall of the mountainside. As the party reach the entrance to the forge, read or paraphrase the following.
Serpent's Head Forge
In the intervening years since Thordak destroyed Serpent's Head fire giants have moved in and claimed the Forge as their own. They have rebuilt the forge and aligned with a group of azers to restart the mining and reignite the forges.
The massive iron door is locked and requires a successful DC 22 Thieves' Tools check to unlock. The door can also be broken open with a successful DC 28 Athletics check. Physically breaking their way through the door will awaken the sleeping fire giant in area S2 who will come to investigate.
Forge Features
As characters explore Serpent's Head, keep in mind the following features:
- Heat. Serpent's Head is built upon a 50-foot-wide stream of lava which radiates intense heat. Any creatures unaccustomed to these tiring conditions must abide by the Extreme Heat rules (DMG p.110).
- Ceilings. The ceilings are 35-feet-high.
- Doors. All the doors in Serpent's Head have been carved to be giant sized. They are 20-feet-tall and made of bronze, decorated with giant runes and faces, with handles 9 feet above the floor. A medium or smaller creature can attempt to open a door, provided that creature, or some other helpful creature, can reach the door handle and unlatch it. While the handle is unlatched, a creature must use an action to push or pull on the heavy door, opening it with a successful DC 13 Athletics check. On a failed check, the door doesn't open.
- Illumination. All the rooms in Serpent's Head are dimly lit, either by giant torches set in sconces 12 feet off the floor, or by the lava stream.


- Lava Stream. Flowing through the center of Serpent's Head is a 50-foot-wide stream of lava. Creatures falling into the lava become partially submerged, taking 10d10 fire damage per round. Any creature that starts a second turn within the lava risks becoming fully submerged. They must succeed a DC 15 Constitution saving throw or sink beneath the surface, taking 18d10 fire damage per round. On a success the creature remains partially submerged and continues to take 10d10 fire damage per round. The lava flows at a rate of 5 feet per round from south to north and counts as difficult terrain.
- Oversized Furnishings and Objects. The furnishings and objects in areas S1, S2, and S3 are sized for giants. Exceptions are noted in the text. Furniture is typically twice as high, long, and wide as its human-sized equivalent, and roughly eight times the weight. Small and Medium creatures can scuttle under and clamber over giant-sized furniture, treating the spaces they occupy as difficult terrain.
- Stairs. The staircase in area S5 is sized for giants. Each step is 3-feet-tall by 3-feet-deep. Medium and smaller creatures treat the staircase as difficult terrain.
- Noise. The constant hammering and grinding in Serpent's Head mask most noises made inside. Conversations can be had without alerting creatures in adjacent rooms, however, shouting or combat will raise the alarm. Perception checks made to listen in Serpent's Head have disadvantage.
See Map 12.2 and Map 12.3 for the complete layout of the Serpent's Head Forge.
S1. Entrance Hall
The massive iron doors open into a large entrance hall. This chamber extends left and right to form a large trapezoidal space. Thick stone pillars support the ceiling 25 feet above. Two large vats of water sit on either side of the room with a slow trickle of water flowing into them from faucets embedded in the wall. As the characters enter, read or paraphrase the following:
The entrance hall also extends beyond the first chamber for an additional 100 feet. A massive stone table sits in the middle of this area with overly large chairs. These chairs are roughly 5 feet wide while the tabletop stands approximately 8 feet tall.
S2. Giant Quarters
This cramped room has four large beds shoved along one wall. In the middle sits a massive brass table. Haphazardly pushed along the other wall are two smaller wooden bookcases that seem to hold various books on geology and mining.
Encounter
There is a sleeping fire giant dreadnought (VGtM p.147). Characters who do not wish to wake the sleeping giant must succeed on a DC 12 Stealth check.
S3. Leader's Chamber
This chamber is locked. The door can be unlocked with a successful DC 18 Thieves' Tools check or broken open with a successful DC 20 Athletics check. When the party enters, read or paraphrase the following:
Trap
The chest at the end of the bed is locked and trapped with a poison needle. It requires a successful DC 17 Thieves' Tools check to disable the trap. On a failure, the character attempting to unlock it must make a DC 15 Dexterity saving throw taking 3d6 poison damage on a failure and are poisoned for an hour. On a successful save, the character takes half the poison damage and is not poisoned.
With the trap disabled or sprung, the lock remains but can now be safely picked. The lock requires a successful DC 18 Thieves' Tools check to unlock.
Treasure
On top of the desk lays a map of the Serpent's Head mine. Unfortunately, it does not have the new excavations marked on it. The chest at the end of the bed contains a cloth sack filled with 400 pp and 850 gp. There is also a small wooden crate filled with various small gemstones worth a total of 500 gp.
S4. Main Forge
This massive chamber has four large anvils. Lava flows through a large forge before it flows out into a pool. Work benches littered with tools line the walls of this chamber. There are two large coffers filled with water on the right side, along the wall nearest the door.
Encounter
Standing next to the forge is a massive Fire Giant Forgecaller (MME p.119). The dwarf-looking creatures working at the anvils are 6 Azer Taskmasters (MME p.19).
S5. Stairs & Temple Antechamber
Beyond the doors on either side of the forge are staircases that curve down. The stone stairs have been hacked and smashed to form large steps sized for giants. They meet at a landing with a large stone door. The door is not locked and leads into a small antechamber with beautiful reliefs carved into the stone on either side. The images depict various interpretations of the All-Hammer.
Another large stone door with an intricately carved design on it stands closed at the far side of this antechamber. Any character that makes a successful DC 18 Perception check will hear muffled hammering coming from behind this door.
S6. Ceremonial Forge
The double doors into this chamber are locked, massive, and heavy. A character can pick the lock with a successful DC 25 Thieves' Tools check. Once unlocked, the doors require a successful DC 18 Athletics check to push open.
This large chamber is an ornate forge built as both a workshop and temple space. The door opens into a square space with work benches lining the walls. The work benches are built from thick chunks of a deep reddish wood. There is another set of double doors embedded in the left wall that leads to area S8. Across the workspace, the room opens up into a massive octagonal forge chamber. As the characters enter, read or paraphrase the following:
The first thing you notice is a massive dwarven head carved out of the stone wall on the far side with a stream of lava pouring from the statue's mouth and flowing along an adamantine trough. It collects in a pool at the center of the chamber.
Set into the floor on the near side of the chamber is a massive ornate iron anvil. Standing at it is a fire giant, hammering on a massive greatsword. Four adamantine pillars line the chamber with smaller fiery creatures stationed guard at each one.
Upon closer inspection, the massive dwarven head statue shows signs of being hacked and slashed in multiple places. Additionally, the floor around the central lava pool is comprised by stone grates through which a lava river can be seen flowing a few hundred feet below. The lava from the pool slowly drains out the bottom and falls to the lava river below.
A character that looks through the grates in the floor with a successful DC 18 Perception check will notice a stone bridge spanning just above the lava river, a few hundred feet east from this temple chamber.
Encounter
As the door grinds open, the Fire Giant Duke (MME p.119) stops hammering and turns to look at who has interrupted his work. The fiery creatures standing guard beside the adamantine pillars are 4 Azer Priests of the Flame (MME p.18). They will attack the party on sight.
Treasure
The fire giant has a large metal ring on its belt with three large keys. The keys go to the main entrance, area S3, and area S6. The fire giant also has a belt pouch with 350 gp worth of small diamonds and 350 gp of other various precious gems.

Development
This massive chamber contains multiple secrets. A character that spends some time investigating the workshop space with a successful DC 15 Investigation check will notice signs of rubble and loose stones littering the floor under a work bench along the western wall. It appears to have escaped the notice of the giants since the work benches are set at dwarf height and therefore block it from their view. Moving some of the larger chunks of rubble aside, a short tunnel opens up into a natural cavern space beyond (area S7.)
Additionally, in the octagonal temple chamber, a character investigating around the massive dwarven head carving with a successful DC 17 Investigation check will notice that some of the chunks missing from the statue are near where it meets the wall on the western side. It appears as if these chunks broke off in attempts to pry the statue from the wall. These attempts appear to have been fruitless. The character will also notice the presence of five perfectly cut holes near the base of the statue. These holes are about six inches in diameter and extend into the stone with a slight upward tilt before the hole bends sharply upward about a foot into the stone (see Wordle Door Puzzle section below).
Wordle Door Puzzle
The massive dwarven head can only be opened by solving the five-letter word phrase. There are five perfectly cut holes at the base of the statue, each about six inches in diameter. These are tubes that have a slight upward tilt for the first foot and then bend sharply upwards. A character that makes a successful DC 20 Investigation check will notice that underneath each hole except the middle one are faint, small carvings of various currency symbols. The symbols, from left to right, stand for platinum, gold, silver, and copper with the middle one blank. If a character casts detect magic, the tubes and the door give off a combination of abjuration and conjuration magic. To complete this puzzle, the party will need to locate the five green glass residuum containers hidden in area S7.
To solve the puzzle, the group will have to figure out the five-letter word that acts as the door's password, which is Zehir. This word is another common name for the Cloaked Serpent.
Green Glass Residuum Containers
There are five green glass residuum containers hidden in area S7 that each contain twenty-six spheres. These spheres all have a different letter carved into them. The different containers are filled with the same twenty-six lettered spheres, but each made from a different metal: copper, silver, electrum, gold, and platinum. When a character is in area S7, a successful DC 15 Investigation check will find the hidden crevice where the five green glass residuum urn-shaped containers are kept.
Trial and Error
If anyone attempts to look inside the tube, they will hear a low hiss emanating from somewhere beyond the upward bend. There is a tiny metallic elemental lizard that lives inside each tube. If the creature is attacked or provoked, it will retreat deeper into the tube. The tiny metallic elemental lizard is magically protected from taking damage.
As the characters begin to experiment with the puzzle, the following are possible outcomes they may experience:
- If someone throws a random pebble inside the tube, it will just fall and clatter down to the end of the tube and onto the ground.
- If someone holds a stone in their palm and inserts their hand into a tube, like offering a treat, nothing will happen, but they will hear grinding sounds from inside the tubes
The characters must proffer five simultaneous offerings where the sequence of spheres spells out a word to be considered a valid offering. The material of the sphere inserted must match the currency symbol carved underneath the tube. For example, a sphere made of platinum must be inserted into the tube with the platinum symbol carved underneath and so on for the other currency symbols. The tube without a currency symbol, in the center, is where the electrum sphere must be placed.
Making a Valid Offering
A valid offering is made by the group when they proffer five simultaneous offerings, matching the sphere material with the currency symbols, and spelling out a five-letter word. When a valid offering occurs, all five creatures will move in unison and lunge at the spheres offered with the following possible responses:
- Correctly lettered sphere in the correct tube. The creature will lunge and hiss at the sphere, then retreat without doing anything else.
- Correctly lettered sphere in the wrong tube. The creature will poke and bump at the sphere until it falls out of the hand holding it. As the sphere emerges from the tube it vanishes and magically reappears in the correct green glass residuum container with a soft clinking sound.
- Incorrectly lettered sphere. The creature will lunge, bite, and devour any wrongly lettered spheres. The character holding the sphere must succeed on a DC 16 Dexterity saving throw or take 1dN piercing damage from the bite, with N being the number of valid offerings made so far within the last hour. (1d1 for the first offering, 1d2 for the second, 1d3 for the third, etc.)
- Accepted Offering. If all five tubes receive the correct letter with the correct metallic sphere, all five creatures lunge and devour the spheres without inflicting any damage to the characters' hands.


Aftermath
After an accepted offering, the characters will hear grinding movement from within the door as the tiny metallic elemental lizards retreat into the ceiling. As they do, the door slowly opens with a deep, mechanical rumble. After 1 minute, the five green glass residuum containers all vanish and reappear where they were originally found in area S7.
Behind the massive dwarven head door is a large tunnel carved into the stone. A river of lava flows long one side of the tunnel with a narrow stone path running along the right side. As soon as the characters enter the tunnel, the carved stone door closes behind them.
Characters that enter the tunnel should advance to Lava Tubes.
S7. Cultist Entrance
This cavern space has various discarded items scattered around the floor. A bed roll lies in one corner, a few scraps of blankets in another. A few other trinkets litter the ground here and there.
A character searching for clues with a successful DC 15 Investigation check will find a small, half-broken scrap that can be identified as a symbol of the Cloaked Serpent as well as a small crevice in the cavern wall. Inside the crevice are five green glass urn-shaped containers. Each container contains twenty-six small spheres made out of a precious metal, all platinum in one, gold in another, followed by electrum, silver, and copper separated into the remaining three. Each sphere has a different letter carved into it. These five containers of metallic spheres are required for the Wordle Door Puzzle in area S6.
There is a much larger crevice in the far wall of this cavern that appears wide enough for a Medium creature to squeeze through. About thirty feet into this crevice, it widens slightly to form a squat narrow tunnel; tall creatures will need to bend. The tunnel twists upwards slightly and light can be seen ahead after about ten minutes of travel. Characters that follow this tunnel will squeeze through the exit and find themselves out of the mountainside and standing amongst falling ash again. This is the entrance used by Cloaked Serpent cultists and is located about a mile west of the main forge entrance, tucked behind large boulders that make it nearly impossible to notice. If characters happen to explore this section of the mountainside before entering the forge, they can stumble upon this secret entrance with a successful DC 23 Investigation check.
S8. Storeroom & Mine Entrance
This chamber is obviously a storeroom. One side has crates filled with various minerals and chunks of metal. The other side of the chamber has stores of food, mining tools, and mechanical bits and pieces. There are crates filled with hundreds of non-perishable rations, barrels of ale, and trunks filled with miner's picks, sledgehammers, and the like. There is a large metal door embedded in the far wall.
When the group opens the interior door, read or paraphrase the following:
When the characters enter the room, the elevator is 1d10 x 10 feet below the surface. Operating the pulley to raise or lower the elevator requires a successful DC 10 Athletics check. The DC for this check increases by 1 for each Medium creature in the elevator (two Small creatures count as one Medium creature for this purpose, one Large creature counts as three Medium), or for each space filled with goods. Up to 12 Small creatures, 6 Medium creatures, 2 Large creatures, or 1 Huge creature can occupy the lift. It takes an action to raise or lower the elevator by 10 feet. The elevator shaft is 150 feet deep.
Characters that enter the mine should advance to Serpent's Head Mine.
From the Adventures of Bramble Tickletoes III & Company:
After managing to halt the volcano's progress towards Kymal by destroying the titan seed located underneath the Cassalanter Villa, the party needed to figure out where the planar incursion ritual is taking place. Lia cast hunter's mark on the cult leader during the fight before he teleported away. After the fight, the group teleported to the west side of the Ironseat Ridge so Lia could triangulate the cultist's general location.
Using Lia's hunter's mark and a map, the party were able to determine the Serpent's Head as the probable location. Bramble then teleported them back to Kymal to check in with Keyleth. Keyleth offers to cast wind walk on the group so they can fly off towards Serpent's Head at high speed.
The spell ends as the group flies over the Torian Forest. They make their way through the ruins of Serpent's Head and sneak into the forge. As they explore, they murder a sleeping fire giant before they stumble upon the main forge. During the battle, Bramble uses his first 9th level spell, Psychic Scream, stunning most of the enemies until they are killed.
In facing the fire giant and azer priests down in the ceremonial forge, it starts as a tough fight. Ultimately, the group succeeds as Bramble polymorphs the giant into a caterpillar, dropping it through the grate into the river of lava below. Unfortunately, fire giants are immune to fire damage, and it just leads to an angry fire giant raising the alarm to the miners below.
S1
S2
S3
S4
S5

Map 12.2
S5
S6
S7
S8

Map 12.3
Serpent's Head Mine
The mine beneath Serpent's Head contains most of the raw materials needed to forge functional and ceremonial weapons and armor. Plenty of iron ore can be found here along with a number of different precious gems.
The elevator descends into a similarly sized chamber carved into the stone as the room above. The sound of hammering and chiseling can be heard ahead. A roughly cut tunnel descends gradually, leading out of this chamber. Looking down the tunnel, a character can see the tunnel extends for roughly 100 feet before curving left. An orange glow from beyond the curve can be seen glinting off the rough-cut walls.
Mining Forge
Just beyond the curve in the tunnel, it opens into a large roughly square chamber filled with flowing lava. Two huge fire giants are hammering away on chunks of rock. Two piles sit on either side of each giant, one filled with hunks of metal, the other with bits of rock. The giants seem to be in the process of separating raw materials. This forge seems to be used primarily for readying the raw materials for actual forge use. Two azers are in the process of dragging crates of raw materials up the tunnel across the chamber.
Encounter
There are 2 Azer Taskmasters (MME p.19) bringing supplies up from the mine below while 2 Fire Giant Forgecallers (MME p.119) are hammering raw materials at the anvils. Use Map 12.4 for the encounter battle map.

Map 12.4
Areas of the Mine
The other tunnel from the mining forge slopes downward and curves to the right. The tunnel is aglow with orange light. After about two hundred feet, the tunnel opens into a massive underground crack in the stone. A bright river of lava flows through, one hundred feet below the mouth of the tunnel. A stone bridge has been built spanning across the magma flow. Across the way, the bridge deposits into another tunnel that quickly widens into a ramp that descends into a massive chamber that was mined long ago.
The following areas correspond to the labels M1 to M6 on map 12.5
M1. Original Mine
Pillars of rock support the stone above from collapsing in what appears to be an old mine chamber. The rock walls are not smooth but pockmarked with holes and covered in scrape marks. There is a large set of metal doors set into the left wall of the chamber, as well as a tunnel carved into the wall farther along the left side.
Secret Chamber. A character that spends some time checking the walls of this cavern with a successful DC 22 Investigation check will notice along the back wall is a well-hidden secret door. If the character investigating the walls is a dwarf, the DC of the investigation check is lowered by 5. This hidden chamber was used to store some of the more treasured finds from this mine.
Treasure
Inside the secret chamber is a shelf containing numerous precious gems and two bottles. The bottles are 2 Potions of Fire Resistance. There are 2 diamonds sitting on the shelf, each worth 500 gp. Finally, there are 8 other precious gems each worth 300 gp apiece: a ruby, emerald, amethyst, sapphire, black sapphire, opal, garnet, jade, and onyx.
M2. Hall and Stairs
Through the metal doors is a passageway that splits left and right before meeting up again, leading into a rough-cut circular chamber with tunnels leading in all four cardinal directions. In the center of the space is a set of rough-hewn stone steps that ascend through the ceiling. Beyond area M1, these spaces all have ceilings roughly 6 feet high and were clearly designed for dwarfs. It doesn't appear that fire giants would fit into these halls.
Encounter
There is a 30% chance of running into a patrol of 4 Azer Taskmasters (MME p.19) moving through these halls. There is only one azer patrol, so once the party has encountered them in any area of the mine, the chance of meeting an azer patrol in subsequent chambers drops to 0%.
M3. Mine Storage
This rectangular structure has stone columns supporting the rock above. It appears to have been mined in the past but is now being used as storage. Mining equipment and empty crates line the walls of this chamber. Another tunnel has been carved out of the left wall with drag marks on the ground that indicates crates are pulled into and out of this tunnel.
Encounter
There is a 30% chance of running into a patrol of 4 Azer Taskmasters (MME p.19) moving through this storage room. There is only one azer patrol, so once the party has encountered them in any area of the mine, the chance of meeting an azer patrol in subsequent chambers drops to 0%.
M4. Azer Sleeping Quarters
There are two access points to this section of the mine where the azers sleep. The tunnel carved into the stone wall in area M1 leads to the rear of this section and the southern tunnel from the circular staircase leads in from area M2. There are six small chambers carved along the sides of a narrow hallway. Each of these rooms contains three short metal platforms that appear to be designed as beds. The hallway dead ends into a larger chamber that was clearly mined at some point, but now also contains a number of metal beds.
Encounter
There is a 30% chance of running into a patrol of 4 Azer Taskmasters (MME p.19) moving through this hallway. There is only one azer patrol, so once the party has encountered them in any area of the mine, the chance of meeting an azer patrol in subsequent chambers drops to 0%.

M5. Current Mine
A network of tunnels spider through the stone as marks along the walls indicate locations that have been mined. Metal pins have been placed in various spots throughout the tunnels as well. These appear to indicate future locations to be mined. This appears to be where most of the iron ore is being mined. Chunks of unrefined iron can be found here, with a number of chunks sitting in small piles waiting to be collected.
Encounter
There are 10 Azer Taskmasters (MME p.19) currently mining throughout these tunnels. If a fight breaks out, they will all come running to protect their fellow miners.
Treasure
There are a number of unrefined iron ore chunks scattered throughout the mine. They are each worth between 5 - 15 gp.
M6. Gem Mine
The rough-hewn stone stairs ascend in a circle into the center of a smaller mining space. Once the stairs break through the ceiling of the chamber, they are open and visible to the space around. An orange glow fills this entire room and glints off gemstone in the rock. To the south, the stone has been mined through to the massive crack containing the lava river. The glow from the magma below suffuses this entire chamber. The walls of this mine sparkle in a way that the walls below do not. It appears there are veins of precious gems up here that were discovered and are currently in the process of being mined.
Encounter
Mining the gemstones up here are 6 Azer Taskmasters (MME p.19) that will attack the group if they appear at the top of the stairs.
Treasure
There are a number of various small gems scattered about this chamber, each worth between 50 - 200 gp.
M1
M2
M3
M4
M5
M6
Map 12.5
Lava Tubes
The entrance to this lava tube is behind the massive dwarven statue in area S6 (Ceremonial Forge) in the Serpent Head's Forge. This tunnel leads ultimately to the Cloaked Serpent cultists' lair. There are a number of traps and puzzles set along this route used to protect the cultists against the fire giants and serve as a trial for new recruits.
After successfully making it through Serpent's Head Forge and into the lava tubes, and before beginning this adventure, the characters should reach 18th level.
Entering the Lava Tubes
As the group enters through the carved dwarven head door, read or paraphrase the following:
The tunnel continues on and slowly curves slightly to the left. After a few minutes of walking, the tunnel comes to an end. The lava is pouring out of a hole in the rock and the path dead ends.
Connecting the Dots
Floating magical runes require the characters to decipher what the symbols mean and how to interact with them to solve this puzzle. This puzzle is placed at the end of the tunnel with no obvious exits other than the way the party entered. When the group moves to within 10 feet of the puzzle, read or paraphrase the following:
The Puzzle
The floating magical symbols are interactive, and a character who touches them will experience a sensation like touching cold metal. There are two different components to this puzzle that the characters can interact with: touching the runes around the outer edge of the circle allows the rotation of the circle as a whole; depending on the rotated position of the circle, dots will appear within it that can be touched by a character.
Rotating the circle both changes the color of the entire display and makes certain points within the circle appear or disappear. Solving this puzzle involves making the points within the circle appear and connecting them to one another by tracing a path between.
There are 10 runes on the outer edge of the circle. The rune in the top position (position one) is the correct position, though the puzzle is not activated yet and won't until the characters rotate the puzzle away from this initial position. A character that uses their finger or another object to touch any of the outer runes can move the circle in a clockwise or counterclockwise direction, causing the outer circle and its associated runes to rotate. The dots and lines within the circle do not rotate and always remain in the same position.
Hints
For players having trouble solving this puzzle, the following clues can be provided by the DM to help guide them towards a solution:
- A successful DC 12 Investigation or Perception check understands that the puzzle can be interacted with manually, and that touching and moving it can manipulate its components.
- A successful DC 15 Arcana check reveals the runes along the outer edge of the circle to be representative of the numbers one through ten.
- A successful DC 17 Insight check understands that the dots appearing within the circle are representative of some kind of map or pathway that needs to be connected somehow.

Raising the Stakes
While it may take some time for the party to figure out the mechanics of how the puzzle works, once they understand, it's mostly a matter of trial and error. To increase the sense of urgency and danger while they are finding the solution, a wall of spikes shifts up out of the ground, 40 feet away from the puzzle and slowly begins to move towards the group.
- This wall encompasses the entire stone path and overhangs the lava river slightly.
- It moves forward at 5 feet a round.
- A combined Strength check of 50 allows the group to hold the wall in place and prevents it from moving for one round. That check must be repeated each round.
- A successful DC 20 Thieves Tools check, made with disadvantage due to the moving nature of the wall, momentarily halts the wall for a round.
Any character who is standing in a spot that the wall moves into must make a DC 15 Dexterity saving throw or be pierced by the spikes, taking 2d6 piercing damage. When the wall reaches the puzzle and there is no more room between the spiked wall and the far wall, the damage increases to 4d6 piercing damage and 4d6 bludgeoning damage as anybody standing in this location is crushed between the two walls. The trap resets after one hour.
The Solution
When a new position is made active by rotating the outer circle, the color of the puzzle changes and the dots within the circle appear or disappear. The characters must rotate the circle until the next set of dots appear and then use their finger to connect the new dots to the pattern that's been drawn so far. The table below explains the color and dots for each available position.
| Circle Position | Puzzle Color | Dots Show up After | Sequence of Positions | Number of Dots Visible |
|---|---|---|---|---|
| 1 | Pale Blue | Orange | 5 | 1 |
| 2 | Orange | Yellow | 4 | 2 |
| 3 | Pink | Black | 7 | 1 |
| 4 | Brown | Red | 2 | 1 |
| 5 | Green | Pink | 8 | 3 |
| 6 | Black | Pale Blue | 6 | 2 |
| 7 | Red | Initial Position | 1 | 2 |
| 8 | Midnight Blue | Purple | 10 | 1 |
| 9 | Yellow | Brown | 3 | 3 |
| 10 | Purple | Green | 9 | 2 |
From the puzzles initial orientation, no dots will appear within the circle until it is rotated to the 7th (red) position. At that point, two dots appear. A line must be drawn connecting the dots, and they will pulse in recognition of a correct move. After the first connection is made, the circle must be rotated.
No new dots will show up until the circle is moved into the 4th (brown) position, at which point one addition dot becomes visible. Once the brown dot is connected to the original two dots, the puzzle pulses to acknowledge the correct move. The circle must then be rotated to the 9th (yellow) position, which reveals three additional dots that must be connected. This process repeats until all 10 positions have been activated and their dots connected.
The correct sequence for rotating the circle into the active position in order to reveal and connect the dots is:
- 7th (red)
- 4th (brown)
- 9th (yellow)
- 2nd (orange)
- 1st (pale blue)
- 6th (black)
- 3rd (pink)
- 5th (green)
- 10th (purple)
- 8th (midnight blue)
Development
Once all the connections are made, the puzzle glows a bright white, the humming becomes louder, and it explodes in a burst of light, momentarily blinding the characters. When the light fades, there is a doorway that has opened in the wall at the end of the tunnel.

The Colored Triangle
This puzzle is designed to be the lock on the next door the party needs to open. The puzzle is placed at the far end of a large cavern with a tall lava fall. The lava then flows across the chamber and out through a hole in the rock towards the previous tunnel. The metal door is in the northwest corner of the cavern and the characters will immediately notice that there are three different large golems hanging thirty feet off the ground from chains attached to the ceiling.
The Puzzle
This particular puzzle requires good analytical skills and focus. The colored triangle is a different kind of combination lock in that every possible combination must be discovered in order to solve the problem. As the characters approach the door, read or paraphrase the following:
The party needs to carefully analyze and track the different combinations of peg movement in order to find all the possible variations. Each peg can only be moved one time along the groove, at which point it becomes immobilized until a new or repeated pattern is created. After each peg has been moved once, either a new combination is found and one of the metal bars unlocks, or a known combination is recreated which does not unlock any additional bars. In either scenario, the pegs return to their original positions for another attempt.
- At the top of the triangle is the blue peg, which can be moved in two directions: down to left (putting it in the bottom left corner) or down to the right (putting it in the bottom right corner).
- In the bottom right corner is the red peg, which can be moved in two directions: up (putting it at the top) or to the left (putting it in the bottom left corner).
- In the bottom left corner is the yellow peg, which can be moved in two directions: up (putting it at the top) or to the right (putting it in the bottom right corner).
Raising the Stakes
If the characters repeat a completed combination, a golem is released from its chains. Below is the order in which the golems are released, one after each repeated combination. After three combinations are repeated, there are no additional golems to be released. If the characters harm any of the golems while they are hanging above, they will activate and attack.
Encounter
After the first repeated combination, the first golem activates and drops to the cavern floor and attacks. This is a Mage Hunter Golem (TCSR p.242).
If the characters repeat a second combination, the second golem activates and drops to the cavern floor and attacks. This golem is a Platinum Golem (TCSR p.243).
If the characters repeat a third combination, the final golem activates and drops to the cavern floor and attacks. This is a Cobalt Golem (TCSR p.240). Use Map 12.6 for the encounter battle map.

Map 12.6
The Solution
To unlock this door, the group must move the pegs in different directions. There are eight possible movement combinations, each representing one of the eight bars keeping the door locked. When a new pattern is reached by moving the pegs, the bar slides open, and the pegs reset to their original positions. In order to unlock the door entirely, each of the eight possible patterns must be created. The table below lists the eight possible combinations required to unlock all eight metal bars and open the door.
| Solution | Top (Blue) Direction | Right (Red) Direction | Left (Yellow) Direction |
|---|---|---|---|
| 1 | Down Right | Left | Right |
| 2 | Down Right | Left | Up |
| 3 | Down Right | Up | Right |
| 4 | Down Right | Up | Up |
| 5 | Down Left | Left | Right |
| 6 | Down Left | Left | Up |
| 7 | Down Left | Up | Right |
| 8 | Down Left | Up | Up |
Development
Unlocking and opening the large metal doors reveal a stone staircase leading upwards. The stairs travel upwards for roughly 200 feet before ending at a small landing that leads through an open archway into a large rectangular room filled with pillars and four identical doors embedded in the far wall. When all the characters walk through the archway, a metal door slides down from the ceiling, blocking off the stairs they just walked up.
Pillar Touching
This room contains several doors to be opened, and the pillars within the room hide the method of opening each door. What lies behind the doors? Well, that remains to be seen…
There are eight identical columns in this room, arranged in a symmetrical pattern. When the party enters the room, read or paraphrase the following:
Each of the doors is magically sealed, with no detectable handle or lock. The trick to opening each of the doors is touching the correct pillars simultaneously. The group discovers this by examining the pillars and interacting with them. Once they realize that contact with the pillars is required, they must also find the right combination of pillars for each door, as well as recognize that the pillars must be touched simultaneously (meaning a different character will have to touch each one at the same time).
Touching a pillar results in the pillar warming up. Touching multiple correct pillars will increase the amount of heat expended by each pillar, although that sensation never becomes uncomfortable or causes damage. When one pillar is already being touched, touching subsequent pillars that are not part of a related pattern has no effect. When the correct pillars are all touched at the same time, they glow with a brief flash of green light and the corresponding door slides open.
Hints
For players having trouble solving this puzzle, the following clues can be provided by the DM to help guide them towards a solution:
- A successful DC 12 Investigation or Perception check of the columns reveals that there are faded handprints visible on all of them, which hints at others before them touching the columns.
- A successful DC 15 Arcana check of the doors reveals that they are certainly magically locked and that it is most likely something found in the room itself that can be used to unlock them.
- A successful DC 17 Arcana or Investigation check done while one or more of the pillars is being touched by somebody concludes that the sequence of the columns being touched is not as important as which ones are being touched simultaneously.
Raising the Stakes
Behind Door C is the correct chamber that will lead on to the Cloaked Serpents cult hideout. Behind the other three doors are magically contained enemies that will attack anyone who opens their door. This trap is designed to weed out the weak or anyone foolish enough to try to enter their hideout. Behind the correct door is an Astral Panther (Appendix B) who will attack anyone not wearing a Cloaked Serpent holy symbol.
Encounter
Behind each door in this chamber are creatures that will attack the party. When Door A is opened, 2 Sand Assassins (Appendix B) come whirling out of it. Behind Door B are 10 Scorch Spiders (Appendix B) that skitter quickly through the door. When Door D is opened, 3 Molten Oozes (Appendix B) squelch through into the chamber.
Behind Door C is the Astral Panther (Appendix B). When the door opens, the panther begins invisible, and the characters don't think there is anything in here. It begins combat with its Ethereal Pounce action. Entering from the Ethereal Plane subverts magical alertness, such as from a Weapon of Warning. Use Map 12.7 for the encounter battle map.
Solution
Each door is opened by having characters simultaneously touch the three pillars that form a line between the door and the opposite wall. In other words, if a character moves in a straight line away from the door they want to open towards the opposite wall, then the first pillar they encounter is the first in the sequence and moving further from the door will lead to the next two in the connection. See the table below and illustration to the right for the full list of combinations to open each door.
| Door | First Pillar | Second Pillar | Third Pillar |
|---|---|---|---|
| A | 2 | 3 | 4 |
| B | 1 | 2 | 3 |
| C | 5 | 6 | 7 |
| D | 6 | 7 | 8 |
Development
Once the characters have opened up Door C and defeated the Astral Panther, a small wooden door sits closed in the far wall of this small chamber. The door is built from a solid piece of dark redwood. The door has an intricate holy symbol of the Cloaked Serpent carved into its face. The carvings are filled with gold filigree to contrast with the dark wood. This door is unlocked and opens to reveal a narrow stone staircase that leads upwards to the lair of the Cloaked Serpent cultists.
From the Adventures of Bramble Tickletoes III & Company:
The party make their way quite skillfully through these challenges as they progress to the cultists' lair. Bramble accurately completes the Triangle Puzzle without any repeated combinations, preventing the activation and release of any of the golems.
As they worked to solve the Pillar Touching Puzzle, the four fought well together against the creatures released from the decoy doors. When they finally fight the Astral Panther, Maoki gets the killing blow by sliding beneath it with his displacer armor activated and gutting it with Broken Fang.


Map 12.7
Serpent's Head Cult Lair
This is the Cloaked Serpent cultists' stronghold. Over the last decade, taking advantage of the destruction of Serpent's Head by Thordak, the Cinder King, the cultists of Zehir constructed this hideout and temple in secret. They hid the main entrance in the abandoned Serpent's Head forge. When the fire giants arrived, the cultists carved out the side entrance and relied on the giants to further obfuscate their lair. The fire giants are unaware of their presence and the traps and puzzles between the forge and this lair were designed to be both a barrier between them and the giants in the event the giants discovered their presence. It also works to test the resolve of new cultists.
See Map 12.8 for the complete layout of the Serpent's Head Cultist Lair.
Z1. Entrance Chamber
The narrow stone steps zigzag upwards for a few minutes before a final flight leads straight into a small chamber. A black marble altar sits opposite the staircase, flanked on either side by green stone pillars. The pillars have been carved with various iconography of Zehir, the Cloaked Serpent. This space is designed for cultists that arrive through the tunnels to cleanse themselves for entry into the rest of the lair. A basin with water sits atop the altar, along with a bottle of what looks like green-tinted oil. A character that makes a successful DC 14 Religion check will recognize this as a vial of holy oil.
Encounter
There are two humanoids that guard the door into the rest of the lair. Upon seeing the characters, one will pull a cord next to them, alerting other cultists in the lair. Then, both will attack the party. The first is an Arcane Knight (MME p.310) and the other is a Hexblade (MME p.318).
Z2. Storage Room
This small chamber is used for storage. It also acts as a hallway between the entrance, sleeping quarters, and main hall. Iron ingots used for forging weapons are stacked against a wall. Barrels, wood, tools, and other various supplies are stacked in the southwest corner. There is a small, locked wooden chest on the floor in the corner nearest the iron ingots.
Treasure
The wooden chest is locked but can be opened with a successful DC 15 Thieves' Tools check. Inside are four finely made snake daggers (Appendix A) with serpent iconography. There is also a small leather pouch filled with 500 gp worth of small emeralds.
Z3. Hallway
The north door from the storage room opens into this hallway. A small brazier in the middle illuminates the hallway with a soft reddish orange glow. Along the eastern side of the hallway hang a number of tapestries depicting various renditions of the Cloaked Serpent. Two doors are set into the western wall, the nearest only 10 feet from the storage room, and the other at the far end of the hallway.
Z4. Sleeping Quarters
This small square room holds three sets of bunkbeds. There are a few small personal items set atop each bed's nightstand. There is nothing of value in this chamber. Depending on the time of day the characters reach the cultists' lair, it is possible a few cultists may be sleeping in here.
Z5. Main Hall
One of the doors in the storage room opens into this massive chamber. There are four other doors out of this chamber, one in the center of the north wall, two spread out along the south wall, and one embedded in the east wall. The door set into the center of the north wall is made of stone and intricately carved with the Cloaked Serpent's holy symbol. The other three doors are all much simpler wooden doors that match the doors seen in the storage room. As the characters enter the chamber, read or paraphrase the following:
If one of the guards in the entrance chamber was able to pull the alarm cord, this room currently holds a significant number of cultists waiting to attack the party. They have mostly gathered here, and in area Z13, where they will give their lives to keep the characters away from their temple and ritual chamber.
Encounter
Moving about the chamber are 3 Remnant Cultists (TCSR p.252) dressed in green robes. There is also a Remnant Chosen (TCSR p.251) dressed in black robes. Posted around the room alongside the doors are 4 Arcane Guards (MME p.310).
Treasure
Each green robed cultist and the Chosen carry a snake dagger (Appendix A).
Z6. Forge of Zehir
This chamber is clearly a forge. A large pool of lava acts as the heat source for the metal with four anvils arranged in a semi-circle around the forge. Two pools of water have been built into the corners of the room nearest the forge. Additionally, a circular pool of water sits between the two doors with a large brazier at its center helping to illuminate the chamber. Stone boxes sit along the north wall filled with chunks of iron ore that are being used to forge weapons. There are two dwarf-sized suits of armor standing resolute along either side wall.
Two worktables sit to the left and right side of this chamber and have a few finished weapons sitting on them. This is clearly where the snake daggers the characters have been finding on cultists were forged. The Cloaked Serpent cultists have a few dwarf members that have been tasked with creating these weapons.
Encounter
There are 4 dwarven Battle Smiths (MME2 p.271) working at the anvils. The 4 suits of armor are Iron Defenders (MME2 p.271) that will animate at a simple command from the dwarfs.
Treasure
Sitting atop the worktables in here are 6 newly forged snake daggers (Appendix A). In addition, there is a small wooden box set on a shelf that contains 200 gp worth of small emeralds.
Z7. Mage Office
Through the eastern door of area Z5, a series of narrow corridors lead to a variety of small chambers. Both doors into this office are locked with arcane locks, requiring a successful DC 25 Thieves' Tools check to unlock. As the door opens, read or paraphrase the following:
In this chamber work Lord and Lady Cassalanter. They are powerful mages that prefer the behind-the-scenes work to the fighting. They have been tasked with creating Magic Scrolls of the teleportation circle spell. These are used by the more prominent cult members to return to the lair without having to sneak past the fire giants or traverse the tunnel system.
Encounter
The two mages are Lord Victoro Cassalanter (Appendix B) and Lady Ammalia Cassalanter (Appendix B). Once one of them reaches approximately half health, they will attempt to dimension door away to area Z13 to protect the entrance into the Cloaked Serpent Temple.
Treasure
Characters that spend time searching this room and succeed on a DC 15 Investigation check will locate a Cloak of Shadows (Appendix A), Glamoured Studded Leather Armor, and Rod of Rulership on Victoro's body. The bookcases hold various magic themed books ranging from potion ingredients to writing scrolls. On Ammalia's body the characters will find a Ring of Protection.
A locked drawer in Ammalia's desk can be unlocked with a successful DC 18 Thieves' Tools check and will find 4 Scrolls of Teleportation Circle within. On each desk is an unfinished scroll, each about half complete.
A character that makes a successful DC 20 Investigation check will find a hidden compartment under Lady Cassalanter's desk. Inside is a large ornate key. It has a handle made out of emerald with an obsidian key head. This key is used to unlock the temple door in Z13. The key is magically attuned to the door and a character that uses detect magic will learn its school of magic is abjuration.
Z8. Empty Room
This chamber currently holds a brazier of magma in its center, illuminating the chamber with reddish orange light. Otherwise, the chamber is empty.
Z9. Small Altar
This room is similarly adorned to area Z1, an entrance chamber with a black marble altar. This space is designed for cultists that arrive via the teleportation circle in area Z10 to cleanse themselves for entry into the rest of the lair. A basin with water sits atop the altar, along with a bottle of green-tinted oil. A character that makes a successful DC 14 Religion check will recognize this as a vial of holy oil.
Z10. Teleportation Circle Chamber
This chamber is locked with an arcane lock. Unlocking the door requires a character to make a successful DC 25 Thieves' Tools check or use a knock spell or similar magic. This room is small, only about 15 feet across. A 10-foot-wide ring of runes etched into the floor glow softly with a pale blue-white light. A character that makes a successful DC 15 Arcana check will recognize this as a circle of teleportation.
Contact from Arcanist Allura Vysoren:
At some point while the group are fighting their way through the cultists' lair, Allura will contact the group via sending. She will inform them that the ritual will become permanent after seven days, and at that point, the planar melding between the Elemental Fire Plane and the Material Plane will be irreversible.
Z11. Storage Chamber
Through the eastern door of area Z5, a series of narrow corridors lead to a variety of small chambers. Following the left hallway from area Z5 leads into another storage chamber. This one appears to be used for food storage. Metal shelves line the walls with crates of various foods lined up underneath. There are even two large wine barrels placed against the east wall of the room. The north door that leads to area Z12 is locked and requires a character to make a successful DC 20 Thieves' Tools check to unlock it.
Z12. Cult Leaders' Bed Chambers
The north door from area Z11 leads up a short flight of stairs to a much larger chamber. In here, seven ornate beds sit against the walls. This bed chamber is clearly designed for the higher ranked leaders within the Cloaked Serpent cult. Each bed has a nightstand next to it with a few personal trinkets sitting atop or within. Between two beds hangs a medium sized painting of a family. Characters that have been inside the Cassalanter Villa in Kymal can make a successful DC 15 History check to recognize this as a painting of the Cassalanter family with their three children. Other than a few personal items, there is nothing of value in this chamber.
Z13. Elemental Guardian Chamber
This massive cavern is incredibly hot. Characters that enter this chamber must succeed on a DC 7 Constitution saving throw or gain 1 level of exhaustion. Characters wearing heavy armor make this save at disadvantage.
Encounter
As the group enters this cavern and reach the central platform, a massive Magma Elemental (Appendix B) climbs up out of the lava to stand atop the platform. If the Cassalanters were able to successfully dimension door away from area Z7, they will be standing upon the stone ledges to either side of the obsidian door at the far end of the cavern.
Lair Actions. When the characters reach the central platform, the lava bubbles up and flows over the path back to the door they came through. This is when the magma elemental claws its way up onto the platform. Every round, on Initiative Count 20, the lava spreads inward, covering increasingly more of the platform. This will cause the characters to move closer to the platform's center.
Trap
A few stone steps carved into the ground lead up to a large ornate obsidian door with an ornate keyhole with a thin circle of inlaid emerald around it. The key for this door is located in area Z7.
If the party did not locate the key, the door can be unlocked with a successful DC 25 Thieves' Tools check. However, unlocking the door without the key causes a poison trap to be sprung. Any characters standing within 20 feet of the door must make a DC 17 Constitution Saving throw. Any character that fails the saving throw suffers 8d6 poison damage and is poisoned for an hour. On a success, characters take half the damage and are not poisoned.
Conclusion
After defeating the Cloaked Serpent cultists in their lair and reaching the entrance into the Grand Cathedral to Zehir, the characters should reach 19th level.
From the Adventures of Bramble Tickletoes III & Company:
When the party reached the cultists' lair, they began fighting their way through the enemy forces. Kayne and Maoki recognized one of the Arcane Guards as Thrynan, the bandit that stole their horse near the Silvercut Crossroads after providing them with information about Ruhn-Shak. During the fight, he ran off to warn the Cassalanters about the intruders. The Remnant Chosen wearing black robes in the main chamber is the same cult leader the group faced beneath the Cassalanter Villa.
Eventually, the party made their way to the Elemental Guardian Chamber to fight the magma elemental and the Cassalanters. During the fight, Bramble uses Psychic Scream on Lord Cassalanter. The spell killed him, and in doing so caused his head to explode. Lady Cassalanter screamed in fury and began targeting him. She used fire storm to knock him unconscious. Maoki managed to heal Bramble with a healing potion, but Lady Cassalanter refused to relent. She used a divine word to kill Bramble. As Maoki and Kayne fought off the magma elemental, Lia targeted Lady Cassalanter which incurred her wrath, and she cast banishment on Lia. During the mayhem, Kayne was able to use revivify on Bramble, bringing him back to life.
Ultimately, Bramble succeeded on a second divine word, staving off death, and opened an arcane gate allowing Kayne and Maoki to access her location. With a final arrow through the throat, Lia managed to kill Lady Cassalanter.
Stairs up from Lava Tube
Map 12.8
Grand Cathedral to Zehir
The obsidian door swings open to reveal a rectangular chamber. A grand staircase at the opposite end ascends out of sight. The left and right walls are decorated with fine, ornate tapestries depicting various representations of Zehir, the Cloaked Serpent.
The stairs across the way ascend 50 feet up into a well-lit chamber. A gray-white marble platform extends out over a slowly flowing river of lava. The lava flows roughly 30 feet below. The marble platform is segmented with three-foot gaps open to the lava below that must be stepped across to journey from one segment to the next. The platform leads to a massive ornate snake head with glittering emerald eyes. As characters step forward, it becomes clear that it isn't just an ornately carved snake head at the center, but rather, an entire snake's body carved out of the stone, coiling around the altar below the marble platform. A humanoid projection created by the red dragon, Igbalneum, stands expectantly at the far end of this chamber.
As the characters reach the top of the stairs, read or paraphrase the following:
A long marble platform extends over a lake of lava, leading towards a massive ornate snake head with glittering emerald eyes. The head of the snake is carved out of gray-brown marble. Lava pours out of its mouth, falling to the river below. Standing in front of the altar is a well-dressed humanoid man, wearing red robes with a green sash and black cords. He turns and smiles at you as you enter the chamber.
"I commend you on your effort. You know, you all smell so familiar...ahhhh yes, I remember. Well, you didn't stop me then, nor will you stop us now. My pet has been waiting for something to play with. Good-bye, you will not leave this chamber alive."
The man smashes a large gem against the stone floor. You catch a glimpse of the gem in the brief second before it smashes. It appears black with a kaleidoscope of colors dancing across its face. Where it smashes a whirlwind of chaos emerges as the man steps back through the stonework of the snake's head and disappears.
Encounter
The creature that emerges from the shattered gem is a Chaos Elemental (Appendix B). A chaos elemental's body is a primordial tempest of all four elements, constantly swirling and fighting each other, creating hybrid elements that quickly dissolve into the four elements again. Anywhere from four to twelve arms may emerge from the roiling elemental body, with each arm formed almost entirely out of one of the four elements, usually at least one arm for each element. A chaos elemental contains the element of air but is too heavy with other elements to be able to fly. Use Map 12.9 for the encounter battle map.
Entrance to the Ritual Chamber
The entrance into the ritual chamber is underneath the marble platform. The characters must jump down onto the snake's body and walk underneath the platform. There is a door built into the altar's platform, made from solid emerald. The lock on this door is extremely intricate and requires a successful DC 30 Thieves' Tools check to unlock.
From the Adventures of Bramble Tickletoes III & Company:
After a long rest in the Elemental Guardian Chamber, the party awake near dawn on the 2nd of Brussendar, three days before the ritual is set to complete. The group make their way into the Grand Cathedral to Zehir and come face to face with the Chaos Elemental. The creature proves more than the party was bargaining for, so Bramble teleports them back to Kymal to regroup.
While in Kymal, they see the destruction caused by the volcano's continued presence and bombardment by elemental attacks. They leave a letter in City Hall for Keyleth as well as a scroll of *teleportation circle in case she finds something or can send help.
Bramble then uses a second scroll of teleportation circle to recommence their battle with the chaos elemental. As the battle commences, Bramble used an Arcane Gate to allow Lia to reach the carved snake's head to investigate. Unfortunately, the Chaos Elemental has tremor sense and blindsight so knew where she was and attacked. Lia quickly used Bramble's Wand of Secrets to determine there was a hidden door below the platform. Then, the elemental flung her off the platform and she landed in the lava as the rest of the party went through the arcane gate and ran down the snake's body towards the door.
Lia scrambled out of the lava with Maoki's help as Bramble used a knock spell to open the emerald door. The party rushed through but unfortunately, the elemental also clambered through before Kayne could close the door. The group continued to fight the creature until Bramble managed to succeed in a banishment spell. The group then short rested in this tunnel before heading into the final ritual chamber.
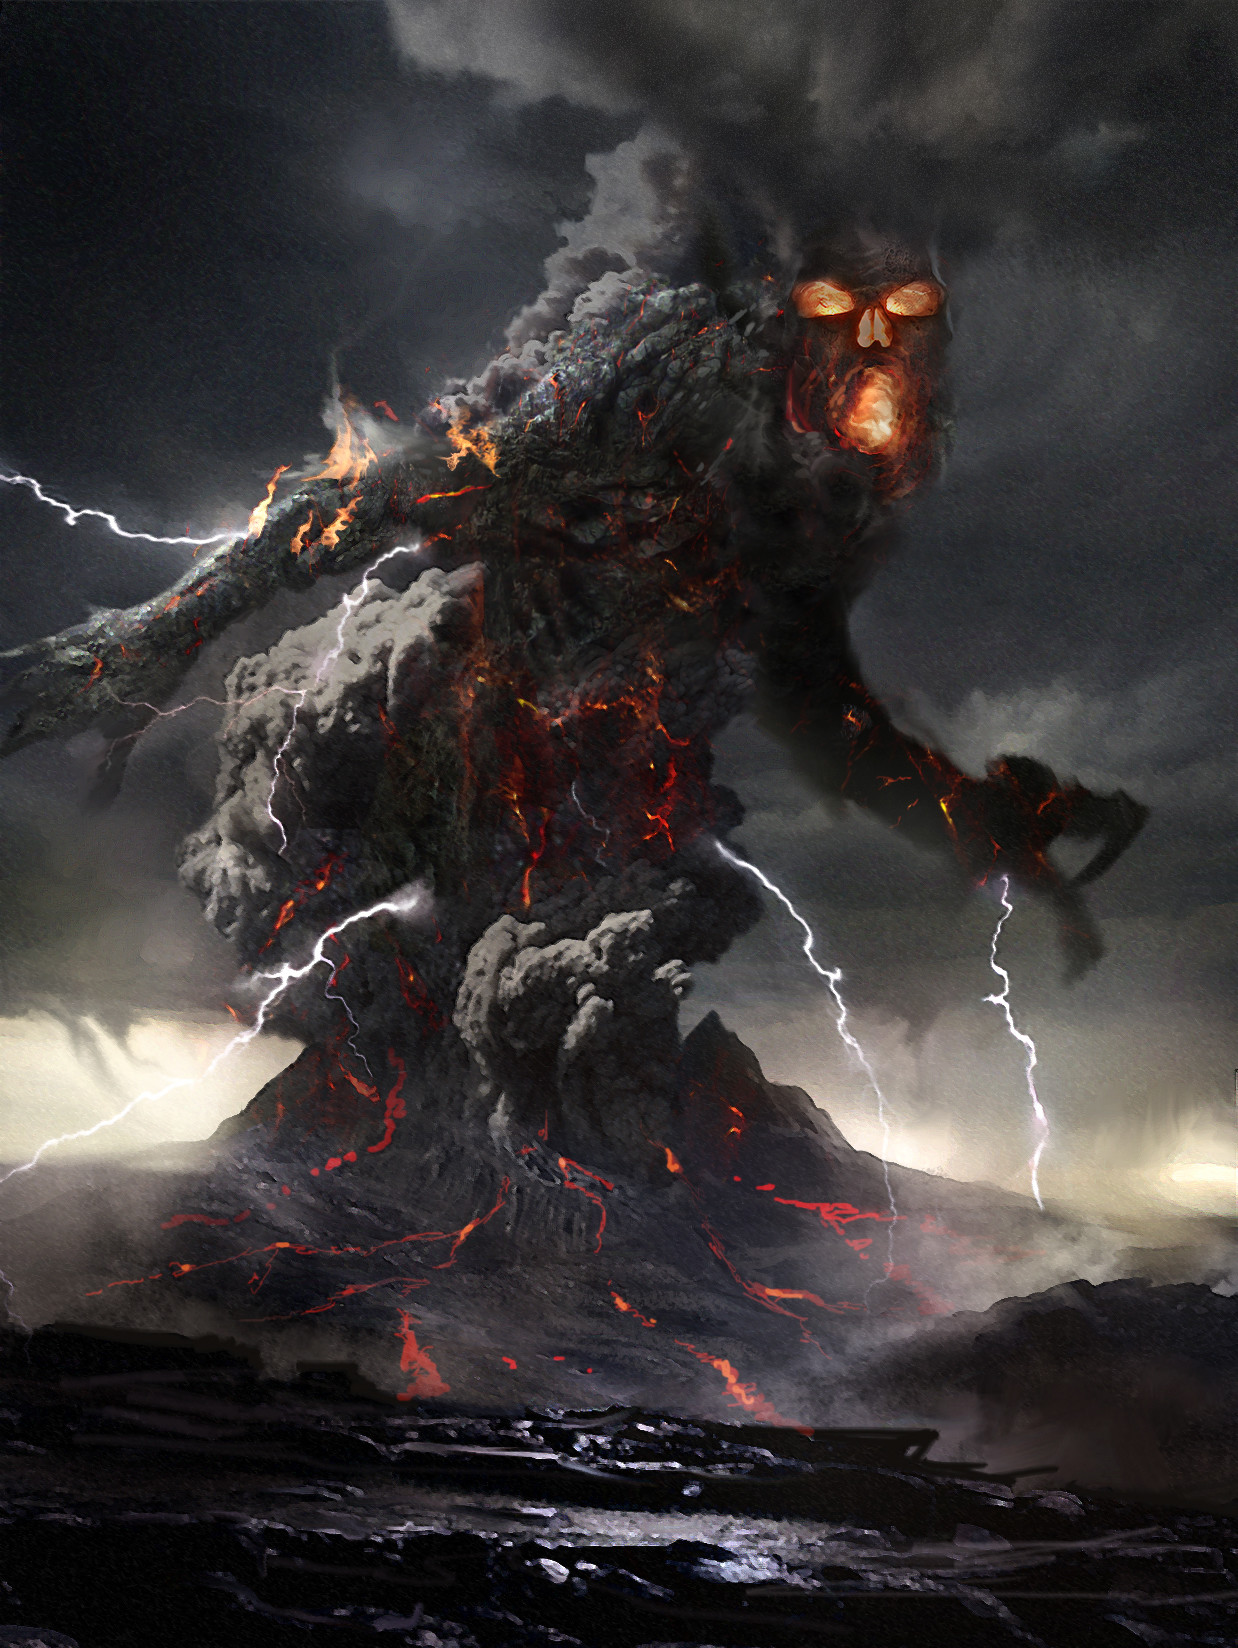

Map 12.9
Volcano Ritual Chamber
Beyond the emerald door lies a carved tunnel that extends for a few hundred feet. A red glow can be seen in the distance, illuminating the mouth of the tunnel.
This ritual chamber is a massive volcanic cavern. Stone pillars jut out of the bubbling, flowing river of lava, rising to a height of 20 - 30 feet. The tunnel deposits characters slightly above the height of the pillars, so as they emerge, they are looking down slightly over the rest of the cavern. Atop three of the stone pillars sit large chunks of assorted color rocks, glowing slightly. These chunks of rock are pieces of different titan seeds floating and slowly revolving above runic circles. There are pieces of blue, red, and green titan seeds.
As the party reaches the mouth of the tunnel overlooking the ritual chamber, read or paraphrase the following:
Lava bubbles throughout the chamber, slowly flowing around a number of rock outcroppings. The mage in red robes you saw in the previous temple space stands atop a cliff across the cavern. His face clearly displays fury at your reappearance.
His voice echoes across the chamber: "You have worn thin my patience. So be it, I shall deal with you myself!"
As he says this, his body shimmers as an apparent illusion dissolves as he jumps from the rocky cliff. Accompanying the man's jump, the sound of loud flapping wings fills the cavern as the illusion finishes dissolving to reveal a massive, red dragon flying through the air above you.
Encounter
The dragon flying towards the party is Igbalneum, an Ancient Red Dragon (MM p.97). The dragon starts the battle with 812 hit points. Information regarding the dragon's lair actions, the titan seed's ability to heal Igbalneum each round, and possible ally arrival during the fight can be found on the next page. Use Map 12.10 for the final encounter battle map.
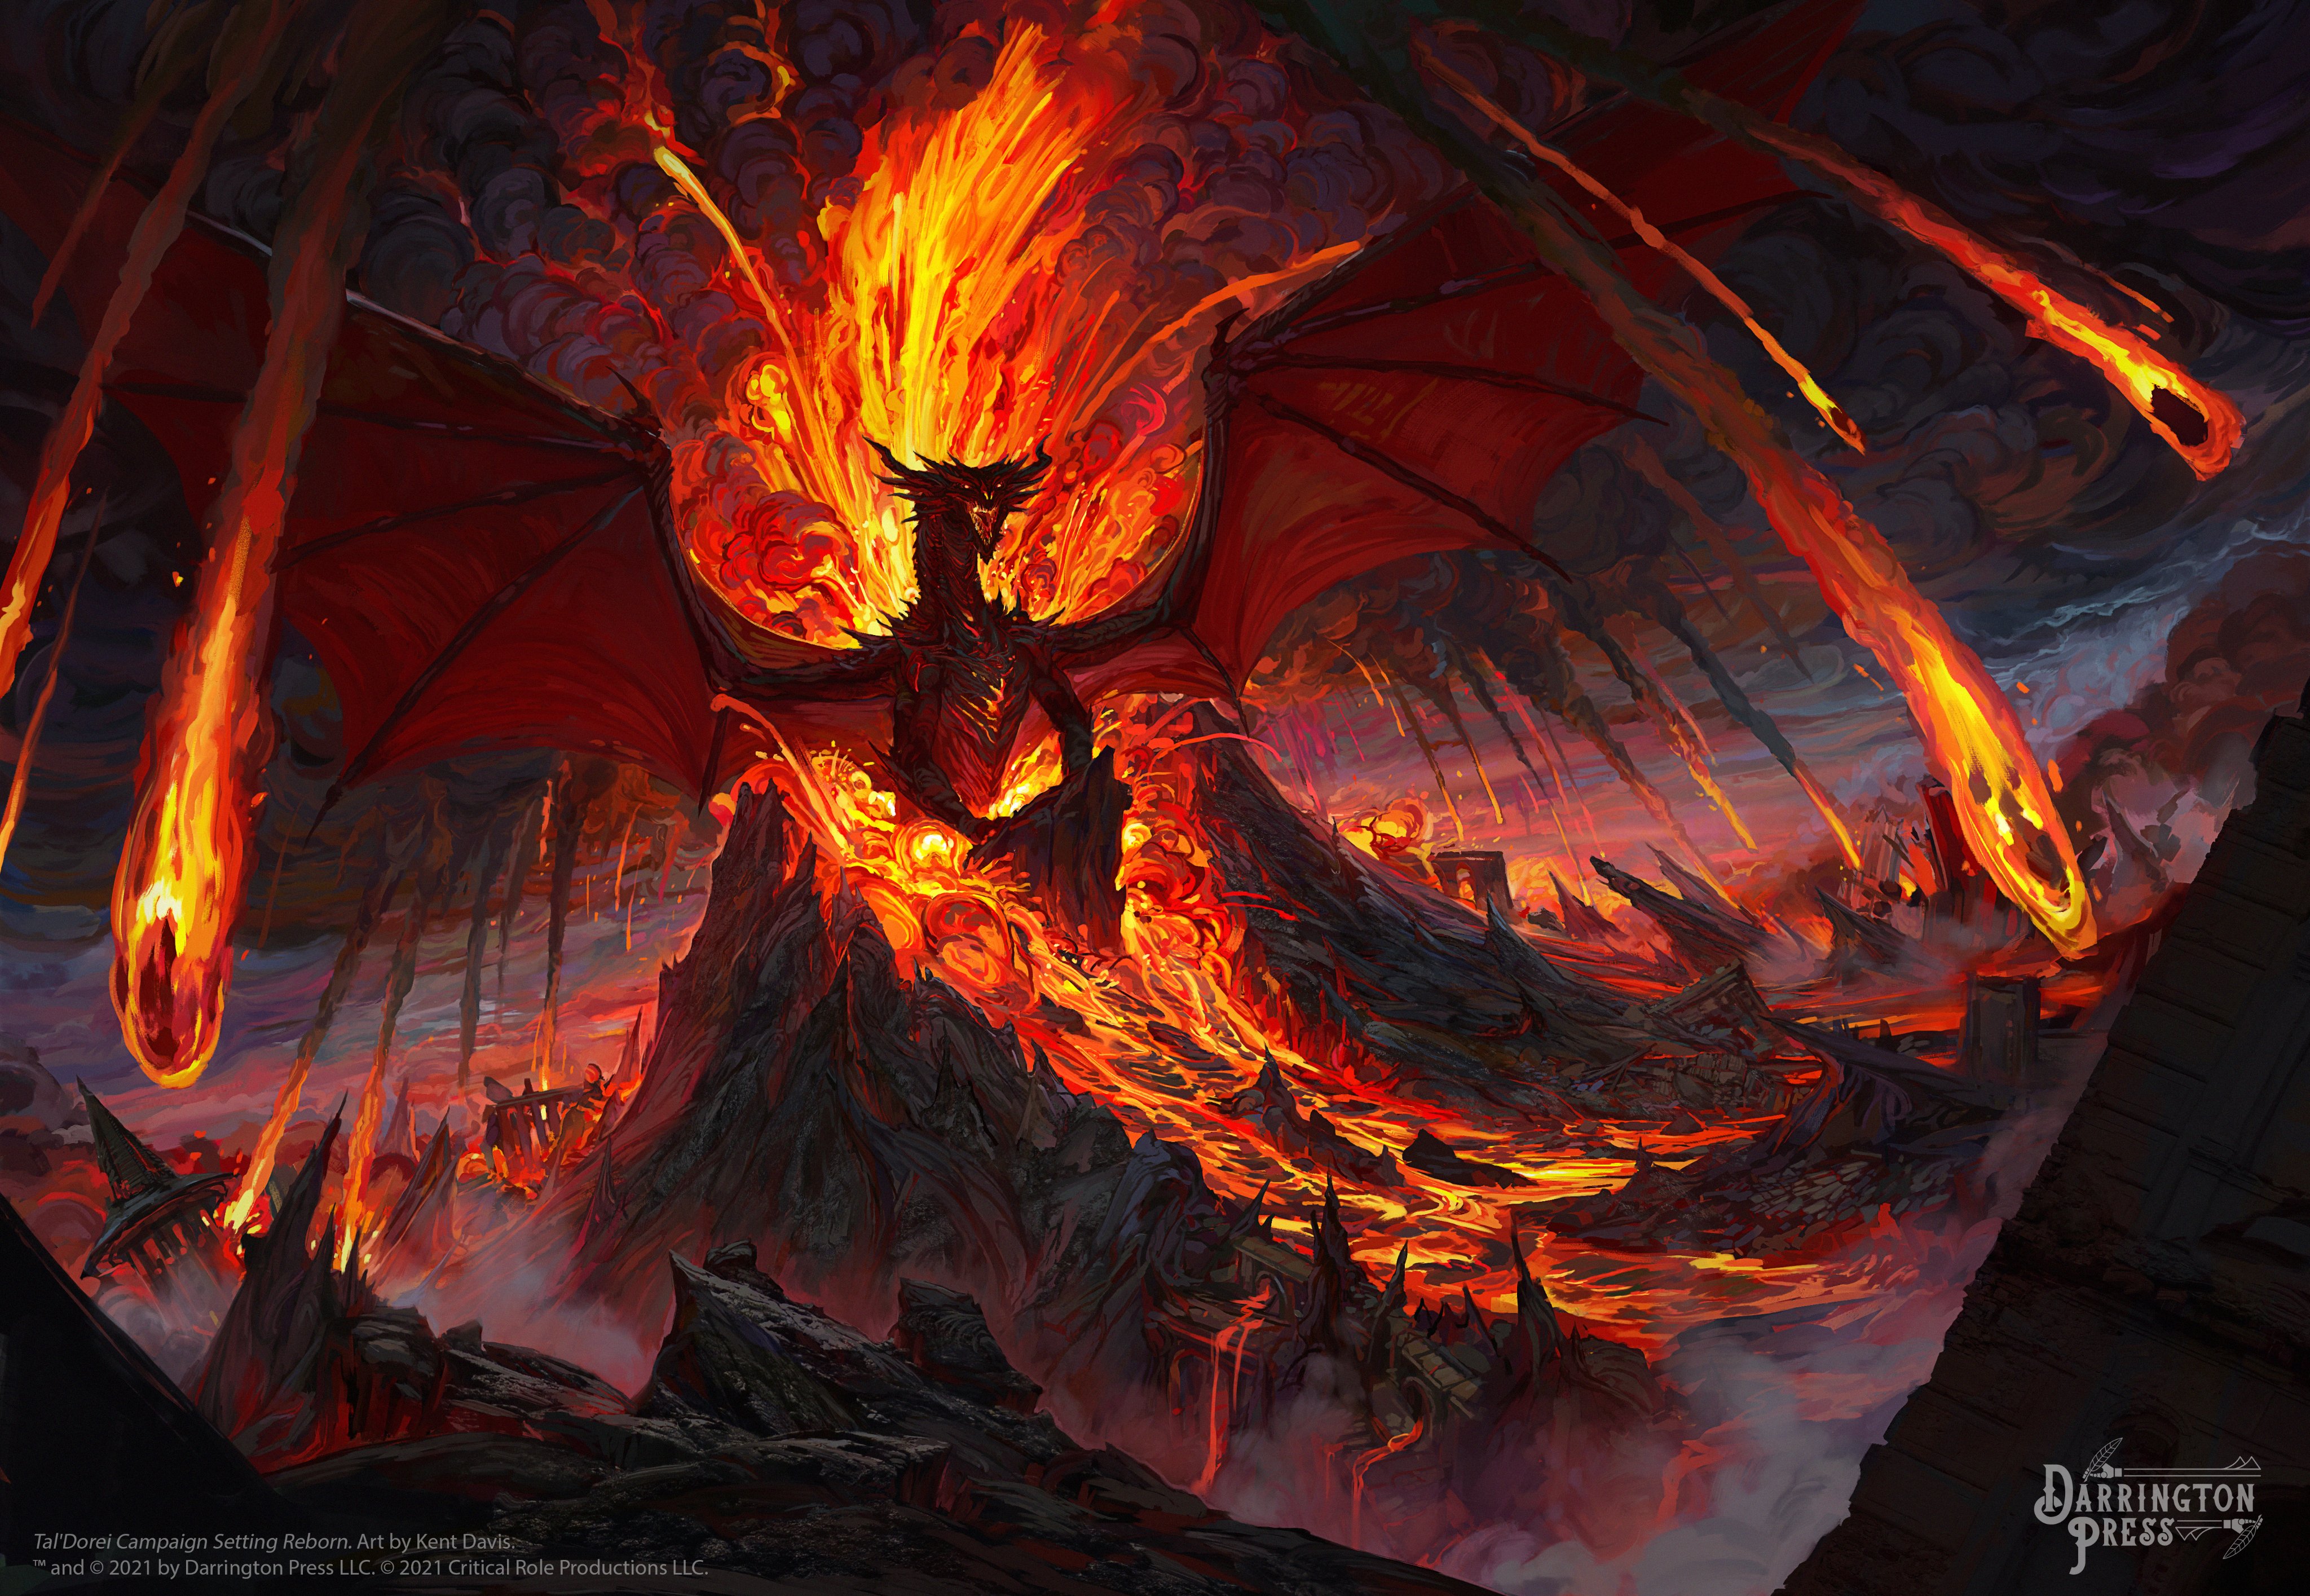
Ritual
These chunks of titan seed are what power the planar incursion ritual. In order for the ritual to be destroyed, these stones must be destroyed. Additionally, the red dragon, Igbalneum is able to siphon some of their power and use them to heal throughout the battle.
- At the start of Igbalneum's turn, each titan seed still functioning heals the dragon by +15 hit points.
Each titan seed has an Armor Class of 20 and 300 hit points. If a titan seed falls below 200 hit points, the healing it can provide Igbalneum falls to only +10 hit points. If a titan seed falls below 100 hit points, the healing it can provide Igbalneum falls to only +5 hit points. The healing from any particular titan seed seizes if it is destroyed.
After 10 Rounds. This battle against Igbalneum is an incredibly deadly fight. Keyleth, Voice of the Tempest (TCSR p.263) will arrive after the first 10 rounds of battle with Pike Trickfoot, Chosen of the Everlight (TCSR p.269). They will assist the party in their fight against the dragon in whatever ways they can.
Lair Actions
On initiative count 20 (losing initiative ties), the dragon uses a lair action to cause one of the following effects and can't use the same effect two rounds in a row:
- Magma erupts from a point on the ground the dragon can see within 120 feet of it, creating a 20-foot-high, 5-foot-radius geyser. Each creature in the geyser's area must make a DC 15 Dexterity saving throw, taking 6d6 fire damage on a failed save, or half as much on a success.
- A tremor shakes the lair in a 60-foot-radius around the dragon. Each creature other than the dragon on the ground in that area must succeed on a DC 15 Dexterity saving throw or be knocked prone.
- Volcanic gases form a cloud in a 20-foot-radius sphere centered on a point the dragon can see within 120 feet of it. The sphere spreads around corners, and its area is lightly obscured. It lasts until initiative count 20 on the next round. Each creature that starts its turn in the cloud must succeed on a DC 13 Constitution saving throw or be poisoned until the end of its turn. While poisoned in this way, a creature is incapacitated.
- Searing heat spreads out in a 15-foot-radius sphere centered on a point the dragon can see within 120 feet of it. Any creature that enters the affected area or starts its turn there must make a DC 15 Constitution saving throw, taking 3d6 fire damage on a failed save, or half as much damage on a successful one. The heat lasts until initiative count 20 on the next round.
Treasure
A short tunnel behind where Igbalneum transformed leads into a small cavern roughly 60 feet across. It is filled with piles of coin and other items. This is the dragon's treasure hoard. The items the characters can find are organized below by different Investigation checks of increasing difficulty. If a character uses a detect magic spell or similar magic, most of the magic items will be easy to locate.
DC 15 Investigation Check. The characters will find 2,000 pp, 8,000 gp, 7 Potions of Healing, a Potion of Heroism, a Horn of Blasting, a Chime of Opening, and a Wand of Wonder.
DC 20 Investigation Check. The characters will find an additional 2,000 pp, 4,000 gp, 5 Greater Healing Potions, a set of Sending Stones, a set of +1 Studded Leather Armor of Fire Resistance, a Javelin of Lightning, and a Potion of Spell Recovery (GS p.100).
DC 25 Investigation Check. The characters will find an additional 2,000 pp, 3,000 gp, 3 Potions of Superior Healing, a Manual of Bodily Health, and 3 Arrows of Slaying. There is one arrow focused on dragons, one focused on aberrations, and one on fiends.
DC 30 Investigation Check. The characters will find an additional 2,000 pp, a Manual of Quickness of Action, a +3 Shield, a +2 Cloak of Protection, and an Ioun Stone of Insight.
Conclusion
If the characters manage to destroy the three titan seeds, the planar incursion ritual to meld a section of the Elemental Plane of Fire with the Material Plane is ended. The portal that opened around the volcano will close, removing its influence from the Material Plane.
Over the days following the Zenith, as the planes drift apart again, the elemental influence left behind will slowly dissipate. It will take months, or even years to rebuild the damage done to Kymal.
At the conclusion of the campaign, with Kymal saved from complete destruction and the prevention of an irreversible melding of the Elemental Plane of Fire with the Material Plane, the characters should reach 20th level.

Map 12.10
From the Adventures of
Bramble Tickletoes III & Company
Final Battle with Igbalneum
As the party entered the ritual chamber, the fight began as Igbalneum used its fire breath on them all before they could scatter. Bramble countered with his 9th level prismatic wall to encompass the dragon. It took the dragon a couple of rounds to escape the prismatic bubble. It emerged blinded and furious and began targeting Bramble in revenge. Meanwhile, Lia, Maoki, and Kayne focused their efforts on destroying the titan seeds.
During the battle, Bramble used Otto's Irresistible Dance on the dragon which worked for a few rounds, until its breath weapon knocked him unconscious. The dragon seized the opportunity to kill Bramble, the final blow coming from its claw attack. Unbeknownst to the dragon, this demise inadvertently met the condition of Bramble's Doomsday Cookie fortune that said "Hasty hands make for quick lives." Consequently, the fortune cookie scroll turned into a scroll of revivify.
Meanwhile, Kayne climbed up the rock to reach the dragon and attacked it with his greatsword. He managed to critically hit with his first attack and coupled with a 5th level divine smite dealt 118 points of damage. He coupled his second hit with a 4th level divine smite dealing an additional 58 points of damage. These attacks successfully drew the dragon's attention onto him.
With a swift flurry of attacks, Igbalneum attacked Kayne and knocked him unconscious. However, Lia reached him in time to use cure wounds and Kayne subsequently healed himself with Lay on Hands.
The dragon's attention was diverted onto Lia, who was knocked unconscious by the dragon's breath weapon right before Keyleth, Voice of the Tempest, arrived accompanied by a gnome woman. Keyleth received the message they left for her in Kymal and came to assist. The group learned later this gnome is none other than Pike Trickfoot, Chosen of the Everlight.
In the chaos of Keyleth and Pike's arrival, Kayne used the scroll of revivify to bring Bramble back from the dead. Simultaneously, Igbalneum killed Lia with a wing attack, just as Keyleth ran and dove off the cliff edge, turning into an Adult Gold Dragon as she did so. Pike used mass heal to heal everyone still standing.
As the battle continued, Pike manages to bring Lia back from the dead with revivify but is quickly knocked unconscious again by the dragon's continued use of its fire breath. The dragon noticed that both Bramble and Pike were continuing to heal the others and manages to kill Bramble a second time. As the dragon got its second killing blow on Bramble, Maoki managed to get the killing blow on the dragon with his bow. "Maoki, how do you want to do this?"
In the battle's aftermath, Keyleth as a gold dragon carried Pike over to Bramble to cast revivify again to bring him back from the dead. Then, Maoki, Kayne, and Bramble spent time carving off the dragon's scales, some hide, a few teeth, and even managed to remove the dragon's heart. As this happened, Lia and Pike explored the treasure cavern.
Finally, they all flew up to the top of the volcano, where Lia plants Quaal's Feather Tree Token, sprouting a giant oak tree, through which Keyleth takes them all back to Kymal using transport via plants. The party set aside 9,500 gp for the city of Kymal, 2,000 gp for the Air Ashari, and 500 gp to Pike. They keep 1,500 pp each for themselves.

Level 20 Battle Royale
Aenor has captured the party...again. They all find themselves comfortably resting after a long day in Bramble's Dragon Heart Tavern in Kymal over the next year as Kymal continues to rebuild. As they fall into sleep, the darkness of their dreamless sleep gives way to grey as their eyes open, blearily. A blanket of grey clouds fills the sky over an unfamiliar battlefield. The party members find themselves scattered to different corners of the battlefield. Use Map 12.11 for the map of the battle royale battlefield.
Choosing a Starting Position
Each character rolls 1d20 to see who rolls for battlefield placement first. Then, in descending order, each character rolls 1d4 to determine initial placement. If a character rolls a number already chosen, roll again until an unchosen number is rolled. As the characters get their bearings, a familiar elven figure descends to about 50 feet above the battlefield and addresses the characters. Read or paraphrase the following:
A familiar elven figure descends to about 50 feet above the center of the battlefield. Wearing fine green robes with golden filigree and long blonde hair, Aenor floats above you. He smiles, looks around, and says: "Tonight, you will fight before me. Between you, one victor shall stand and gain my blessing."
At which point, he raises his hands, and you watch as a force field of energy suddenly (whoosh) warps around and encapsulates the battlefield. It also closes off above the battlefield at a height of about 40 feet from the upper level.
Each character gets one full turn to prepare, without moving, before rolling for initiative to commence the battle.
Battlefield Features
The central platform holds a blue glowing pedestal that stands in the middle. Sitting in the corners, up against the walls forming the upper platform, are four large magical braziers. The upper platform encircling the edge of the battlefield is raised ten feet above the ground. The wall between the ground and the upper platform extends five feet above the floor of the platform. In the corners of the upper platform are four turrets. They are completely encased in stone, with two flights of stairs that lead in from either side.
The following areas of the battlefield have unique features that may impact the characters throughout the battle.
Healing Pedestal
The pedestal in the center of the battlefield holds a blue glowing orb heals any creature within 10 feet of it on Initiative Count 20. It heals any character for 2d6 hit points.
Force Fields
The force field that encircles the battlefield extends upward to where it closes off the sky above. It remains in place, resolutely, preventing any creature from passing through it.
- Round 9. At the start of the round, the force field begins to hum and vibrate.
- Round 10. At the start of the round, the force field shrinks inward by 5 feet at the start of the round, dealing 1d10 force damage if it has to shove a character. It deals 10d10 to any immovable objects. It continues to shrink inward by 5 feet at the start of each round until it reaches the platform in the center of the battlefield.
Quadrants
The battlefield is split up into four starting quadrants with different environments:
Quadrant 1. Large boulders protrude from dark blue water with the occasional spark of electrical energy flicking through it. A character that lands in the water has the potential to be electrocuted. The character must make a DC 17 Dexterity saving throw, suffering 4d6 lightning damage on a failure, or half as much on a success.
Quadrant 2. Large rocks protrude from green, sulfuric swamp water. A character that lands in the water has the potential to be poisoned. They must make a DC 18 Constitution saving throw, suffering 3d10 poison damage on a failure and are poisoned for 1 minute. On a success, the character only suffers half the damage and is not poisoned. A poisoned character can reattempt the save at the end of each of their turns, ending the poisoned condition on a success.
Quadrant 3. Snow covered rocks protrude from icy, slushy water. Submerging into the water instantly freezes the character. The character must make a DC 20 Constitution saving throw, suffering 3d8 cold damage on a failure or half as much on a success.
Quadrant 4. Large rocks protrude from the lava filling the area below. A character that lands in the lava suffers 4d6 fire damage.
Crates
There are six crates scattered around the upper platform. There is a crate placed in each of the four corner turrets built into the upper platform. Then, there are two crates, one on the east and west side of the upper platform, placed into the small indent in the platform wall. Opening any of the crates requires an action. Grabbing the potion inside any of the crates is considered a free action.
Four Corner Crates. Each of the crates in the corner turrets contains a Superior Healing Potion.
Two Central Crates. The two crates set along the east and west walls of the upper platform hold a Potion of Immunity. The potions last for one minute. The character must roll 1d4 to determine the type of immunity within the potion: (1) Lightning, (2) Acid, (3) Cold, or (4) Fire.
Battle Map Lair Actions
On initiative count 20, losing all ties, the DM rolls 1d10 to determine which lair action occurs. The same lair action cannot occur two rounds in a roll. Lair actions must be resolved before progressing to the next characters turn.
Battle Royale Lair Actions
| d10 | Lair Action |
|---|---|
| 1 - 2 | Brazier's Flare Up. Any creature within 15 feet must make a DC 15 Dexterity saving throw or suffer 3d8 elemental damage. Roll 1d6 to determine acid, cold, fire, lightning, poison, or thunder damage. |
| 3 - 4 | Quadrant 1 Lightning Strike. Any creature in this quadrant is targeted with a lightning bolt. The targeted creature must make a DC 15 Dexterity saving throw suffering 3d10 lightning damage on a failure, or half as much on a success. |
| 5 - 6 | Quadrant 2 Acid Blast. Any creature in this quadrant is splashed with acid as the swamp belches liquid. Each creature in this quadrant must make a DC 15 Dexterity saving throw suffering 4d6 acid damage on a failure, or half as much on a success. |
| 7 - 8 | Quadrant 3 Ice Fog. Any creature in this quadrant is enveloped in an icy cold fog. A creature in the fog must make a DC 15 Constitution saving throw suffering 4d6 cold damage on a failure, or half as much on a success. This effect lasts until the next lair action. Any creature that enters the fog while it persists must make the Constitution saving throw. |
| 9 - 10 | Quadrant 4 Magma Geyser. Any creature in that quadrant must make a DC 15 Dexterity saving throw suffering 4d6 fire damage on a failure, or half as much on a success. |
1
2
3
4

Map 12.11
Epilogue
The western half of Kymal was destroyed during the volcano's emergence and continued presence before the ritual was destroyed by Lia, Maoki, Kayne, and Bramble. During the elemental activity and fighting, The Margrave of Kymal, Prudence was killed. There were whispers that she had ties to the Myriad, so this may have inadvertently been a good thing for the city of Kymal.
In the aftermath, Polla Everforge was unanimously appointed Margrave after the lead she took in organizing the City Watch and personally defending the city from the elemental invasions. It will take a year or so to rebuild the western half of Kymal. During this time, the new Margrave mandates that the Gralhund and Cassalanter Villas be torn down and turned into parks accessible to all citizens of Kymal. The Gralhund's stay in Jorenn Village under pseudonyms and are never seen in Kymal again.
The Party
Upon their return to Kymal, Arcanist Allura Vysoren presents the party with an award from the Tal'Dorei Council for valor, and exceptional aid provided to the realm. Upon both Maoki's and Bramble's request, Margrave Polla agrees to erect a statue of the group to be placed just inside the northwestern gate. It will stand guard facing the Ironseat Ridge and the direction of the volcano's arrival.
Obviously, Bramble makes sure to use his magic mouth spell on each of the party members after it has been constructed. Bramble will have each of the party member's shout their catch phrases to capture them with the spell. The phrases each party member's statue will shout are as follows:
- Bramble's: "I am Bramble, here me roar!"
- Kayne's: "I would like to smite."
- Lia's: "This is my favored terrain."
- Maoki's: "Sneak attack!"
The base of the statue will have a plaque that reads "This is in honor of Bramble Tickletoes III and Company, saviors of Kymal, and let's be honest, all of Tal'Dorei."
In addition, Polla, on behalf of the city of Kymal, gifts the party a newly reconstructed building they can use as a headquarters. The party decides to turn it into an inn and tavern. Bramble offers to provide the builders an extra 100 pp if he can be personally involved in its construction to ensure it is built to the party's specifications. The tavern will be called Bramble's Dragon Heart Tavern.
Lia
Lia returns to the Dawnmist Pines, and to her husband, Engolan. She returns more confident in her abilities and leadership and is now ready to take her place by his side as leader of their community, the Realm of Elenen. Additionally, she decides to start a ranger school for women in Elenen that specializes in archery, favored terrains, and stealthing. When the first class of ranger cadets is ready for graduation, they are brought on a mission with the entirety of Bramble Tickletoes III and Company as their final practical exam.
In the intervening years, Lia will travel back and forth to Kymal frequently to spend time with her friends as well as go on the occasional adventure with the group.
Kayne
After the events of the campaign, Kayne intends to move back to the Dawnmist Pines and build a fine little house for himself on the outskirts of Elenen. He intends to make yearly pilgrimages to various Stormlord temples across Tal'Dorei and provides the occasional anonymous donation.
Kayne plans to visit the tavern franchises often and assist Bramble and Maoki in running them. He has a cast made of the ancient dragon heart before he sells it to the Alabaster Lyceum for 10,000 gp, and has the cast hung up in Bramble's Dragon Heart Tavern. Eventually, Kayne starts a small distillery at his home and makes the Ancient Dragon's Blood Whiskey that is sold only at their Kymal tavern.
As the years go by, Kayne will set out on a trek back to the Stormlord's Mountain Temple on Issylra to pray and commune with the Stormlord. And finally, closer to home, will guest lecture at Lia's ranger school from time to time.
Bramble
In the immediately aftermath, as Kymal begins to rebuild, Bramble gifts 100 pp to Xoblob to help him rebuild his store. This ensures its return and is even more ostentatiously purple than it was before. Bramble also quickly resupplies his stores of jade dust in order to continue his obsession with magic mouthing anything that takes his fancy.
Ultimately, Bramble intends to spend most of his time and energy focused on the group's tavern. After the first year, once Bramble's Dragon Heart Tavern has been well established in Kymal, he will secure properties in many of the other major cities across Tal'Dorei to form a chain of taverns. The franchise locations will be called Bramble's Dragon Scale Tavern and can be found in Emon, Westruun, Syngorn, Byroden, Saewic, and even Ruhn-Shak. There will also be a tavern built in Elenen, the place Kayne and Lia call home. Bramble intends to mount a red dragon scale in each tavern as its namesake suggests, then turns any remaining scales into goblets that are used only at the Kymal tavern with Kayne's Ancient Dragon's Blood Whiskey.
Finally, he will pay a wizard to create permanent teleportation circles between the Kymal and Elenen taverns so the party can reunite often for adventures. As the years go by, Bramble will slowly create a number of simulacrums to run each franchise tavern.

Maoki
Maoki has always had a deeply chaotic spirit, and in the intervening years after saving Kymal from destruction is no exception. Initially, he has the red dragon hide he harvested turned into a gleaming set of studded leather armor. He then spends part of the first year at the Cobalt Reserve in Westruun studying how to run a business because he chose to invest all of his money into the tavern and its franchises.
Once the Kymal tavern has been established, Maoki next goes in search of a master craftsman named Chetney that is rumored to live in Uthodurn, over in the Greying Wildlands of Wildemount. He wants multiple perfect replicas made of the arrow he used to kill the red dragon, Igbalneum, that will be hung in each tavern with a plaque beneath that reads: "Bramble's arrow that slew the dragon."
Bramble and Maoki have agreed to install a secret underground office within each tavern that can only be accessed through a hidden entrance. Maoki intends to use these offices to begin running an underground crime organization. This organization's name will be The Twinkle Hands, and they will steal from the rich and give to the poor.
At some point in the future, while in Syngorn, Maoki intends to locate the wealthiest evil individual he can find, break in and cause chaos in their home, and purposefully lead the owner out into the street where Maoki intends to goad them into publicly killing him while decrying his innocence. Bramble will be hiding nearby and will abscond with his body, casting raise dead on him, bringing him back to life. Bramble will go around telling the story of what happened and spread the word about how this evil individual killed an innocent man. Meanwhile, Maoki will rebrand himself with a new persona as Master Twinkle Hands the leader of the criminal organization he started.
Farewell
A tale of four friends. Wild swells of adventure, friendship, and destiny. And with that, the story of Lia, Maoki, Kayne, and Bramble, collectively known as Bramble Tickletoes III and Company, comes to a close.
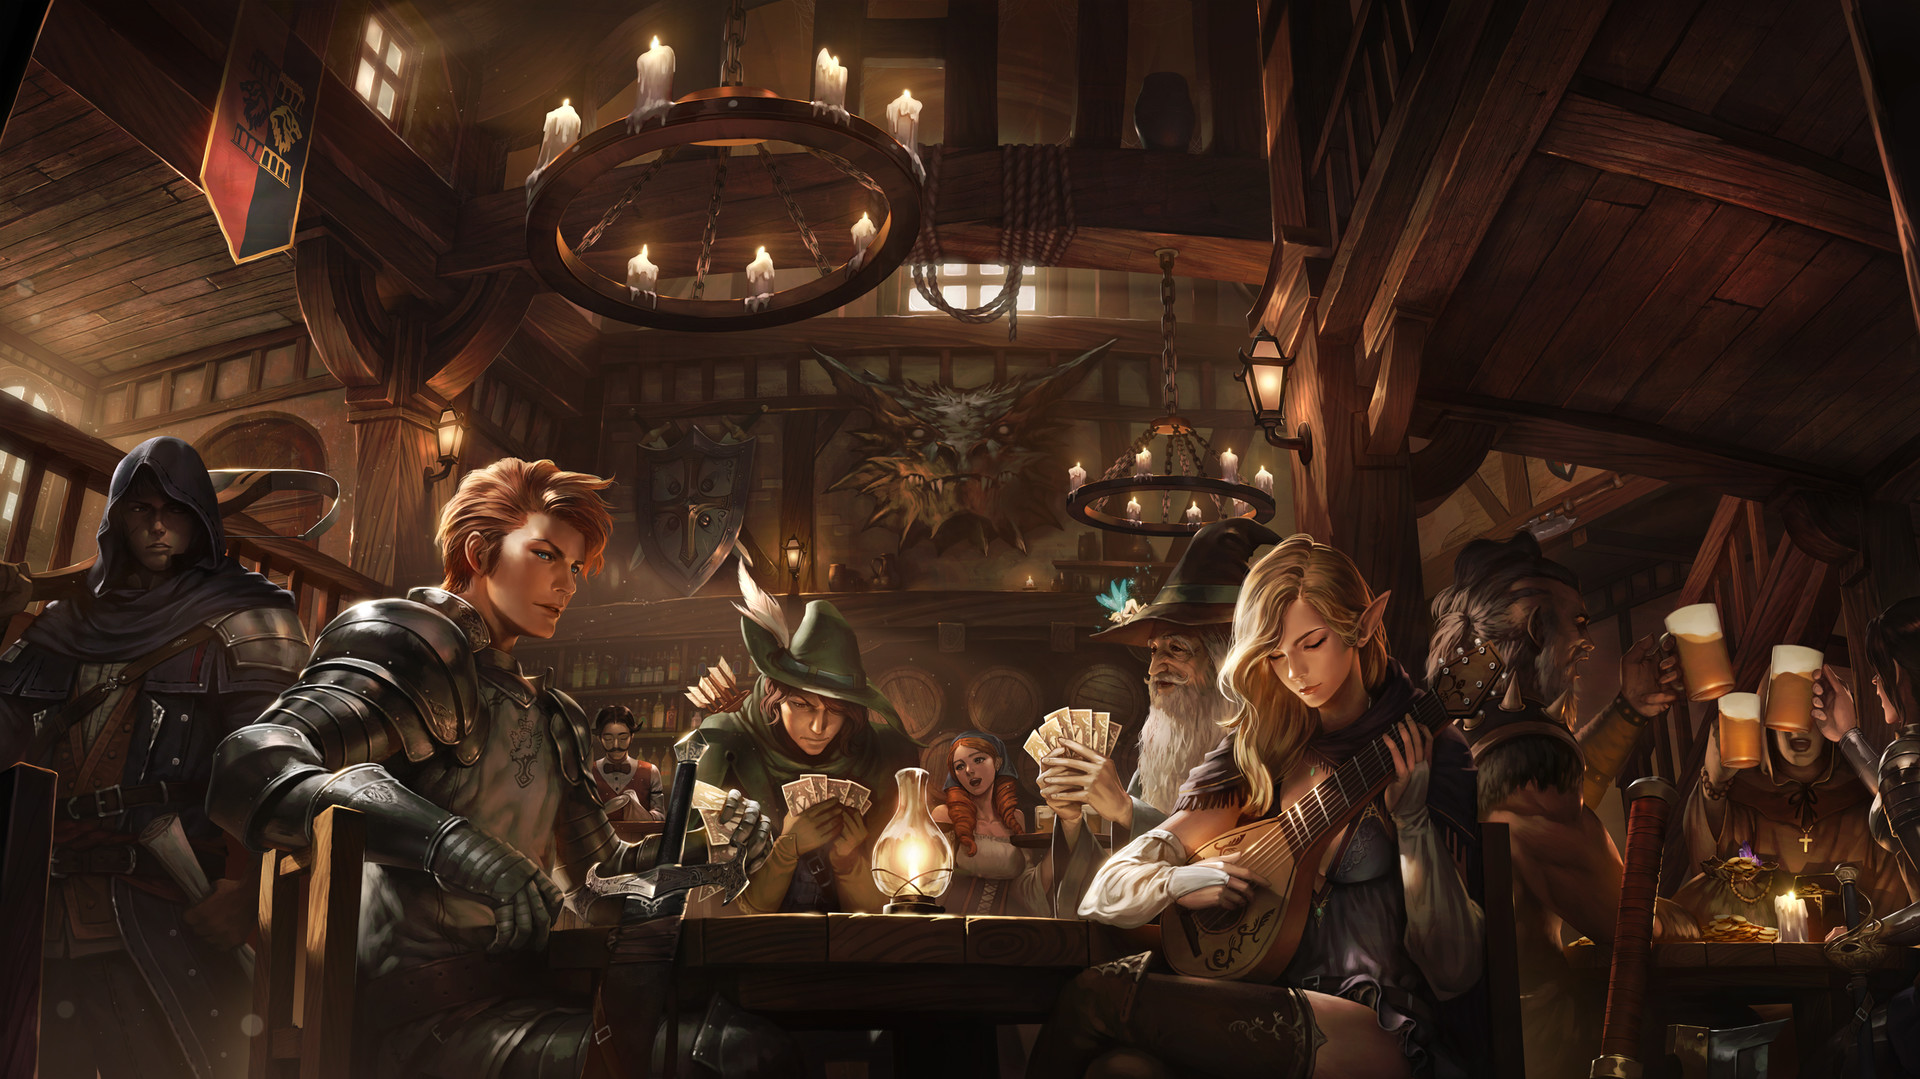
A
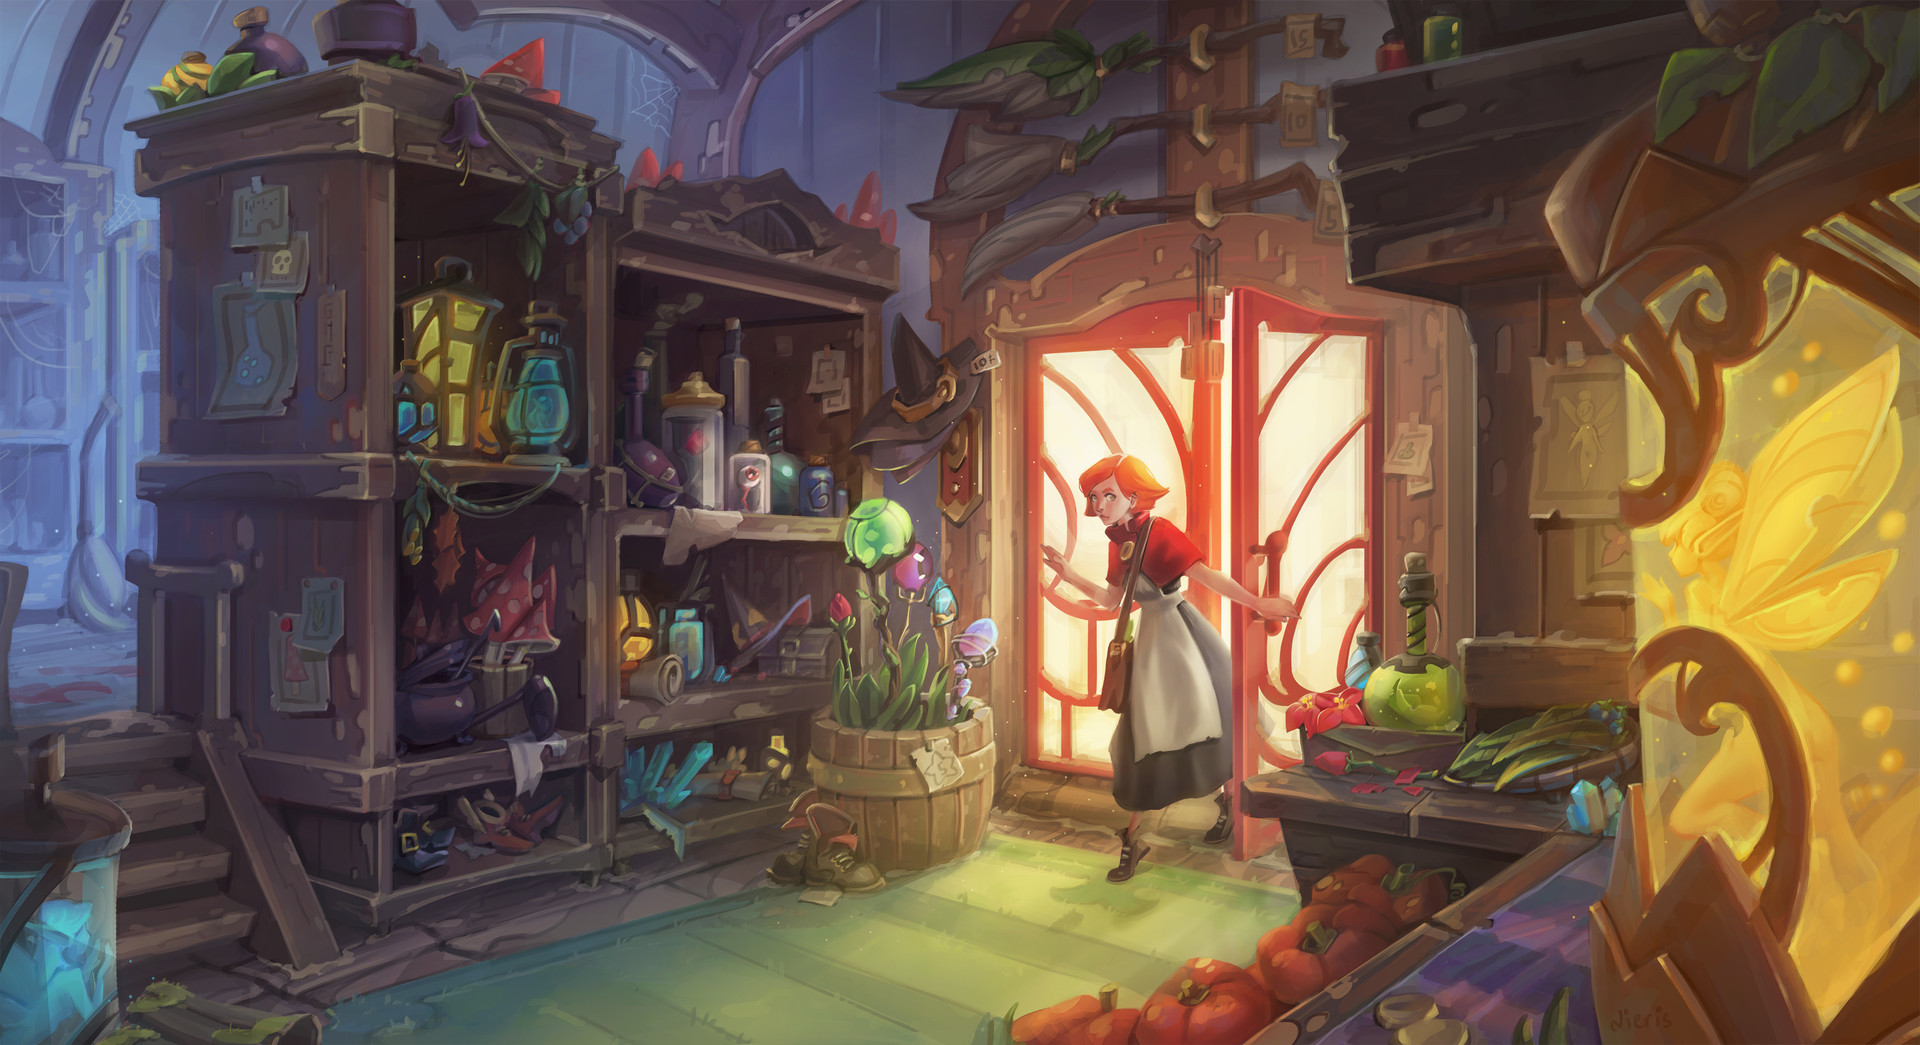
Appendix A: Magic Items
Since magic was first introduced to mortals in ages past, many have sought to channel the gifts of magic into implements of power. Master crafters and fine artisans have long worked with talented arcanists and divine acolytes to craft beautiful artifacts of protection, or to forge armaments of war. The most skilled archmages enchanted and assembled vast collections of mighty artifacts throughout the Age of Arcanum, most of which were scattered and lost in the conflicts of the Calamity.
Adventurers, archeologists, and unscrupulous explorers delve into dungeons, ruins, and forgotten places of lore in hopes of recovering these objects of power, even as spellcasters and researchers seek to replicate ancient enchantments by their own hands. This section contains a collection of new magic items and artifacts found in Exandria.
Magic Items of Exandria
Whether found in subterranean tomb while searching for lost treasure, chosen as a reward from a wealthy collector of curiosities, or stumbled across as a discarded object of hidden potential, magic items are always highly sought after by adventurers. Relics of magic provide a perfect opportunity to bring alive the history of ages long gone, and to reward players for diligently seeking their way in the world.
Magic Item Descriptions
This appendix describes new magic items that appear in the adventure, and which are presented here in alphabetical order.
Apprentice Wizard's Magical Ale
Potion, uncommon
A ruddy brown liquid swirls inside the vial. It is very strong alcohol. When imbibed, a creature must succeed on a DC 12 Constitution saving throw or become drunk for an hour. A creature that casts a cantrip or spell while under the effects of this liquor must roll on the Wild Magic Table.
Artifact of Chance
Wondrous item, legendary (requires attunement)
This artifact is a pair of golden dice, attached together by an intricately carved golden chain. In order to use this artifact, a creature must attune to it, and complete the activation rite inscribed in the magical tome: Fate's Fickle Friend. When activated, for the next hour the wearer is bestowed with a limited ability to see into the immediate future. For the duration, the wearer can't be surprised and has advantage on attack rolls, ability checks, and saving throws. Additionally, other creatures have disadvantage on attack rolls against you for the duration.
Curse. As the activation fades at the end of an hour, there is a 25% chance the artifact's power sucks the life out of its wearer, causing their death at the end of the hour. At the end of the hour, the wearer must roll 1d100. On a 1 - 25, the artifact causes their death. Additionally, revivify is not powerful enough magic to bring the wearer back from death; a more powerful spell, such as raise dead is required. When the artifact is successful in causing the death of its wearer, the chance of death for the next person to activate the dice to die increase by 10%. If the chance of death reaches 100%, the artifact seizes to be magical.
Regardless of the result at the end of the hour, the artifact cannot be used again for 7 days.
Ashen Gorge Vault Key
Wondrous item, legendary
This finely molded golden key is embedded with numerous precious gems. The handle of the key has been molded from gold into the shape of a dragon with its wings outstretched. This key has no magical ability of its own, however, it is magically tied to a secret vault door, deep in the Ashen Gorge. If found, this secret vault door can only be opened using this key. This was one of the many vaults that made up the lair of Thordak, the Cinder King during his first incursion into Tal'Dorei. Gold, jewels, and magic items from all ages of the world may lie in wait within the dozen or more secret vaults of the Cinder King's lair.


Bell Stone
Wondrous item, common
When struck, this granite stone rings with the sound of a large bell.
Bloodthirsty Bistoury
Weapon (dagger), uncommon
You gain a +1 bonus to attack and damage rolls made with this magic weapon. When this dagger is help by an evil-aligned creature, any creature hit by it does not bleed from the attack or the wound it leaves for 10 minutes. This elegant, dark dagger is never blood-stained and easily pierces flesh.
Bloody Marilith Potion
Potion, very rare
When you drink this potion, you can take one additional reaction on every turn for 1 minute. This potion is a deep crimson color with a thick consistency that vibrates softly within its bottle, sending ripples along its surface. It smells and tastes of freshly ground pepper, hot spices, and faintly sour tomato juice. It pleasantly burns your tongue when drinking it.
Cantrip Candles
Wondrous item, rare
Using an action, you can expend a charge to light this candle for one minute. It has 5 charges. The candle is associated with a cantrip from the sorcerer spell list.
While it burns, characters within 15 feet of the candle who are able to smell the scent it emits gain the ability to cast the cantrip associated with the candle for the duration. Characters who are already able to cast the cantrip gain no benefit from smelling the scent. If a character chooses to leave the radius of the scent, they lose the ability to cast the cantrip. When casting the cantrip, your spellcasting ability is Charisma.
When casting a spell with the help of the candle there is a 10% chance of casting it with Wild Magic.
Cloak of Shadows
Wondrous item, rare (requires attunement)
This eerily still cloak seems to absorb some of the light that touches it. As a bonus action, the wearer of this cloak can become invisible until the end of their next turn. The wearer becomes visible early if they attack or cast a spell.
Cloaked Serpent Ritual Snake Dagger
Weapon (dagger), uncommon
This ritual Dagger is a magic dagger that grants a +1 bonus to attack and damage rolls made with it. When you use this dagger, you gain advantage on all checks to make runes, carvings, or anything else of a similar nature on behalf of the Cloaked Serpent. A horribly ominous tool, the dagger emanates a strange green aura that faintly illuminates the green stone filled notches embedded in the handle and along the steel blade.


Displacer Armor
Armor (leather or studded leather), uncommon
While you wear this armor, as a bonus action, the wearer can tap one of the two displacer tentacles dangling from the armor to activate the armor. When activated, the armor projects a magical illusion that makes you appear to be standing in a place near your actual location, causing any creature to have disadvantage on attack rolls against you. If you take damage, this property ceases to function. This armor has two uses, and it regains all expended uses when you finish a long rest.
Dread Orb of the Whispered One
Wondrous item, Artifact (requires attunement)
This heavy black orb is cold to the touch and fine green lines on its surface glow a ghastly green when held.
After attuning to this item, you become cursed. Immediately make a DC 17 Constitution saving throw. On a failure, your hit point maximum is reduced by 8d8. On a success, your hit point maximum is reduced by half that amount. Should this reduce your hit point maximum to zero, your soul is separated from your body and a dread wraith (Appendix B) and a dread wight (Appendix B) rise where you stood. Repeat this saving throw every day at dusk.
While attuned to this artifact, you can cast each of the following spells once (spell save DC 17, spell attack modifier +9), regaining the ability to cast them at dusk: blight (5th level), eyebite (6th level), finger of death (7th level).
Earring of Whisper
Wondrous item, rare
While this simple silver earring might seem like a minor trinket, it rests on the cutting edge of adventuring gear and technology, helping a team coordinate like never before. With a simple touch and a word, an entire group can be synchronized in their actions. Available in a variety of fashions depending on the crafter.
Touching this earring is a free action and allows the user to communicate with all other paired earrings within 500 feet, akin to the message spell. Wearers of this earring will passively receive communications from the group of paired earrings. If other earrings are outside of 500 feet, they do not receive the message.
Pairing: Over a short rest, a user is able to add or remove an earring from the communication group. To do so, they must attempt a DC 15 Arcana check to manipulate the network. On a success, the earring is added or removed from the grouping. On a failure, there is no change to the grouping.
Elusive Lantern
Wondrous item, common When lit, the light from this lantern can only be seen by its carrier.
Fate's Fickle Friend Tome
Wondrous item, artifact
This leather-bound tome with gold filigree contains the rite of activation for the Artifact of Chance. The inside cover has an inscription: "Those who take, but do not earn, must pay most dearly in their turn." The inside pages read as blank.
As an action, a character can expend a 3rd level spell slot or higher into the book. The internal pages glow as the hidden text of the Rite of Chance appears. This text remains visible for 1 hour. While visible, you can spend 10 minutes ritually invoking the Rite to activate the Artifact of Chance.
Leacher's Emerald
Wondrous item, rare (requires attunement)
This green emerald is an ancient relic imbued with necrotic energies by an evil necromancer long ago. Its master and wielder, once attuned, can attempt to magically implant the emerald into the chest of any living creature. The creature must successfully win a grapple contest to resist the attempt.
As a bonus action the emerald's master can use it to transfer 3d6 hit points from the victim to themself if it is within 60 ft. The emerald has two charges per day and regains all of its charges at dawn. The gem exerts no control over the victim otherwise, but the master of the emerald knows its direction and distance at all times. If the emerald crosses into another plane, the owner knows which one.
Extraction. A skilled physician can remove the gem on a successful DC 17 Medicine check, but the patient suffers 4d10 piercing damage on every attempt. A greater restoration spell can be used to eject the gem. The emerald radiates evil and should its 'master' ever use it for its intended purpose, their alignment permanently shifts a step closer to evil.
Nimblewright Detector
Wondrous item, uncommon
This foot-long copper contraption has an umbrella-like protrusion at one end and can be used to find a nimblewright. To activate the nimblewright detector, a character must hold down its trigger. When the activated device comes within 500 feet of a nimblewright, the umbrella begins to spin, whir, and click. The spinning, whirring, and clicking accelerates as the distance to the target lessens, reaching max velocity and volume when a nimblewright is within 30 feet of the device.

Oni's Dark Tome
Wondrous item, rare
This small leatherbound spellbook contains the maddened scrawling of a dark wizard. The tome has ten charges, which can be expended to create one of the following effects:
Hex. While holding the book, you can use an action to expend 1 charge to cast hex on a target you can see in range.
Psychic Lash. While holding the book, you can use an action to expend 3 charges and force a creature within 60 feet to make a DC 15 Wisdom saving throw, taking 4d6 psychic damage on a failed save or half as much damage on a successful one. You can expend extra charges as part of the initial action, increasing the damage by 1d6 per extra charge.
Curse of Sleep. While holding the book, you can use your action to expend 6 charges and cast sleep as a 1st level spell. You can expend additional charges as part of the initial action, increasing the spell's level by 1 for each extra charge.
The dark tome regains 1d6 +1 charges daily at dawn. If the tome's last charge is expended, roll a d20. On a 1, the Oni is returned to life, its body reforming in the nearest space to where its remains were buried or destroyed. The Oni is always aware of the tome's direction and distance from its current location.
Paper Bird
Wondrous Item, uncommon
After you write a message of fifty words or fewer on this magic sheet of parchment and speak a creature's name, the parchment magically folds into a Tiny paper bird and Hies to the recipient whose name you uttered. The recipient must be on the same plane of existence as you, otherwise the bird turns into ash as it takes flight.
The bird is an object that has 1 hit point, an Armor Class of 13, a flying speed of 60 feet, a Dexterity of 16 (+3), and a score of 1 (- 5) in all other abilities, and it is immune to poison and psychic damage.
It travels to within 5 feet of its intended recipient by the most direct route, whereupon it turns into a non-magical and inanimate sheet of parchment that can be unfolded only by the intended recipient. If the bird's hit points or speed is reduced to 0 or if it is otherwise immobilized, it turns to ash.
Paper birds usually come in small, flat boxes containing 1d6 + 3 sheets of the parchment.
Signal Jewels
Wondrous item, common
A pair of gems that can alter their color to resemble an emerald, ruby, sapphire, onyx, or amethyst. Whoever holds on jewel can use a Bonus Action at any time to change the color of the other jewel.
Stone of Golorr
Wondrous item, artifact (requires attunement)
The Stone of Golorr is a glossy, greenish-gray stone that fits in the palm of your hand. The stone is actually an aboleth named Golorr, transformed by magic into an object.
Random Properties. The Stone of Golorr has the following properties, determined by rolling on the tables in the "Artifacts" section in chapter 7 of the DMG: 1 minor beneficial property and 1 minor detrimental property
Legend Lore. The Stone of Golorr has 3 charges and regains 1d3 expended charges daily at dawn. While holding the stone, you can expend 1 charge to cast legend lore.
By using the stone to cast legend lore, you communicate directly with the aboleth, and it shares its knowledge with you. The aboleth can't lie to you, but the information it provides is often cryptic or vague.
The aboleth knows where the Vault of Dragons is located and that three keys are needed to open the vault. It will hint cryptically, of a guardian that protects the vault's contents.
Failed Memory. When your attunement to the Stone of Golorr ends, you must make a DC 16 Wisdom saving throw. On a failed save, you lose all memory of the stone being in your possession and all knowledge imparted by it. A remove curse spell cast on you has a 20 percent chance of restoring the lost knowledge and memories, while a greater restoration spell does so automatically.
Sentience. The Stone of Golorr is a sentient lawful evil magic item with an Intelligence of 18, a Wisdom of 15, and a Charisma of 18. It has hearing and darkvision out to a range of 120 feet. It can communicate telepathically with the creature that is attuned to it, as long as that creature understands at least one language. In addition, the aboleth learns the greatest desires of any creature that communicates telepathically with the stone.
The Stone of Golorr hungers for information and prefers not to remain in the clutches of any creature for too long. Whenever the stone desires a new owner, it demands to be given to another intelligent creature as quickly as possible. If its demands are ignored, it tries to take control of its owner.
Personality. The Stone of Golorr has an alien intellect that is both domineering and hungry for knowledge. It thinks of itself as an ageless and immortal god.
Destroying the Stone. While in stone form, the aboleth isn't a creature and isn't subject to effects that target creatures. The Stone of Golorr is immune to all damage. Casting an antipathy/sympathy spell on the stone destroys it if the antipathy effect is selected and the spell is directed to repel aberrations. When the spell is cast in this way, the stone transforms into mucus and is destroyed, and Golorr the aboleth appears in an unoccupied space within 30 feet of the stone's remains. The aboleth is incensed by the stone's destruction, and it attacks all other creatures it can see.

Sunbeacon
Wondrous item, rare
While holding this ball of translucent pearl, you can use your action to make the sunbeacon emit bright daylight in a radius of 120 feet or one 5-feet beam of bright daylight out to a range of 10,000 feet.
Urine of Bear Extract
Potion, uncommon
The liquid inside this potion smells faintly of pine and berries. After drinking this potion, the imbiber is polymorphed into a bear for 1d20 minutes.
Wavering Wonder Ink
Wondrous item, uncommon
This dark green ink appears to contain small glittering motes and gives off a faint odorless smoke when wet. After making a marking of any kind with this ink, the writer can speak a command word of their choosing causing the ink to disappear. Once the ink has dried, speaking the command word over it will cause it to reappear. Repeating the command word returns the ink to its invisible state. Writing over it with regular ink causes that ink to be replaced by the Wonder Ink for the duration the Wonder Ink is visible.
One inkwell contains enough to cover either 10 pages or 8 square feet of skin, wood, stone, or other materials. The ink is suitable for tattooing.
The ink can be sensed by detect magic. Casting dispel magic on the ink will cause it to become visible.
Dwarven Power Runes
Dwarves are loath to write on that which may easily perish, preferring stone as the primary medium for their script. Typically, they carve their runes into the walls of caverns, stone buildings, pillars, or standing stones.
Occasionally, a spellcaster of vast magical ability may imbue one of these stones with a powerful arcane enchantment, allowing the rune to be transferred to a weapon or suit of armor. A creature that is within 5 feet of one of these power runes can perform a 1-hour ritual, meditating upon it while laying their hands on a weapon or suit of armor of their choice.
At the complete of the ritual, the rune vanishes from the stone and becomes emblazoned upon the object, permanently infusing it with the rune's magic. A nonmagical object that undergoes this process becomes magical. If the object already bears one of these runes, the ritual fails.
Battlevow
Runestone, rare (transfers to any weapon)
When you make an attack with this weapon, you can activate this rune to magically mark your target as your sworn enemy until it dies or until you finish a long rest. While marked in this way, as a bonus action, you can discern your sworn enemy's location (distance and direction from you) as long as the two of you are on the same plane of existence. You can only have one such sworn enemy at a time.
When you attack your sworn enemy with this weapon, you can add your proficiency bonus to the damage roll, and the attack is a critical hit on a roll of 19 or 20. While your sworn enemy lives, you have disadvantage on attack rolls against all other creatures. When your sworn enemy dies, roll a d6. On a result of 1 - 5, this rune cannot be used again until you finish a long rest.
Endure
Runestone, very rare (transfers to any armor)
When you make a death saving throw, this rune activates. Unless you roll a 1, you can treat the result as a 20. Once this rune has been activated, roll a d6. On a result of 1 - 4, it cannot be used again until you finish a long rest.


Focus
Runestone, rare (transfers to any armor)
When you fail a Constitution saving throw made to maintain concentration on a spell, you can activate this rune to succeed instead. Once this rune has been activated, roll a d6. On a result of 1 - 4, it cannot be used again until you finish a long rest.
Precision
Runestone, rare (transfers to any weapon)
When you have advantage on an attack roll with this weapon, you can activate this rune to roll the d20 a third time, taking the highest result. Once this rune has been activated, roll a d6. On a result of 1 - 5, it cannot be used again until you finish a long rest.
Punishment
Runestone, uncommon (transfers to any weapon)
When you roll a 20 on an attack roll made with this weapon, you can activate this rune to roll one of the weapon's damage dice one additional time and add it to the extra damage of the critical hit. Once this rune has been activated, roll a d6. On a result of 1 - 2, it cannot be used again until you finish a long rest.
Smite
Runestone, uncommon (transfers to any melee weapon)
While holding this weapon, you can activate this rune to cast any of the following spells: searing smite, thunderous smite, or wrathful smite. Spells cast in this way have a save DC of 13. Once this rune has been activated, roll a d6. On a result of 1 - 4, it cannot be used again until you finish a long rest.
Swiftstrike
Runestone, very rare (transfers to any melee weapon)
While holding this weapon, you can activate this rune to cast steel wind strike. When you make the spell's attacks, you do so with an attack bonus of +9. Once this rune has been activated, roll a d6. On a result of 1 - 5, it cannot be used again until you finish a long rest.
Resolve
Runestone, rare (transfers to any armor)
When you fail a Wisdom saving throw, you can activate this rune to reroll the save with advantage. Once this rune has been activated, roll a d6. On a result of 1 - 4, it cannot be used again until you finish a long rest.
Retribution
Runestone, rare (transfers to any armor)
When an enemy scores a critical hit against you, you can use your reaction to activate this rune. The next attack roll you make with this weapon against that creature has advantage and, if it hits, it is automatically a critical hit. Once this rune has been activated, roll a d6. On a result of 1 - 4, it cannot be used again until you finish a long rest.
Vanish
Runestone, uncommon (transfers to any armor)
When you are hit by an attack, you can activate this rune as a reaction to become invisible and move up to your speed. Once this rune has been activated, roll a d6. On a result of 1 - 4, it cannot be used again until you finish a long rest.
Ward
Runestone, uncommon (transfers to any armor)
Immediately after you are hit by an attack, you can activate this rune as a reaction to cast sanctuary on yourself (save DC 13). When you cast the spell in this way, the spell ends at the end of your next turn. Once this rune has been activated, roll a d6. On a result of 1 - 3, it cannot be used again until you finish a long rest.
Wound
Runestone, uncommon (transfers to any weapon)
When you roll a 20 on an attack roll made with this weapon, you can activate this rune to tear open a deep wound where you hit. Unless the target is an undead or a construct, it must succeed on a DC 15 Constitution saving throw or take 1d10 damage of the same type as the attack at the start of each of its turns. Any creature can take an action to stanch the wound with a successful DC 15 Medicine check. Once this rune has been activated, roll a d6. On a result of 1 - 3, it cannot be used again until you finish a long rest.

Vestiges of Divergence
During the wars of the Calamity, destruction rained across the world. Fragmented chronicles of this time recount battles between gods that leveled mountains and sank whole civilizations beneath the waves. Chosen heroes rose up to accept weapons, armor, and other magic items blessed by their patron gods to staunch the inexorable tide of death. Powerful archmages wove the overflowing arcane powers of the war into legendary magic items that could both thwart death and mete it out in equal measure.
These relics of the Age of Arcanum armed mortals with god-like powers and escalated the Calamity to a fever pitch. Soon after, the war climaxed in a wave of total destruction that left much of Exandria in ruins. Thousands of years of history were reduced to ash -- and in that ash were buried many of these selfsame relics. Some of those not lost were passed down through bloodlines for generations, becoming potent symbols of authority and rulership. Others were sealed away by those who feared their power. These mighty echoes of the war that nearly shattered Exandria and the divine banishment that followed are known as the Vestiges of Divergence.
The Vestiges of Divergence are unique even among legendary magic items, for each one touches the defiant soul of its wielder and grows in power alongside them. The base state of a Vestige of Divergence is its dormant state, which the item returns to if sealed away or otherwise kept from being attuned by a worthy individual for a prolonged period of time. A dormant state still imbues a modicum of power to an attuned wielder. But with time, perseverance, and personal growth, the Vestige of Divergence can regain access to some of its lost power in its awakened state. Eventually, if its bearer overcomes personal hardship and transforms their own soul, a Vestige of Divergence reaches its full potential in its exalted state. This shows the true power of the item, as it was when first utilized in the Calamity against gods armed for war.
The point at which a character finds a Vestige of Divergence, as well as the point at which that item starts to unlock its full power, is entirely in the hands of the Dungeon Master. The acquisition of such an item -- or the discovery of its true identity -- has the potential to be a scene of momentous narrative weight. Those who bear a Vestige of Divergence are respected and feared by those who understand these items' true power. But such an honor can also paint a target on the bearer's back, for many covet such power, and would do anything to obtain it.
Many of the Vestiges of Divergence detailed in this section are scattered across Exandria. Some of these relics remain lost to time, waiting for someone to find them among the dust and rubble. Others might be in use by powerful heroes ready to pass the item's power onto a worthy successor who fights for the proper cause. Still others might be in the hands of twisted souls using them to terrorize the weak and defenseless. The Vestiges of Divergence are both magic items and narrative devices, and it's the DM's choice as to where any one of them might be found or earned.
Advancement of a Vestige of Divergence
The conditions by which a Vestige of Divergence progresses to its next level of power can vary, and often revolve around the nature of the specific item and its magic. An attuned bearer of a Vestige of Divergence must often symbolically progress to a new state of self-discovery or accomplishment. Alternatively, a Vestige of Divergence might bequeath new power to a character in a state of extreme personal duress or desperation.
Such triggering moments are entirely up to the Dungeon Master to identify and unveil, and as such, will likely manifest in unexpected ways. Players should allow the organic narrative moments that they feel might exemplify such an advancement to occur, and DMs should tailor the triggering moment accordingly to be important, impactful, and memorable.
Examples of the kinds of moments that can trigger the advancement of a Vestige of Divergence include the following:
- A character finally surmounts one of their greatest fears, bravely overcoming a traumatic event to save a party member.
- A character is mercilessly defeated by a long-hated foe, and in the face of such defeat, they feel a deep, dormant strength grow from within.
- A character loses a close ally in battle, and their anguish and fury stirs the power within their Vestige of Divergence.
- A character discovers a facet of their destiny that calls their actions toward a dangerous cause -- and against their own fear, they accept their fate and responsibility.
- A character claims vengeance against a rival who has tormented them for ages.
- A character known for restraint gives in to the amoral violence that the relic they bear was dedicated to.
If you want to keep the Vestiges "balanced," in addition to being narratively significant, then characters may find a dormant Vestige before 9th level -- perhaps unaware that it's even a Vestige! That dormant Vestige is awakened somewhere between 9th and 15th level and is exalted at any time after that. Even using these level ranges as a rule of thumb, you shouldn't rely too heavily on those mechanical benchmarks. A Vestige of Divergence's advancement is triggered by character development, not simply by leveling up.
To Suit the Wielder
The Vestiges of Divergence were all created by humanoids or gifted by the gods to their humanoid champions. As such, all of these legendary magic items are sized to suit Medium creatures. However, the mighty magic that thrums within each item allows it to grow or shrink in size to suit the creature attuned to it.
Arch Heart's Wrath
Weapon (longbow), legendary (requires attunement by a ranger)
A longbow molded from a fledgling Tangled Spruce tree, the wood slowly transitioning from a young verdant green at the top to a deep-rooted brown at the bottom. This bow was crafted and wielded by the Arch Heart themself. Any who trespass the lands of the Arch Heart had best brace themselves for the wrath of they who wield this bow. You gain a +1 bonus to attack and damage rolls made with this weapon.
Once per turn when you hit a target with an attack from this weapon, you can add 1d6 radiant damage. You can also cast the light cantrip on any ammunition fired from this weapon at-will, changing the piercing damage to radiant as well.
Awakened
When the user awakens the Arch Heart's Wrath, apply the following effects:
- The bonus to attack and damage rolls increases to +2.
- The Arch Heart's Wrath has 5 charges and regains 1d4 + 1 charges at dawn. You may cast the following spells with the Arch Heart's Wrath: ensnaring strike (1 charge), hail of thorns (1 charge), conjure barrage (2 charges), or lightning arrow (2 charges).
- Radiant Tracker. You can use an action to fire an arrow of pure radiant energy at a creature you can see within range. Make a ranged attack against the target, if it hits the target, it takes 3d8 radiant damage and is under the effects of a 3rd-level hunter's mark spell that does not require concentration. You can use this ability once between long rests.
Exalted
When the user exalts the Arch Heart's Wrath, apply the following effects:
- The bonus to attack and damage rolls increases to +3.
- The radiant damage you can add once per turn becomes 2d6.
- The number of charges becomes 7, and it regains 1d6 + 1 charges at dawn. You gain these additional spells: swift quiver (3 charges), conjure volley (3 charges).
- Radiant Tracker. This ability can now be used twice between long rests.
Armor of the Spider Queen
Armor (studded leather), legendary (requires attunement by a druid)
Woven together by servants of the Spider Queen, this studded leather chest piece and shoulder guards are made of black leather. Each piece is lined and accented with the silk of a Midnight Spider. While attuned to this armor you gain a +1 bonus to AC. The AC bonus from this armor extends to any wild shaped forms the wearer turns into.
Your natural weapon attacks also deal an additional 1d4 damage. You also gain an additional use of your Wild Shape while attuned to this armor.
Awakened
When the user awakens the Armor of the Spider Queen, apply the following effects:
- Your bonus to AC becomes +2.
- The additional damage dealt by your natural weapons increases to 1d8.
- The wearer may expend 2 uses of Wild Shape to assume the shape of a phase spider with the wearer's mental stats as per the Wild Shape ability.
Exalted
- When the user exalts the Armor of the Spider Queen, apply the following effects:
- Your bonus to AC becomes +3.
- The additional damage dealt by your natural weapons increases to 1d12.
- While attuned to this armor, the wearer chooses and imbues this armor with resistance to a damage type of your choice: fire, cold, acid, lightning, or necrotic. This choice can be changed during a short rest. This resistance persists in your wild shape form.


Blade of the Stormlord
Weapon (greatsword), legendary (requires attunement)
This greatsword was crafted from a single piece of jagged obsidian forged from lightning, encased in sea glass. The pommel is fashioned out of the oak from a lightning struck tree. Attack and damage rolls with this weapon have a +1 bonus, and any attack with this weapon deals an additional 1d6 lightning damage.
Awakened
When the user of this item awakens the Blade of the Stormlord, apply the following effects:
- The bonus to attack and damage rolls become +2.
- The additional lightning damage dealt by the weapon increases to 1d8.
- As an action, you can pierce the Blade of the Stormlord into the ground to cast the spell thunderwave at a 2nd level (spell save DC 15). You cannot use this ability again until you finish a short or long rest.
- When you score a critical hit with this weapon, the target must succeed on a DC 15 Strength saving throw or be knocked back 10 feet by the lightning that flashes out of the blade on the attack.
Exalted
When the user of this item exalts the Blade of the Stormlord, apply the following effects:
- The bonus to attack and damage rolls become +3.
- The additional lightning damage dealt by the weapon increases to 2d6.
- As an action, in addition to thunderwave, the Blade of the Stormlord can now be used to cast the spell storm sphere.
- The spell save DC increases to 17 for all spells cast by this weapon.
- When you score a critical hit with this weapon, the target must succeed on a DC 17 Strength saving throw or be knocked back 10 feet by the lightning that flashes out of the blade on the attack. You can also roll an additional 2d6 lightning damage when determining the extra damage for the critical hit.
Broken Fang
Weapon (dagger), legendary (requires attunement by a non-good character)
This jagged dagger is made of a single piece of obsidian. Its pommel is adorned with raven feathers. This dagger has been tainted by its years spent in the Shadowfell. You have a +1 bonus to attack and damage rolls made with this weapon. Once attuned, as a bonus action, this dagger can be summoned and banished to the Shadowfell.
Whenever you inflict damage and the target has 10 or less hit points left, you suddenly feel like by pushing yourself a little bit further, you can finish them off -- you may choose to inflict an additional 1d10 psychic damage to both you and your target. Whenever you kill a creature, you gain 1d10 temporary hit points.
Awakened
When a character awakens Broken Fang, apply the following changes:
- The bonus to attack and damage rolls become +2.
- Increase the temporary hit points gained when killing a creature to 2d6.
- You gain +1 to Intimidation checks while holding it and add half your Charisma bonus to your damage rolls with this dagger (up to a maximum of +3).
Exalted
When a character exalts Broken Fang, apply the following changes:
- The bonus to attack and damage rolls become +3.
- The bonus to Intimidation checks increases to +2.
- Increase the temporary hit points gained when killing a creature to 2d8.
- When you drop a creature to 0 hit points with an attack using Broken Fang, you can immediately make an additional melee attack with this weapon as part of your attack action.


Dawning Tome
Wondrous item, legendary (requires attunement by a wizard)
Inscribed with the emblem of the Dawnfather, this blue and gold tome has long been a symbol of power amongst the arcane community. The pages in the book are blank, but when a wizard attunes to this item, any spells they know are automatically copied into the Dawning Tome. From then on, the user may use the tome as their spell book.
While attuned to the Dawning Tome, you gain a +1 bonus to your spell attack bonus and have advantage on Constitution saving throws to concentrate on spells. When you cast spells from the Dawning Tome, you may use a spells gold value instead of the regularly required material components.
Awakened
When the user awakens the Dawning Tome, apply the following affects:
- The bonus to spell attack rolls becomes +2.
- You may store up to 5 levels of spells in the Dawning Tome to be cast at a later time.
- The user of the Dawning Tome is always under the effects of mage armor.
Exalted
When the user exalts the Dawning Tome, apply the following affects:
- The bonus to spell attack rolls become +3.
- You gain a +1 to your spell save DC.
- The amount of spell levels the Dawning Tome can store increases to 9.
- Arcane Affinity. You may choose to have a spell that requires an attack roll to have advantage to hit when you cast it, or you may have the target of a spell that requires a saving throw to have disadvantage on the saving throw. You can use this ability once between short or long rests.
Fang of the Wildmother
Weapon (scimitar), legendary (requires attunement)
This scimitar blade is carved from the fang of a long-forgotten beast that was ripped from its jaw and set onto a simple brown leather-wrapped handle. A bust of the Wildmother is carved just below the cross guard. The Wildmother blessed this sword with the wrath and power of the wilderness to hunt down any prey the user sets their eyes on. While attuned to this item, your movement speed increases by 10 feet, and you gain +1 to attack and damage rolls with this item.
Awakened
When the user of this item awakens the Fang of the Wildmother, apply the following effects:
- The bonus to attack and damage rolls become +2.
- Your movement speed increases by another 5 feet.
- When you score a critical hit on a creature with this weapon, you may cast hunter's mark as a 1st level spell on that creature. Casting the spell in this way does not require concentration. You may only have one creature marked at a time. Once this ability has been used, it cannot be used again until you finish a short or long rest.
Exalted
When the user of this item exalts the Fang of the Wildmother, apply the following effects:
- The bonus to attack and damage rolls becomes +3.
- Your movement speed increases by an additional 5 feet.
- The level of the hunter's mark spell cast with this weapon increases to 3rd level. You can now use this ability twice between short or long rests.
- When you take the Dash action on your turn, difficult terrain does not affect your movement speed.


Helm of the Divine King
Wondrous item, legendary (requires attunement)
Gifted from the Allhammer to one of the first dwarven kings, this elegant bronze helm seems to shine with divine brilliance. While wearing this helm, you gain resistance to psychic damage and have advantage on saving throws against being charmed or frightened. Any attempt to read your mind is negated.
Awakened
When the user awakens the Helm of the Divine King, apply the following effects:
- You are immune to the charmed and frightened condition.
- You can see all invisible creatures and objects within 20 feet of you.
- While attuned to the helm, you may cast the spirit guardians spell at 3rd level. Casting the spell in this way does not require concentration and has a spell save DC of 15. Once you have used this ability, you cannot do so again until you have completed a long rest.
Exalted
When the user exalts the Helm of the Divine King, apply the following effects:
- You become immune to psychic damage.
- You gain truesight out to a range of 20 feet.
- The spell save DC for your spirit guardians increases to 17 and can now be used twice per long rest.
Mageslayer Plate
Armor (plate), legendary (requires attunement)
During the Age of Arcanum, a courageous knight with the blessing of the Dawnfather set out to oppose those who had succumb to the raw magics of the world. This heavy plate was crafted for him by the highest priests of the Dawnfather, bearing His sigil of a sun. This armor can hold up to 5 charges, and recharges 1d4 charges daily at dawn.
When you are targeted by an enemy's spell, you can use your reaction to absorb part of the spell. The armor gains a number of charges equal to the spell level of the triggering spell. You are still subject to whatever effects the spell would normally inflict upon you. You cannot use this ability again until you finish a long rest.
When you hit with a melee attack, you can choose to expend any number of charges from the armor, dealing an additional 1d6 force damage per charge expended, which is inflicted on the target of that attack.
Awakened
When the user awakens the Mageslayer Plate, apply the following effects:
- You gain a +1 bonus to your AC while wearing this armor.
- You can use the armor to cast counterspell at 4th level once per day. Your spell casting ability for this is Strength.
- The armor's maximum charges become 7, and it regains 1d4 + 2 charges daily at dawn.
Exalted
When the user exalts the Mageslayer Plate, apply the following effects:
- Increase the bonus to your AC to +2.
- You now cast counterspell as a 6th-level spell.
- The armor's maximum charges become 10 and it regains 1d6 + 3 charges daily at dawn.


Moonweaver's Needle
Weapon (rapier), legendary (requires attunement)
This silvery rapier is formed of a single, seamless piece of steel. Imbued with the light of the Moonweaver, the rapier sheds dim light out to a radius of 10 feet. Attack and damage rolls made with this weapon have a +1 bonus, and any attack with this weapon deals an additional 1d6 radiant damage.
Awakened
When the user awakens the Moonweaver's Needle, apply the following effects:
- The bonus to attack and damage rolls become +2.
- The additional radiant damage dealt becomes 2d6.
- The Moonweaver's Needle now has 5 charges and regains 1d4+1 charges at dawn. You may cast the following spells by expending charges from the Moonweaver's Needle: blur (1 charge), silence (2 charges), invisibility (2 charges), or moonbeam (2 charges).
- You are always under the effects of protection from evil and good against celestials, fiends, and undead.
Exalted
When the user exalts the Moonweaver's Needle, apply the following effects:
- The bonus to attack and damage rolls becomes +3.
- The additional radiant damage dealt becomes 3d6.
- The number of charges becomes 7, and you instead regain 1d6+1 charges at dawn. You gain these additional spells: aura of life (3 charges), greater invisibility (4 charges), and cure wounds at 5th level (4 charges).
- Your protection from evil and good ability now extends to aberrations, elementals, and fey, as well as celestials, fiends, and undead.
Oblivion's Anchor
Wondrous item, legendary (requires attunement by a non-good character)
Oblivion's Anchor exudes an aura of darkness and shadows. This item resembles an old iron spike with arcane runes etched along its sides. In order to attune to this item, you must stab yourself through the chest with it. Once attuned, the item disappears into the wielder's chest and can only be seen through divination magic.
While attuned to this item you can see through both natural and magical darkness. When a creature strikes you with a melee attack, they take 1d6 necrotic damage as the power of the Chained Oblivion escapes your body. You also gain resistance to necrotic damage.
Curse. Once attuned, the Oblivion's Anchor takes hold within the wielder. The removal of the item requires the use of a greater restoration spell. After the greater restoration spell is cast, Oblivion's Anchor is thrust immediately out of the wielder. This process causes the wielder to suffer 1d10 piercing damage per the wielder's level. As it emerges, Oblivion's Anchor has long, thin barbs sticking out of it since it was attuned. After it emerges, the spikes quickly shrink and disappear.
Awakened
When the user awakens Oblivion's Anchor, apply the following effects:
- The damage creatures take when they hit you with a melee attack becomes 1d8.
- Your maximum hit points cannot be reduced.
- Chain Drain. This item has 7 charges and regains 1 charge every time you reduce a creature to zero hit points. As an action, you can attack a creature with spectral chains. Choose the number of expended charges and make an unarmed strike against a creature within 15 feet. On a hit the target takes 1d8 necrotic damage per charge expended and you regain half as many hit points.
- Curse. In addition to the damage taken on its removal in the unawakened state, once it's awakened the damage is increased by 20 piercing damage. Upon its removal, the Anchor reverts to its unawakened state.
Exalted
When the user exalts Oblivion's Anchor, apply the following effects:
- The damage creatures take when they hit you with a melee attack becomes 2d6.
- You gain immunity to necrotic damage.
- The item's maximum charges become 10.
- If you are knocked unconscious by an attack or spell, you can choose to have all creatures within 10 feet of you suffer 1d4 necrotic damage. Any damage dealt by this, you regain as hit points. You cannot use this ability again until you finish a long rest.
- Curse. In addition to the damage taken on its removal in the awakened state, once it's exalted the damage is increased by 40 piercing damage. Upon its removal, the Anchor reverts to its unawakened state.


Pact Breaker
Wondrous item, legendary (requires attunement by a non-good warlock)
A blood red stone seething with anger and hatred, the remnants of a fierce battle between warlock and patron. When the wearer begins casting spells with this ring it grows warm to the touch, the energy within nearly shaking the ring with power.
While attuned to this item, you gain a +1 bonus to spell attack rolls and the saving throw DCs of your warlock spells. Once per turn when you hit a target with an attack, you can add necrotic damage equal to 1d6 + your Charisma modifier to the damage roll.
Awakened
When the user awakens Pact Breaker, apply the following effects:
- Your bonus to spell attacks rolls and saving throw DCs increases to +2.
- Additional necrotic damage once per turn increases to 1d8 + your charisma modifier.
- Vitality Transfer. Your magic seeps into the muscles of your victim and saps away some of their vitality and grants it to you. Whenever you damage a creature with a spell, its movement speed is reduced by 5 feet and your movement speed is increased by 5 feet until the start of your next turn.
Exalted
When the user exalts Pact Breaker, apply the following effects:
- Your bonus to spell attack rolls and saving throw DCs increases to +3.
- Additional necrotic damage once per turn increases to 1d10 + your charisma modifier.
- Vitality Transfer. This ability now reduces the target's speed by 10 feet and increases your speed by 10 feet. When you score a critical hit against a creature, the target must succeed on a DC 17 Constitution saving throw or be paralyzed until the end of your next turn.
Stormkeeper
Wondrous item, legendary (requires attunement)
Blessed by the Stormlord with the resilience of a hurricane, this silvery belt has a cloud motif design with a strange glowing turquoise stone that acts as a clasp. This belt imbues those who would rely on their own hardiness with the power to survive even the strongest blows. The strength of the storms flows through you, raising your Constitution score to 22.
Awakened
When the user of this item awakens Stormkeeper, apply the following effects:
- Your Constitution score becomes 24.
- When you are struck by a melee weapon attack, you may use your reaction to rebuke your attack and have them roll a DC 15 Constitution saving throw. On a failed save, they suffer 3d8 thunder damage and are pushed back 10 feet. On a successful save, they take half as much damage and are not pushed back. Once this ability has been used, it cannot be used again until you complete a short or long rest.
Exalted
When the user of this item exalts Stormkeeper, apply the following effects:
- Your Constitution score becomes 26.
- The saving throw DC to resist being pushed by your reaction increases to 17 and you may use this ability twice per short or long rest.


Zuwati's Song
Wondrous item, legendary (requires attunement by a bard)
This ring has a large, beautiful jade stone inlaid upon a large ornate gold ring. Etched upon the jade is a wondrous carving of music notes. While attuned to this ring, you gain a +1 to your Spell Save DC. Additionally, you may save two levels worth of spells within.
Awakened
When a character awakens Zuwati's Song, apply the following changes:
- Increase the bonus to your Spell Save DC to +2.
- Increase the total level of spells the ring can store to 4.
- This ring gains 5 charges. As a bonus action, you can expend 1 charge to extend the range of any spell that you cast. When you cast a spell that has a range of 5 feet or greater, you double the range of the spell. When you cast a spell that has a range of touch, you make the range of the spell 30 feet. This ring recovers 1d4+1 charges each day at dawn.
Exalted
When a character awakens Zuwati's Song, apply the following changes:
- Increase the bonus to your Spell Save DC to +3.
- Increase the total level of spells the ring can store to 6.
- Increase the total charges of Zuwati's Song to 8. It still recovers charges at the same rate of 1d4+1 charges each day at dawn.
- Additionally, as a reaction, when targeted by a melee attack, you can expend 3 charges to have the ring scream and cause all enemies within 30 feet to make a DC 17 Constitution Saving throw or become stunned until the end of your next turn.
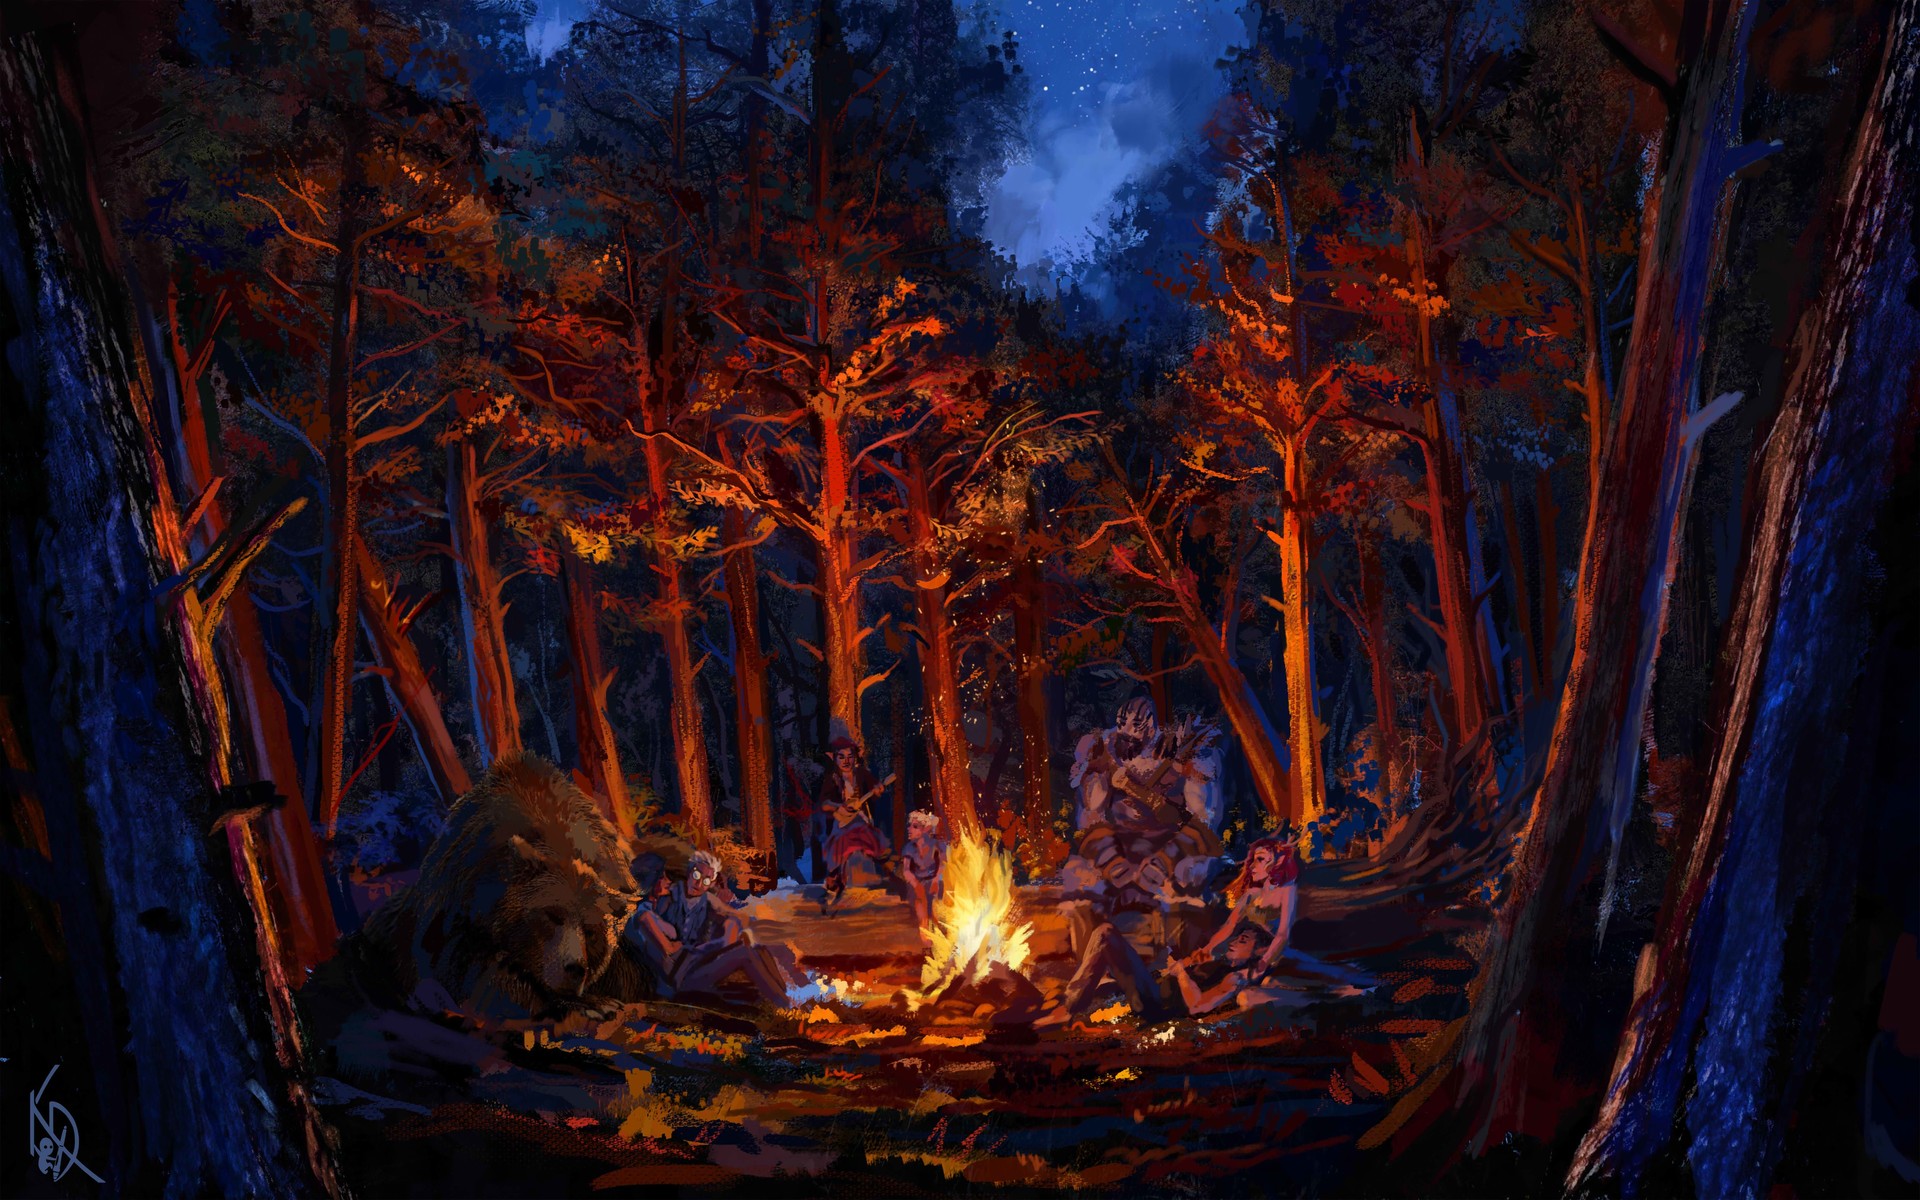

B

Appendix B: Tal'Dorei Bestiary
Tal'Dorei is filled with wondrous creatures and characters. Whether they prove to be allies or enemies to the heroes, these beings' game statistics are provided here. These creatures are designed to supplement the monsters found in the fifth edition core rules, not replace them. Tal'Dorei is also filled with countless classic monsters, and adventures here will incorporate both familiar mythic creatures and the unique creatures of Exandria.
Many are the dangers of Tal'Dorei, and even mighty adventurers quickly learn to watch their step in these lands, whether in deepest wilderness or in the middle of one of its many settlements. What follows is a handful of the monsters, warriors, and agents iconic to Tal'Dorei for use in your campaign. As with any monster, the DM should feel free to adjust these traits using the guidelines in the DMG to make them better serve the needs of their campaign.
This appendix provides description and stat blocks for several creatures that appear in the adventure. The creatures are organized alphabetically. A few creatures are gathered under a group heading; for example, the "Black Wolves" section contains stat blocks for members of the Black Wolves, and those stat blocks are presented alphabetically within that section.
Stat Blocks by Creature Type
Here are lists of the creatures in this bestiary, sorted by creature type.
Constructs
- Clockwork Dragon
- Evil Doll
- Jade Spider
- Minotaur Construct
- Nimblewright
- Thread-Bound Griffon
Elementals
- Ash Elemental
- Burning Spirit
- Chaos Elemental
- Lava Elemental
- Magma Elemental
- Sand Assassin
- Scorch Spider
- Shadow Elemental
- Slag Spirit
- Smoke Elemental
- Storm Guardian
Fey
- Astral Panther
Fiends
- Gertrude: Night Hag
- Pumpkin King
Humanoids
- Aenor Gleenwith
- Amin
- Ammalia Cassalanter
- Barnibus Blastwind
- Barry
- Brendal
- Captain Jacqueline
- Captain Pinna
- Cassius Anthond
- Everett
- Fraxen
- Hrabbaz
- Lord Galvyn
- Nedda Greenbottle
- Orond Gralhund
- Oskar
- Remma
- Renaer Krishtan
- Saeth Cromley
- Sheriff Arcos
- Urstul Floxin
- Victoro Cassalanter
- War Ringer Mirna
- Yalah Gralhund
Monstrosities
- Brachiosaurus
- Carnotaurus
- Deinonychus
- Indominus Rex
- Megalodon
- Mosasaurus
- Phase Spider Matriarch
- Quetzalcoatlus
- Spinosaurus
- Velociraptor
Oozes
- Molten Ooze
- Necrotic Slime
Plants
- Bloodstock Vine
- Haunted Pumpkin
- Pumpkin Abomination
- Pumpkin Puppet
Undead
- Allip
- Dread Wight
- Dread Wraith
- Drowned Ghoul
- Drowned Zombie
- Giant Undead Ape
- Gloom
- Mummy Warrior
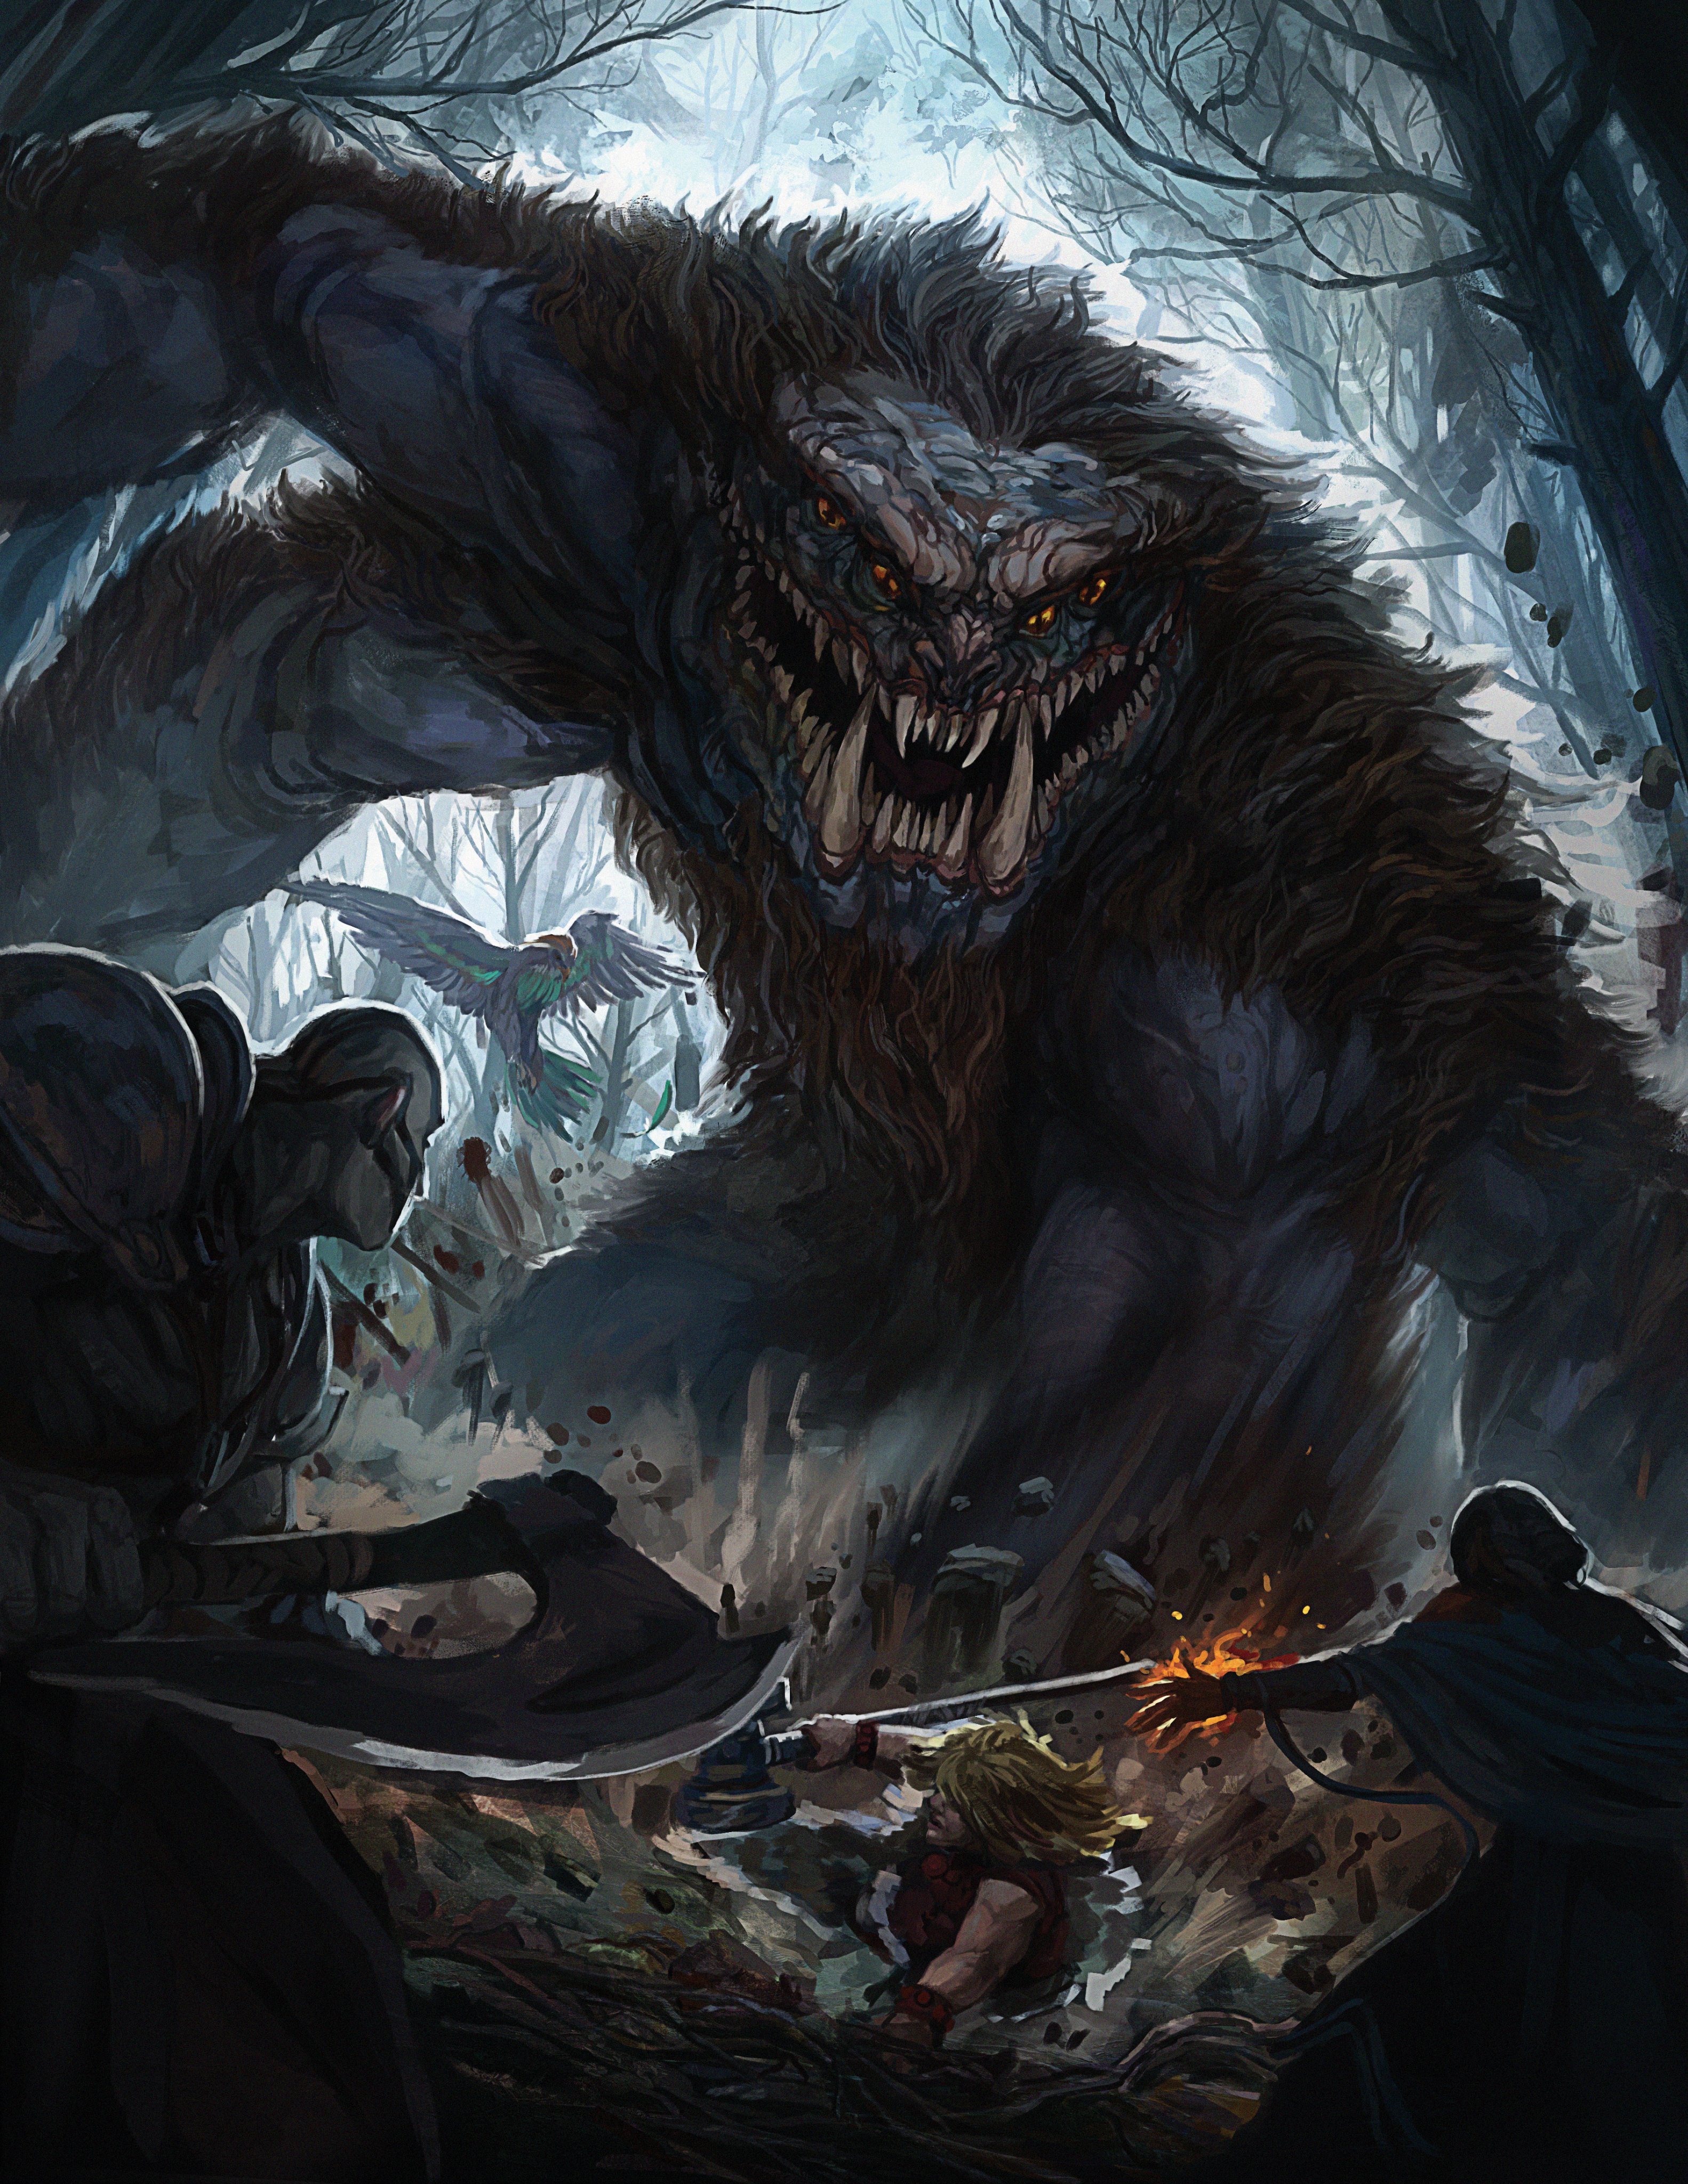
Allip
An allip is the spectral residue of an individual driven to dementia and suicide. It wants only one thing: revenge. To obtain it, it pursues relentlessly those who caused its loss.
Allip
Medium undead, neutral evil
- Armor Class 13
- Hit Points 40 (9d8)
- Speed 20 ft., fly 40ft. (hover)
STR DEX CON INT WIS CHA 6(-2) 17(+3) 10(+0) 17(+3) 15(+2) 16(+3)
- Proficiency Bonus +3
- Saving Throws Int +6, Wis +5
- Skills Perception +5, Stealth +6
- Damage Resistances acid, fire, lightning, thunder; bludgeoning, piercing, and slashing damage from nonmagical attacks
- Damage Immunities cold, necrotic, poison
- Condition Immunities charmed, exhaustion, frightened, grappled, paralyzed, petrified, poisoned, prone, restrained
- Senses darkvision 60 ft., passive Perception 15
- Languages the languages it knew in life
- Challenge 5 (1,800 XP)
Incorporeal Movement. The allip can move through other creatures and objects as if they were difficult terrain. It takes 5 (1d10) force damage if it ends its turn inside an object.
Actions
Maddening Touch. Melee Spell Attack: +6 to hit, reach 5 ft., one target. Hit: 17 (4d6 + 3) psychic damage.
Whispers of Madness. The allip chooses up to three creatures it can see within 60 feet of it. Each target must succeed on a DC 14 Wisdom saving throw, or it takes 7 (1d8 + 3) psychic damage and must use its reaction to make a melee weapon attack against one creature of the allip's choice that the allip can see. Constructs and undead are immune to this effect.
Howling Babble (Recharge 6). Each creature within 30 feet of the allip that can hear it must make a DC 14 Wisdom saving throw. On a failed save, a target takes 12 (2d8 + 3) psychic damage, and it is stunned until the end of its next turn. On a successful save, it takes half as much damage and isn't stunned. Constructs and undead are immune to this effect.

Astral Panther
The wilderness in all its many forms -- tundra, forest, desert, and other biomes -- is not without awareness or agency. The land itself gives birth to mighty spirits, fey and elementals that are so ancient that they are largely forgotten except by the oldest in the multiverse. These primal spirits are all connected to a form of land, taking the shape of a plant or animal from their domains.
Though they are composed of powerful magic, these mighty spirits struggle to physically leave their ancient realms in some of the oldest parts of the Feywild: the savage wilds called the Spirit World. If their domains on the Material Plane are threatened, they project a weak reflection of their true nature, an avatar, to defend the land. These avatars take little effort for a primal spirit to control, and the spirit is not harmed if the avatar is slain.
The Astral Panther is the spirit of the starry night sky and, in some worlds, even the moon. The Panther is an ambassador between the pure darkness of the bat and the blinding sunlight of the eagle. The Astral Panther also patrols the dream world, hunting for nightmares.
The Panther is enigmatic and nearly always speaks in riddles. It takes champions more frequently than almost any other primal spirit, yet its champions rarely know its actual goals, as the Panther prefers to give its messages through mysterious dreams, and no one can be certain which lands even constitute the Panther's domains.
The Panther is secretly aware of many prophecies, both cosmic and small-scale predictions, and seems to be concerned with the path of natural fate itself. It even sometimes appears in the dreams of those other than druids, delivering cryptic messages to nudge fate along.
Astral Panther
Huge fey, lawful neutral
- Armor Class 16 (natural armor)
- Hit Points 189 (18d12 + 72)
- Speed 60 ft., climb 50 ft.
STR DEX CON INT WIS CHA 21(+5) 19(+4) 19(+4) 19(+4) 20(+5) 18(+4)
- Saving Throws Dex +8, Int +6, Wis +9
- Skills Insight +9, Perception +9, Religion +6, Stealth +10
- Damage Resistances necrotic; bludgeoning, piercing, and slashing from nonmagical attacks
- Damage Immunities poison, radiant
- Condition Immunities charmed, exhaustion, frightened, paralyzed, petrified, poisoned, unconscious
- Senses truesight 120 ft., passive Perception 19
- Languages Celestial, Druidic, Sylvan, telepathy 120 ft.
- Challenge 12 (8,400 XP)
Astral Invisibility. As a bonus action, the panther can magically turn invisible until its concentration ends (as if concentrating on a spell) or until it makes an attack. When its invisibility ends, it flashes with enchanting starlight. Each other creature within 20 feet of the panther must succeed on a DC 16 Wisdom saving throw or be charmed by the panther until the end of its next turn. While charmed in this way, it is unable to move or take actions. A creature is immune to this effect if it doesn't rely on sight, as with blindsight, or if it can't see, as when blinded.
Illumination. While the panther isn't invisible, it sheds dim light in a 40-foot radius.
Innate Spellcasting. The panther's innate spellcasting ability is Wisdom (spell save DC 17). The panther can innately cast the following spells, requiring no components:
At will: dancing lights, misty step, pass without trace
1/Day each: contact other plane, dimension door, dream
Keen Smell. The panther has advantage on Wisdom (Perception) checks that rely on smell.
Magic Resistance. The panther has advantage on saving throws against spells and other magical effects.
Magic Weapons. The panther's weapon attacks are magical.
Actions
Multiattack. The panther makes two melee attacks: either two attacks with its claw, or one attack with its bite and one attack with its claw.
Bite. Melee Weapon Attack: +9 to hit, reach 5 ft., one target. Hit 16 (2d10 + 5) piercing damage.
Claw. Melee Weapon Attack: +9 to hit, reach 5 ft., one target. Hit 15 (3d6 + 5) slashing damage plus 3 (1d6) radiant damage.
Ethereal Pounce. The panther pounces through the ethereal plane, teleporting up to 30 feet to an unoccupied space. The teleportation consumes the panther's speed as movement. The panther can immediately make two claw attacks against a target within 5 feet, and if either attack hits, the target must succeed on a DC 16 Strength saving throw or be knocked prone. If the target is prone, the panther can make one bite attack against it as a bonus action.
Bloodstock Vine
Hacking and slashing through thick foliage is a common technique used by those making their own way through the jungle. More experienced adventurers know that, because of the Bloodstock Vine, a more cautious approach is smarter.
Bloodstocks appear exactly as vines until they open their mouth, giving them an advantage on any unsuspecting travelers. The Bloodstock Vines will hang from trees or lie across paths waiting for its victims to approach. Once a creature is close enough, it will bite its prey, infecting it with a deadly poison and wait for it to die or constrict it so it can't escape before devouring it and quenching its thirst for blood.
Bloodstocks dwell in jungle or swamp type environments and move much like a snake. They are strictly carnivorous; however, they do not rely on food to survive. A Bloodstock can survive on water and oxygen but will constantly feast on the flesh of any creature that crosses its path.
Bloodstock Vine
Medium plant, unaligned
- Armor Class 12 (natural armor)
- Hit Points 72 (12d8 + 18)
- Speed 30 ft.
STR DEX CON INT WIS CHA 19(+4) 16(+3) 13(+1) 2(-5) 10(+0) 1(-5)
- Skills Stealth +9
- Damage Vulnerabilities fire
- Damage Immunities acid, poison
- Senses blindsight 20 ft.
- Languages --
- Challenge 3 (700XP)
Camouflage. The Bloodstock Vine has advantage on Dexterity (Stealth) checks made to hide in swampy and or jungle terrain.
False Appearance. While the Bloodstock Vine remains motionless, it is indistinguishable from a normal vine.
Actions
Multiattack. This creature can use two attacks with its bite.
Bite. Melee Weapon Attack: +7 to hit, reach 10 ft., one target. Hit: 9 (1d6 + 6) piercing damage, and the target must make a DC 13 Constitution saving throw, taking 31 (7d8) poison damage on a failed save, or half as much damage on a successful one.
Constrict. Melee Weapon Attack: +5 to hit, reach 10 ft., one target. Hit: 13 (2d8 + 4) bludgeoning damage, and the target is grappled (escape DC 16). Until this grapple ends, the creature is restrained, and the Bloodstock Vine can't restrict another target.

Clockwork Dragon
Made from gleaming metal and countless complex cogs and gears, this draconic creature has the presence of a dangerous killing machine. Clockwork dragons are siege machines fashioned after their namesake. A green glow burns in the eyes of an enormous mechanical dragon. Gears whir as the war machine spreads steel wings, spewing flames.
Clockwork Dragon
Huge construct, unaligned
- Armor Class 18 (natural armor)
- Hit Points 184 (16d12 + 80)
- Speed 40 ft., fly 80 ft.
STR DEX CON INT WIS CHA 23(+6) 10(+0) 20(+5) 9(-1) 11(+0) 5(-3)
- Saving Throws Dex +5, Con +10
- Skills Perception +10
- Damage Immunities poison, psychic; bludgeoning piercing, and slashing from nonmagical weapons that aren't adamantine
- Condition Immunities charmed, exhaustion, frightened, paralyzed, petrified, poisoned
- Senses truesight 60 ft., darkvision 120 ft., passive Perception 20
- Languages understands the languages of its creator but can't speak
- Challenge 14 (11,500 XP)
Immutable Form. The dragon is immune to any spell or effect that would alter its form.
Legendary Resistance (3/Day). If the dragon fails a saving throw, it can choose to succeed instead.
Self Destruct. When the dragon is reduced to 0 hit points, it explodes, and each creature within 30 feet of it must make a DC 18 Dexterity saving throw, taking 21 (6d6) fire damage and 21 (6d6) piercing damage on a failed save, or half as much damage on a successful one.
Actions
Multiattack. The dragon makes three attacks: one with its bite and two with its claws.
Bite. Melee Weapon Attack: +11 to hit, reach 10 ft., one target. Hit 17 (2d10 + 6) piercing damage.
Claw. Melee Weapon Attack: +11 to hit, reach 5 ft., one target. Hit 13 (2d6 + 6) slashing damage.
Tail. Melee Weapon Attack: +11 to hit, reach 15 ft., one target. Hit 15 (2d8 + 6) bludgeoning damage.
Breath Weapons (Recharge 5-6). The dragon uses one of the following breath weapons.
Fire Tar Breath. The dragon sprays flaming tar in a 30-foot cone. Each creature in that area must make a DC 18 Dexterity saving throw, taking 35 (10d6) fire damage on a failed save, or half as much damage on a successful one. On a failed save, a creature is restrained (escape DC 18). While restrained in this way, a creature takes 10 (3d6) fire damage at the start of each of its turns.
Knockout Gas Breath. The dragon exhales knockout gas in a 60-foot cone. Each creature in that area must succeed on a DC 18 Constitution saving throw or fall unconscious for 10 minutes. This effect ends for a creature if the creature takes damage, or someone uses an action to wake it.
Legendary Actions
The dragon can take 3 legendary actions, choosing from the options below. Only one legendary action option can be used at a time and only at the end of another creature's turn. The dragon regains spent legendary actions at the start of its turn.
Detect. The dragon makes a Wisdom (Perception) check.
Tail Attack. The dragon makes a tail attack.
Wing Attack (Costs 2 Actions). The dragon beats its wings. Each creature within 10 feet of the dragon must succeed on a DC 19 Dexterity saving throw or take 13 (2d6 + 6) bludgeoning damage and be knocked prone. The dragon can then fly up to half its flying speed.

Dinosaurs
Dinosaurs, or behemoths, are among the oldest reptiles in the world. Predatory dinosaurs are savage, territorial hunters. Herbivorous dinosaurs are less aggressive, but they might attack to defend their young, or if startled or harassed.
Dinosaurs come in many sizes and shapes. Larger varieties often have drab coloration, while smaller dinosaurs have colorful markings akin to birds. Dinosaurs roam rugged and isolated areas that humanoids seldom visit, including remote mountain valleys, inaccessible plateaus, tropical islands, and deep fens.
Brachiosaurus
This gargantuan creature is amongst the biggest of the dinosaurs. The Brachiosaurus has a long solid body and long giraffe-like neck, making this creature as tall as fifty feet and as long as eighty-three feet. Although this dinosaur is an herbivore and has an appetite of vegetation life, especially vegetation from treetops. The Brachiosaurus will gore predators by charging them and bashing them prone with its powerful and strong neck, and then stomp on them to defend itself. Because of its heavy weight, even a smaller Brachiosaurus can be deadly if crushed beneath its wide feet.
Carnotaurus
Often confused for a smaller Tyrannosaurus Rex, the Carnotaurus is built very much the same but smaller in size. Although the Carnotaurus is slightly smaller with significantly smaller arms, it has unique horns that protrude from the sides of its head similar to a bull. It uses its horns to ram, bash, and head-butt other creatures that oppose it. The Carnotaurus also has several tiny teeth that is uses to kill prey as it is a meat-eating dinosaur with a keen sense of smell. Although this predator towers over humanoids at around fourteen feet tall, it has a poor sense of vision and typically relies on sound and smell.
Deinonychus
Taller, and longer than the Velociraptor, the Deinonychus shares much of the same qualities including their appearance and unique curved claw on their feet. The Deinonychus can also jump great distances without needing a running start due to its powerful hind legs. Some of these medium sized creatures are covered in feathers, while others appear with reptilian-like skin. The Deinonychus is capable of gutting large size creatures in a matter of seconds with their long and sharp claws. Typically, these creatures will pounce on a target, latch on to it with their strong jaws, and proceed to slash at it with their claws until their target dies of blood loss or trauma. Much like Velociraptors, these creatures travel, hunt, and dwell in packs of three to six other Deinonychus. It's also common to see a Deinonychus assume the alpha position within a pack of Velociraptors
Brachiosaurus
Gargantuan monstrosity, unaligned
- Armor Class 15 (natural armor)
- Hit Points 130 (5d20 + 80)
- Speed 25 ft.
STR DEX CON INT WIS CHA 24(+7) 11(+0) 19(+4) 11(+0) 12(+1) 15(+2)
- Skills Perception +15
- Damage Resistances piercing, slashing from nonmagical weapons
- Damage Immunities bludgeoning
- Senses passive Perception 12
- Languages --
- Challenge 7 (2,900 XP)
Siege Monster. The Brachiosaurus deals double damage to objects and structures.
Keen Sight. The Brachiosaurus has advantage on Wisdom (Perception) checks that rely on sight.
Trampling Charge. If the Brachiosaurus moves at least 20 feet straight toward a creature and then hits it with a gore attack on the same turn, that target must succeed on a DC 19 Strength saving throw or be knocked prone. If the target is prone, the Brachiosaurus can make one stomp attack against it as a bonus action.
Actions
Gore. Melee Weapon Attack: +8 to hit, reach 5 ft., one target. Hit: 20 (2d12 + 7) bludgeoning damage.
Stomp. Melee Weapon Attack: +10 to hit, reach 5 ft., one target. Hit: 27 (5d8 + 7) bludgeoning damage.


Carnotaurus
Large monstrosity, unaligned
- Armor Class 13 (natural armor)
- Hit Points 85 (10d10 + 30)
- Speed 40 ft.
STR DEX CON INT WIS CHA 17(+3) 14(+2) 15(+2) 2(-4) 10(+0) 7(-2)
- Skills Perception +2
- Senses passive Perception 9
- Languages --
- Challenge 7 (2,900 XP)
Poor Depth Perception. The Carnotaurus has disadvantage on any attack roll against a target more than 30 feet away.
Keen Smell. The Carnotaurus has advantage on Wisdom (Perception) checks that rely on smell.
Charge. If the Carnotaurus moves at least 10 feet straight toward a target and then hits it with a gore attack on the same turn, the target takes an extra 9 (2d8) piercing damage. If the target is a creature, it must succeed on a DC 14 Strength saving throw or be pushed up to 10 feet away and knocked prone.
Actions
Multiattack. The Carnotaurus makes two attacks: one with its bite and one with its horns.
Bite. Melee Weapon Attack: +10 to hit, reach 5 ft., one target. Hit: 23 (3d8 + 10) piercing damage. If the target is a Medium or smaller creature, it is grappled (escape DC 14). Until this grapple ends, the target is restrained, and the Carnotaurus can't bite another target.
Gore. Melee Weapon Attack: +6 to hit, reach 5 ft., one target. Hit: 13 (2d8 + 4) piercing damage.
Deinonychus
Medium monstrosity, unaligned
- Armor Class 15 (natural armor)
- Hit Points 90 (10d8 + 30)
- Speed 60 ft.
STR DEX CON INT WIS CHA 16(+3) 18(+4) 16(+3) 19(+4) 19(+4) 14(+2)
- Saving Throws Dex +7, Int +7
- Skills Perception +16, Stealth +15
- Senses darkvision 60 ft., passive Perception +18
- Languages --
- Challenge 7 (2,900 XP)
Blood Frenzy. The Deinonychus has advantage on melee attack rolls against any creature that doesn't have all its hit points.
Keen Senses. The Deinonychus has advantage on Wisdom (Perception) Checks that rely on sight, sound, or smell.
Pack Tactics. The Deinonychus has advantage on attack rolls against a creature if at least one of the Deinonychus's allies is within 5 feet of the creature and the ally isn't incapacitated.
Standing Leap. The Deinonychus's long jump is up to 40 feet and its high jump is up to 25 feet, with or without a running start.
Savage Pounce. If the Deinonychus moves at least 20 feet straight toward a creature and then hits it with a bite attack on the same turn, that target must succeed on a DC 15 Strength saving throw or be knocked prone. If the target is prone, the Deinonychus can make two claw attacks against it as a bonus action.
Actions
Multiattack. The Deinonychus makes 3 attacks: one with its bite, and two with its claws.
Bite. Melee Weapon Attack: +8 to hit, reach 5 ft., one target. Hit: 16 (2d8 + 8) piercing damage.
Claws. Melee Weapon Attack: +8 to hit, reach 5 ft., one target. Hit: 12 (2d8 + 4) slashing damage.

Indominus Rex
Huge monstrosity, unaligned
- Armor Class 16 (natural armor)
- Hit Points 186 (13d12 + 102)
- Speed 60 ft.
STR DEX CON INT WIS CHA 25(+7) 18(+4) 20(+5) 19(+4) 12(+1) 8(-1)
- Skills Perception +8, Stealth +8
- Senses darkvision 60 ft., passive Perception +16
- Languages --
- Challenge 11 (7,200 XP)
Ambusher. The Indominus Rex has advantage on attack rolls against any creature it has surprised.
Brave. The Indominus Rex has advantage on saving throws against being frightened.
Chameleon Carapace. The Indominus Rex can change the color of its skin to match the color and texture of its surroundings. As a result, it has advantage on Dexterity (Stealth) checks made to hide.
Keen Senses. The Indominus Rex has advantage on Wisdom (Perception) Checks that rely on sight, sound, or smell.
Thermal Vision. The Indominus Rex can see any creature within 60 feet of it, that has a heated body temperature, making creatures within range have disadvantage on Dexterity (Stealth) checks made to hide.
Actions
Multiattack. The Indominus Rex makes three attacks: only one of which can be its bite.
Bite. Melee Weapon Attack: +10 to hit, reach 10 ft., one target. Hit: 43 (4d12 + 17) piercing damage. If the target is a Medium or smaller creature, it is grappled (escape DC 17). Until this grapple ends, the target is restrained, and the Indominus Rex can't bite another target.
Claws. Melee Weapon Attack: +7 to hit, reach 5 ft., one target. Hit: 11 (2d6 + 4) slashing damage.
Tail. Melee Weapon Attack: +10 to hit, reach 10 ft., one target. Hit: 20 (3d8 + 7) bludgeoning damage.
Indominus Rex
This huge dinosaur-like creature can measure up to 50 feet in length and has white, reptilian-like, skin. The Indominus Rex is a ferocious predator that kills for sport and has a very fast running speed. Although much larger than a Tyrannosaurus Rex, it resembles much of the same qualities except it has longer arms that are equipped with extended, sharp claws, as well as an extended jaw filled with several hundred more teeth. Being that this creature is a hybrid of several different types of dinosaurs and other beasts, the Indominus Rex has the ability to camouflage into its surroundings, as well as seeing other creatures body heat with thermal-like vision. This terrifying creature is extremely cunning, and utilizes its intelligence to stalk, trap, and manipulate prey and victims. Once a target is spotted, the lndominus Rex will charge towards it and attack with its claws, tail, and or bite
Megalodon
Three times the size of a normal Great White Shark, the Megalodon is a much deadlier extension of one. These gargantuan water dwelling creatures reach lengths of seventy feet and have thousands of teeth that are capable of growing back in a matter of days. Their jaws can be extended open to simply swallow other swimming creatures and are wide enough to take in small sea vessels. The Megalodon typically inhabits warmer waters and dwells in the deepest and darkest ocean floors. Some seek out the Megalodon because it's believed their teeth provide good luck and are also used in potions or for magical spells. Because some of their teeth are so large, some individuals that stumbled upon them believed that they were the remains of fossilized dragons' tongues.
Mosasaurus
This huge aquatic dwelling dinosaur roams in giant beds of water such as oceans, seas, and sometimes lakes, so long as they are large enough to contain the feared Mosasaurus. These creatures can reach lengths up to fifty-six feet and are capable of devouring any living creature smaller than itself. Although the Mosasaurus has several large and small teeth, it typically swallows prey whole. They Mosasaurus will also attack ships and has been known to swallow small boats in a single gulp. Those who have encountered a Mosasaurus, and lived to talk about it, have described them as paralyzing to look at because of their frightening size and vicious behavior. The Mosasaurus appears almost as a humongous eel with a large extended jaw and four paddle-like flippers that give it tremendous swimming speed. These creatures mostly eat creatures that occupy its watery habitat; however, they have been known to beach themselves to eat creatures upon ocean adjacent shores.
Megalodon
Gargantuan monstrosity, unaligned
- Armor Class 16 (natural armor)
- Hit Points 197 (17d20 + 19)
- Speed 0 ft., swim 70 ft.
STR DEX CON INT WIS CHA 29(+9) 18(+4) 25(+7) 5(-3) 13(+2) 7(-2)
- Skills Perception +6
- Senses blindsight 60 ft., passive Perception 15
- Languages --
- Challenge 9 (5,000 XP)
Blood Frenzy. The Megalodon has advantage on melee attack rolls against any creature that doesn't have all its hit points.
Water Breathing. The Megalodon can breathe only underwater.
Actions
Bite. Melee Weapon Attack: +10 to hit, reach 5 ft., one target. Hit: 30 (6d10) piercing damage. If the target is a creature, it is grappled (escape DC 16). Until this grapple ends, the target is restrained, and the Megalodon can't bite another target.
Swallow. The Megalodon makes one bite attack against a huge or smaller creature it is grappling. If the attack hits, that creature takes the bites damage and is swallowed, and the grapple ends. While swallowed, the creature is blinded and restrained, it has total cover against attacks and other effects outside the Megalodon. If the Megalodon takes 20 damage or more on a single turn from a creature inside it, the Megalodon must succeed on a DC 15 Constitution saving throw at the end of that turn or regurgitate all swallowed creatures, which fall prone in a space within 10 feet of the Megalodon. If the Megalodon dies, a swallowed creature is no longer restrained by it and can escape from the corpse using 25 feet of movement, exiting prone.
Mosasaurus
Huge monstrosity, unaligned
- Armor Class 19 (natural armor)
- Hit Points 243 (18d12 + 126)
- Speed 0 ft., swim 60 ft.
STR DEX CON INT WIS CHA 30(+10) 17(+3) 20(+5) 14(+2) 15(+2) 12(+1)
- Skills Perception +15
- Damage Immunities cold
- Condition Immunities charmed, frightened, prone, petrified, terrified
- Senses darkvision 120ft., passive Perception 16
- Languages --
- Challenge 18 (20,000 XP)
Fear Aura. Any creature hostile to the Mosasaurus that starts its turn within 20 feet of the Mosasaurus must make a DC 21 Wisdom saving throw, unless the Mosasaurus is incapacitated. On a failed save, the creature is frightened until the start of its next turn. If a creature's saving throw is successful, the creature is immune to the Mosasaurus' Fear Aura for the next 24 hours.
Hold Breath. The Mosasaurus can hold its breath out of water for 1 hour.
Siege Monster. The Mosasaurus deals double damage to objects and structures.
Actions
Bite. Melee Weapon Attack: +18 to hit, reach 5 ft., one target. Hit: 23 (3d8 + 10) piercing damage. If the target is a large or smaller creature that creature is grappled and swallowed. While swallowed, the creature is blinded and restrained, it has total cover against attacks and other effects outside the Mosasaurus, and it takes 42 (12d6) necrotic damage at the start of each of the Mosasaurus' turns. If the Mosasaurus takes 50 damage or more on a single turn from a creature inside it, the Mosasaurus must succeed on a DC 25 Constitution saving throw at the end of that turn or regurgitate all swallowed creatures, which fall prone in a space within 10 feet of the Mosasaurus. If the Mosasaurus dies, a swallowed creature is no longer restrained by it and can escape from the corpse using 25 feet of movement, exiting prone.

Quetzalcoatlus
Huge monstrosity, unaligned
- Armor Class 13 (natural armor)
- Hit Points 126 (11d12 + 55)
- Speed 25ft., fly 80 ft.
STR DEX CON INT WIS CHA 15(+2) 19(+4) 21(+5) 11(+0) 13(+2) 14(+2)
- Skills Perception +14
- Damage Immunities lightning, thunder
- Senses darkvision 60 ft., passive Perception 12
- Languages --
- Challenge 6 (2,300 XP)
Dive Attack. If the Quetzalcoatlus is flying and dives at least 20 feet straight toward a target and then hits it with a melee weapon attack, the attack deals an extra 10 (1d12 + 4) damage to the target.
Flyby. The Quetzalcoatlus doesn't provoke an opportunity attack when it flies out of an enemy's reach.
Keen Sight. The Quetzalcoatlus has advantage on Wisdom (Perception) checks that rely on sight.
Actions
Beak. Melee Weapon Attack: +9 to hit, reach 5 ft., one target. Hit: 22 (3d10 + 6) piercing damage.
Quetzalcoatlus
With a wingspan of up to forty feet, the Quetzalcoatlus is a huge bird-like creature that, when standing, is the size of a giraffe. Excluding giant creatures and dragons, the Quetzalcoatlus is the largest flying creature. It has a long toothless and narrow beak used for eating fish and other small or tiny creatures. Typically, the Quetzalcoatlus travels in small packs or remains isolated away from any other creatures. It spends a majority of its time soaring through the skies only to be grounded while resting. The Quetzalcoatlus has a long neck and stout body with bat-like wings and tiny hook-like claws on its hands. Its skull has a slight bulge that protects it from being crushed by predators as well as provides aerodynamics while flying.
Spinosaurus
The Spinosaurus is a massive carnivorous dinosaur with a large overgrown spine protruding from its back. It has a large extended mouth similar to an alligator that's filled with several long piercing teeth. The size and strength of a Spinosaurus is what makes this creature one of the deadliest dinosaurs known to exist. As the Spinosaurus towers over a Tyrannosaurus Rex, it uses its powerful jaws to break the necks of larger creatures before feasting on their remains. In addition to its strength and size, this dinosaur is a skilled hunter on both land and in water. The Spinosaurus uses its keen sense of hearing and smell to track and listen for prey which ranges from fish to other large creatures. Most of these creatures prefer land but some do dwell and hunt in lakes and rivers.
Velociraptor
Quick, intelligent, and proficient in hunting and tracking, the Velociraptor is one of the most feared creatures of its kind, even despite being relatively smaller in size compared to other dinosaurs. The Velociraptor is a carnivorous creature that appears as a large bipedal lizard-like creature with long and sharp claws on its hands, and feet. The Velociraptor is easily identifiable by its long and protruding curved claw on each of its feet. These creatures are some of the most intelligent amongst the dinosaur kingdom, and travel in packs of up to six, and no less than three. Velociraptor's use stealth and pack tactics to surround and trap their prey while using their own language to communicate intelligent verbal commands to one another. Much like wolves, Velociraptor's will always defend another of its kind especially when another calls for help with its loud and unique sounding bark. When a Velociraptor engages a target, it will often leap great distances and pounce on its target pinning it to the ground before thrashing with its sharp claws and snapping with its piercing bite. Because the Velociraptor is an intelligent creature, they are among the only dinosaurs that can open doors.


Spinosaurus
Huge monstrosity, unaligned
- Armor Class 17 (natural armor)
- Hit Points 166 (13d12 + 82)
- Speed 50 ft., swim 50 ft.
STR DEX CON INT WIS CHA 27(+8) 17(+3) 20(+5) 9(-1) 15(+2) 8(-1)
- Skills Perception +6
- Senses passive Perception 16
- Languages --
- Challenge 11 (7,200 XP)
Aggressive. As a bonus action, the Spinosaurus can move up to its speed toward a hostile creature that it can see.
Amphibious. The Spinosaurus can breathe air and water.
Blood Frenzy. The Spinosaurus has advantage on melee attack rolls against any creature that doesn't have all its hit points.
Charge. If the Spinosaurus moves at least 15 feet straight toward a target and then hits it with a melee attack on the same turn, the target takes an extra 6 (1d12) bludgeoning damage. If the target is a creature, it must succeed on a DC 15 Strength saving throw or be pushed up to 20 feet away and knocked prone.
Keen Hearing and Smell. The Spinosaurus has advantage on Wisdom (Perception) checks that rely on hearing and smell.
Siege Monster. The Spinosaurus deals double damage to objects and structures.
Actions
Multiattack. The Spinosaurus makes three melee attacks: only one of which can be its bite.
Bite. Melee Weapon Attack: +10 to hit, reach 10 ft., one target. Hit: 43 (4d12 + 17) piercing damage. If the target is a smaller creature, it is grappled (escape DC 17). Until this grapple ends, the target is restrained, and the Spinosaurus can't bite another target.
Claws. Melee Weapon Attack: +10 to hit, reach 5 ft., one target. Hit: 10 (1d8 + 6) slashing damage.
Velociraptor
Medium monstrosity, unaligned
- Armor Class 14 (natural armor)
- Hit Points 65 (10d8 + 20)
- Speed 60 ft.
STR DEX CON INT WIS CHA 14(+2) 20(+5) 14(+2) 19(+4) 18(+4) 13(+2)
- Skills Perception +15, Stealth +14
- Senses darkvision 60 ft., passive Perception +17
- Languages --
- Challenge 4 (1,100 XP)
Blood Frenzy. The Velociraptor has advantage on melee attack rolls against any creature that doesn't have all its hit points.
Keen Senses. The Velociraptor has advantage on Wisdom (Perception) checks that rely on sight, sound, or smell.
Pack Tactics. The Velociraptor has advantage on an attack roll against a creature if at least one of the Velociraptor's allies is within 5 feet of the creature and the ally isn't incapacitated.
Pounce. If the Velociraptor moves at least 30 feet straight toward a creature and then hits it with a claw attack on the same turn, that target must succeed on a DC 15 Strength saving throw or be knocked prone. If the target is prone, the Velociraptor can make one bite attack against it as a bonus action.
Standing Leap. The Velociraptor's long jump is up to 30 feet and its high jump is up to 20 feet, with or without a running start.
Actions
Multiattack. The Velociraptor makes three attacks: one with its bite, and two with its claws.
Bite. Melee Weapon Attack: +5 to hit, reach 5 ft., one target. Hit: 12 (2d8 + 4) piercing damage.
Claws. Melee Weapon Attack: +5 to hit, reach 5 ft., one target. Hit: 10 (2d8 + 2) slashing damage.
Dread Wight
Dread wights are the animated remains of creatures that were terribly violent and hateful in life. They exist only to continue their reign of terror against others, causing fear, pain, sorrow, and death whenever they can.
A dread wight has the features it did in life, but it is emaciated and wizened. Its face is constantly twisted into a rictus grin of cruelty, and intense hatred of the living burns in its eyes. Its weak-looking form disguises an unnatural strength and speed that makes its life-draining powers stunningly deadly.
Dread Wight
Medium undead, neutral evil
- Armor Class 16 (natural armor)
- Hit Points 150 (20d8 + 60)
- Speed 30 ft.
STR DEX CON INT WIS CHA 17(+3) 14(+2) 16(+3) 10(+0) 13(+1) 13(+1)
- Proficiency Bonus +4
- Skills Perception +4, Stealth +5
- Damage Resistances necrotic; bludgeoning, piercing, and slashing from nonmagical weapons that aren't silvered
- Damage Immunities poison
- Condition Immunities exhaustion, poisoned
- Senses darkvision 60 ft., passive Perception 14
- Languages the languages it knew in life
- Challenge 11 (7,200 XP)
Dread Aura. A creature that starts its turn within 15 feet of the dread wight must succeed on a DC 15 Constitution saving throw or take 6 (2d6) psychic damage and become frightened until the start of its next turn. If the target's saving throw is successful, it is immune to the dread wight's dread aura for the next 24 hours. Undead are immune to this aura.
Turn Resistance. The dread wight has advantage on saving throws against any effect that turns undead.
Actions
Multiattack. The dread wight makes three attacks with its greatsword. It can use its finger of dread and its life drain in place of one longsword attack each.
Greatsword. Melee Weapon Attack: +7 to hit, reach 5 ft., one target. Hit: 13 (2d6 + 3) slashing damage plus 14 (4d6) necrotic damage.
Life Drain. Melee Weapon Attack: +7 to hit, reach 5 ft., one target. Hit: 23 (4d8 + 3) necrotic damage. The target must succeed on a DC 14 Constitution saving throw or its hit point maximum is reduced by an amount equal to the damage taken. This reduction lasts until the target finishes a long rest. The target dies if this effect reduces its hit point maximum to 0.
Finger of Dread (Recharge 6). The dread wight points at one creature it can see within 60 feet of it. The target must succeed on a DC 15 Wisdom saving throw or take 27 (6d8) necrotic damage and become frightened until the end of the dread wight's next turn. While frightened in this way, the creature is also paralyzed. If the target's saving throw is successful, it is immune to the dread wight's finger of doom for the next 24 hours.
Create Ghoul or Ghast. The dread wight targets a humanoid within 10 feet of it that has been dead for no longer than 24 hours and died violently. The target's body rises as a ghoul (on a roll of 1-4 on a d6) or as a ghast (on a roll of 5-6 on a d6). The ghoul or ghast is under the dread wight's control. The wight can have no more than seven ghouls or ghasts under its control at one time.

Dread Wraith
A wraith is malice incarnate, concentrated into an incorporeal form that seeks to quench all life. The creature is suffused with negative energy, and its mere passage through the world leaves nearby plants blackened and withered. Animals flee from its presence. The most ancient wraiths grow to the size of an ogre, towering figures of pure malevolence. They lurk in the most dangerous ruins, soaking up necrotic energy to empower themselves, with many specters under their command to do their bidding.
Vile Oblivion. When a mortal humanoid lives a debased life or enters into a fiendish pact, it consigns its soul to eternal damnation in the Lower Planes. However, sometimes the soul becomes so suffused with negative energy that it collapses in on itself and ceases to exist. When this occurs, the spirit becomes a soulless wraith — a malevolent void trapped on the plane where it died. Almost nothing of the wraith's former existence is preserved; in this new form, it exists only to annihilate other life.
Dread Wraith
Medium undead, neutral evil
- Armor Class 13 (16 with mage armor)
- Hit Points 150 (20d8 + 60)
- Speed 0 ft., fly 60 ft. (hover)
STR DEX CON INT WIS CHA 6(-2) 16(+3) 16(+3) 12(+1) 14(+2) 17(+3)
- Proficiency Bonus +4
- Damage Resistances acid, cold, fire, lightning, thunder; bludgeoning, piercing, and slashing from nonmagical weapons that aren't silvered
- Damage Immunities necrotic, poison
- Condition Immunities charmed, exhaustion, grappled, paralyzed, petrified, poisoned, prone, restrained
- Senses darkvision 60 ft., passive Perception 12
- Languages the languages it knew in life
- Challenge 11 (7,200 XP)
Dread Aura. A creature that starts its turn within 15 feet of the dread wraith must succeed on a DC 15 Constitution saving throw or take 6 (2d6) psychic damage and become frightened until the start of its next turn. If the target's saving throw is successful, it is immune to the dread wraith's dread aura for the next 24 hours. Undead are immune to this aura.
Incorporeal Movement. The wraith can move through other creatures and objects as if they were difficult terrain. It takes 5 (1d10) force damage if it ends its turn inside an object.
Innate Spellcasting. The dread wraith's innate spellcasting ability is Charisma (spell save DC 15). It can innately cast the following spells, requiring no material components:
At will: detect magic, mage armor, silent image
Spellcasting. The dread wraith is an 11th-level spellcaster. Its spellcasting ability is Charisma (spell save DC 15, +7 to hit with spell attacks). It regains its expended spell slots when it finishes a short or long rest (5th-level spell slots) or when it finishes a long rest (6th-level spell slot). It knows the following warlock spells:
Cantrips (at will): chill touch, mage hand, minor illusion,
poison spray1st - 5th level (3 5th-level slots): arms of Hadar, cause
fear, blight, counterspell, crown of madness,
darkness, fear, greater invisibility, dimension door,
synaptic static, negative energy flood6th level (1 slot): eyebite
Turn Resistance. The dread wraith has advantage on saving throws against any effect that turns undead.
Actions
Life Drain. Melee Weapon Attack: +7 to hit, reach 5 ft., one target. Hit: 23 (4d8 + 3) necrotic damage. The target must succeed on a DC 15 Constitution saving throw or its hit point maximum is reduced by an amount equal to the damage taken. This reduction lasts until the target finishes a long rest. The target dies if this effect reduces its hit point maximum to 0.
Create Specter or Poltergeist. The dread wraith targets a humanoid within 10 feet of it that has been dead for no longer than 24 hours and died violently. The target's body rises as a specter (on a roll of 1-4 on a d6) or as a poltergeist (on a roll of 5-6 on a d6). The specter or poltergeist is under the dread wight's control. The wraith can have no more than seven specters or poltergeists under its control at one time.

Drowned Ghoul
Ghouls roam the night in packs, driven by an insatiable hunger for humanoid flesh.
Devourers of Flesh. Like maggots or carrion beetles, ghouls thrive in places rank with decay and death. A ghoul haunts a place where it can gorge on dead flesh and decomposing organs. When it can't feed on the dead, it pursues living creatures and attempts to make corpses of them. Though they gain no nourishment from the corpses they devour, ghouls are driven by an unending hunger that compels them to consume. A ghoul's undead flesh never rots, and this monster can persist in a crypt or tomb for untold ages without feeding.
Drowned Ghoul
Medium undead, chaotic evil
- Armor Class 12
- Hit Points 22 (5d8)
- Speed 30 ft.
STR DEX CON INT WIS CHA 13(+1) 15(+2) 10(+0) 7(-2) 10(+0) 6(-2)
- Proficiency +2
- Damage Immunities poison
- Condition Immunities charmed, exhaustion, poisoned
- Senses darkvision 60 ft., passive Perception 10
- Languages Common
- Challenge 1 (200 XP)
Bottom Treader. The drowned ghoul cannot swim, and it sinks to the bottom of any body of water. It takes no penalties to its movement or attacks when underwater. It is immune to the effects of being underwater at a depth greater than 100 feet.
Undead Nature. A drowned ghoul doesn't require air, food, drink, or sleep.
Actions
Bite. Melee Weapon Attack: +2 to hit, reach 5 ft., one target. Hit: 9 (2d6 + 2) piercing damage.
Claws. Melee Weapon Attack: +4 to hit, reach 5 ft., one target. Hit: 7 (2d4 + 2) slashing damage. If the target is a creature other than an elf or undead, it must succeed on a DC 10 Constitution saving throw or be paralyzed for 1 minute. The target can repeat the saving throw at the end of each of its turns, ending the effect on itself on a success.
Drowned Zombie
From somewhere in the darkness, a gurgling moan is heard. A form lurches into view, dragging one foot as it raises bloated arms and broken hands. The zombie advances, driven to kill anyone too slow to escape its grasp.
Dark Servants. Sinister necromantic magic infuses the remains of the dead, causing them to rise as Zombies that do their creator's bidding without fear or hesitation. They move with a jerky, uneven gait, clad in the moldering apparel they wore when put to rest, and carrying the stench of decay.
Most Zombies are made from humanoid remains, though the flesh and bones of any formerly living creature can be imbued with a semblance of life. Necromantic magic, usually from spells, animates a zombie. Some zombies rise spontaneously when dark magic saturates an area. Once turned into a zombie, a creature can't be restored to life except by powerful magic, such as a resurrection spell.
A zombie retains no vestiges of its former self, its mind devoid of thought and imagination. A zombie left without orders simply stands in place and rots unless something comes along that it can kill. The magic animating a zombie imbues it with evil, so left without purpose, it attacks any living creature it encounters.
Hideous Forms. Zombies appear as they did in life, showing the wounds that killed them. However, the magic that creates these vile Creatures often takes time to run its course. Dead warriors might rise from a battlefield, eviscerated and bloated after days in the sun. The muddy cadaver of a peasant could claw its way from the ground, riddled with maggots and worms. A zombie might wash ashore or rise from a marsh, swollen and reeking after weeks in The Water.
Mindless Soldiers. Zombies take the most direct route to any foe, unable to comprehend obstacles, tactics, or dangerous terrain. A zombie might stumble into a fast-flowing river to reach foes on a far shore, clawing at the surface as it is battered against rocks and destroyed. To reach a foe below it, a zombie might step out of an open window. Zombies stumble through roaring infernos, into pools of acid, and across fields littered with caltrops without hesitation.
A zombie can follow simple orders and distinguish friends from foes, but its ability to reason is limited to shambling in whatever direction it is pointed, pummeling any enemy in its path. A zombie armed with a weapon uses it, but the zombie won't retrieve a dropped weapon or other tool until told to do so.

Drowned Zombie
Medium undead, neutral evil
- Armor Class 8
- Hit Points 22 (3d8 + 9)
- Speed 20 ft.
STR DEX CON INT WIS CHA 13(+1) 6(-2) 16(+3) 3(-4) 6(-2) 5(-3)
- Proficiency Bonus +2
- Damage Immunities poison
- Condition Immunities poisoned
- Senses darkvision 60 ft., passive Perception 8
- Languages understands the languages it knew in life but can't speak
- Challenge 1/4 (50 XP)
Bottom Treader. The drowned zombie cannot swim, and it sinks to the bottom of any body of water. It takes no penalties to its movement or attacks when underwater. It is immune to the effects of being underwater at a depth greater than 100 feet.
Undead Fortitude. If damage reduces the zombie to 0 hit points, it must make a Constitution saving throw with a DC of 5 + the damage taken, unless the damage is radiant or from a critical hit. On a success, the zombie drops to 1 hit point instead.
Undead Nature. A drowned zombie doesn't require air, food, drink, or sleep.
Actions
Slam. Melee Weapon Attack: +3 to hit, reach 5 ft., one target. Hit: 4 (1d6 + 1) bludgeoning damage.
Evil Doll
Over the centuries, as Montarthas Manor stood at the edge of the haunted Ruins of Torthil, all manner of evil came to reside here. Some of that evil coalesced into the rotting body of a doll long buried beneath the rubble. The doll, powered by necrotic energy, roams the Manor preying on anything living that is unlucky enough to stumble inside the manor.
Evil Doll
Tiny construct, chaotic evil
- Armor Class 14
- Hit Points 119 (14d10 + 42)
- Speed 20 ft.
STR DEX CON INT WIS CHA 7(-2) 18(+4) 17(+3) 8(-1) 10(+0) 16(+3)
- Damage Vulnerabilities fire
- Damage Resistances piercing and slashing from nonmagical weapons
- Damage Immunities poison
- Condition Immunities charmed, exhaustion, frightened, paralyzed, poisoned, unconscious
- Senses darkvision 60 ft., passive Perception 10
- Languages Common
- Challenge 4 (1,100 XP)
False Appearance. While the evil doll remains motionless, it is indistinguishable from an ordinary, inanimate children's doll.
Frightening Lullaby. Once per day, the evil doll can use a bonus action to sing a creepy children's lullaby. All creatures within 30 feet that can hear it, must succeed on a DC 15 Wisdom saving throw.
On a failed saving throw the creature will become frightened and must succeed on another DC 15 Wisdom saving throw to break the enchantment at the end of their next turn. On a second failed save, the creature will become paralyzed, and can attempt a DC 15 Wisdom saving throw on each turn. Once it has succeeded a saving throw, the creature will no longer be paralyzed.
Shadow Blend (Recharge 5-6). As a bonus action, the evil doll can disappear into the shadows. Use this feature as an escape mechanism.
Actions
Multiattack. The evil doll makes two attacks: one with its knife and one with its claw.
Claw. Melee Weapon Attack: +6 to hit, reach 5ft., one target. Hit: 7 (1d6 + 4) slashing damage.
Knife. Melee Weapon Attack: +6 to hit, reach 5ft., one target. Hit: 11 (2d6 + 4) piercing damage.
Gertrude: Night Hag
Gertrude is a night hag that became employed by General Montarthas as an advisor. Gertrude would assist the General in decision making with the forthcoming yearly orc invasions. Ultimately her plans were to ruin the city and use its population to feed from the power of their life force. This was achievable by seducing the General and corrupting his heart with a powerful green emerald. Gertrude first fed off the life force of the manor's residents, sucking them dry. As her power grew, the population from the city were next to fall. Heavily undermanned, the city ultimately fell to the orcs and was abandoned, with only the manor standing the test of time.
Gertrude: Night Hag
Medium fiend, neutral evil
- Armor Class 17 (natural armor)
- Hit Points 112 (15d8 + 45)
- Speed 30 ft.
STR DEX CON INT WIS CHA 18(+4) 15(+2) 16(+3) 16(+3) 14(+2) 16(+3)
- Skills Deception +7, Insight +6, Perception +6, Stealth +6
- Damage Resistances cold, fire; bludgeoning, piercing, and slashing from nonmagical weapons that aren't silvered
- Condition Immunities charmed
- Senses darkvision 120 ft., passive perception 16
- Languages Abyssal, Common, Infernal, Primordial
- Challenge 5 (1,800 XP)
Innate Spellcasting. The hag's innate spellcasting ability is Charisma (spell save DC 13, +5 to hit with spell attacks). She can innately cast the following spells, requiring no material components.
At will: detect magic, magic missile
2/day each: create undead, plane shift (self only),
ray of enfeeblement, sleepMagic Resistance. The hag has advantage on saving throws against spells and other magical effects.
Actions
Claws (Hag Form Only). Melee Weapon Attack: +6 to hit, reach 5 ft., one target. Hit: 13 (2d8 + 4) slashing damage.
Change Shape. The hag magically polymorphs into a Small or Medium female humanoid, or back into her true form. Her statistics are the same in each form. Any equipment she is wearing or carrying is transformed. She reverts to her true form if she dies.
Etherealness. The hag magically enters the Ethereal Plane from the Material Plane, or vice versa. To do so, she must have a heartstone in her possession.
Nightmare Haunting (1/Day). While on the Ethereal Plane, the hag magically touches a sleeping humanoid on the Material Plane. A protection from evil and good spell cast on the target prevents this contact. As long as the contact persists, the target has dreadful visions. If these visions last for at least 1 hour, the target gains no benefit from its rest, and its hit point maximum is reduced by 5 (1d10). If this effect reduces the target's hit point maximum to 0, the target dies, and if they were evil, its soul is trapped in the hag's soul bag. The reduction to the target's hit point maximum lasts until removed by the greater restoration spell or similar magic.

Giant Undead Ape
These giant undead apes are mindless soldiers of Aenor's. The undead apes will take the most direct route to any foe, unable to comprehend obstacles, tactics, or dangerous terrain. They can follow simple orders and distinguish friends from foes, but its ability to reason is limited to shambling in whatever direction it is pointed, pummeling any enemy in its path.
Giant Undead Ape
Huge undead, chaotic evil
- Armor Class 12
- Hit Points 240 (20d12 + 132)
- Speed 40 ft., climb 40 ft.
STR DEX CON INT WIS CHA 24(+7) 14(+2) 22(+6) 7(-2) 12(+1) 7(-2)
- Saving Throws Con +9
- Skills Athletics +9, Perception +4
- Damage Immunities poison
- Condition Immunities charmed, exhaustion, poisoned
- Senses passive Perception 14
- Languages --
- Challenge 7 (2,900 XP)
Reckless. At the start of its turn, the ape can gain advantage on all melee weapon attack rolls during that turn, but attack rolls against it have advantage until the start of its next turn.
Undead Fortitude. If damage reduces the undead ape to 0 hit points, it must make a Constitution saving throw with a DC of 5 + the damage taken, unless the damage is radiant or from a critical hit. On a success, the undead ape drops to 1 hit point instead.
Actions
Multiattack. The ape makes two fist attacks.
Fist. Melee Weapon Attack: +10 to hit, reach 10 ft., one target. Hit: 22 (3d10 + 7) bludgeoning damage.
Rock. Ranged Weapon Attack: +10 to hit, range 50/100 ft., one target. Hit: 30 (7d6 + 7) bludgeoning damage.
Gloom
A gloom is a terrifying condensation of death and necrotic energy. Hailing from the cursed lands of the Shadowfell, these nightmarish creatures hunt areas of the world that are saturated with evil and death. The gloom's proclivity for darkness makes it extremely dangerous at night or in heavily shaded places where it can blend in with its surroundings.
Gloom
Medium undead, chaotic evil
- Armor Class 8 (natural armor)
- Hit Points 3 (1d6 - 1)
- Speed 20 ft.
STR DEX CON INT WIS CHA 8(-1) 10(+0) 8(-1) 6(-2) 14(+2) 8(-1)
- Damage Vulnerabilities radiant
- Damage Immunities necrotic, poison
- Condition Immunities frightened, grappled, paralyzed, petrified, poisoned, prone, restrained
- Senses darkvision 60 ft., passive Perception 10
- Languages Common
- Challenge 1 (200 XP)
Midnight Stealth. In nighttime conditions or areas of darkness, the Gloom blends in almost perfectly and receives a +8 bonus to Stealth checks.
Sphere of Darkness. A sphere of total darkness surrounds the creature. While walls and natural barriers can block it, it will extend outward up to 60 feet and extinguishes nonmagical and magical darkness. A DC 15 Perception check is required to see the Gloom's dark essence at the sphere's center.
Actions
Squeeze Heart. Melee Weapon Attack: +0 to hit, reach 5 ft., one target.
The Gloom reaches through its target's armor and chest to squeeze their heart. This attack ignores the target's AC. The Gloom only has to succeed on an attack roll of 10 or higher. If that happens, the DM must roll a D10 and use the chart below to calculate the amount of necrotic damage the Gloom Deals.
Dice Result Necrotic Damage 1 - 2 2d4 3 - 4 2d6 5 - 6 2d8 7 - 8 2d10 9 - 0 2d12
Hybrid Elementals
The elemental planes of water, earth, fire, and air align on planar borders where two elements combine to form a new dual element, such as earth and fire creating lava. These border zones give rise to new hybrid elementals made of these combined elements.
Sometimes a hybrid elemental can be formed when an elemental journeys to an elemental plane that isn't native to and absorbs its energy. Most elementals are harmed by extended exposure to the other elemental planes but surviving in one can enable an elemental to absorb its energy. A dual elemental can even fuse with a third element and be reborn as a more powerful hybrid elemental made of three elements.
Ash Elemental
An ash elemental, composed of fire and earth, rolls across the ground as a searing hot mount of ashes, dust, and cinders. Almost as hot as a fire elemental but incapable of starting nearly as many blazes, the ash elemental still leaves a grimy, burning trail in its wake. At times, it may spin in a sudden flurry of cinders, tossing up a cloud of hot dust and ash around it as a defense.
These elementals are often flung across the sky by volcanic eruptions. Almost as light as air and capable of flying upon heated air, ash elementals float slowly to the ground across the nearby region. They can also emerge from the ashes of huge fires, both in cities and the wild.
Ash Elemental
Large elemental, neutral
- Armor Class 15 (natural armor)
- Hit Points 114 (12d10 + 48)
- Speed 40 ft.
STR DEX CON INT WIS CHA 16(+3) 15(+2) 18(+4) 6(-2) 10(+0) 6(-2)
- Damage Resistances bludgeoning, piercing, and slashing from nonmagical attacks
- Damage Immunities fire, poison
- Condition Immunities exhaustion, grappled, paralyzed, petrified, poisoned, prone, restrained, unconscious
- Senses darkvision 60 ft., passive Perception 10
- Languages Primordial
- Challenge 6 (2,300 XP)
Ash Form. The elemental can move through a space as narrow as 1 inch wide without squeezing. A creature that touches the elemental or hits it with a melee attack while within 5 feet of it takes 4 (1d8) fire damage. In addition, the elemental can enter a hostile creature's space and stop there. The first time it enters a creature's space on a turn, that creature takes 4 (1d8) fire damage. A creature that ends its turn inside the elemental's space also takes 4 (1d8) fire damage.
Slow Fall/Rise. The elemental falls at a rate of only 60 feet per round and takes no damage from falls. While the elemental is in extremely hot environments it also has a flying speed of 15 feet and can hover.
Actions
Multiattack. The elemental makes three Touch attacks.
Touch. Melee Weapon Attack: +6 to hit, reach 5 ft., one target. Hit: 10 (2d6 + 3) fire damage.
Ash Flurry (Recharge 4-6). Each creature within 5 feet of the elemental must make a DC 14 Dexterity saving throw. On a failure, a target takes 18 (4d8) fire damage, or half as much damage on a success. In addition, the area of effect is heavily obscured by searing ash until the start of the elemental's next turn. Any creature that ends its turn in the area takes 4 (1d8) fire damage.
Burning Spirit
Burning spirits are by far the most dangerous of any of the elemental spirits, though they rarely cause harm on purpose. They are the most friendly and warm of these minor spirits, and they are usually the smallest, too. Yet simply by following their urges to explore, investigate, learn, and make friends, these hapless creatures set the world ablaze with spreading flames. Few burning spirits understand that fire is dangerous to others.
Because of the light, heat, and energy that a burning spirit constantly produces, some people endeavor to capture these tiny spirits inside glass jars or other non-flammable containers. This can backfire, as burning spirits are intelligent enough to remember a grudge, and should one ever escape your imprisonment, you may return to find all you own consumed in a blaze. The spirit might not understand the danger of its own flames, but its tiny rampage will ignite them anyway.
Chaos Elemental
Only rarely does an elemental of three elements survive the fusion of the fourth missing element. Each kind of tri-elemental is menaced by the remaining element, so most infusions of that element will be lethal. However, in exceedingly rare cases, all four elements can be combined in the body of a single elemental, transforming it into an embodiment of pure chaos and destruction: a fiendish elemental called a chaos elemental.
A chaos elemental's body is a primordial tempest of all four elements, constantly swirling and fighting each other, creating hybrid elements that quickly dissolve into the four elements again. Anywhere from four to twelve arms may emerge from the roiling elemental body, with each arm formed almost entirely out of one of the four elements. A chaos elemental contains the element of air but is too heavy with other elements to be able to fly.
Force of Destruction. The combination of so many opposed elements and hybrid elements fighting for dominance within the elemental is the complete suffusion of the elemental with malevolent chaotic energy. Because of this, chaos elementals are elemental demons, attuned to the Abyss, and driven to cause destruction, madness, pain, and death. From the moment of their birth, these elementals roam across creation, destroying all in their path. Only the most cunning of villains can harness the wrath of a chaos elemental without bringing destruction on themselves in the process, but that doesn't prevent the many demon lords of the Abyss or the archdevils of the Nine Hells from trying.
Elemental Cauldrons. Inside a chaos elemental's body, all kinds of bizarre transmutations and infusions are constantly occurring. Legends say that any material, no matter how rare, magical, or impossible, could form inside these living laboratories.
Burning Spirit
Tiny elemental, chaotic neutral
- Armor Class 14 (natural armor)
- Hit Points 18 (4d4 + 8)
- Speed 20 ft., fly 40 ft.
STR DEX CON INT WIS CHA 3(-4) 18(+4) 15(+2) 7(-2) 8(-1) 11(+0)
- Skills Stealth +6
- Damage Resistances bludgeoning, piercing, and slashing from nonmagical attacks
- Damage Immunities fire, poison
- Condition Immunities exhaustion, grappled, paralyzed, petrified, poisoned, prone, restrained, unconscious
- Senses darkvision 60 ft., passive Perception 9
- Languages Primordial
- Challenge 1 (200 XP)
Avoidance. If the spirit is subjected to an effect that allows it to make a saving throw to take only half damage, it instead takes no damage if it succeeds on the saving throw, and only half damage if it fails.
Fire Form. The spirit can entire a hostile creature's space and stop there. It can move through a space as narrow as 1 inch wide without squeezing. A creature that touches the spirit or hits it with a melee attack while within 5 feet of it takes 5 (1d10) fire damage. Any flammable object the spirit touches (including those it walks on) ignites instantly if it isn't being worn or carried.
Illumination. The spirit sheds bright light in a 5-foot radius and dim light for an additional 5 feet.
Water Susceptibility. For every 5 feet the spirit moves in water, or for every gallon of water splashed on it, it takes 1 cold damage.
Actions
Touch. Melee Weapon Attack: +6 to hit, reach 5 ft., one target. Hit: 6 (1d4 + 4) fire damage. If the target is a creature or a flammable object, it ignites. Until a creature takes an action to douse the fire, the target takes 5 (1d10) fire damage at the start of each of its turns.
Chaos Elemental
Gargantuan elemental, chaotic evil
- Armor Class 19 (natural armor)
- Hit Points 350 (20d20 + 140)
- Speed 60 ft., burrow 50 ft., climb 50 ft., swim 80 ft.
STR DEX CON INT WIS CHA 26(+8) 17(+3) 25(+7) 12(+1) 10(+0) 19(+4)
- Saving Throws Str +15, Dex +10, Wis +7, Cha +11
- Damage Immunities acid, cold, fire, lightning, poison, thunder; bludgeoning, piercing, and slashing from nonmagical attacks
- Condition Immunities charmed, exhaustion, frightened, paralyzed, petrified, poisoned, unconscious
- Senses blindsight 120 ft., tremorsense 120 ft., passive Perception 10
- Languages Abyssal, Primordial, telepathy 120 ft.
- Challenge 22 (41,000 XP)
Chaos Form. The elemental ignores movement restrictions caused by the elements. At the start of each of its turns, each creature within 5 feet of it takes 3 (1d6) fire damage plus 3 (1d6) acid damage, 3 (1d6) cold damage, 3 (1d6) lightning damage, and 3 (1d6) thunder damage. A creature also takes this damage when it touches the elemental or hits it with a melee attack while within 5 feet of it.
Fiendish Hybrid. The elemental is also a fiend (demon).
Legendary Resistance (3/Day). If the elemental fails a saving throw, it can choose to succeed instead.
Magic Resistance. The elemental has advantage on saving throws against spells and other magical effects.
Magic Weapons. The elemental's weapon attacks are magical.
Siege Monster. The elemental deals double damage to objects and structures.
Actions
Multiattack. The elemental makes four attacks: a fling, a scorch, a slam, and a smash attack.
Fling. Melee Weapon Attack: +15 to hit, reach 10 ft., one target. Hit 17 (2d8 + 8) bludgeoning damage plus 4 (1d8) thunder damage, and the target must succeed on a DC 20 Constitution saving throw or be pushed 30 feet in a direction of the elemental's choice and deafened until the end of the target's next turn. Unsecured objects of size Huge or smaller are pushed automatically.
Scorch. Melee Weapon Attack: +15 to hit, reach 10 ft., one target. Hit 22 (5d8) fire damage, and if the target is a creature or a flammable object, it ignites. Until a creature takes an action to douse the fire, the target takes 11 (2d10) fire damage at the start of each of its turns.
Slam. Melee Weapon Attack: +15 to hit, reach 20 ft., one target. Hit 17 (2d8 + 8) bludgeoning damage plus 4 (1d8) cold damage, and the target is grabbed by the water arm (escape DC 20) and restrained while it is grabbed.
Smash. Melee Weapon Attack: +15 to hit, reach 20 ft., one target. Hit 21 (3d8 + 8) bludgeoning damage, and the target must succeed on a DC 20 Strength saving throw of be knocked prone.
Transmute (Recharge 5-6). The elemental alters the form of each creature and object within 30 feet of it to confuse the elements. Ground, water, and air in the area is transformed to slurry: heavily obscured water that is difficult terrain. Each other creature and object in the area must make a DC 20 Constitution saving throw. On a failed save, a target takes 39 (6d12) force damage and is stunned until the end of its next turn. On a success, it takes half damage and isn't stunned.
Legendary Actions
The elemental can take 3 legendary actions, choosing from the options below. Only one legendary action option can be used at a time and only at the end of another creature's turn. The elemental regains spent legendary actions at the start of its turn.
Destructive Wrath. The elemental makes two melee attacks using different weapons. The attacks must be made against objects or structures.
Howl of Terror (Costs 2 Actions). The elemental roars with primordial fury that resonates in the soul. Each creature of the elemental's choice that is within 120 feet of the elemental must make a DC 20 Wisdom saving throw. On a failed save, a creature is frightened until the end of its next turn. On a success, a creature becomes immune to the elemental's Howl of Terror for the next 24 hours.
Primordial Flow (Costs 2 Actions). The elemental moves its speed without provoking opportunity attacks. For this move, it can enter a hostile creature's space and it can move through a space as narrow as 1 inch wide without squeezing, but it can't end the movement in such a place. The first time it enters a creature's space during this movement, the creature takes damage from the elemental's Chaos Form trait.
Lava Elemental
The bulbous, slowly bubbling form of a lava elemental is difficult to distinguish from the viscous flow of volcanic activity. Despite being made of molten rock, composed of earth and fire, lava elementals lack the speed of fire or the stability and momentum of earth, lending their movements a certain lurching slowness. Lava elementals are usually found underground or in volcanoes outside the Plane of Fire.
Lava elementals burrow through earth like magma from deep below the surface. When something makes them cold, their molten bodies harden and cool briefly, causing them to stiffen and slow. Water can sap heat from their body fast than anything else, and so they avoid it as an instinctual anathema.
Magma Elemental
Elementals composed of earth and fire; magma elementals are hulking brutes. They are similar to lava elementals, but larger and faster, with more stability and control to their motions because of the extra rockiness making up their bodies. They mostly stay underground, burrowing fiery tunnels through the earth, or lurking in volcanoes.
A magma elemental can pose as a massive boulder, making it easy to surprise adventurers that venture into volcanic dungeons. Efreeti often find ways to bind these elementals and command them in battle, wielding their mighty power as tunnel-makers and siege weapons for the City of Brass.
Slag Spirit
Slag spirits are thusly named because they are usually found in among the forges of smiths and glassblowers, though they are exceedingly rare. These spirits can also be native to volcanoes and to the border realm between the Elemental Planes of Earth and Fire.
These molten spirits, which slide along the ground or float like a bubble, are made of heated metal that never cools while they live. Some believe, however, that a slag spirit can be shaped into a tool or weapon made of metal using the same smithing techniques as would be used for any piece of molten metal. This is done by slaying the spirit with icy water, forever cooling it, and creating a metal stronger than steel.
Smoke Elemental
Smoke elementals fly through the air, appearing as dark clouds of smoke or soot with the hazy shape of grasping arms extending outward. A smoke elemental can often display a malevolent face for just a moment inside its billowing darkness. The body of a smoke elemental, composed of fire and air, is still just as searing hot as if it had been born from a flame a moment ago. It is also noxious to all creatures that breathe. Even a whiff will bring most creatures to a debilitating fit of coughing and wheezing.
Smoke elementals are native to the border realm that sits between the Elemental Planes of Air and Fire: an endless stretch of fire, smoke, and rising ash, with arcs of lightning coiling within the black clouds.
Lava Elemental
Large elemental, neutral
- Armor Class 15 (natural armor)
- Hit Points 102 (12d10 + 36)
- Speed 25 ft., burrow 25 ft.
STR DEX CON INT WIS CHA 18(+4) 10(+0) 16(+3) 5(-3) 10(+0) 6(-2)
- Damage Resistances bludgeoning, piercing, and slashing from nonmagical attacks
- Damage Immunities fire, poison
- Condition Immunities exhaustion, paralyzed, petrified, poisoned, unconscious
- Senses darkvision 60 ft., tremorsense 30 ft., passive Perception 10
- Languages Primordial
- Challenge 6 (2,300 XP)
Cooled Lava. If the elemental takes cold damage, it partially cools to stone; it's speed is reduced by 10 feet until the end of its next turn, and its Lava Form trait doesn't function for that duration.
Illumination. The elemental sheds bright light in a 20-foot radius and dim light for an additional 20 feet while it's Lava Form trait is functioning.
Lava Form. A creature or object that touches the elemental or hits it with a melee attack while within 5 feet of it takes 10 (3d6) fire damage. A creature that ends its turn within 5 feet of the elemental takes 5 (1d10) fire damage. At the end of the elemental's turn, it ignites all flammable objects within 5 feet of it that aren't being worn or carried.
Water Susceptibility. For every 5 feet the elemental moves in water, or for every gallon of water splashed on it, it takes 1 cold damage.
Actions
Slam. Melee Weapon Attack: +7 to hit, reach 10 ft., one target. Hit: 13 (2d8 + 4) bludgeoning damage plus 10 (3d6) fire damage, and the target must succeed on a DC 14 Dexterity saving throw or become restrained by hardening rock. A creature can make a DC 15 Strength (Athletics) check as an action, freeing itself or a creature within reach from this rock on a success. The rock has AC 17 and 12 hit points, and it is immune to fire, poison, and psychic damage.
Magma Elemental
Huge elemental, neutral
- Armor Class 16 (natural armor)
- Hit Points 228 (24d12 + 72)
- Speed 40 ft., burrow 40 ft.
STR DEX CON INT WIS CHA 23(+6) 11(+0) 17(+3) 4(-3) 10(+0) 9(-1)
- Saving Throws Str +11, Con +8
- Damage Resistances bludgeoning, piercing, and slashing from nonmagical attacks
- Damage Immunities fire, poison
- Condition Immunities exhaustion, paralyzed, petrified, poisoned, unconscious
- Senses darkvision 60 ft., tremorsense 60 ft., passive Perception 10
- Languages Primordial
- Challenge 13 (10,000 XP)
Cooled Lava. If the elemental takes cold damage, it partially cools to stone; its speed is reduced by 20 feet until the end of its next turn, and it's Lava Form trait doesn't function for that duration.
False Appearance. While the elemental remains motionless, it can choose to suppress it's Lava Form trait, causing it to be indistinguishable from a normal (albeit huge) boulder.
Illumination. The elemental sheds bright light in a 30-foot radius and dim light for an additional 30 feet while it's Lava Form trait is functioning.
Lava Form. A creature or object that touches the elemental or hits it with a melee attack within 5 feet of it takes 10 (3d6) fire damage. A creature that ends its turn within 5 feet of it takes 5 (1d10) fire damage.
Molten Tunnels. When it burrows, the elemental leaves a tunnel in its wake. The sides of this tunnel remain burning hot for 10 minutes, after which the tunnel collapses. When a creature enters the tunnel for the first time on a turn or starts its turn inside the tunnel, it takes 11 (2d10) fire damage.
Siege Monster. The elemental deals double damage to objects and structures.
Water Susceptibility. For every 5 feet the elemental moves in water, or for every gallon of water splashed on it, it takes 1 cold damage.
Actions
Multiattack. The elemental makes two smash attacks.
Smash. Melee Weapon Attack: +9 to hit, reach 10 ft., one target. Hit: 17 (2d10 + 6) bludgeoning damage plus 21 (6d6) fire damage, and the target must succeed on a DC 16 Strength saving throw or be knocked prone. If the target is not flying, on a hit or miss, the area of ground in a 15-foot diameter circle centered beneath the target becomes filled with lava. The area is difficult terrain for the next 10 minutes, and any creature who enters the area or ends its turn there takes 21 (6d6) fire damage.
Meteor Breath. The elemental spews tiny chunks of burning stone. Each creature in a 10-foot radius sphere centered on a point within 60 feet of the elemental must make a DC 16 Dexterity saving throw. On a failure, a target takes 10 (3d6) bludgeoning damage plus 10 (3d6) fire damage, or half as much damage on a success. Each object in the area that isn't being worn or carried takes full damage and ignites if its flammable.

Slag Spirit
Tiny elemental, chaotic neutral
- Armor Class 15 (natural armor)
- Hit Points 26 (4d4 + 16)
- Speed 20 ft., fly 10 ft.
STR DEX CON INT WIS CHA 10(+0) 8(-1) 18(+4) 5(-3) 8(-1) 9(-1)
- Skills Stealth +1
- Damage Resistances bludgeoning, piercing, and slashing from nonmagical attacks
- Damage Immunities fire, poison
- Condition Immunities exhaustion, paralyzed, petrified, poisoned, unconscious
- Senses darkvision 60 ft., passive Perception 9
- Languages Primordial
- Challenge 1/2 (100 XP)
Avoidance. If the spirit is subjected to an effect that allows it to make a saving throw to take only half damage, it instead takes no damage if it succeeds on the saving throw, and only half damage if it fails.
Cooling. If the spirit takes cold damage, it partially cools and stiffens; its speed is reduced by 10 feet and the fire damage it deals is reduced by half until the end of its next turn.
Heated Body. A creature that touches the spirit or hits it with a melee attack while within 5 feet of it takes 7 (2d6) fire damage. At the start of each of the spirit's turns, it deals 7 (2d6) fire damage to each creature that is grappling it.
Illumination. The spirit sheds dim light in a 5-foot radius.
Water Susceptibility. For every 5 feet the spirit moves in water, or for every gallon of water splashed on it, it takes 1 cold damage.
Actions
Touch. Melee Weapon Attack: +4 to hit, reach 5 ft., one target. Hit: 7 (2d6) fire damage.
Smoke Elemental
Large elemental, neutral
- Armor Class 14 (natural armor)
- Hit Points 102 (12d10 + 36)
- Speed 0 ft., fly 40 ft. (hover)
STR DEX CON INT WIS CHA 13(+1) 17(+3) 16(+3) 6(-2) 10(+0) 6(-2)
- Damage Resistances lightning, thunder; bludgeoning, piercing, and slashing from nonmagical attacks
- Damage Immunities fire, poison
- Condition Immunities exhaustion, grappled, paralyzed, petrified, poisoned, prone, restrained, unconscious
- Senses darkvision 60 ft., passive Perception 10
- Languages Primordial
- Challenge 6 (2,300 XP)
Smoke Form. The elemental can move through a space as narrow as 1 inch wide without squeezing. Anything inside the elemental's space or seen through it is heavily obscured, except to the elemental. In addition, the elemental can enter a hostile creature's space and stop there.
The first time it enters a creature's space on a turn, that creature takes 3 (1d6) fire damage and must make a DC 15 Constitution saving throw. A creature that ends its turn inside the elemental's space also takes 3 (1d6) fire damage and must make the saving throw. On a failed save, a creature must spend its action on its next turn retching and reeling. Creatures that don't need to breathe or are immune to poison automatically succeed on this saving throw.Actions
Multiattack. The elemental makes two Slam attacks.
Slam. Melee Weapon Attack: +6 to hit, reach 5 ft., one target. Hit: 12 (2d8 + 3) bludgeoning damage plus 5 (1d10) fire damage.


Jade Spider
Wide stone steps rise a few hundred feet to the Arach-Tinilith, the cathedral to the Spider Queen in the drow city of Ruhn-Shak. Non-drow are forbidden from entering this part of the city. A pair of giant jade spiders flank the stairway at the top, ready to animate and attack any non-drow that climb the steps.
Jade Spider
Large construct, unaligned
- Armor Class 17 (natural armor)
- Hit Points 250 (24d10 + 120)
- Speed 30 ft., climb 30 ft.
STR DEX CON INT WIS CHA 20 (+5) 9 (−1) 18 (+4) 3 (−4) 8 (−1) 1 (−5)
- Damage Immunities acid, poison, psychic; bludgeoning, piercing, and slashing from nonmagical attacks that aren't adamantine
- Condition Immunities charmed, exhaustion, frightened, paralyzed, petrified, poisoned
- Senses truesight 120 ft., passive Perception 9
- Languages understands the languages of its creator but can't speak
- Challenge 9 (5,000 XP)
Acid Absorption. Whenever the jade spider is subjected to acid damage, it takes no damage and instead regains a number of hit points equal to the acid damage dealt.
Berserk. Whenever the jade spider starts its turn with 60 hit points or fewer, roll a d6. On a 6, the spider goes berserk. On each of its turns while berserk, the jade spider attacks the nearest creature it can see.
If no creature is near enough to move to and attack, the jade spider attacks an object, with preference for an object smaller than itself. Once the jade spider goes berserk, it continues to do so until it is destroyed or regains all its hit points.
Immutable Form. The jade spider is immune to any spell or effect that would alter its form.
Magic Resistance. The jade spider has advantage on saving throws against spells and other magical effects.
Magic Weapons. The jade spider's weapon attacks are magical.
Actions
Multiattack. The jade spider makes two slam attacks.
Slam. Melee Weapon Attack: +8 to hit, reach 5 ft., one target. Hit: 16 (2d10 + 5) bludgeoning damage. If the target is a creature, it must succeed on a DC 15 Constitution saving throw or have its hit point maximum reduced by an amount equal to the damage taken. The target dies if this attack reduces its hit point maximum to 0. The reduction lasts until removed by the greater restoration spell or other magic.
Haste (Recharge 5–6). Until the end of its next turn, the jade spider magically gains a +2 bonus to its AC, has advantage on Dexterity saving throws, and can use its slam attack as a bonus action.


Minotaur Construct
Even mightier than an iron golem, the Minotaur Construct is at least 20 feet tall. It is so massive that during combat, it merely crushes its opponents by stepping on them. Thankfully, it is very rare as only the wealthiest and most powerful can afford to have one created.
Minotaur Construct
Huge construct, unaligned
- Armor Class 21
- Hit Points 297 (22d12 + 154)
- Speed 30 ft.
STR DEX CON INT WIS CHA 28(+9) 9(-1) 24(+7) 3(-4) 11(+0) 1(-5)
- Damage Immunities fire, poison; bludgeoning, piercing, and slashing from nonmagical weapons that aren't adamantine
- Condition Immunities charmed, exhaustion, frightened, paralyzed, petrified, poisoned
- Senses darkvision 120 ft., passive Perception 10
- Languages understands the languages of its creator but can't speak
- Challenge 18 (20,000 XP)
Fire Absorption. Whenever the minotaur is subjected to fire damage, it takes no damage and instead regains a number of hit points equal to the fire damage dealt.
Immutable Form. The minotaur is immune to any spell or effect that would alter its form.
Magical Resistance. The minotaur has advantage on saving throws against spells and other magical effects.
Magical Weapons. The minotaur's weapon attacks are magical.
Siege Monster. The minotaur deals double damage to objects and structures.
Actions
Multiattack. The minotaur makes two melee attacks.
Slam. Melee Weapon Attack: +15 to hit, reach 10 ft., one target. Hit 27 (4d8 + 9) bludgeoning damage.
Sword. Melee Weapon Attack: +15 to hit, reach 15 ft., one target. Hit 31 (4d10 + 9) slashing damage.
Crushing Stride. The minotaur moves up to its speed in a straight line. During this move, it can enter Large or smaller creatures' spaces. A creature whose space the minotaur enters must succeed on a DC 21 Dexterity saving throw. On a successful save, the creature is pushed 5 feet to the nearest space out of the minotaur's path. On a failed save, the creature falls prone and takes 27 (4d8 + 9) bludgeoning damage. If the minotaur remains in the prone creature's space, the creature is also restrained until it's no longer in the same space as the minotaur. While restrained in this way, the creature, or another creature within 5 feet of it, can make a DC 21 Strength check. On a success, the creature is shunted to an unoccupied space of its choice within 5 feet of the minotaur and is no longer restrained.
Reactions
Angry Bull. When hit by a melee attack, the minotaur can use its slam attack against the attacker.
Reposition. When flanked, the minotaur can move half its speed without provoking attacks of opportunities.
Molten Ooze
Oozes are simple-minded, amorphous creatures that live only to consume. Some oozes take on elemental traits, such as the heated kind known as the molten ooze. It is mottled with red and black and speckled with orange flecks and is easily mistaken for lava itself. Its body is dense, viscous, and resilient against harm. These oozes are extremely dangerous for novice adventurers.
When a molten ooze moves, it rolls like a slow, fiery bubble, or flows like a slithering trickle of lava. Any organic material it moves over is dissolved, and any remains are seared to ash, which the ooze will also consume. It leaves stone and metal unharmed.
Molten oozes typically dwell within volcanoes or fiery caverns beneath the earth, although some lurk in alleys and abandoned buildings in the City of Brass, the efreeti capital in the Elemental Plane of Fire. Some efreeti even keep these oozes as pets, using them to dispose of waste and to clean surfaces in their palaces. In a pinch, the oozes can even serve as defenders against enemies, but anyone who keeps an ooze as a pet knows that the ooze doesn't distinguish friend from food, especially in the chaos of a frenzied battle
Molten Ooze
Medium ooze, unaligned
- Armor Class 6
- Hit Points 110 (13d8 + 52)
- Speed 20 ft., climb 20 ft.
STR DEX CON INT WIS CHA 14(+2) 3(-4) 19(+4) 1(-5) 6(-2) 1(-5)
- Damage Immunities acid, fire, lightning, slashing
- Condition Immunities blinded, charmed, deafened, exhaustion, frightened, prone
- Senses blindsight 60 ft. (blind beyond this radius), passive Perception 8
- Languages --
- Challenge 7 (2,900 XP)
Amorphous. The ooze can move through a space as narrow as 1 inch wide without squeezing.
False Appearance. While the ooze remains motionless, it is indistinguishable from a pool of lava or a molten rock.
Molten Form. A creature that touches the ooze or hits it with a melee attack while within 5 feet of it takes 3 (1d6) acid damage plus 5 (1d10) fire damage. At the start of the ooze's turn, it also deals this damage to each creature that it is grappling.
Spider Climb. The ooze can climb difficult surfaces, including upside down on ceilings, without needing to make an ability check.
Actions
Pseudopod. Melee Weapon Attack: +5 to hit, reach 5 ft., one target. Hit: 5 (1d6 + 2) bludgeoning damage plus 7 (2d6) acid damage and 9 (2d8) fire damage, and if the target is a creature, it is grappled (escape DC 14). While grappled in this way, the target is also restrained. Until this grapple ends, the ooze can't attack another target. If the target is a creature or a flammable object, it is also set ablaze. Until a creature takes an action to douse the fire, the creature takes 5 (1d10) fire damage at the end of each of its turns.

Mummy Warrior
Raised by dark funerary rituals and still wrapped in the shrouds of death, mummies shamble out from lost temples and tombs to slay any who disturb their rest.
Preserved Wrath. The long burial rituals that accompany a mummy's entombment help protect its body from rot. In the embalming process, the newly dead creature's organs are removed and placed in special jars, and its corpse is treated with preserving oils, herbs, and wrappings. After the body has been prepared, the corpse is typically wrapped in linen bandages.
The Will of Dark Gods. An undead mummy is created when the priest of a death god or other dark deity ritually imbues a prepared corpse with necromantic magic. The mummy's linen wrappings are inscribed with necromantic markings before the burial ritual concludes with an invocation to darkness. As a mummy endures in undeath, it animates in response to conditions specified by the ritual. Most commonly, a transgression against its tomb, treasures, lands, or former loved ones will cause a mummy to rise.
Mummy Warrior
Medium undead, lawful evil
- Armor Class 14 (half plate)
- Hit Points 83 (11d8 + 33)
- Speed 25 ft.
STR DEX CON INT WIS CHA 18(+4) 8(-1) 16(+3) 8(-1) 12(+1) 13(+1)
- Saving Throws Wis +4
- Damage Vulnerabilities fire
- Damage Resistances bludgeoning, piercing, and slashing from nonmagical weapons
- Damage Immunities necrotic, poison
- Condition Immunities charmed, exhaustion, frightened, paralyzed, poisoned
- Senses darkvision 60 ft., passive Perception 11
- Languages the languages it knew in life
- Challenge 6 (2,300 XP)
Aura of Rot. If the warrior damages a creature with 5 ft., it must succeed on a DC 14 Constitution saving throw or be cursed with mummy rot. The cursed target can't regain hit points, and its hit point maximum decreases by 10 (3d6) for every 24 hours that elapse. If the curse reduces the target's hit point maximum to 0, the target dies, and its body turns to dust. The curse lasts until removed by the remove curse spell of other magic.
Actions
Multiattack. The mummy warrior can use its Dreadful Glare and makes two attacks with its khopesh sword.
Khopesh Sword. Melee Weapon Attack: +6 to hit, reach 5 ft., one target. Hit: 13 (2d8 + 4) slashing damage.
Dreadful Glare. The mummy warrior targets one creature it can see within 60 feet of it. If the target can see the mummy warrior, it must succeed on a DC 14 Wisdom saving throw against this magic or become frightened until the end of the mummy's next turn. If the target fails the saving throw by 5 or more, it is also paralyzed for the same duration. A target that succeeds on the saving throw is immune to the Dreadful Glare of all types of mummies for the next 24 hours.

Necrotic Slime
Necrotic slimes are the most powerful and feared among the oozes. These slimes take the form of huge black blobs, larger than any other ooze and capable of consuming creatures the size of giants. They bubble with a necrotic energy that reanimates those that it consumes, creating undead servants that help it by bringing prey for it to feast on. A creature that is engulfed by a necrotic slime is slowly eaten down to the bone, leaving behind a perfectly clean and intact skeleton.
Significantly more intelligent than their brethren, necrotic slimes are capable of strategic thought and know when they are outmatched. If a necrotic ooze detects the presence of a creature or group of creatures powerful enough to defeat it, it has enough intelligence to hide effectively and escape into the underground. A necrotic slime can also command its servants intelligently and uses them for scouting and for diversions.
Necrotic Slime
Huge ooze, chaotic evil
- Armor Class 9
- Hit Points 180 (19d10 + 76)
- Speed 25 ft., climb 25 ft.
STR DEX CON INT WIS CHA 19(+4) 9(-1) 18(+4) 8(-1) 11(+0) 1(-5)
- Damage Immunities acid, cold, lightning, necrotic, slashing
- Condition Immunities blinded, charmed, deafened, exhaustion, frightened, prone
- Senses blindsight 60 ft. (blind beyond this radius), passive Perception 10
- Languages --
- Challenge 8 (3,900 XP)
Amorphous. If the slime has no creature engulfed, it can move through a space as narrow as 1 inch wide without squeezing.
Enveloping Slime. Other creatures can enter the slime's space, but a creature that does so is subjected to the slime's engulf and has disadvantage on the saving throw. Creatures inside the slime can only be spotted with a successful DC 15 Wisdom (Perception) check and have total cover. A creature within 5 feet of the slime can take an action to pull a creature or object out of the slime. Doing so requires a successful DC 15 Strength check, and the creature making the attempt takes 13 (3d8) necrotic damage. The slime can hold one huge or large creature, or up to nine Medium or smaller creatures inside it at a time.
Necrotic Form. A creature that touches the slime or hits it with a melee attack while within 5 feet of it takes 4 (1d8) necrotic damage.
Reanimator. A humanoid that dies while engulfed by the slime and then remains within the slime for 24 hours rises as a skeleton under the slime's control. The slime can have no more than four skeletons under its control at one time.
Spider Climb. The slime can climb difficult surfaces, including upside down on ceilings, without needing to make an ability check.
Actions
Multiattack. The slime makes two attacks: one pseudopod attack and one grasp attack.
Pseudopod. Melee Weapon Attack: +7 to hit, reach 5 ft., one target. Hit: 17 (3d8 + 4) necrotic damage.
Grasp. Melee Weapon Attack: +7 to hit, reach 5 ft., one target not already engulfed by the slime. Hit: 7 (1d6 + 4) bludgeoning damage and the target is engulfed by the slime, suffering the same initial and ongoing effects as the engulf action.
Engulf. The slime moves up to its speed. While doing so, it can enter Huge or smaller creatures' spaces. Whenever the slime enters a creature's space, the creature must make a DC 16 Dexterity saving throw. On a successful save, the creature can choose to be pushed 5 feet back or to the side of the slime. A creature that chooses not to be pushed suffers the consequences of a failed saving throw. On a failed save, the slime enters the creature's space, and the creature takes 13 (3d8) necrotic damage and is engulfed. The engulfed creature can't breathe, is restrained, and takes 27 (6d8) necrotic damage at the start of each of the slime's turns. When the slime moves, the engulfed creature moves with it. An engulfed creature can try to escape by taking an action to make a DC 16 Strength check. On a success, the creature escapes and enters a space of its choice within 5 feet of the slime.

Phase Spider Matriarch
A phase spider possesses the magical ability to phase in and out of the Ethereal Plane. It seems to appear out of nowhere and quickly vanishes after attacking. Its movement on the Ethereal Plane before coming back to the Material Plane makes it seem like it can teleport. This is the matriarch of the phase spiders, mother to the brood, she awaits the hatching of her eggs.
Phase Spider Matriarch
Large monstrosity, unaligned
- Armor Class 15 (natural armor)
- Hit Points 120 (16d10 + 32)
- Speed 30 ft., climb 30 ft.
STR DEX CON INT WIS CHA 17(+3) 13(+1) 14(+2) 8(-1) 12(+1) 11(+0)
- Skills Stealth +4
- Senses darkvision 60 ft., passive Perception 11
- Languages --
- Challenge 7 (2,900 XP)
Brood Empathy. The phase spider matriarch can communicate empathically with all phase spiders of her brood within 100 feet. Each member of her brood understands her needs and wishes and fulfills them to the best of its abilities.
Ethereal Jaunt. As a bonus action, the phase spider matriarch can magically shift from the Material Plane to the Ethereal Plane, or vice versa.
Spider Climb. The phase spider matriarch can climb difficult surfaces, including upside down on ceilings, without needing to make an ability check.
Web Walker. The phase spider matriarch ignores movement restrictions caused by webbing.
Actions
Multiattack. The phase spider matriarch makes two bite attacks.
Bite. Melee Weapon Attack: +6 to hit, reach 5 ft., one creature. Hit: 8 (1d10 + 3) piercing damage, and the target must make a DC 14 Constitution saving throw, taking 18 (4d8) poison damage on a failed save, or half as much damage on a successful one. If the poison damage reduced the target to 0 hp, the target is stable but poisoned for 1 hour, even after regaining hp, and is paralyzed while poisoned in this way.
Web (Recharge 5-6). Ranged Weapon Attack: +4 to hit, range 30/60 ft., one creature. Hit: The target is restrained by webbing. As an action, the restrained target can make a DC 14 Strength (Athletics) check, bursting the webbing on a success. The webbing can also be attacked and destroyed (AC 12; 15 hp; vulnerability to fire damage; immunity to bludgeoning, poison, and psychic damage).

Pumpkin Plants
With various bodies consisting of twisted bunches and tendrils and a head of a pumpkin with a large, jagged mouth splitting it in half. While this grotesque grin might seem jolly, the pumpkin plant seeks nothing less than the slaughter of any non-gourd that travels through their territory. In combat they have many weapons: vines, claws, and even a weapon. These aggressive squashes are agile and more mobile than one may think, waiting for prey to wander by before springing out to attack. Corpses are quickly pulled underground in order to feed the roots of their king as well as to hide any remains that might tip off future victims to their ambush sites.
Haunted Pumpkin
Small plant, neutral evil
- Armor Class 13 (natural armor)
- Hit Points 22 (5d6 + 5)
- Speed 20 ft.
STR DEX CON INT WIS CHA 8(-1) 14(+2) 12(+1) 2(-5) 8(-1) 3(-4)
- Damage Vulnerabilities bludgeoning, fire
- Condition Immunities blinded, deafened
- Senses blindsight 60 ft. (blind beyond this radius) passive Perception 9
- Languages --
- Challenge 1/2 (100 XP)
False Appearance. While the haunted pumpkin remains motionless, it is indistinguishable from a regular pumpkin.
Actions
Choking Vines. Melee Weapon Attack: +4 to hit, reach 5 ft., one target. Hit: 8 (2d6 + 2) piercing damage, and a Medium or smaller creature is grappled (escape DC 12). Until this grapple ends, the target is restrained, and the pumpkin cannot use its vines on another target.
Vine Whip. Melee Weapon Attack: +4 to hit, reach 10 ft., two separate targets. Hit: 6 (1d8 + 2) slashing damage.
Pumpkin Abomination
Large plant, neutral evil
- Armor Class 11 (natural armor)
- Hit Points 47 (5d10 + 20)
- Speed 30 ft.
STR DEX CON INT WIS CHA 18(+4) 8(-1) 18(+4) 2(-5) 8(-1) 3(-4)
- Damage Vulnerabilities fire
- Condition Immunities blinded, deafened
- Senses blindsight 60 ft. (blind beyond this radius) passive perception 9
- Languages --
- Challenge 1 (200 XP)
Actions
Vine Whip. Melee Weapon Attack: +5 to hit, reach 10 ft., two separate targets. Hit: 7 (1d8 + 4) slashing damage.
Claws. Melee Weapon Attack: +5 to hit, reach 5 ft., one target. Hit: 10 (2d6 + 4) slashing damage.

Pumpkin King
Huge fiend, neutral evil
- Armor Class 16 (full plate)
- Hit Points 78 (8d12 + 26)
- Speed 20 ft.
STR DEX CON INT WIS CHA 18(+4) 6(-2) 16(+3) 13(+1) 13(+1) 12(+1)
- Saving Throws Wisdom +3, Strength +6
- Skills Athletics +6, Intimidation +3, Insight +3
- Damage Vulnerabilities radiant, fire
- Damage Resistances necrotic
- Condition Immunities blinded, deafened
- Senses blindsight 60ft. (blind beyond this radius) passive Perception 11
- Languages Common, Infernal
- Challenge 4 (450 XP)
Actions
Vine Whip. Melee Weapon Attack: +6 to hit, reach 30 ft., two separate targets. Hit: 11 (2d6 + 4) slashing damage.
Seed Blast. (Recharge 6) The King of Pumpkins showers his enemies with burning seeds in a 20 ft-cone. Each creature in the area must make a DC 13 Dexterity saving throw or suffer 21 (6d6) fire damage. On a successful save, suffer half as much.
Reactions
Pumpkin Visage. Once per round, when a creature within 30 ft declares an attack against the king, he may force them to succeed on a DC 13 Wisdom saving throw or be frightened until the beginning of their next turn (interrupting the triggering attack).
Pumpkin Puppet
Medium plant, neutral evil
- Armor Class 14
- Hit Points 32 (5d8 + 10)
- Speed 20 ft.
STR DEX CON INT WIS CHA 14(+2) 8(-1) 14(+2) 2(-5) 8(-1) 3(-4)
- Damage Vulnerabilities fire
- Condition Immunities blinded, deafened
- Senses blindsight 60 ft. (blind beyond this radius) passive Perception 9
- Languages --
- Challenge 1/2 (100 XP)
Actions
Choking Vines. Melee Weapon Attack: +4 to hit, reach 5 ft., one target. Hit: 8 (2d6 + 2) piercing damage, and a Medium or smaller creature is grappled (escape DC 14). Until this grapple ends, the target is restrained, as well as the creature.
Longsword. Melee Weapon Attack: +4 to hit, reach 5 ft., one target. Hit: 5 (1d8 + 1) piercing damage.
Sand Assassin
A sand assassin resembles an athletic human made entirely of sand, usually with more sand shaped into cords or rags wrapping around it. With just a bit of dust or sand about, this unusually lawful elemental is easily mistaken from afar for a normal desert traveler, but a good look at its head reveals that it has no face, save for the one hollow eye in its forehead.
Sand assassins are bound to guard a stretch of land for eternity, hunting down and slaying all those who trespass upon their charge. These elementals sometimes come to decide that a particular place is worthy of protection for inscrutable reasons of their own, but usually they are bound by the one who summoned them, often someone long-dead, such as a long-forgotten resident of ancient ruins buried in a canyon or stretch of desert that the elemental still guards.
Loyal Sentinels. Often the elemental doesn't recall what it was in the location that it required protection, and rarely do they care to remember, either. For the sand assassin, the task is all that matters. Those that are slain by sand assassins are usually mistaken for victims of a sandstorm, and even those lucky few that escape the reaches of the elemental almost never know what it was, hidden beneath the sands, that they were warded away from.
Ruthless Hunters. Sand assassins detest being seen by those who have not yet trespassed and prefer to hide from such beings. In combat, this elemental tries to sneak up on its victims, hiding as a dust cloud or among a real sandstorm to approach its targets, then suddenly blinding them with its Sand Form trait before attacking them. It usually prefers to strike those that are alone so it can deal bonus damage.
If it is in melee range with a target that isn't alone, the elemental will seek a target in the fight that is more alone, blinding those that threaten opportunity attacks and flying or burrowing to reach its next lonely victim. If its enemies stay grouped together to avoid the bonus damage, the sand assassin attempts to blind many targets at once instead.
Sand Assassin
Medium elemental, lawful neutral
- Armor Class 17 (natural armor)
- Hit Points 104 (16d8 + 32)
- Speed 60 ft., burrow 30 ft., fly 30 ft. (hover)
STR DEX CON INT WIS CHA 13(+1) 20(+5) 15(+2) 9(-1) 14(+2) 12(+1)
- Saving Throws Dex +9
- Skills Perception +6, Stealth +9
- Damage Resistances lightning; bludgeoning, piercing, and slashing from nonmagical attacks
- Damage Immunities poison
- Condition Immunities exhaustion, grappled, paralyzed, petrified, poisoned, prone, restrained, unconscious
- Senses darkvision 120 ft., tremorsense 60 ft., passive Perception 10
- Languages Primordial
- Challenge 9 (5,000 XP)
Dispersal. As a bonus action, the sand assassin can disperse or end its dispersal. While dispersed, the sand assassin is Gargantuan, its space is lightly obscured, enemies have disadvantage on attack rolls against it, and it is indistinguishable from a cloud of dust, but it cannot make attacks and it automatically fails all Strength saving throws and ability checks.
Glass. If the sand assassin takes more than 15 fire damage at once, it partially glasses; its speed is reduced by 5 feet for 1 minute.
Sand Form. The sand assassin can move through a space as narrow as 1 inch wide without squeezing. In addition, the sand assassin can enter a hostile creature's space and stop there. The first time it enters a creature's space on a turn, that creature must succeed on a DC 14 Constitution saving throw. A creature that ends its turn inside the sand assassin's space must also make the saving throw. On a failed saving throw, a creature is blinded for 1 minute. A creature repeats the saving throw at the end of each of its turns, ending the blindness on a success.
Undetectable in Sandstorms. While the sand assassin is heavily obscured by sand or dust, it is invisible, and it can't be sensed by blindsight or tremorsense.
Actions
Multiattack. The sand assassin makes two Sand Claw attacks.
Sand Claw. Melee Weapon Attack: +9 to hit, reach 5 ft., one target. Hit 18 (3d8 + 5) slashing damage, If the target does not have any allies within 5 feet of it, the sand swirls around it and the attack deals 9 (2d8) bonus slashing damage.

Scorch Spiders
Spiders are evocative and classic monsters -- predators that seem to straddle the world of the natural and the world of the monstrous, weaving webs to catch their prey and paralyze them with venom. Besides the normal giant spiders one might find in a fantasy world, there are more exotic and elemental varieties.
Found in the depths of active volcanoes and swarming the caverns of the Elemental Plane of Fire, the elementals known as scorch spiders were created long ago by the azer, who intended the spiders to be used as weapons against the salamander armies of the efreeti, for they are not immune to poison. But many spiders escaped to the Elemental Planes, where they thrived in numbers far beyond those produced by the azer spider breeders. Some have even made it to the Underdark, where they hunt other spiders by chasing them onto their webs, igniting the webbing. Scorch spiders aren't harmed by the fire and they're immune to spider venom, making them a terror to natural spider species.
Despite their elemental nature, scorch spiders act like most other spiders, building webs that cannot burn and laying obsidian eggs in their lava-bound nests, waiting for prey to venture too close. They devour elementals just as eagerly as they do creatures made of flesh or the fresh ashes of such creatures. The carapace of a scorch spider, which often grows to be a foot long or more, is said to be as hard as diamond and always searing hot, just like their fiery blood.
Scorch spiders are exceedingly dangerous for novice adventurers to hunt, but their silk is a treasure for those looking to craft garments to protect against fire. Scorch spider eggs are also prized by arcanists for the essence of elemental fire they contain. They can be broken open and mixed into an alchemical concoction or tapped for their magical power to enchant magic items with flame.
Scorch Spider
Tiny elemental, unaligned
- Armor Class 20 (natural armor)
- Hit Points 26 (4d4 + 16)
- Speed 30 ft., climb 30 ft.
STR DEX CON INT WIS CHA 4(-3) 20(+5) 18(+4) 2(-4) 10(+0) 5(-3)
- Skills Stealth +9
- Damage Vulnerabilities cold, thunder
- Damage Immunities fire, poison; bludgeoning, piercing, and slashing from nonmagical weapons that aren't adamantine
- Condition Immunities poisoned
- Senses blindsight 10 ft., darkvision 60 ft., passive Perception 10
- Languages --
- Challenge 4 (1,100 XP)
Death Burst. When the spider dies, it explodes in a burst of fiery blood and ooze. Each creature within 5 feet of it must make a DC 13 Dexterity saving throw, taking 7 (2d6) fire damage on a failed save, or half as much damage on a successful one. Flammable objects that aren't being worn or carried in that area are ignited.
Heated Carapace. At the start of each of the spider's turns, it deals 3 (1d6) fire damage to each creature grappling it and each creature or object it is grappling or it is climbing on. A creature that touches the spider or hits it with a melee attack while within 5 feet of it takes 3 (1d6) fire damage.
Spider Climb. The spider can climb difficult surfaces, including upside down on ceilings, without needing to make an ability check.
Stiffen. If the spider takes cold damage, its heated body stiffens in response, and its speed is reduced to 15 feet until the end of its next turn.
Volcanic Web Walker. The spider ignores movement restrictions caused by webbing, lava, or magma.
Web Sense. While in contact with a web, the spider knows the exact location of any other creature in contact with the same web.
Actions
Bite. Melee Weapon Attack: +7 to hit, reach 5 ft., one target. Hit: 7 (1d4 + 5) piercing damage plus 3 (1d6) fire damage, and the target must make a DC 13 Constitution saving throw. On a failed save, the target takes 7 (2d6) fire damage and 9 (2d8) poison damage, and it ignites. Until a creature takes an action to douse the fire, the target takes 5 (1d10) fire damage at the start of each of its turns. On a success, the target takes half damage and doesn't ignite. If the damage from the save reduces the target to 0 hit points, the target is stable but poisoned for 1 hour, even after regaining hit points, and is paralyzed while poisoned in this way.
Shadow Elemental
Shadow elementals are creatures of living shade, brought into being from the depths of the Shadowfell. Appearing as nebulous forms of ever-shifting gloom, they lash out at the living with tendrils as insubstantial as darkness itself.
Bound and Summoned. These elusive creatures rarely roam the Material Plane of their own free will. When they do, it is almost exclusively deep underground, places the light has never touched. More frequently, they manifest as servants summoned from the Shadowfell, bound into service by powerful spellcasters.
Shadow elementals seem to understand the commands of their summoners, regardless of what language they speak. Beyond this, however, these creatures never seem to communicate in any manner. It is unknown whether they have any language at all.
Enemy of the Light. Although these creatures are not directly harmed by sunlight, it does cause them considerable discomfort, and they do all that they can to escape or snuff out the hateful illumination. Similarly, shadow elementals find the presence of living beings not native to the Shadowfell to be disturbing, although not nearly to the same extent as they do light itself. When not under a summoner's control, they make every effort to extinguish life and light both. They are as obedient as any elemental when summoned, so most shadow elementals are only as evil as their master's permit.
Elemental Nature. A shadow elemental doesn't require air, food, drink, or sleep.
Shadow Elemental
Large elemental, neutral evil
- Armor Class 14
- Hit Points 90 (12d10 + 24)
- Speed 0 ft., fly 60 ft. (hover)
STR DEX CON INT WIS CHA 16(+3) 19(+4) 14(+2) 6(-2) 10(+0) 7(-2)
- Skills Stealth +7
- Damage Resistances cold, necrotic; bludgeoning, piercing, and slashing damage from nonmagical weapons
- Damage Immunities poison
- Condition Immunities exhaustion, grappled, paralyzed, petrified, poisoned, prone, restrained, unconscious
- Senses darkvision 120 ft., passive perception 10
- Languages --
- Challenge 5 (1,800 XP)
Blinding Light. When the shadow elemental takes radiant damage, it must make a Constitution saving throw with a DC of 10 or half the radiant damage taken, whichever is higher. On a failed save, the elemental is blinded until the end of its next turn.
Shade's Sight. Magical darkness doesn't impede the elemental's darkvision.
Shadow Form. The elemental can enter a hostile creature's space and stop there. It can move through a space as narrow as 1 inch wide without squeezing.
Shadow Stealth. While in dim light or darkness, the shadow elemental can take the Hide action as a bonus action.
Actions
Multiattack. The elemental makes two tendril attacks.
Tendril. Melee Weapon Attack: +7 to hit, reach 10 ft., one target. Hit: 13 (2d8 + 4) bludgeoning damage and the creature is pulled up to 5 feet towards the elemental.
Whirling Shadows (Recharge 4-6). A 10-foot radius of magical darkness extends out from the elemental, moves with it, and spreads around corners, lasting until the end of the elemental's next turn. Darkvision can't penetrate this darkness, and no natural light can illuminate it. If any of the darkness overlaps with an area of light created by a spell of 2nd level or lower, the spell creating the light is dispelled.

Storm Guardian
Fights against storm guardians can be incredibly dangerous, especially when facing them in the wild rather than when summoned to a battlefield. Storm guardians are a type of elemental, usually found, unsurprisingly, inside of powerful rainstorms like thunderstorms, hurricanes, and monsoons. Many are encountered on the open sea or in the sky when traveling by airship, and some can even be found near the mountaintop lairs of powerful storm giants or ancient blue dragons. Of course, they can also be found in the elemental's native home, the elemental planes themselves. When surrounded by dense fog, mist, or clouds, the storm guardian can benefit greatly from its massive electricity-based blindsight radius, striking enemies with its shocking fists to devastating effect before they even realize what's hit them, and the open space gives it plenty of room to fly away from its enemies.
Storm Guardian
Large elemental, neutral
- Armor Class 18 (plate)
- Hit Points 154 (20d8 + 46)
- Speed 0 ft., fly 90 ft.
STR DEX CON INT WIS CHA 18(+4) 14(+2) 14(+2) 9(-1) 10(+0) 10(+0)
- Saving Throws Dex +5, Con +5
- Damage Resistances acid, fire; bludgeoning, piercing, and slashing from nonmagical weapons
- Damage Immunities cold, lightning, poison, thunder
- Condition Immunities exhaustion, grappled, paralyzed, petrified, poisoned, prone, restrained, unconscious
- Senses darkvision 60 ft., passive Perception 10
- Languages Primordial
- Challenge 7 (2,900 XP)
Magic Weapons. The elemental's weapon attacks are magical.
Tempest Form. The elemental can move through a space as narrow as 1 inch wide without squeezing. In addition, the elemental can enter a hostile creature's space and stop there. The first time it enters a creature's space on a turn, that creature takes 5 (1d8) lightning damage. A creature that ends its turn inside the elemental's space also takes 5 (ad8) lightning damage.
Actions
Multiattack. The storm guardian makes two melee attacks.
Shocking Fist. Melee Weapon Attack: +8 to hit, reach 5 ft., one target. Hit: 9 (1d8 + 4) bludgeoning damage + 4 (1d6) lightning damage.
Thunderous Strike (Recharge 5-6). The storm guardian makes one melee attack. On a hit, the target takes an extra 16 (3d10) thunder damage and must succeed on a DC 14 Strength saving throw or be knocked prone.
Thread-Bound Griffon
Found on tapestries and rugs, thread-bound constructs are created with magic that infuses textiles with the essence of a once-living creature. They appear mundane until triggered, at which point the pattern comes to life.
Thread-Bound. When killed, the creature vanishes, reappearing upon the textile to which it is bound in a death pose. At the next dawn, it again assumes its living pattern and can be triggered again. If the textile is destroyed while the pattern of the creature is on it, the creature is also destroyed. Otherwise, damage to the textile does not harm the creature. If the creature is killed and the textile has been destroyed, the creature is permanently destroyed.
Construct Nature. The thread-bound construct doesn't require air, food, drink, or sleep
Thread-Bound Griffon
Large construct, unaligned
- Armor Class 12
- Hit Points 59 (7d10 + 21)
- Speed 30 ft., fly 80 ft.
STR DEX CON INT WIS CHA 18(+4) 15(+2) 16(+3) 2(-4) 13(+1) 8(-1)
- Skills Perception +5
- Damage Resistances bludgeoning, piercing, and slashing from nonmagical attacks
- Damage Immunities poison
- Condition Immunities charmed, exhaustion, frightened, paralyzed, petrified, poisoned
- Senses darkvision 60 ft., passive Perception 15
- Languages understands the languages of its creator but can't speak
- Challenge 3 (700 XP)
Antimagic Susceptibility. The thread-bound griffon is incapacitated while in the area of an antimagic field. If targeted by dispel magic, the thread-bound griffon must succeed on a Constitution saving throw against the caster's spell save DC or return to the textile to which it is bound for 1 minute.
Immutable Form. The thread-bound griffon is immune to any spell or effect that would alter its form.
Keen Sight. The thread-bound griffon has advantage on Wisdom (Perception) checks that rely on sight.
Magic Weapons. The thread-bound griffon's weapon attacks are magical.
Shifting Form. The thread-bound griffon can enter a hostile creature's space and stop there. It can move through a space as narrow as 1 inch wide without squeezing.
Actions
Multiattack. The thread-bound griffon makes two attacks: one with its beak and one with its claws.
Beak. Melee Weapon Attack: +6 to hit, reach 5 ft., one target. Hit: 8 (1d8 + 4) piercing damage.
Claws. Melee Weapon Attack: +6 to hit, reach 5 ft., one target. Hit: 11 (2d6 + 4) slashing damage.

NPCs
Aenor Gleenwith
A powerful elf wizard, who also happens to be an artificer and engineer, called Aenor Gleenwith, has been around for far too long and things were starting to get boring. One day, an idea surfaced. He had heard of legendary challenges and set out to find survivors and understand how the experience was and how they worked. He realized these challenges were meant to kill without any kind of mercy or shame and only the smartest can survive it. He decided that he would spend his time and massive fortune to create his very own dungeon with the intention of challenging adventurers. His dungeon would be the ultimate trial for this kind of person.
Over the intervening decades he designed the dungeon, blueprints, traps and so on. Finally, the dungeon was ready. But first it needed to be tested. He tested it on various groups of adventurers, adjusting as needed, and scrying on their progress. Aenor always meets the survivors at the end and explains the situation to them, offering to revive any fallen ally and restore any harm done during the trial, like a lost limb, for instance. He also asks for feedback and offers the group a generous amount of gold. The old elf is still not satisfied with the results and hence, the trials must continue.
Aenor Gleenwith
Medium humanoid (high elf), chaotic neutral
- Armor Class 18 (Robe of the Archmagi)
- Hit Points 170 (20d8 + 80)
- Speed 30 ft., fly 30 ft.
STR DEX CON INT WIS CHA 12(+10) 16(+3) 18(+4) 22(+6) 18(+4) 14(+2)
- Saving Throws Int +12, Wisdom +10
- Skills Arcana +12, Insight +10, Investigation +12, Perception +10
- Senses passive Perception 20
- Languages Common, Elf, Abyssal, Infernal
- Challenge 16 (15,000 XP)
Arcane Ward. Aenor has a magical ward that has 30 hit points. Whenever Aenor takes damage, the ward takes the damage instead. If the ward is reduced to 0 hit points, Aenor takes any remaining damage. When Aenor casts an abjuration spell of 1st level or higher, the ward regains a number of hit points equal to twice the level of the spell.
Magic Resistance. Aenor has advantage on saving throws against spells and other magical effects.
Robe of the Archmagi. Aenor has the following effects due to this robe, already included in his stats: his base Armor Class is 15 + his Dexterity modifier, he has advantage on saving throws against spells and other magical effects, and his spell save DC and spell attack bonus each increase by 2.
Spellcasting. Aenor is a 20th-level spellcaster. His spellcasting ability is Intelligence (spell save DC 22, +14 to hit with spell attacks). Aenor has the following spells prepared:
At will: misty step, shield
1/Short or Long Rest: blink, fireball
Cantrips (at will): chill touch, fire bolt, light, mage hand,
prestidigitation1st level (4 slots): absorb elements, charm person, detect magic, disguise self, sleep
2nd level (3 slots): detect thoughts, melf's acid arrow,
mirror image, suggestion3rd level (3 slots): clairvoyance, counterspell, dispel
magic, lightning bolt, slow4th level (3 slots): blight, polymorph, stoneskin
5th level (3 slots): cone of cold, modify memory,
scrying6th level (2 slots): mass suggestion
7th level (2 slots): forcecage, teleport
8th level (1 slot): sunburst
9th level (1 slot): foresight, time stop, wish
Actions
Fire Bolt. Ranged Spell Attack: +14 to hit, range 120 ft., one target. Hit 22 (4d10)
Reactions
Rod of Absorption (30 levels. Aenor can use his reaction to absorb a spell that is targeting only him and not with an area of effect. The absorbed spell's effect is canceled, and the spell's energy -0 not the spell itself -- is stored in the rod. The energy has the same level as the spell when it was cast. The rod can absorb and store up to 50 levels of energy of the course of its existence. Once the rod absorbs 50 levels of energy, it can't absorb more. If Aenor is targeted by a spell that the rod can't store, the rod has no effect on that spell. Aenor can convert energy stored in it into spell slots to cast spells he has prepared or knows. Aenor can create spell slots only of a level equal to or lower than his own spell slots, up to a maximum of 5th level.
Amin
Amin is the owner of Amin's Arcana Emporium in Kymal. His shop is full of magical items ranging from simple potions and baubles to more exotic merchandise like enchanted armor and rings of protection.
He is a middle-aged thin male gnome with light brown hair. He is an exuberant salesman and very handsome. He began his arcane journey as a student of the Alabaster Lyceum before graduating and traveling Tal'Dorei on various adventures. Eventually, he moved to Kymal and built his shop to supply future groups of adventurers with the magical tools to be successful. Amin has made a number of connections in his life and is friends with a number of prominent arcanists, including Allura Vysoren. In addition, he also has a few contacts within the Cobalt Reserve in Westruun.
Amin
Small humanoid (gnome), chaotic good
- Armor Class 14 (mage armor)
- Hit Points 86 (12d6 + 36)
- Speed 25 ft.
STR DEX CON INT WIS CHA 8(-1) 13(+1) 16(+3) 20(+5) 12(+1) 10(+0)
- Proficiency Bonus +4
- Saving Throws Int +9, Wis +5
- Skills Arcana +9, Insight +5, Investigation +9, Persuasion +4
- Senses darkvision 60 ft., passive Perception 11
- Languages Common, Dwarvish, Gnomish
- Challenge 9 (5,000 XP)
Arcane Recovery (Recharges after a Long Rest). During a short rest, Amin can recover expended spell slots equal to or less than half his wizard level (rounded up).
Gnome Cunning. Amin has advantage on all Intelligence, Wisdom, and Charisma saving throws against magic.
Shapechanger (Recharges after a Long Rest). Amin can use polymorph without costing a spell slot.
Special Equipment. Amin wields a wand of magic missiles and usually carries a spell scroll of delayed blast fireball. Amin also has a potion of supreme healing and 2 potions of greater healing.
Spellcasting. Amin is a 12th-level spellcaster. His spellcasting ability is Intelligence (spell save DC 17, +9 to hit with spell attacks). He has the following wizard spells prepared:
Cantrips (at will): mage hand, mending, poison spray,
prestidigitation, true strike1st level (4 slots): charm person, detect magic, mage
armor, longstrider2nd level (3 slots): alter self, invisibility, spider climb
3rd level (3 slots): fly haste
4th level (3 slots): confusion, conjure minor
elementals, polymorph5th level (2 slots): animate objects, cloudkill
6th level (1 slot): chain lightning, disintegrate, flesh to
stoneTransmuter Stone. Amin gains one of the following benefits as long as this stone is in his possession:
- An increase to speed of 10 feet.
- Proficiency in Constitution saving throws.
- Resistance to acid, cold, fire, lightning, or thunder damage (his choice whenever he chooses this benefit).
Amin can change the effect of his stone each time he casts a transmutation spell of 1st level or higher.
War Caster. Amin has experience casting spells in combat. He has advantage on Constitution saving throws made to maintain his concentration. Additionally, when a hostile creature's movement provokes an opportunity attack, Amin can use his reaction to cast a spell at the creature instead of making an opportunity attack. The spell must have a casting time of 1 action and must target only that creature.
Actions
Dagger. Melee or Ranged Weapon Attack: +5 to hit, reach 5 ft. or range 20/60 ft., one target. Hit: 3 (1d4 + 1) piercing damage.
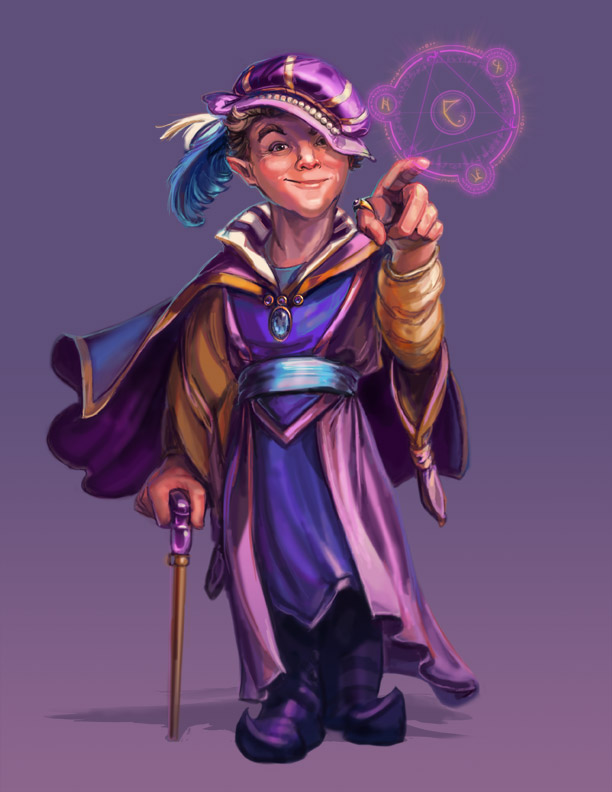
Ammalia Cassalanter
The vainglorious lady of House Cassalanter is schooled in the arcane arts. Like her husband Victoro, she worshipped the Lord of the Hells before turning to the Cloaked Serpent. When they were young, Ammalia and Victoro signed a contract with the archdevil, trading the souls of their children for power, good health, and long life. The soul of Osvaldo, their eldest son, was taken immediately, and he was transformed into a chain devil. The souls of the younger twins, Terenzio and Elzerina, will be taken when they turn nine years old.
A provision in the contract allows the Cassalanters to buy their way out of it but doing so requires a tremendous amount of coin and a mass sacrifice of unfortunate people. While Victoro hunts for the fabled Vault of Dragons, Ammalia makes plans to host a poisoned feat in celebration of the Night of Ascension.
Ammalia is well mannered, well read, well-traveled, and exceptionally shrewd. She is known for driving a hard bargain. Her hobby is lepidopterology, and her estate has the most beautiful butterfly garden. She allows her youngest children to play in the garden under her supervision.
Ammalia Cassalanter
Medium humanoid (human), lawful evil
- Armor Class 18 (plate)
- Hit Points 113 (15d8 + 45)
- Speed 30 ft.
STR DEX CON INT WIS CHA 16(+3) 10(+0) 12(+1) 17(+3) 20(+5) 14(+2)
- Saving Throws Con +8, Wis +10, Cha +7
- Skills Intimidation +7, Perception +10, Religion +10
- Senses passive Perception 20
- Languages Common, Abyssal
- Challenge 13 (10,000 XP)
Aura of Dread. A creature hostile to Ammalia that starts its turn within 20 feet of her must succeed on a DC 18 Wisdom saving throw, unless Ammalia is incapacitated. On a failed save, the target is frightened until the start of its next turn. While frightened in this way, the target can't perform any actions except to move up to half its speed away from Ammalia. If a creature's saving throw is successful, the creature is immune to Ammalia's Aura of Dread for the next 24 hours.
Legendary Resistance (3/Day). If Ammalia fails a saving throw, she can choose to succeed instead.
Smite (1/Turn). As a bonus action, when Ammalia hits a creature with a weapon attack, she can expend a 1st level spell slot to deal an extra 2d8 necrotic damage and the target must succeed on a DC 18 Wisdom saving throw or become frightened until the end of its next turn. The creature is paralyzed while frightened in this way. If Ammalia expends a spell slot of 2nd level or higher, the extra necrotic damage increases by 1d8 for each level above 1st (maximum 5d8).
Spellcasting. Ammalia is a 17th-level spellcaster. Her spellcasting ability is Wisdom (spell save DC 18, +10 to hit with spell attacks). She has the following cleric spells prepared:
Cantrips (at will): guidance, mending, sacred flame,
thaumaturgy, toll the dead1st level (4 slots): bane, command
2nd level (3 slots): augury, hold person, zone of truth
3rd level (3 slots): bestow curse, dispel magic, spirit
guardians4th level (3 slots): banishment, guardian of faith,
freedom of movement5th level (2 slots): contagion, dispel evil and good,
flame strike6th level (1 slot): blade barrier, harm
7th level (1 slot): divine word, fire storm
8th level (1 slot): antimagic field
9th level (1 slot): gate
Actions
Multiattack. Ammalia makes two morningstar attacks.
Morningstar. Melee Weapon Attack: +8 to hit, reach 5 ft., one target. Hit 7 (1d8 + 3) piercing damage plus 9 (2d8) necrotic damage.
Legendary Actions
Ammalia can take 3 legendary actions, choosing from the options below. Only one legendary action can be used at a time and only at the end of another creature's turn. Ammalia regains spent legendary actions at the start of her turn.
Attack. Ammalia makes a single weapon attack.
Move. Ammalia moves up to half her speed.
Bane/Command. Ammalia casts bane or command, using a spell slot as normal.
Cast a Spell (Costs 2 Actions). Ammalia casts a spell from her list of prepared spells, using a spell slot as normal.
Barnibus Blastwind
Barnibus works for the Kymal City Watch, investigating crimes that involve the use of magic. He comes across as prickly and secretive, confiding in Saeth Cromley, a retired sergeant of the City Watch who assists in many of his investigations.
A lifelong bachelor, Barnibus has a small, tidy estate in the Entertainment District that he inherited from his grandmother. When not serving the City Watch, he spends his days reading and writing books in his library. Barnibus uses spells that help him investigate crimes, pry secrets from the minds of suspects, and locate missing persons. He finds violence appalling and would never use his magic to inflict harm on others -- even those who harm him.
Barnibus Blastwind
Medium humanoid (human), lawful good
- Armor Class 10 (13 with mage armor)
- Hit Points 24 (7d8 - 7)
- Speed 30 ft.
STR DEX CON INT WIS CHA 9(-1) 10(+0) 9(-1) 17(+3) 15(+2) 11(+0)
- Saving Throws Int +5, Wis +4
- Skills Arcana +5, Insight +6, Investigation +7, Perception +4
- Senses passive Perception 14
- Languages Common, Draconic, Dwarvish, Halfling
- Challenge 2 (450 XP)
Special Equipment. Barnibus carries a wand of magic detection.
Spellcasting. Barnibus is a 7th-level spellcaster. His spellcasting ability is Intelligence (spell save DC 13, +5 to hit with spell attacks). He has the following wizard spells prepared:
Cantrips (at will): blade ward, light, mage hand,
message
1st level (4 slots): comprehend languages, identify, mage armor, shield
2nd level (3 slots): detect thoughts, suggestion
3rd level (3 slots): clairvoyance, sending
4th level (1 slot): locate creature, Otiluke's resilient
sphereActions
Dagger. Melee or Ranged Weapon Attack: +2 to hit, reach 5ft., or range 20/60 ft., one target. Hit: 2(1d4) piercing damage.
The Black Wolves
Once the characters reach Kymal, they will be challenged by a rival adventuring party. This rivalry starts when they witness one of the characters cheating at a game in one of the many casinos. The rivals kidnap the character, holding them in an abandoned warehouse as collateral until they are paid to keep their silence on what they saw. If the characters are unable to pay the ransom, the Black Wolves will send them on a quest to retrieve a magic item they have been tasked with acquiring. Once the task is complete, the Black Wolves hold no ill-will towards the characters. Though it's likely the characters won't feel the same way.
As the rivals make their own way through adventures, they grow in power and ambition just as the characters do. When the Verdant War breaks out, the Black Wolves offer their services to the Gwessar Forces as highly skilled mercenaries. Throughout the adventure, there are many opportunities for the characters to run into their rivals: potentially facing off, becoming reluctant allies, or simply ignoring one another.
Barry
Barry is a sturdy male dwarf bard. He hails from the underground dwarven realm of Kraghammer. He and his sister, Fraxen, traveled to Kymal looking for mercenary work as neither wanted to go into any of the normal dwarven trades. He typically dresses in dark green leathers and plays a bagpipe.
Brendal
Brendal is the youngest of the group. He is a half-elf male with long black hair. In his early twenties, Brendal originally started training to be a monk for the Cobalt Soul but didn't like the rules and rigor of the training, so he decided to leave and strike out on his own. He still likes to dress in dark blues, reminiscent of his time in the Cobalt Soul.
Everett
Everett is the middle-aged, half-elf leader of the Black Wolves. Everett has long brown hair, a well-trimmed beard, and a single gold earring in his left ear. Originally born in Syngorn, where half-elfs are not treated kindly, he was an outcast from early on, and soon left the glaring, judgmental eyes behind. Forced to live in poverty, Everett learned to sneak and steal to survive. Eventually, he met Remma in Kymal, where they met the other members of their group and have found a way to scratch out a life for themselves.
Fraxen
Fraxen is a female dwarf fighter. She carries a longbow and rapier and is equally deadly with each. She has long brown hair, tied in a braid down her back. She typically wears dark brown leather armor with a dark green jerkin. Initially from Kraghammer, she and her brother Barry decided to leave home and travel in search of adventure. Eventually, they found themselves in Kymal where they met Everett and Remma.
Remma
Remma is a human woman in her early forties. She typically dresses in dark black leather armor to better blend into the shadows. Growing up in Stilben, she had to quickly learn to protect herself from the many shady folk that lived there. She came to realize she had a knack for stealth and stealing. She grew tired of the swamp and yearned for a bigger city to test her skills, eventually making her way to Kymal where she met Everett. Together, they put together this group of mercenaries and have carved a home for themselves, here in Kymal.
Barry (Tier 2)
Medium humanoid (dwarf), chaotic neutral
- Armor Class 14 (studded leather armor)
- Hit Points 50 (6d8 + 20)
- Speed 25 ft.
STR DEX CON INT WIS CHA 11(+0) 14(+2) 15(+2) 12(+1) 8(-1) 17(+3)
- Proficiency Bonus +3
- Saving Throws Dex +5, Cha +6
- Skills Arcana +4, Deception +6, History +4, Insight +3, Investigation +5, Performance +9, Persuasion +9, Stealth +5
- Damage Resistance poison
- Senses darkvision 60 ft., passive Perception 11
- Languages Common, Dwarvish, Thieves' Cant
- Challenge 4 (1,100 XP)
Dwarven Resilience. Barry has advantage on saving throws against poison, and he has resistance against poison damage.
Song of Rest (1/Short Rest.) During a short rest, Barry can use soothing music or oration to help revitalize his wounded allies. If he or any friendly creatures who can hear his performance regain hit points by spending Hit Dice at the end of the short rest, each of those creatures regains an extra 1d6 hit points.
Spellcasting. Barry is a 6th-level spellcaster. His spellcasting ability is Charisma (spell save DC 14, +6 to hit with spell attacks). He has the following bard spells prepared:
Cantrips (at will): friends, prestidigitation, vicious
mockery1st level (4 slots): charm person, cure wounds, detect
magic, faerie fire2nd level (3 slots): hold person, phantasmal force
3rd level (3 slots): clairvoyance, dispel magic, fear,
fireball, tonguesActions
Shortsword. Melee Weapon Attack: +5 to hit, reach 5 ft. Hit: 5 (1d6 + 2) slashing damage.
Dagger. Melee or Ranged Weapon Attack: +5 to hit, reach 5 ft., or range 20/60 ft., one target. Hit: 4 (1d4 + 2) piercing damage.
Bonus Actions
Bardic Inspiration (3/Short Rest). Barry grants a Bardic Inspiration die to one creature other than himself within 60 feet of him who can hear him. Once within the next 10 minutes, the creature can roll a d8 and add the number rolled to one ability check, attack roll, or saving throw it makes.
Reactions
Cutting Words. When a creature that Barry can see within 60 feet makes an attack roll, an ability check, or a damage roll, Barry can use his reaction to expend one of his uses of Bardic Inspiration, rolling a Bardic Inspiration die and subtracting the number rolled from the creature's roll. The creature is immune if it can't hear you or if it's immune to being charmed.

Barry (Tier 3)
Medium humanoid (dwarf), chaotic neutral
- Armor Class 14 (studded leather armor)
- Hit Points 73 (10d8 + 20)
- Speed 25 ft.
STR DEX CON INT WIS CHA 11(+0) 14(+2) 15(+2) 12(+1) 8(-1) 19(+4)
- Proficiency Bonus +4
- Saving Throws Dex +6, Cha +8
- Skills Arcana +5, Deception +8, History +9, Insight +3, Investigation +5, Performance +12, Persuasion +12, Stealth +10
- Damage Resistance poison
- Senses darkvision 60 ft., passive Perception 11
- Languages Common, Dwarvish, Thieves' Cant
- Challenge 7 (2,900 XP)
Dwarven Resilience. Barry has advantage on saving throws against poison, and he has resistance against poison damage.
Song of Rest (1/Short Rest.) During a short rest, Barry can use soothing music or oration to help revitalize his wounded allies. If he or any friendly creatures who can hear his performance regain hit points by spending Hit Dice at the end of the short rest, each of those creatures regains an extra 1d8 hit points.
Spellcasting. Barry is a 10th-level spellcaster. His spellcasting ability is Charisma (spell save DC 16, +8 to hit with spell attacks). He has the following bard spells prepared:
Cantrips (at will): blade ward, friends, prestidigitation,
vicious mockery1st level (4 slots): charm person, cure wounds, detect
magic, faerie fire2nd level (3 slots): hold person, phantasmal force
3rd level (3 slots): clairvoyance, dispel magic, fear,
fireball, tongues4th level (3 slots): compulsion, confusion, dominate
beast, polymorph5th level (2 slots): dominate person
Actions
Shortsword. Melee Weapon Attack: +6 to hit, reach 5 ft. Hit: 5 (1d6 + 2) slashing damage.
Dagger. Melee or Ranged Weapon Attack: +6 to hit, reach 5 ft., or range 20/60 ft., one target. Hit: 4 (1d4 + 2) piercing damage.
Bonus Actions
Bardic Inspiration (4/Short Rest). Barry grants a Bardic Inspiration die to one creature other than himself within 60 feet of him who can hear him. Once within the next 10 minutes, the creature can roll a d10 and add the number rolled to one ability check, attack roll, or saving throw it makes.
Reactions
Cutting Words. When a creature that Barry can see within 60 feet makes an attack roll, an ability check, or a damage roll, Barry can use his reaction to expend one of his uses of Bardic Inspiration, rolling a Bardic Inspiration die and subtracting the number rolled from the creature's roll. The creature is immune if it can't hear you or if it's immune to being charmed.

Brendal (Tier 2)
Medium humanoid (half-elf), chaotic neutral
- Armor Class 16
- Hit Points 30 (5d8+5)
- Speed 40ft.
STR DEX CON INT WIS CHA 12(+1) 16(+3) 13(+1) 10(+0) 17(+3) 10(+0)
- Proficiency Bonus +3
- Saving Throws Str +4, Dex +6
- Skills Acrobatics +6, Athletics +4, Deception +3, Insight +6, Religion +3, Stealth +6
- Senses darkvision 60 ft., passive Perception 13
- Languages Common, Elvish, Dwarvish, Thieves' Cant
- Challenge 3 (700 XP)
Fey Ancestry. Brendal has advantage on saving throws against being charmed, and magic can't put him to sleep.
Ki Energy (5/Short or Long Rest). Brendal can spend these ki points to fuel various ki features. Brendal knows the following ki features: flurry of blows, patient defense, step of the wind, stunning strike.
Shadow Arts. Brendal can use 2 ki points to cast darkness, darkvision, pass without trace, or silence without providing material components.
Cantrip (at will): minor illusion
Slow Fall. Brendal can reduce any falling damage he takes by 25 points.
Actions
Multiattack. Brendal attacks two times with his Unarmed Strike.
Unarmed Strike. Melee Weapon Attack: +6 to hit. Hit: 6 (1d6 + 3) bludgeoning damage.
Stunning Strike. When Brendal hits a creature with a melee attack, he can spend 1 ki point to force the creature to make a DC 14 Constitution saving throw or be stunned until the end of Brendal's next turn.
Bonus Actions
Flurry of Blows. Immediately after Brendal takes the Attack action, he can spend 1 ki point to make two unarmed strikes as a bonus action.
Patient Defense. Brendal can spend 1 ki point to take the Dodge action.
Step of the Wind. Brendal can spend 1 ki point to take the Disengage or Dash action, and his jump distance is doubled for the turn.
Unarmed Strike. When Brendal uses the Attack action with an unarmed strike, he can make one unarmed strike as a bonus action.
Reactions
Deflect Missiles. When Brendal is hit with a ranged weapon attack, he may use his reaction to subtract 14 (1d10 + 9) from the damage. If this reduces the damage to 0, he may make a ranged attack with a range of 20/60 ft. using the ammunition he just caught as part of the same reaction. This attack has +8 to hit and deals 7 (1d8 + 3) piercing damage.
Brendal (Tier 3)
Medium humanoid (half-elf), chaotic neutral
- Armor Class 17
- Hit Points 57 (9d8+9)
- Speed 45ft.
STR DEX CON INT WIS CHA 12(+1) 18(+4) 13(+1) 10(+0) 17(+3) 10(+0)
- Proficiency Bonus +4
- Saving Throws Str +5, Dex +8
- Skills Acrobatics +8, Athletics +5, Deception +4, Insight +7, Religion +4, Stealth +8
- Senses darkvision 60 ft., passive Perception 13
- Languages Common, Elvish, Dwarvish, Thieves' Cant
- Challenge 6 (2,300 XP)
Evasion. If Brendal is subjected to an effect that allows him to make a Dexterity saving throw to take only half damage, he instead takes no damage if he succeeds on the saving throw, and only half damage if he fails.
Fey Ancestry. Brendal has advantage on saving throws against being charmed, and magic can't put him to sleep.
Ki Energy (9/Short or Long Rest). Brendal can spend these ki points to fuel various ki features. Brendal knows the following ki features: flurry of blows, patient defense, step of the wind, stunning strike.
Magical Attacks. Brendal's unarmed strikes count as magical.
Shadow Arts. Brendal can use 2 ki points to cast darkness, darkvision, pass without trace, or silence without providing material components.
Cantrip (at will): minor illusion
Slow Fall. Brendal can reduce any falling damage he takes by 45 points.
Unarmored Movement. Brendal can move along vertical surfaces and across liquids without falling.
Actions
Multiattack. Brendal attacks two times with his Unarmed Strike.
Unarmed Strike. Melee Weapon Attack: +8 to hit. Hit: 7 (1d6 + 4) bludgeoning damage.
Stunning Strike. When Brendal hits a creature with a melee attack, he can spend 1 ki point to force the creature to make a DC 15 Constitution saving throw or be stunned until the end of Brendal's next turn.
Stillness of Mind. Brendal ends one effect on himself causing him to be charmed or frightened.
Bonus Actions
Shadow Step. When Brendal is in dim light or darkness, he can teleport up to 60 feet to an unoccupied space he can see that is also in dim light or darkness. He then has advantage on the first melee attack he makes before the end of his turn.
Flurry of Blows. Immediately after Brendal takes the Attack action, he can spend 1 ki point to make two unarmed strikes as a bonus action.
Patient Defense. Brendal can spend 1 ki point to take the Dodge action.
Step of the Wind. Brendal can spend 1 ki point to take the Disengage or Dash action, and his jump distance is doubled for the turn.
Unarmed Strike. When Brendal uses the Attack action with an unarmed strike, he can make one unarmed strike as a bonus action.
Reactions
Deflect Missiles. When Brendal is hit with a ranged weapon attack, he may use his reaction to subtract 19 (1d10 + 14) from the damage. If this reduces the damage to 0, he may make a ranged attack with a range of 20/60 ft. using the ammunition he just caught as part of the same reaction. This attack has +8 to hit and deals 8 (1d8 + 4) piercing damage.
Everett (Tier 2)
Medium humanoid (half-elf), chaotic neutral
- Armor Class 17 (+1 studded leather armor)
- Hit Points 64 (8d8 + 24)
- Speed 30 ft., climb 30 ft.
STR DEX CON INT WIS CHA 8(-1) 18(+4) 16(+3) 14(+2) 10(+0) 14(+2)
- Proficiency Bonus +3
- Saving Throws Dex +7, Int +5
- Skills Acrobatics +7, Athletics +2, Deception +5, Intimidation +5, Investigation +5, Perception +3, Sleight of Hand +10, Stealth +10
- Senses darkvision 60 ft., passive Perception 13
- Languages Common, Elvish, Halfling, Thieves' Cant
- Challenge 5 (1,800 XP)
Evasion. If Everett is subjected to an effect that allows him to make a Dexterity saving throw to take only half damage, he instead takes no damage if he succeeds on the saving throw, and only half damage if he fails.
Fey Ancestry. Everett has advantage on saving throws against being charmed, and magic can't put him to sleep.
Sneak Attack. Once per turn, Everett can deal an extra 14 (4d6) to one creature when he hits with an attack if he has advantage on the attack role. He doesn't need advantage on the attack roll if an ally is within 5 feet, and he doesn't have disadvantage on the roll.
Actions
+1 Rapier. Melee Weapon Attack: +8 to hit, reach 5 ft., one target. Hit: 9 (1d8 + 5) piercing damage.
Shortbow. Ranged Weapon Attack: +7 to hit, range 80/320 ft., one target. Hit: 7 (1d6 + 4) piercing damage.
Dagger. Melee or Ranged Weapon Attack: +7 to hit, reach 5 ft., or range 20/60 ft., one target. Hit: 6 (1d4 + 4) piercing damage.
Bonus Actions
Cunning Action. Everett can take the Dash, Disengage, or Hide action.
Fast Hands. Everett can use his thieves' tools to disarm a trap or pick a lock.
Reactions
Uncanny Dodge (1/Turn). Everett halves the damage that he takes from an attack that hits him. He must be able to see the attacker.


Everett (Tier 3)
Medium humanoid (half-elf), chaotic neutral
- Armor Class 18 (+1 studded leather armor)
- Hit Points 105 (12d8 + 36)
- Speed 30 ft., climb 30 ft.
STR DEX CON INT WIS CHA 8(-1) 20(+5) 16(+3) 14(+2) 10(+0) 14(+2)
- Proficiency Bonus +4
- Saving Throws Dex +9, Int +7
- Skills Acrobatics +9, Athletics +3, Deception +6, Intimidation +6, Investigation +6, Perception +4, Sleight of Hand +13, Stealth +13
- Senses darkvision 60 ft., passive Perception 14
- Languages Common, Elvish, Halfling, Thieves' Cant
- Challenge 8 (3,900 XP)
Evasion. If Everett is subjected to an effect that allows him to make a Dexterity saving throw to take only half damage, he instead takes no damage if he succeeds on the saving throw, and only half damage if he fails.
Fey Ancestry. Everett has advantage on saving throws against being charmed, and magic can't put him to sleep.
Reliable Talent. Everett has refined his chosen skills to perfection. Whenever he makes an ability check he is proficient in, he can treat rolls of 9 or lower as a 10.
Sneak Attack. Once per turn, Everett can deal an extra 21 (6d6) to one creature when he hits with an attack if he has advantage on the attack role. He doesn't need advantage on the attack roll if an ally is within 5 feet, and he doesn't have disadvantage on the roll.
Actions
+1 Rapier. Melee Weapon Attack: +10 to hit, reach 5 ft., one target. Hit: 10 (1d8 + 6) piercing damage.
Shortbow. Ranged Weapon Attack: +9 to hit, range 80/320 ft., one target. Hit: 8 (1d6 + 5) piercing damage.
Dagger. Melee or Ranged Weapon Attack: +9 to hit, reach 5 ft., or range 20/60 ft., one target. Hit: 7 (1d4 + 5) piercing damage.
Bonus Actions
Cunning Action. Everett can take the Dash, Disengage, or Hide action.
Fast Hands. Everett can use his thieves' tools to disarm a trap or pick a lock.
Reactions
Uncanny Dodge (1/Turn). Everett halves the damage that he takes from an attack that hits him. He must be able to see the attacker.

Fraxen (Tier 2)
Medium humanoid (dwarf), chaotic neutral
- Armor Class 20 (studded leather armor and shield)
- Hit Points 54 (6d10 + 18)
- Speed 25 ft.
STR DEX CON INT WIS CHA 14(+2) 18(+4) 17(+3) 10(+0) 12(+1) 8(-1)
- Proficiency Bonus +3
- Saving Throws Str +5, Con +6
- Skills Acrobatics +7, Perception +4, Performance +2, Survival +4
- Damage Resistance poison
- Senses darkvision 60 ft., passive Perception 14
- Languages Common, Dwarvish, Thieves' Cant
- Challenge 4 (1,100 XP)
Action Surge (1/Short Rest). Once on her turn, Fraxen can take one additional action.
Dwarven Resilience. Fraxen has advantage on saving throws against poison, and she has resistance against poison damage.
Fighting Style. Defense – while Fraxen wears armor, she gains a +1 bonus to AC.
Combat Superiority (4/Short Rest). Fraxen has 4 superiority dice (d8) that can be expended to use a combat maneuver. If a combat maneuver requires a target to make a saving throw, it's a Maneuver save DC 15. Fraxen can only apply one maneuver per attack. Fraxen knows the following maneuvers:
- Distracting Attack. When Fraxen hits a creature with a weapon attack, she can expend a superiority die to distract the creature, adding the superiority die to the attack's damage roll. The next attack roll by an attacker other than Fraxen before the start of her next turn has advantage.
- Feinting Attack. Fraxen can expend a superiority die and use a bonus action on her turn to feint, gaining advantage on her next attack against a target within 5 feet this turn. If that attack hits, she can add the superiority die to the attack's damage roll.
- Precision Attack. When Fraxen makes a weapon attack roll against a creature, she can expend one superiority die to add it to the roll. She can use this maneuver before or after making the attack roll, but before any effects of the attack are applied.
Actions
Multiattack. Fraxen attacks two times with her longbow or rapier.
Longbow. Ranged Weapon Attack: +7 to hit, range 150/600 ft., one target. Hit: 8 (1d8 + 4) piercing damage.
Rapier. Melee Weapon Attack: +7 to hit, reach 5 ft., one target. Hit: 8 (1d8 + 4) piercing damage.
Bonus Actions
Second Wind (1/Short Rest). As a bonus action, Fraxen can regain 1d10 + 6 hit points.
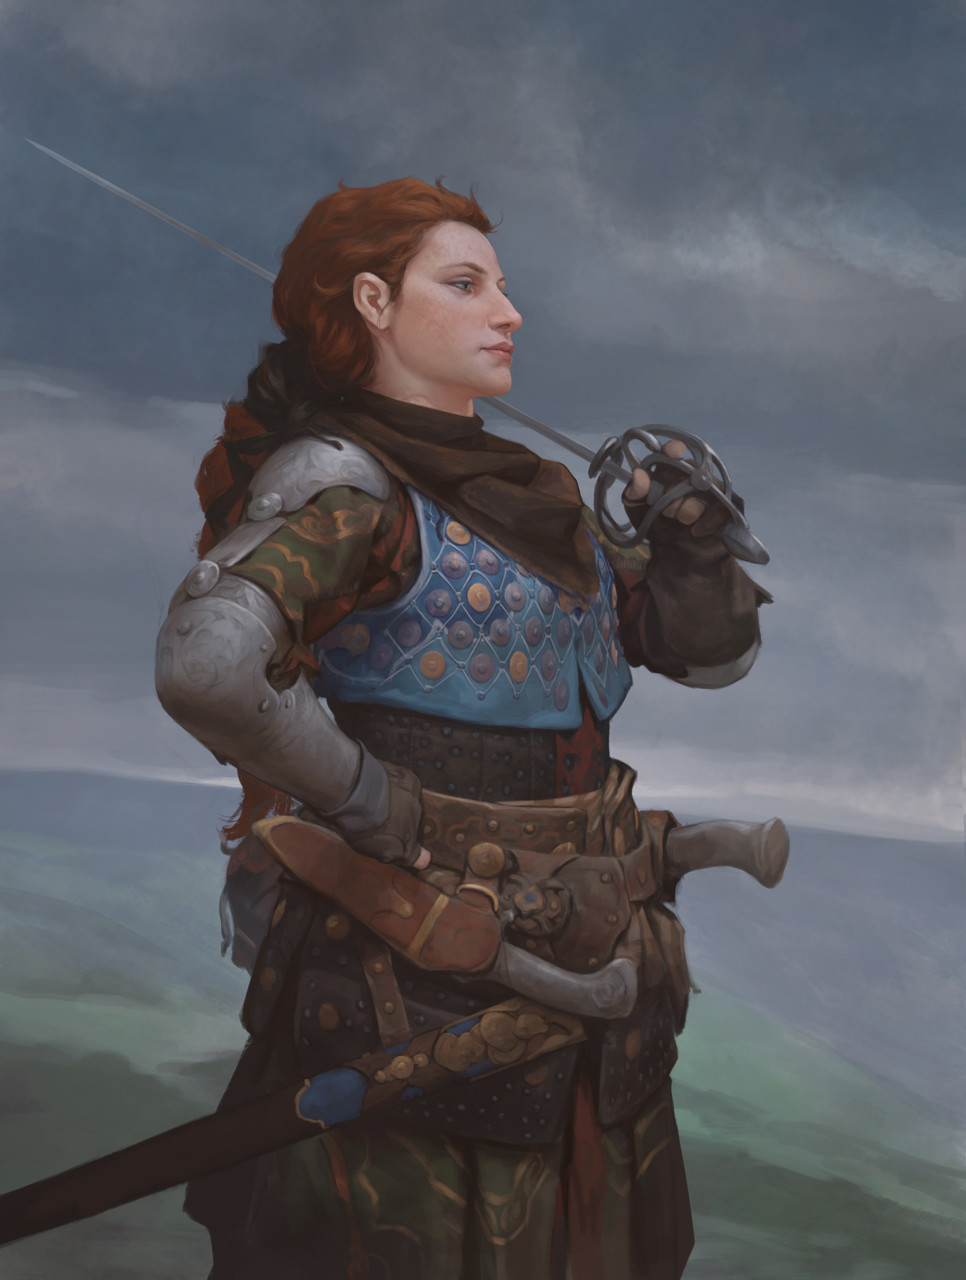
Fraxen (Tier 3)
Medium humanoid (dwarf), chaotic neutral
- Armor Class 21 (studded leather armor and shield)
- Hit Points 94 (10d10 + 30)
- Speed 25 ft.
STR DEX CON INT WIS CHA 14(+2) 20(+5) 17(+3) 10(+0) 12(+1) 8(-1)
- Proficiency Bonus +4
- Saving Throws Str +6, Con +7
- Skills Acrobatics +9, Perception +5, Performance +3, Survival +5
- Damage Resistance poison
- Senses darkvision 60 ft., passive Perception 15
- Languages Common, Dwarvish, Thieves' Cant
- Challenge 7 (2,900 XP)
Action Surge (1/Short Rest). Once on her turn, Fraxen can take one additional action.
Dwarven Resilience. Fraxen has advantage on saving throws against poison, and she has resistance against poison damage.
Fighting Style. Defense – while Fraxen wears armor, she gains a +1 bonus to AC.
Indomitable (1/Long Rest). Fraxen can reroll a failed saving throw.
Combat Superiority (5/Short Rest). Fraxen has 5 superiority dice (d10) that can be expended to use a combat maneuver. If a combat maneuver requires a target to make a saving throw, it's a Maneuver save DC 17. Fraxen can only apply one maneuver per attack. Fraxen knows the following maneuvers:
- Commanders Strike. Fraxen can forgo one of her attacks and use a bonus action to direct one of her companions to strike. That creature can immediately use its reaction to make one weapon attack, adding the superiority die to the attack's damage roll.
- Distracting Attack. When Fraxen hits a creature with a weapon attack, she can expend a superiority die to distract the creature, adding the superiority die to the attack's damage roll. The next attack roll by an attacker other than Fraxen before the start of her next turn has advantage.
- Evasive Footwork. When Fraxen moves, she can expend a superiority die, rolling the die and adding the number rolled to her AC until she stops moving.
- Feinting Attack. Fraxen can expend a superiority die and use a bonus action on her turn to feint, gaining advantage on her next attack against a target within 5 feet this turn. If that attack hits, she can add the superiority die to the attack's damage roll.
- Maneuvering Attack. When Fraxen hits a creature with a weapon attack, she can expend one superiority die to add the superiority die to the attack's damage roll, and maneuver one of her allies into a better position. The ally can use its reaction to move up to half its speed without provoking opportunity attacks from the target Fraxen attacked.
- Precision Attack. When Fraxen makes a weapon attack roll against a creature, she can expend one superiority die to add it to the roll. She can use this maneuver before or after making the attack roll, but before any effects of the attack are applied.
- Trip Attack. When Fraxen hits a creature with a weapon attack, she can expend one superiority die to attempt to knock the target down. She adds the superiority die to the attack's damage roll, and if the target is Large or smaller, must make a Strength saving throw. On a failed save, the target is knocked prone.
Actions
Multiattack. Fraxen attacks two times with her longbow or rapier.
Longbow. Ranged Weapon Attack: +9 to hit, range 150/600 ft., one target. Hit: 9 (1d8 + 5) piercing damage.
Rapier. Melee Weapon Attack: +9 to hit, reach 5 ft., one target. Hit: 9 (1d8 + 5) piercing damage.
Bonus Actions
Second Wind (1/Short Rest). As a bonus action, Fraxen can regain 1d10 + 10 hit points.
Remma (Tier 2)
Medium humanoid (human), chaotic neutral
- Armor Class 17 (studded leather armor)
- Hit Points 73 (10d8 + 20)
- Speed 30 ft.
STR DEX CON INT WIS CHA 11(+0) 18(+4) 14(+2) 13(+1) 9(-1) 15(+2)
- Proficiency Bonus +3
- Saving Throws Dex +7, Int +4
- Skills Athletics +3, Deception +5, Investigation +4, Perception +2, Sleight of Hand +10, Stealth +10
- Senses darkvision 60 ft., passive Perception 12
- Languages Common, Elvish, Thieves' Cant
- Challenge 4 (1,100 XP)
Assassinate. During her first turn, Remma has advantage on attack rolls against any creature that hasn't taken a turn. Any hit Remma scores against a surprised creature is a critical hit.
Sneak Attack. Once per turn, Remma can deal an extra 10 (3d6) to one creature when she hits with an attack if she has advantage on the attack role. She doesn't need advantage on the attack roll if an ally is within 5 feet, and she doesn't have disadvantage on the roll.
Actions
Rapier. Melee Weapon Attack: +7 to hit, reach 5 ft., one target. Hit: 8 (1d8 + 4) piercing damage.
Shortbow. Ranged Weapon Attack: +7 to hit, range 80/320 ft., one target. Hit: 7 (1d6 + 4) piercing damage.
Dagger. Melee or Ranged Weapon Attack: +7 to hit, reach 5 ft., or range 20/60 ft., one target. Hit: 6 (1d4 + 4) piercing damage.
Bonus Actions
Cunning Action. Remma can take the Dash, Disengage, or Hide action.
Reactions
Uncanny Dodge (1/Turn). Remma halves the damage that she takes from an attack that hits her. She must be able to see the attacker.
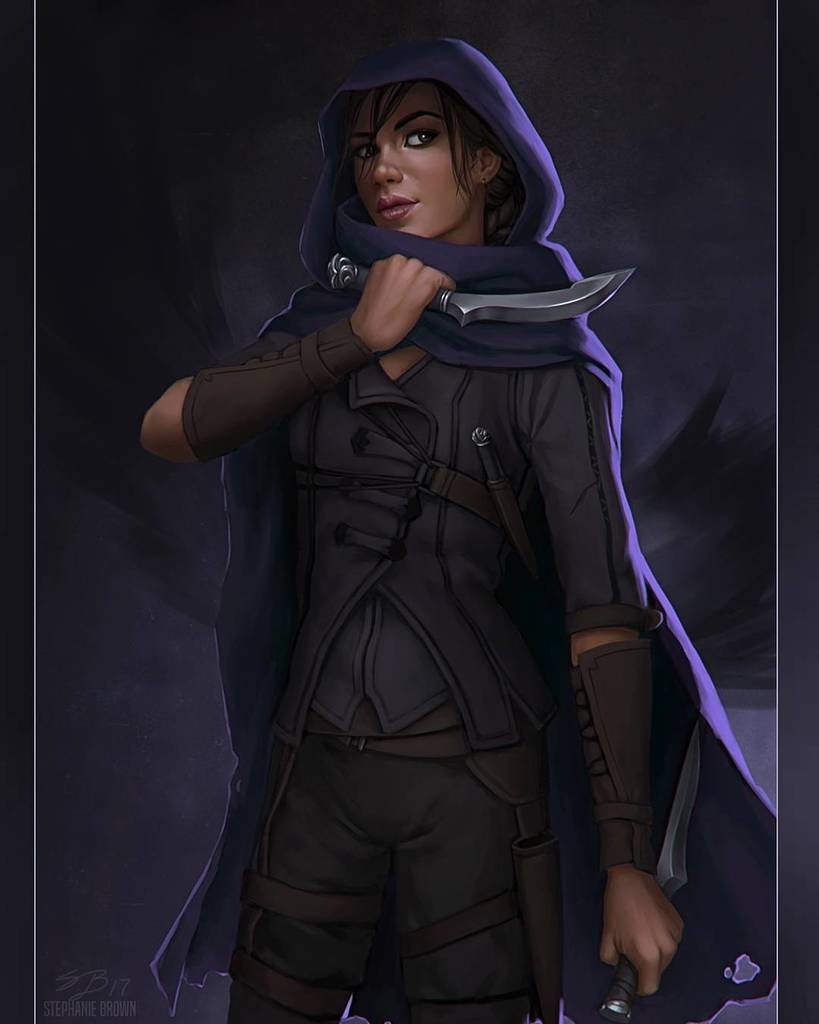
Remma (Tier 3)
Medium humanoid (human), chaotic neutral
- Armor Class 17 (studded leather armor)
- Hit Points 73 (10d8 + 20)
- Speed 30 ft.
STR DEX CON INT WIS CHA 11(+0) 20(+5) 14(+2) 13(+1) 9(-1) 15(+2)
- Proficiency Bonus +4
- Saving Throws Dex +9, Int +5
- Skills Athletics +4, Deception +6, Investigation +5, Perception +3, Sleight of Hand +13, Stealth +13
- Senses darkvision 60 ft., passive Perception 13
- Languages Common, Elvish, Thieves' Cant
- Challenge 7 (2,900 XP)
Assassinate. During her first turn, Remma has advantage on attack rolls against any creature that hasn't taken a turn. Any hit Remma scores against a surprised creature is a critical hit.
Evasion. If Remma is subjected to an effect that allows her to make a Dexterity saving throw to take only half damage, she instead takes no damage if she succeeds on the saving throw, and only half damage if she fails.
Infiltration Expertise. Remma can create a fictional false identity for herself within seven days and 25 gp spent to establish the history, profession, and affiliations for the identity. When in disguise, other creatures believe her to be that person until given an obvious reason not to.
Sneak Attack. Once per turn, Remma can deal an extra 18 (5d6) to one creature when she hits with an attack if she has advantage on the attack role. She doesn't need advantage on the attack roll if an ally is within 5 feet, and she doesn't have disadvantage on the roll.
Actions
Rapier. Melee Weapon Attack: +9 to hit, reach 5 ft., one target. Hit: 9 (1d8 + 5) piercing damage.
Shortbow. Ranged Weapon Attack: +9 to hit, range 80/320 ft., one target. Hit: 8 (1d6 + 5) piercing damage.
Dagger. Melee or Ranged Weapon Attack: +9 to hit, reach 5 ft., or range 20/60 ft., one target. Hit: 7 (1d4 + 5) piercing damage.
Bonus Actions
Cunning Action. Remma can take the Dash, Disengage, or Hide action.
Reactions
Uncanny Dodge (1/Turn). Remma halves the damage that she takes from an attack that hits her. She must be able to see the attacker.

Captain Jacqueline
Captain Jacqueline is the Skyship captain of the Crimson Aspect. Jacqueline is a middle-aged half-elf woman with flowing silver hair who loves nothing more than sailing the skies. She wears a turquoise cape and a sky-blue bandana.
She grew up in Nicodranas, a vibrant port city along the Menagerie Coast of Wildemount. She father was First Mate on a trading vessel, and she basically grew up on ships. As she grew up, she began working on ships and slowly moved up the ranks. One day, while sailing the Lucidian Ocean, she saw a skyship fly by above them and vowed to work on one, one day.
Jacqueline made her way to Ank'Harel and managed to book a job on the Crimson Aspect. She quickly proved herself and became First Mate to her captain, Captain Zilko. When he retired a few years ago, he sold his captains share in the skyship to Jacqueline.
Captain Jacqueline
Medium humanoid (half-elf), lawful neutral
- Armor Class 14 (leather armor, wooden shield)
- Hit Points 59 (8d8 + 16)
- Speed 30 ft.
STR DEX CON INT WIS CHA 10(+0) 13(+1) 15(+2) 8(-1) 20(+5) 14(+2)
- Proficiency Bonus +3
- Saving Throws Int +2, Wis +8
- Skills Animal Handling +8, Athletics +3, Medicine +8, Nature +2, Perception +8, Survival +8
- Senses darkvision 60 ft., passive Perception 18
- Languages Common, Dwarvish, Elvish
- Challenge 6 (2,300 XP)
Fey Ancestry. Jacqueline has advantage on saving throws against being charmed, and magic can't put her to sleep.
Spellcasting. Jacqueline is an 8th-level spellcaster. Her spellcasting ability is Wisdom (spell save DC 16, +8 to hit with spell attacks). She has the following druid spells prepared:
Cantrips (at will): druidcraft, poison spray, resistance
1st level (4 slots): animal friendship, charm person,
cure wounds, detect magic, faerie fire2nd level (3 slots): barkskin, hold person, mirror
image, misty step3rd level (3 slots): call lightning, conjure animals,
daylight, dispel magic, water breathing, water walk4th level (2 slots): blight, control water, freedom of
movement, grasping vineNatural Recovery (Recharges after a Long Rest). During a short rest, Jacqueline can recover expended spell slots equal to or less than half their druid level (rounded up).
Actions
Scimitar. Melee Weapon Attack: +4 to hit, reach 5 ft. Hit: 4 (1d6 + 1) slashing damage.
Dagger. Melee or Ranged Weapon Attack: +4 to hit, reach 5 ft., or range 20/60 ft., one target. Hit: 3 (1d4 + 1) piercing damage.
Sling. Ranged Weapon Attack: +4 to hit, range 30/120, one target. Hit: 3 (1d4 + 1) bludgeoning damage.
Bonus Actions
Wild Shape (2 Uses/Day). Jacqueline magically polymorphs into a beast of CR 1 or lower. Her game statistics are replaced by the statistics of the new form, but she retains her alignment, personality, and Intelligence, Wisdom, and Charisma scores. She also retains all of her skill and saving throw proficiencies, in addition to gaining those of the new form. She assumes the new form's hit points and Hit Dice and returns to the number of hit points she had when she reverts to her normal form. Any equipment she is wearing or carrying is absorbed or borne by her new form (her choice). She reverts to her humanoid form as a bonus action, or when she falls unconscious. Her attacks in Wild Shape form are magical, and she can remain in her Wild Shape for up to 4 hours.

Captain Pinna
Captain Pinna is the dwarf captain of the Bearded Sun. He is amber skinned with a bushy blond beard. He is never seen about the ship without a large black captain's hat adoring his head. He has multiple ear piercings and a number of tattoos covering his body.
Originally growing up in Uthodurn in the Flotket Alps of the Greying Wildlands. A city known for its craftsmanship and blacksmithing, Pinna knew from an early age that he was not cut out for the lifestyle of Uthodurn. When he was old enough, he made his way to Palebank Village where he found a job on a sailing ship. He took quite quickly to sailing, loving the salty air and the gentle roll of the ship over the waves. He found his way to the Menagerie Coast until finding a home on a trading vessel named the Bearded Sun. He eventually became First Mate and then took command when his captain was killed in a pirate attack. He sails his ship between the major port towns all over Exandria from Shorecomb to Emon to Ank'Harel and Nicodranas.
Captain Pinna
Medium humanoid (dwarf), chaotic neutral
- Armor Class 17 (+1 studded leather)
- Hit Points 90 (12d8 + 36)
- Speed 25 ft.
STR DEX CON INT WIS CHA 11(+0) 18(+4) 14(+2) 12(+1) 10(+0) 14(+2)
- Saving Throws Dex +7, Con +5, Int +4
- Skills Deception +5, Intimidation +5, Perception +3, Stealth +7
- Damage Resistances poison
- Senses darkvision 60 ft., passive perception 13
- Languages Common, Dwarvish
- Challenge 7 (2,900 XP)
Cunning Action. On each of his turns, Pinna can use a bonus action to take the Dash, Disengage, or Hide action.
Dual Wielder. When Pinna is wielding a separate melee weapon in each hand, he gains a +1 bonus to his AC (included in AC). In addition, he can draw or stow two one-handed weapons.
Dwarven Resilience. Pinna has advantage on saving throws against poison.
Fancy Footwork. When Pinna makes a melee attack at a creature, that creature can't make opportunity attacks against him until the end of the turn.
Feinting Attack. As a bonus action, Pinna can choose one creature within 5 feet of it. It has advantage on his next attack roll against the target.
Sneak Attack (1/Turn). Pinna deals an extra 10 (3d6) damage when he hits a target with a weapon attack and has advantage on the attack roll, or when the target is within 5 feet of an ally of Pinna's that isn't incapacitated, and Pinna doesn't have disadvantage on the attack roll.
Toujours l'Audace. Pinna adds his Charisma modifier to his initiative rolls. In addition, he can use Sneak Attack with any melee attack made against a target that has none of its allies adjacent to it.
Two-Weapon Fighter. Pinna can use a bonus action to make one melee or ranged weapon attack with his dagger.
Actions
Multiattack. Captain Pinna makes two rapier attacks.
+1 Rapier. Melee Weapon Attack: +8 to hit, reach 5 ft., one target. Hit: 9 (1d8 + 5) piercing damage.
+1 Dagger. Melee or Ranged Weapon Attack: +8 to hit, reach 5 ft. or range 20/60 ft., one target. Hit: 7 (1d4 + 5) piercing damage.
Reactions
Riposte. When a creature misses Pinna with a melee attack, he can make one melee weapon attack against it.

Cassius Anthond
Cassius lived in Byroden with his family. He had a mother, father, and younger sister. Cassius was 14 when Thordak attacked and decimated half the village. Cassius was off in the fields with his friends when Thordak came, but the rest of his family was home and were killed in the attack. After, in his despair, Cassius prayed for the power to bring back his family. In his depression, the Cloaked Serpent came to him and offered him revenge.
Cassius in his hatred believed that Syngorn could have done something to prevent Thordak's initial rampage which would have prevented his family from being murdered. Cassius began finding goblins to corrupt to his bidding. Cassius used the goblins for grunt work, spying on Byroden and Syngorn, aiding in the capture of Lucan Aloro.
Cassius kidnapped Lucan Aloro from Syngorn ten days prior to start of the campaign and has been slowly corrupting him to his will. The final step in the corruption process for Lucan to be a true sorcerer of the Cloaked Serpent is a humanoid sacrifice. Together, their goal is to capture more students to have an army large enough to take over Syngorn.
Cassius Anthond
Medium humanoid (human), chaotic evil
- Armor Class 14 (mage armor)
- Hit Points 37 (5d8 + 15)
- Speed 30 ft.
STR DEX CON INT WIS CHA 11(+0) 12(+1) 14(+2) 16(+3) 14(+2) 17(+3)
- Skills Arcana +5, History +5, Investigation +5, Persuasion +5
- Senses darkvision, 120 ft., passive Perception +2
- Languages Common, Abyssal
- Challenge 3 (700 XP)
Spellcasting. Cassius is a 4th level sorcerer. His spell casting ability is Charisma (spell save DC 13, +5 to hit with spell attacks). He has the following sorcerer spells prepared:
Cantrips (at will): blade ward, chill touch, dancing
lights, mage hand, poison spray1st level (4 slots): disguise self, mage armor, witch
bolt2nd level (3 slots): crown of madness, darkness,
suggestionActions
Cloaked Serpent Ritual Snake Dagger. Melee or Ranged Weapon Attack: +3 to hit, reach 5 ft., or range 20/60 ft., one target. Hit: 3 (1d4 + 1) piercing damage.
Hrabbaz
Hrabbaz is a muscle-bound half-orc with a cleft palate who serves the lord and lady of House Gralhund as a bodyguard. He is well mannered and dresses impeccably -- a disarming appearance that belies a murderous heart. Though he has great respect for Lady Yalah Gralhund, he is less fond of her moody husband, and wouldn't be sad to see Orond knocked down a peg or two.
Hrabbaz
Medium humanoid (half-orc), neutral evil
- Armor Class 12
- Hit Points 112 (15d8 + 45)
- Speed 30 ft.
STR DEX CON INT WIS CHA 20(+5) 15(+2) 17(+3) 10(+0) 14(+2) 12(+1)
- Saving Throws Str +8, Con +6
- Skills Athletics +8, Intimidation +4, Perception +5
- Senses darkvision 60 ft., passive Perception 15
- Languages Common, Orc
- Challenge 5 (1,800 XP)
Indomitable (2/Day). Hrabbaz can reroll a saving throw that he fails. He must use the new roll.
Relentless Endurance (Recharges after a Long Rest). When Hrabbaz is reduced to 0 hit points but not killed outright, he drops to 1 hit point instead.
Actions
Multiattack. Hrabbaz makes three attacks with his morningstar.
Morningstar. Melee Weapon Attack: +8 to hit, reach 5 ft., one target. Hit: 9 (1d8 + 5) piercing damage, plus 3 (1d6) piercing damage if Hrabbaz has more than half his hit points remaining.

Lord Galvyn
Lord Galvyn Eghan is the adult son of Kayne Eghan, the Baron of Byroden. He is a tall, brown-haired man in his early thirties. Galvyn is Byroden's Village Master and works to keep track of the farms on the outskirts of the village, as well as the other small townships throughout the Mornset Countryside. He works to make sure trade is smooth, and merchandise is distributed where it's needed.
Nedda Greenbottle
Nedda Greenbottle is an old wispy white haired gnome woman in her mid-nineties. She is extremely short and very eccentric. She used to live on the outskirts of Hayfield before the townsfolk became increasingly wary of her and she decided to uproot and move to somewhere more remote. She lives in a small hut an hour or so inside the Verdant Expanse.
Lord Galvyn
Medium humanoid (human), lawful good
- Armor Class 17 (half plate)
- Hit Points 72 (11d8 + 22)
- Speed 30 ft.
STR DEX CON INT WIS CHA 18(+4) 14(+2) 14(+2) 10(+0) 14(+2) 10(+0)
- Saving Throws Str +6, Con +4, Wis +4
- Skills Intimidation +2, Perception +4
- Senses passive Perception 14
- Languages Common
- Challenge 4 (1,100 XP)
Second Wind (Recharges after a Short or Long Rest). As a bonus action, Lord Galvyn can regain 16 hit points.
Actions
Multiattack. Lord Galvyn makes two melee attacks.
Longsword. Melee Weapon Attack: +6 to hit, reach 5 ft., one target. Hit: 8 (1d8 + 4) slashing damage.
Reactions
Intercept Attack. In response to another creature with 5 feet of him being hit by an attack roll, Lord Galvyn gives that creature a +5 bonus to its AC against that attack, potentially causing a miss. To use this ability, Lord Galvyn must be able to see the creature and the attacker.
Self-Sacrifice. When a creature within 5 feet of Lord Galvyn is hit by an attack, he swaps places with that creature and is hit instead.
Nedda Greenbottle
Small humanoid (gnome), neutral good
- Armor Class 17 (natural armor)
- Hit Points 82 (11d8 + 33)
- Speed 25 ft.
STR DEX CON INT WIS CHA 18 (+4) 12 (+1) 16 (+3) 13 (+1) 14 (+2) 14 (+2)
- Skills Arcana +3, Deception +4, Perception +4, Stealth +3
- Senses darkvision 60 ft., passive Perception 14
- Languages Common, Gnomish, Sylvan
- Challenge 3 (700 XP)
Gnome Cunning. Nedda has advantage on all Intelligence, Wisdom, and Charisma saving throws against magic.
Innate Spellcasting. Nedda's innate spellcasting ability is Charisma (spell save DC 12). She can innately cast the following spells, requiring no material components:
At will: dancing lights, minor illusion, vicious
mockeryMimicry. Nedda can mimic animal sounds and humanoid voices. A creature that hears the sounds can tell they are imitations with a successful DC 14 Wisdom (Insight) check.
Actions
Quarterstaff. Melee Weapon Attack: +6 to hit, reach 5 ft., one target. Hit: 9 (1d8 + 4) slashing damage.
Illusory Appearance. Nedda covers herself and anything she is wearing or carrying with a magical illusion that makes her look like another creature of her general size and humanoid shape. The illusion ends if Nedda takes a bonus action to end it or if she dies. The changes wrought by this effect fail to hold up to physical inspection. For example, Nedda could appear to have scaly skin, but someone touching her would feel her smooth skin. Otherwise, a creature must take an action to visually inspect the illusion and succeed on a DC 20 Intelligence (Investigation) check to discern that Nedda is disguised.
Invisible Passage. Nedda magically turns invisible until she attacks or casts a spell, or until her concentration ends (as if concentrating on a spell). While invisible, she leaves no physical evidence of her passage, so she can be tracked only by magic. Any equipment she wears or carries is invisible with her.
Nimblewright
A nimblewright is a magical construct created to serve as a guard or assassin. Composed predominantly of lightweight wood and powered by magic, it can pass for humanoid while wearing clothing. Some nimblewrights wear plain clothing, while others are clad in flashier attire. A nimblewright is emotionless, its face frozen in whatever expression was given to it by its creator.
Duelist. A nimblewright moves like a dancer and fights like a swashbuckler, using dodges and parries to avoid damage while deftly skewering its foes.
Constructed Nature. A nimblewright doesn't require air, food, drink, or sleep. Damage it takes can be repaired with mending spells, but a nimblewright reduced to 0 hit points is permanently destroyed.
Nimblewright
Medium construct, unaligned
- Armor Class 18 (natural armor)
- Hit Points 45 (6d8 + 18)
- Speed 60 ft.
STR DEX CON INT WIS CHA 12(+1) 18(+4) 17(+3) 8(-1) 10(+0) 6(-2)
- Saving Throws Dex +6
- Skills Acrobatics +8, Perception +2
- Damage Resistances bludgeoning, piercing, and slashing from nonmagical attacks
- Condition Immunities exhaustion, frightened, petrified, poisoned
- Senses darkvision 60 ft., passive Perception 12
- Languages understands one language known to its creator but can't speak
- Challenge 4 (1,100 XP)
Magic Resistance. The nimblewright has advantage on saving throws against spells and other magical effects.
Magic Weapons. The nimblewright's weapon attacks are magical.
Repairable. As long as it has at least 1 hit point remaining, the nimblewright regains 1 hit point when a mending spell is cast on it.
Sure-Footed. The nimblewright has advantage on Strength and Dexterity saving throws made against effects that would knock it prone.
Actions
Multiattack. The nimblewright makes three attacks: two with its rapier and one with its dagger.
Rapier. Melee Weapon Attack: +6 to hit, reach 5 ft., one target. Hit: 8 (1d8 + 4) piercing damage.
Dagger. Melee or Ranged Weapon Attack: +6 to hit, reach 5 ft., or range 20/60 ft., one target. Hit: 6 (1d4 + 4) piercing damage.
Reactions
Parry. The nimblewright adds 2 to its AC against one melee attack that would hit it. To do so, the nimblewright must see the attacker and be wielding a melee weapon.

Orond Gralhund
The Gralhunds are nobles who trade in arms and mercenaries, and whose family motto is "We see both sides." Orond is the patriarch, but he's not a quick-thinking or cultured sort -- and deep down, he knows it. He leaves most of the plotting and socializing to his wife, Yalah, to whom he is devoted.
Orond is a short, stocky man who dresses well and is easy on the eyes. When he opens his mouth, his boorish nature, inflated sense of self-importance, fragile ego, and despicable opinions about "the common rabble" come to the fore, and his charm quickly dissipates. When not in his wife's company, he is prone to excessive boasting and temper tantrums. When he must speak to strangers, he keeps his half-orc bodyguard Hrabbaz close by, for fear that others might attack and rob him at any moment. While in Yalah's presence, Orond becomes an altogether different person: quiet, almost timid, and happy to let his wife have the spotlight.
Orond relies on Yalah to manage the Cloaked Serpent cultists. He spends his days watching mercenaries train, paying bills, and ranting about the cost of doing business in the city. Although he is human, Orond was born with a tiefling's tail. The tail was amputated when he was a young boy, but the scar on his backside remains.
Orond Gralhund
Medium humanoid (human), neutral evil
- Armor Class 16 (chain shirt)
- Hit Points 52 (8d8 + 16)
- Speed 30 ft.
STR DEX CON INT WIS CHA 16(+3) 11(+0) 14(+2) 9(-1) 10(+0) 15(+2)
- Saving Throws Con +4, Wis +2
- Senses passive Perception 10
- Languages Common
- Challenge 3 (700 XP)
Actions
Multiattack. The knight makes two melee attacks.
Greatsword. Melee Weapon Attack: +5 to hit, reach 5 ft., one target. Hit: 10 (2d6 + 3) slashing damage.
Heavy Crossbow. Ranged Weapon Attack: +2 to hit, range 100/400 ft., one target. Hit: 5 (1d10) piercing damage.

Oskar
Oskar is a goliath man, seven feet and six inches tall. He is incredibly well-built, has a bald head, and wears a simple tattered tunic with leather pants and boots. His face looks like he's been in a lot of fights over the years. He is the current reigning champion of the fighting pit beneath The Leering Stag, and is a veteran, and survivor, of the Brawler's League.
His life has revolved around fighting, ever since he grew up in the Upper Slums of Emon. Eventually he was hired as muscle by the Clasp which began a very lucrative career. He was well paid for his work and was often used when someone needed to be plied for information or when a Spireling needed protection. One year, the Brawler's League was held in Emon, and the Clasp offered to bankroll him if he signed up to fight. He didn't win but was one of the final contestants.
Oskar
Medium humanoid (goliath), chaotic neutral
- Armor Class 14
- Hit Points 125 (10d12 + 50)
- Speed 40 ft.
STR DEX CON INT WIS CHA 20(+5) 13(+1) 17(+3) 8(-1) 12(+1) 10(+0)
- Proficiency Bonus +4
- Saving Throws Str +9, Con +7
- Skills Acrobatics +5, Athletics +9, Nature +3, Performance +4, Survival +5
- Senses passive Perception 11
- Languages Common, Giant
- Challenge 7 (2,900 XP)
Brutal Critical. When Oskar scores a critical hit, he rolls double weapon damage dice as usual, then rolls 1 additional weapon damage dice.
Feral Instinct. Oskar has advantage on initiative rolls.
Intimidating Presence. As an action, Oskar can choose to frighten one creature within 30 feet that can see or hear him. The creature must succeed on a Wisdom saving throw (save DC 12) or be frightened until the end of his next turn. On subsequent turns, he can use his action to extend the duration of this effect until the end of his next turn or until the creature ends its turn out of line of sight or more than 60 feet away.
Rage (4/Day). Oskar enters a rage that lasts for one minute or until he falls unconscious or chooses to end it (no action required). While raging, Oskar gains the following benefits:
- He has advantage on Strength checks and Strength saving throws.
- He deals an extra 3 damage when he hits a target with a melee weapon attack (included in attacks).
- He has resistance to bludgeoning, piercing, and slashing damage.
While raging, Oskar can't be charmed or frightened while raging. If he is charmed or frightened when he enters the rage, the effect is suspended for the duration of the rage.
Frenzy. Oskar can choose to go into a frenzy when he rages. If he does so, for the duration of his rage he can make a single melee weapon attack as a bonus action on each of his turns. When his rage ends, he suffers one level of exhaustion.
Reckless. At the start of his turn, Oskar can gain advantage on all melee weapon attack rolls during that turn, but attack rolls against him have advantage until the start of his next turn.
Actions
Multiattack. Oskar makes two greataxe attacks.
+1 Magic Greataxe. Melee Weapon Attack: +10 to hit, reach 5 ft., one target. Hit: 15 (1d12 + 9) slashing damage.
Javelin. Melee or Ranged Weapon Attack: +9 to hit, reach 5 ft., or range 30/120 ft., one target. Hit: 11 (1d6 + 8) piercing damage.
Reaction
Stone's Endurance (Recharge on a Short Rest). When Oskar takes damage, he can use his reaction to reduce the damage he takes by 1d12 + 3.

Renaer Krishtan
Renaer is the estranged nephew of Margrave Jaktur Krishtan. Qualities that both share include striking good looks, a love of drink, and a flair for diplomacy. What Renaer lacks is his uncle's belligerence, ill temper, and bad judgment.
Renaer lives off a sizable inheritance left to him by his mother. Approaching middle age, he has given up adventuring and settled down somewhat. Renaer spends most of his free time in taverns and festhalls.
Renaer Krishtan
Medium humanoid (human), chaotic good
- Armor Class 15 (leather armor)
- Hit Points 66 (12d8 + 12)
- Speed 30 ft.
STR DEX CON INT WIS CHA 12(+1) 18(+4) 12(+1) 14(+2) 11(+0) 15(+2)
- Skills Acrobatics +8, Athletics +5, Persuasion +6
- Senses passive Perception 10
- Languages Common
- Challenge 3 (700 XP)
Lightfooted. Renaer can take the Dash or Disengage action as a bonus action on each of its turns.
Actions
Multiattack. Renaer makes three attacks: one with a dagger and two with its rapier.
Dagger. Melee or Ranged Weapon Attack: +6 to hit, reach 5 ft. or range 20/60 ft., one target. Hit: 6 (1d4 + 4) piercing damage.
Rapier. Melee Weapon Attack: +6 to hit, reach 5 ft., one target. Hit: 8 (1d8 + 4) piercing damage.
Saeth Cromley
Saeth Cromley is a retired sergeant of the City Watch, a likable fellow with a sharp, sarcastic wit. He occasionally comes out of retirement at the request of Barnibus Blastwind, and he assists the mage in investigating unusual crimes in the city. Cromley helps Barnibus relate to the common folk, and he is good at coaxing information out of them. Though Cromley was once a strict proponent of Watch regulations and dress codes, he has grown a bit lax in both matters now that he's officially retired.
Saeth Cromley
Medium humanoid (human), lawful good
- Armor Class 17 (splint)
- Hit Points 58 (9d8 + 19)
- Speed 30 ft.
STR DEX CON INT WIS CHA 16(+3) 13(+1) 14(+2) 10(+0) 11(+0) 14(+2)
- Skills Athletics +5, Intimidation +4, Perception +2
- Senses passive Perception 12
- Languages Common
- Challenge 3 (700 XP)
Actions
Multiattack. Saeth makes two longsword attacks. If he has a shortsword drawn, it can also make a shortsword attack.
Longsword. Melee Weapon Attack: +5 to hit, reach 5 ft., one target. Hit: 7 (1d8 + 3) slashing damage, or 8 (1d10 + 3) slashing damage if used two-handed.
Shortsword. Melee Weapon Attack: +5 to hit, reach 5 ft., one target. Hit: 6 (1d6 + 3) piercing damage.
Heavy Crossbow. Ranged Weapon Attack: +3 to hit, range 100/400 ft., one target. Hit: 7 (1d10 + 1) piercing damage.


Sheriff Arcos
Arcos is a tall man with long golden hair and light hazel eyes. He used to be a military man but returned home after he retired and was asked to take up the mantle of Sheriff. As he has gotten older, he has put on a few pounds and now barely fits into his breast plate.
Urstul Floxin
Urstul Floxin works for the Cloaked Serpents, and he is the highest-ranking cult member stationed at House Gralhund. Urstul is a glorified thug with all the charm and breeding a snake, but the Gralhunds tolerate him because he feeds them useful information culled from his spies throughout the city. Urstul is a large, heavyset man in his forties.
Sheriff Arcos
Medium humanoid (human), lawful good
- Armor Class 16 (breastplate)
- Hit Points 33 (5d8 + 10)
- Speed 30 ft.
STR DEX CON INT WIS CHA 16(+3) 14(+2) 14(+2) 10(+0) 12(+1) 10(+0)
- Skills Intimidation +2, Perception +3
- Senses passive Perception 13
- Languages Common
- Challenge 2 (450 XP)
Second Wind (Recharges after a Short or Long Rest). As a bonus action, Arcos can regain 9 hit points.
Actions
Multiattack. Sheriff Arcos makes two melee attacks.
Longsword. Melee Weapon Attack: +5 to hit, reach 5 ft., one target. Hit: 7 (1d8 + 3) slashing damage.
Reactions
Protection. When an attacker Sheriff Arcos can see makes an attack roll against a creature within 5 feet of him, he can impose disadvantage on the attack roll.
Urstul Floxin
Medium humanoid (human), lawful evil
- Armor Class 15 (studded leather)
- Hit Points 78 (12d8 + 24)
- Speed 30 ft.
STR DEX CON INT WIS CHA 11(+0) 16(+3) 14(+2) 13(+1) 11(+0) 10(+0)
- Saving Throws Dex +6, Int +4
- Skills Acrobatics +6, Deception +3, Perception +3, Stealth +9
- Damage Resistances poison
- Senses passive Perception 13
- Languages Common, Abyssal, Thieves' Cant
- Challenge 8 (3,900 XP)
Assassinate. During its first turn, Urstul has advantage on attack rolls against any creature that hasn't taken a turn. Any hit Urstul scores against a surprised creature is a critical hit.
Evasion. If Urstul is subjected to an effect that allows him to make a Dexterity saving throw to take only half damage, he instead takes no damage if he succeeds on the saving throw, and only half damage if he fails.
Sneak Attack. Once per turn, Urstul deals an extra 14 (4d6) damage when he hits a target with a weapon attack and has advantage on the attack roll, or when the target is within 5 feet of an ally of his that isn't incapacitated and Urstul doesn't have disadvantage on the attack roll.
Actions
Multiattack. Urstul makes two shortsword attacks.
Shortsword. Melee Weapon Attack: +6 to hit, reach 5 ft., one target. Hit: 6 (1d6 + 3) piercing damage, and the target must make a DC 15 Constitution saving throw, taking 24 (7d6) poison damage on a failed save, or half as much damage on a successful one.
Light Crossbow. Ranged Weapon Attack: +6 to hit, range 80/320 ft., one target. Hit: 7 (1d8 + 3) piercing damage, and the target must make a DC 15 Constitution saving throw, taking 24 (7d6) poison damage on a failed save, or half as much damage on a successful one.
Victoro Cassalanter
The lord of House Cassalanter is a devilishly handsome half-elf who likes coin and power. He and his wife gained both by cutting a deal with the Lord of the Hells, which involved trading away the souls of their three children.
Victoro Cassalanter
Medium humanoid (half-elf), lawful evil
- Armor Class 15 (glamoured studded leather, ring of protection)
- Hit Points 97 (15d8 + 30)
- Speed 30 ft.
STR DEX CON INT WIS CHA 13(+1) 13(+1) 14(+2) 16(+3) 17(+3) 18(+4)
- Saving Throws Con +6, Wis +7
- Skills History +7, Insight +7, Persuasion +8, Religion +7
- Damage Immunities Poison
- Condition Immunities poisoned
- Senses darkvision 60 ft., passive Perception 13
- Languages Common, Draconic, Elvish, Infernal
- Challenge 10 (5,900 XP)
Special Equipment. Victoro wears a ring of protection and glamoured studded leather disguised to look like fine clothing. He carries a rod of rulership shaped like a ruby-tipped cane and wears a Cloak of Shadows.
Fey Ancestry. Victoro has advantage on saving throws against being charmed, and magic can't put him to sleep.
Spellcasting. Victoro is a 15th-level spellcaster. His spellcasting ability is Wisdom (spell save DC 15, +7 to hit with spell attacks). Victoro has the following cleric spells prepared:
Cantrips (at will): guidance, light, mending, spare the
dying, thaumaturgy1st level (4 slots): charm person, command, detect
magic, disguise self, protection from evil and
good, sanctuary2nd level (3 slots): augury, lesser restoration, mirror
image, pass without trace, spiritual weapon3rd level (3 slots): blink, clairvoyance, dispel magic,
magic circle, protection from energy4th level (3 slots): banishment, dimension door,
divination, freedom of movement, polymorph5th level (2 slots): dominate person, flame strike,
modify memory, insect plague6th level (1 slot): heal
7th level (1 slot): divine word
8th level (1 slot): earthquake
Actions
Multiattack. Victoro makes two attacks with his rapier.
Rapier. Melee Weapon Attack: +5 to hit, reach 5 ft., one target. Hit: 5 (1d8 + 1) piercing damage.
Cloak of Shadows (2/Day). Victoro becomes invisible until the end of his next turn. He becomes visible early immediately after he attacks or casts a spell.
Summon Devil (Recharges after 9 Days). Victoro summons a barbed devil. The devil appears in an unoccupied space within 30 feet of Victoro, acts as Victoro's ally, and can't summon other devils. It remains for 1 minute, until it or Victoro dies, or until Victoro dismisses it as an action.

War Ringer Mirna
Mirna Eghan is the adult daughter of Kayne Eghan, the Baron of Byroden. She is a tall, freckled woman with auburn hair in her late twenties. She is the leader of the town's militia, given the title of War Ringer. She is a stoic individual who tries to act older than she is. She is a good leader and the soldiers under her command respect her as she is never afraid to run into the fray with them.
Yalah Gralhund
The lady of House Gralhund is no fool. She has a keen mind and the wisdom to discern friend from foe. She also has a husband who worships her and a house that has the resources of the Cloaked Serpent at its disposal.
Yalah stays abreast of events in the city, keeps a tight rein on her children, and uses her station and her family's wealth to pry secrets from all she deals with.
Yalah shares the services of a half-orc bodyguard with her husband, although Hrabbaz is more loyal to her than to him. She also uses the Cloaked Serpent cultists as her personal spy network, dealing mostly with the Cloaked Serpent assassin Urstul Floxin, whom she treats as an underling.
War Ringer Mirna
Medium humanoid (human), neutral good
- Armor Class 16 (chain mail)
- Hit Points 27 (5d8 + 5)
- Speed 30 ft.
STR DEX CON INT WIS CHA 13(+1) 10(+0) 12(+1) 10(+0) 11(+0) 10(+0)
- Saving Throws Str +3, Con +3
- Skills Perception +2
- Senses passive Perception 12
- Languages Common
- Challenge 1 (200 XP)
Actions
Multiattack. War Ringer Mirna makes two melee attacks.
Longsword. Melee Weapon Attack: +3 to hit, reach 5 ft., one target. Hit: 5 (1d8 + 1) slashing damage.
Heavy Crossbow. Ranged Weapon Attack: +2 to hit, range 100/400 ft., one target. Hit: 5 (1d10) piercing damage.
Reactions
Parry. When an attacker hits Mirna with a melee attack and Mirna can see the attacker, she can roll 1d6 and add the number rolled to her AC against the triggering attack, if she's using a melee weapon.
Yalah Gralhund
Medium humanoid (human), neutral evil
- Armor Class 14
- Hit Points 50 (6d8 + 6)
- Speed 30 ft.
STR DEX CON INT WIS CHA 10(+0) 16(+3) 12(+1) 16(+3) 12(+1) 17(+3)
- Saving Throws Dex +4, Cha +5
- Skills Deception +5, Perception +3, Stealth +5
- Senses passive Perception 13
- Languages Common, Abyssal
- Challenge 3 (700 XP)
Dark Whispers. Yalah can use a bonus action on her turn to target one creature within 30 feet of her. If the target can hear her, the target must succeed on a DC 13 Charisma saving throw or be frightened for 1 minute. While frightened in this way, a creature must take the Dash action and move away from Yalah by the safest available route on each of its turns, unless there is nowhere to move, in which case it needn't take the Dash action. If the creature ends its turn in a location where it doesn't have line of sight to Yalah, the creature can repeat the saving throw. On a success, the effect ends.
Psychic Blades (3/day). Yalah deals an extra 10 (3d6) damage when she hits a target with a weapon attack.
Spellcasting. Yalah is a 6th-level spellcaster. Its spellcasting ability is Charisma (spell save DC 13, +5 to hit with spell attacks). She has the following bard spells prepared:
Cantrips (at will): minor illusion, thunderclap,
vicious mockery1st level (4 slots): charm person, dissonant
whispers, earth tremor, thunderwave2nd level (3 slots): blindness/deafness, hold person
3rd level (3 slots): catnap, enemies abound, major
imageActions
Rapier. Melee Weapon Attack: +5 to hit, reach 5 ft., one target. Hit: 7 (1d8 + 3) piercing damage plus 10 (3d6) poison damage.
Light Crossbow. Ranged Weapon Attack: +5 to hit, range 30/120 ft., one target. Hit: 7 (1d8 + 3) piercing damage.
C
Appendix C - Handouts
Handout 1

Chapter 1, page 23
Handout 2

Chapter 2, page 48
Handout 3

Chapter 2, page 49
Handout 4

continued on next page
Handout 4

Chapter 3, page 84
Handout 4 translated to Common

Chapter 3, page 84
Handout 5


Chapter 4, page 91
Handout 6

Chapter 4, page 110
Handout 7

Chapter 8, page 201
D
Appendix D - Location Index
Boundless possibilities await eager adventurers of all kinds who explore Tal'Dorei, from the vast fields of the Dividing Plains to the treacherous crags of Tal'Dorei's many mountains, from the storm wracked Lucidian Coast to the immemorial depths of the Rifenmist Jungle. Countless nomadic civilizations exist within these realms of magic and monsters, as do dozens of tiny villages, thriving towns, and bustling cities. The people of Tal'Dorei do what they can to survive and share the tales of treasures and adventure with any who will listen.
This appendix presents the various areas of Tal'Dorei, broken into eight major regions: the Lucidian Coast; the Alabaster Sierras; the Dividing Plains; the Cliffkeep Mountains; the Stormcrest Mountains; the Rifenmist Peninsula; the Verdant Expanse; and finally, the Bladeshimmer Shoreline. Each section describes the region's prominent features and include a page number to find further information about cities important to the plot hooks within the campaign.
Lucidian Coast
The stormy Lucidian Ocean crashes furiously against the rocky coasts of eastern Tal'Dorei, chewing inlets into the coastline and spurring vast banks of impenetrable fog across the waters. Most ships rightly avoid the volatile northern waters, instead docking at southern ports like Stilben. Adventurous folk leave their seafaring vessels behind and brave the Mooren River Run to Drynna. Yet even there, the Lucidian Coast is not without its dangers; vicious wildlife stalks the wilderness, and flocks of harpies have harried the shores since time immemorial, drawing lost sailors to their doom upon the rocks.
Alabaster Sierras
In the northeastern reaches of the continent, where the waters of the Lucidian Ocean break between the rocky shores of Tal'Dorei, a lush treeline fills the valleys between the chalk-white bluffs of the Alabaster Sierras. This gelid northern territory has for decades been beyond the reach of the Tal'Dorei Council and fallen under the rule of the Chamber of Whitestone. However, over twenty years ago, thousands of Emonian refugees fled to Whitestone to ride out the devastation of the Chroma Conclave. These refugees included the bereaved family of the Last Sovereign. Since those dark days, the Chamber of Whitestone has enjoyed a close relationship with the Tal'Dorei Council. Lady Vex'ahlia de Rolo, a member of the Chamber of Whitestone, also sits on the Tal'Dorei Council itself, further strengthening the bonds of unity between this once-isolated land and the rest of the realm.
Beyond Whitestone, the region's vibrant-yet-gothic urban center, the Alabaster Sierras are framed by dangerously windy shoreside cliffs and dry, desolate mountains swarming with harpies, cold-adapted wyverns, and other hungry monstrosities. Beneath the peaks, the valley opens into the thickly wooded pine forest known as the Parchwood. This dense, temperate rainforest is beautiful and lush, but many shadowed threats loom in the dark of the wood.
The northern center of the valley marks a single clearing, where the humble city of Whitestone stands as the source of rule and law in this land. The people here have been hardened through strife and exalted through freedom, enough to know honor and appreciate loyalty like few other civilizations do.
Dividing Plains
Tal'Dorei's vast heartland, framed by the Stormcrest Mountains in the southwest, the Cliffkeeps in the north, and the Summit Peaks in the south, contains miles and miles of rolling hills, tall-grass prairies, sky-blue rivers, and fertile farmlands. Within these plains, the hardworking people of the realm tend to their fields and businesses while adventurers and village militias battle back the wild beasts and wandering bandits of the region. The safest way to avoid being beset by monsters is to travel the Silvercut Roadway, which slices through the endless plains, connects the coasts, and shepherds caravans between them. Of course, the roads are coursing with highwaymen and bandits, so which route is safer is entirely up to the traveler to decide.
Cults of the Betrayer Gods also prey upon the people of the plains. The most fearsome of these death cults are the Ravagers, a bloody band of warriors exiled from cities and nomadic clans alike. All people of the plains fear the Ravagers, and even the smallest villages train people old enough to hold a spear how to defend their homes. Beyond the grassy plains, owlbears and other monstrosities stalk the forests and foothills that dot the plains and border it on many sides. Packs of centaurs also gallop across the open plains, delivering the Arch Heart's justice as they see fit.
Kymal
A description of the city of Kymal, along with a list of specific locations can be found on page 28 - 30. A map of Kymal can be found on page 31.
Torian Forest
A description of the Torian Forest can be found on page 278.
Westruun
A description of the city of Westruun, along with a list of specific locations, can be found on pages 214 - 217. A map of Westruun can be found on page 217.
Cliffkeep Mountains
Spanning the northern reaches of Tal'Dorei, the Cliffkeep Mountains are an impenetrable barrier between the Republic of Tal'Dorei and the frozen Neverfields. The southern foothills are dotted with forests and pockets of civilization, standing resolute against the unwelcoming topography. Deep within the earth, the dwarven stronghold of Kraghammer flourishes, just a few scant leagues above ancient caverns that plunge into a domain of unknowable horrors.
The Cliffkeeps are the largest mountain range in all of Tal'Dorei, and innumerable types of beings make their homes upon the crags, in mountainside caves, and in the miles upon miles of tunnels that descend into the earth below them. Dwarves, half-giants, goblins, and kobolds are the best-known peoples of the Cliffkeeps, but the mountains are also home to the fire giants of Vulkanon, wandering ettins and hill giants, hungry cyclopes, frost giant marauders from the Neverfields, and cave-dwelling trolls.
Near the earth elemental rift and the Ashari village of Terrah, the mountains themselves seem to rise up in defense as earth elementals spring from the living stones. Northward, peaks reach higher, and winds grow colder as snow and ice take the lands to become the frozen waste of the Neverfields. These challenges keep the common folk at bay, the secrets and spoils held within these crags calling to the brave, the clever, and the foolhardy.
Serpent's Head
A description of the village of Serpent's Head can be found on page 279.
Stormcrest Mountains
Spanning Tal'Dorei's southern reaches, buttressed against the Verdant Expanse, stand the massive Stormcrest Mountains. The winds of the Lucidian Ocean wail through the storm-battered peaks, and few dare make these treacherous mountains their home. The few who do live amidst the Stormcrests are ferocious monstrosities and the giantkin strong enough to defeat them—and those few peoples cunning enough to evade storm, monster, and giant alike. The only friendly towns anywhere near these forsaken peaks lie in the Mornset Countryside pushing along the Stormpoint range, far beyond the influence of the Tal'Dorei Council. These rugged folk are used to fending for themselves and scoff at the thought of returning to so-called "civilization," preferring life among the swamps and shadowed forests.
Ruhn-Shak
A description of the Underdark city of Ruhn-Shak, along with a list of specific locations, can be found on pages 135 - 136. A map of Ruhn-Shak can be found on page 136.
Wrettis
A description of the location where the ruined tower, Wrettis, is located can be found on page 94.
Rifenmist Peninsula
South of the Stormcrest Mountains and the Verdant Expanse are a number of autonomous communities that live outside the influence of the Republic of Tal'Dorei and its constituent city-states. A number of plans to expand into Rifenmist have been brought to the Tal'Dorei Council, but strong opposition from the Syngornian delegation and the Master of Defense have consistently buried these plans before they can come to fruition.
A number of communities exist on the Rifenmist Peninsula. Some are lost remnants of the Scattered War that chose to flee Drassig's rule to the isolated and unpopulated Mornset Countryside rather than fight against his tyranny. These are the communities that some Emonian merchants wish to bring into the fold of Tal'Dorei proper. Farther to the south (and occasionally roaming north into Mornset) are the Orroyen elves, a collection of nomadic tribes. The Orroyen and the elves of Syngorn see one another as family, and the Syngornian delegation refuses to allow the council to interfere with their cousins' way of life.
Beyond the Mornset people and the Orroyen are a number of other small, individualistic settlements that live in fear of the imperial power that commands Rifenmist: the Iron Authority. Tal'Dorei's Master of Defense warns the council of provoking this slumbering empire, for they are preoccupied with their unholy conquest of the Rifenmist Jungle in the name of their patron deity, the Strife Emperor. A number of Orroyen elves and other people of Rifenmist long for Emon's aid in breaking the grip of the Iron Authority, but fear that allowing the Republic of Tal'Dorei to gain a military foothold in Rifenmist would simply be trading one imperial master for another.
Beyond the political struggles of this realm are terrors only true heroes can survive. Enormous, ancient beasts stalk the vine-twisted paths of the jungle that consumes the majority of the peninsula's coastline. An expanding morass of fungus spreads from a mysterious, corrupt source along the eastern depths of the underbrush, while a secret society of naga-worshippers bring bloody offerings to their snake-queen.
Mornset Countryside
Information about the Mornset Countryside can be found on page 13.
Byroden
A description of the town of Byroden along with a list of specific locations can be found on pages 14 - 15. A map of Byroden can be found on page 15.
Hayfield
A description of the hamlet of Hayfield along with a list of specific locations can be found on page 20. A map of Hayfield can be found on page 21.
Verdant Expanse
East of the Stormcrest Mountains, hundreds of miles of massive, unbridled forest shroud the landscape in mystery and shadow. This dense greenwood was for centuries traversed by few but the elves of Tal'Dorei, for it was known to be their domain, and theirs alone. Even in the time of Zan Tal'Dorei, when her rebels and their elven allies saved the realm from tyranny, it was understood that the coasts were humanity's domain, and the woods were that of elvenkind. Times have changed, however. The alliances formed to oppose Thordak the Cinder King united virtually all of Tal'Dorei's disparate peoples, and many more than simply elves now walk the shaded paths of the Verdant Expanse. Even so, much of the Expanse is protected by the watchful eyes of the Wardens of Syngorn, as it has been for hundreds of years.
Merchants travel from Emon to Syngorn along roads sanctioned for trade, hunters both human and elven alike seek glory in tracking the wild beasts that roam the untamed wilderness, and bands of dark elf raiders from Ruhn-Shak prowl the forest under cover of night. This enchanted wood holds the decay of the seasons at bay, and its trees are green year-round.
The Verdant Expanse is sustained by a massive confluence of ley lines—rivers of magical power that flow through the earth—after the devastation of the Calamity shifted the flow of magic across the world. The region is saturated with magic. Magical creatures flock to the forest's supernaturally vibrant boughs, including wayward fey, unicorns, unusual arcane monstrosities like owlbears, and displaced aberrations that call the darker groves their home.
Falcon's Hollow
A description of the town of Falcon's Hollow, along with a list of specific locations, can be found on page 90. A map of Falcon's Hollow can be found on page 90.
Green Scar Outpost
A description of the Green Scar Outpost, along with a list of specific locations, can be found on page 402. A map of Green Scar Outpost can be found on page 402.
Mannhal
A description of the village of Mannhal, along with a list of specific locations, can be found on page 89. A map of Mannhal can be found on page 89.
The Mirescar
A description of the Mirescar can be found on page 249.
Saewic
A description of the town of Saewic, along with a list of specific locations, can be found on pages 87 - 88. A map of Saewic can be found on page 88.
Syngorn
A description of the city of Syngorn, along with a list of specific locations, can be found on page 403 - 407. A map of Syngorn can be found on page 407.
Vues'dal Waters
A description of Vues'dal Waters can be found on page 87.
Bladeshimmer Shoreline
The Bladeshimmer Shoreline, named for the distant glimmering of sun across the Ozmit Sea, stretches across the central western coast of Tal'Dorei. This coast is where humans, halflings, and gnomes first set foot on the continent of Tal'Dorei, and it bears the marks of their first steps on this land. It's also home to the present heart of the Republic of Tal'Dorei.
The shoreline is a hub of international trade, for the western coast of Tal'Dorei is closest to the continents of Issylra and Marquet. Dozens of tall-masted trading ships set sail to and from its calm shores each day — as well as the majestic skyships that daily soar in and out of the resplendent capital city of Emon.
Inland Bladeshimmer is mostly temperate grassland, intercut by cool, winding rivers. The bulk of western Tal'Dorei's produce comes from farms here, blessed with clean water and non-salinated soil, despite the ocean's proximity. Emon's presence lends the region stability. Nevertheless, the yeomen living beyond the city's walls struggle to defend their small plots from burrowing ankhegs, corrupting fiends, and the various folkloric spirits and monsters that lurk in the shadows of their minds.
Emerald Outpost
A description of the Emerald Outpost, along with a list of specific locations, can be found on page 153. A map of Emerald Outpost can be found on page 154.
Emon
A description of the city of Emon, along with a list of specific locations, can be found on pages 155 - 161. A map of Emon can be found on page 162.
The Shalesteps
A description of the villages of the Shalesteps, along with a list of specific locations in Midshale, can be found on page 196. A map of Midshale can be found on page 197.
Issylra
Northwest of Tal'Dorei, across the freezing waters of the Ozmit Sea, lies Issylra, home to Vasselheim, commonly called the oldest surviving city on Exandria. Issylra is considered by most to be the land where all civilization emerged and spread in the time of the Founding, making it the religious core for many, and the focal point of historical study for others. It was also where most of the flying cities of the Age of Arcanum first rose from the ground. Its people rose high—and fell hard from those dizzying heights, and to this day, many there still hate and fear the power of arcane magic.
The territory known as Othanzia encompasses a majority of the continent's developed regions, keeping most domains protected and governed by the might of the theocracy of Vasselheim. Nestled among eastern taiga forests of the Vesper Timberland, the city of Vasselheim stands as the oldest known seed of civilization and religion, and the only city to withstand every catastrophe that has rocked Exandria since the gods brought life to it. As the spiritual center of most of the world, Vasselheim is ruled by a coalition of high priests of the many Prime Deities. These hierophants are viewed by their people as the defenders of their virtuous society, and of all of Othanzian culture.
Beyond Vasselheim's ancient walls are frigid, untamed wilds, some of which are untouched since the Founding itself. These lands are populated by ancient monsters and dire beasts. Smaller camps, communities, and townships are scattered across the surrounding snowy plains, and those who call Othanzia home have become hardy and self-sufficient.
Elsewhere in Othanzia, the lands of Issylra are sparsely populated by scattered republics of varying morality. Traveling between these city-states is difficult, due to the lingering beasts of the Calamity that stalk the lands beyond Vasselheim.
Vasselheim
A description of the city of Vasselheim, along with a list of specific locations, can be found on pages 170 - 173. A map of Vasselheim can be found on page 173.
Shorecomb
A description of the port city of Shorecomb, along with a list of specific locations, can be found on pages 186 - 187. A map of Shorecomb can be found on page 187.

Additional Locations
This section of Appendix D outlines a few locations that are mentioned in the campaign but were not visited long enough, or thoroughly enough, to require outlining within the body of the campaign story. The two locations outlined here are the small fishing village of Green Scar Outpost as well as the elf city of Syngorn.
Green Scar Outpost
Population: 38 (95% half-elfs, 5% other races)
Religions: Major – Wildmother
Minor – Stormlord
This small fishing village is located on the southern edge of the Vues'dal Waters. Most of the buildings here are fashioned out of wood and thatch, which have been gathered from the surrounding woods. Only about 30 people actually live here, while a number visit from time to time. There is a large barracks opposite the docks. It looks large enough to house the approximate 20 Verdant Guard that are typically stationed here to protect the small outpost.
Green Scar Outpost Locations
The following areas, 1 through 8, are specific locations in Green Scar Outpost and can be found labeled on Map D.1.
1. Blacksmith. The blacksmith is a long, single-story building with two smokestacks. The interior is one large room filled with anvils, work benches, and brick forges. A half-elf man named Horben works here, primarily fixing the Guard's armaments or fixing broken tools.
2. General Provisions. The largest wooden building in the Outpost, the General Provisions is run by a middle-aged half-elf woman named Qiona. The store sells everything from food to tools. Everything the residents can purchased come from the General Provisions which is resupplied from Saewic once a week.
3. Barracks. The barracks is a wide, single story timber framed building. It is large enough to hold the twenty Verdant Guard that are stationed here. A hatch in the roof allows guard to be stationed atop, keeping an eye on the forest's edge.
4. Tavern. The tavern is a timber framed simple building, with a thatch roof. The proprietor is a rugged half-elf man named Falstaer. It holds a few roughhewn tables and chairs, and a large live-edge oak bar. With few options, the fish and chips are a staple.
5. Inn. The inn is the only two-story building in Green Scar Outpost. The inn is run by a portly woman named Saffaen. As primitive as the outpost is, the inn offers fairly comfortable accommodations for those few visitors they receive throughout the year.
6. Dock House. The dock house is usually closed and locked. It is only used on the days when ships are scheduled to dock.
7. Fishing Supplies. Fish is a crucial resource for the outpost, both for trade and food. This shop sells bait and other fishing supplies for the fisherman.
8. Docks. Three wooden docks protrude out into the Vues'dal Waters. These docks are built out into deep enough water for ships from Saewic to dock weekly to unload supplies and provisions and pick up timber materials to sell. Ships from Saewic occasionally bring a fresh batch of soldiers to relieve those stationed here.

Map D.1
Syngorn
Population: 38,540 (85% elves, 9% humans, 3% halflings,
3% other races)
Religions: Major – Arch Heart, Wildmother, Moonweaver
Minor – Knowing Mentor, Spider Queen
Founded by the sorceress Yenlara in the wake of the Divergence, Syngorn became the heart of elven civilization on Tal'Dorei following its calamitous destruction. This beautiful city of curving stone is built in harmony with the trees of the Expanse and sits against the western base of the Stormcrest Mountains. It is all but impervious to external assault — not simply because of its 40-foot-high walls of ivy-covered jade, and not only because it's also surrounded by living trees of the Verdant Expanse and beacons of detection that keep constant vigil for intruders. No, Syngorn is virtually unassailable because every entrance to the city is warded by a series of threshold crests: massive emblems of a crescent moon, flanked by two trees, over a deep cerulean stone. These enchanted stones act as an anchor to the Fey Realm, where Syngorn's founders once recovered, allowing the city itself to vanish tracelessly into the Fey Realm as a final act of preservation.
The city has been governed since its inception by the High Warden, a hereditary monarch who appoints proven individuals to three other offices alongside them as the Wardens of Syngorn. Each Warden carries a title and bears a responsibility to guide the city toward safety and prosperity. The Verdant Lord is the head of the city guard, though they delegate this responsibility to a Vice Protector when leading the armies of Syngorn to war abroad.
The Guildrunner manages the city's treasury and oversees commerce within Syngorn's borders. The Voice of Memory is a heralded keeper of history and culture, and is often seen interacting with the elven people, gathering new memories for the archives. The High Warden has always been of Yenlara's bloodline and is responsible for keeping order within Syngorn and its territories, as well as within the Wardens themselves.
Syngorn is steeped in elven tradition that dates back to before the Divergence. The arts are lauded and revered, the pursuit of knowledge is respected and encouraged, and some training in refined martial techniques is culturally expected. The idea of trade between other cities and nations is understood to be both healthy and beneficial, but most foreign trade and travel is relegated to outer areas of the city.
There was a time that few foreigners ever saw Syngorn's innermost reaches, but that time has passed. Syngorn's gates are open to travelers from across Tal'Dorei — though all who visit the city are bound by Syngorn's strict cultural laws to respect their millennia-old traditions. Any who disrespect the ways of Syngorn are warned but once and are thrown out of the city thereafter. Delicate crafts by Syngornian hands are sought after by collectors around the world, so many Syngornians take up the trade for both profit and honor.
If Syngorn appears free of crime, it's because elven criminals have hundreds of years of experience at lurking in the shadows. A thriving market for illegal goods runs invisibly through the city's guilds. Though time often seems to stand still in Syngorn, crime moves with the same celerity as it does in other cities — it must, if the criminal underbelly wants to stay one step ahead of the Wardens of Syngorn.
The most common contraband to pass through Syngorn are shipments of suude, stolen goods, and dwarven trinkets. Many come to Syngorn to purchase these goods for a low price on the black market, but those unwilling to make a journey and risk being stopped by the Verdant Guard can wait for these goods to make their way up to Kymal, where they can be purchased at an outrageous markup of five times their cost in Syngorn.
Most people in Syngorn have their basic needs taken care of by the city's government, to ensure the wellbeing of their people. Nevertheless, some people still fall into poverty, and these destitute individuals are often preyed upon by pickpockets, swindlers, and smugglers who seek to use them as patsies for a paltry sum of gold.
The perpetual shade of the thick, green canopy of the forest maintains cooler weather throughout the summer months, while this far south, the ice and snow of winter is present, but minimal.
Wards of Syngorn
Syngorn is broken up into six main districts and has a variety of neighborhoods:
Memory Ward
The mind of Syngorn is contained within a ring of marble walls in Syngorn's northeast reaches. A winding stair, the One Thousand Steps, leads up to its lofty gate. Standing in the center of its grand court is the mystical Sequoia of Remembrance, a three-hundred-foot-tall redwood within which are stored the lives and memories of every elf in Tal'Dorei. At least, those whose bodies are brought before the sequoia and are granted the Rite of Remembrance, as performed by the Voice of Memory and her disciples, have their memories preserved and added to the collective. Nearly all elves in Syngorn receive this rite, and a vast number of elves who live elsewhere write into their wills that they must be subject to the rite after their death.
Wisps of violet light flit about the sequoia's ancient boughs, and those who look closely into their centers have been known to catch glimpses of eras past, troubles present, and things that yet may be. The great redwood and its spirits are watched and tended to by the Dreamweavers, elves who have dedicated their waking and sleeping lives to the protection of their heritage. About five hundred Dreamweavers and five thousand scholars, merchants, and other elves call this district their home.
The elves are a culture obsessed with tradition and the past. As such, the Dreamweavers are among the most well-respected factions within Syngorn. Their leader, Ouestra, the Voice of Memory, is likewise the most revered and socially powerful of the Wardens.
Beryl Keep
This fortress district houses the martial might of Syngorn. Situated on a hill in the northwest of the city, thick walls of leaf-green beryl separate the district from the rest of the city. Within these walls are rows of barracks, archery ranges, trance chambers, forges, mess halls, and all the other necessities to train an army of long-lived elves. At the far northwest of the district is the Beryl Keep itself. The near-unassailable fortress proves the saying that even the most utilitarian of elven things are beautiful to mortal eyes. Six eucalyptus trees of unknown age mark the boundaries of the keep, and between them grows a thick curtain of ironbark. A dense canopy of impenetrable steelfern forms its roof. Legend says that when Syngorn's need is greatest, the six ancient eucalyptus trees that guard the keep will uproot and march as mighty treants to defend the city.
The Beryl Keep is commanded by Verdant Lord Celindar, Syngorn's master strategist. He possesses a crystal ball of true seeing within his war room, which he can use to scry upon any part of the Verdant Expanse and to pierce any illusion. From this vantage point, he commands his forces like a chess master, always one step ahead of the threats within the enchanted forest. So far, Syngorn remains safe because its enemies are wild and disorganized. Were they to unify, the might of the Verdant Guard would truly be put to the test.
The armies of Syngorn are about five thousand elves strong, though only about three thousand are within this district at any time. The rest are stationed at outposts within the Verdant Expanse and the Fey Realm.
Tarn Ward
Syngorn's central ward is a peaceful commerce district surrounding Lake Ywnnlas and split by the channels that feed it. From sunrise to sunset, no business is conducted here, save for food service at public houses and beds at inns. During the daylight hours, elves socialize, play, sing songs, write poetry, paint great works of art, and meditate here. Elves are long-lived, and if half the day is not spent in peace and self-improvement, it is thought that the day was truly wasted, no matter how productive one might have been in matters of business.
At nightfall, however, the Tarn Ward changes. The Tarn Thoroughfare opens at moonrise, lit only by the heavens and by magical, floating lanterns. The streets are silent but for the ethereal elvensong that guides those who know how to listen through the streets. Elves and half-elves raised in Syngorn know this musical language, but those unfamiliar with it must use a comprehend languages spell to follow the melody. When the river of sound guides a customer to a vendor, they speak in hushed Elvish, like an audience whispering at the theatre.
Most shops along the Tarn Thoroughfare are affiliated with one of three guilds — the Spellbenders' Guild, the Elvencraft Alliance, or the Mithral Fellowship — and the sly Guildrunner Rawndel sits at the head of all three. The Warden of this district, Rawndel lives in a permanent magnificent mansion with a façade adorned with splendid fey grotesques and is respected by elven merchants and nobles alike. The elves don't seem to mind his monopoly on Thoroughfare trade, as their lives haven't been affected much, but High Warden Tirelda worries of the long-term consequences of Rawndel's power-hungry behavior.
Syngornian Goods
Any basic goods can be purchased in Syngorn at twice their usual cost. These goods, however, are of fine elven make. Weapons have a +1 bonus to damage rolls, horses and other mounts increase their movement speed by 10 feet, and other items are possessed of unearthly beauty and preternatural durability. All common magic items can be easily found here, and any uncommon magic item has a 50 percent chance of being found here in the ward's many market stalls. Finding magic items of greater rarity requires an interested character to make a DC 21 Investigation check to find a rare item, or a DC 25 Investigation check to find a very rare item. These items are rarely for sale and can only be bartered for — typically by completing a dangerous quest for the person who possesses them.
Emerald Citadel
The great palace of Syngorn looms high over the north of the city — a mighty castle of faded white marble, now covered with climbing ivy and sprouting plants. As the highest point in the gradually sloping city, its emerald-tipped spires can be seen from anywhere below. Visitors to the citadel first climb a grand set of stairs, curved like a flowing river of marble, before reaching its brass gates. The Verdant Guard aggressively protects the castle's main entrance, rejecting any commoner who does not have an invitation to the palace marked with the High Warden's seal. High Warden Tirelda's monocled majordomo, a silver-haired elf named Ibbimas, screens all of the High Warden's supplicants.
The palace's high, vaulted ceilings are supported by pillars of gleaming marble carved in the image of tall elm trees, such that the ceilings are a canopy of polished stone. Beautiful portraits and busts of past Wardens line the walls, along with opulent tapestries of Yenlara and the creation of Syngorn. The citadel is made up of four main levels. The basement levels hold the castle dungeons, as well as grand vaults containing fabulous treasure, historical artifacts, and overwrought gifts — the latter given by emissaries uncertain of how to present a gift fine enough for an elven monarch. The first floor holds lush quarters for ambassadors and visiting dignitaries. The second floor's chambers are dedicated to business of state, including the High Warden's throne room. The towers above the citadel contain studies and quarters for the High Warden and her family.
Feygrove
A once-splendid manor house in southern Syngorn is now completely overgrown with plant life. Massive mulberry trees sprout at odd angles out of windows and through gables, and fairy lights dance around the house at all hours of the day. When Syngorn returned from the Fey Realm after the Conclave's defeat, the elves unintentionally brought a little of the Fey Realm with them. A number of fey creatures slipped through a gate from the Fey Realm to Exandria, then wriggled through Syngorn's defenses and made their home in the mansion of an elven noblewoman named Lady Ladri Il'shavfa. She has tried for years to reclaim her home, but even the patience of elves wears thin; the fey are simply too numerous and too tenacious to be kicked out for good.
The fey interlopers, however, are having the time of their lives. Far from merely throwing nightly parties — though they do that, too — they have made Il'shavfa Manor a place for them to experiment with wild new magic. Their leader, a pixie prince named Windybranch, has found great pleasure in planting strange fey plants in the house and watching as they integrate with the mansion. The house is now a living, breathing, thinking thing—a new friend for the fey! It keeps the elves out and it's a great conversationalist! To the fey, this arrangement has no downsides! The fairies have named this manor after the Archfey who first allowed them into the city. To them, their new home is Artagan's Lodge (and it's said that the Archfey Artagan occasionally stays within its walls when he visits Tal'Dorei).
Since the Feygrove was first "founded" over twenty years ago, the fey have spilled out of Il'shavfa Manor and made an entire district of the city into their home. By this point, only the most stubborn of elven nobility still gripe about "the fey menace" within their midst. Most of Syngorn's residents are delighted to have a district filled with the fey, even if it causes the southern end of the city to be a little more chaotic than usual. The fey here seem to have kind hearts, and their chaos rarely crosses the line from churlish pranks into cruelty.
Reverie Walks
The artistic and spiritual center of Syngorn is a winding labyrinth of living trees and stones. Elves who seek a day-long (or days-long) journey of meditation may wander the Reverie Walks, entering a trance-like state as they do so. Those who seek true enlightenment may dedicate years of their near-immortal lives to wandering the ever-shifting labyrinth, finding peace in isolation or in search of the Stone of the Arch Heart in the labyrinth's center. An elven monk named Lyssev Sorveline has walked the labyrinth for five hundred years, seeking answers to questions even the gods do not know. Some elves leave gifts of food for the Wanderer within the labyrinth, allowing them to continue their eternal meditation in peace.
No Warden holds sway over the Reverie Walks. Legend holds that the living stones and trees that shift the labyrinth are devotees of the Arch Heart that swore to be their god's eternal wardens.

Syngorn Locations
The following areas, 1 through 8, are famous landmarks in Syngorn and can be found labeled on Map D.2.
1. Elvencraft Alliance Guildhall. The Elvencraft Alliance is supposedly the oldest guild in Syngorn. They are entrusted with creating works of art that spread the culture of Syngorn far and wide across Tal'Dorei. The front rooms of their guildhall are a museum of fine elven crafts from ages past, and they're open to all who wish to appreciate Syngorn's cultural heritage.
2. Guildrunner's Mansion. Guildrunner Rawndel, Warden of the Tarn Ward, makes his home within a permanent magnificent mansion. Its exterior is a magnificent façade of stone and leering fey statues, yet if one were to look inside, they would find it completely empty. The door, which is constantly locked to all but the Guildrunner and his guests, is actually a portal to an extradimensional space containing a manor of supernatural beauty and luxury.
3. Mithral Fellowship Guildhall. The master metallurgists and smiths of the Mithral Fellowship are tasked with arming the Verdant Guard and the armies of Syngorn. In peacetime, they turn their talents to creating things of beauty from metal and jewels, sometimes in tandem with the artists of the Elvencraft Alliance. Due to their military involvement, none but authorized members of the fellowship are allowed within their guildhall.
4. One Thousand Steps. This winding stair is the only way in or out of the Memory Ward. Each step is inscribed with an ancient elven idiom, aphorism, or impossible philosophical question. Anyone who enters the Memory Ward is told to read the aphorism upon the first step and ponder it the entire time they are climbing the stairway. If they find peace in their answer, they are to read the inscription of the second step on their next journey, and so on. There are few, even among the elves, who have pondered the inscriptions of all of the steps to their satisfaction.
5. Spires of Yurek. Roads lined with dormitories and vendors radiate out from the branches of the Sequoia of Remembrance to the walls of the Memory Ward, providing essentials for not only the Dreamweavers, but the elven scholars who teach, study, and experiment with magic within the Spires of Yurek. This academy was named for Yurek Windkeeper, founder of the Arcana Pansophical and personal counselor to the Voice of Memory herself. The school is small compared to Emon's magnificent Alabaster Lyceum, but its seven marble towers are no less awe-inspiring. Characters who visit the Spires of Yurek can learn any historical fact by studying its tomes for one hour and then making a successful DC 20 History check. They can even uncover hints toward long-lost secrets by completing a day's study and then succeeding on a DC 25 History check. New spells are constantly being invented here, and countless tomes filled with ancient spells can be found within the libraries.

6. Tower of Moonlight. Most visitors to Syngorn doubt that Ouestra, the Voice of Memory, truly dwells in a tower of moonlight. It is the truth. Her tower does not exist under the light of the sun, and then appears as a semi-solid pillar of Catha's silvery glow, occasionally veined by lines of Ruidus' ruddy light when the smaller moon is full. Its inside has supposedly never been seen by any but the other Wardens of Syngorn, and a thousand rumors circulate throughout the realm of the magical and divine marvels that must be contained within.
7. Spellbenders' Guildhall. The Verdant Expanse is saturated with magic. The ley energies that suffuse the greenwood make it easy for arcanists to create works of spellcraft by themselves, when it might take a half-dozen mages working in concert in other lands. Many of Syngorn's most trustworthy magi are members of the Spellbenders, a guild dedicated to creating new spells and using them to create works of art, defend their homeland, and improve their peoples' lives. Their guildhall is only accessible to those with the express permission of Guildrunner Rawndel.
8. Stone of the Arch Heart. In the heart of the Reverie Walks is a column of pure diamond, carved in the radiant likeness of an androgynous elf. Though the Arch Heart is worshiped throughout Tal'Dorei as a god of magic and art, they are something more to the elves of Syngorn: a progenitor of their people, a deity of fatherhood and motherhood, yet also of neither — a liminal god that by their very nature both embraces and destroys binaries. Elves that are "born of the Arch Heart" are honored within Syngorn, and many who seek that honor wander the Reverie Ward in search of the Stone, longing for physical transformation, social power, or arcane might. Some search for centuries and never find it, but in times of peril, the Arch Heart always makes their wisdom known to those who truly need it.
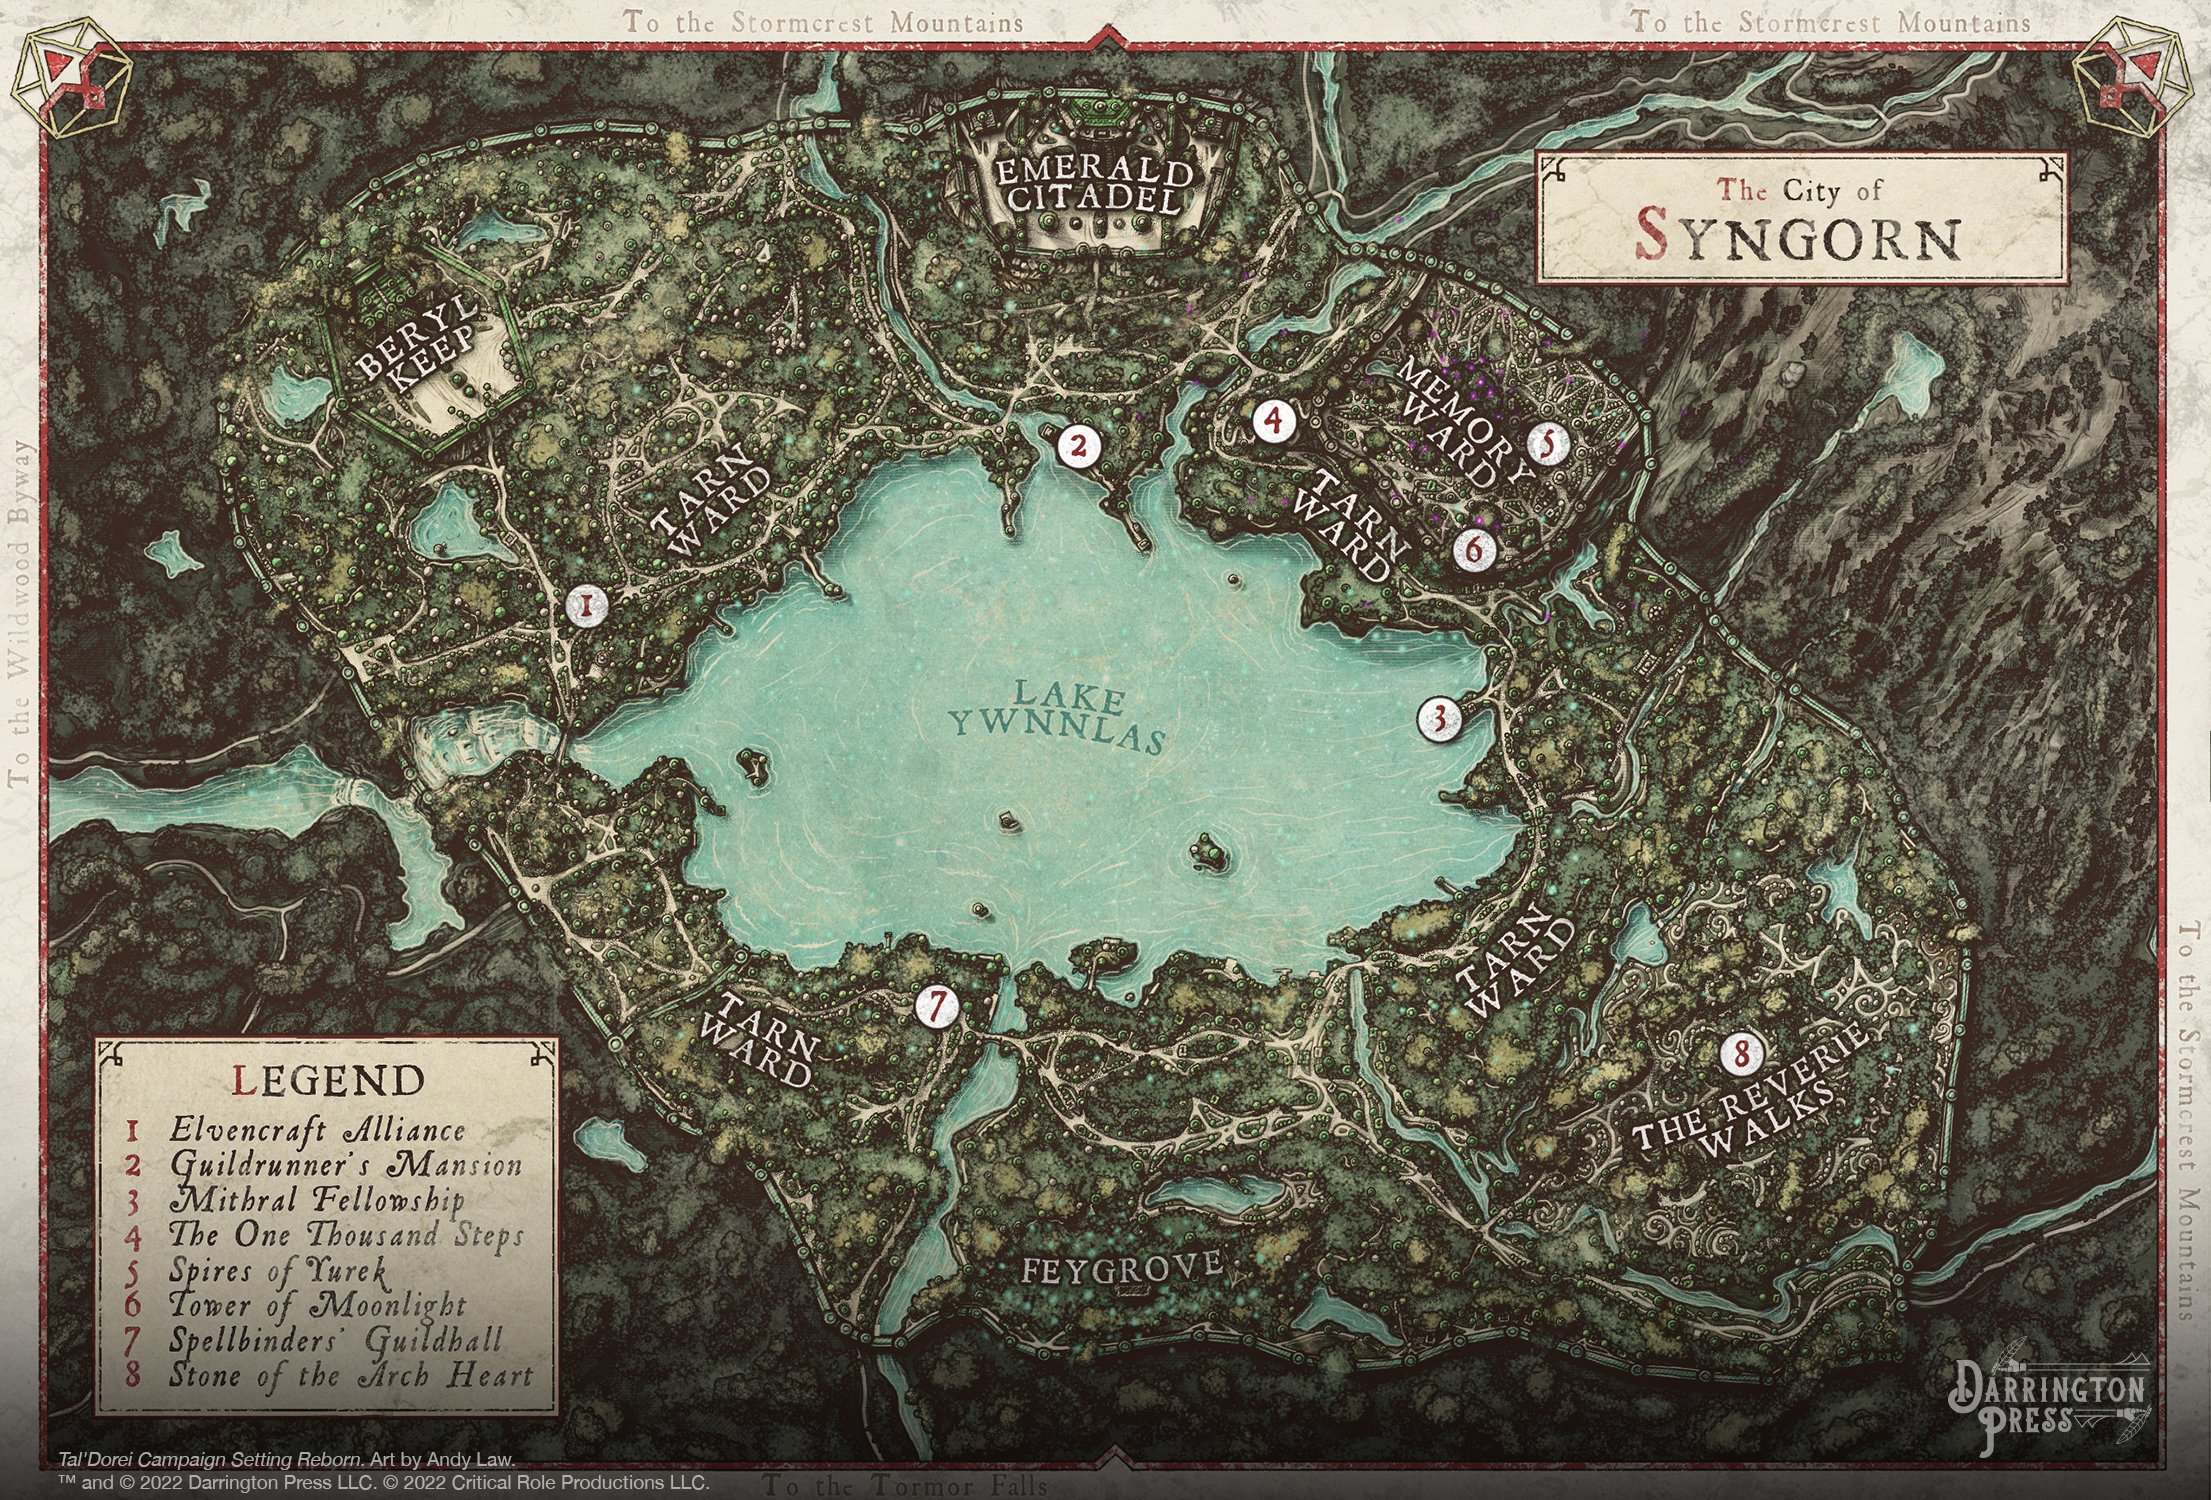
Map D.2
E
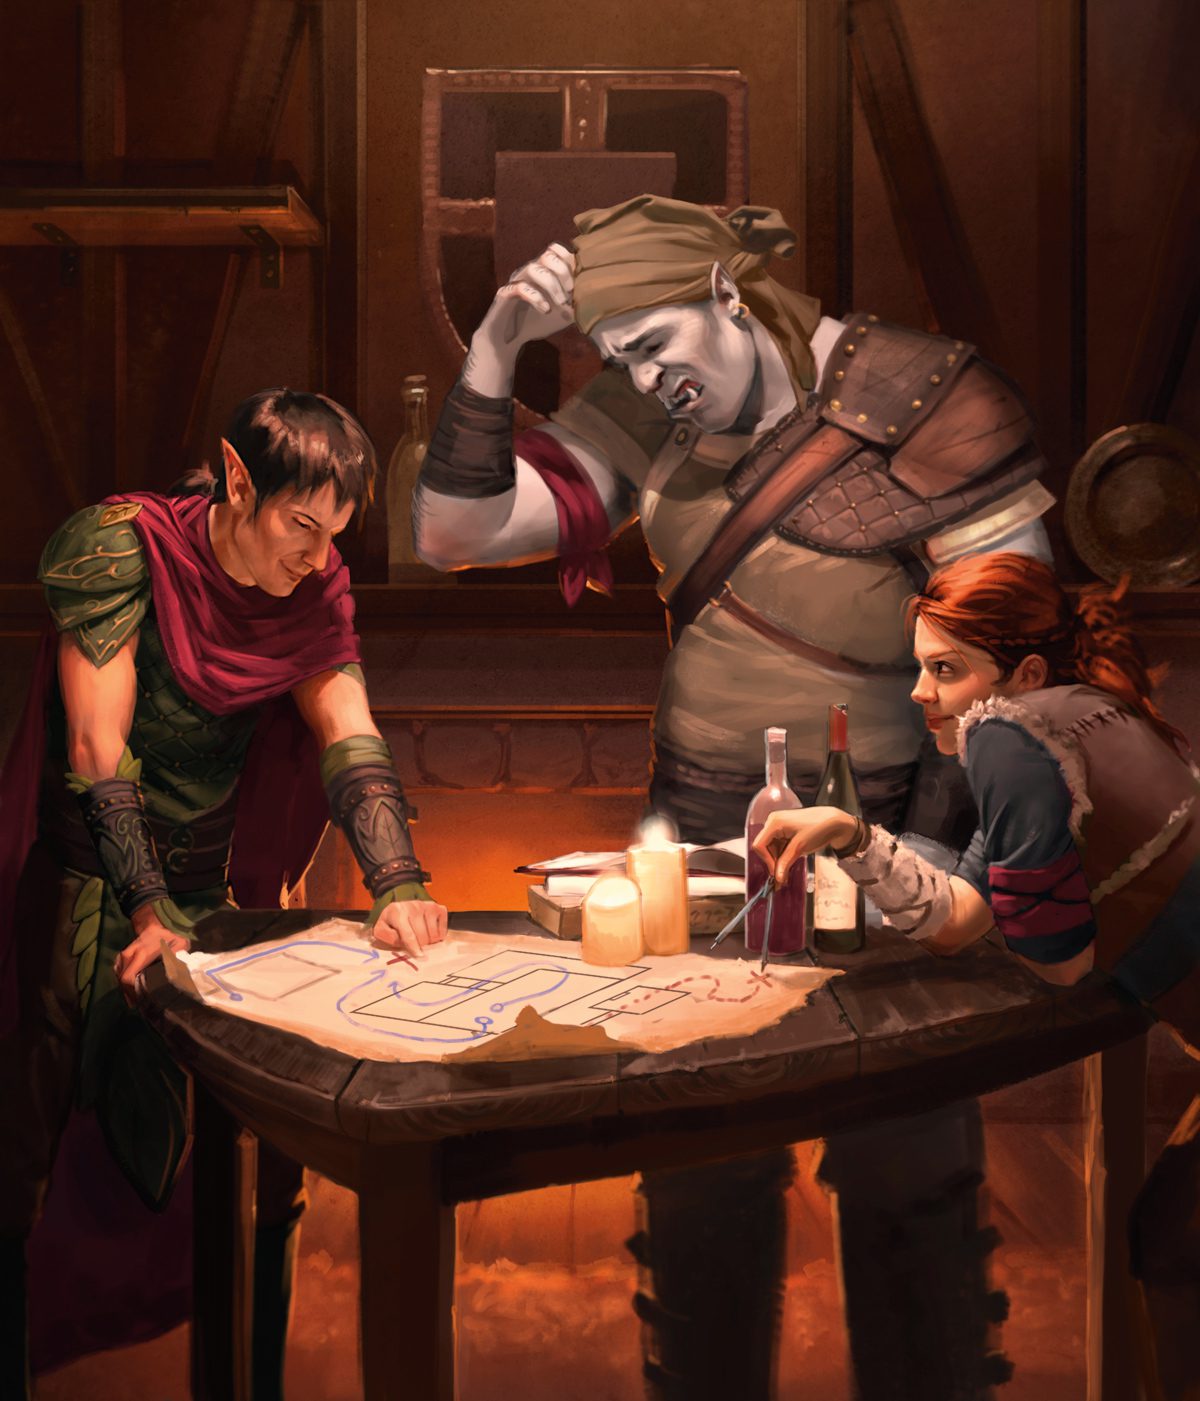
Appendix E - Variant Rules
Corruption
Certain landscapes house deeply evil places or artifacts that corrupt the very nature of people who spend time around them. Sites where the presence of such terrible wickedness can slowly twist and infect the physical forms of even the most holy of creatures. Unhallowed or cursed locations that erode the drive and will of those that linger. When sleep comes to those that stay, it's this period of vulnerability that invites the darkness in. This ruleset allows you to have this dark influence slowly infect your adventuring party, helping build tension as they traverse the shadowed lands.
If a character completes a long rest near a source of strong, unholy evil or deeply corrupt magic, they must roll a Wisdom saving throw. The DC of the saving throw is outlined below and is dependent on the character's current Corruption level and proximity to the source of evil. On a failure, the character suffers 1 point of Corruption. When a new tier of corruption is achieved (Mild to Moderate, Moderate to Severe), roll a d8 on the Corruption Effects Table below to determine the effect of that character's corruption.
Corruption Tiers Table
| No Corruption (0 Points) | Mild Corruption (1 - 2 Points) | Moderate Corruption (3 - 8 Points) | Severe Corruption (9 - 11 Points) | Dead / Insane (12+ Points) | |
|---|---|---|---|---|---|
| Save DC (within 5 miles) | 10 | 12 | 14 | 18 | - |
| Save DC (within 1 mile) | 12 | 14 | 18 | 22 | - |
| Save DC (within 500 feet) | 14 | 18 | 22 | 25 | - |
Corruption Effects
Many of the following corruption effects carry some form of mechanical detriment, but the real fun is being aware and weaving them into narrative and roleplaying scenarios. Consider how some of these effects might alter a social encounter or adjust the character's reaction to a particular event. Don't be afraid to remind a character of their corruption should a moment arise where they may have an opportunity to incorporate it.
Gaining Corruption Points
Corruption effects are cumulative with previous effects as higher tiers are achieved. Effects fade when enough corruption points have been cured to lower the character's tier of corruption (Moderate to Mild, Mild to None). If a character reaches 12 or more Corruption points, the DM decides whether or not the character dies instantly or goes insane and becomes an NPC under their control. A character with 12 or more corruption points cannot be brought back to life or restored to player control until they are brought below 12 corruption points.
Situational trauma can lead the DM to tailor Corruption Effects to characters temporarily. Really twisted DMs can even customize particularly terrible creatures to afflict characters with Corruption Points with certain attacks, magical items that corrupt the user, or tomes that corrupt the reader when read.
Removing Corruption Points
Corruption can be cured naturally by resting away from any source of corruption, at a rate of 1 corruption point per week of rest. Otherwise, a lesser restoration spell can cure 1 corruption point, and a greater restoration spell can cure 1d4 corruption points.
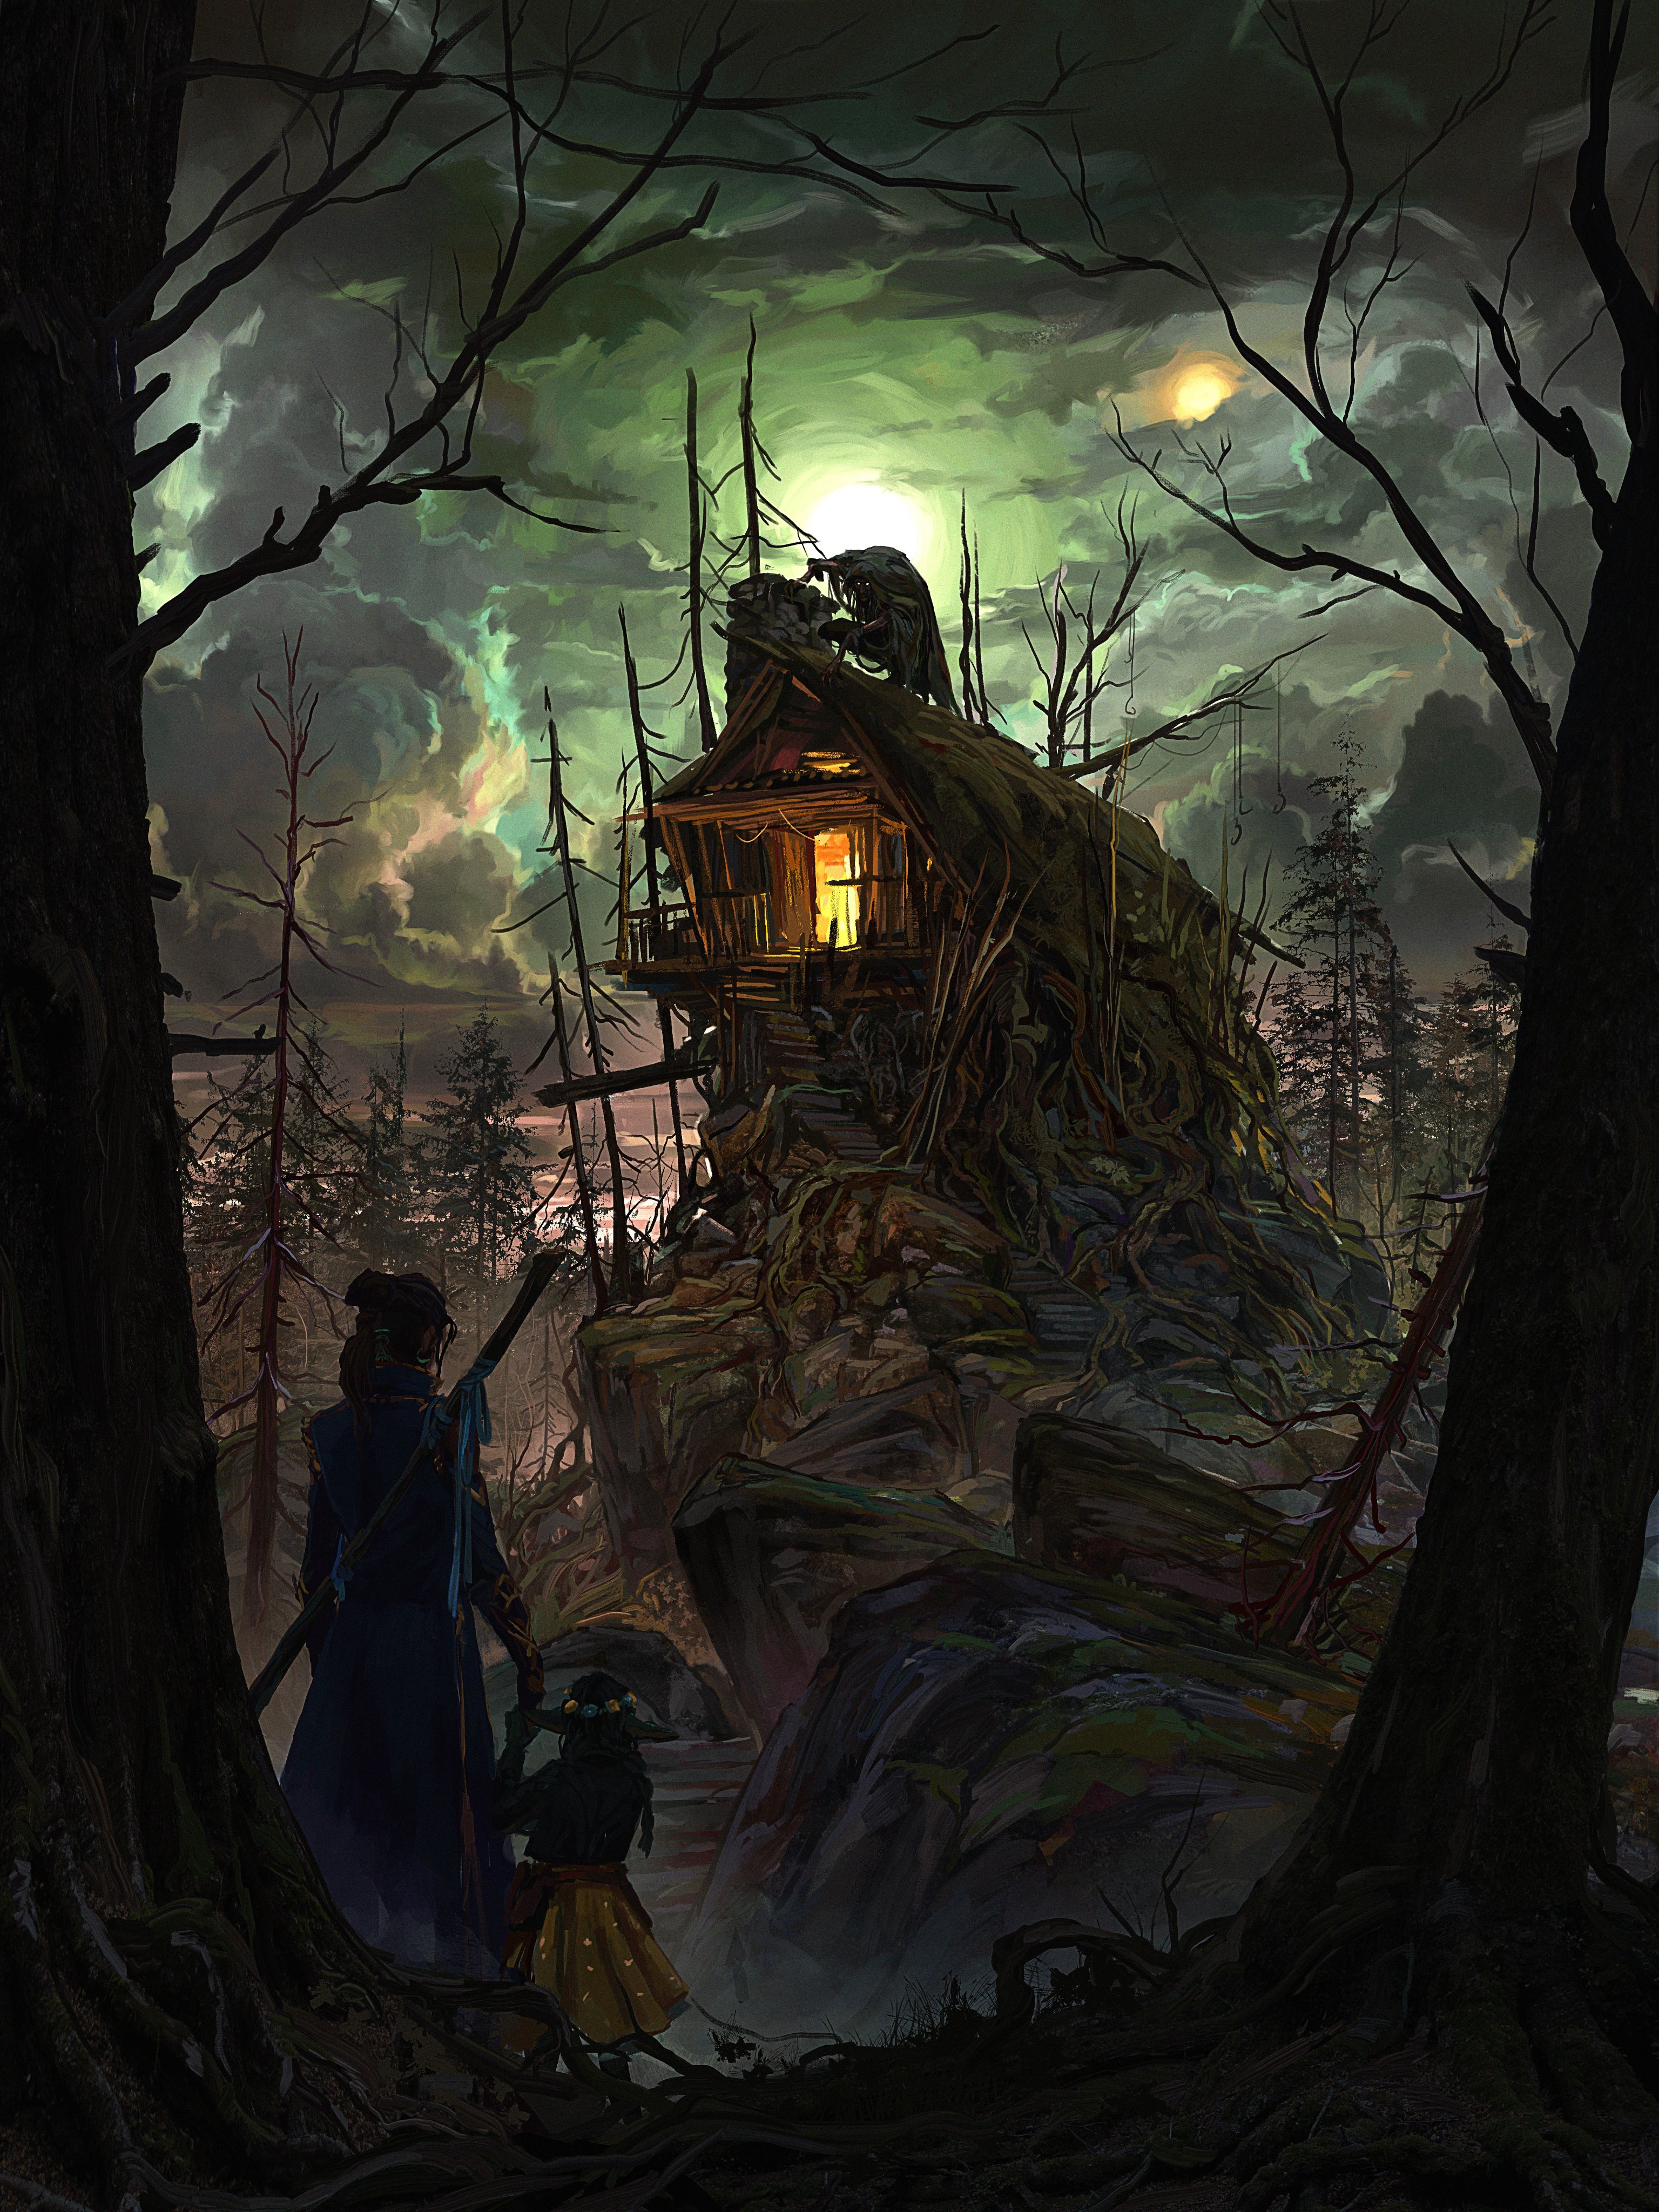
Corruption Effects Table
| d8 | Mild Corruption | Moderate Corruption | Severe Corruption |
|---|---|---|---|
| 1 | Hallucinations | Seeping Sores | Warped Spine |
| 2 | Hoarder | Moral Decay | Murderous |
| 3 | Compulsive | Distracted | Withered Flesh |
| 4 | Cough | Jittery | Paranoid |
| 5 | Trusting | Rotten Joints | Mark of the Cursed |
| 6 | Reckless | Body Parasites | Broken Will |
| 7 | Scent of Decay | Chronic Fatigue | Eyes of Shadow |
| 8 | Mildly Phobic | Moderately Phobic | Severely Phobic |
Body Parasites. Parasitic worms infest and writhe throughout your innards. Any hit points regained through spending Hit Dice are halved.
Broken Will. Your willpower has crumbled, leaving your mind vulnerable. You have disadvantage on Wisdom ability checks and Wisdom saving throws.
Chronic Fatigue. Your body has difficulty with continuous physical activity. If you do not take a short or long rest directly after a combat that lasted more than 1 minute, you suffer 1 point of exhaustion.
Compulsive. You begin to exhibit a mild, compulsive ritual of the DM's choice. This can manifest as categorizing collected loot, or needing to thoroughly clean yourself after every challenge, for example. You take 1.5 times as long to complete a short rest.
Cough. You develop an uncontrollable cough that creeps up occasionally. You have disadvantage on Stealth checks.
Distracted. Your mind has grown scattered and easily clouded. You have disadvantage on Intelligence ability checks.
Eyes of Shadow. Your eyes grow jet black and empty, your pupils becoming small glowing points of green flame. You gain Darkvision for 60 feet, but also gain Sunlight Sensitivity. You have disadvantage on attack rolls and on Perception checks that rely on sight when you, the target of your attack, or whatever you are trying to perceive is in direct sunlight.
Jittery. You become far too easy to spook or startle. You have disadvantage on initiative rolls.
Hallucinations. Strange visions and sourceless whispers occasionally tug at your perception. You have disadvantage on Perception checks.
Hoarder. You are compelled to collect anything and everything of mild value you can. Simple trinkets stumbled across must be gathered and carried, if able, until at carrying capacity.
Mark of the Cursed. A black curse on your very soul resists divine energies. Any hit points you would regain via spells are halved.
Mildly Phobic. You acquire a mild fear of a certain creature type of the DM's choice. During the first round of combat with a creature of the chosen type, you are frightened.
Moderately Phobic. You acquire a moderate fear of a certain creature type of the DM's choice. When you enter combat with a creature of the chosen type, you must make a Wisdom saving throw (DC is 10 + your total corruption points). On a failure, you are frightened of them for 1 minute.
Moral Decay. Your disposition towards the world around you has shifted towards the darkness that twists within you. Your alignment shifts once either laterally or towards evil. Good can shift to Neutral. Neutral can shift to Evil. Lawful can shift to Chaotic. Chaotic can shift to Lawful. This shift is the DM's choice and should be relayed to the player in secret.
Murderous. You suffer irresistible urges at the sight of the helpless. If any creature you can see is incapacitated (friend or foe), you must spend your turn moving directly toward that creature and attacking it, if possible.
Paranoid. You no longer trust even your closest allies. You no longer count as a "friendly" creature to anyone, nor does anyone count as a "friendly" creature to you, in regard to abilities or spells. The only creature your beneficial spells and abilities can target is yourself.
Reckless. You've become impulsive in the face of dangerous situations. The first attack made against you in any combat encounter has advantage on the attack roll.
Rotten Joints. Your joints begin to suffer from internal decay and degeneration. You have disadvantage on Dexterity ability checks.
Scent of Death. Your body has begun to emit a terrible stench of rotting flesh. You have disadvantage on Persuasion checks.
Seeping Sores. Painful sores cover your body, making it difficult to exhibit all of your strength. You have advantage on Strength ability checks.
Severely Phobic. You acquire a severe fear of a certain creature type of the DM's choice. When you enter combat with a creature of the chosen type, you become frightened of the creature for 1 minute and must make a Wisdom saving throw (DC is 10 + your total corruption points). On a failure, you are stunned. You can repeat this saving throw at the end of your turn.
Trusting. You become too eager to accept others at face value. You have disadvantage on Insight checks.
Warped Spine. Your spine has become twisted and hunched. You have disadvantage on Dexterity ability checks and Dexterity saving throws.
Withered Flesh. Your flesh has pulled tight against your skeleton, making your visage terrifying to most. You have disadvantage on Charisma ability checks and Charisma saving throws.
Overland Journeys
Within the standard 5th Edition ruleset, there's very little space given over to the 'third pillar' of the game experience - exploration. Many DMs will either gloss over extended travel with nothing more than evocative narration, or simply craft their campaigns to avoid having to deal with it in the first place. These rules are intended to provide a way for DMs to include epic quests and grueling journeys, when simply getting from A to B is a feat in itself.
Journeys as Dungeons
The classic dungeon crawl is as old as D&D itself, and many an adventure is built entirely around a party's daring delve into a dark dungeon in search of fame and fortune. This ruleset effectively re-imagines an overland journey as a kind of dungeon crawl, with each room in the dungeon being replaced by a scene on the journey.
Step 1: The Route
Upon beginning a journey, first determine the route to be traveled, noting the distance and the terrain type. Each type of terrain has a travel speed and a travel DC, as noted below.
Travel Speeds
Each terrain type has its own travel speed, which is the number of miles the party can cross each day of travel.
Slow. 10 miles per day
Medium. 20 miles per day.
Fast. 30 miles per day.
Terrain Types
Terrain should be classified into one of the types below, which are shown with their corresponding maximum speed and travel DC:
Good Roads. Max speed: Fast. Travel DC: 5. Safe, well-traveled roads and trade routes, often connecting major cities. Navigation is trivial, and danger is rare.
Bad Roads. Max speed: Fast. Travel DC: 10. Old roads, disused or bandit-prone, connecting towns or running through dangerous wilderness areas. Navigation is simple, though the road sometimes vanishes for stretches of a few miles, and dangers are more common.
Grassland. Max speed: Medium. Travel DC: 10. Rolling hills, plains, or farmland, potentially with game trails or other pathways. Navigation is by landmark and the horizon, and there are often predators and other dangers to be mindful of.
Forest. Max speed: Slow. Travel DC: 15. Thick woodlands, forests, and other areas of heavy tree cover. Navigation can be hard without trails, and dangers lurk beneath the boughs.
Swamp. Max speed: Slow. Travel DC: 20. Bogs, marshes, and swampland, with uncertain footing and inhospitable quagmires. Navigation is tough, and dangers abound.
Mountain. Max speed: Slow. Travel DC: 20. Cliffs, mountain passes, clustered caverns, and ragged ravines. Trails are few and far between, passes are narrow and hard to cross, and predators prowl the peaks.
Desert. Max speed: Slow. Travel DC: 25. Desiccated dunes, shifting sands and barren wastes, with little in the way of sustenance or guiding landmarks. Footing is uncertain, days are hot, nights are cold, and predators stalk any travelers.
Arctic. Max speed: Medium. Travel DC: 20. Freezing glaciers and snow-covered reaches, far from the grasp of civilization. Navigation is hard in the snow, and dangers can creep close without warning.
Underdark. Max speed: Medium. Travel DC: 25. A web of subterranean tunnels and subsurface mushroom forests, infested with monsters and precarious empires of drow and duergar. It's easy to be turned around in the Underdark, and even easier to fall victim to one of the many threats.

Example
Bramble, Kayne, Lia, and Maoki are traveling from the town of Byroden deep into the Verdant Expanse in search of a lost temple. It's a long, arduous trek through the huge, forested region, and the group estimates the whole journey to be roughly one hundred and twenty miles.
Forest terrain has a travel speed of Medium, which equates to twenty miles per day. This means that the trip should take around six days of travel.
Step 2: Embarking
With the journey duration and difficulty assigned, it can be populated with events. The number and difficulty of encounters the party finds along their quest will be modified according to the party's skill in the roles below, thus resulting in a dynamic, reactive journey.
Remember that not all encounters have to be combat, or even hostile. Think of each encounter as a "point of interest" along the route - an opportunity for the DM to zoom in on the party as they find something interesting, or a potential threat to avoid or confront.
Roles
Once the party has planned their journey, there are four roles for the party to fill along the journey, the Navigator, the Lookout, the Scout, and the Hunter. Each role requires a skill check, the results of which will affect the time it takes the party to complete the journey as well as the difficulties they face along the way.
In parties with fewer than four members, each character can fill up to two roles, though if they choose to fill two roles their skill checks for both will be made with disadvantage.
In parties with more than four members, up to two characters can fill each role - in a role filled by two characters, the character with the highest modifier for that skill makes the check with advantage.
The Lookout
The Lookout is in charge of watching for danger, alerting the party when bandits or roving predators are near, and keeping an eye out for places or things of interest along the way. At the outset of each leg of the journey, the Lookout makes a Perception check against the terrain's travel DC, with the result affecting how many encounters the party will come across along the journey.
- Pass by 5 or more: In the clear. The party will see 1 encounter per ten days of travel.
- Pass: Interesting times. The party will see 2 encounters per ten days of travel.
- Fail: Dangerous terrain. The party will see 3 encounters per ten days of travel.
- Fail by 5 or more: Stalked by misfortune. The party will see 4 encounters per ten days of travel.
The Scout
The Scout is in charge of assessing the terrain ahead and steering the party clear of monster lairs and environmental hazards. At the outset of each leg of the journey, the Scout makes a Nature check against the terrain's travel DC, with the result affecting the difficulty of the encounters the party will face along the way.
Encounter difficulty is adjusted by the DM using the CR system on page 274 of the Dungeon Master's Guide.
- Pass by 5 or more: No threat. The journey's encounters will be Easy.
- Pass: On guard. The journey's encounters will be Medium.
- Fail: Uncertain territory. The journey's encounters will be Hard.
- Fail by 5 or more: Danger abounds. The journey's encounters will be Deadly.
The Hunter
The Hunter is in charge of keeping the party fed and watered, tracking down game animals, searching for fresh water, and monitoring the party's supplies. At the outset of each leg of the journey, the Hunter makes an attack roll against the terrain's travel DC, with the result affecting how physically draining the trip is.
- Pass by 5 or more: Abundance. The party consume no supplies, as food is plentiful. Each character may remove one level of Exhaustion, if they have any.
- Pass: Good hunting. The party consume their supplies at half the usual rate, as foraging provides sufficient food.
- Fail: Sparse pickings. Game is in short supply - the party can only find enough to barely keep them alive and must rely solely on their supplies. If they run out, each member gains one level of Exhaustion for each ten days traveled.
- Fail by 5 or more: Barren. Game is absent, and the party is unable to find sources of potable water - the party consume their supplies at double the rate, if they have any. Should they run out, each member gains one level of Exhaustion for each ten days traveled without supplies.
Example
Bramble, Kayne, Lia, and Maoki are about to set off on their trek through the Verdant Expanse, and each of them chooses a role. The forest's travel DC is 15, so they'll each make their checks against a DC of 15.
Lia, as an experienced ranger, chooses to navigate. She makes a Survival check and scores a 16 - a pass. The party will be on-time to make the journey in the expected ten days.
Maoki, a cunning rogue, chooses to be the lookout. He makes a Perception check and scores a 19 - a pass. The party will see two encounters across their ten-day trip.
Bramble, a learned bard, elects to scout. He makes a Nature check, but only scores a 9 - a fail by 5 or more! The two encounters the party faces, if they turn to combat, will be Deadly!
Kayne, a skilled paladin, takes charge of hunting. He makes an attack roll and scores a 14 - a failure. Luckily, the group brought enough rations and supplies to last them the full ten days, because they're forced to rely entirely on rations as forage and food is little to be found. If anything happens to them, the whole group would be forced to gain a level of exhaustion!
Step 3: The Encounters
With the journey's real duration determined, and the number and difficulty of encounters along the way decided, all that remains is for the Dungeon Master to combine it all into a cohesive story.
Premade Encounters
Should the DM wish, each encounter along the route can be pre-planned in advance. The DM might decide that the party will first wander into the territories of an isolationist enclave of wood elves, before a few days later stumbling across the entrance to an overgrown temple still crawling with foul undead, for example.
This approach works best if there is either sufficient time between the outset of the journey and the actual in-game traveling for the DM to plan out these encounters, or if the DM already has enough world building detail in place for the region - it allows the encounters the party face to both evoke the foes and themes of the campaign, but also to be carefully crafted for the party themselves.
Random Encounters
If the DM prefers, they can simply roll on the random tables found on pages 92 - 112 of Xanathar's Guide to Everything, which are broken down by terrain type and Challenge Rating. As a simple conversion:
For Easy encounters, roll on the table for the level bracket below the characters.
For Medium encounters, roll on the table for the current level bracket of the characters.
For Hard encounters, roll on the table for the level bracket above the characters.
For Deadly encounters, roll on the table for the level bracket two above the characters.
Example
The DM for Bramble, Kayne, Lia, and Maoki elects to roll for the two encounters the party will face along their journey. The party are level 7, but thanks to Bramble's fumbling scouting their encounters will be Deadly, so the DM finds the table for Forest encounters at levels 17+ (XGtE p.100) and makes two rolls.
The DM rolls an 18 and a 91 - a herd of unicorns, and an ancient green dragon. He's confident that the good-aligned party won't find conflict with the unicorns, but the ancient dragon is far above their weight class: the four adventurers will have to play their cards right to avoid a potentially lethal fight.
Notes
There are some class features or other game elements that can alter how the DM might like to use these rules, which are addressed below.
Characters with the Outlander background. The Wanderer feature states "you can find food and fresh water for yourself and up to five other people each day, provided that the land offers berries, small game, water, and so forth." As such, it is recommended that if the character with this feature takes the Hunter role, they make their attack roll with advantage - their background helps them find what game is around, but cannot help if there simply is nothing to find.
Rangers with Favored Terrain. The Natural Explorer feature grants a number of benefits which sadly see little use in many campaigns. With this in mind, it is recommended that they apply to these journey rules as such:
- If the journey is made through the Ranger's favored terrain, the party's maximum speed is raised by one level (from Slow to Medium, or from Medium to Fast).
- If the journey is made through the Ranger's favored terrain, the terrain's travel DC is lowered by 5.
- If the journey is made through the Ranger's favored terrain, the Ranger makes their check for any role they fill with advantage.
Overland Journeys - Player Cheat Sheet
Within the standard 5th Edition ruleset, there's very little space given over to the 'third pillar' of the game experience - exploration. The classic dungeon crawl is as old as D&D itself, and many an adventure is built entirely around a party's daring delve into a dark dungeon in search of fame and fortune. This effectively re-imagines an overland journey as a kind of dungeon crawl, with rooms in the dungeon replaced by scenes on the journey.
Once the party has planned their journey, there are four roles for the party to fill along the journey, the Navigator, the Lookout, the Scout, and the Hunter. Each role requires a skill check, the results of which will affect the time it takes the party to complete the journey and the difficulties they face along the way.
Ruhn-Shak Despair Rules
The Despair Deck represents the unnatural behaviors and neuroses that can come over those who visit the Shadowfell, or any adventure that contains an element of gloom or horror. If the characters' adventures take them into a city of drow in the Underdark besieged by a mysterious power, it might make sense to use the Despair Deck to add the desired atmosphere. Characters who travel into suck locales find that cheer turns to gloom, friendship becomes enmity, and reason transforms into madness. Usually, these changes occur over months or years. Adventurers suffer the effects more rapidly, for they are constantly engaged in life-or-death struggles that test their physical and mental limits.
The Despair Deck consists of cards that represent an aspect of gloom: apathy, fear, or madness. Over the course of the adventure, players draw cards from the Despair Deck to find out what aspect of despair afflicts their characters.
Gaining Despair
A character usually becomes beset with despair when he or she enters an area encompassed by overwhelming gloom or completes a long rest within such an area. At the end of a long rest, or when a character first enters an area encompassed by overwhelming gloom, the character must draw a card from the Despair Deck.
Sometimes, the DM might have the players draw Despair Cards when their adventurers are subject to particularly horrifying or gloomy conditions. For example, the players might draw despair cards after the adventurers discover a lair where ghouls have been feeding off townspeople. Having players draw cards in this way can challenge the characters, but it can also be a distraction, since it's more difficult to keep track of multiple cards. If you have players draw additional Despair Cards, it's a good idea to make sure that a few characters have already overcome their initial Despair Cards.
Overcoming Despair
The effects of Despair Cards can be debilitating, but characters have opportunities to overcome them. Whenever a character completes a long rest, the player rolls a d20 to see if his or her character overcomes a despair effect. On a result of 10 or higher, a character overcomes the effect.
When an adventurer overcomes a despair effect, he or she is bolstered by the success. When the despair effect ends, the adventurer gains the benefit in the "Boon" effect on the respective card until their next long rest. In addition, that card no long counts as an active Despair Card.
Keeping Secrets:
Players might want to keep their cards a secret from one another, enabling them to convey their cards' effects through roleplaying. If choosing to allow this, it's still probably a good idea for the DM to know what cards the players have.

Despair Cards


Titan Seed Wild Magic Surges
Primordial titan seeds are immensely powerful magical artifacts. Their magical energy can powerfully impact the natural world that surrounds them. This magical energy suffuses the surrounding environment like a static charge that can cause unintended magical discharges. The range to which this magical static extends varies greatly depending on the size of the titan seed.
A full-size titan seed, approximately 25 square feet, like the one located under the Stormpoint Mountains creates magical static in a 50-mile radius. A 5-foot square chunk creates magical static for a 1-mile radius. A palm-sized chunk creates magical static for a 15-foot radius.
Mechanically, whenever a spell of 1st level or higher is cast within this magical static, players must roll a d20. On a roll of 10 or lower, a wild magic surge occurs, and the DM must roll a d100 on the wild magic table below.
Wild Magic Surge
| d100 | Effect |
|---|---|
| 1 | Roll on this table at the start of each of your turns for the next minute, ignoring this result on subsequent rolls. |
| 2 | You switch positions with the target of your spell immediately after the spell is cast. |
| 3 | For the next minute, you can see any invisible creature if you have line of sight to it. |
| 4 | A flaming horse appears in an unoccupied space within 5 feet of you, then disappears 1 minute later. This is not a Nightmare; it is a real horse set aflame. |
| 5 | A modron chosen and controlled by the DM appears in an unoccupied space within 5 feet of you, then disappears 1 minute later. |
| 6 | You cast plant growth as a 3rd-level spell centered on yourself. You do not get a chance to exclude any areas from being affected. |
| 7 | You cast fireball as a 3rd-level spell centered on yourself. |
| 8 | All non-magical weapons in a 60-foot radius around you turn to food for 1 minute. |
| 9 | You cast magic missile as 5th-level spell. |
| 10 | The next time you speak, you release a 30-foot cone of fire. Any creature within the cone must make a DC 13 Dexterity saving throw suffering 4d6 fire damage on a failure, or half as much on a success. |
| 11 | Roll a d10. Your height changes by a number of inches equal to the roll. If the roll is odd, you shrink. If the roll is even, you grow. |
| d100 | Effect |
|---|---|
| 12 | You are cocooned within a large crystal until someone breaks it. The crystal has an AC of 18 with 5 hit points. |
| 13 | You cast confusion centered on yourself. |
| 14 | You cast thunderwave centered on yourself. |
| 15 | For the next minute, you regain 5 hit points at the start of each of your turns. |
| 16 | You cast grease centered on yourself. |
| 17 | You are transported to the Ethereal Plane until the end of your next turn, after which time you return to the space you previously occupied or the nearest unoccupied space if that space is occupied. |
| 18 | You grow a long beard made of feathers that remains until you sneeze, at which point the feathers explode out from your face. |
| 19 | A swarm of rats emerge out of the ground and carry you 30 feet in a random direction before disappearing back into the ground. |
| 20 | The earth around suddenly turns into mud. All creatures within 30 feet are stuck in place until they make a DC 15 Strength saving throw. |
| 21 | Creatures have disadvantage on saving throws against the next spell you cast in the next minute that involves a saving throw. |
| 22 | A mature oak tree sprouts out of the ground and grows to a height of 50 feet in an unoccupied space within 60 feet of you. |
| 23 | Your skin turns a vibrant shade of blue. A remove curse spell can end this effect. |
| 24 | You are suddenly only able to speak with animals for the next 24 hours. |
| 25 | An eye appears on your forehead for the next minute. During that time, you have advantage on Perception checks that rely on sight. |
| 26 | You suddenly gain 100 lbs. for the next minute, during which your speed is halved. |
| 27 | For the next minute, all your spells with a casting time of 1 action have a casting time of 1 bonus action. |
| 28 | On your next turn, you spend your action vomiting up 1d100 sp. |
| 29 | You teleport up to 60 feet to an unoccupied space of your choice that you can see. |
| 30 | Cabbages suddenly sprout abundantly within 30 feet of you. |
| d100 | Effect |
|---|---|
| 31 | Your hands are suddenly covered in sticky goop. The next time you cast a spell with somatic components within 1 minute, roll 1d20. On a roll of 10 or less, you are unable to cast the spell and waste the action, but the spell slot is not used. |
| 32 | You are transported to the Astral Plane until the end of your next turn, after which time you return to the space you previously occupied or the nearest unoccupied space if that space is occupied. |
| 33 | Maximize the damage of the next damaging spell you cast within the next minute. |
| 34 | You can mimic the voice of the spell's target perfectly for the next 24 hours. |
| 35 | Roll a d10. Your age changes by a number of years equal to the roll. If the roll is odd, you get younger (minimum 1 year old). If the roll is even, you get older. |
| 36 | You suddenly grow antlers. The size and majesty of the antlers increase based on the level of the spell cast. You shed the antlers after 24 hours. |
| 37 | 1d6 flumphs controlled by the DM appear in unoccupied spaces within 60 feet of you and are frightened of you. They vanish after 1 minute. |
| 38 | Both you and the target of your spell are flung 10 feet in opposite directions. |
| 39 | You regain 2d10 hit points. |
| 40 | The gravity in a 30-foot radius of you reverses until the start of your next turn. See the reverse gravity spell. The height to which the gravity is reversed is only 30 feet. |
| 41 | You turn into a potted plant until the start of your next turn. While a plant, you are incapacitated and have vulnerability to all damage. If you drop to 0 hit points, your pot breaks, and your form reverts. |
| 42 | You are suddenly distracted by a cloud of gnats for the next minute, during which you can use an action or bonus action on your turn, but not both. |
| 43 | For the next minute, you can teleport up to 20 feet as a bonus action on each of your turns. |
| 44 | The inciting spell ricochets off target to target a random creature within 30 feet. |
| 45 | You cast levitate on yourself. |
| 46 | The money on your person cycles. CP turns to SP, SP to GP, and GP to CP. |
| 47 | A unicorn controlled by the DM appears in a space within 5 feet of you, then disappears 1 minute later. |
| 48 | One of the eyes of your spell's target is replaced by a 500 gp sapphire. |
| d100 | Effect |
|---|---|
| 49 | You can't speak for the next minute. Whenever you try, pink bubbles float out of your mouth. |
| 50 | You can't hear for the next minute. Instead, smoke continuously billows out of your ears. |
| 51 | A spectral shield hovers near you for the next minute, granting you a +2 bonus to AC and immunity to magic missile. |
| 52 | You suddenly grow a 3-foot-long prehensile tail. After an hour, it falls off. |
| 53 | You are immune to being intoxicated by alcohol for the next 5d6 days. |
| 54 | All unlocked doors and windows within 60 feet fly open. |
| 55 | Your hair falls out buy grows back within 24 hours. |
| 56 | A sudden, small explosion goes off in your face, blackening it with soot. |
| 57 | For the next minute, any flammable object you touch that isn't being worn or carried by another creature bursts into flame. |
| 58 | A geyser bursts out of the ground beneath you. It lifts you 50 feet into the air until the start of your next turn. |
| 59 | You regain your lowest-level expended spell slot. |
| 60 | A bear appears within 60 feet of you. It is extremely confused and angry and lasts for 1 minute. |
| 61 | For the next minute, you must shout when you speak. |
| 62 | Grass instantly sprouts out the ground, covering a 20-foot radius and grows to 3 feet tall. After 1 minute, the grass withers, dies, and disappears. |
| 63 | You cast fog cloud centered on yourself. |
| 64 | You suddenly can only breathe water for the next minute. |
| 65 | Up to three creatures you choose within 30 feet of you take 4d10 lightning damage. |
| 66 | You fall unconscious until the start of your next turn. See the Unconscious Condition. |
| 67 | You are frightened by the nearest creature until the end of your next turn. |
| 68 | If the target of your spell dies in the next minute, its ghost haunts you. |
| 69 | Each creature within 30 feet of you becomes invisible for the next minute. The invisibility ends on a creature when it attacks or casts a spell. |
| 70 | Each creature within 60 feet of you must make a DC 15 Wisdom saving throw or drops whatever they are holding. |
| d100 | Effect |
|---|---|
| 71 | You gain resistance to all damage for the next minute. |
| 72 | Each object within 20 feet of you that is not worn or carried is pulled 10 feet towards you. |
| 73 | A random creature within 60 feet of you becomes poisoned for 1d4 hours. |
| 74 | You smell strongly of lavender for the next 1d6 days. |
| 75 | You glow with bright light in a 30-foot radius for the next minute. Any creature that ends its turn within 5 feet of you is blinded until the end of its next turn. |
| 76 | Your clothes shrink until they are uncomfortably tight. |
| 77 | You cast polymorph on yourself. If you fail the saving throw, you turn into a sheep for the spell's duration. |
| 78 | If the spell you cast would kill the target, their extremities fly apart. |
| 79 | Illusory butterflies and flower petals flutter in the air within 10 feet of you for the next minute. |
| 80 | You are suddenly trapped inside an impenetrable giant glass ball for the next minute. |
| 81 | You can take one additional action immediately. |
| 82 | Your hands become massive. For the next minute, your unarmed strikes deal 1d8 bludgeoning damage. |
| 83 | Each creature within 30 feet of you takes 1d10 necrotic damage. You regain hit points equal to the sum of the necrotic damage dealt. |
| 84 | You cast mirror image. |
| 85 | You cast fly on a random creature within 60 feet of you. |
| d100 | Effect |
|---|---|
| 86 | Your arms become tentacles for the next minute. Any spells that require somatic components are cast at disadvantage. |
| 87 | A disembodied voice ridicules your every decision on initiative count 20 for the next minute. |
| 88 | A large floating eye follows you around for the next hour. |
| 89 | You become invisible for the next minute. During that time, other creatures can't hear you. The invisibility ends if you attack or cast a spell. |
| 90 | Your Intelligence and Strength ability scores swap for an hour. |
| 91 | If you die within the next minute, you immediately come back to life as if by the reincarnate spell. |
| 92 | Everyone around you appears to be a decaying corpse for the next 24 hours. |
| 93 | Your size increases by one size category for the next minute. |
| 94 | All fires within a 60-foot radius are immediately extinguished. |
| 95 | You and all creatures within 30 feet of you gain vulnerability to piercing damage for the next minute. |
| 96 | You become frightened by a random color for the next hour. |
| 97 | You are surrounded by faint, ethereal music for the next minute. |
| 98 | You become sick with a head cold for the next 24 hours. |
| 99 | You regain all expended sorcery points. |
| 100 | The next phrase you speak becomes true. |

F
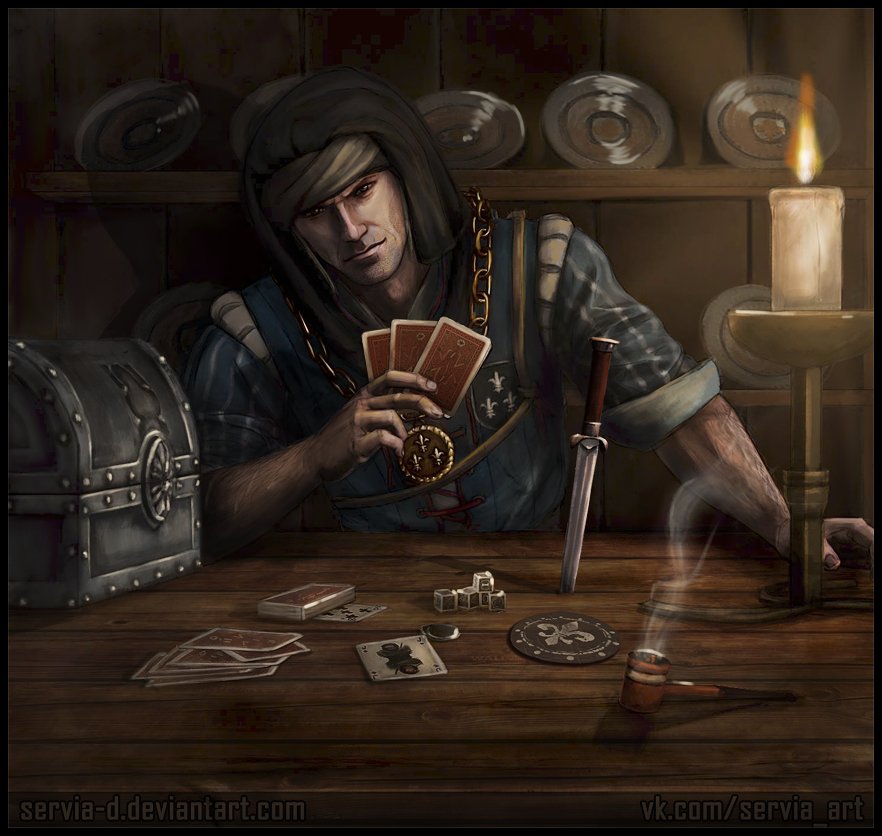
Appendix F - Gambling Games & Drugs
Gambling Games
As you walk through the front doors, the scents of sweat, perfumes, and tobacco immediately hit your nostrils, as the lively melodies of two musical groups compete from across the establishment, forming a strange discordant sound towards the center of the main room. Large square tables draped in crimson cloth fill the space from one end to the other, different shapes and sizes, crowds of different numbers huddled around each. You see three dozen patrons of all walks of life tending to their various games of chance. Card tables, dice games, even a small, contained race table in the far corner stir cheers and anguish...
Avandra's Favor
Dice game, 25 gold minimum buy-in
Avandra's Favor, also sometimes called The Changebringer's Favor, is a simple but popular dice game from Marquet. This dice game is deceptively simple and an easy way to lose gold in a hurry. "Roll the dice and may Avandra be with you!"
Game Mechanics
Players place their bet and roll 2d6. If the result is a 7 or a 12, they win. Players that lose can choose to double their bet and roll an additional 1d6, with the same win condition.
Cheating. Sleight of Hand can offer a player the chance to reroll one of the dice; it is a contested roll against other players Insight.
Gambit of Ord
Card game, 50 gold initial buy-in
Gambit of Ord is a popular card game played all across Exandria, and even the planes beyond. The name originated from Marquet, but it is known by many other names, such as Tinder Start on the Plane of Fire.
Players place their bets and are dealt a card. After two rounds of raising the bet and being dealt additional cards, players reveal their cards and add their values together. The player with the highest total wins the pot.
Game Mechanics
Each card player rolls 1d8, keeping the die hidden. Each player then has the chance to raise the bet, call the bet, or fold. This continues until all bets are even.
Then each player rolls 1d6, keeping it secret as well, and have another round to raise, call, or fold.
Each remaining player then rolls 1d4. They all reveal the 1d8, 1d6, and 1d4, adding them all together. Whoever has the highest result wins.
Cheating. Sleight of Hand can offer a player the chance to reroll one of the dice; it is a contested roll against other players Insight. Alternatively, a Deception check contested against another player's Insight can force a fold.
Winnings
The winner takes 80% of the pot, the other 20% goes to the House. Ties split the 80% winnings.
Run of Luck
Racing lizard game, 25 gold minimum buy-in
Quon a Drensal, or Run of Luck in Common, is an old Marquesian gambling game where players bet on racing lizards.
Players place bets on one of five lizards. The lizards are released from cages onto a mazelike track. The lizard that reaches the end of the track first is the winner. The players that bet on the winning lizard receive double their bet. Players that bet on the second-place lizard wins back half of their bet.
Game Mechanics
The DM rolls a d4 for each lizard three times, describing the state of the race after each roll. The lizard with the highest total is the winner.
Winnings
The lizard with the highest total roll wins, and those who bet on it double their bet as winnings. Second place bet gets half of their bet back.
The Crick Queen's Call
Card game, 10 gold initial buy-in
The Crick Queen's Call is a card game popular in Wildemount. Each player places the ante and is dealt three cards. Players call, raise, or fold until all bets are even. Players that raise can be dealt another card, which replaces one of their previous cards. Players then compare hands. Whoever has the best hand wins the pot.
Game Mechanics
Players roll 3d6 and keep the results hidden. If a player ups their ante, they can reroll 1d6 and must keep the new roll. Whoever has the best hand wins.
Cheating. Sleight of Hand can offer a player the chance to switch out one of their cards (reroll one of the dice); it is a contested roll against other players Insight.
Winning Hands
In order from best to worst, there are six possible hands:
| Hand | Example |
|---|---|
| Three of a kind | (5, 5, 5) |
| Straight | (2, 3, 4) |
| Evens | (2, 4, 6) only |
| Odds | (1, 3, 5) only |
| Two of a Kind | (2, 2, 1) |
| High Card | (6, 3, 2) |
Higher numbers beat lower numbers in similar hands. For example, Three of a Kind (5, 5, 5) beats Three of a Kind (4, 4, 4). Likewise, a Straight (4, 5, 6) beats a Straight (3, 4, 5).
Drugs
The Clasp and the Myriad deal in a variety of illegal, mind-altering drugs, and Kymal is the epicenter of both organizations' clientele. Though the creation and possession of these drugs is strictly prohibited in most of Tal'Dorei, they have found popularity within all levels of society. The regulation of these bizarre drugs proves difficult, however, as their exotic qualities often confound those who would subvert their questionable usage. Especially in Kymal, where the City Watch frequently looks the other way for a small bribe. As such, supply and demand remain steady despite the inevitable hazards of production. If you want to include drugs in your campaign, consider discussing with your group in a session zero to make sure everyone is okay to encounter them in-game.
Black Sap
Tarry substance, 300 gp per dose
This tarry substance harvested from the dark boughs of the death's head willow is a powerful intoxicant. It can be smoked as a concentrate or injected directly into the bloodstream. A creature subjected to a dose of black sap cannot be charmed or frightened for 1d6 hours. For each dose of black sap consumed, a creature must succeed on a DC 15 Constitution saving throw or become poisoned for 2d4 hours -- an effect that is cumulative with multiple doses. Black sap is valued at 300 gp per dose.
Blight Ichor
Green liqueur, 200 gp per dose
This bitter chartreuse concoction is distilled from a fungus native to the Blightshore badlands. The sickly green liqueur harbors potent psychedelic properties. Provided it is neither a construct nor undead, a creature subjected to a dose of blight ichor gains advantage on Intelligence and Wisdom checks, as well as vulnerability to psychic damage, for 1 hour. For each dose of blight ichor consumed, the creature must succeed on a DC 15 Constitution saving throw or become poisoned for 1d6 hours and suffer the effects of a confusion spell for 1 minute. An undead creature subjected to a dose of blight ichor gains advantage on all Dexterity checks and is immune to the frightened condition for 1 hour. Blight ichor is valued at 200 gp per dose.

Oloore Root
Teabags, 100 gp per dose
This root is typically sold in teabags for 100 gp per dose. It was originally a ritualistic tool used by the followers of many gods, but now sees more recreational use. Oracles used it to enhance their divinations, for it helped them leave their physical bodies behind and become closer to gods and spirits. Drinking tea brewed from the root causes intense hallucinations, which feel like they have granted perfect clarity of mind to the imbiber.
After drinking oloore tea as an action, you must succeed on a DC 19 Constitution saving throw or experience vivid hallucinations for 1d4 hours. During this time, you have disadvantage on attack rolls and ability checks. If you fail the saving throw by 10 or more, your hallucinations become horrific visions and you gain a level of exhaustion. On a success, you gain preternatural clarity, allowing you to cast the scrying spell once within the next 1d4 hours.
Skein
Grayish-blue dust, 50 gp per dose
Skein is a fine grayish-blue dust named for the effect it has when eaten: users can supposedly see the weave of time. Skein is a dried and ground fungus, an effective and popular drug. It is mostly seen on the outskirts of cities where it is not so heavily controlled and where there isn't a huge jail sentence if caught with it.
Around ten minutes after ingestion, this substance begins to make its effects known. As nausea creeps in, one's vision begins to cloud over on the edges as the imbiber begins to see faint snow-like dust out to a range of 10 feet. In this area, the colors of the world become colorless: black, white, and gray tones. Opening up the user's perception into the Ethereal Plane, the user must make a DC 15 Wisdom saving throw as this dangerous substance has the potential side effect of stunning the user for an hour. On a failure, the user's mind is unable to resist this potential ill effect and they are stunned for the duration. On a success, the user is not stunned, but they still may find themselves woozy, and potentially black out, if they are unable to hold their composure as their body is strained by this dangerous substance.
Soothsalts
Crimson crystals, 150 gp per dose
Soothsalts are derived from a naturally occurring crystalline substance discovered throughout the wilds of the Miskath Strand. The crimson crystals have been mined from cavernous veins like those in the mouth of the Miskath Pit and found within smaller geode formations near sites ravaged by the Calamity. Soothsalts are consumed orally in lozenge-sized doses, and frequent users can be identified by the telltale crimson stain around their mouths. A creature subjected to a dose of soothsalts gains advantage on all Intelligence checks for 1d4 hours.
For each dose of soothsalts consumed, the creature must succeed on a DC 15 Constitution saving throw or gain one level of exhaustion -- an effect which is cumulative with multiple doses. Soothsalts are valued at 150 gp per dose.
Suude
Glittering powder, 80 gp per dose
Exandria's most infamous drug, suude is a glittering powder made from residuum. It was first developed by power-hungry archmages in the Age of Arcanum as an incense burned to enhance focus during ritual spellcasting. The secret to its refinement has been lost and rediscovered a variety of times since the Calamity, and many different types of suude have been developed by arcanists in search of ever-greater power. It has terrible addictive and mentally degenerative properties, even when used sparingly.
After burning suude within a vessel and inhaling its fumes as an action, you take 4d10 psychic damage and must make a DC 10 Constitution saving throw. On a failure, you become poisoned for 1 hour and fall unconscious for 1 minute, or until you are shaken awake as an action. During this time, the world seems to move in slow motion, and your vision is twisted in kaleidoscopic colors -- yet your focus is never distorted. If one dose of suude, or more, is used within 1 hour of another, the DC of the Constitution saving throw is increased by 5 per additional dose. If you fail this save by 10 or more, you instantly drop to 0 hit points.
On a success, you gain the ability to use one of the following Metamagic options as a sorcerer for the next minute, requiring no sorcery points. The type of Metamagic you gain access to depends on the type of suude, and once you use it, you can't use it again until you inhale suude again.
Brown suude allows you to use the Extended Spell Metamagic option, blue suude allows you to use Twinned Spell, and red suude grants Distant Spell.
Zeal
Purple gel, 150 gp per dose
Distilled from the ichor of demons, zeal was originally used by Tal'Dorei's ancient berserkers to grant them incredible strength and courage before battles. These days, it's most commonly used by criminal bruisers before a brawl. Most modern warriors stay well away from zeal, due both to its addictive nature and to the mental and physical degeneration it can cause over long periods of time. When prepared properly, zeal is a purple, ashy-tasting gel that typically costs 150 gp per dose.
After slathering zeal across your exposed skin as an action, you must make a DC 12 Constitution saving throw. On a failure, you become paralyzed for 1d4 rounds as your muscles lock up. On a success, your weapon attacks deal an additional 1d6 damage for the next minute. After this effect ends, you gain one level of exhaustion.
G
Appendix G - Festivals
Though the world of Exandria is filled with strife, from dragon attacks to bandit attacks, to evil liches luring the living into their lairs to join their undead armies, it's important to remember that there are still times of joy and revelry. Calendars are dotted with holidays to honor deities or celebrate important historic events. Carnivals travel between cities and towns across the land, bringing performers, games, and attractions for all manner of folk to enjoy.
Competitions
The spirit of competition calls to many. Whether their eyes are on the prizes, or simply the glory of victory, there are often no shortages of people queueing to enter competitions and contests at festivals. Also consider how the intrigue of a tournament can help further your plot, or introduce additional challenges, rivalries, and complications for your party members.
Archery Contest
When most people think of an archery competition, they think of competitors standing in a row, shooting at targets at a fixed location, each trying to land their shot as close to the bullseye as possible. It offers bleachers for commoners to view from, elevated viewing boxes for nobles or royalty, and all of the classic cliches and tropes we're accustomed to. It's clean, it's simple, and it's ripe for drama.
The formal options for this competition are limited to shortbow, excluding heavy crossbows and longbows from the competition. By building the competition around a weapon with an effective range of 80 feet and a maximum range of 320 feet, it keeps the playing field significantly smaller and easier to manage. This also gives room for hand crossbow and dagger throwing characters to petition for entry to competitions, should the DM so desire. They'll be competing at a marked disadvantage, but they'll still have a fighting chance, and nothing feels cooler than beating the odds.
Targets are generally a soft wood, or fabric affixed to a dense bale of straw. There are five sections in varying colors, which each offer a different number of points for hitting. The bullseye offers 9 points, the first ring is 7, second is 5, third is 3, and hitting the outermost fourth ring is 1 point.
It's important to remember that in combat, hitting a target with a powerful strike is generally more important than exactly where the target is hit; hitting a particular location is generally the realm of narrative freedom. For most enemies, a matter of an inch or two difference in the location of the hit is inconsequential to the damage being dealt. In target-shooting competitions however, an inch or two can determine who's standing on the podium in the end. Thus, the ACs for different rings of the target will vary based on the distance from the target.
Range Competition Scoring
| Ring | 30ft | 60ft | 90ft |
|---|---|---|---|
| Bullseye - 9 points | AC 22 | AC 26 | AC 30 |
| First Ring - 7 points | AC 18 | AC 22 | AC 26 |
| Second Ring - 5 points | AC 15 | AC 18 | AC 22 |
| Third Ring - 3 points | AC 12 | AC 15 | AC 18 |
| Fourth Ring - 1 point | AC 10 | AC 12 | AC 15 |
Each competitor takes three shots at 90 feet, three shots at 60 feet, and a final set of three shots at 30 feet. To speed up the process, depending on the number of entrants, you may drop the lowest scoring two or three entrants at the end of each set. Tie breakers can continue as necessary until the winner is decided.
Arm-Wrestling Contest
A competition of muscle, leverage, and sheer force of will. Competitors in an arm-wrestling contest make Athletics opposed grapple checks against one another for three rounds, and the best of three wins the match. However, if one competitor beats their opponent's score by 10 or more, it is considered an "instant win," slamming their opponent's arm down on the table and inflicting 1d4 bludgeoning damage.
Drinking Contest
Festivals are always made more festive with the addition of alcohol. After all, liquor loosens inhibitions, as well as one's grip on the purse strings. Thus, competitive drinking has become a popular activity as well as an attraction. Consider what location the drinking contest may be held in, be it a properly cordoned-off beer garden, a sponsoring tavern, or simply in a public place where things could easily get out of control.
Before a drinking contest takes place, you'll need to calculate each entrant's drinking tolerance. A simple way to do this is to take their Constitution score (not bonus), and multiply it based on their size.
Alcohol Tolerance Size Modifier
| Size | Constitution Score Modifier |
|---|---|
| Tiny | x0.5 |
| Small | x1 |
| Medium | x1.5 |
| Large | x2 |
| Huge | x4 |
| Gargantuan | x6 |
The standard "stock drink" is beer, ranking in at 3 points. Other drinks can be ranked above or below this level depending on their alcohol content. Every time the contestant consumes a drink, it will add to their alcohol content, depending on how alcoholic the drink is. Once they pass the threshold of their alcohol tolerance, they'll need to make a Constitution saving throw for every drink they take. The DC begins at 10 and raises by the score of each drink they consume. The last competitor to pass out is the winner.
Example Drinking Game
Let's see how a game would play out between our three example drinkers, Maoki, Kayne, and Bramble. Maoki is a tiefling with a Con of 14, which means his alcohol tolerance will be 21. Kayne is a human with a CON of 18, meaning his score will be 27, and Bramble is a halfling with a Con of 14, meaning his score will be 14.
Drinking beer, with an alcohol rating of 3 per drink, it will take 7 drinks before Maoki has to make his first save. When he drinks his eighth beer, he will be rolling a DC 13 Constitution saving throw (one 3-point drink above the base DC 10). If he drinks another, his DC becomes 16. If he drinks another, his DC becomes 19. If at any point he fails, he will pass out and be out of the competition. By the same coin, it will take Kayne nine drinks before he has to begin making Constitution saving throws, and it will take five drinks for Bramble.
Eating Contest
Food is a part of many holidays and festivals and eating large amounts of food is considered a primary method of celebration by many. It stands to reason that someone's competitive nature meant an eating contest would be born.
Typically, eating contests select a single food item as their focus. Pies are common as they are made to a uniform size and density. However, any food could be used, ranging from apples to ears of corn, to giant turkey legs. Judges are always on hand to ensure that the food is fully consumed, and an excess of food is not left behind (pie crust still in the pan, meat left on a bone, etc.). Competitors are disqualified if they stand from the table, pass out at the table, or if they throw up. The last competitor still eating wins.
Competitors in a pie eating contest make Constitution saving throws for each pie they eat, with the DC steadily raising for each pie eaten. If a competitor fails their Constitution save, they are given the "full" status. They may continue to compete if they wish, but additional saves will be made with disadvantage. Failing another Constitution saving throw after becoming full will cause the competitor to vomit.
Eating Contest DCs
| Round | Constitution Save DC |
|---|---|
| 1 | DC 11 |
| 2 | DC 12 |
| 3 | DC 13 |
| 4 | DC 14 |
| 5 | DC 16 |
| 6 | DC 18 |
| 7 | DC 20 |
| 8 | DC 23 |
| 9 | DC 26 |
| 10 | DC 30 |
If your competitors somehow make it past round 10, continue to add 5 to the DC for each additional round of eating. Keep in mind, for the sake of roleplay, that these are servings of food and not rounds of combat, therefore, each round need not consist of a mere six seconds.
Rule of Cool: The Hollow Leg
Everyone knows that one person whose stomach seems to be connected to another plane of existence. If your adventuring party contains that one person, feel free to give them a bonus in the competition, such as advantage on all of their rolls. It may seem to be an unbalanced advantage, but if they're established as being a "big eater" (which normally offers virtually no advantages), it would be silly not to give them the edge in this contest.
While one may question where the big eater puts their food, a character with sleight of hand may have worked out that detail in a unique way. If a character wants to sneak handfuls of food down their shirt collar, or into a bag hidden under the table, they are welcome to make the attempt. For example, if they make a DC 15 Sleight of Hand check, they have snuck away enough food to make their Constitution saving throw with advantage for that round. If they beat a DC 20 Sleight of Hand check, they manage to sneak away enough food that whatever is left is inconsequential, and they can skip their Constitution saving throw for the round. However, if they fail the Sleight of Hand check, they will be noticed by a judge and disqualified.
Festival Games
Many festival games are, in fact, rigged. They are designed to make it appear easy to win, but use tricks of perspective, distraction, and faulty equipment to tilt the games in favor of the operators rather than the players. Furthermore, many booth workers provide examples of the games being played to show how "easily" they can be won, at least, with the added benefit of standing in a different location than the characters, knowing exactly where to hit, or using different equipment.
Festival games should always have a cost to play. This cost is at the DM's discretion and may vary based on the clientele of the festival; nobles may be willing to pay up to 1 gp per game to try their hand, whereas a festival catering to commoners may only be able to get away with 5 cp per game.
Milk Bottle Toss
A classic game in which six milk bottles are stacked in a pyramid on a table, and the competitor is given a ball to throw at them, attempting to knock them over. If all six bottles are toppled by a throw, they win a fantastic prize!
However, the Milk Bottle Toss is not designed to be won. A number of factors are set up in order to lean against the character's favor. For example, the bottom three bottles are often filled with lead, making them several pounds heavier. Additionally, the soft ball is especially soft, sometimes even with a cork core. This does not mean that the game cannot be won, but it can be especially difficult to win. Accuracy and how hard the ball is thrown are key factors.
For the purposes of this game, the ball counts as an improvised weapon (thus benefiting from the Tavern Brawler feat), dealing 1d4 damage and having a normal range of 20 feet, and a long range of 60 feet. Its damage bonus is calculated on strength and cannot be finessed.
Milk Bottle Toss
| Bottles Knocked Down | AC | Damage Required |
|---|---|---|
| 1 bottle | 10 | 1 |
| 2 bottles | 12 | 2 |
| 3 bottles | 13 | 3 |
| 4 bottles | 16 | 4 |
| 5 bottles | 18 | 6 |
| 6 bottles | 20 | 8 |
Identifying a Rigged Milk Bottle Toss
A Perception check can be made to identify aspects of the rigged game.
- DC 15. The ball seems especially soft, and likely to absorb some of the force of the throw.
- DC 20. Judging by the way the bottles move when struck, the bottom ones are heavier.
- DC 25. One of the milk bottles on the bottom is misaligned, jutting out slightly and absorbing most of the force of the impact.
Strongman Test
Though arm-wrestling is a test of one's muscle, the strongman test is a step further in determining who is the strongest in the land. In this game, players pay for a chance to swing a hammer at a stack of stone slabs. If they manage to break all of the slabs with a single strike, they will win a fantastic prize! However, only breaking partially through the stack will still net them a small consolation prize.
Typically, the "resident strongman" who performs at the event will be on hand to demonstrate how "easy" the challenge is, by breaking a stack of slabs, before challenging onlookers to do the same. When paying challengers step up, a new set of slabs is put out, they are given a hammer, and a single swing to try to split the stack.
However, there may be many factors working against the platers. There are many ways this game can be rigged or create the illusion of being easier than it is.
Stone Slab Breaking
| Athletics Check DC | Layers of Stone Broken |
|---|---|
| 12 | 1 Layer |
| 14 | 2 Layers |
| 16 | 3 Layers |
| 18 | 4 Layers |
| 20 | 5 Layers |
| 23 | 6 Layers |
| 26 | 7 Layers |
| 30 | 8 Layers |
Identifying a Rigged Strongman Test
A Perception check can be made to identify aspects of the rigged game.
- DC 15. The lower slabs of stone are ever so slightly thicker than the upper slabs.
- DC 20. The hammer being handed to paying contestants isn't as heavy as the one used in examples by the festival workers or strongmen on the payroll.
- DC 25. The stack broken in the example is very cleanly split; it was likely scored to make it easier to crack down the middle.
Vendors
Aside from entertaining attractions and games of chance or skill, there are plenty more ways to lose your coin. Vendors will often set up with exotic wares, unique treats, or even just frivolous trinkets that most people wouldn't spend their money on otherwise.
Beer Garden
An open-air establishment primarily for serving alcohol. Though many consider inebriated revelry to be an important part of festival entertainment, drunkards can cause a lot of problems if left to wander freely. Thus, beer gardens provide a fun and comfortable atmosphere with easy access to more beer, in an effort to entice boozers to stay in one spot.
Beer gardens can be remarkably simple setups, consisting of tables and benches, with little else required. They may be in the open under the sun, covered by tent canopies or large umbrellas, or simply the shade of trees. They may also set up a stage for musical performances or provide small games to keep drinkers entertained.
Food is commonly served in beer gardens as well. Some beer gardens may endeavor to offer many different kinds of beer, gathering kegs from different breweries in different locales. They heavily encourage drinkers to "taste the world," challenging them to drink one of every kind of beer they offer.
Face Painting
Though most popular with children, carousing adults often find themselves seated at the face-painting booth. This relatively cheap activity gives someone a temporary, festive costume in lieu of having to wear a mask.
Face Painting Designs
| d12 | Designs |
|---|---|
| 1 | Dragon |
| 2 | Butterfly |
| 3 | Fairy |
| 4 | Tiger |
| 5 | Warrior |
| 6 | Goblin |
| 7 | Spiderwebs |
| 8 | Rainbow |
| 9 | Skeleton |
| 10 | Jester's Mask |
| 11 | Flowers |
| 12 | Pirate |
Hair Braiding
When you have little money for entertainment, you find other ways to keep yourself busy, and when you have no money for frivolous things like cosmetics, you make do with the options available to you. Hair braiding is a popular pastime for young ladies, especially in the lower social castes, and is often passed down from mothers to their daughters. When "dressing up" for festivals and fairs, the unique and creative braiding styles of peasant girls became noticed by the wealthy and adventuring sort alike.
Hair braiding booths are now popular destinations at festivals and fairs, for ladies and gentlemen of all ages. Little noble girls having their hair done up in braids will be seated next to Dwarven warriors having their beards plaited, next to druids having flowers woven into their tresses. Additional accessories like beads, ribbons, and decorative cord may also be offered for an additional charge.
Masks
Festivals are a wonderful opportunity to cut loose and have fun, and for many, they are a time to shirk responsibilities and enjoy getting lost in a crowd. A recognizable person may have a hard time achieving this level of freedom, and so, masks are marketed for a variety of reasons.
Children may wear masks in order to play tricks in the hopes of escaping punishment. Lovers may wear masks in order to enjoy being in public, but still keep their romance a secret. Nobles may wear masks in order to rub elbows with the common folk for a day. A criminal or a famous hero might don a mask in order to avoid unwanted attention.
Masks come in a wide range of designs. Though masks to resemble jesters are common, consider what kind of fantastic beasts you could offer, such as dragon masks, goblin masks, beholder masks, and so on. If your adventuring party has performed epic feats, with deeds known far and wide, consider the surprise of finding masks of their own faces.
Musical Instruments & Noisemakers
The Player's Handbook provides many examples of musical instruments for bards and other performers. However, these instruments are somewhat expensive, and are far more sophisticated than most unskilled revelers would want. For those who simply want to make some noise, consider this list of cheap instruments.
Basic Instruments
| Type | Price | Weight |
|---|---|---|
| Bell | 2 sp | 0.5 lbs. |
| Castanets | 3 sp | -- |
| Hand Drum | 1 gp | 1 lb. |
| Simple Flute | 5 sp | 0.5 lb. |
| Whistle | 8 cp | -- |
Note that while all of these objects can produce sound, they are not sufficient quality to be suitable as bardic instruments.
Food & Drink
Any festival is going to offer something extra for you to spend your money on. Whether it's a variety of delicious treats, or a fun trinket to remember the day, you're likely to be assaulted by hawkers calling for your attention from their booths at every possible opportunity.
Festival Foods
Foods must satisfy several needs in order to truly be considered "festival treats". First and foremost, they must be easy to eat while walking, and not require any additional utensils, thus resulting in many festival foods being served on skewers. Secondarily, they must be uncommon foods that most people will not eat during the course of a normal month; otherwise, they wouldn't be treats. Lastly, flavor is prioritized above nutritional value. No one expects to subsist on festival food.
Though vendors will hawk any of their wares with enthusiasm, festival food tends to advertise itself. The smells waft for some distance, and anyone seen walking by with a tasty treat in their hands is sure to garner attention and questions of "Where did you get that?"
Caramel Apples
Apples (typically of the tart and crisp variety) are skewered on sticks, then dipped into soft caramel and let to dry, sometimes after being covered in finely chopped nuts. Because soft caramel does not transport well, caramel apples are usually made day-of, and the smell of warm caramel often carries for some distance throughout the festival grounds.
Cotton Candy
Originally an Elven invention, it has since been adopted by countless other cultures. To begin, sugar is melted in water with flavorings and colors, then allowed to cool in a ring. The ring is stretched and folded over and over, until it has been stretched into no less than 16,000 thin strands of sweet, sugary candy floss. Though originally served in a bowl, it is now often wrapped on sticks for festival convenience, but remains a somewhat expensive treat.
Funnel Cake
A deep-fried confection made by pouring dough through a thin spout (a funnel) into a vat of boiling oil, in a circular pattern. The tangled mass is cooked until golden brown, then let to drain of excess oil before being topped. The most common topping is a drizzling of sugar syrup and a light sprinkling of salt.
Grilled Corn
Corn on the cob is already considered a 'hand-held' food, but by skewering it with a stick on either end, it can now be covered with a variety of toppings and still keep one's hands relatively clean. Butter, salt and pepper, cheese, garlic, sauces, or any other number of toppings can be spread over the sweet and crispy charred kernels.
Mini Pies
Everyone loves pie, and the fact that sweet or savory pies can have any number of fillings makes them a favorite of festival goers. However, 'pie' tends to be served in slices, requiring utensils and a place to sit. Thus, mini pies were invented by a team of industrious gnomes.
Nuts
A wide variety of roasted nuts are often served at festivals, coated in various sweet, salty, or savory seasonings.
Pretzels
Supposedly invented by a monk working out of a temple as a reward for children who had learned their prayers, the knotted bread was designed to look like folded arms.
Sausage On A Stick
Of all of the things that could be served on a stick, smoked meat is a very popular one. Regional preferences and different kinds of meat, as well as various dips or drizzled sauces, can make this simple dish vary wildly from location to location.
Turkey Legs
Cured and roasted turkey legs are perhaps one of the most filling offerings of festival food stands. Their unusually large size, and the fact they're often salt cured has led to rumors they may in fact be legs from something else...
Festival Drinks
Beer gardens are not the only place where beverages are made available at festivals. Ciders, juices, lemonades, and other beverages are common, and welcome outdoors on hot days. In cold climates and for wintry holidays, beverages like tea and hot spiced cider may be made available instead
Beer
This brewed alcoholic drink is the third most popular beverage behind water and tea, supposedly because early civilizations believed it was healthier than drinking water from lakes and rivers. Though they eventually realized the act of boiling the water to make the beer was what made it safe, beer consumption did not decline.
Cider
Though similar to wine in that is fermented from fruit, cider has a lower alcohol content and is generally easier and cheaper to produce a quality beverage. Most ciders are apple-based, but some experiment with mixing additional fruit.
Lemonade
A non-alcoholic mixture of water, fresh squeezed lemon juice, and a sweetener such as honey or sugar. Magical or mundane efforts may be made to keep the beverage cold before serving, as it is considered especially refreshing during hot weather.

Art Credits
Cover Page: Kent Davis
Page 4: Kent Davis
Page 9: Lia Henson
Page 9 Yunhee Lee
Page 10: Kelly McLarnon
Page 10: Shalizeh7
Page 11: image from Explorer's Guide to Wildemount
Page 16: Chua Eng Han
Page 19: Nicholas Cloister
Page 23: Lino Drieghe
Page 24: Jung Park
Page 25: Min Bak
Page 26: LLirik-13
Page 30: Jongmin Ahn
Page 33: Alex Pushkarev
Page 34: Charlie Fox
Page 37: Christine Ridgway
Page 38: Philipp A. Urlich
Page 42: Toni Justamante Jacobs
Page 46: PB Publishing
Page 51: Natalya Dzuba
Page 54: Evgeniy Musienko
Page 55: Bethesda Softworks
Page 56: image from Waterdeep - Dragon Heist
Page 57: Mei-Xing
Page 58: Unknown Artist
Page 61: Alex Van der Linde
Page 64: image from Waterdeep - Dragon Heist
Page 67: Bryan Syme
Page 72: Igor Kieryluk
Page 74: Kristele Pelland
Page 79: image from Waterdeep - Dragon Heist
Page 81: image from Waterdeep - Dragon Heist
Page 85: image from Out of the Abyss
Page 86: Jake Rowell
Page 88: Tom Cartos
Page 90: Philipp A. Urlich
Page 92: Jesper Friis
Page 94: Noah Bradley
Page 95: Tiago Sousa
Page 97: Lily Morran
Page 105: Josh Eitan
Page 107: Clara Daly
Page 108: Johannes Figlhuber
Page 109: David Frasheski
Page 110: Rene Aigner
Page 114: Felicia Cano
Page 117: Chris Rahn
Page 119: Derk Venneman
Page 123: Kieran Yanner
Page 125: Philipp A Urlich
Page 126: Andrew Mar
Page 127: Sean Vo
Page 128: Sean Vo
Page 129: Erik Taberman
Page 131: Wizards of the Coast
Page 132: Unknown Artist
Page 134: Ona Kristensen
Page 137: Sean Vo
Page 140: Wolfenstein: The Old Blood
Page 147: Kent Davis
Page 149: Nele Diel
Page 150: James RPG Art
Page 152: Dmitry Burmak
Page 159: Critical Role
Page 160: Kent Davis
Page 161: Adrian Ibarra Lugo
Page 164: Suomar
Page 165: Monika Zawistowska
Page 167: Svetoslav Petrov
Page 170: Brandon Chang
Page 171: Kent Davis
Page 172: Kent Davis
Page 174: Brady Gurley
Page 177: Ahmad Hilmi
Page 178: Philipp A. Urlich
Page 179: Crocorax
Page 183: Yuqio
Page 184: Philipp A. Urlich
Page 185: Elisa Serio
Page 188: Anthony Avon
Page 190: Philipp A. Urlich
Page 192: Tae Hoon Kang
Page 194: Ananasdragon
Page 195: Wizards of the Coast
Page 199: Timothy Von Rueden
Page 200: Sergey Lameyko
Page 201: Wizards of the Coast
Page 203: Spacefjords
Page 204: Paul Yates
Page 208: Chunyu Wang
Page 209: faction symbol from the Tal'Dorei Campaign Setting Reborn
Page 212: Linda Lithen
Page 215: Olivia Samson
Page 216: Kent Davis
Page 218: Couple of Kooks
Page 219: Zairos Artwork
Page 222:Maxiesnax
Page 223: Bruno Rodrigues
Page 224: Bruno Rodrigues
Page 225: Bruno Rodrigues
Page 226: Wizards of the Coast
Page 227: Grace Liu
Page 228: Antonio J Manzanedo
Page 230: Bruno Rodrigues
Page 230: Dan Scott
Page 231: Wizards of the Coast
Page 233: Christian Zeuch
Page 235: Cubehero
Page 236: Rod Wong
Page 237: Roman3dArt
Page 239: Fel-X
Page 245: Shue13
Page 247: Wizards of the Coast
Page 248: MissSaber444
Page 250: Jonah Baumann
Page 251: Karbo
Page 253: Simon Dominic Brewer
Page 257: Darya Abdulina
Page 259: Frej Agelii
Page 261: Patrik Fuxa
Page 263: Andrew Mar
Page 264: Sarinnet Charean
Page 265: FerdinandLadera
Page 271: Jack Shergold
Page 275: Kalberoos
Page 275: Joy Park
Page 277: Rudy Siswahto
Page 279: Solfour
Page 281: Ed Pulella
Page 283: Nikki Dawes
Page 284: Mrhull1212
Page 289: Lars2D
Page 291: Thomas Bourdon
Page 292: DJ Brewer
Page 293: DJ Brewer
Page 295: DJ Brewer
Page 300: Daren Horley
Page 302: Kent Davis
Page 303: Captain Kato
Page 305: Kent Davis
Page 308: Conceptopolis
Page 309: Woo Chul Lee
Page 310: Nika Firsova
Page 311: Infinity 3D Prints
Page 311: Starla Moore
Page 312: The Griffon's Saddlebag
Page 312: The Griffon's Saddlebag
Page 312: Jelke Ludolphij
Page 312: The Griffon's Saddlebag
Page 312: John Sherrill
Page 313: Dungeon Scribe
Page 313: image from Waterdeep - Dragon Heist
Page 313: Phil Beckwith
Page 314: image from Waterdeep - Dragon Heist
Page 314: image from Waterdeep - Dragon Heist
Page 315: Magical Kaleidoscope
Page 315: Jelke Ludolphij
Page 315: Mads R. Andersen
Page 316: Kobold Press
Page 318: Dungeon Strugglers
Page 318: Unknown Artist
Page 319: Elder Scrolls
Page 319: Goldilust
Page 320: The Griffon's Saddlebag
Page 320: The Griffon's Saddlebag
Page 321: Artigas
Page 321: The Griffon's Saddlebag
Page 322: The Griffon's Saddlebag
Page 322: The Griffon's Saddlebag
Page 323: Lalanice
Page 323: Dungeon Strugglers
Page 324: Jean Roux
Page 324: Kent Davis
Page 325: Christian Hadfield
Page 326: Kent Davis
Page 327: Wizards of the Coast
Page 329: Paizo Publishing
Page 330: Damien Mammoliti
Page 331: Eldar Zakirov
Page 332: Raph Herrera Lomotan
Page 334: Raph Herrera Lomotan
Page 335: Eldar Zakirov
Page 337: Targete
Page 338: Wizards of the Coast
Page 339: Wizards of the Coast
Page 340: Miguel Regodon
Page 341: Wizards of the Coast
Page 343: nJoo Hou
Page 347: Svetlin Velinov
Page 348: Luca Zeccoli
Page 348: Luca Zeccoli
Page 349: Thomas Mahon
Page 350: Rod Wong
Page 351: Paizo Publishing
Page 352: Sven Bybee
Page 353: Unknown Artist
Page 354: Wizards of the Coast
Page 355: Yuriy Gaber
Page 356: Felicia Cano
Page 357: Gianluca Rolli
Page 359: Wizards of the Coast
Page 360: Yuqio
Page 361: Wizards of the Coast
Page 363: The Gryph
Page 366: Grafit-art
Page 368: Francis Lim
Page 370: Daniel Castiblanco
Page 371: JB Casacop
Page 372: Stepan Alekseev
Page 374: Stephanie Brown
Page 375: Iga Oliwiak
Page 376: Shane Braithwaite
Page 377: Takaya Kung
Page 378: image from Waterdeep - Dragon Heist
Page 380: image from Waterdeep - Dragon Heist
Page 381: image from Waterdeep - Dragon Heist
Page 382: Hans Lim
Page 383: image from Waterdeep - Dragon Heist
Page 383: image from Waterdeep - Dragon Heist
Page 385: image from Waterdeep - Dragon Heist
Page 387: Lurrlonde
Page 390: P.B. Publishing
Page 394: image from Ghosts of Saltmarsh
Page 397: Kent Davis
Page 401: Kent Davis
Page 405: Kent Davis
Page 406: Bryan Syme
Page 409: Carmen Sinek
Page 410: Kent Davis
Page 412: Kent Davis
Page 416: Jorge Jacinto
Page 420: Angie Huntang
Page 423: Grace Liu
Page 424: Servia
Page 425: Hugo Cardenas
Page 426: faction symbol from the Explorer's Guide to Wildemount
Page 428: Oliver Elm
Page 431: Sandara
Page 434: Savvy Jensen
Page 436: Kent Davis
Page 437: BlackSalander
Page 438: Kent Davis
Page 439: Kent Davis
Back Cover: Critical Role Logo
Back Cover: Dan English

Map Credits
Page 6: Map by Andrew Law
Page 13: Map by Andrew Law
Page 15: Map by u/agrjones
Page 19: Map by Mike Schley
Page 21: Map by Mike Schley
Page 24: Map by Afternoon Maps
Page 27: Map by Joshua Reynolds
Page 28: Map by Andrew Law
Page 31: Map by Ignytezero
Page 36: Map by Kobold Press
Page 39: Map by u/Ravenousfire
Page 40: Map by Unknown Artist
Page 43: Map by Elven Tower
Page 44: Map by Unknown Artist
Page 45: Map by RPGhorsemen
Page 53: Map by PB Publishing
Page 54: Map by PB Publishing
Page 60: Map by u/LiosLionheart
Page 61: Map by Mrwickedclown
Page 63: Map by Tych Maps
Page 73: Map by ValeurRPG
Page 75: Map by ValeurRPG
Page 77: Maps by Tych Maps
Page 78: Map by Tych Maps
Page 80: Map by Neutral Party
Page 81: Map by u/Jolzeres
Page 85: Map by ValeurRPG
Page 87: Map by Andrew Law
Page 88: Map by Matthias Rothenaicher
Page 89: Map by Daniel's Maps
Page 90: Map by Unknown Artist
Page 91: Map by Maphammer
Page 92: Map by The Modern Lich
Page 93: Map by Neutral Party
Page 97: Map by u/SirTopamHatt
Page 100: Map by Milby's Maps
Page 101: Map by u/CanadaTay
Page 102: Map by Neutral Party
Page 103: Map by Neutral Party
Page 104: Map by u/aazuredragon
Page 105: Map by Zatnikotel
Page 106: Map by GoAdventureMaps
Page 108: Map by TaverntalesMaps
Page 108: Map by 2MinuteTabletop
Page 111: Map by u/sktchup
Page 111: Map by Neutral Party
Page 113: Maps by Tehox Maps
Page 114: Map by J.Dungeonmaster
Page 116: Map by Elven Tower
Page 118: Maps by Andrew Law
Page 119: Maps by Andrew Law
Page 120: Map by Neutral Party
Page 121: Map by Tehox Maps
Page 122: Map by Mike Schley
Page 122: Map by Neutral Party
Page 123: Map by Neutral Party
Page 125: Map by Unknown Artist
Page 126: Map by Dungeon Mapster
Page 129: Map by Neutral Party
Page 130: Map by 2-Minute Tabletop
Page 136: Map by Mike Schley
Page 138: Map by The Crafty Dice
Page 139: Map by Don Farland
Page 141: Map by Neutral Party
Page 142: Map by Unknown Artist
Page 144: Map compiled by u/mezm9r
Page 146: Map by Spellarena
Page 152: Map by Dungeon Mapster
Page 153: Map by Andrew Law
Page 154: Map by The Reclusive Cartographer
Page 155: Map by Andrew Law
Page 162: Map by Andrew Law
Page 168: Map by Scribbles in Space
Page 170: Map by West Haberlein
Page 173: Map by u/Omnicidian
Page 175: Map by Venatus Maps
Page 175: Map by Dice Grimorium
Page 177: Map by Neutral Party
Page 178: Map by Dice Grimorium
Page 179: Map by Neutral Party
Page 182: Map by Czepeku
Page 186: Map by West Haberlein
Page 187: Map by The Reclusive Cartographer
Page 191: Map by S. Mitchell Maps
Page 191: Map by Unknown Artist
Page 193: Map by Daniel's Maps
Page 196: Map by Andrew Law
Page 197: Map by Daniel's Maps
Page 202: Map by Neutral Party
Page 207: Map by Cartographer's Guild
Page 210: Map by Neutral Party
Page 211: Map by Hassly
Page 213: Map by Andrew Law
Page 214: Map by Andrew Law
Page 217: Map by Andrew Law
Page 232: Map by Christian Zeuch
Page 238: Map by Christian Zeuch
Page 240: Map by Christian Zeuch
Page 244: Map by DM Andy
Page 249: Map by Andrew Law
Page 250: Map by Forgotten Adventures
Page 251: Map by Czepeku
Page 254: Map by David Fink Barrentine
Page 255: Map by Neutral Party
Page 258: Map by PogS Props
Page 262: Map by Neutral Party
Page 263: Map by Tehox
Page 266: Map by AAW Games
Page 272: Map by Impman2
Page 276: Map by u/Sylias
Page 278: Map by Andrew Law
Page 280: Map by Neutral Party
Page 286: Map by Tom Cartos
Page 287: Map by Tom Cartos
Page 288: Map by AfternoonMaps
Page 290: Map by Limithron
Page 293: Map by Moonlight Maps
Page 295: Map by DJ Brewer
Page 299: Map by Sliph Battlemaps
Page 301: Map by Tavern Tales Maps
Page 304: Map by Dice Grimorium
Page 307: Map by Kate Moody
Page 402: Map by u/jkennedy1998
Page 403: Map by Andrew Law
Page 407: Map by Andrew Law
Page 408: Map by Andrew Law

Adventure Credits
-
Lost Halls of Everforge
-
adapted from The Book of Lairs by Kobold Press.
-
-
The Haunted Torthil Manor
-
adapted from The Haunt by P.B. Publishing.
-
-
Chapter 3 - Kymal: Dragon Heist
-
adapted from Waterdeep: Dragon Heist by Wizards of the Coast.
-
-
Forest of Gloom
-
adapted from Lost in the Forest of Gloom by Stew Shearer.
-
-
A Small Maze
-
adapted from A Small Maze by Tehox Maps.
-
-
The Lamenting Lighthouse
-
adapted from The Lamenting Lighthouse by Sven Truckenbrodt.
-
-
Shalestep Horror
-
adapted from The Thing That Came to Weeping Hollow by Alex Clippinger.
-
-
The Great Trial
-
adapted from The Great Trial by Christian Zeuch
-
-
Fires Over Kymal
-
adapted from Fires of Iskh by The Arcane Library
-
-
Gauntlet of Flame
-
adapted from Gauntlet of Flame by JVC Parry
-

Miscellaneous Credits
-
Dwarven Power Runes
-
by Spectre Creations
-
-
Corruption Rules
-
by Matthew Mercer
-
-
Overland Journeys
-
by u/Littlerob
-
-
Despair Rules & Cards
-
from The Shadowfell: Gloomwrought and Beyond by Wizards of the Coast
-
-
Gambling Games
-
by Matthew Mercer
-
-
Drugs
-
by Matthew Mercer
-
-
Festivals, Feasts and Fairs
-
by Ashley May
-


How do you
want to do this?
A little over a decade has passed since Vox Machina slew the Chroma Conclave and banished the Whispered One, much of Tal'Dorei has recovered. But hate still festers in the hearts of those on the fringes of society, cast aside, or forgotten. The Cloaked Serpent raises armies south of Syngorn as their cultists spread like a poison through the veins of Tal'Dorei's cities.
This adventure begins in Byroden, a small town nestled in the untouched wilderness of the Mornset Countryside, but quickly leads characters across central Tal'Dorei, visiting the major cities of Kymal, Westruun, and Emon, and even delving into the Underdark to the hidden drow city of Ruhn-Shak.
Will the adventurers manage to uncover the sinister plots of the Cloaked Serpent in time? The adventure begins, where will you take it?

A fifth edition Dungeons & Dragons adventure for characters of levels 2 - 20